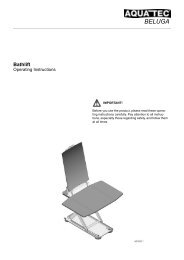
Bath Lift Owners Manual - Access Mobility Center
Bath Lift Owners Manual - Access Mobility Center
Bath Lift Owners Manual - Access Mobility Center

You also want an ePaper? Increase the reach of your titles
YUMPU automatically turns print PDFs into web optimized ePapers that Google loves.
Minivator<br />
<strong>Bath</strong> Bliss Recliner<br />
User manual<br />
Handbuch<br />
Guide d’utilisation<br />
<strong>Manual</strong> del usuario<br />
<strong>Manual</strong>e d’uso
Minivator Reclining <strong>Bath</strong> <strong>Lift</strong><br />
For your safety<br />
Fully read this manual prior<br />
to using your Minivator <strong>Bath</strong><br />
<strong>Lift</strong>. Failure to do so may<br />
result in damage to your<br />
bath lift or injury.<br />
Serial No. Found on the Hand Control:<br />
Supplier/dealer stamp<br />
Important<br />
information<br />
Your <strong>Bath</strong> <strong>Lift</strong><br />
• Your Minivator <strong>Bath</strong> <strong>Lift</strong> is designed as<br />
a bathing aid only. Never use the <strong>Bath</strong><br />
<strong>Lift</strong> for any other purpose, such as a<br />
stand or lifting device.<br />
• Never allow children to operate or play<br />
with the <strong>Bath</strong> <strong>Lift</strong>.<br />
• Keep animals away from the <strong>Bath</strong> <strong>Lift</strong>.<br />
• The <strong>Bath</strong> <strong>Lift</strong> contains no user<br />
serviceable parts. In the event of<br />
damage or malfunction please contact<br />
your Minivator Dealer or our Customer<br />
Service Department on 08700 118282.<br />
• Do not use any abrasive cleaning<br />
agents – this may permanently damage<br />
the <strong>Bath</strong> <strong>Lift</strong>.<br />
• Do not store the <strong>Bath</strong> <strong>Lift</strong> near a heat<br />
source.<br />
• If the <strong>Bath</strong> <strong>Lift</strong> has been stored in<br />
low temperatures for a prolonged<br />
period of time, allow it to reach room<br />
temperature before operating.<br />
Your Hand Control<br />
• Your hand control must be charged<br />
for 24 hours before first use to<br />
ensure optimum battery life.<br />
• Always disconnect the handset before<br />
transporting the <strong>Bath</strong> <strong>Lift</strong>.<br />
• Only original hand controls<br />
manufactured by Minivator may be<br />
used.<br />
• Only charge the hand control in dry<br />
rooms, i.e. not in the bathroom.<br />
• Only original battery chargers should be<br />
used. Use of an incorrect charger could<br />
damage the batteries and will invalidate<br />
the warranty.<br />
• Do not use the hand control if there are<br />
any obvious signs of damage.<br />
• Never store the hand control near a<br />
heat source.<br />
• Never throw the hand control into<br />
an open fire – this could cause an<br />
explosion.<br />
• Do not insert any items into the open<br />
socket of the hand control.<br />
Use your <strong>Bath</strong> <strong>Lift</strong> safely<br />
• Before using the <strong>Bath</strong> <strong>Lift</strong> for the<br />
first time familiarise yourself with its<br />
operation by driving the lift up and<br />
down and testing the emergency stop<br />
button. This will also ensure that the<br />
<strong>Bath</strong> <strong>Lift</strong> is operating correctly before<br />
you use it.<br />
• Do not operate the <strong>Bath</strong> <strong>Lift</strong> if a fault<br />
has occurred – contact your Minivator<br />
dealer or our Customer Service<br />
department on 08700 118282.<br />
• Never place your hand between the<br />
edge of the bath and the <strong>Bath</strong> <strong>Lift</strong><br />
whilst operating the <strong>Bath</strong> <strong>Lift</strong> to prevent<br />
injury.<br />
• Always sit in the middle of the seat with<br />
your back up against the back rest.<br />
• The <strong>Bath</strong> <strong>Lift</strong> should only be operated<br />
by persons that can safely control the<br />
system, i.e. people with severe mental<br />
or physical disabilities should consult a<br />
healthcare professional before using a<br />
<strong>Bath</strong> <strong>Lift</strong>.<br />
ENGLISH<br />
For service or repair consult your Supplier or<br />
Dealer for advice.<br />
• Clean the battery charger with a dry<br />
cloth only.<br />
Only authorised persons should service or repair<br />
your Minivator <strong>Bath</strong> <strong>Lift</strong>.<br />
1<br />
2
Minivator Reclining <strong>Bath</strong> <strong>Lift</strong><br />
Introduction<br />
Contents<br />
Page<br />
Thank you for choosing a Minivator<br />
<strong>Bath</strong> <strong>Lift</strong> to assist you in your bathing<br />
needs. Please read these operating<br />
instructions carefully before use. Your<br />
Minivator <strong>Bath</strong> <strong>Lift</strong> has been designed<br />
and built with careful attention to detail.<br />
In order to ensure many years of trouble<br />
free use please follow the instructions<br />
carefully.<br />
Introduction and<br />
Manufacturing Standards 3<br />
Features of your Minivator<br />
<strong>Bath</strong> <strong>Lift</strong> 4<br />
Unpacking your Minivator<br />
<strong>Bath</strong> <strong>Lift</strong> 5<br />
Features of your<br />
Minivator <strong>Bath</strong> <strong>Lift</strong><br />
1<br />
2<br />
Raised tactile feature<br />
Battery unit/hand control<br />
3 Reclining backrest<br />
4 Folding side panels<br />
ENGLISH<br />
Please contact your Minivator dealer<br />
or our Customer Service Department in<br />
the United Kingdom on 08700 118282<br />
if your <strong>Bath</strong> <strong>Lift</strong> requires attention and<br />
we would be pleased to help you.<br />
Minivator recommends that you do not<br />
undertake maintenance tasks other than<br />
the routine care explained in this handbook.<br />
Please contact your supplier or Minivator<br />
dealer if you require further information.<br />
A maintenance check is recommended<br />
every 2 years.<br />
Maximum user weight for this <strong>Bath</strong> <strong>Lift</strong> is<br />
130kg, or 290lbs, or 20½ stones.<br />
Assembling your Minivator<br />
<strong>Bath</strong> <strong>Lift</strong> 6<br />
Setting the backrest to the final<br />
reclined positions 7<br />
Installing your Minivator<br />
<strong>Bath</strong> <strong>Lift</strong> 9<br />
Correct Seating 10<br />
Operating the Battery Unit/<br />
Hand control 11<br />
5 Mains operated charger<br />
6 Side straps<br />
7 Removable and washable<br />
covers<br />
8 Powerful suction cups<br />
3<br />
7<br />
Manufacturing<br />
Standards<br />
Minivator has been accredited as<br />
conforming to the international standard<br />
of manufacturing, recognised by the<br />
award of ISO 9001.<br />
Minivator is audited regularly to ensure<br />
we continue to conform to ISO 9001<br />
which ensures you have a high quality,<br />
well manufactured product.<br />
Removing the <strong>Bath</strong> <strong>Lift</strong><br />
from the bath 12<br />
Recharging your Battery/<br />
Hand Control 13<br />
Removing the covers and cleaning<br />
and washing Instructions 14<br />
4<br />
6<br />
5<br />
7<br />
8<br />
1<br />
2<br />
4<br />
3 4
Minivator Reclining <strong>Bath</strong> <strong>Lift</strong><br />
Unpacking your Minivator<br />
<strong>Bath</strong> <strong>Lift</strong><br />
Remove all the items from the box.<br />
These are:-<br />
Assembling your Minivator<br />
<strong>Bath</strong> <strong>Lift</strong><br />
Place the <strong>Bath</strong> <strong>Lift</strong> base unit in the required<br />
position in the bath.<br />
ENGLISH<br />
• The <strong>Bath</strong> <strong>Lift</strong> complete with covers.<br />
• The Battery Unit/Hand Control. This is<br />
permanently sealed, and the batteries are<br />
not removeable or replaceable, they are<br />
rechargeable.<br />
• The mains powered battery charger.<br />
• The two side straps.<br />
See Fig. 1.<br />
IMPORTANT NOTICE<br />
Before you use your Minivator <strong>Bath</strong> <strong>Lift</strong><br />
you MUST charge the battery unit for a<br />
MINIMUM of 24 hours.<br />
This will ‘condition’ the batteries and<br />
prepare them for first use.<br />
For ease of handling when unpacking, the <strong>Bath</strong><br />
<strong>Lift</strong> may be split into two separate components,<br />
by lifting the backrest approximately 30° using<br />
the actuator bar as a handle, and lifting it clear<br />
of the base unit, see Fig. 2 and 3.<br />
Figure 1<br />
Locate the backrest mounting the lugs into their<br />
receivers on the base unit, as shown in Fig. 4.<br />
Recline positions<br />
Position 1 gives a fully reclined angle of 10° from<br />
the vertical.<br />
Position 2 gives a fully reclined angle of 35° from<br />
the vertical.<br />
Position 3 gives a fully reclined angle of 45° from<br />
the vertical.<br />
See Fig. 5.<br />
Note: Do not connect the battery unit/hand<br />
control to the <strong>Bath</strong> <strong>Lift</strong> until it is assembled<br />
and in the reclined position in the bath. The<br />
battery unit/hand control MUST be fully<br />
charged.<br />
Note: Ensure that there are no obstacles to<br />
interfere with the <strong>Bath</strong> <strong>Lift</strong> when setting the<br />
recline angle.<br />
Figure 4<br />
Position 1<br />
Note: The Minivator <strong>Bath</strong> <strong>Lift</strong> is fitted with a<br />
patented mechanism that prevents the scissor<br />
action from opening until the <strong>Bath</strong> <strong>Lift</strong> is<br />
correctly assembled.<br />
Figure 2<br />
Position 2<br />
Position 3<br />
Figure 3<br />
Figure 5<br />
5 6
Minivator Reclining <strong>Bath</strong> <strong>Lift</strong><br />
Setting the backrest to the<br />
final recline positions<br />
The backrest has three final reclined positions<br />
10º, 35º and 45º (from the vertical).<br />
ENGLISH<br />
To set the angle at 10º (Fig. 6) pivot the backrest<br />
until the locking cross bar on the bottom of the<br />
rod can locate into the 1st notch on the locking<br />
mechanism, as shown in Fig. 7.<br />
Note: The cross bar must not be powered<br />
when it is out of its locating collar on the<br />
actuator, i.e. do not use the hand control<br />
unless the actuator is located correctly.<br />
Figure 6<br />
Figure 9<br />
Figure 12<br />
To set the angle at 35º (Fig. 8) press the release<br />
lever (Fig. 10 and 11) gently and allow the<br />
backrest to recline further and the locking cross<br />
bar to locate into the 2nd notch on the locking<br />
mechanism (Fig. 7).<br />
3rd notch<br />
2nd notch<br />
1st notch<br />
To set the angle at 45º (Fig. 9) press the release<br />
lever (Fig. 10 and 11) gently and allow the<br />
backrest to recline further and the locking cross<br />
bar to locate into the 3rd notch on the locking<br />
mechanism (Fig. 7).<br />
Refolding your <strong>Bath</strong> <strong>Lift</strong> is the reverse of<br />
assembling.<br />
The release lever must be pressed (Fig. 10 and 11),<br />
then gently fold the backrest over until it touches<br />
the seat (Fig. 12).<br />
Figure 7<br />
Figure 10<br />
Note: Always ensure that the seat is at its<br />
fully lowered and reclined position before<br />
refolding the backrest.<br />
Note: Ensure that there are no obstacles to<br />
interfere with the <strong>Bath</strong> <strong>Lift</strong> when setting the<br />
desired recline angle.<br />
Figure 8<br />
Figure 11<br />
7 8
Minivator Reclining <strong>Bath</strong> <strong>Lift</strong><br />
Installing your Minivator<br />
<strong>Bath</strong> <strong>Lift</strong><br />
Installing your Minivator <strong>Bath</strong> <strong>Lift</strong><br />
safely<br />
Your Minivator <strong>Bath</strong> <strong>Lift</strong> should be fitted into the<br />
bath as shown in Fig. 13, and held in place by the<br />
six powerful suction cups.<br />
Before every use.<br />
• Ensure the bath is clean, and free from debris.<br />
Check to confirm effective adhesion by the<br />
suction cups.<br />
• Allow sufficient space behind the <strong>Bath</strong> <strong>Lift</strong> for<br />
the backrest to recline.<br />
• Ensure no obstacles will impede the <strong>Bath</strong> <strong>Lift</strong>.<br />
E.g. soap dishes, overflows, taps, etc.<br />
Suction cups will not adhere to non-slip or<br />
textured surfaces.<br />
Fitting side straps - where bath<br />
handles are present<br />
Ensure that the side straps are located over bath<br />
handles (Fig. 14) - these straps allow the <strong>Bath</strong><br />
<strong>Lift</strong>’s folding side panels to rise smoothly, and<br />
without becoming trapped or impeded on the<br />
bath’s handles.<br />
Note: The <strong>Bath</strong> <strong>Lift</strong> can be damaged if side<br />
straps are not fitted to bath handles.<br />
Figure 13<br />
Figure 14<br />
Correct Seating<br />
When using your <strong>Bath</strong> <strong>Lift</strong> always ensure the side<br />
panels are correctly positioned, these should be<br />
level and over the edges of the bath as shown in<br />
Fig. 16.<br />
Avoid using the seat back as a means to<br />
steady yourself.<br />
Facing outwards, sit on to the <strong>Bath</strong> <strong>Lift</strong> side<br />
panel and then move on to the seat area. Slowly<br />
lift your legs separately over into the bath, ease<br />
yourself into the central area of the seat. Face<br />
forwards and have your legs and feet extended.<br />
Always keep your hands away from the seat,<br />
folding side panels and mechanism, when<br />
operating the <strong>Bath</strong> <strong>Lift</strong>.<br />
Before using the <strong>Bath</strong> <strong>Lift</strong> consider means of<br />
requesting help if needed.<br />
Note: Seek advice from a qualified person<br />
such as an Occupational Therapist, if you<br />
are in any way concerned over the correct<br />
procedure for using the <strong>Bath</strong> <strong>Lift</strong>.<br />
Figure 16<br />
ENGLISH<br />
Connecting the Battery Unit/<br />
Hand Control to the <strong>Bath</strong> <strong>Lift</strong><br />
Plug the <strong>Bath</strong> <strong>Lift</strong> power lead fully and firmly into<br />
the fully charged Battery Unit/Hand Control as<br />
shown in Fig. 15.<br />
EMERGENCY STOP<br />
The <strong>Bath</strong> <strong>Lift</strong> hand control is fitted with an<br />
emergency stop button. Pressing this button<br />
will stop the <strong>Bath</strong> <strong>Lift</strong>.<br />
Figure 15<br />
9 10
Minivator Reclining <strong>Bath</strong> <strong>Lift</strong><br />
Operating the<br />
Battery Unit/Hand Control<br />
Connect the fully charged Battery Unit /Hand<br />
Control to the <strong>Bath</strong> <strong>Lift</strong>’s power lead. You will be<br />
able to use the specially designed connectors to<br />
make a firm connection. Press the down button<br />
to lower and the up button to raise the <strong>Bath</strong> <strong>Lift</strong>.<br />
Note: The UP and DOWN buttons have tactile<br />
features to aid the visually impaired (Fig. 17).<br />
If you wish to recline the backrest further, when<br />
the seat has reached its lower position continue<br />
to press the down button, this will recline the<br />
backrest further.<br />
When the desired angle is reached release the<br />
button.<br />
To raise the backrest, press the UP button.<br />
Continue to press the UP button to raise the<br />
seat to the original position - level with the bath<br />
edges.<br />
Figure 17<br />
Removing the <strong>Bath</strong> <strong>Lift</strong><br />
You should always remove the <strong>Bath</strong> <strong>Lift</strong> from the<br />
bath in 2 sections; backrest and base unit.<br />
To remove the backrest ensure the seat is at<br />
its fully lowered position before refolding and<br />
removing the backrest.<br />
The release lever must be pressed (Fig. 19), then<br />
gently fold the backrest over until it touches the<br />
seat (Fig. 20).<br />
Raise it again by 30º until you can lift it away.<br />
Fold the side panels over onto the seat.<br />
Pull the release strap on the top of the front<br />
handle to release the front suction cups (Fig. 21).<br />
When they are free gently tilt the <strong>Bath</strong> <strong>Lift</strong> by the<br />
front handle NOT BY THE RELEASE STRAP. This<br />
will release the rear suction cups.<br />
Note: Damaged suction cups should be<br />
replaced immediately. Consult your supplier or<br />
Minivator dealer.<br />
Figure 19<br />
ENGLISH<br />
The Hand Control can be fitted on to a smooth<br />
surface by using the suction cups underneath<br />
(Fig. 18). To release just press the edge of the<br />
sucker rim.<br />
Note: The Battery Unit/Hand Control has a<br />
built in safety feature. If the batteries do not<br />
have sufficient power to lower and then raise<br />
the <strong>Bath</strong> <strong>Lift</strong> – the unit WILL NOT DESCEND.<br />
An amber warning light will appear inside<br />
the battery symbol to indicate low power, see<br />
Recharging on page 13.<br />
Figure 20<br />
Figure 18<br />
Figure 21<br />
11 12
Minivator Reclining <strong>Bath</strong> <strong>Lift</strong><br />
Recharging the<br />
Battery Unit/Hand Control<br />
Note: It is strongly recommended that the<br />
Battery Unit/Hand Control is recharged after<br />
every use.<br />
Unplug the Battery Unit/Hand Control from the<br />
<strong>Bath</strong> <strong>Lift</strong> power lead, as shown in Fig. 22. Plug<br />
the charger into the small jack socket on the<br />
connector (Fig. 23).<br />
Note: Never unplug the connectors shown<br />
in Fig. 22 by pulling on the cables or Hand<br />
Control. This may damage the cables.<br />
Plug the charger into a suitable mains supply.<br />
A warning light on the charger will illuminate to<br />
show it is on.<br />
The amber light on the Battery Unit/Hand<br />
Control indicates the unit needs to be<br />
recharged soon.<br />
The red warning light on the Battery Unit/<br />
Hand Control indicates the unit needs to be<br />
recharged immediately.<br />
The need to recharge with increased<br />
frequency indicates the complete Battery<br />
unit/Hand control needs replacing.<br />
Note: It is recommended that the Battery Unit/<br />
Hand Control is recharged for 8 hours.<br />
Shorter charges are not recommended as<br />
these will reduce the batteries’ life.<br />
Figure 22<br />
Figure 23<br />
Removing the covers<br />
Cleaning and washing<br />
instructions<br />
Removing and refitting the covers<br />
Place the <strong>Bath</strong> <strong>Lift</strong> in an accessible area.<br />
Pull the cover retaining buttons from the seat<br />
and backrest mouldings by easing them free, as<br />
shown in Fig. 24.<br />
Remove the button assembly from the covers if<br />
machine washing.<br />
When replacing, ensure all the buttons are<br />
correctly fitted onto the cover and then click<br />
the buttons back into the seat and backrest<br />
mouldings (Fig. 25 and 26).<br />
The <strong>Bath</strong> <strong>Lift</strong> should not be used without<br />
covers.<br />
Cleaning and washing instructions<br />
Keep your <strong>Bath</strong> <strong>Lift</strong> clean and free of residue.<br />
<strong>Bath</strong>room cleaning and sterilizing materials are<br />
safe to use on this product.<br />
Avoid use of abrasive material.<br />
Ensure all areas are thoroughly rinsed before reusing<br />
the <strong>Bath</strong> <strong>Lift</strong>.<br />
The covers are machine washable at 60°C.<br />
DO NOT IRON.<br />
DO NOT TUMBLE DRY.<br />
Figure 24<br />
Figure 25<br />
ENGLISH<br />
SAFETY PRECAUTION!<br />
When recharging always use a socket away<br />
from the bathroom and recharge in a dry<br />
environment.<br />
Disposal of Battery Unit/Hand Control:<br />
Please conform to local regulations. Your<br />
supplier will advise on this matter.<br />
Figure 26<br />
13 14
Minivator Limited<br />
82 First Avenue<br />
Pensnett Estate<br />
Kingswinford<br />
West Midlands DY6 7FJ<br />
England<br />
User support: 08700 118282<br />
International Desk: +44 (0)1384 275736<br />
Email: sales@minivator.co.uk<br />
www.minivator.co.uk<br />
www.minivator.de<br />
www.minivator.fr<br />
www.minivator.es<br />
www.minivator.it<br />
North America<br />
Sterling Stairlifts<br />
10 Industrial Park Drive<br />
Mount Pocono PA<br />
18344<br />
United States<br />
Tel: 570 895 2480<br />
Toll Free: 1 866 276 LIFT/5438<br />
Email: info@sterling-stairlifts.com<br />
www.sterling-stairlifts.com