Week 1 - Two Peas in a Bucket
Week 1 - Two Peas in a Bucket
Week 1 - Two Peas in a Bucket

You also want an ePaper? Increase the reach of your titles
YUMPU automatically turns print PDFs into web optimized ePapers that Google loves.
TWOpeas<strong>in</strong>abucket.COM photography Course:<br />
12 <strong>Week</strong>s to Better Photos<br />
By Mark & Joanna Bolick<br />
LESSONS ONE -- S IX<br />
This class is designed to appeal to beg<strong>in</strong>n<strong>in</strong>g photographers with all types of cameras.<br />
Each article is packed with visuals and <strong>in</strong>cludes <strong>in</strong>formation on the topic of the week, a question<br />
& answer section, and a camera challenge so that you can put your new-found knowledge to use.<br />
This packet of <strong>in</strong>formation to download & pr<strong>in</strong>t <strong>in</strong>cludes weeks 1-6:<br />
<strong>Week</strong> 1: Aperture Basic Tra<strong>in</strong><strong>in</strong>g<br />
<strong>Week</strong> 2: Advanced Aperture<br />
<strong>Week</strong> 3: Light<br />
<strong>Week</strong> 4: Flash<br />
<strong>Week</strong> 5: Composition & Fram<strong>in</strong>g<br />
<strong>Week</strong> 6: Shoot<strong>in</strong>g Indoors
TWOpeas<strong>in</strong>abucket.COM photography Course:<br />
12 <strong>Week</strong>s to Better Photos<br />
By Mark & Joanna Bolick<br />
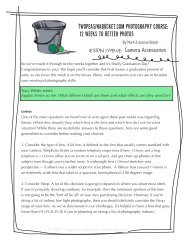
LESSON ONE: Aperture basic tra<strong>in</strong><strong>in</strong>g<br />
One of the most necessary but oftentimes least understood parts of photography is Aperture.<br />
The size of the aperture, or f/stop, of a lens determ<strong>in</strong>es how much of your photograph is <strong>in</strong><br />
focus. Generally, when you hear someone talk about f/stop, they are referr<strong>in</strong>g to aperture --<br />
the terms are often used <strong>in</strong>terchangeably. The f/stop on a lens can go from 1.2 to 22 or sometimes<br />
higher. (It’s not really important to this class for you to understand the mathmatical basis<br />
for these numbers, but <strong>in</strong>stead to understand what they mean to your photography.)<br />
F/stops can be confus<strong>in</strong>g at first. The f/stop numbers refer to how open or closed the aperture<br />
on the lens is. The wider the open<strong>in</strong>g of the lens, the greater the amount of light that enters<br />
your camera at one time – which means that when your aperture is wide open your focus will<br />
be shallower and fewer th<strong>in</strong>gs <strong>in</strong> your photo will be <strong>in</strong> focus.<br />
Here is a photo of an open aperture on a<br />
50mm lens.<br />
The WIDER the aperture, the more light<br />
that comes through the camera -- because<br />
a lot of light is flow<strong>in</strong>g through the<br />
aperture open<strong>in</strong>g LESS of your photo<br />
will be <strong>in</strong> focus.<br />
A low f/stop, such as f/1.4 or f/2.8, is considered<br />
a wide-open aperture.<br />
(photo courtesy istockphoto.com)<br />
1
TWOpeas<strong>in</strong>abucket.com photography Course: 12 <strong>Week</strong>s to Better Photos<br />
Here is a photo of a closed aperture on a<br />
50mm lens.<br />
The SMALLER the aperture, the less light<br />
allowed -- because there is very little<br />
light flow<strong>in</strong>g through the aperture MORE<br />
of your photo will be <strong>in</strong> focus.<br />
A high f/stop, such as f/22, is considered a<br />
closed aperture.<br />
(photo courtesy istockphoto.com)<br />
The smaller the open<strong>in</strong>g on the lens, the smaller the amount of light that is allowed to<br />
enter your camera at one time – which means your focus is deeper and more of your<br />
photo will be <strong>in</strong> focus.<br />
The confusion for most people arrives when you try and put the f/stop number with these<br />
scenarios. In terms of aperture open<strong>in</strong>gs, f/1.4 would be a wide-open aperture on most<br />
high-end lenses, whereas f/22 would be a virtually closed aperture.<br />
Basically, when you use a low f/stop, less of your photo will be <strong>in</strong> focus. When<br />
you use a higher f/stop, MORE of your photo will be <strong>in</strong> focus.<br />
* * * * *<br />
This week, we’re encourag<strong>in</strong>g you to check out the “Aperture Priority” mode on your camera<br />
(check your manual if you’re not sure if you have this mode.) Aperture Priority is usually represented<br />
with an Av or A symbol on your camera dial. When you are us<strong>in</strong>g the aperture priority<br />
mode, you are responsible for sett<strong>in</strong>g your own aperture while lett<strong>in</strong>g the camera set the shutter<br />
speed.<br />
Com<strong>in</strong>g next week:<br />
In ideal light<strong>in</strong>g conditions, it’s easy to play around with your aperture sett<strong>in</strong>gs to create a variety<br />
of different images based on how much of your photo is <strong>in</strong> focus. Problems can arise, however,<br />
when you f<strong>in</strong>d yourself <strong>in</strong> a low-light situation and have to use a low aperture for a photo where<br />
you want the majority of your subject(s) to be <strong>in</strong> focus. This is where shutter speed and film speed<br />
(ISO) come <strong>in</strong>to play with aperture, and we’ll address this relationship <strong>in</strong> next week’s lesson on<br />
advanced aperture.<br />
2
WEEKLY CHALLENGE: Explor<strong>in</strong>g Aperture<br />
TWOpeas<strong>in</strong>abucket.com photography Course: 12 <strong>Week</strong>s to Better Photos<br />
So here’s the question we want to focus on this week:<br />
Just how much of your photo do you want to be <strong>in</strong> focus?<br />
The answer, of course, varies accord<strong>in</strong>g to the situation. But <strong>in</strong> order to become more<br />
comfortable choos<strong>in</strong>g your aperture, we <strong>in</strong>vite you to partake <strong>in</strong> our weekly challenge:<br />
First of all, we want you to operate your camera <strong>in</strong> Aperture Priority mode (often<br />
<strong>in</strong>dicated with an “A” or an “Av” on your camera dial. (Don’t worry about shutter speed<br />
as the camera will take care of that for you.) The goal of this challenge is to discover what<br />
different f/stop sett<strong>in</strong>gs on your camera will produce for you and to become more<br />
comfortable with select<strong>in</strong>g these sett<strong>in</strong>gs to fit your subject.<br />
The easiest way to do this is to f<strong>in</strong>d a fixed subject such as a flower, a tree limb, or <strong>in</strong> our<br />
case, a birdbath. (If you are outside <strong>in</strong> daylight, set your ISO to around 400. We highly<br />
recommend you try this first challenge outdoors, if it’s not too cold for you! If you are<br />
<strong>in</strong>side, you may have to set the ISO on your camera much higher like 1250 or even 1600.<br />
Your photos will be gra<strong>in</strong>y, but you should still be able to tell what your aperture sett<strong>in</strong>g is<br />
do<strong>in</strong>g to your photos.)<br />
1. Set your f/stop (often accomplished by turn<strong>in</strong>g a dial, but check your manual if<br />
you’re not sure) to the lowest sett<strong>in</strong>g it will go. Compose your image and use<br />
either the manual focus or autofocus to focus on one particular spot of your<br />
subject (the subject of our photos was the frontmost rim of the birdbath, and<br />
we made sure to focus on this for all 3 photos). Take your picture.<br />
2. Move your aperture sett<strong>in</strong>g to someth<strong>in</strong>g around f/8. Compose and<br />
refocus on the same element aga<strong>in</strong>. Take your picture.<br />
3. Move your aperture sett<strong>in</strong>g to the highest sett<strong>in</strong>g it will go to (most likely<br />
f/22). Compose and focus on the same element aga<strong>in</strong>. Take your picture.<br />
Now br<strong>in</strong>g these pictures <strong>in</strong>to your image edit<strong>in</strong>g program and look at the<br />
differences <strong>in</strong> the composition.<br />
3
TWOpeas<strong>in</strong>abucket.com photography Course: 12 <strong>Week</strong>s to Better Photos<br />
1. On the first image,<br />
you will have very little<br />
outside the <strong>in</strong>itial focus<br />
po<strong>in</strong>t <strong>in</strong> focus.<br />
The front of the birdbath<br />
is visible here, but the<br />
background is completely<br />
blurry.<br />
2. On the second image,<br />
you will have more of your<br />
subject <strong>in</strong> focus, but still<br />
will ma<strong>in</strong>ta<strong>in</strong> a pleas<strong>in</strong>g<br />
background blur that<br />
separates your subject from<br />
the background elements.<br />
The front & <strong>in</strong>side of the<br />
birdbath are <strong>in</strong> focus and the<br />
background, though visible,<br />
is not <strong>in</strong> sharp focus.<br />
3. On your f<strong>in</strong>al image, you<br />
will most likely have virtually<br />
everyth<strong>in</strong>g <strong>in</strong> front and beh<strong>in</strong>d<br />
your subject <strong>in</strong> focus.<br />
Pretty much everyth<strong>in</strong>g is <strong>in</strong><br />
focus -- even the ugly satellite<br />
dish & lamp post on the<br />
right-hand side of the trees.<br />
This is how aperture works: the<br />
lower the f/stop, the less that is<br />
<strong>in</strong> focus. The higher the f/stop,<br />
the more that is <strong>in</strong> focus.<br />
4
Q & A: Aperture<br />
TWOpeas<strong>in</strong>abucket.com photography Course: 12 <strong>Week</strong>s to Better Photos<br />
First of all, we wanted to thank you for submitt<strong>in</strong>g your questions on the thread that we posted<br />
on photography board! We were so excited to see so many questions (and hope to respond to<br />
a great deal of them throughout the class, either directly, <strong>in</strong> this section, or through the topics &<br />
content we’ve chosen to discuss based on your suggestions.)<br />
Q: Southern Art said: I would like to learn more about aperture, shutter speed, exposure...and<br />
when to use what sett<strong>in</strong>gs.<br />
A: This is def<strong>in</strong>itely the request we received most frequently, which is why we’ve chosen to start<br />
the course by discuss<strong>in</strong>g Aperture, followed next week by Aperture, ISO & Shutter Speed.<br />
Q: Snowball2 said: The only comment I have is not to forget those of us who are us<strong>in</strong>g a po<strong>in</strong>tand-shoot.<br />
(A digital slr is on my wishlist, but I haven’t got it yet!) I’d love to learn more about<br />
composition and us<strong>in</strong>g natural light. And gett<strong>in</strong>g the most out of my camera, such as it is.<br />
A: We absolutely want to <strong>in</strong>clude everyone! After we tackle aperture, shutter speed, and ISO,<br />
we’re go<strong>in</strong>g to discuss Light, Composition, lenses, and tak<strong>in</strong>g photos <strong>in</strong> a variety of sett<strong>in</strong>gs. We<br />
just ask for your patience while we cover the basics for those who do have bridge, digital, or<br />
film SLRs. (Although, if a digital slr is on your wishlist, it can’t hurt to do a little preread<strong>in</strong>g!)<br />
Q: **c<strong>in</strong>dyupnorth** asked, “Is this only for digital??! Hope not!!”<br />
A: No, it’s not! However, we do want everyone to understand that this is a beg<strong>in</strong>n<strong>in</strong>g<br />
photography course, and not a beg<strong>in</strong>n<strong>in</strong>g Photoshop class. (We do th<strong>in</strong>k, though, that<br />
Photoshop for Photographers would be a great class to follow this one!)<br />
Q: Chris <strong>in</strong> Ontario commented: I have a Canon Rebel xti and have never taken a photo without<br />
it be<strong>in</strong>g on automatic. I really need to start over and learn the basics so I can take manual<br />
photos.<br />
A: We know that shoot<strong>in</strong>g <strong>in</strong> manual can be <strong>in</strong>timidat<strong>in</strong>g, and we also know that there are a lot<br />
of you out there who just received new digital SLRs for Christmas. So we’re encourag<strong>in</strong>g you to<br />
take a small step first -- <strong>in</strong>stead of jump<strong>in</strong>g <strong>in</strong>to full manual mode we’d like you to try out one<br />
of the creative modes, Aperture Priority, first. This mode allows you to make one big choice<br />
(your aperture) while rely<strong>in</strong>g on the camera to make the other choice (shutter speed) for you.<br />
Q: Thayerzoo asked: What is the correct Aperture or focal po<strong>in</strong>t (closest person, furtherest or<br />
person <strong>in</strong> the middle) for multiple subject photos so everyone is <strong>in</strong> focus?<br />
A: The short answer is: We recommend us<strong>in</strong>g around an f/8 (depend<strong>in</strong>g on the size of the<br />
group) and focus<strong>in</strong>g on the subjects on the outside of the group. We’ll discuss group shots<br />
<strong>in</strong>depth <strong>in</strong> <strong>Week</strong> 9: Portraits.<br />
Q: Meglabs asked: What do S, L, and R stand for? (I’m really a beg<strong>in</strong>ner)<br />
A: It’s great to be a beg<strong>in</strong>ner, and we’re glad you’re <strong>in</strong>terested <strong>in</strong> learn<strong>in</strong>g more! SLR stands for<br />
S<strong>in</strong>gle Lens Reflex, and it refers to a type of camera. For more <strong>in</strong>formation on camera types,<br />
terms, and a bevy of other topics, check out the exist<strong>in</strong>g photography articles <strong>in</strong> the Photography<br />
Education section at 2peas. (From the menu bar at the top of the homepage, simply select<br />
“photography articles” from the drop-down menu under “Photography” at the far right-hand<br />
side of the page.)<br />
5
TWOpeas<strong>in</strong>abucket.COM photography Course:<br />
12 <strong>Week</strong>s to Better Photos<br />
By Mark & Joanna Bolick<br />
LESSON TWO, part 1: ISO & Shutter Speed<br />
Last week we took a look at how aperture and f/stop sett<strong>in</strong>gs work on your camera to restrict<br />
and control the elements <strong>in</strong> your photos that are <strong>in</strong> focus. The goal for our weekly challenge<br />
was to get you comfortable with adjust<strong>in</strong>g the f/stop numbers for the amount of focus you<br />
desire <strong>in</strong> your photos. With a week’s worth of practice, we hope that you are now more<br />
knowledgeable about how f/stops work and which f/stops produce certa<strong>in</strong> k<strong>in</strong>ds of looks.<br />
Once you’re comfortable with f/stops, then throw<strong>in</strong>g <strong>in</strong> ISO and shutter speed is fairly simple.<br />
ISO, or film speed, is really just a sett<strong>in</strong>g to determ<strong>in</strong>e how quickly an image will be captured<br />
by either the film or digital sensor. The higher the ISO, the quicker the image will be captured<br />
and the less light that is required. The lower the ISO, the longer it takes for the image to be<br />
captured and the more light you will need.<br />
ISO depends on your surround<strong>in</strong>gs and the amount of light available. Th<strong>in</strong>k back to when you<br />
used film -- do you remember consult<strong>in</strong>g the back of the film box for the handy reference<br />
guide that suggested what film speed should be used when? It’s still a good rule of thumb for<br />
digital cameras. In general, use:
TWOpeas<strong>in</strong>abucket.com photography Course: 12 <strong>Week</strong>s to Better Photo<br />
“So why I can’t I just shoot <strong>in</strong> 1600 ISO all the time so I capture images quickly and don’t<br />
have to worry about how much light is available?”<br />
Good question! The trade-off is that the higher you set the ISO, the more digital noise (or<br />
film gra<strong>in</strong>) is created <strong>in</strong> the image. The faster the camera captures the image, the less time<br />
it has to be accurate, so the sharpness of the image will suffer. A good rule of thumb is that<br />
anyth<strong>in</strong>g 800 or over will beg<strong>in</strong> to give you digital noise <strong>in</strong> your image. The higher your<br />
ISO, the more digital noise.<br />
* * * * *<br />
Shutter Speed<br />
After you’ve considered your ISO it’s time to th<strong>in</strong>k about shutter speed.<br />
Your shutter speed is how quickly the shutter, or the little door that opens <strong>in</strong> front of your<br />
film or image sensor, operates. It can range from several seconds (or m<strong>in</strong>utes on the Bulb<br />
sett<strong>in</strong>g) to 1/1600 of a second or faster. It might help to visualize your shutter literally as a<br />
door, with your shutter speed controll<strong>in</strong>g how fast or how slow the door opens and closes.<br />
A faster shutter speed will freeze action whereas a slower shutter speed can create a blurred<br />
effect (or can just be downright blurry.) When you set your shutter speed on your camera,<br />
you’ll see numbers like 60, 120, 250, 1000 and so on. These actually represent 1/60th of a<br />
second, 1/120th of a second and so on. So the higher the bottom number on the fraction,<br />
the faster the shutter speed. The smaller the number, the slower the shutter speed. You will<br />
also see shutter speeds for seconds, <strong>in</strong>dicated by <strong>in</strong>ch marks ("). For example, if the display<br />
says 1"5, that <strong>in</strong>dicates a shutter speed of 1½ seconds. If the display says 30", the shutter<br />
will be open for 30 seconds.<br />
As a general rule of thumb:<br />
Use your tripod (or a flat, stable surface) for shutter speeds slower than 1/50th<br />
of a second -- so any shutter speed read<strong>in</strong>g 50 or below, and anyth<strong>in</strong>g with <strong>in</strong>ch marks.<br />
Use a slow shutter speed to portray a blurred subject or surround<strong>in</strong>gs.<br />
If you are hand-hold<strong>in</strong>g your camera, set your shutter speed at a<br />
m<strong>in</strong>imum of 1/60th of a second (<strong>in</strong>dicated by the number 60) or faster.<br />
Hold your breath while tak<strong>in</strong>g the photo to help keep yourself steady.<br />
If you are wiggly or have wiggly subjects, <strong>in</strong>crease your shutter speed.<br />
Fast-mov<strong>in</strong>g objects will need a faster shutter speed,<br />
around 1/1000 of a second or higher, <strong>in</strong> order to<br />
freeze the subject(s) <strong>in</strong> action.<br />
week two<br />
2
WEEKLY CHALLENGE: The Kitchen S<strong>in</strong>k test<br />
TWOpeas<strong>in</strong>abucket.com photography Course: 12 <strong>Week</strong>s to Better Photos<br />
So here’s the question we want to focus on this week:<br />
When should I use a fast shutter speed?<br />
We call this one the kitchen s<strong>in</strong>k test. If you don’t have a w<strong>in</strong>dow by your kitchen<br />
s<strong>in</strong>k, try a bathroom s<strong>in</strong>k. If you don’t have enough light <strong>in</strong>side your house, a water<br />
hose, a babbl<strong>in</strong>g brook, or a ra<strong>in</strong> puddle will do.<br />
First of all, we want you to operate your camera <strong>in</strong> Shutter Priority mode (often<br />
<strong>in</strong>dicated with an “S” or “Tv” on your camera dial. (Don’t worry about aperture as the<br />
camera will take care of that for you.)<br />
If you are <strong>in</strong>side go ahead and bump up your ISO between 1000 and 1600 unless you<br />
have an abundance of available light.<br />
1. F<strong>in</strong>d your kitchen s<strong>in</strong>k (that shouldn’t be too hard.)<br />
2. Now locate an object that is go<strong>in</strong>g to obstruct the water flow<strong>in</strong>g from the<br />
faucet. Basically, you want someth<strong>in</strong>g that will <strong>in</strong>terrupt the flow of water,<br />
caus<strong>in</strong>g the water to “splash” around it (similar to what a child’s boots do<br />
when tromp<strong>in</strong>g through a ra<strong>in</strong> puddle.)<br />
3. Set your shutter speed to 1/80th of a second (<strong>in</strong>dicated by the number<br />
80.) Turn on the water and take the picture.<br />
4. Now set your shutter really high (around 1/1000 of a second or higher)<br />
and take the photo aga<strong>in</strong>.<br />
Don’t worry so much if the composition of your two photos isn’t exactly the same. What<br />
we’re look<strong>in</strong>g for here is a visual <strong>in</strong>dication that you’ve “frozen” the action by us<strong>in</strong>g a high<br />
shutter speed.<br />
***Bonus po<strong>in</strong>ts: Grab your tripod and set up your shot aga<strong>in</strong> us<strong>in</strong>g a really slow<br />
shutter speed, such as half a second, <strong>in</strong>dicated as 0"5, or 1 second, <strong>in</strong>dicated as 1". What<br />
effect does that give you? In what situations can you use this effect?<br />
[For those of you with po<strong>in</strong>t & shoot cameras set your camera on the action mode (usually<br />
<strong>in</strong>dicated by a little runn<strong>in</strong>g man) to obta<strong>in</strong> a high shutter speed. Take a photo <strong>in</strong> action<br />
mode, and then a second photo <strong>in</strong> a different mode, such as landscape.]<br />
week two<br />
3
TWOpeas<strong>in</strong>abucket.com photography Course: 12 <strong>Week</strong>s to Better Photos<br />
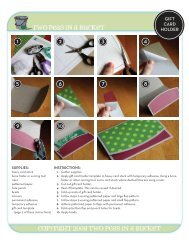
1. For our challenge photos we<br />
used a glass vase turned upside<br />
down <strong>in</strong> the s<strong>in</strong>k. We placed the<br />
vase directly under the faucet and<br />
turned the water on “hot” to add a<br />
little steam (just for fun.)<br />
The shutter speed here is 1/85 of<br />
a second. We focused on the spot<br />
where the water first touches the<br />
glass.<br />
As you can tell, a slow shutter<br />
speed does not visually stop the<br />
flow of water com<strong>in</strong>g from the<br />
faucet.<br />
2. For our second photo we bumped<br />
up the shutter speed to 1/1300 of<br />
a second. As you can tell, we were<br />
able to stop (or freeze) the water<br />
<strong>in</strong> motion by us<strong>in</strong>g a higher (faster)<br />
shutter speed.<br />
You may also notice that there is less<br />
<strong>in</strong> focus on this photo. Because<br />
we used a higher shutter speed, the<br />
camera automatically chose a lower<br />
f/stop to compensate.<br />
This is how shutter speed works: the<br />
faster the shutter speed, the faster the<br />
camera takes the picture. The slower<br />
the shutter speed, the slower the<br />
camera takes the picture.<br />
4
TWOpeas<strong>in</strong>abucket.com photography Course: 12 <strong>Week</strong>s to Better Photos<br />
LESSON TWO, part 2: But Wait -- there’s MORE!<br />
Please note:<br />
This part of the class is specifically written for those who are us<strong>in</strong>g SLR or dSLR cameras.<br />
***Also note: please don’t read this part until AFTER<br />
you’ve completed the shutter speed challenge for this week***<br />
Now that we’ve talked about aperture, shutter speed, and ISO, it’s time to th<strong>in</strong>k about<br />
achiev<strong>in</strong>g balance. The Tao of us<strong>in</strong>g our cameras, so to speak.<br />
--Dur<strong>in</strong>g the aperture challenge <strong>in</strong> week one we learned that we need to have a LOT of light <strong>in</strong> order<br />
to use a high f/stop like f/22. (If you took your photos <strong>in</strong>doors you may have noticed that your photos<br />
at the high f/stops tended to come out blurry.)<br />
-- Dur<strong>in</strong>g the shutter speed challenge this week we learned that we need to have a LOT of light<br />
<strong>in</strong>doors to use a very high shutter speed. To compensate for high shutter speeds <strong>in</strong>doors, the camera<br />
chose a low f/stop, result<strong>in</strong>g <strong>in</strong> a shallow depth of field.<br />
To achieve what your camera considers to be correct exposure your aperture and shutter<br />
speed need to balance to let <strong>in</strong> enough light to expose your image. (The exposure is the image<br />
created by the light enter<strong>in</strong>g the camera and be<strong>in</strong>g recorded onto the film or digital sensor.)<br />
Thankfully for us, most SLR<br />
cameras come with a built-<strong>in</strong><br />
meter that tells you when you<br />
are correctly expos<strong>in</strong>g your<br />
images.<br />
Look through the viewf<strong>in</strong>der of<br />
your camera. Do you see<br />
all those little numbers at<br />
the bottom of the screen? --><br />
Do you know what<br />
they stand for?<br />
(photo courtesy istockphoto.com)<br />
| | |<br />
shutter aperture exposure<br />
speed<br />
meter<br />
5
TWOpeas<strong>in</strong>abucket.com photography Course: 12 <strong>Week</strong>s to Better Photos<br />
shutter<br />
exposure<br />
speed aperture meter<br />
| | |<br />
When you are look<strong>in</strong>g through your camera the exposure meter is located on the bottom of<br />
your viewf<strong>in</strong>der. It looks sort of like a scale, and will generally have a zero or image <strong>in</strong>dicat<strong>in</strong>g<br />
the middle of the scale, and plus and m<strong>in</strong>us numbers to the right and left of center.<br />
Quick - focus on someth<strong>in</strong>g with your camera and press your shutter button half-way down<br />
(the button you use to take the photo.) Do you see a bl<strong>in</strong>k<strong>in</strong>g l<strong>in</strong>e on your exposure meter?<br />
When you are focus<strong>in</strong>g on an image, a small <strong>in</strong>dicator light will show up on the scale,<br />
<strong>in</strong>dicat<strong>in</strong>g your current exposure. If the l<strong>in</strong>e is on the m<strong>in</strong>us section, your image is<br />
underexposed. If the l<strong>in</strong>e that lights up is on the plus section, your image is overexposed. If the<br />
l<strong>in</strong>e is centered, you have achieved what the camera considers to be the correct exposure.<br />
Do you see those other two numbers to the left of the exposure meter <strong>in</strong> the illustration above?<br />
They might look familiar by now, as they <strong>in</strong>dicate your current shutter speed and aperture.<br />
When <strong>in</strong> manual mode, you use the exposure meter to balance your f/stop with the shutter<br />
speed to equal a correct exposure. Really, if you have already set your ISO for the amount of<br />
light you have or the situation you’re <strong>in</strong>, then operat<strong>in</strong>g <strong>in</strong> manual mode means you’re just<br />
mak<strong>in</strong>g 2 choices -- your shutter speed and your aperture.<br />
Here’s the best part: If you already know the range where you want one of those two<br />
numbers to be, then the camera is ready to help you f<strong>in</strong>d the other number that correctly<br />
balances your exposure.<br />
week two 6
You Can Do It!<br />
TWOpeas<strong>in</strong>abucket.com photography Course: 12 <strong>Week</strong>s to Better Photos<br />
You know what that means, don’t you? Yes, it means that you can operate <strong>in</strong> manual mode.<br />
Yes, you, I promise! Let’s take it slow.<br />
Turn your camera dial to Manual mode (usually <strong>in</strong>dicated by an “M.”)<br />
Choose a non-mov<strong>in</strong>g object either <strong>in</strong>doors or outdoors.<br />
Step 1: Consider your surround<strong>in</strong>gs.<br />
Refer back to the ISO chart on page 1 and set your ISO.<br />
Step 2: Consider your priority.<br />
Aperture controls the amount of the photo <strong>in</strong> focus -- do you want to limit your depth of field?<br />
Shutter speed controls the pace of the photo - do you want to freeze or blur the action?<br />
Step 3: Select the number on the camera.<br />
If you’ve chosen aperture as your priority, set your f/stop. If you’ve chosen shutter speed, set it.<br />
Step 4: Focus on your subject and press the shutter button half-way down.<br />
F<strong>in</strong>d the bl<strong>in</strong>k<strong>in</strong>g l<strong>in</strong>e on your exposure meter -- is the image underexposed (-) or overexposed (+)?<br />
Step 5: To balance your exposure, you will need to change the OTHER number (the one<br />
that’s not the priority.)<br />
If you selected your aperture, change the shutter speed until your l<strong>in</strong>e is centered on the exposure<br />
meter. If you selected your shutter speed, change the f/stop until your l<strong>in</strong>e is centered. As you’re<br />
turn<strong>in</strong>g the dial for either sett<strong>in</strong>g, keep an eye on the exposure meter. If the l<strong>in</strong>e is go<strong>in</strong>g <strong>in</strong> the wrong<br />
direction (not toward center) reverse the dial.<br />
....and, relax! Whew!<br />
Disclaimer: Okay, so we’re not really f<strong>in</strong>ished yet. Look at the numbers through the viewf<strong>in</strong>der aga<strong>in</strong>.<br />
Is your shutter speed 60 or above? If not, you may have to decrease your f/stop. If your orig<strong>in</strong>al<br />
priority was shutter speed, check your f/stop number. Will that f/stop work with the amount of your<br />
subject you want <strong>in</strong> focus? Take the photo and f<strong>in</strong>d out! Are you not gett<strong>in</strong>g anywhere at all? Increase<br />
your ISO if your meter <strong>in</strong>dicates that the image is severely underexposed. Decrease your ISO if your<br />
meter <strong>in</strong>dicates that the image is severely overexposed. OR just come yell at Joanna on this week’s<br />
photography message board thread and we’ll work on it together.<br />
I know that probably just seemed like a LOT of work to set up 1 photo! But you can do it!<br />
Remember, too, that you don’t have to use manual mode all the time. But we do want you to try. It’s<br />
perfectly okay to rely on the Aperture Priority & Shutter Priority modes if you don’t want to make all<br />
the decisions or you need to take a photo quickly without th<strong>in</strong>k<strong>in</strong>g. But if you want to help 7<br />
your camera make the decisions, than manual mode gives you this ability.
TWOpeas<strong>in</strong>abucket.com photography Course: 12 <strong>Week</strong>s to Better Photos<br />
Q & A: ISO, Shutterspeed, and Aperture<br />
Did you really make it through all 8 pages? Whew! We know that we covered a lot this week,<br />
but that doesn’t mean that you have to know it all at once. (Also, don’t worry -- we’re not<br />
go<strong>in</strong>g to make you operate <strong>in</strong> manual mode for the rest of the course. We just want you to be<br />
<strong>in</strong>formed.)<br />
Q: When is a good time to use a very slow shutterspeed?<br />
A: A slow shutter speed<br />
can be used to depict<br />
the motion of an object<br />
(such as a ferris wheel)<br />
aga<strong>in</strong>st the stillness of<br />
its surround<strong>in</strong>gs.<br />
Another example<br />
would be show<strong>in</strong>g<br />
the blur of busy traffic<br />
go<strong>in</strong>g by on the street.<br />
This photo by Mark<br />
was taken us<strong>in</strong>g a<br />
shutter speed of one<br />
second, with the<br />
camera on a tripod.<br />
The f/stop is f/20 so<br />
that the majority of<br />
his photo <strong>in</strong> focus.<br />
Q: Chris <strong>in</strong> Ontario asked: Are manual photos if done the correct way better than a photo that<br />
is taken on automatic?<br />
A: The question of if one is “better” than the other really depends on you and the composition<br />
you desire for your photo. You can absolutely take a fantastic photo on auto. If you want to<br />
control the set-up of the photo, or have to take a photo <strong>in</strong> poor light conditions, it is often<br />
helpful to know how to use manual mode to do so to achieve the results you desire.<br />
Q: Allison_Hiller said : I bought the Understand<strong>in</strong>g Exposure book and quickly realized that I<br />
can’t learn by just read<strong>in</strong>g...def<strong>in</strong>itely need photos and specific how-to’s. The more illustrations,<br />
the better. Hope that helps!<br />
A: Allison, it is def<strong>in</strong>itely our goal to give you this <strong>in</strong>formation <strong>in</strong> bite-size chunks. Also, we<br />
love visuals, which is why we try to <strong>in</strong>clude as many photos and illustrations as we can. Thanks<br />
for your suggestions!<br />
Also, a note about exposure. This week we talked about what the camera considers to be<br />
“correct” exposure. Exposure, however, is a tricky th<strong>in</strong>g and whole books have been written<br />
on gett<strong>in</strong>g it correct and then <strong>in</strong>tentionally mess<strong>in</strong>g it up for artistic purposes. Keep <strong>in</strong> m<strong>in</strong>d that<br />
there can be a difference between what the camera th<strong>in</strong>ks is the correct exposure and what<br />
YOU th<strong>in</strong>k is the “correct” exposure. A creative exposure (where you control the sett<strong>in</strong>gs to get<br />
the look you want) does not always equal a “correct” exposure sett<strong>in</strong>g on the camera. The book<br />
mentioned above, “Understand<strong>in</strong>g Exposure,” does a great job expla<strong>in</strong><strong>in</strong>g this more <strong>in</strong> depth.<br />
week two 8
TWOpeas<strong>in</strong>abucket.COM photography Course:<br />
12 <strong>Week</strong>s to Better Photos<br />
By Mark & Joanna Bolick<br />
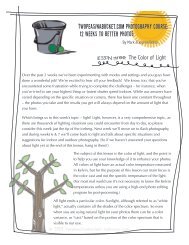
LESSON Three: The Color of Light<br />
Over the past 2 weeks we’ve been experiment<strong>in</strong>g with modes and sett<strong>in</strong>gs and you guys have<br />
done a wonderful job! We're excited to hear all your feedback! We know, too, that you’ve<br />
encountered some frustration while try<strong>in</strong>g to complete the challenges – for <strong>in</strong>stance, when<br />
you’ve tried to use your highest f/stop or fastest shutter speed <strong>in</strong>doors. While our answers have<br />
varied depend<strong>in</strong>g on the specific situation or camera, there has been one constant throughout<br />
– the photos you take and the results you get will always depend on the amount of light that<br />
you have.<br />
Which br<strong>in</strong>gs us to this week’s topic – light! Light, however, is a very comprehensive topic, as<br />
there are thousands of light<strong>in</strong>g situations you could encounter from day to day, so please<br />
consider this week just the tip of the iceberg. Next week we’ll move on to flash photography,<br />
and dur<strong>in</strong>g weeks 6 & 7 we’ll come back to light and talk about specific situations and<br />
suggestions for <strong>in</strong>door and outdoor photography. (So if we haven't answered your questions<br />
about light yet at the end of this lesson, hang <strong>in</strong> there!)<br />
The subject of this lesson is the color of light, and the po<strong>in</strong>t is<br />
to help you use your knowledge of it to enhance your photos.<br />
All colors of light have an actual color temperature measured<br />
<strong>in</strong> Kelv<strong>in</strong>, but for the purpose of this lesson our ma<strong>in</strong> focus is<br />
the color cast and not the specific temperature of the light.<br />
(For most real world use it's not necessary to know the Kelv<strong>in</strong><br />
temperatures unless you are us<strong>in</strong>g a high-end photo edit<strong>in</strong>g<br />
program for post-process<strong>in</strong>g.)<br />
All light emits a particular color. Sunlight, although referred to as "white<br />
light," actually conta<strong>in</strong>s all the shades of the color spectrum. So even<br />
when you are us<strong>in</strong>g natural light for your photos there can be a color<br />
variance, or "cast," based on the portion of the color spectrum that is<br />
visible to our eye.
TWOpeas<strong>in</strong>abucket.com photography Course: 12 <strong>Week</strong>s to Better Photo<br />
Outdoors<br />
For <strong>in</strong>stance, on a clear, bright day outside you'll often encounter a soft yellow cast <strong>in</strong><br />
morn<strong>in</strong>g photography, a cooler, bluer color cast at mid-day, and a warmer, orange color cast<br />
<strong>in</strong> afternoon photography. (Also, take note that <strong>in</strong> morn<strong>in</strong>g and even<strong>in</strong>g light your photos<br />
will have a softer contrast as compared to the harsh, strong contrast found <strong>in</strong> the middle of<br />
the day.) Below are three examples of photos taken on the same bright day at the beach.<br />
am noon pm<br />
6:45 am 12:00pm 6:15 pm<br />
The color cast on an overcast day will vary depend<strong>in</strong>g on the cloud cover. But fortunately<br />
for us, most outdoor color casts can be used to enhance and flatter our photos, as long as<br />
we keep <strong>in</strong> m<strong>in</strong>d the k<strong>in</strong>d of light we'll get at particular times of the day. So use the warm<br />
glow of the sett<strong>in</strong>g sun to your advantage!<br />
week three 2
Indoors<br />
Indoor light, however, is where we can run <strong>in</strong>to a few problems with color cast. Artificial<br />
light creates a color cast that may not be readily apparent to the naked eye, but will<br />
become immediately obvious when photographed.<br />
The two ma<strong>in</strong> types of <strong>in</strong>door light are flourescent and <strong>in</strong>candescent bulbs. Flourescent<br />
lights, often found <strong>in</strong> office environments or warehouse superstores, can give off a green<br />
or purplish cast. Incandescent lights, often found <strong>in</strong> our homes, tend to give off a<br />
yellowish/orange color cast. (As opposed to a soft yellow light outdooors, the yellow light<br />
found <strong>in</strong>doors tends to be overbear<strong>in</strong>g and unpleasant.)<br />
This photo was<br />
taken <strong>in</strong> our kitchen<br />
with the white<br />
balance set on<br />
auto (AWB).<br />
Note the obvious<br />
yellow cast <strong>in</strong> the<br />
sk<strong>in</strong> tones and on<br />
the walls. The red<br />
tablecloth almost<br />
looks orange.<br />
TWOpeas<strong>in</strong>abucket.com photography Course: 12 <strong>Week</strong>s to Better Photo<br />
S<strong>in</strong>ce purple, green, and strong yellow casts can be rather unflatter<strong>in</strong>g to our subjects, <strong>in</strong>door<br />
light<strong>in</strong>g requires more work. This is where White Balance comes <strong>in</strong>to play.<br />
White balance is simply a fancy way of sett<strong>in</strong>g the color temperature of your image. The human<br />
eye is very adept at compensat<strong>in</strong>g for color changes <strong>in</strong> light and allow<strong>in</strong>g us to view light <strong>in</strong> a very<br />
large spectrum. Most film cameras handle white balance <strong>in</strong> the film itself and you simply purchase<br />
film to match the light<strong>in</strong>g situation. Camera sensors, however, are not quite as <strong>in</strong>telligent, and they<br />
must be told what color the light is for a given situation <strong>in</strong> order to compensate for that color. To<br />
help with this, digital cameras come with some pre-set white balance sett<strong>in</strong>gs such as Auto (AWB),<br />
Daylight, and Tungsten, among others. Properly sett<strong>in</strong>g your white balance for your light<strong>in</strong>g<br />
situation will greatly <strong>in</strong>crease the impact of your photos and decrease the amount of time you<br />
spend edit<strong>in</strong>g them. White Balance sett<strong>in</strong>gs will vary from camera to camera, but here are some<br />
typical icons & the sett<strong>in</strong>gs they correspond to:<br />
cloudy<br />
tungsten<br />
bright sun<br />
flourescent<br />
week three<br />
3
Tutorial: Custom White Balance<br />
TWOpeas<strong>in</strong>abucket.com photography Course: 12 <strong>Week</strong>s to Better Photos<br />
The best way to combat color casts <strong>in</strong>doors is to use a custom white balance (it can also be<br />
referred to as a manual white balance.) This will force the camera to set its white balance for<br />
the exact light<strong>in</strong>g situation that you are shoot<strong>in</strong>g.<br />
Please note: Sett<strong>in</strong>g a custom white balance is camera specific. To familarize yourself with the<br />
process, we're go<strong>in</strong>g to take you through a step-by-step us<strong>in</strong>g our camera. These steps could vary<br />
quite a bit depend<strong>in</strong>g on your camera. We th<strong>in</strong>k you'll be pleasantly surprised, though, how easy<br />
and effective it can be to use a custom white balance.<br />
Step 1: Locate the custom white balance<br />
sett<strong>in</strong>g on your camera. We selected<br />
ours by press<strong>in</strong>g the "AF/WB" button<br />
and then turn<strong>in</strong>g the dial to locate<br />
the correct icon.<br />
Step 2: F<strong>in</strong>d a pla<strong>in</strong> white piece of paper<br />
(or posterboard or cardstock) to<br />
photograph. You want to take the<br />
photo of the paper <strong>in</strong> the light<strong>in</strong>g<br />
situation you'll be shoot<strong>in</strong>g <strong>in</strong>.<br />
Step 3: Hold the paper so that it fills the<br />
entire frame. The white paper doesn't<br />
have to be <strong>in</strong> focus - it just has to fill<br />
the frame. (If your camera won't take the<br />
photo because the object is too close to the<br />
lens, switch off the autofocus on your lens,<br />
take the photo, and switch the AF back on.)<br />
Step 4: On your camera's menu locate the<br />
custom white balance sett<strong>in</strong>g. Your<br />
camera will ask you to select the photo<br />
you just took of the white paper, and set<br />
this as your white balance.<br />
**If the light changes or you change locations you<br />
will have to redo the white balance. To stop us<strong>in</strong>g<br />
a custom white balance, simply turn your white<br />
balance sett<strong>in</strong>g back to the AWB icon or whichever<br />
preset you prefer.
TWOpeas<strong>in</strong>abucket.com photography Course: 12 <strong>Week</strong>s to Better Photos<br />
WEEKLY CHALLENGE: Experiment<strong>in</strong>g with White Balance<br />
So here’s the question we want to focus on this week:<br />
What can I do to combat color casts <strong>in</strong> <strong>in</strong>door photos?<br />
This week we're go<strong>in</strong>g to stay <strong>in</strong>doors for our photos. You can change your white balance<br />
no matter what mode you're operat<strong>in</strong>g <strong>in</strong>, so for this challenge, take your pick of modes -<br />
from aperture priority to shutter priority to manual. However, it will be easiest to see the<br />
differences <strong>in</strong> your photos if you turn off your flash.<br />
1. Photograph an object (or people, as long as they're will<strong>in</strong>g to sit still for a<br />
bit) <strong>in</strong> your house the way you typically would, us<strong>in</strong>g the auto white<br />
balance sett<strong>in</strong>g (often <strong>in</strong>dicated as AWB.)<br />
2. Now select the tungsten white balance sett<strong>in</strong>g (usually the icon for this<br />
sett<strong>in</strong>g is an upside down lightbulb) and take the photo aga<strong>in</strong>.<br />
3. Grab a piece of white paper, posterboard, or cardstock, large enough to<br />
fill the frame of your lens.<br />
4. Follow the steps <strong>in</strong> your manual to set your custom white balance.<br />
5. Us<strong>in</strong>g your custom white balance, take your photo aga<strong>in</strong>.<br />
6. Upload your photos and compare.<br />
***Bonus po<strong>in</strong>ts: Experiment with your other white balance sett<strong>in</strong>gs. Try out the "cloudy"<br />
sett<strong>in</strong>g outdoors versus the "bright" sett<strong>in</strong>g. Take your camera to the office if you have<br />
flourescent lights overhead and play around with that white balance sett<strong>in</strong>g. If you have a<br />
film camera, try experiment<strong>in</strong>g with tungsten film.<br />
[Sett<strong>in</strong>g the white balance for a static tungsten sett<strong>in</strong>g will assume that <strong>in</strong>candesent is the<br />
sole light source <strong>in</strong> the photo. This can be a problem if you have a comb<strong>in</strong>ation of both<br />
natural light and <strong>in</strong>candescent light <strong>in</strong> your photo. The color balance for tungsten is<br />
significantly different than the balance for natural light and you can get some pretty eerie<br />
colors. The best way to combat this <strong>in</strong> camera is to use a custom white balance for your<br />
<strong>in</strong>door shots. This will force the camera to set its white balance for the exact light<strong>in</strong>g<br />
situation that you are shoot<strong>in</strong>g.]<br />
week three<br />
5
TWOpeas<strong>in</strong>abucket.com photography Course: 12 <strong>Week</strong>s to Better Photos<br />
AWB<br />
Tungsten<br />
1. For our challenge photos we<br />
placed a white milkglass vase on the<br />
table <strong>in</strong> our d<strong>in</strong><strong>in</strong>g room. Not only<br />
does this room have <strong>in</strong>candescent<br />
light<strong>in</strong>g, but it also has very orange<br />
walls, which lend a dist<strong>in</strong>ct color<br />
cast of their own.<br />
The first photo was taken <strong>in</strong> manual<br />
mode with our white balance set on<br />
auto.<br />
2. The difference between the first<br />
and second photos is not drastic,<br />
but this may have more to do with<br />
the orange walls.<br />
The second photo was taken us<strong>in</strong>g<br />
the "tungsten" sett<strong>in</strong>g.<br />
3. The third photo was taken after<br />
sett<strong>in</strong>g a custom white balance.<br />
Custom<br />
6
Q & A: Light<br />
TWOpeas<strong>in</strong>abucket.com photography Course: 12 <strong>Week</strong>s to Better Photos<br />
Q: Are there other tools for sett<strong>in</strong>g a custom white balance?<br />
A: Yes. Because you have to set your custom white balance for every light<strong>in</strong>g scenario, it's<br />
not always convenient to carry around a large piece of white paper. There are professional<br />
accessories that will help you achieve the same th<strong>in</strong>g -- such as Expo Imag<strong>in</strong>g's Expodisc<br />
(www.expodisc.com) -- they're just more expensive.<br />
Q: C<strong>in</strong>di asked, "How and why would I use a gray card...?<br />
A: A gray card (just like it<br />
sounds - it's a neutral gray<br />
colored card) is another<br />
tool you can use to set<br />
white balance.<br />
However, you use a gray<br />
card when you want to<br />
correct your white balance<br />
<strong>in</strong> post-process<strong>in</strong>g <strong>in</strong>stead<br />
of <strong>in</strong>-camera.<br />
Us<strong>in</strong>g a Gray Card<br />
Basically, you shoot a frame with your gray card <strong>in</strong> the sett<strong>in</strong>g where you're go<strong>in</strong>g to be<br />
tak<strong>in</strong>g your photos. Then you shoot the rest of your photos as you normally would. (Just as you<br />
would change the custom white balance <strong>in</strong> camera for each different light<strong>in</strong>g scenario, take a<br />
photo of the gray card <strong>in</strong> each different scenario as well.)<br />
When you're done tak<strong>in</strong>g photos, your next step is to open the photo of the gray card <strong>in</strong> your<br />
photo-edit<strong>in</strong>g program to set your white balance for each series of photos you took <strong>in</strong> that sett<strong>in</strong>g.<br />
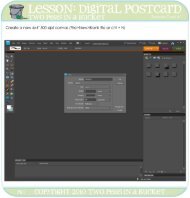
For example, <strong>in</strong> Photoshop CS3, you would:<br />
1. Open your photo of the gray card <strong>in</strong> Photoshop.<br />
2. Select Image>> Adjustments >> Curves from the menu at the top.<br />
3. In the curves box, select your middle <strong>in</strong>k dropper (the gray one) and use it to click on the<br />
gray portion of the gray card <strong>in</strong> the photo.<br />
4. Before clos<strong>in</strong>g the Curves box, select "Save Preset" to save your new white balance sett<strong>in</strong>gs.<br />
5. Now open the rest of the photos that you took where you first photographed the gray card.<br />
6. For each photo, select Image >> Adjustments >> Curves, and then choose "Load Preset" to<br />
load your custom white balance sett<strong>in</strong>g to color correct the image.<br />
week three 7
TWOpeas<strong>in</strong>abucket.COM photography Course:<br />
12 <strong>Week</strong>s to Better Photos<br />
By Mark & Joanna Bolick<br />
LESSON Four: Flash<br />
Ah, the Flash. Is it our nemesis or is it our friend? Personally, we'd rather avoid it altogether,<br />
but as you've certa<strong>in</strong>ly discovered over the past few weeks there are times when even the best<br />
comb<strong>in</strong>ation of ISO, aperture, and shutter speed won't help us capture what we want <strong>in</strong> low<br />
light situations.<br />
You might gather from read<strong>in</strong>g that this we're not overly fond of flash use. Ma<strong>in</strong>ly we're not<br />
big fans of the way a flash can detract from a photograph's impact. That be<strong>in</strong>g said, proper<br />
use of a flash can really make a positive difference, and that's the topic of this week's lesson:<br />
tips & tricks for us<strong>in</strong>g your flash effectively.<br />
There are two ma<strong>in</strong> types of flash for your camera - <strong>in</strong>ternal & external. An <strong>in</strong>ternal flash is a<br />
part of your camera (you can't remove it from the camera body) whereas an external flash is a<br />
detachable camera accessory. For the purpose of this discussion we're go<strong>in</strong>g to concentrate on<br />
us<strong>in</strong>g your <strong>in</strong>ternal, on-camera flash (though we'll touch on external flash a bit at the end.)<br />
So first th<strong>in</strong>gs first:<br />
Whether you're <strong>in</strong>doors or outdoors, when should you use your flash?<br />
Indoors<br />
We are big fans of natural light, but, realistically, when you are <strong>in</strong>doors<br />
and there is <strong>in</strong>sufficient light to capture your picture with a comb<strong>in</strong>ation<br />
of ISO, shutter speed and aperture, you have very little choice but to use<br />
your flash. Still, with<strong>in</strong> that use, there are some th<strong>in</strong>gs to do to achieve a<br />
more pleas<strong>in</strong>g effect with the flash.
TWOpeas<strong>in</strong>abucket.com photography Course: 12 <strong>Week</strong>s to Better Photo<br />
Consider distance<br />
Because the camera flash becomes the dom<strong>in</strong>ant<br />
lightsource when used, it can cause some light<strong>in</strong>g<br />
extremes that will affect your photos. For example,<br />
the photo on the left was taken with the subjects<br />
stand<strong>in</strong>g directly <strong>in</strong> front of a light-colored wall.<br />
Notice the strong shadow beh<strong>in</strong>d the baby?<br />
Plac<strong>in</strong>g a subject near a wall will cast a very strong<br />
shadow aga<strong>in</strong>st that wall. Move your subjects as far<br />
away from walls as possible. If you do have to place<br />
them near a wall, try to f<strong>in</strong>d a dark colored wall that<br />
will lessen the impact of the shadow.<br />
Camera flashes tend to be strong and extremely over<br />
eager <strong>in</strong> their desire to light the subject. A flash fires as<br />
low or as powerful as it believes the meter is tell<strong>in</strong>g it to,<br />
which means that if you're <strong>in</strong> a dark environment, the<br />
flash will attempt to light up the entire area. Because your<br />
flash tends to cast light on your subject like a bright<br />
flashlight, your subject can be washed out if you're<br />
stand<strong>in</strong>g to close to it (as shown <strong>in</strong> the photo on the left.)<br />
A good rule of thumb is to keep your subject at least<br />
5-6 feet <strong>in</strong> front of you, and leave at least that much<br />
distance beh<strong>in</strong>d the subject and the closest wall. In<br />
addition to keep<strong>in</strong>g subjects at a consistent distance,<br />
meter on the subject as much as possible. You may<br />
lose your background, but it won’t overblow your<br />
subjects. For the second carseat photo, we took a<br />
step back before tak<strong>in</strong>g the photo aga<strong>in</strong>.<br />
week four<br />
2
F<strong>in</strong>ally, <strong>in</strong> regard to distance (both <strong>in</strong>doors and outdoors) it's important to keep <strong>in</strong> m<strong>in</strong>d that<br />
most built-<strong>in</strong> flashes have an effective range of about 10-12 feet. This means that if you're<br />
try<strong>in</strong>g to take a picture of someth<strong>in</strong>g a good 12+ feet from you, your foreground will be<br />
well-lit but your background will be dark (which is really not helpful if you're try<strong>in</strong>g to<br />
photograph that object <strong>in</strong> the background.) This also applies to telephoto lenses - your flash<br />
may not be strong enough to light up your subject if your lens is extended all the way out.<br />
Consider Glare<br />
It's very important to consider the surfaces <strong>in</strong><br />
front of you as you look through the viewf<strong>in</strong>der.<br />
A glass, sh<strong>in</strong>y, or mirrored surface is go<strong>in</strong>g to<br />
reflect that flash right back at you <strong>in</strong> your photo,<br />
which is not so appeal<strong>in</strong>g.<br />
In regard to eyeglasses, a recent tip we read on<br />
the photography message board (such a valuable<br />
resource of <strong>in</strong>formation!) is to have your subject<br />
tip their glasses down slightly by lift<strong>in</strong>g the part<br />
of the glasses that goes over the ears. (Tip courtesy<br />
of 2peas user flute4peace, real name Nikki.)<br />
TWOpeas<strong>in</strong>abucket.com photography Course: 12 <strong>Week</strong>s to Better Photo<br />
Speak<strong>in</strong>g of eyes & reflection, red eye is caused by the reflection of the flash off the<br />
backside of the eyeball (the ret<strong>in</strong>a). Many po<strong>in</strong>t & shoot cameras have a red eye reduction<br />
sett<strong>in</strong>g that fires short bursts of the flash before the ma<strong>in</strong> flash fires. These bursts are meant<br />
to contract the iris of the eye and reduce the reflection on the ret<strong>in</strong>a from the ma<strong>in</strong> flash,<br />
and this technique seems to have vary<strong>in</strong>g degrees of success. Another option is to have your<br />
subject look slightly over your shoulder <strong>in</strong>stead of directly <strong>in</strong>to the camera. In your photos,<br />
they will appear to be look<strong>in</strong>g at you, but the slight angle will prevent the flash from<br />
reflect<strong>in</strong>g off the ret<strong>in</strong>a and greatly reduce the <strong>in</strong>stances of red eye.<br />
Q: amanda_m asked:<br />
How do you handle light<strong>in</strong>g <strong>in</strong> a dark area besides bump<strong>in</strong>g up ISO or us<strong>in</strong>g a flash?<br />
A: If you're still frustrated with your <strong>in</strong>door photos us<strong>in</strong>g an <strong>in</strong>-camera flash, look <strong>in</strong>to<br />
diffus<strong>in</strong>g your flash. There are products on the market now specifically designed for diffus<strong>in</strong>g,<br />
or soften<strong>in</strong>g the <strong>in</strong>tesity of the flash on a po<strong>in</strong>t & shoot camera. OR you can make your own<br />
diffuser -- while do<strong>in</strong>g a Google search we read various accounts of people us<strong>in</strong>g everyth<strong>in</strong>g<br />
from used dryer sheets to semi-opaque adhesive tape to coffee filters to vellum placed directly<br />
<strong>in</strong> front of the flash to help elim<strong>in</strong>ate its harshness.<br />
week four<br />
3
Us<strong>in</strong>g your Flash Outdoors<br />
TWOpeas<strong>in</strong>abucket.com photography Course: 12 <strong>Week</strong>s to Better Photos<br />
Let’s not overlook a flash’s usefulness outdoors. “What!?,” you say,<br />
“Why would I use a flash outdoors when I have all that natural light?”<br />
Even when you're outdoors you'll encounter situations where your subject's eyes are<br />
completely shadowed because the light source is too high or your subject is slightly <strong>in</strong> the<br />
shade while the rest of the scene is well-lit. This is where your flash will come <strong>in</strong> handy as a<br />
fill flash. Basically, a fill flash is your normal flash. But <strong>in</strong> scenarios where you already have<br />
ambient light, your flash is merely "fill<strong>in</strong>g <strong>in</strong>" the areas of your photo that may be shadowed<br />
or poorly lit. Here's the important part -- not only is fill flash helpful on bright, sunny days<br />
where you subject is backlit, but it can help "pop" your colors on gray, overcast w<strong>in</strong>ter days.<br />
no flash<br />
vs.<br />
fill flash<br />
Lastly, a bit about night portrait mode, also known as night scene mode. This<br />
mode can come <strong>in</strong> handy for light<strong>in</strong>g your nighttime photos. By us<strong>in</strong>g a slow<br />
shutter speed and sync<strong>in</strong>g the flash, night portrait mode allows you to take a<br />
photo that properly exposes both the foreground and the background. It usually<br />
helps to use this mode with a tripod. Also, most importantly, make sure that your<br />
subjects rema<strong>in</strong> still while you're tak<strong>in</strong>g the photo.
TWOpeas<strong>in</strong>abucket.com photography Course: 12 <strong>Week</strong>s to Better Photos<br />
WEEKLY CHALLENGE: Experiment<strong>in</strong>g with Fill Flash<br />
So here’s the question we want to focus on this week:<br />
What can I do to elim<strong>in</strong>ate shadows <strong>in</strong> outdoor photos?<br />
Last week we told you to stay <strong>in</strong>side for the challenge. Now this week we'd like you to head<br />
outdoors if at all possible (we know it's hard this time of year) and take on one (or all 3) of the<br />
follow<strong>in</strong>g parts of the challenge. [We're giv<strong>in</strong>g you a few choices here based on the type<br />
of camera you own and the amount of control you're comfortable hav<strong>in</strong>g over your camera.]<br />
You can use almost any shoot<strong>in</strong>g mode (such as AV or portrait) to accomplish parts 1 & 2,<br />
as long as the mode allows you to turn on your flash.<br />
1. Use fill flash to "pop" colors on a gray day.<br />
This one should work well with w<strong>in</strong>ter! Take a photo of your subject outdoors without the<br />
flash. Then manually turn on the flash for your camera so that it fires when you're tak<strong>in</strong>g a<br />
photo. (It helps to have a colorful subject or sett<strong>in</strong>g for this part of the challenge.)<br />
2. Use fill flash to elim<strong>in</strong>ate dark shadows on the face on a bright day.<br />
Take a picture of a human subject outdoors <strong>in</strong> the sunsh<strong>in</strong>e without the flash. Then<br />
manually turn on your flash. (Your camera is go<strong>in</strong>g to th<strong>in</strong>k you're crazy s<strong>in</strong>ce it knows<br />
that it already has enough light on a sunny day, so double check to make sure that your<br />
flash is go<strong>in</strong>g off before tak<strong>in</strong>g the second photo of your subject.)<br />
3. Use fill flash to combat backlight<strong>in</strong>g on a shadowed subject.<br />
This challenge works best if your subject is <strong>in</strong> a shadow, or not as brightly lit as the<br />
background and surround<strong>in</strong>gs. You will get the best results if you do this option <strong>in</strong><br />
manual mode. The best th<strong>in</strong>g to do is to manually turn on your flash on the camera, then meter<br />
on the brightest area of the photo you wish to take. Set your exposure meter for the bright area.<br />
Then recompose to focus on your subject and press the shutter. Ideally, your flash will fire,<br />
giv<strong>in</strong>g light to your subject while the camera takes care of the background. Your camera will<br />
expose the brighter area of the photo correctly and your flash will fire enough to expose your<br />
shadowed subject correctly. Now turn off your flash and take the photo aga<strong>in</strong> without the fill<br />
flash.<br />
***Bonus po<strong>in</strong>ts: Experiment with night portrait mode if you have it on your camera.***<br />
week four<br />
5
TWOpeas<strong>in</strong>abucket.com photography Course: 12 <strong>Week</strong>s to Better Photos<br />
AWB<br />
Tungsten<br />
The above photos are an example of part one of the weekly challenge. The first photo was taken<br />
without the flash, while the second was taken us<strong>in</strong>g the <strong>in</strong>-camera flash.(Note how us<strong>in</strong>g the flash<br />
can also create catchlights <strong>in</strong> your subject's eyes.) The photos below are an example of part two<br />
of the challenge (same kid, 5 years later.) The first photo was taken without the flash. Note that the<br />
fill-flash did overexpose the subject <strong>in</strong> the second photo, but it's noth<strong>in</strong>g a few steps <strong>in</strong> your photo<br />
edit<strong>in</strong>g program can't handle. Check out this week's challenge onl<strong>in</strong>e for more photo examples.<br />
Custom<br />
6
Q & A: Flash<br />
TWOpeas<strong>in</strong>abucket.com photography Course: 12 <strong>Week</strong>s to Better Photos<br />
Q: Caroscraps asked: Do I need an external flash and why?<br />
(and why are they so expensive?) and Holly Koenigsfeld said<br />
as well, "I would love to know about external flashes and<br />
how to use them."<br />
A: Do you absolutely need an external flash? No. Are they<br />
more versatile and useful than a built-<strong>in</strong> flash? Def<strong>in</strong>itely.<br />
The biggest benefit to external flashes is that you can control<br />
both the <strong>in</strong>tensity of the flash as well as direction of the flash<br />
(so it doesn't always have to be on full-beam fac<strong>in</strong>g foward.)<br />
You can turn the flash away from your subjects, bounce the<br />
flash off walls or the ceil<strong>in</strong>g, or diffuse the light with an<br />
accessory such as a Lightsphere to soften the appearance of<br />
the flash <strong>in</strong> your photos. In fact, you might not be able to tell<br />
that you've taken a flash photo at all!<br />
External flashes are more expensive because, just like your<br />
camera body, you can adjust almost everyth<strong>in</strong>g on one to<br />
suit your needs, and all that control comes with a price. We<br />
honestly believe that a good external flash is just as worthy an<br />
<strong>in</strong>vestment as quality lenses when it comes to SLR (and dSLR)<br />
photography.<br />
Q: Theshyone asked: hot shoe, slave flash, whatever you call<br />
it, how do you use it?<br />
A: A hot shoe is the bracket on an SLR or digital SLR camera<br />
where an external flash attaches to the camera. A slave flash<br />
is a second flash, not attached to your camera, that responds<br />
to the flash on your camera and fires <strong>in</strong> sync with the shutter.<br />
The flash on your camera controls the slave flash, and you<br />
can set it up so that the flash on your camera doesn't fire but<br />
your slave flash does fire, or have both fire at the same time.<br />
A slave flash is a secondary light source, and is useful for<br />
additional light<strong>in</strong>g or contrast<strong>in</strong>g light<strong>in</strong>g <strong>in</strong> a photo.<br />
Q: Juliettie asked: What is the best way to use fill flash outdoors? My camera doesn't have a fill<br />
flash per se...I can force the flash but it seems to create new problems (harsh sk<strong>in</strong>tones with loss<br />
of dimension) <strong>in</strong> place of old ones (heavy shadows undereye, etc.)<br />
A: You, dear reader, may enounter these same problems while you complete this week's<br />
challenge. While an external flash allows you to control the <strong>in</strong>tensity of the flash, it's hard to<br />
control a built-<strong>in</strong> flash. The best th<strong>in</strong>g to do is experiment and become familiar with situations that<br />
work with the built-<strong>in</strong> flash. If you're <strong>in</strong> a brightly lit situation that needs fill-flash, you really need<br />
to try to meter on the brightest spot of the photo and set your exposure based on the brightest<br />
area. If you accidentally meter on the darkest area, your camera is go<strong>in</strong>g to tell your flash to fire<br />
with full power because it th<strong>in</strong>ks it's dark, and then your subjects will most likely be washed out.<br />
week four 7
TWOpeas<strong>in</strong>abucket.COM photography Course:<br />
12 <strong>Week</strong>s to Better Photos<br />
By Mark & Joanna Bolick<br />
LESSON FIVE: Composition<br />
Whew! We've been work<strong>in</strong>g hard these past four weeks, haven't we? We thought we'd take<br />
a break from the technical jargon and manual operation of our cameras this week to<br />
concentrate on composition.<br />
Lanna asked: I've got the light<strong>in</strong>g (usually) and the other technical stuff, but when it<br />
comes to fram<strong>in</strong>g, yeah, not so hot. If you aren't born with an <strong>in</strong>nate sense of fram<strong>in</strong>g/<br />
compos<strong>in</strong>g, how can you learn it? I'd love five fail-proof tips ... or six or seven...<br />
Accord<strong>in</strong>g to the onl<strong>in</strong>e Oxford American Dictionary, composition can be def<strong>in</strong>ed as "the<br />
artistic arrangement of the parts of the picture." Simply put, it's the way you compose your<br />
photos. Composition, like creativity, is <strong>in</strong> the eye of the beholder, and there can be great<br />
differences of op<strong>in</strong>ion <strong>in</strong> what one considers to be "good" composition. Our goal <strong>in</strong> provid<strong>in</strong>g<br />
the follow<strong>in</strong>g tips, therefore, is to give you a start<strong>in</strong>g po<strong>in</strong>t for compos<strong>in</strong>g your photos. (This is<br />
by no means an exhaustive list, but is <strong>in</strong>tended to be a spr<strong>in</strong>g board for your learn<strong>in</strong>g.)<br />
Tip#1 -- Keep it Simple.<br />
Elim<strong>in</strong>ate the distractions <strong>in</strong> your photos.<br />
It's important to tra<strong>in</strong> your eye to be aware of<br />
what is go<strong>in</strong>g on <strong>in</strong> the background beh<strong>in</strong>d your<br />
subject (not to mention the foreground if it's<br />
visible.) You can remove distract<strong>in</strong>g elements<br />
from your photos by physically mov<strong>in</strong>g them<br />
out of the scene, reposition<strong>in</strong>g your subjects<br />
<strong>in</strong> a better location, tak<strong>in</strong>g a few steps forward<br />
for a close-up shot, or decreas<strong>in</strong>g your depth of<br />
field.<br />
Case <strong>in</strong> po<strong>in</strong>t: In the example on the right you just<br />
might notice the black lamp stick<strong>in</strong>g out of the back<br />
of Mark's head, not to mention dozens of people<br />
beh<strong>in</strong>d him. While we couldn't elim<strong>in</strong>ate the<br />
people (tourists) I did ask him to take a few steps to<br />
the right and then recomposed my photo.
TWOpeas<strong>in</strong>abucket.com photography Course: 12 <strong>Week</strong>s to Better Photo<br />
Tip#2 -- Apply the Rule of Thirds<br />
The rule of thirds capitalizes on the fact that our eyes are naturally drawn to a po<strong>in</strong>t about<br />
two-thirds of the way up (or over) on a photo. Mentally divide your scene <strong>in</strong>to 3rds as<br />
you're look<strong>in</strong>g through your viewf<strong>in</strong>der or at the LCD screen. To follow the rule you'll want<br />
to compose your photo so that your subject(s) or action is located at one of the <strong>in</strong>tersect<strong>in</strong>g<br />
po<strong>in</strong>ts rather than <strong>in</strong> the middle, or dead center, of the image.<br />
Tip#3 -- Keep an Eye on the Horizon<br />
You can also apply the rule of thirds to the placement of the horizon <strong>in</strong> your photos.<br />
Place the horizon about<br />
2/3 of the way up on the<br />
photo to keep the focus<br />
on what is below it<br />
(such as land or water)<br />
OR<br />
Position the horizon<br />
about 1/3 of the way<br />
up on the photo if you<br />
want the focus to be on<br />
what is above it (the sky.)<br />
2
** Keep <strong>in</strong> m<strong>in</strong>d that the rule of thirds isn't an actual "rule" but a guidel<strong>in</strong>e. For example, if<br />
you want to command someone's attention you can break the rule by plac<strong>in</strong>g your subject<br />
directly <strong>in</strong> the center of your photo, like we did <strong>in</strong> the first photo below.<br />
Tip#4 -- Frame your subject<br />
TWOpeas<strong>in</strong>abucket.com photography Course: 12 <strong>Week</strong>s to Better Photo<br />
Use elements <strong>in</strong> the foreground of your photo to frame the center of <strong>in</strong>terest. Architectural<br />
elements (such as arches or fences) as well as those found <strong>in</strong> nature work well for this.<br />
Tip#5 -- Fill the Frame<br />
In addition to elim<strong>in</strong>at<strong>in</strong>g distract<strong>in</strong>g backgrounds (tip #1) it's also important to elim<strong>in</strong>ate wasted<br />
space <strong>in</strong> your photos. Allow your subject to dom<strong>in</strong>ate the photo (fill the frame) to give it more<br />
prom<strong>in</strong>ence. Keep <strong>in</strong> m<strong>in</strong>d that cropp<strong>in</strong>g your photos <strong>in</strong> an edit<strong>in</strong>g program is a simple fix. It's also<br />
important to dist<strong>in</strong>guish that empty space <strong>in</strong> a photo is not necessarily considered wasted space when used effectively.<br />
1. too many distractions 2. good, but could be closer 3. a simple crop <strong>in</strong> Photoshop<br />
3
TWOpeas<strong>in</strong>abucket.com photography Course: 12 <strong>Week</strong>s to Better Photos<br />
Tip#6 -- Try a New Perspective<br />
Make sure to exam<strong>in</strong>e your subject from different angles -<br />
a new view can change the perspective of the whole photo.<br />
For example,<br />
take a horizontal<br />
and a vertical<br />
shot of the same<br />
subject.<br />
Step back and look for l<strong>in</strong>es (<strong>in</strong> this case, footpr<strong>in</strong>ts)<br />
or patterns that will lead the viewer's eye across the photo.<br />
Hit the ground -<br />
if you're tak<strong>in</strong>g photos of a child or pet,<br />
get down on the ground and see the<br />
world at their level.<br />
Tell the story by tak<strong>in</strong>g photos from different perspectives.
WEEKLY CHALLENGE: Creative Composition<br />
TWOpeas<strong>in</strong>abucket.com photography Course: 12 <strong>Week</strong>s to Better Photos<br />
This week: Take on this week's tips for composition!<br />
The good news: It doesn't matter what k<strong>in</strong>d of camera you have for this challenge!<br />
Consider one or more of the follow<strong>in</strong>g tips as you compose your photo:<br />
1. Keep it simple - elim<strong>in</strong>ate distractions<br />
2. Apply the rule of thirds<br />
3. Keep an eye on the horizon<br />
4. Frame your subject<br />
5. Fill the frame<br />
6. Try a new perspective<br />
Then post your favorite photos from the week <strong>in</strong> the photo gallery, but be sure to share<br />
how you applied the tips (or effectively broke them) to compose your photos.<br />
***Bonus po<strong>in</strong>ts: Share YOUR favorite tips for composition with us! ***<br />
What tips from the checklist did we use <strong>in</strong> this photo?<br />
week five<br />
5
Q & A: Composition<br />
TWOpeas<strong>in</strong>abucket.com photography Course: 12 <strong>Week</strong>s to Better Photos<br />
Q: heather*t asked: A beg<strong>in</strong>ner question would be, What are the rules for good photographic<br />
composition...and what rules can be broken effectively? Also, what can you do compositionally to<br />
spice up posed family pictures?<br />
A: Rules are meant to be broken, right? Just because this week's tips might work <strong>in</strong> many<br />
situations doesn't mean that they'll work <strong>in</strong> ALL situations. So the important th<strong>in</strong>g is to remember<br />
not to take the tips as RULES, but as GUIDELINES. If they work for you, use them. But if they don't<br />
work, don't worry about stay<strong>in</strong>g with<strong>in</strong> the guidel<strong>in</strong>es. Don't let these tips h<strong>in</strong>der your creativity.<br />
A: As far as group portraits, here are a few suggestions we've found to be effective:<br />
After tak<strong>in</strong>g a tradition, full-length photo, take a few steps closer for a close-up of your subjects. Also<br />
note that the pose directly below is relaxed and comfortable. Encourage your group to have some fun<br />
(such as the jump<strong>in</strong>g groomsmen pictured below) to avoid stiff, posed photos. A little fun can also go<br />
a long way to relax<strong>in</strong>g your subjects, and you can follow the fun with a formal pose as well.<br />
AWB<br />
Tungsten<br />
For full-length poses,<br />
stagger your subjects, or<br />
try arrang<strong>in</strong>g group<strong>in</strong>gs<br />
with<strong>in</strong> your portrait - for<br />
example, have mom and<br />
dad stand together, then<br />
daughter and son<br />
together but a little <strong>in</strong><br />
front of mom & dad.<br />
F<strong>in</strong>ally, try a different<br />
perspective. The group<br />
photo on the left was<br />
shot from the top of the<br />
stairs Custom while the family<br />
stood at the land<strong>in</strong>g<br />
halfway down the stairs.<br />
week five 6
-<br />
TWOpeas<strong>in</strong>abucket.COM photography Course:<br />
12 <strong>Week</strong>s to Better Photos<br />
By Mark & Joanna Bolick<br />
LESSON S iX: Shoot<strong>in</strong>g Indoors<br />
This week and next week we're go<strong>in</strong>g to concentrate on pull<strong>in</strong>g together what we've already<br />
learned <strong>in</strong> weeks 1-5 and apply<strong>in</strong>g it effectively <strong>in</strong> our day-to-day lives. After all, we want you<br />
to be comfortable us<strong>in</strong>g your cameras <strong>in</strong> a variety of sett<strong>in</strong>gs & situations.<br />
Mak<strong>in</strong>g Compromises<br />
Indoor photography (and by "<strong>in</strong>door" we're <strong>in</strong>itially referr<strong>in</strong>g to photography that takes place<br />
<strong>in</strong> our homes) is often about mak<strong>in</strong>g compromises. As we discovered through the weekly<br />
challenges there isn't always enough light <strong>in</strong>doors to achieve the sett<strong>in</strong>gs we would like to<br />
use, and due to that lack of light we're forced to sacrifice some of our ideals <strong>in</strong> order to still<br />
get the photos, or results, that we want.<br />
-- Sometimes that sacrifice is ISO, and with a high ISO our images are gra<strong>in</strong>y. One way to<br />
combat digital noise after the fact is by us<strong>in</strong>g a software tool (such as Noiseware) to<br />
elim<strong>in</strong>ate or reduce the digital noise, and another way (either <strong>in</strong>-camera or <strong>in</strong> post-process<strong>in</strong>g)<br />
is to simply turn the photo to black & white, where an element of gra<strong>in</strong><strong>in</strong>ess is expected <strong>in</strong> the<br />
photo.<br />
-- At other times the sacrifice is depth of field. If you're cont<strong>in</strong>ually frustrated with your <strong>in</strong>door<br />
photos it might be time to consider a lens with a lower f/stop (for example, a 50mm f/1.8 is<br />
very much affordable, and, as an added bonus, very lightweight.)<br />
-- Most often, we'd wager, the sacrifice is shutter speed. As discovered through the challenges<br />
a flash will help to "freeze" the action, but a flash also comes with its own limitations and/or<br />
complications. A tripod can be helpful, though sometimes hard to reposition quickly.<br />
-- Also to consider is the color of the light - you can create a custom white balance (and<br />
remember to change it for your next scenario) or make the most of the yellow glow of<br />
tungsten light<strong>in</strong>g that lends a cozy feel to photos.
TWOpeas<strong>in</strong>abucket.com photography Course: 12 <strong>Week</strong>s to Better Photo<br />
Thankfully, we do get one big boost of light dur<strong>in</strong>g the day thanks to mother nature (dependent<br />
on the day's weather, of course - a compromise <strong>in</strong> itself) with the addition of natural light.<br />
Mak<strong>in</strong>g the Most of Natural Light<br />
1. F<strong>in</strong>d it<br />
To make the most of natural light, it's very important to be aware of where the natural light is<br />
<strong>in</strong> your home as well as when it's available. For <strong>in</strong>stance, <strong>in</strong> our previous house, our children's<br />
bedrooms faced the east and would be well-lit <strong>in</strong> the morn<strong>in</strong>gs on sunny days. By late<br />
afternoon the sun was sett<strong>in</strong>g <strong>in</strong> the west and was visible outside our sunroom, which<br />
was at the back of the house.<br />
2. Indirect light vs. Direct light<br />
Perhaps the BEST aspect of natural light <strong>in</strong>doors occurs when the sun isn't sh<strong>in</strong><strong>in</strong>g directly <strong>in</strong><br />
the w<strong>in</strong>dows, but is <strong>in</strong>stead provid<strong>in</strong>g <strong>in</strong>direct natural light. Indirect natural light provides you<br />
with a well-lit area that doesn't have the strong shadows, or contrast, of direct light. (You can<br />
use lightweight or sheer curta<strong>in</strong>s or bl<strong>in</strong>ds to help filter direct light to achieve the same effect.)<br />
Here is an example of direct light vs. <strong>in</strong>direct light, taken <strong>in</strong> a hospital room. In the photo on the left<br />
the subjects are fac<strong>in</strong>g a w<strong>in</strong>dow. Note the cast of the shadow to the left of the baby as well as the<br />
yellow light beam<strong>in</strong>g down on their faces. The second photo was also taken near the w<strong>in</strong>dow, but with<br />
the bl<strong>in</strong>ds closed to elim<strong>in</strong>ate the harsh glare of the sun.<br />
2
TWOpeas<strong>in</strong>abucket.com photography Course: 12 <strong>Week</strong>s to Better Photo<br />
***This is not to say, however, that direct light is necessarily a bad th<strong>in</strong>g! You can def<strong>in</strong>itely<br />
use it to your advantage when light<strong>in</strong>g your subjects. Particularly if you're look<strong>in</strong>g for more<br />
contrast <strong>in</strong> your black & white photos, direct light on your subjects can be a great th<strong>in</strong>g.<br />
This photo is an<br />
example of us<strong>in</strong>g<br />
direct light to your<br />
advantage. Although<br />
the baby's body is <strong>in</strong><br />
shadows, his face,<br />
and his eyelashes <strong>in</strong><br />
particular, are<br />
illum<strong>in</strong>ated by the<br />
light stream<strong>in</strong>g<br />
through the w<strong>in</strong>dow.<br />
3. Use Natural Light Sources to your Advantage<br />
W<strong>in</strong>dows and doors (storm doors or French doors, for <strong>in</strong>stance) are great sources of natural<br />
light. Your position and the placement of your subjects <strong>in</strong> relation to the natural light source<br />
makes a big difference as well. For example, both photos below were taken when the<br />
subject was parallel to the w<strong>in</strong>dow. Notice how well the light illum<strong>in</strong>ates the subject's face<br />
and features <strong>in</strong> both photos.<br />
The subject is parallel to the w<strong>in</strong>dow and the<br />
photographer is perpendicular to the w<strong>in</strong>dow.<br />
3
TWOpeas<strong>in</strong>abucket.com photography Course: 12 <strong>Week</strong>s to Better Photos<br />
In these photos, the subject is fac<strong>in</strong>g the w<strong>in</strong>dow while the photographer is sitt<strong>in</strong>g with his/<br />
her back to the w<strong>in</strong>dow.) Take note of the catchlights <strong>in</strong> the subject's eyes. Catchlights are<br />
highlights <strong>in</strong> the eyes of a subject, and <strong>in</strong> this case the catchlights will look like w<strong>in</strong>dows<br />
because that is what the eyes are reflect<strong>in</strong>g.<br />
The reflection of the w<strong>in</strong>dow br<strong>in</strong>gs highlights<br />
to the subject's eyes.<br />
One f<strong>in</strong>al th<strong>in</strong>g - when<br />
tak<strong>in</strong>g photos of subjects <strong>in</strong><br />
front of a natural light source<br />
it's very important to pay<br />
attention to your exposure<br />
meter<strong>in</strong>g. Remember <strong>in</strong><br />
week 4 how we metered on<br />
the bright areas of the photo<br />
to properly expose the<br />
background while us<strong>in</strong>g the<br />
fill flash?<br />
You can employ the same<br />
strategy <strong>in</strong>doors with the<br />
flash OR you can meter on<br />
your subjects to properly<br />
expose them while<br />
overexpos<strong>in</strong>g the bright<br />
background light.<br />
This example shows the difference between meter<strong>in</strong>g on the<br />
background w<strong>in</strong>dow vs. meter<strong>in</strong>g on the subject
TWOpeas<strong>in</strong>abucket.com photography Course: 12 <strong>Week</strong>s to Better Photos<br />
WEEKLY CHALLENGE: Us<strong>in</strong>g w<strong>in</strong>dows as a light source<br />
So here’s the question we want to focus on this week:<br />
How can I take advantage of natural light <strong>in</strong>doors?<br />
We want you to take advantage of your w<strong>in</strong>dows this week!<br />
To consider: You can use any type of camera this week, but please try to take<br />
these photos without a flash.<br />
Choose one or all of the follow<strong>in</strong>g options for tak<strong>in</strong>g your photos:<br />
1. Position your subject <strong>in</strong> direct light and then reposition your subject <strong>in</strong><br />
<strong>in</strong>direct, or filtered, light.<br />
2. Capture catchlights - have your subject face the w<strong>in</strong>dow while you're sitt<strong>in</strong>g<br />
or stand<strong>in</strong>g with your back to the w<strong>in</strong>dow.<br />
3. Position your subject so that he/she/it is parallel to the w<strong>in</strong>dow, while you are<br />
perpendicular to the w<strong>in</strong>dow.<br />
4. For those with SLRs or digiSLRs: If you can adjust the exposure meter on your<br />
camera, try meter<strong>in</strong>g on the background light vs. meter<strong>in</strong>g on your subject and<br />
sett<strong>in</strong>g the exposure for your subject. Also note that you could use a wall <strong>in</strong> the<br />
room or the floor to set your exposure meter.<br />
Please remember to post your favorite photos from the week <strong>in</strong> the photo gallery!<br />
Thank you for your participation!<br />
week six<br />
5
TWOpeas<strong>in</strong>abucket.com photography Course: 12 <strong>Week</strong>s to Better Photos<br />
Q & A: Indoors<br />
Q: IrishSheila asked: I've heard all over that it's recommended NOT to use flash if you can avoid<br />
it. But <strong>in</strong> my experience, a lot of times this makes for blurry photos <strong>in</strong>doors, even if me and my<br />
subject are completely still and there seems to be sufficient light.<br />
A: As stated <strong>in</strong> the article, <strong>in</strong>door photography is often about compromises. In low light situations<br />
we're often push<strong>in</strong>g our cameras to the max to achieve correct exposure by us<strong>in</strong>g either a slow<br />
shutter speed or a low f/stop <strong>in</strong> comb<strong>in</strong>ation with a high ISO to take our pictures. In these<br />
situations there is plenty of opportunity for blurr<strong>in</strong>ess. For example, if our f/stop is really low, our<br />
photos will have a very shallow depth of field, and most of the photo can be out of focus. A slow<br />
shutter speed makes it very hard to hand-hold your camera and still take the photo, and can also<br />
result <strong>in</strong> blurr<strong>in</strong>ess even if your subjects are sitt<strong>in</strong>g still.<br />
Q: Milkcan asked: Captur<strong>in</strong>g action shots <strong>in</strong>doors without a flash - is this even possible?<br />
A: Tak<strong>in</strong>g action shots <strong>in</strong>doors is really its own special subject, and we're go<strong>in</strong>g to address it <strong>in</strong><br />
depth <strong>in</strong> week 8: On the Go. We'll be featur<strong>in</strong>g a special guest (and fellow pea) who makes a<br />
liv<strong>in</strong>g <strong>in</strong> sports photography and has offered to share her tips & tricks for tak<strong>in</strong>g action shots both<br />
<strong>in</strong>doors and outside. Not only that, but she's go<strong>in</strong>g to answer YOUR specific questions as well<br />
<strong>in</strong> a special message board chat dur<strong>in</strong>g week 8! Look for her feature as well as others to come <strong>in</strong><br />
weeks 8-11. (Just a little someth<strong>in</strong>g special to spice up the second half of the course.)<br />
Q: Tr<strong>in</strong>aRN asked: What k<strong>in</strong>d of <strong>in</strong>door lights can you buy and where should they be positioned?<br />
What are the different suggested studio setups, what do they look like?<br />
A: Unfortunately, we're not go<strong>in</strong>g to be talk<strong>in</strong>g about light<strong>in</strong>g setups <strong>in</strong> this course. It's not that<br />
we don't th<strong>in</strong>k those questions are important, but rather that we don't feel that studio setups are<br />
necessarily a beg<strong>in</strong>n<strong>in</strong>g photography topic. However, it is relevant to po<strong>in</strong>t out that an additional<br />
way to enhance your <strong>in</strong>door light is by us<strong>in</strong>g studio light<strong>in</strong>g, umbrellas, softboxes, etc.<br />
** In addition, one affordable way to help redirect light to your subject's face is by us<strong>in</strong>g a<br />
reflector. Although there are professional photography reflectors, you can also simply use a 2' x 3'<br />
piece of white foamcore (foam board) to help light to your subject. The subject can hold the board<br />
just outside the frame of your shot to br<strong>in</strong>g light to his or her face, or you can ask another family<br />
member to help reflect light onto the subject by hold<strong>in</strong>g the board <strong>in</strong> a certa<strong>in</strong> position.<br />
week six<br />
6