Image Capture - NCI Division of Cancer Treatment and Diagnosis ...
Image Capture - NCI Division of Cancer Treatment and Diagnosis ...
Image Capture - NCI Division of Cancer Treatment and Diagnosis ...

You also want an ePaper? Increase the reach of your titles
YUMPU automatically turns print PDFs into web optimized ePapers that Google loves.
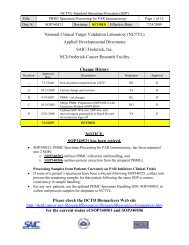
DCTD St<strong>and</strong>ard Operating Procedures (SOP)<br />
Title: <strong>Image</strong> <strong>Capture</strong> <strong>of</strong> Tumor Biopsy Slides from γH2AX Immun<strong>of</strong>luorescence Assay Page 7 <strong>of</strong> 25<br />
Doc. #: SOP340533 Revision: D Effective Date: 9/22/2013<br />
7.0 OPERATING PROCEDURES<br />
7.1 <strong>Image</strong> capture should be completed for a single slide tray from the Bond-Max Processing Module<br />
tray (up to 8 clinical slides from a single patient <strong>and</strong> 2 calibrator/control [CalCon] slides). <strong>Image</strong>s<br />
captured using this SOP will be analyzed in SOP340534, batched by slide tray.<br />
7.1.1 Record the name <strong>and</strong> certification number <strong>of</strong> the Certified Assay Operator performing the<br />
image capture, the facility running this SOP, the Patient ID, <strong>and</strong> the clinical protocol<br />
number in the Batch Record (Appendix 1).<br />
7.1.2 Attach a COPY <strong>of</strong> the Slide Information Table from the Batch Record <strong>of</strong> SOP340523 for<br />
the patient slides being processed in this SOP <strong>and</strong> record the date the slide tray was<br />
processed on the Bond-Max System <strong>and</strong> the slide tray number in the Batch Record<br />
(Appendix 1). Cross out any slides that are not imaged in this SOP.<br />
7.1.3 Patient sample information from the Shipping Manifest <strong>of</strong> SOP340507 (attached to<br />
SOP340522) will be needed to fill in dose level information during image capture.<br />
7.2 Install the <strong>Image</strong>-Pro s<strong>of</strong>tware on the PC associated with the microscope; this s<strong>of</strong>tware will use<br />
the custom-designed macros for this assay to perform image capture.<br />
7.2.1 Macro installation instructions can be found in Appendix 3, Section 1A; the first time the<br />
macro is run the instructions in Appendix 3, Section 1B should be followed before<br />
proceeding.<br />
7.2.2 Auto-white balance, dark frame subtraction, <strong>and</strong> background correction should be<br />
established the first time the <strong>Image</strong>-Pro s<strong>of</strong>tware is run on a PC; see Appendix 3,<br />
Section 2 for details.<br />
7.2.3 If using s<strong>of</strong>tware other than <strong>Image</strong>-Pro, the image capture module for quantitative<br />
immun<strong>of</strong>luorescence can be achieved using manual or automated capture methods that<br />
meet a set <strong>of</strong> minimum specifications as outlined in Appendix 3, Section 3.<br />
7.3 Protocol for <strong>Image</strong> <strong>Capture</strong><br />
7.3.1 Turn on the Leica DM5000B microscope, light source, <strong>and</strong> the QImaging Retiga-2000R<br />
camera. Allow lamp to warm up for 10 min before use. Important: An objective with at<br />
least a 0.70 NA is required for optimal resolution during image capture.<br />
7.3.1.1 Record the total usage hours to date for the EL6000 Light Source <strong>and</strong> Liquid<br />
Light Guide in the Batch Record (Appendix 1, Section 1). Calculate <strong>and</strong><br />
record the current rating for both <strong>and</strong> ensure they are within the manufacturer’s<br />
specifications.<br />
7.3.1.2 Record the time the EL6000 Light Source <strong>and</strong> Liquid Light Guide are turned<br />
on in the Batch Record (Appendix 1, Section 1).<br />
7.3.2 Open the <strong>Image</strong>-Pro s<strong>of</strong>tware <strong>and</strong> in the macro toolbar that pops up select the Initialize<br />
Macro button; the macro <strong>Capture</strong> Menu window will open.<br />
7.3.2.1 If the macro toolbar does not pop up when <strong>Image</strong>-Pro s<strong>of</strong>tware is opened,<br />
return to SOP Step 7.2.1 <strong>and</strong> the follow instructions for first time use <strong>of</strong> the<br />
macro.