Image Capture - NCI Division of Cancer Treatment and Diagnosis ...
Image Capture - NCI Division of Cancer Treatment and Diagnosis ...
Image Capture - NCI Division of Cancer Treatment and Diagnosis ...

Create successful ePaper yourself
Turn your PDF publications into a flip-book with our unique Google optimized e-Paper software.
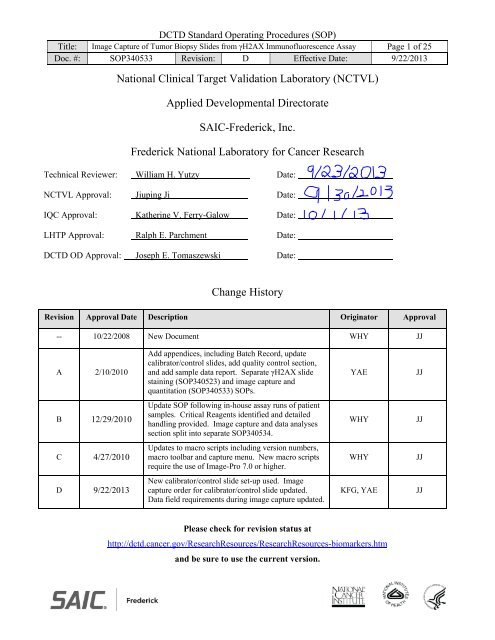
DCTD St<strong>and</strong>ard Operating Procedures (SOP)<br />
Title: <strong>Image</strong> <strong>Capture</strong> <strong>of</strong> Tumor Biopsy Slides from γH2AX Immun<strong>of</strong>luorescence Assay Page 1 <strong>of</strong> 25<br />
Doc. #: SOP340533 Revision: D Effective Date: 9/22/2013<br />
National Clinical Target Validation Laboratory (NCTVL)<br />
Applied Developmental Directorate<br />
SAIC-Frederick, Inc.<br />
Frederick National Laboratory for <strong>Cancer</strong> Research<br />
Technical Reviewer: William H. Yutzy Date:<br />
NCTVL Approval: Jiuping Ji Date:<br />
IQC Approval: Katherine V. Ferry-Galow Date:<br />
LHTP Approval: Ralph E. Parchment Date:<br />
DCTD OD Approval: Joseph E. Tomaszewski Date:<br />
Change History<br />
Revision Approval Date Description Originator Approval<br />
-- 10/22/2008 New Document WHY JJ<br />
A 2/10/2010<br />
Add appendices, including Batch Record, update<br />
calibrator/control slides, add quality control section,<br />
<strong>and</strong> add sample data report. Separate γH2AX slide<br />
staining (SOP340523) <strong>and</strong> image capture <strong>and</strong><br />
quantitation (SOP340533) SOPs.<br />
YAE<br />
JJ<br />
B 12/29/2010<br />
Update SOP following in-house assay runs <strong>of</strong> patient<br />
samples. Critical Reagents identified <strong>and</strong> detailed<br />
h<strong>and</strong>ling provided. <strong>Image</strong> capture <strong>and</strong> data analyses<br />
section split into separate SOP340534.<br />
WHY<br />
JJ<br />
C 4/27/2010<br />
Updates to macro scripts including version numbers,<br />
macro toolbar <strong>and</strong> capture menu. New macro scripts<br />
require the use <strong>of</strong> <strong>Image</strong>-Pro 7.0 or higher.<br />
WHY<br />
JJ<br />
D 9/22/2013<br />
New calibrator/control slide set-up used. <strong>Image</strong><br />
capture order for calibrator/control slide updated.<br />
Data field requirements during image capture updated.<br />
KFG, YAE<br />
JJ<br />
Please check for revision status at<br />
http://dctd.cancer.gov/ResearchResources/ResearchResources-biomarkers.htm<br />
<strong>and</strong> be sure to use the current version.
DCTD St<strong>and</strong>ard Operating Procedures (SOP)<br />
Title: <strong>Image</strong> <strong>Capture</strong> <strong>of</strong> Tumor Biopsy Slides from γH2AX Immun<strong>of</strong>luorescence Assay Page 2 <strong>of</strong> 25<br />
Doc. #: SOP340533 Revision: D Effective Date: 9/22/2013<br />
TABLE OF CONTENTS<br />
OVERVIEW OF IMMUNOFLUORESCENCE ASSAY FOR BIOPSIES ...............................................................3<br />
1.0 PURPOSE .....................................................................................................................................................4<br />
2.0 SCOPE ..........................................................................................................................................................4<br />
3.0 ABBREVIATIONS .......................................................................................................................................4<br />
4.0 INTRODUCTION .........................................................................................................................................4<br />
5.0 ROLES AND RESPONSIBILITIES .............................................................................................................5<br />
6.0 MATERIALS AND EQUIPMENT REQUIRED .........................................................................................6<br />
7.0 OPERATING PROCEDURES .....................................................................................................................7<br />
APPENDIX 1: BATCH RECORD .......................................................................................................................... 13<br />
APPENDIX 2: UPDATING QIMAGING DRIVER ............................................................................................... 17<br />
APPENDIX 3: MACRO INSTALLATION AND MICROSCOPE SET UP .......................................................... 18<br />
APPENDIX 4: CALIBRATOR/CONTROL SLIDES AND CLINICAL SLIDES .................................................. 20<br />
APPENDIX 5: FIELD SELECTION FOR IMAGING ............................................................................................ 22<br />
APPENDIX 6: IMAGE CAPTURE EXAMPLES ................................................................................................... 24
DCTD St<strong>and</strong>ard Operating Procedures (SOP)<br />
Title: <strong>Image</strong> <strong>Capture</strong> <strong>of</strong> Tumor Biopsy Slides from γH2AX Immun<strong>of</strong>luorescence Assay Page 3 <strong>of</strong> 25<br />
Doc. #: SOP340533 Revision: D Effective Date: 9/22/2013<br />
OVERVIEW OF IMMUNOFLUORESCENCE ASSAY FOR BIOPSIES<br />
SOP340507:<br />
Tumor Frozen Needle<br />
Biopsy Specimen<br />
Collection <strong>and</strong> H<strong>and</strong>ling<br />
• Collect <strong>and</strong> freeze tumor<br />
needle biopsies for use in<br />
biomarker assays<br />
Ship to Certified Assay<br />
Site<br />
SOP340522:<br />
Tumor Frozen Needle<br />
Biopsy Preparation for the<br />
γH2AX IFA<br />
• NBF fix <strong>and</strong> paraffin embed<br />
tumor needle biopsies <strong>and</strong><br />
positive control sample<br />
• Section biopsies for use in<br />
γH2AX IFA<br />
• Stain 2 slides by H&E for<br />
st<strong>and</strong>ard histology analysis<br />
Calibrator/Control Slides<br />
(PADIS/IQC-Provided Critical Reagent)<br />
Ship to Certified Assay<br />
Site<br />
SOP340523:<br />
γH2AX IFA for Tumor<br />
Biopsy Slides<br />
• Load biopsy slides into Bond-Max Processing Module<br />
• Bond-Max automated staining <strong>of</strong> slides with biotinylated-γH2AX monoclonal primary<br />
antibody as the detector <strong>and</strong> a streptavidin, Alexa Fluor 488 conjugate as the reporter<br />
• Stain slides with DAPI <strong>and</strong> mount cover slips<br />
Ship to Certified Assay<br />
Site<br />
SOP340533:<br />
<strong>Image</strong> <strong>Capture</strong> <strong>of</strong> Tumor<br />
Biopsy Slides From<br />
γH2AX IFA<br />
<strong>Image</strong> within 18 to 72 h<br />
• <strong>Capture</strong> images <strong>of</strong> γH2AX-stained biopsy slides from a single patient (1 Bond-Max<br />
slide tray) using a fluorescent microscope <strong>and</strong> Plan Apo 20x objective with ≥ 0.7 NA.<br />
SOP340534:<br />
<strong>Image</strong> <strong>and</strong> Data analyses <strong>of</strong><br />
Tumor Biopsy Slides From<br />
γH2AX IFA<br />
• Quantitate captured images <strong>of</strong> γH2AX-stained biopsy slides using <strong>Image</strong>-Pro s<strong>of</strong>tware,<br />
custom macros, <strong>and</strong> a data analyses Excel
DCTD St<strong>and</strong>ard Operating Procedures (SOP)<br />
Title: <strong>Image</strong> <strong>Capture</strong> <strong>of</strong> Tumor Biopsy Slides from γH2AX Immun<strong>of</strong>luorescence Assay Page 4 <strong>of</strong> 25<br />
Doc. #: SOP340533 Revision: D Effective Date: 9/22/2013<br />
1.0 PURPOSE<br />
St<strong>and</strong>ardize an immunohistochemical method for detecting <strong>and</strong> quantifying histone H2AX<br />
phosphorylated at serine 139 (γH2AX) staining in formalin-fixed, paraffin-embedded human tissue<br />
biopsies for pharmacodynamic studies <strong>of</strong> chemotherapeutic DNA-damaging agents.<br />
2.0 SCOPE<br />
This procedure applies to all personnel involved in the image capture <strong>of</strong> slides stained using the γH2AX<br />
Immun<strong>of</strong>luorescence Assay (IFA) for Tumor Biopsy Slides (SOP340523). This SOP outlines the<br />
recommended procedure for image capture <strong>of</strong> γH2AX-stained, paraffin-embedded tumor biopsy sections.<br />
The goal <strong>of</strong> the SOP <strong>and</strong> associated training is to ensure consistency <strong>of</strong> γH2AX measurement between<br />
clinical sites.<br />
3.0 ABBREVIATIONS<br />
Ab = Antibody<br />
CalCon = Calibrator/Control<br />
CCD = Charge Coupled Device<br />
DAPI = 4',6-Diamidino-2-Phenylindole<br />
DCTD = <strong>Division</strong> <strong>of</strong> <strong>Cancer</strong> <strong>Treatment</strong> <strong>and</strong> <strong>Diagnosis</strong><br />
DIH = Digital Imaging Head<br />
FITC = Fluorescein Isothiocyanate<br />
γH2AX = Histone H2AX Phosphorylated at Serine 139<br />
H&E = Hemotoxylin <strong>and</strong> Eosin<br />
ID = Identification/Identifier<br />
IFA = Immun<strong>of</strong>luorescence Assay<br />
LHTP = Laboratory <strong>of</strong> Human Toxicology & Pharmacology<br />
NA = Numerical Aperture<br />
NBF = Neutral Buffered Formalin<br />
NCTVL = National Clinical Target Validation Laboratory<br />
%NAP = Percent Nuclear Area Positive for γH2AX<br />
QC = Quality Control<br />
SOP = St<strong>and</strong>ard Operating Procedure<br />
Strp488 = Alexa Fluor 488-Streptavidin Conjugate<br />
4.0 INTRODUCTION<br />
The γH2AX IFA is an immunohistochemistry-based staining assay developed to quantify the nuclear<br />
DNA damage marker, histone γH2AX. The assay uses a biotinylated-γH2AX monoclonal antibody as the<br />
detector <strong>and</strong> an Alexa Fluor 488-streptavidin conjugate (Strp488) as the reporter for immunostaining.
DCTD St<strong>and</strong>ard Operating Procedures (SOP)<br />
Title: <strong>Image</strong> <strong>Capture</strong> <strong>of</strong> Tumor Biopsy Slides from γH2AX Immun<strong>of</strong>luorescence Assay Page 5 <strong>of</strong> 25<br />
Doc. #: SOP340533 Revision: D Effective Date: 9/22/2013<br />
5.0 ROLES AND RESPONSIBILITIES<br />
Laboratory Director/Supervisor The Laboratory Director/Supervisor, directs laboratory operations,<br />
supervises technical personnel <strong>and</strong> reporting <strong>of</strong> findings, <strong>and</strong> is<br />
responsible for the proper performance <strong>of</strong> all laboratory procedures.<br />
The Laboratory Director/Supervisor oversees the personnel who follow<br />
the SOPs within the laboratory <strong>and</strong> is responsible for ensuring the<br />
personnel are certified <strong>and</strong> have sufficient experience to h<strong>and</strong>le clinical<br />
samples.<br />
Certified Assay Operator<br />
A Certified Assay Operator may be a Laboratory Technician/<br />
Technologist, Research Associate, or Laboratory Scientist who has<br />
been certified through DCTD training on this SOP. The Certified<br />
Assay Operator works under the guidance <strong>of</strong> the Laboratory<br />
Director/Supervisor. This person performs laboratory procedures <strong>and</strong><br />
examinations in accordance with the current SOP(s), as well as any<br />
other procedures conducted by a laboratory, including maintaining<br />
equipment <strong>and</strong> records <strong>and</strong> performing quality assurance activities<br />
related to performance.<br />
5.1 It is the responsibility <strong>of</strong> the Laboratory Director/Supervisor to ensure that all personnel have<br />
documented training <strong>and</strong> qualification on this SOP prior to the actual h<strong>and</strong>ling <strong>and</strong> processing <strong>of</strong><br />
samples from clinical trial patients. The Laboratory Director/Supervisor is responsible for<br />
ensuring the Certified Assay Operator running the SOP has sufficient experience to h<strong>and</strong>le <strong>and</strong><br />
analyze clinical samples.<br />
5.2 The Certified Assay Operator for this SOP should be well versed <strong>and</strong> comfortable with light<br />
microscopy techniques.<br />
5.3 Digital versions <strong>of</strong> the <strong>Image</strong> Information Table in the Batch Record (Appendix 1, Sections 2)<br />
can be created for logging sample information as long as all column information exactly matches<br />
the table in the Batch Record. If any portion <strong>of</strong> the Batch Record is recorded in a digital copy,<br />
cross through that section, state “See attached sheet,” <strong>and</strong> initial. A copy <strong>of</strong> the completed,<br />
digital table must be printed <strong>and</strong> attached to the Batch Record in order to maintain a complete<br />
audit trail.<br />
5.4 The Certified Assay Operator responsible for conducting the assay is to follow this SOP <strong>and</strong><br />
complete the required tasks <strong>and</strong> associated documentation. The Batch Record (Appendix 1) must<br />
be completed in real-time for each experimental run, with each page dated <strong>and</strong> initialed, <strong>and</strong><br />
placed with the clinical sample information.<br />
5.5 All responsible personnel are to check the DCTD Biomarkers Web site<br />
(http://dctd.cancer.gov/ResearchResources/ResearchResources-biomarkers.htm) to verify that the<br />
most recent version <strong>of</strong> the SOP for the assay is being used.
DCTD St<strong>and</strong>ard Operating Procedures (SOP)<br />
Title: <strong>Image</strong> <strong>Capture</strong> <strong>of</strong> Tumor Biopsy Slides from γH2AX Immun<strong>of</strong>luorescence Assay Page 6 <strong>of</strong> 25<br />
Doc. #: SOP340533 Revision: D Effective Date: 9/22/2013<br />
6.0 MATERIALS AND EQUIPMENT REQUIRED<br />
6.1 Kimwipes (e.g., Fischer Scientific, Cat#: 06-666A)<br />
6.2 Bond-Max slide tray containing one patient’s clinical sample slides <strong>and</strong> calibrator/control slides<br />
processed according to SOP340523<br />
6.2.1 A copy <strong>of</strong> the Slide Information Table from the Batch Record <strong>of</strong> SOP340523 for all<br />
slides being processed (SOP340523; Appendix 1, Section 3)<br />
6.2.2 A copy <strong>of</strong> the patient sample information from the Batch Record <strong>of</strong> SOP340522 for the<br />
biopsy samples (SOP340522; Appendix 1, Sections 2 <strong>and</strong> 3)<br />
6.3 QImaging Retiga-2000R fast 1394 mono-cooled camera (QImaging, Model#: RET-2000R-F-M-<br />
12-C)<br />
6.4 Leica Microscope (SOP as written references this set up)<br />
6.4.1 Leica DM5000B microscope with 1X C mount adaptor (Leica, Cat#: 541510)<br />
6.4.2 EL6000 external light source with Liquid Light Guide <strong>and</strong> OEM bulbs (Leica, Cat#:<br />
11504116). Must have known usage hours for light source <strong>and</strong> light guide; these hours<br />
must be within the manufacturer’s specifications<br />
6.4.3 Leica Plan Apo 20x/0.70 numerical aperture (NA) objective, PH2<br />
6.4.4 DAPI (blue channel, Chroma A4 filter, BP 360/40) <strong>and</strong> FITC (green channel, Chroma L5<br />
filter, BP 480/40) filter sets<br />
6.5 Nikon Microscope<br />
6.5.1 Nikon Eclipse 80i or 90i (Nikon Instruments)<br />
• DIH-E or DIH-M digital imaging head<br />
• 1X C-mount CCD camera coupler<br />
6.5.2 Nikon Intensilight, Model: C-HGFl (manual; Nikon Instruments)<br />
6.5.3 Nikon CFI Plan Apo DM 20x/0.75 NA objective, PH2 (Nikon Instruments)<br />
6.5.4 DAPI (blue channel, UV-2E/C) <strong>and</strong> FITC (green channel, B-2E/C) filter cubes (Nikon<br />
Instruments)<br />
6.6 PC (Parallels for Mac not supported)<br />
6.7 <strong>Image</strong>-Pro 7.0 or higher (lower versions <strong>of</strong> <strong>Image</strong>-Pro are not supported <strong>and</strong> may not work with<br />
the macro) with updated drivers for the QImaging camera (see Appendix 2; Media Cybernetics)<br />
6.8 Micros<strong>of</strong>t Excel 2003, 2007, or 2010<br />
6.9 The following files will be provided to DCTD Certified Assay Operators during the training<br />
course:<br />
6.9.1 A self-extracting zip file entitled “gH2AX qIFA macro v091611.exe” will include<br />
required files for image capture <strong>and</strong> analysis including the macro files<br />
gH2AX<strong>Capture</strong>Control_ v011211.bas, List<strong>and</strong>ExcelSorter_for_gH2AX<strong>Image</strong>Assay.bas,<br />
<strong>and</strong> qIFA_gH2AX_ v072007.ipm).<br />
Alternate microscope systems using 20x objective with at least a 0.70 NA may be used, but must meet<br />
the following performance specifications: (1) image capture time for each field for each calibrator must<br />
be less than or equal to 1 min, <strong>and</strong> (2) each calibrator must return a %NAP within the acceptable ranges<br />
as defined in SOP340534.
DCTD St<strong>and</strong>ard Operating Procedures (SOP)<br />
Title: <strong>Image</strong> <strong>Capture</strong> <strong>of</strong> Tumor Biopsy Slides from γH2AX Immun<strong>of</strong>luorescence Assay Page 7 <strong>of</strong> 25<br />
Doc. #: SOP340533 Revision: D Effective Date: 9/22/2013<br />
7.0 OPERATING PROCEDURES<br />
7.1 <strong>Image</strong> capture should be completed for a single slide tray from the Bond-Max Processing Module<br />
tray (up to 8 clinical slides from a single patient <strong>and</strong> 2 calibrator/control [CalCon] slides). <strong>Image</strong>s<br />
captured using this SOP will be analyzed in SOP340534, batched by slide tray.<br />
7.1.1 Record the name <strong>and</strong> certification number <strong>of</strong> the Certified Assay Operator performing the<br />
image capture, the facility running this SOP, the Patient ID, <strong>and</strong> the clinical protocol<br />
number in the Batch Record (Appendix 1).<br />
7.1.2 Attach a COPY <strong>of</strong> the Slide Information Table from the Batch Record <strong>of</strong> SOP340523 for<br />
the patient slides being processed in this SOP <strong>and</strong> record the date the slide tray was<br />
processed on the Bond-Max System <strong>and</strong> the slide tray number in the Batch Record<br />
(Appendix 1). Cross out any slides that are not imaged in this SOP.<br />
7.1.3 Patient sample information from the Shipping Manifest <strong>of</strong> SOP340507 (attached to<br />
SOP340522) will be needed to fill in dose level information during image capture.<br />
7.2 Install the <strong>Image</strong>-Pro s<strong>of</strong>tware on the PC associated with the microscope; this s<strong>of</strong>tware will use<br />
the custom-designed macros for this assay to perform image capture.<br />
7.2.1 Macro installation instructions can be found in Appendix 3, Section 1A; the first time the<br />
macro is run the instructions in Appendix 3, Section 1B should be followed before<br />
proceeding.<br />
7.2.2 Auto-white balance, dark frame subtraction, <strong>and</strong> background correction should be<br />
established the first time the <strong>Image</strong>-Pro s<strong>of</strong>tware is run on a PC; see Appendix 3,<br />
Section 2 for details.<br />
7.2.3 If using s<strong>of</strong>tware other than <strong>Image</strong>-Pro, the image capture module for quantitative<br />
immun<strong>of</strong>luorescence can be achieved using manual or automated capture methods that<br />
meet a set <strong>of</strong> minimum specifications as outlined in Appendix 3, Section 3.<br />
7.3 Protocol for <strong>Image</strong> <strong>Capture</strong><br />
7.3.1 Turn on the Leica DM5000B microscope, light source, <strong>and</strong> the QImaging Retiga-2000R<br />
camera. Allow lamp to warm up for 10 min before use. Important: An objective with at<br />
least a 0.70 NA is required for optimal resolution during image capture.<br />
7.3.1.1 Record the total usage hours to date for the EL6000 Light Source <strong>and</strong> Liquid<br />
Light Guide in the Batch Record (Appendix 1, Section 1). Calculate <strong>and</strong><br />
record the current rating for both <strong>and</strong> ensure they are within the manufacturer’s<br />
specifications.<br />
7.3.1.2 Record the time the EL6000 Light Source <strong>and</strong> Liquid Light Guide are turned<br />
on in the Batch Record (Appendix 1, Section 1).<br />
7.3.2 Open the <strong>Image</strong>-Pro s<strong>of</strong>tware <strong>and</strong> in the macro toolbar that pops up select the Initialize<br />
Macro button; the macro <strong>Capture</strong> Menu window will open.<br />
7.3.2.1 If the macro toolbar does not pop up when <strong>Image</strong>-Pro s<strong>of</strong>tware is opened,<br />
return to SOP Step 7.2.1 <strong>and</strong> the follow instructions for first time use <strong>of</strong> the<br />
macro.
DCTD St<strong>and</strong>ard Operating Procedures (SOP)<br />
Title: <strong>Image</strong> <strong>Capture</strong> <strong>of</strong> Tumor Biopsy Slides from γH2AX Immun<strong>of</strong>luorescence Assay Page 8 <strong>of</strong> 25<br />
Doc. #: SOP340533 Revision: D Effective Date: 9/22/2013<br />
7.3.3 For each assay run, the macro will create a folder using the entry in the “Protocol” field<br />
<strong>of</strong> the <strong>Capture</strong> Menu (SOP Step 7.3.7). This folder, which will be referred to as the<br />
Header Folder from this point on, will be placed in the location selected for the “<strong>Image</strong><br />
Directory” field on the <strong>Capture</strong> Menu (default C:\gH2AX qIFA\IpWin Source<br />
Files\Scripts\Projects\). All *.tif images will be saved in the Header Folder.<br />
7.3.3.1 In order to ensure images captured for the same Protocol are not overwritten<br />
we suggest entering “CTEP#_Date_Increment” in the “Protocol” field <strong>of</strong> the<br />
<strong>Capture</strong> Menu (e.g., CTEP1234_20101024_1).<br />
7.3.3.2 Record the name <strong>of</strong> the Header Folder in the Batch Record (Appendix 1,<br />
Section 2).<br />
7.3.4 The following order for image capture will ensure data are analyzed, sorted <strong>and</strong><br />
graphed correctly in SOP340534. <strong>Capture</strong> images for BOTH calibrator/control<br />
(CalCon) slides first, in the section order below, followed by the clinical samples.<br />
Slide<br />
<strong>Capture</strong><br />
Order<br />
Bond Tray<br />
Position<br />
1 Position 1 CalCon*<br />
2 Last Position CalCon*<br />
Slide Description<br />
3-10 Position 2-N Clinical Samples<br />
*See Appendix 4 for CalCon <strong>and</strong> clinical slide set up.<br />
Section <strong>Capture</strong> Order<br />
Cal-Low (A)<br />
Cal-Mid (B)<br />
Cal-High (C)<br />
Positive Control (D)<br />
Negative Control (E)<br />
Cal-Low (A)<br />
Cal-Mid (B)<br />
Cal-High (C)<br />
Positive Control (D)<br />
Negative Control (E)<br />
Post-dose Biopsy<br />
Pre-dose Biopsy<br />
Positive Control (testes)<br />
7.3.5 As images are captured, complete the <strong>Image</strong> Information Table in the Batch Record<br />
(Appendix 1, Section 2) with the Bond Slide ID Number for each slide, in the order it is<br />
captured, along with the corresponding Bond-Max slide tray position; add notes for<br />
individual slides or images as needed.<br />
7.3.6 A minimum <strong>of</strong> 3 (more is highly recommended) analyzable images should be captured<br />
for each tissue section on a slide; avoid necrotic areas, large gaps in the tissue, or areas<br />
where tissue has folded onto itself.<br />
If < 3 analyzable images can be captured from a tissue section, note in the <strong>Image</strong><br />
Information Table (Appendix 1, Section 2) the reason for the inability to capture 3<br />
analyzable images.<br />
IMPORTANT: If a tissue section has no analyzable fields, capture a single background<br />
image for that section to ensure the data are sorted <strong>and</strong> graphed correctly in SOP340534.
DCTD St<strong>and</strong>ard Operating Procedures (SOP)<br />
Title: <strong>Image</strong> <strong>Capture</strong> <strong>of</strong> Tumor Biopsy Slides from γH2AX Immun<strong>of</strong>luorescence Assay Page 9 <strong>of</strong> 25<br />
Doc. #: SOP340533 Revision: D Effective Date: 9/22/2013<br />
7.3.7 <strong>Capture</strong> Parameters: Left side <strong>of</strong> <strong>Capture</strong> Menu. Enter the information for each section<br />
<strong>of</strong> each slide as image capture is performed. This information is used to generate a<br />
unique image file name for each image. Example file name:<br />
WHY_ CTEP1234_0035_20101024_0T850MD_gH2AX_Predose_1678489_tumor<br />
biopsy_Sample_MP_1.tif<br />
Data Fields<br />
<strong>Image</strong> Directory<br />
<strong>Image</strong><br />
Directory:<br />
Project<br />
Use the default – C:\gH2AX qIFA\IpWin<br />
Source Files\Scripts\Projects\<br />
<strong>Capture</strong> Menu<br />
Investigator:<br />
Protocol:<br />
Slide<br />
Group ID:<br />
Patient ID:<br />
Dose:<br />
Dose Time:<br />
Bond Slide<br />
ID:<br />
Stain or<br />
Target<br />
Signal:<br />
Sample<br />
Unique<br />
Identifier:<br />
PHL<br />
Identifier:<br />
Tissue:<br />
Enter your initials<br />
“CTEP#_PatientID_Date (YYYYMM<br />
DD),” no hyphens<br />
(Names the Header Folder that is created in<br />
the <strong>Image</strong> Directory)<br />
Leave Blank<br />
Leave Blank<br />
Leave Blank<br />
Leave Blank<br />
Enter the Bond Slide ID Number as<br />
assigned by the Bond Processing Module<br />
(SOP340523)<br />
Enter “gH2AX”<br />
Type in either CalLow, CalMid, Cal<br />
High, Positive, Negative, Predose, or<br />
Postdose; no hyphens.<br />
Paraffin block number<br />
Select the type <strong>of</strong> tissue being imaged in<br />
the drop-down box (e.g., tumor biopsy)<br />
Click the appropriate checkbox<br />
<strong>Image</strong><br />
You are on<br />
<strong>Image</strong>...<br />
This will be automatically filled <strong>and</strong><br />
increment upwards; number will reset with<br />
each new Sample or Slide
DCTD St<strong>and</strong>ard Operating Procedures (SOP)<br />
Title: <strong>Image</strong> <strong>Capture</strong> <strong>of</strong> Tumor Biopsy Slides from γH2AX Immun<strong>of</strong>luorescence Assay Page 10 <strong>of</strong> 25<br />
Doc. #: SOP340533 Revision: D Effective Date: 9/22/2013<br />
7.3.8 <strong>Capture</strong> Steps: Right side <strong>of</strong> <strong>Capture</strong> Menu:<br />
Identify phase-dense regions <strong>of</strong> the biopsy at 200x magnification under phase contrast.<br />
See Appendix 5, Sections 1 <strong>and</strong> 2 for field selection suggestions.<br />
Step 1 Change the microscope excitation filter to the DAPI filter (Chroma A4 filter, BP 360/40),<br />
click the Auto Exposure button, <strong>and</strong> adjust the focus on the sample to be imaged. Select<br />
areas on the slide with no necrosis or confounders <strong>and</strong> avoid edges <strong>of</strong> the tissue area to<br />
avoid edge-staining artifacts (for examples <strong>of</strong> phase-contrast <strong>and</strong> fluorescent images, see<br />
Appendix 5, Sections 2 <strong>and</strong> 3). Click Continue. Note: Keep the light source shutter<br />
closed on the microscope as much as possible to prevent bleaching <strong>of</strong> the Strp488 <strong>and</strong><br />
DAPI signals.<br />
Step 2 Adjust the exposure for the DAPI channel (in milliseconds [ms]) for optimal image<br />
capture. Begin with a test exposure time <strong>of</strong> 30-50 ms; click the Test Exposure button.<br />
The displayed image will represent what the downstream quantitation macro will identify<br />
as quantifiable nuclei (blue); overexposed nuclei (pink); or non-counted, underexposed<br />
nuclei (purple). Overexposure <strong>of</strong> the signal will have a “swelling” effect on the area <strong>of</strong><br />
the nuclei, giving a larger “false-positive” area. Underexposure will shrink the area,<br />
resulting in a weaker DAPI signal in stained nuclei. Sample images <strong>of</strong> over-, under-, <strong>and</strong><br />
correct exposures are in Appendix 6, Section 1.<br />
Increase or decrease the exposure time for the DAPI signal for optimal nuclei exposure<br />
within the image field (i.e., minimize the underexposed nuclei without swelling the<br />
nuclear area). Once the exposure is adjusted to give an accurate representation <strong>of</strong> the<br />
nuclei, click Continue, <strong>and</strong> the program will capture the DAPI image.<br />
Step 3 Change the microscope excitation filter to the Strp488 filter (FITC/fluorescein; Chroma<br />
L5 filter, BP 480/40). Click the Auto Exposure button (may need to click multiple times<br />
to increase the exposure enough to see some background aut<strong>of</strong>luorescence).<br />
A selection box will appear over a monochrome image in a capture window;<br />
alternatively, place a check by “Intensity Map,” <strong>and</strong> the monochrome image will be<br />
replaced by a color intensity map <strong>of</strong> the image. The selection box will be used to<br />
establish the Strp488 background aut<strong>of</strong>luorescence. Move the selection box to an area <strong>of</strong><br />
the image that shows the most intense background aut<strong>of</strong>luorescence signal. Within this<br />
region, ensure that there are no black areas (lacking signal), debris fluorescence, or<br />
γH2AX-specific signal. Once an area is selected, click Get Exposure.<br />
The γH2AX exposure is adjusted <strong>and</strong> captured by the macro automatically. This step<br />
may take a few moments depending on the amount <strong>of</strong> background aut<strong>of</strong>luorescence.<br />
The γH2AX/DAPI composite *.tif file will be saved to the Header Folder as entered in<br />
the <strong>Image</strong> Directory field <strong>of</strong> the <strong>Capture</strong> Menu. An example <strong>of</strong> a captured image is<br />
shown in Appendix 6, Section 2.<br />
Note: <strong>Image</strong>-Pro occasionally behaves erratically during image capture. For example, the<br />
selection box for aut<strong>of</strong>luorescence (Step 3 above) can jump across the capture window or the<br />
image capture process can take an inordinate amount <strong>of</strong> time. Be sure the correct version <strong>of</strong><br />
<strong>Image</strong>-Pro is being used <strong>and</strong> that the drivers for the camera are up to date. To update the drivers,<br />
follow the instructions in Appendix 2. With older computers, the speed <strong>and</strong> memory <strong>of</strong> the<br />
capture computer may need to be increased if the macro behaves erratically
DCTD St<strong>and</strong>ard Operating Procedures (SOP)<br />
Title: <strong>Image</strong> <strong>Capture</strong> <strong>of</strong> Tumor Biopsy Slides from γH2AX Immun<strong>of</strong>luorescence Assay Page 11 <strong>of</strong> 25<br />
Doc. #: SOP340533 Revision: D Effective Date: 9/22/2013<br />
7.3.9 Next <strong>Image</strong>, Section, or Slide:<br />
Important: On the <strong>Capture</strong> Menu, the Next, Next Sample, or Next Slide button<br />
must be selected between each image captured (see next step). Changing the entry fields<br />
in the <strong>Capture</strong> Menu without clicking one <strong>of</strong> these buttons will cause the data in the data<br />
analyses Excel workbook to be mis-grouped/-sorted.<br />
IMPORTANT: If a tissue section has no analyzable fields, capture a single background<br />
image for that section to ensure the data are sorted <strong>and</strong> graphed correctly in SOP340534.<br />
7.3.9.1 <strong>Capture</strong> ≥ 3 different images per tissue section. See Appendix 4 for CalCon<br />
<strong>and</strong> clinical slide section orientation.<br />
7.3.9.2 Next <strong>Image</strong>, Same Section, Same Slide:<br />
Click the Next button at the bottom <strong>of</strong> the screen in the “<strong>Image</strong>” section; the<br />
<strong>Capture</strong> Menu window will cycle to the next image number for that tissue<br />
section. Repeat image capture as outlined in SOP Step 7.3.8.<br />
7.3.9.3 Next <strong>Image</strong>, Different Section, Same Slide:<br />
Click Next Sample; the <strong>Capture</strong> Menu window will reset the image<br />
number to 1. The Bond Slide ID Number will remain the same.<br />
As needed, update fields on the left side <strong>of</strong> the <strong>Capture</strong> Menu (SOP<br />
Step 7.3.7) for the new section being analyzed. Be sure to update the fields to<br />
reflect which section on the slide is being imaged, i.e., positive control (testes),<br />
pre-dose, or post-dose biopsy, or specific CalCon section. Repeat image<br />
capture as outlined in SOP Step 7.3.8.<br />
7.3.9.4 Next <strong>Image</strong>, Different Slide:<br />
Click Next Slide; the <strong>Capture</strong> Menu window will reset to image number 1.<br />
Change the Bond Slide ID Number. As needed, update fields on the left side<br />
<strong>of</strong> the <strong>Capture</strong> Menu (SOP Step 7.3.7) for the new slide <strong>and</strong> section being<br />
analyzed. Repeat image capture as outlined in SOP Step 7.3.8.<br />
7.3.10 Once all images have been captured, click Exit Program at the bottom <strong>of</strong> the <strong>Capture</strong><br />
Menu.<br />
7.3.11 Record the time the light source <strong>and</strong> guide are turned <strong>of</strong>f <strong>and</strong> total hours used in this<br />
assay in the Batch Record (Appendix 1, Section 1).<br />
7.4 Proceed to SOP340534 for image <strong>and</strong> data analyses.<br />
7.5 Review <strong>and</strong> finalize the Batch Record (Appendix 1) <strong>and</strong> obtain required signatures. Document<br />
ANY <strong>and</strong> ALL deviations from this SOP in the Batch Record (Appendix 1, Section 3).<br />
7.6 The Laboratory Director/Supervisor should review the Batch Record <strong>and</strong> sample reports <strong>and</strong> sign<br />
the Batch Record affirming the data contained within the reports are correct (Appendix 1,<br />
Section 4).
DCTD St<strong>and</strong>ard Operating Procedures (SOP)<br />
Title: <strong>Image</strong> <strong>Capture</strong> <strong>of</strong> Tumor Biopsy Slides from γH2AX Immun<strong>of</strong>luorescence Assay Page 12 <strong>of</strong> 25<br />
Doc. #: SOP340533 Revision: D Effective Date: 9/22/2013<br />
THIS PAGE LEFT BLANK ON PURPOSE
DCTD St<strong>and</strong>ard Operating Procedures (SOP)<br />
Title: <strong>Image</strong> <strong>Capture</strong> <strong>of</strong> Tumor Biopsy Slides from γH2AX Immun<strong>of</strong>luorescence Assay Page 13 <strong>of</strong> 25<br />
Doc. #: SOP340533 Revision: D Effective Date: 9/22/2013<br />
APPENDIX 1: BATCH RECORD<br />
The Batch Record should contain information for one slide tray, <strong>and</strong> therefore a single patient’s batched clinical<br />
slides. Record times using military time (24-h designation); for example, specify 16:15 to indicate 4:15 PM.<br />
Patient ID:<br />
CTEP/Clinical Protocol Number:<br />
Date Slide Tray Processed in Bond-Max:<br />
Slide Tray Number:<br />
Certified Assay Operator:<br />
Certification Number:<br />
Facility/Laboratory Running <strong>Image</strong> <strong>Capture</strong>:<br />
Attach a copy <strong>of</strong> the Slide Information Table from SOP340523 for the slides being processed in this SOP.<br />
1. Light Source <strong>and</strong> Guide Usage Hours<br />
The known usage hours for the Light Source <strong>and</strong> Light Guide must be within the manufacturer’s<br />
specifications. The Liquid Light Guide should be replaced at the same time as the Light Source.<br />
Total Usage<br />
Hours<br />
Before Assay<br />
Current Rating*<br />
Manuf. max. hours<br />
Total usage hours<br />
= x<br />
Time<br />
Turned On<br />
After Assay<br />
Time<br />
Turned Off<br />
Hours Used<br />
in this Assay<br />
Light Source h = : : h<br />
* Exposure time is a function <strong>of</strong> both the light source <strong>and</strong> light guide. Recommendations for tracking the current<br />
rating <strong>and</strong> minimum amount <strong>of</strong> illumination needed to proceed with the SOP are provided during the training<br />
course.<br />
BATCH RECORD: INITIALS DATE:
DCTD St<strong>and</strong>ard Operating Procedures (SOP)<br />
Title: <strong>Image</strong> <strong>Capture</strong> <strong>of</strong> Tumor Biopsy Slides from γH2AX Immun<strong>of</strong>luorescence Assay Page 14 <strong>of</strong> 25<br />
Doc. #: SOP340533 Revision: D Effective Date: 9/22/2013<br />
2. <strong>Image</strong> Information Table<br />
Fill in the Bond Slide ID Number for each slide in the order it is captured along with the corresponding Bond-<br />
Max slide tray position; slide data should match that collected during SOP340523. Complete the remaining<br />
column as needed during imaging. IMPORTANT: A CalCon slide will be in the first <strong>and</strong> last positions on a<br />
slide tray, but should be the first two slides that go through image capture.<br />
Name <strong>of</strong> the Header Folder<br />
<strong>Capture</strong><br />
Order<br />
Slide Tray<br />
Position<br />
Bond Slide<br />
ID Number<br />
Notes on <strong>Image</strong>s<br />
1 Position 1 CalCon slide<br />
2 Last Position CalCon slide<br />
3<br />
4<br />
5<br />
6<br />
7<br />
8<br />
9<br />
10<br />
BATCH RECORD: INITIALS DATE:
DCTD St<strong>and</strong>ard Operating Procedures (SOP)<br />
Title: <strong>Image</strong> <strong>Capture</strong> <strong>of</strong> Tumor Biopsy Slides from γH2AX Immun<strong>of</strong>luorescence Assay Page 15 <strong>of</strong> 25<br />
Doc. #: SOP340533 Revision: D Effective Date: 9/22/2013<br />
3. Notes, including any deviations from the SOP:<br />
4. Laboratory Director/Supervisor Review <strong>of</strong> Batch Record<br />
Laboratory Director/Supervisor:<br />
Date:<br />
(PRINT)<br />
(SIGN)<br />
BATCH RECORD: INITIALS DATE:
DCTD St<strong>and</strong>ard Operating Procedures (SOP)<br />
Title: <strong>Image</strong> <strong>Capture</strong> <strong>of</strong> Tumor Biopsy Slides from γH2AX Immun<strong>of</strong>luorescence Assay Page 16 <strong>of</strong> 25<br />
Doc. #: SOP340533 Revision: D Effective Date: 9/22/2013<br />
THIS PAGE LEFT BLANK ON PURPOSE<br />
BATCH RECORD: INITIALS DATE:
DCTD St<strong>and</strong>ard Operating Procedures (SOP)<br />
Title: <strong>Image</strong> <strong>Capture</strong> <strong>of</strong> Tumor Biopsy Slides from γH2AX Immun<strong>of</strong>luorescence Assay Page 17 <strong>of</strong> 25<br />
Doc. #: SOP340533 Revision: D Effective Date: 9/22/2013<br />
APPENDIX 2: UPDATING QIMAGING DRIVER<br />
The most current version <strong>of</strong> the QImaging Family Driver can be downloaded at<br />
http://support.mediacy.com/drivers.asp<br />
1. Installation:<br />
A. Download the driver *.zip file to a temporary location.<br />
B. Extract/unzip the contents.<br />
C. Double-click (run) the *.exe installer <strong>and</strong> follow the prompts.<br />
The installer does 3 things:<br />
a. Copies the <strong>Image</strong>-Pro <strong>Capture</strong> Driver <strong>and</strong> <strong>Capture</strong> Module into the <strong>Image</strong>-Pro directory.<br />
If you have more than one Media Cybernetics application installed on this computer,<br />
make sure to select the appropriate directories when prompted.<br />
b. Installs low-level libraries (QCAM) provided by the QImaging Corporation. This<br />
includes the Windows drivers (.sys, .inf) necessary to operate the camera.<br />
c. Installs <strong>and</strong> loads a third-party 1394 IEEE (Firewire) stack provided by Thesycon.<br />
2. Sometimes the last step (c.) does not complete properly.<br />
If this is the case, the camera will not be recognized <strong>and</strong> the s<strong>of</strong>tware will behave as if no camera is<br />
attached. To correct this issue, the Thesycon driver must be manually loaded. To accomplish this,<br />
complete the following steps:<br />
A. Unplug the camera from the computer.<br />
B. Open the Control Panel (Start Menu) <strong>and</strong> select “System.” On the System Properties dialog,<br />
select the “Hardware” tab, then “Device Manager.”<br />
C. Locate the “IEEE 1394 Bus host controllers” hive <strong>and</strong> exp<strong>and</strong> by clicking on the + icon. If it says<br />
anything other than “T1394…” (for example, “Texas Instruments OHCI Compliant IEEE….,” the<br />
Thesycon stack is not loaded.<br />
D. Right click on the listing <strong>and</strong> select “Update Driver…” If the Windows Update screen appears,<br />
select “No, not at this time.”<br />
E. Depending on the Operating System, you will have different options: In Windows XP, select<br />
“Advanced” then “Don’t search, I will choose the driver…” In Windows Vista, select “Browse<br />
my computer for driver s<strong>of</strong>tware,” then “Let me pick from a list <strong>of</strong> device drivers on this<br />
computer.”<br />
F. On the next dialog, a list <strong>of</strong> Firewire stacks will be found. It will typically list a generic “OHCI<br />
Compliant IEEE 1394 Host Controller” <strong>and</strong> the default “Texas Instruments….” There should<br />
also be an option for “T1394…”—this is the Thesycon stack. Select this option <strong>and</strong> press Next.<br />
G. When Windows has successfully updated the driver, close this dialog <strong>and</strong> plug in the camera.<br />
H. If you are presented with the “Found New Hardware” wizard, follow the prompts to complete the<br />
installation. Otherwise, a new hive will appear in Device Manager displaying a generic<br />
QImaging camera entry or “Imaging Device.” You are now ready to use the camera in <strong>Image</strong>-<br />
Pro.
DCTD St<strong>and</strong>ard Operating Procedures (SOP)<br />
Title: <strong>Image</strong> <strong>Capture</strong> <strong>of</strong> Tumor Biopsy Slides from γH2AX Immun<strong>of</strong>luorescence Assay Page 18 <strong>of</strong> 25<br />
Doc. #: SOP340533 Revision: D Effective Date: 9/22/2013<br />
APPENDIX 3: MACRO INSTALLATION AND MICROSCOPE SET UP<br />
1. Installing the <strong>Image</strong> <strong>Capture</strong> <strong>and</strong> Data analyses Macro<br />
A. Installation Instructions<br />
a. Double-click (run) the self-extracting zip file entitled “gH2AX qIFA macro<br />
v091611.exe” <strong>and</strong> follow the prompts<br />
b. The macro scripts are automatically saved on the hard drive under C:\gH2AX qIFA\.<br />
Note: Do not create this folder ahead <strong>of</strong> time or change the name <strong>of</strong> the folder; it will<br />
prevent proper loading <strong>of</strong> the files.<br />
B. First Time the Macro is Run<br />
Before the macro is used for data analyses, the user needs to activate the macro toolbar on startup<br />
<strong>and</strong> initialize the macro.<br />
a. Activate the macro toolbar on startup:<br />
i) On the <strong>Image</strong>-Pro taskbar go to Window > Edit<br />
Workflow Toolbar <strong>and</strong> then select Open. Click the<br />
“Show Toolbar on Startup” checkbox.<br />
ii) Open C:\gH2AX qIFA\IpWin Source Files\Scripts\Menu<br />
<strong>and</strong> select "gH2AX qIFA toolbar.ipt" <strong>and</strong> Open then<br />
select OK in the Edit Workflow Toolbar menu.<br />
Now each time <strong>Image</strong>-Pro opens the macro toolbar (image on right) will open as<br />
well.<br />
b. Initialize the macro. This queries the user where the macro script files were installed.<br />
i) Select Initialize Macro from the macro toolbar (alternately run the<br />
"gH2AX_<strong>Capture</strong>_Control_Menu" script).<br />
ii)<br />
Browse to the location where the script files are installed (by default: C:\gH2AX<br />
qIFA\IpWin Source Files\Scripts) <strong>and</strong> click on OK.<br />
Note: If the wrong script location was specified or the script location was moved, go to<br />
the <strong>Image</strong>-Pro folder (By default: C:\IPWIN70) <strong>and</strong> delete the "ipmacro.ini" file.<br />
Proceed with initializing the macro as above. Note: If you are using this file for other<br />
<strong>Image</strong>-Pro macros you should not delete it.<br />
2. Initial Microscope <strong>and</strong> Camera Setup With <strong>Image</strong>-Pro S<strong>of</strong>tware<br />
After initial setup <strong>of</strong> the <strong>Image</strong>-Pro s<strong>of</strong>tware on the computer associated with a microscope, set the autowhite<br />
balance, dark frame subtraction, <strong>and</strong> background correction for the CCD camera <strong>and</strong> microscope.<br />
For auto-white balance, use a CalCon slide as a reference, viewing an area with no tissue. While<br />
installing the CCD in the <strong>Image</strong>-Pro s<strong>of</strong>tware, set the auto-white balance when instructed. Be sure the<br />
slide is being viewed in bright-field illumination, using the 20x phase-contrast lens (20x PH 2) with the<br />
light intensity set to a comfortable level <strong>and</strong> the microscope slightly out <strong>of</strong> focus.
DCTD St<strong>and</strong>ard Operating Procedures (SOP)<br />
Title: <strong>Image</strong> <strong>Capture</strong> <strong>of</strong> Tumor Biopsy Slides from γH2AX Immun<strong>of</strong>luorescence Assay Page 19 <strong>of</strong> 25<br />
Doc. #: SOP340533 Revision: D Effective Date: 9/22/2013<br />
3. <strong>Image</strong> <strong>Capture</strong> Macro Specifications<br />
The image capture macro is responsible for acquiring images in a consistent manner for the image<br />
analysis macro. Consistency between each image capture is controlled by adjusting the exposure based<br />
on background intensity. Below are recommendations to achieve this using either a manual or automated<br />
capture method.<br />
It should be noted that development <strong>of</strong> image capture <strong>and</strong> analysis macro scripts requires familiarity <strong>of</strong><br />
both the image analysis s<strong>of</strong>tware being used as well as basic macro programming knowledge to ensure the<br />
required specifications for the SOP are met.<br />
1.) Using a 20x objective with at least a 0.70 NA, capture separate 12 bit images in the DAPI <strong>and</strong> FITC<br />
channels.<br />
2.) Specifications for DAPI Channel <strong>Image</strong><br />
A. DAPI intensity across all nuclei is typically even throughout a field <strong>of</strong> view <strong>and</strong> only<br />
requires a visual representation <strong>of</strong> an acceptable exposure. For the γH2AX IFA, target<br />
nuclei should have DAPI intensity values within a predefined "Optimal Exposure" range.<br />
a. For 12 bit images, the following DAPI fluorescence intensity ranges are<br />
recommended when creating an image capture macro:<br />
i) Glass (no DAPI stained nuclei): 0-401<br />
ii) Over-exposed: 2506-4095<br />
iii) Optimal exposure: 820-2505<br />
iv) Under-exposed: 402-819<br />
B. Once the DAPI fluorescence intensity has been adjusted within the optimal exposure<br />
range <strong>and</strong> no intact nuclei fall into the under-exposed range, the DAPI channel image for<br />
that field can be captured. Be sure to minimize nuclei that fall into the over-exposed<br />
range; over-exposed nuclei are acceptable if the signal is restricted to the center <strong>of</strong> the<br />
nucleus.<br />
3.) Specifications for FITC Channel <strong>Image</strong><br />
A. For the γH2AX IFA, FITC channel acquisition is done using step-wise exposures until a<br />
mean intensity threshold (MIT) <strong>of</strong> 500 is achieved on a known area <strong>of</strong> background<br />
aut<strong>of</strong>luorescence. The image capture macro should use the following specifications to<br />
achieve this.<br />
a. Draw a region <strong>of</strong> interest (ROI) box on a known area <strong>of</strong> background<br />
aut<strong>of</strong>luorescence <strong>and</strong> measure the mean intensity.<br />
b. The exposure should then be adjusted until the MIT = 500. This can be achieved<br />
by manually selecting exposures until the target threshold is met or by using an<br />
exposure increment routine as follows:<br />
i) If Target(MIT) - Current(MIT) ≤ 20; increment exposure by 1,<br />
ii) Else if Target(MIT) - Current(MIT) ≤ 60; increment exposure by 2,<br />
iii) Else if Target(MIT) - Current(MIT) ≤ 200; increment exposure by 5,<br />
iv) Else if Target(MIT) - Current(MIT) ≤ Target(MIT); increment exposure<br />
by 10.<br />
c. Acquire the FITC channel once the MIT exposure is reached.<br />
4.) Pseudo-color the monochrome images (DAPI = blue, FITC = green) <strong>and</strong> combine into an 8 bit TIFF<br />
image.
DCTD St<strong>and</strong>ard Operating Procedures (SOP)<br />
Title: <strong>Image</strong> <strong>Capture</strong> <strong>of</strong> Tumor Biopsy Slides from γH2AX Immun<strong>of</strong>luorescence Assay Page 20 <strong>of</strong> 25<br />
Doc. #: SOP340533 Revision: D Effective Date: 9/22/2013<br />
APPENDIX 4: CALIBRATOR/CONTROL SLIDES AND CLINICAL SLIDES<br />
1. Calibrator/Control Slides<br />
A. Day-to-day variability in sample processing <strong>and</strong> staining is monitored by employing a set <strong>of</strong><br />
calibrator samples, <strong>and</strong> positive <strong>and</strong> negative controls. Two CalCon slides are required for each<br />
set <strong>of</strong> patient slides <strong>and</strong> are run in the first <strong>and</strong> last positions in each slide tray <strong>of</strong> a Bond-Max run.<br />
Sections & Tissue – CalCon slide<br />
Cal-Low (A)<br />
Xenograft (Vehicle-treated)<br />
Cal-Mid (B) Xenograft (<strong>Treatment</strong> A)<br />
Cal-High (C) Xenograft (<strong>Treatment</strong> B)<br />
Positive Control (D) Mouse testes<br />
Negative Control (E) Mouse jejunum<br />
B. Control Section Criteria<br />
a. The positive control specimen, mouse testes, should be intensely stained with the γH2AX<br />
Ab (> 10%). Staining should be restricted to spermatogonia, spermatocytes, <strong>and</strong><br />
spermatids; spermatozoa should be negative for γH2AX. Blood vessels, seminiferous<br />
tubules, <strong>and</strong> connective tissue should be negative for nuclear γH2AX staining.<br />
b. The negative control specimen, mouse jejunum, should be low/negative for γH2AX<br />
(≤ 1%). Minimal staining for γH2AX may be present in the crypt cells.<br />
C. γH2AX Calibrator Section Criteria<br />
a. Calibrator sections are generated from NBF-fixed, paraffin-embedded mouse xenograft<br />
tumor quadrants derived from vehicle <strong>and</strong> drug treated animals representing 3 different<br />
levels <strong>of</strong> γH2AX expression (Calibrators [Cal] -Low, -Mid, <strong>and</strong> -High). The calibrators<br />
serve as a visual reference st<strong>and</strong>ard for drug-effect on target.<br />
b. The specifications for γH2AX levels in the calibrators are determined by lot:<br />
Tissue<br />
Cal-Low (A)<br />
Cal-Mid (B)<br />
Cal-High (C)<br />
Specifications Provided by Lot<br />
Max %NAP threshold, set by lot<br />
Min %NAP threshold <strong>and</strong> min fold over Cal-Low, set<br />
by lot<br />
Min %NAP threshold <strong>and</strong> min fold over Cal-Low, set<br />
by lot<br />
c. If the γH2AX control specimens pass, but the calibrators fail, γH2AX can still be<br />
reported, but should not be considered quantitative.
DCTD St<strong>and</strong>ard Operating Procedures (SOP)<br />
Title: <strong>Image</strong> <strong>Capture</strong> <strong>of</strong> Tumor Biopsy Slides from γH2AX Immun<strong>of</strong>luorescence Assay Page 21 <strong>of</strong> 25<br />
Doc. #: SOP340533 Revision: D Effective Date: 9/22/2013<br />
2. Clinical Slides<br />
A. Clinical samples for this assay will be frozen needle biopsies collected according to SOP340507,<br />
embedded <strong>and</strong> sectioned according to SOP340522, <strong>and</strong> stained for γH2AX according to<br />
SOP340523.<br />
B. One set <strong>of</strong> slides will be labeled with “γH2AX.” These slides represent every 3 rd section from the<br />
tissue block (Slides #2, #5, #8, #12, etc...) <strong>and</strong> should be stained for γH2AX within 1 wk <strong>of</strong><br />
sectioning.<br />
C. Slide #1 <strong>and</strong> #11 are pre-stained with H&E <strong>and</strong> can be used to determine if γH2AX<br />
immun<strong>of</strong>luorescent staining is within the tumor tissue.<br />
D. Two sets <strong>of</strong> backup slides (labeled “Backup-1” <strong>and</strong> “Backup-2”) are available for use if the first<br />
slide set does not meet QC criteria for γH2AX staining.
DCTD St<strong>and</strong>ard Operating Procedures (SOP)<br />
Title: <strong>Image</strong> <strong>Capture</strong> <strong>of</strong> Tumor Biopsy Slides from γH2AX Immun<strong>of</strong>luorescence Assay Page 22 <strong>of</strong> 25<br />
Doc. #: SOP340533 Revision: D Effective Date: 9/22/2013<br />
APPENDIX 5: FIELD SELECTION FOR IMAGING<br />
1. H&E-stained needle biopsy<br />
Below is an H&E-stained needle biopsy illustrating field selection for image capture. Phase-dense<br />
regions <strong>of</strong> the biopsy (lacking necrotic areas, large gaps in the tissue, or areas where tissue has folded<br />
onto itself) should be selected at 200x under phase contrast (see Section 2), <strong>and</strong> then imaged under<br />
fluorescence following SOP Section 7.3.8.
DCTD St<strong>and</strong>ard Operating Procedures (SOP)<br />
Title: <strong>Image</strong> <strong>Capture</strong> <strong>of</strong> Tumor Biopsy Slides from γH2AX Immun<strong>of</strong>luorescence Assay Page 23 <strong>of</strong> 25<br />
Doc. #: SOP340533 Revision: D Effective Date: 9/22/2013<br />
2. Sample phase-contrast <strong>and</strong> composite fluorescent images<br />
3. Sample DAPI monochrome images <strong>and</strong> corresponding composite fluorescent images
DCTD St<strong>and</strong>ard Operating Procedures (SOP)<br />
Title: <strong>Image</strong> <strong>Capture</strong> <strong>of</strong> Tumor Biopsy Slides from γH2AX Immun<strong>of</strong>luorescence Assay Page 24 <strong>of</strong> 25<br />
Doc. #: SOP340533 Revision: D Effective Date: 9/22/2013<br />
APPENDIX 6: IMAGE CAPTURE EXAMPLES<br />
1. Examples <strong>of</strong> Live Workspace preview images representing over-, under-, <strong>and</strong> correctly exposed<br />
fields<br />
A. Overexposed nuclei; notice pink coloring <strong>and</strong> swelling effect <strong>of</strong> nuclei.<br />
B. Underexposed nuclei; purple nuclei will not be counted.<br />
C. Correctly exposed nuclei ready for imaging.
DCTD St<strong>and</strong>ard Operating Procedures (SOP)<br />
Title: <strong>Image</strong> <strong>Capture</strong> <strong>of</strong> Tumor Biopsy Slides from γH2AX Immun<strong>of</strong>luorescence Assay Page 25 <strong>of</strong> 25<br />
Doc. #: SOP340533 Revision: D Effective Date: 9/22/2013<br />
2. <strong>Capture</strong>d fluorescent image<br />
Sample *.tif image generated after image capture <strong>of</strong> a positive control section.