Quick Start Guide - Nvidia
Quick Start Guide - Nvidia
Quick Start Guide - Nvidia

Create successful ePaper yourself
Turn your PDF publications into a flip-book with our unique Google optimized e-Paper software.
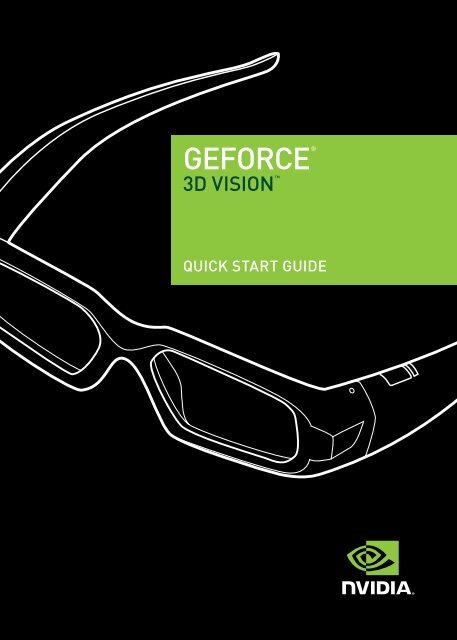
GEFORCE<br />
®<br />
3D VISION <br />
QUICK START GUIDE
01<br />
minimum system requirements<br />
Thank you for choosing NVIDIA ® GeForce ® 3D Vision ,<br />
the most immersive gaming experience for the PC.<br />
Before you begin, please review the following minimum<br />
system requirements to ensure your PC is properly<br />
configured to enjoy the GeForce 3D Vision experience.<br />
Minimum System<br />
Requirements<br />
®<br />
> > Microsoft Windows ®<br />
Vista 32-bit or 64-bit<br />
®<br />
> > Intel Core 2 Duo or AMD<br />
Athlon X2 CPU or higher<br />
>><br />
>><br />
1GB of system memory<br />
(2GB is recommended)<br />
100 MB free disk space<br />
Supported 3D Ready displays<br />
®<br />
> > Samsung SyncMaster <br />
2233RZ 120 Hz LCD display<br />
®<br />
> > ViewSonic FuHzion <br />
VX2265wm 120 Hz LCD display<br />
®<br />
> > Mitsubishi 1080p DLP ®<br />
Home Theater TV: WD-57833,<br />
WD-60735, WD-60C8,<br />
WD-65735, WD-65736, WD-<br />
65C8, WD-65833, WD-65835,<br />
WD-73735, WD-73736,<br />
WD-73833, WD-73835, WD-<br />
73C8, L65-A90<br />
®<br />
> > DepthQ HD 3D Projector by<br />
Lightspeed Design, Inc.<br />
®<br />
> > Generic 3D Ready DLP HDTV<br />
>><br />
100 Hz and higher analog CRT<br />
Compatible NVIDIA desktop<br />
GeForce GPU<br />
>> GeForce 8 Series<br />
• NVIDIA GeForce 8800 GT<br />
• NVIDIA GeForce 8800 GTS<br />
• NVIDIA GeForce 8800 GTS 512<br />
• NVIDIA GeForce 8800 GTX<br />
• NVIDIA GeForce 8800 Ultra<br />
>> GeForce 9 Series<br />
• NVIDIA GeForce 9600 GT<br />
• NVIDIA GeForce 9800 GT<br />
• NVIDIA GeForce 9800 GTX<br />
• NVIDIA GeForce 9800 GTX+<br />
• NVIDIA GeForce 9800 GX2<br />
>><br />
All GeForce GTX 200 Series<br />
Note: Please visit<br />
www.nvidia.com/3dvision<br />
for a full list of supported<br />
GPUs and supported<br />
Geforce 3D Vision<br />
Ready displays.
02 EQUIPMENT<br />
The following parts and assemblies are included<br />
in the NVIDIA GeForce 3D Vision box.<br />
Wireless Glasses<br />
IR Emitter<br />
DVI-to-HDMI Cable<br />
(For use with DLP HDTVs)<br />
Two USB Cables<br />
(6 foot and 10 foot)<br />
Cleaning Pouch<br />
Cleaning Cloth<br />
VESA 3-pin Stereo Cable<br />
Software and Manuals CD with<br />
GeForce 3D Vision User <strong>Guide</strong><br />
Interchangeable<br />
Nosepieces
03<br />
EQUIPMENT IN-DEPTH<br />
Wireless Glasses<br />
IR Receiver<br />
Do not block<br />
ON button<br />
Press for battery<br />
life status<br />
Indicator light<br />
Note: GeForce 3D Vision glasses are<br />
designed to fit over most standard glasses.<br />
The GeForce<br />
3D Vision glasses<br />
hold approximately<br />
40-hours of gaming<br />
per full charge.<br />
Flashing red<br />
indicates less than<br />
two hours of charge<br />
remaining.<br />
USB connection<br />
to charge glasses<br />
(light is amber when<br />
charging)<br />
Nose piece<br />
Replace with one<br />
of three sizes for a<br />
comfortable fit<br />
Attention: The GeForce 3D Vision glasses are not prescription<br />
eyewear, sunglasses, nor a protective goggle. Do not use the<br />
glasses for any general eyewear purposes (e.g., driving, reading,<br />
protection from sunlight or ultraviolet light, etc.) as such use may<br />
result in injury.
IR Emitter<br />
Back of IR Emitter<br />
Thumbwheel to adjust<br />
stereoscopic depth in game<br />
VESA Stereo Cable Port<br />
For DLP HDTVs, connect<br />
VESA stereo cable to<br />
display<br />
Power indicator light<br />
USB connection to<br />
computer<br />
Backlit GeForce 3D Vision<br />
ON/OFF button<br />
Front of IR Emitter<br />
Note: The effective range of the IR Emitter is 15 feet.
04<br />
INSTALLATION AND SETUP<br />
1<br />
2<br />
Before you begin the installation, you must remove<br />
the graphics driver currently on your computer.<br />
Go to <strong>Start</strong>>Control Panel>Programs and Features<br />
If you have an NVIDIA graphics card, double click NVIDIA Drivers.*<br />
> > Select the option Remove only the following.<br />
> > Select NVIDIA Display Driver<br />
> > Click Remove<br />
>> Restart your computer<br />
* If you are replacing a non NVIDIA graphics card, be sure to remove the graphics<br />
driver and power down your system to replace the card before continuing.<br />
Insert the GeForce 3D Vision Software and Manuals CD drivers.<br />
3 Select Install GeForce Graphics driver.<br />
4 Select Yes, I want to restart my computer now when prompted.<br />
The installation process automatically continues after restart.<br />
5 Select Next to install the GeForce 3D Vision driver.<br />
6 Select Finish to complete the installation. The GeForce 3D<br />
Vision Setup Wizard automatically begins when the InstallShield<br />
completes. The Setup Wizard takes you through installing the IR<br />
emitter, setting up your display, and configuring the glasses.<br />
7 Select Next to begin the Setup Wizard. The Wizard is very intuitive<br />
and easy to follow.<br />
8<br />
9<br />
Connect your IR Emitter when prompted to do so.<br />
Select your gaming environment.<br />
10 3D Ready display found.<br />
11 Turn on your glasses.
12 Test your hardware setup.<br />
This screen is used to verify that your hardware is properly configured<br />
to view stereoscopic 3D effects and that your glasses and emitter are<br />
functioning properly. Follow the directions on<br />
the screen.<br />
If you cannot see the proper images, the Setup Wizard will not continue until the<br />
hardware issue is resolved. Use the Back button to check your glasses, emitter<br />
and hardware configuration.
04<br />
INSTALLATION AND SETUP<br />
(CONTINUED)<br />
(For LCD displays only) Do you notice flicker in your peripheral vision<br />
when looking through the glasses?<br />
If you are seeing excessive flicker in your peripheral vision, this<br />
screen allows you to change the refresh rate of your display.<br />
When you select Yes, the refresh rate options are displayed.<br />
Select the Test with this refresh rate button to verify that your selection helps<br />
with the flicker.
13 Verify your ability to view stereoscopic 3D content.<br />
Now that we know your hardware can interpret stereoscopic<br />
3D content, we need to make sure you can. Inability to see the<br />
Medical Test image in stereoscopic 3D may be due to:<br />
>><br />
>><br />
Adjustments needed for improved stereoscopic 3D viewing.<br />
Select Back and verify that you can see stereoscopic 3D on the Test<br />
your hardware setup screen.<br />
Visual problems.<br />
Refer to the Safety Requirements located in the User <strong>Guide</strong> for<br />
precautions. Consult a physician if you suspect a physical problem<br />
seeing stereoscopic 3D.<br />
Attention: If you fail the medical test and can not see the test<br />
image, NVIDIA recommends that you do not use GeForce 3D<br />
Vision. Please consult your eye doctor for any possible vision<br />
anomalies. GeForce 3D Vision will not be enabled.<br />
14 Setup Complete.<br />
Congratulations! You are now ready to see in stereoscopic 3D!<br />
For detailed information on the NVIDIA Control Panel, refer<br />
to the GeForce 3D Vision User <strong>Guide</strong> located on the CD.<br />
Please visit www.nvidia.com/support to access our 24x7x365 online<br />
knowledgebase system, where you can submit questions to our tech<br />
support staff. GeForce 3D Vision customers also have access to toll<br />
free technical support at 1-800-797-6530 from 9AM-6PM PST, M-F.
05<br />
GAME COMPATIBILITY<br />
NVIDIA has tested and provided built-in driver profiles for many<br />
of the top selling games to ensure they work properly with<br />
GeForce 3D Vision. All games that have been tested are listed<br />
in the NVIDIA Control Panel with their Compatibility rating.<br />
To open the NVIDIA Control Panel, right click on the desktop and<br />
select the NVIDIA Control Panel. You can also go to <strong>Start</strong> › NVIDIA<br />
Corporation › NVIDIA Control Panel. Select View compatibility<br />
with games from the topics in the left window pane. This option<br />
displays a list of all the games that have been tested by NVIDIA<br />
using stereoscopic 3D software. Each game has been rated<br />
with Excellent, Good, Fair, Not Recommended. These ratings<br />
are based on how well the games work in stereoscopic 3D<br />
and if there are any issues in the game that may interfere with<br />
your GeForce 3D Vision experience. To view a game in the best<br />
possible quality, you must follow the Issues and Recommended<br />
settings noted by NVIDIA. Not following these settings could<br />
result in the game not running in stereoscopic 3D or artifacts.
Displays the recommended settings for<br />
the game selected in the list. Use the<br />
shortcut keys Ctrl+Alt+Insert to display the<br />
information as an overlay while in the game.<br />
Check this box to see only those<br />
games loaded on your system.<br />
Unchecked, all games tested by<br />
NVIDIA are listed.<br />
NVIDIA is continually updating the list of supported games.<br />
Please go to www.nvidia.com/3dvision for the latest list of games.
06 CONFIGURATIONS<br />
DLP HDTV Connection Diagram<br />
DLP<br />
HDMI Port<br />
PC<br />
IR Emitter<br />
VESA 3-pin<br />
stereo cable<br />
3D Glasses<br />
Emitter Port<br />
USB DVI<br />
DVI-to-HDMI<br />
Cable<br />
USB Cable<br />
Attention: Check your DLP’s manual to see if there is a specific<br />
HDMI port used to connect a PC to your HDTV. In addition, change<br />
the input mode on the TV’s menu to PC or Computer to ensure the<br />
TV can process the video signal correctly.
120 Hz LCD Connection Diagram<br />
LCD<br />
DVI<br />
PC<br />
IR Emitter<br />
USB DVI<br />
USB Cable<br />
Dual link DVI cable<br />
(supplied with the display)
www.nvidia.com