GBC DocuBind P300 - MyBinding.com
GBC DocuBind P300 - MyBinding.com
GBC DocuBind P300 - MyBinding.com

You also want an ePaper? Increase the reach of your titles
YUMPU automatically turns print PDFs into web optimized ePapers that Google loves.
SAFETY MESSAGES<br />
Your safety as well as the safety of others is important to<br />
<strong>GBC</strong>. In this Operator Manual and on the product are important<br />
safety messages. Read these messages carefully.<br />
A The safety alert symbol precedes each safety message<br />
..in this Operator Manual. This symbol indicates a<br />
potential personal safety hazard that could hurt you or others.<br />
as well as cause product or property damage.<br />
The following warning is found on this unit:<br />
This safety message means you could be seriously hurt or<br />
killed if you open the product and expose yourself to hazardous<br />
voltage<br />
A<br />
CAUTION: IN CASE OF EMERGENCY, USE THE POWER<br />
CORO AS A MAIN OISCONNECT DEVICE!<br />
.Unplug the <strong>DocuBind</strong> <strong>P300</strong> before moving it, or when it is<br />
not in use for an extended period of time.<br />
.Do not operate with a damaged supply cord or plug, after it<br />
malfunctions, or after it has been damaged in any manner.<br />
.Do not overload electrical outlets beyond their capacity as<br />
this can result in fire or electrical shock.<br />
.Do not alter attachment plug. Plug is configured for the<br />
appropriate electrical supply<br />
.The unit is intended for indoor use only-<br />
.Never push objects into this product through cabinet slots.<br />
Do not spill liquid of any kind on this product.<br />
.Do not operate if the product has been exposed to rain or<br />
water.<br />
The following symbols appear on this product, and their<br />
meaning is as follows:<br />
Ef3PUNCH<br />
PLJRESET<br />
A WARNING: For your protection, do not connect the<br />
<strong>DocuBind</strong> <strong>P300</strong> to electrical power until you read these<br />
instructions <strong>com</strong>pletely. Keep these instructions in a convenient<br />
location for future reference. To guard against injury,<br />
the following basic safety precautions must be observed in<br />
the set-up and use of this product.<br />
IMPORTANTSAFEGUARDS<br />
GENERALSAFEGUARDS<br />
.Use the <strong>DocuBind</strong> <strong>P300</strong> only for its intended purpose of<br />
punching and binding paper and covers according to the<br />
indicated specifications.<br />
.Do not place anything in the punch opening of the machine<br />
other than paper and cover stock.<br />
.Place unit on a secure, stable work area to prevent the<br />
machine falling and possibly causing personal injury and<br />
damage to the unit-<br />
.Follow all warnings and instructions marked on the product.<br />
.Lift the machine from the bottom, not the cover.<br />
.Do not lift the machine by the cover or paper holder wire.<br />
ELECTRICAL SAFEGUARDS<br />
The <strong>DocuBind</strong> <strong>P300</strong> must be connected to a supply voltage<br />
corresponding to the electrical rating of the machine as indicated<br />
on the seriaVrating plate or in this manual<br />
h CAUTION: THE POWE RECEPTACLE MUST BE LOCATED<br />
~ NEAR THE EOUIPMENT AND BE EASILY ACCESSIBLE.<br />
SERVICE<br />
Do not attempt to service or repair the <strong>DocuBind</strong> <strong>P300</strong> yourself.<br />
Unplug the unit and contact an authorized <strong>GBC</strong> service<br />
representative for exchange or repair.<br />
CLEANING<br />
A<br />
CAUTION: Unplug this product before cleaning.<br />
Wipe exterior only with a damp cloth. Do not use detergents<br />
or solvents.<br />
The following notes apply only to the units rated 230V 50Hz.<br />
MAIN COROSET SELECTION (FOR 230VAC MACHINES ONLY)<br />
When choosing a detachable line cord for use with the<br />
<strong>DocuBind</strong> <strong>P300</strong>, always observe the following.<br />
The cordset consists of three <strong>com</strong>ponents; the attachment<br />
plug, cordage and appliance inlet. Each of these <strong>com</strong>ponents<br />
must meet European regulatory approvals for safety.<br />
The following minimum electrical ratings for the specific<br />
cordset are published for safety purposes. DO NOT USE<br />
CORDSETS THAT DO NOT MEE THE FOLLOWING MINIMUM<br />
ELECTRICAL REQUIREMENTS.<br />
PLUG: 3A, 250 volts, 50/60 Hz, Class 1,3 conductor,<br />
European safety agency approved.<br />
CORDAGE: Type H05W-F3GO.75, Harmonized ( - ).<br />
The "" symbols indicate cordage approved to appropriate<br />
European standard (NOTE: "HAR" may be substituted<br />
by the approval mark of the European safety agency which<br />
approved the cordage. An example would be" - ".<br />
APPLiANCE CONNECTOR: 3A, 250 volts, 50/60 Hz, European<br />
safety approved, Type IEC 320. Cordset shall not exceed 3<br />
meters in length. Cordset with <strong>com</strong>ponent electrical ratings<br />
greater than the minimum spec~ied electrical ratings may be<br />
substituted.<br />
3
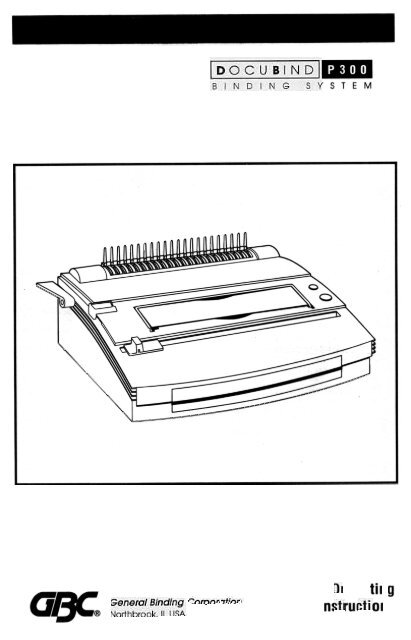
Thank you for purchasing the <strong>GBC</strong> OocuBind <strong>P300</strong>. This system<br />
features our new exclusive Radiaf Bind design. This design<br />
enables you to assemble your document as you punch. making<br />
it easier to load paper onto the binding <strong>com</strong>b than previous<br />
systems! The OocuBind <strong>P300</strong> advanced punching technology<br />
also makes it easier to punch more paper at once while<br />
providing greater reliability.<br />
A. GmlNG STARTED<br />
1. Firmly push the female end of the power cord into the<br />
power cord receptacle (A) located on the back of the<br />
machine (see figure 1 ).<br />
h CAUTION: Make sure this step is <strong>com</strong>plete prior to<br />
~ plugging the male end ot the power cord into a power<br />
receptacle .<br />
2 Plug the male end of the power cord into an appropriate<br />
power receptacle.<br />
B. DETERMINE SHEET WIDTH<br />
1. Set Edge Guide (8) to paper size you wish to bind (11",<br />
8-1/2" letter size, 11-1/4" oversized cover, A4 ring, AS,<br />
Japan A4) (see figure 1). When using oversized covers, set<br />
the Edge Guide on Covers, punch all of the covers for your<br />
job and set aside. Move the Edge Guide back to the 11"<br />
setting to punch your contents then bind.<br />
C. DETERMINE PLASTI CDMB SIZE<br />
1 Slide the Binder Sizer open (C)(see figure 1 ).<br />
2. Place document including covers behind Binder Sizer.<br />
3. Release the Binder Sizer and select the <strong>com</strong>b binding<br />
elementhat corresponds with the size shown by guide.<br />
Only <strong>com</strong>b sizes up to 1" (25 mm) are shown. Your<br />
<strong>DocuBind</strong> can bind documents up to 425 sheets, or 2"<br />
(50 mm) <strong>com</strong>b size. For best results, always use <strong>GBC</strong><br />
brand covers with <strong>GBC</strong> color-coordinated binding <strong>com</strong>bs.<br />
D. PUNCHING PAPER (see figure 2)<br />
1 Lift the Wire Paper Suppor1 (D) into place (optional).<br />
2. Align sheets or covers and inser1 edge to be bound into<br />
punch throat (D1).<br />
3. Jog the sheets until they are flush against the edge guide<br />
and the bottom of the punch throat. Allow the paper to rest<br />
againsthe Wire Paper SUppOr1. or, you may<br />
prefer to hold the sheets in place with one hand.<br />
4. To punch, press the PUNCH ~button (02). The Oocu-<br />
Bind <strong>P300</strong> punches up to 15 sheets of 20 Ib./80 gram<br />
paper at once. Punch only TWO clear covers at a time to<br />
prevent jams and excessive wear.<br />
5. If punch jams, depress the RESET~button (03). Then<br />
press the PUNCH ~button (02) again and remove paper<br />
or covers from punch throat (it may be necessary to punch<br />
several times in order to remove the paper). Repeat steps 1<br />
to 4 with slightly less paper to avoid punch jams on additionallifts.<br />
E. BINDING<br />
1. Place a Plastic Comb Binding Element behind the Vertical<br />
Comb (E) with the open portion of element facing you (see<br />
figure 3).<br />
2. Rotate the Bind Lever up (E1) toward you until the Comb<br />
Binding Element (E2) opens sufficiently to insert your<br />
document (see figure 4).<br />
3. Thread front cover finished .side facing down (see figure 5),<br />
onto open Binding Element Fingers (E3). Thread pages,<br />
front facing down, onto element. Repeat for large documents<br />
as required. Place the back cover, finished side<br />
facing upward on open Binding Element Fingers last.<br />
4. Push the Bind Lever away from you back to its original<br />
position to close the binding element.<br />
5. Remove book by lifting upward. Your presentation is<br />
now <strong>com</strong>plete!<br />
6. Once you be<strong>com</strong>e familiar with your <strong>DocuBind</strong> <strong>P300</strong>,<br />
you will find that you can bind as you punch, increasing<br />
your productivity.<br />
F. EMPTY CHIP DRAWER<br />
1. Empty Chip Drawer (F) after repeated use. Pull drawer<br />
gently toward you to open. When putting back in, the<br />
drawer will snap into place (see figure 6).<br />
G. SERVICE<br />
Should your <strong>DocuBind</strong> require service contact <strong>GBC</strong> at'<br />
Quartet/<strong>GBC</strong><br />
5700 Old Orchard Road<br />
Skokie, IL 60077 USA<br />
1-800-541-0094<br />
http://www.gbc.<strong>com</strong>/opd<br />
SPECIFICATIONS<br />
Dimensions'<br />
18" (W) x 81/2" (H) x 16" (0)<br />
457mm x 216mm x 406mm<br />
Bind Capacity"<br />
425 sheets or 2"<br />
(50mm)<br />
Weight:<br />
341bs. (15.2 kg.)<br />
Maximum Sheet Width'<br />
11.7" (297mm A4)<br />
Electrical<br />
Power'<br />
115V AC, 60Hz, 2.3 amps, 130<br />
watts or 230V AC, 50Hz,<br />
1.3 amps<br />
Dis-engagable Pins"<br />
1 (A5 paper) within <strong>com</strong>b<br />
storage bin<br />
Punch Capacity"<br />
15 sheets of 20 Ib. paper<br />
15 sheets of 80 glm2 paper<br />
5