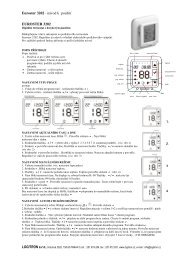
ATSFI-02 tr-eng kk - Logitron
ATSFI-02 tr-eng kk - Logitron
ATSFI-02 tr-eng kk - Logitron

You also want an ePaper? Increase the reach of your titles
YUMPU automatically turns print PDFs into web optimized ePapers that Google loves.
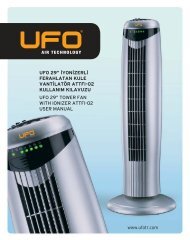
UFO 16" PORTAT‹F ‹YON‹ZERL‹<br />
FERAHLATICI VANT‹LATÖR<br />
<s<strong>tr</strong>ong>ATSFI</s<strong>tr</strong>ong>-<s<strong>tr</strong>ong>02</s<strong>tr</strong>ong> KULLANIM KILAVUZU<br />
UFO 16'' STAND FAN WITH<br />
IONIZER <s<strong>tr</strong>ong>ATSFI</s<strong>tr</strong>ong>-<s<strong>tr</strong>ong>02</s<strong>tr</strong>ong> USER MANUAL<br />
www.ufo<strong>tr</strong>.com
UFO 16" PORTAT‹F ‹YON‹ZERL‹<br />
FERAHLATICI VANT‹LATÖR<br />
<s<strong>tr</strong>ong>ATSFI</s<strong>tr</strong>ong>-<s<strong>tr</strong>ong>02</s<strong>tr</strong>ong> KULLANIM KILAVUZU<br />
www.ufo<strong>tr</strong>.com
De¤erli Müflterimiz,<br />
Bu kullan›m k›lavuzu UFO 16'' Portatif ‹yonizerli Ferahlat›c› Vantilatör <s<strong>tr</strong>ong>ATSFI</s<strong>tr</strong>ong>-<s<strong>tr</strong>ong>02</s<strong>tr</strong>ong><br />
modelimiz için haz›rlanm›flt›r.<br />
Yüksek kaliteli ve verimli orijinal bir UFO ürünü alm›fl bulunuyorsunuz. UFO 16''<br />
Portatif ‹yonizerli Ferahlat›c› Vantilatör <s<strong>tr</strong>ong>ATSFI</s<strong>tr</strong>ong>-<s<strong>tr</strong>ong>02</s<strong>tr</strong>ong> sahip oldu¤u iyonizer özelli¤i<br />
ile sizi ferahlatarak sa¤l›¤›n›z ve rahat›n›za büyük katk› sa¤layacakt›r.<br />
Bu do¤ru karar›n›z ve UFO'ya duydu¤unuz güven için tefle<strong>kk</strong>ür ederiz.<br />
Memnuniyetinizin uzun süreli olmas› için lütfen bu kullan›m k›lavuzunu di<strong>kk</strong>atlice<br />
okuyunuz.<br />
Özellikle "Güvenlik Talimatlar›" bölümündeki kurallara harfiyen uyunuz.<br />
Do¤ru montaj, do¤ru çal›flt›rma ve bak›m siz ve vantilatörden faydalanacak di¤er<br />
kiflilerin güvenli¤i için çok önemlidir.<br />
Lütfen bu Kullan›m K›lavuzunu gerekli hallerde tekrar baflvurmak üzere güvenli bir<br />
yerde saklay›n›z.<br />
Yeni UFO'nuzu keyifli günlerde kullanman›z dile¤iyle.<br />
www.ufo<strong>tr</strong>.com
‹çindekiler 1<br />
1. ‹çindekiler.........................................................................................................................1<br />
2. ‹yon, Negatif ‹yon ve Negatif ‹yonun Yararlar›..........................................................2<br />
3. Cihaz›n Kurulum Tablosu ve Teknik Özellikleri.............................................................3<br />
4. Vantilatörün Montaj›..............................................................................................4<br />
5. Cihaz›n Kullan›lmas› - Kon<strong>tr</strong>ol Paneli ile Çal›flt›rma..............................................................5<br />
6. Cihaz›n Kullan›lmas› - Uzaktan Kumanda ile Çal›flt›rma......................................... 6<br />
7. Güvenlik Talimatlar›...........................................................................................................7<br />
8. Temizlik ve Bak›m........................................................................................................8<br />
9. Ufo Yetkili Servisleri - Teknik Servis...........................................................................9<br />
10. Garanti ile ‹lgili Olarak Müflterinin Di<strong>kk</strong>at Etmesi Gereken Hususlar..............................10<br />
1
2<br />
‹yon Nedir?<br />
‹yonlar bir elek<strong>tr</strong>on kazanan ya da kaybeden atom veya moleküllerdir. Nö<strong>tr</strong>al bir<br />
molekül veya atomdan bir elek<strong>tr</strong>on ayr›ld›¤› zaman iyon oluflur. Bir elek<strong>tr</strong>on kaybeden<br />
moleküller pozitif iyonlar ve bir elek<strong>tr</strong>on kazanan moleküller negatif iyonlar olarak<br />
bilinir.<br />
Negatif ‹yonlar Havay› Nas›l Temizler?<br />
Negatif iyonlar negatif bir flarja sahip iken havadaki hemen hemen tüm partiküller<br />
pozitif bir flarja sahiptir. Negatif iyonlar ve havadaki partiküller manyetik olarak<br />
birbirini çeker. Havada yeteri kadar yüksek konsan<strong>tr</strong>asyonda negatif iyon bulundu¤unda<br />
negatif iyonlar gezici partikülleri çekerler. Bu durum havadaki partiküllerin çok a¤›r<br />
olmas›na neden olur. Sonuç olarak partiküller havadan afla¤› düfler ve sa¤l›¤a zararl›<br />
partiküllerin solunum sistemi içine çekilmesi önlenir. Böylece yaflad›¤›m›z ortamda<br />
ferahl›k hissi sa¤lar.<br />
Negatif ‹yonlar›n Yararlar›:<br />
> Soludu¤umuz oksijenin artmas›na yard›mc› olurlar<br />
> Sigara kokusu, kirli hava ve e<strong>tr</strong>afta uçuflan partikülleri yok ederek havay› temizler.<br />
> Ruh sa¤l›¤›n› iyilefltirir, sinirleri gevfletir ve enerjiyi artt›r›r.<br />
> Depresyonu azalt›r, uykuyu düzenler, soluk almay› kolaylaflt›r›r ve hava kalitesini<br />
art›r›r.<br />
> Bakteri, duman ile toz ve küf gibi alerji yap›c› maddeleri havadan etkili bir flekilde<br />
temizler.<br />
> Yay›lan negatif iyonlar TV ve bilgisayar ekranlar›n›n oluflturdu¤u pozitif iyonlar›,<br />
nötürleyerek insanlara zararl› etkisini azalt›r.<br />
> Negatif iyonlar saçlardaki statikli¤i nö<strong>tr</strong>lefltirerek saç›n daha yumuflak olmas›n›<br />
sa¤lar.<br />
Negatif iyonlar tüm bu özelliklerinden dolay› az enerji tüketimi ile yaflama ortam›m›z›<br />
ferahlatarak sa¤l›¤›m›z ve rahatl›¤›m›za büyük katk› sa¤layacakt›r.<br />
2
Cihaz›n Kurulum Tablosu ve Teknik Özellikleri 3<br />
Hata yapmamak için tüm parçalar› kullanmadan önce lütfen monte ediniz.<br />
1. Ön Kafes Somunu<br />
2. Ön Kafes<br />
3. Pervane Sabitleme Somunu<br />
4. Pervane<br />
5. Pervane Çemberi<br />
6. Arka Kafes Ba¤lant› Somunu<br />
7. Arka Kafes<br />
8. Motor Mili<br />
9. Pim<br />
10. Motor<br />
11. Negatif ‹yon<br />
12. LED Ekran›<br />
13. Kon<strong>tr</strong>ol Paneli<br />
14. Uzaktan Kumanda<br />
15. Güç Kablosu<br />
16. Taban<br />
17. Taban Tespit Somunu<br />
Teknik Özellikleri<br />
> K›z›lötesi uzaktan kumanda ve dokunmatik butonu<br />
> LED ekran<br />
> Hava temizli¤ini ve ferahl›¤›n› sa¤lamak üzere negatif iyon özelli¤i<br />
> 7,5 saatlik zaman göstergesi<br />
> 3 ayr› h›zda çal›flma seçene¤i (slow - mid - fast )<br />
> Ayarlanabilir yükseklik ve sa¤a-sola sal›n›m seçene¤i<br />
> Afl›r› ›s›nmaya karfl› koruma<br />
> fieffaf Pervane<br />
> Çal›flma Gerilimi : 220-240V ~<br />
> Frekans : 50 Hz<br />
> Güç : 60W<br />
3
4<br />
Vantilatörün Montaj›<br />
Tüm parçalar› ambalaj›ndan ç›kar›n›z.<br />
Portatif Vantilatör Gövdesinin Montaj›<br />
1. Gövde borusu, taban ve taban tespit vidalar›n› ç›kar›n.<br />
2. Gövde borusunu tabana yerlefltirin ve sabitleyin.<br />
3. Gövde ve taban› birbirine monte etmek için taban tespit vidalar›n› kullan›n.<br />
Arka Kafesin Montaj›<br />
1. Pervane sabitleme somununu milin üzerinden saat yönüne çevirerek ç›kar›n›z.<br />
2. Arka kafes ba¤lant› somununu saat yönünün tersine çevirerek ç›kar›n›z.<br />
3. Arka kafesi, motorun ön k›sm›nda bulunan 3 adet çubuk arka kafesin 3 adet deli¤ine<br />
(tutma kolunun yukar› bakacak flekilde ) denk gelecek flekilde motora yerlefltiriniz.<br />
4. Kafes ba¤lama somununu yerine tak›p saat yönüne çevirerek s›k›ca ba¤lay›n›z.<br />
Pervanenin Montaj›<br />
1. Pervaneyi mile yerlefltirin ve pimin pervane kanal›na oturmas›n› sa¤lay›n.<br />
2. Pervane sabitleme somununu kullanarak pervaneyi sabitleyin. Pervane sabitleme<br />
somununu saat yönünün tersine, üzerindeki "TIGHT" oku yönünde s›k›flt›rarak<br />
pervaneyi sabitleyiniz.<br />
Uyar›: ‹fllemin do¤ru yap›lmas› çok önemlidir. Aksi takdirde çal›flma esnas›nda pervane<br />
bofllukta döner ve ürünün zarar görmesine neden olabilir.<br />
Ön Kafesin Montaj›<br />
1. Ön kapa¤› ürün logosu dik konumda olacak flekilde arka kafesin üzerine yerlefltiriniz<br />
ve tek bir parça haline gelecek flekilde üst taraftan birleflmelerine di<strong>kk</strong>at ediniz.<br />
2. Ön kapak jant›n› kanala oturacak flekilde yerlefltirin ve tornavidayla sabitleyin.<br />
Uyar›: Vantilatörün kafesleri düzgün olarak yerinde tak›l› olmad›kça çal›flt›rmay›n›z<br />
4
Cihaz›n Kullan›lmas› / Kon<strong>tr</strong>ol Paneli ile Çal›flt›rma<br />
5<br />
Cihaz›n›z› kon<strong>tr</strong>ol paneli veya uzaktan kumanda ile kumanda<br />
edebilirsiniz.<br />
A. Kon<strong>tr</strong>ol Paneli ile Çal›flt›rma<br />
1. SWING (SALINIM & SAVURMA)<br />
> Soldan sa¤a do¤ru sal›n›m› bafllatmak için SWING butonuna<br />
Yukar› ve afla¤›ya sal›n›m<br />
bas›n.<br />
> Yukar›dan afla¤›ya do¤ru sal›n›m› bafllatmak ayn› butona ikinci<br />
kez bas›n.<br />
> Çifte sal›n›m› bafllatmak için üçüncü kez bas›n (vantilatör 8<br />
fleklinde sal›n›m yapacakt›r.)<br />
> Tüm sal›n›m› durdurmak için dördüncü kez SWING butonuna bas›n.<br />
2. ON (AÇMA)<br />
Sa¤a ve sola sal›n›m<br />
Cihaz›n›z› çal›flt›rmak için ON butonuna bas›n. ON butonu ayn› zamanda vantilatör h›z<br />
seçimi yapmak için kullan›labilir.<br />
3. TIMER (ZAMANLAYICI)<br />
Vantilatörünüzü gerekli zamana göre çal›flt›rmak için TIMER butonuna bas›n. 7.5 saatlik<br />
otomatik zaman göstergesi belirir. Butona her bas›ld›¤›nda 0.5 saat mevcut zamana eklenir.<br />
4. SPEED (HIZ)<br />
H›z butonuna bas›n ve kon<strong>tr</strong>ol paneli üzerindeki ›fl›k ile uyuflan DÜfiÜK/ORTA/YÜKSEK h›z<br />
ayar› için üflemeyi seçin. Cihaz›n›z› çal›flt›rmak için de bu butonu kullanabilirsiniz.<br />
5. WIND (ÜFLEME MODLARI) Normal/Natural/Sleep<br />
Normal: Düflük, orta ve yüksek ayarlar›na göre üfleme.<br />
Natural: Güçlü ve yumuflak ayarlara göre do¤al üfleme. Bir düflük bir yüksel ayarlara göre üfleme.<br />
Sleep: ‹lk yar›m saat güçlü ve yumuflak üfleme yapt›ktan sonra orta h›zda do¤al üflemeye geçer.<br />
‹kinci yar›m saatte ise önceden belirlenmifl süre sonuna dek yumuflak do¤al üflemeye geçer.<br />
6. ION (‹YON YAYIMI)<br />
Kon<strong>tr</strong>ol paneli üzerindeki veya uzaktan kumanda üzerindeki ION butonuna basarak harekete geçirin.<br />
VANT‹LATÖR AÇISININ AYARLANMASI<br />
> Cihaz›n›z›n sal›n›m yapaca¤› alan ayarlanabilir. Dikey aç›y› ayarlamak için motoru yukar›<br />
ve afla¤›ya do¤ru hareket ettirin.<br />
5
6<br />
Cihaz›n Kullan›lmas› / Uzaktan Kumanda ile Çal›flt›rma<br />
B. Uzaktan Kumanda ile Çal›flt›rma<br />
Cihaz› çal›flt›rmak için kumandada bulunan ON/SPEED butonuna bas›n.<br />
OFF (KAPAMA)<br />
Vantilatör çal›fl›rken kapatarak beklemeye (standby) al›r.<br />
SWING (SALINIM & SAVURMA)<br />
> Soldan sa¤a do¤ru sal›n›m› bafllatmak için SWING butonuna bas›n.<br />
> Yukar›dan afla¤›ya do¤ru sal›n›m› bafllatmak ayn› butona ikinci<br />
kez bas›n.<br />
Yukar› ve afla¤›ya sal›n›m<br />
> Çifte sal›n›m› bafllatmak için üçüncü kezbas›n (vantilatör 8<br />
fleklinde sal›n›m yapacakt›r.).<br />
> Tüm sal›n›m› durdurmak için dördüncü kez SWING butonuna bas›n.<br />
ON (AÇMA)<br />
Cihaz›n›z› çal›flt›rmak için ON butonuna bas›n.<br />
ON butonu ayn› zamanda vantilatör h›z seçimi<br />
yapmak için kullan›labilir.<br />
Sa¤a ve sola sal›n›m<br />
(ZAMANLAYICI)<br />
Vantilatörünüzü gerekli zamana göre çal›flt›rmak için TIMER butonuna<br />
bas›n. 7.5 saatlik otomatik zaman göstergesi belirir. Butona her<br />
bas›ld›¤›nda 0.5 saat mevcut zamana eklenir.<br />
SPEED (HIZ)<br />
H›z butonuna bas›n ve kon<strong>tr</strong>ol paneli üzerindeki ›fl›k ile uyuflan<br />
DÜfiÜK/ORTA/YÜKSEK h›z ayar› için üflemeyi seçin.<br />
Cihaz›n›z› çal›flt›rmak için de bu butonu kullanabilirsiniz.<br />
WIND (ÜFLEME MODLARI) Normal/Natural/Sleep<br />
Normal: Düflük, Orta ve Yüksek ayarlar›na göre üfleme.<br />
Natural: Güçlü ve yumuflak ayarlara göre s›ras›yla bir h›zl› bir yavafl do¤al üfleme.<br />
Sleep : ‹lk yar›m saat güçlü ve yumuflak üfleme yapt›ktan sonra orta h›zda do¤al<br />
üflemeye geçer. ‹kinci yar›m saatte ise önceden belirlenmifl süre sonuna dek yumuflak<br />
do¤al üflemeye geçer.<br />
ION (‹YON YAYIMI)<br />
Kon<strong>tr</strong>ol paneli üzerindeki veya uzaktan kumanda üzerindeki ION butonuna basarak<br />
harekete geçirin.<br />
6
Güvenlik Talimatlar› 7<br />
> Vantilatör çal›flt›r›lmadan önce, vantilatör ve güç kablosu üzerinde bir hasar olup<br />
olmad›¤› mutlaka kon<strong>tr</strong>ol edilmelidir. E¤er hasar varsa cihaz›n›z› çal›flt›rmayarak<br />
teknik servise baflvurulmal›d›r.<br />
> Vantilatörü veya herhangi bir parças›n› aç›k alev, piflirme veya di¤er ›s›tma<br />
cihazlar›n›n yan›na koymay›n›z.<br />
> Vantilatörü duvara veya tavana asmay›n›z veya monte etmeyiniz<br />
> Hareketli parçalara dokunmaktan kaç›n›n›z.<br />
> Vantilatörün montaj›n› tamamlamadan, kesinlikle fiflini prize takmay›n›z.<br />
> Vantilatörünüzü prize ba¤lamadan önce, flebeke elek<strong>tr</strong>i¤inin tip/barkod etiketinde<br />
belirtilmifl olan voltaja uygun olmas›na di<strong>kk</strong>at ediniz.<br />
> Vantilatörünüzü her zaman kuru ve sabit zeminler üzerine koyunuz, banyo küveti,<br />
yüzme havuzu ve dufl gibi sulu yerlerden uzak tutunuz.<br />
> Kullan›mda de¤ilken, vantilatörü bir yerden baflka bir yere tafl›rken, parçalar›n›<br />
takarken veya ç›kart›rken ve temizlemeden önce fiflini çekiniz.<br />
> Bu ürün, çocuklar›n yak›nlar›nda kullan›ld›¤›nda yetiflkinlerin gözetimi gerekir. Bu<br />
ürün, çocuklar veya fiziksel, duyusal veya zihinsel kapasiteleri cihaz› güvenle<br />
kullanmalar›n› <strong>eng</strong>elliyorsa di¤er kifliler taraf›ndan yard›m veya gözetim olmadan<br />
kullan›lma amaçl› de¤ildir.<br />
> Vantilatörünüzü küçük çocuklardan uzak tutunuz.<br />
> Güvenli¤iniz için güç kablosunu prizden çekiniz. Cihaz çal›fl›rken fifli çekmeyin.<br />
> Kablonun prize tamamen tak›l› oldu¤undan emin olun.<br />
> Güç kablosunu ›slak elle asla tutmay›n, aksi halde bu durum yang›na veya elek<strong>tr</strong>ik<br />
çarpmas›na neden olabilir.<br />
> Cihaz›n›z› tek bafl›n›za parçalar›na ay›rmay›n, onarmay›n veya de¤ifliklik yapmay›n.<br />
Yetkili olmayan kifli veya kurumlarca yap›lan onar›mlar garantinin hükümsüz<br />
kalmas›na neden olabilir.<br />
> Hazne içerisindeki su tükendi¤inde su güvenlik butonu cihaz› otomatik olarak<br />
durduracakt›r.<br />
> Kafes içerisine parmak ya da herhangi bir cisim sokmay›n›z.<br />
> Kullan›c› Korumas› Cihaz›n›z›n motoru motor s›cakl›¤› çok yüksek seviyeye ç›kt›¤›nda<br />
plastik yan›¤› ve biçimsizli¤ini <strong>eng</strong>ellemek için cihaz› otomatik olarak durdurur.<br />
7
8<br />
Temizlik ve Bak›m<br />
1. Herhangi bir temizlik ifllemine bafllamadan önce vantilatörünüzün çal›flmad›¤›na<br />
ve prizden çekili oldu¤una emin olunuz.<br />
2. Temizli¤e bafllamadan önce kafes ve pervaneyi gövdeden ay›r›n ve kuruduktan<br />
sonra tekrar monte edin.<br />
3. Sert temizleme malzemeleri kullanmay›n›z. Nemli bir bez ile siliniz ve kullanmadan<br />
önce çok iyi kurulay›n›z.<br />
4. Su veya baflka herhangi bir s›v› içerisine sokmay›n›z.<br />
5. Elek<strong>tr</strong>ik kablosunun tamiri veya de¤iflmesi gerekti¤i takdirde, bu tamirat yetkili<br />
servis taraf›ndan yap›lmal›d›r.<br />
6. Temizlik süresince pervaneyi di<strong>kk</strong>atli bir flekilde tafl›y›n.<br />
7. Motor ömrünü uzatmak için temizlik yapt›ktan sonra motor taban›na bir kaç<br />
damla ya¤ ekleyin.<br />
Not: Herhangi bir onar›m, kablo ya da prizin de¤ifltirilmesi veya yenilenmesi durumlar›nda<br />
lütfen yetkili yetkili servis merkezine baflvurunuz.<br />
8
UFO Yetkili Servisleri - Teknik Servis 9<br />
De¤erli Müflterilerimiz,<br />
Sizlere yenilikçi, iyi ve kaliteli ürün vermek kadar, iyi hizmet vermenin de önemine<br />
inan›yoruz. Bu kullan›m k›lavuzu siz bilinçli tüketicilere daha yak›n olmak, sorunlar›n›za<br />
daha çabuk çözüm bulmak için haz›rlanm›flt›r.<br />
Ürünlerimiz ve bulundu¤unuz yerdeki güncel yetkili servisler ve servis adresleri<br />
ha<strong>kk</strong>›nda bilgi alabilece¤iniz internet adresimiz: www.ufo<strong>tr</strong>.com<br />
Ayr›ca internet adresimizde bulunan UFO Forum'a üye olabilir ve yaz›l› olarak istek<br />
ve sorular›n›z› di¤er tüketicilerle paylaflabilirsiniz. Tüm soru ve sorunlar›n›z mümkün<br />
olan en k›sa sürede çözümlenecek ve cevapland›r›lacakt›r.<br />
Afla¤›daki önerilere uyman›z› rica ederiz.<br />
Servis ihtiyac›n›z oldu¤unda bu kullanma k›lavuzunun ekinde verilen listede belirtti¤imiz<br />
üzere size en yak›n herhangi bir UFO Yetkili Servisine baflvurunuz.<br />
Onar›m ve yedek parça de¤iflimi yaln›zca UFO Yetkili Servisler veya SUN taraf›ndan<br />
yetki verilmifl di¤er uzman kifliler taraf›ndan yap›lmal›d›r.<br />
‹fliniz bitti¤inde Yetkili Servisten "Teknik Servis Ar›za Formunu" istemeyi lütfen<br />
unutmay›n›z. Alaca¤›n›z Teknik Servis Ar›za Formu ileride ürününüzde meydana<br />
gelebilecek herhangi bir sorunda size yarar sa¤layacakt›r.<br />
Ürünü ald›¤›n›zda Garanti Belgesini Yetkili UFO Sat›c›s›na onaylat›n›z.<br />
Kullan›m ömrü: 10 y›ld›r. ( Ürünün fonksiyonunu yerine getirebilmesi için gerekli<br />
yedek parça bulundurma süresi)<br />
UFO, Yetkili Servis Bayileri, 7 Bölge yöneticili¤i ve bunlara ba¤l› Yetkili Servislerle<br />
siz müflterilerimizin hizmetindedir.<br />
9
10<br />
Garanti ile ‹lgili Olarak Müflterinin Di<strong>kk</strong>at Etmesi Gereken Hususlar<br />
SUN taraf›ndan verilen bu garanti, Vantilatör'ün normalin d›fl›nda kullan›lmas›ndan do¤acak ar›zalar›n<br />
giderilmesini kapsamad›¤› gibi, afla¤›daki durumlarda da garanti d›fl›d›r.<br />
1. Kullanma hatalar›ndan meydana gelen hasar ve ar›zalar,<br />
2. Ürünün müflteriye tesliminden sonraki yükleme, boflaltma ve tafl›ma s›ras›nda oluflan hasar ve ar›zalar.<br />
3. Voltaj düflüklü¤ü veya fazlal›¤›; hatal› elek<strong>tr</strong>ik tesisat›; ürünün etiketinde yaz›l› voltajdan farkl›<br />
voltajda kullanma nedenlerinden meydana gelecek hasar ve ar›zalar,<br />
4.Yang›n, deprem ve y›ld›r›m düflmesinden meydana gelecek hasar ve ar›zalar,<br />
5. Ürünün kullanma k›lavuzlar›nda yer alan hususlara ayk›r› kullan›lmas›ndan kaynaklanan ar›zalar,<br />
6. Ürünün tamir yerine nakliyesi s›ras›nda oluflan hasar ve ar›zalar.<br />
7. Bu kullanma k›lavuzunun ekinde verilen garanti belgesinde belirtilen teslim tarihini takip eden 2 (‹ki)<br />
y›l içinde ve yaln›zca barkod üzerinde belirtilen modelde meydana gelecek ar›zalar için geçerlidir.<br />
8. Garanti süresinde anlaflmazl›k do¤du¤u takdirde fatura tarihi esas al›naca¤›ndan, kullan›c›n›n Garanti<br />
Belgesiyle birlikte faturay› veya okunakl› bir fotokopisini muhafaza etmesi gereklidir.<br />
9. Garanti belgesi üzerinde ve UFO markal› vantilatörün orijinal seri numaras›nda tahrifat yap›lm›fl olmas›<br />
hallerinde garanti hükmünden düfler. ‹braz edilen Garanti Belgesi'nin ar›zal› ürüne ait olmas› flartt›r.<br />
10. Üzerinde sat›c› firma kafle ve imzas› ile sat›fl tarihi olmayan belgeler geçersizdir.<br />
UFO markal› ürünlerin tümü<br />
sertifikal›d›r.<br />
CE Belgesi Veren Kuruluflun;<br />
Ad›: Guangzhou Vkan Certification & Testing Institute. All rights reserved. Privacy Statement.<br />
Tel.:+86-20-32293888 Fax:+86-20-32293889, Email: cs@cvc.org.cn Adresi: No.3, Tiantaiyi Road,<br />
Kaitai Avenue, Science City, Guangzhou, 510663, P. R. C.<br />
‹THALATÇI F‹RMA<br />
Ürünün veya ambalaj›n üzerindeki bu sembol, ürünün normal ev at›klar› ile birlikte at›lmamas› gerekti¤ini, elek<strong>tr</strong>ikli<br />
ve elek<strong>tr</strong>onik cihazlar›n geri dönüflümüne yönelik toplama noktalar›na ulaflt›r›lmas› gerekti¤ini göstermektedir.<br />
Bu ürünü do¤ru flekilde imha etti¤iniz taktirde do¤an›n ve insan sa¤l›¤›n›n korunmas›na katk›da bulunmufl<br />
olacaks›n›z. Yanl›fl imha do¤aya ve insan sa¤l›¤›na zarar verecektir. Bu ürünün geri dönüflümü ha<strong>kk</strong>›nda daha<br />
fazla bilgiyi belediyenizden, çöp toplama servisinizden veya ürünü sat›n ald›¤›n›z ma¤azadan edinebilirsiniz.<br />
Made in P.R.C.<br />
10
UFO 16'' STAND FAN WITH<br />
IONIZER <s<strong>tr</strong>ong>ATSFI</s<strong>tr</strong>ong>-<s<strong>tr</strong>ong>02</s<strong>tr</strong>ong> USER MANUAL<br />
www.ufo<strong>tr</strong>.com
Distinguished User,<br />
This user manual has been designed for UFO 16'' Stand Fan with Ionizer <s<strong>tr</strong>ong>ATSFI</s<strong>tr</strong>ong>-<s<strong>tr</strong>ong>02</s<strong>tr</strong>ong>.<br />
You have purchased a high quality and efficient UFO product. UFO 16'' Stand Fan<br />
with Ionizer <s<strong>tr</strong>ong>ATSFI</s<strong>tr</strong>ong>-<s<strong>tr</strong>ong>02</s<strong>tr</strong>ong> will con<strong>tr</strong>ibute to your health and comfort via its ionizer<br />
specification.<br />
We would like to express our thanks to you for choosing UFO and reliance on UFO<br />
products. For a sustainable pleasure with your appliance, please read this manual<br />
thoroughly.<br />
Please stick especially to the ins<strong>tr</strong>uctions in the "Safety Ins<strong>tr</strong>uctions" section.<br />
Proper installation, operating and maintenance assume great importance for the<br />
safety of you and of those who will benefit from the fan.<br />
Please keep this manual in a safe place for future reference.<br />
Enjoy your UFO.<br />
www.ufo<strong>tr</strong>.com
Table of Contents 1<br />
1. Table of Contents...................................................................................................................1<br />
2. Ion, Negative Ion and Benefits of Negative Ion..........................................................2<br />
3. Installing Chart and Technical Specifications.............................................................3<br />
4. Assembly of the Fan.......................................................................................................................4<br />
5. Operating the Fan - Through Con<strong>tr</strong>ol Panel...........................................................................5<br />
6. Operating the Fan - Through Remote Con<strong>tr</strong>ol........................................................ 6<br />
7. Safety Precautions..................................................................................................................7<br />
8. Cleaning and Maintenance........................................................................................................8<br />
9. UFO Authorized Services - Technical Services...........................................................................9<br />
10. Warranty Terms.................................................................................................................................10<br />
1
2<br />
What is ion?<br />
An atom or group of atoms that bears an elec<strong>tr</strong>ic charge is called ion. Positively charged<br />
ions are called positive ions and negatively charged ions are called positive ions.<br />
How do negative ions purify the air?<br />
Most all particles in the air have a positive charge or are positively ionized, while<br />
negative ions have a negative charge. Negative ions are drawn to these positively<br />
charged particles by magnetic at<strong>tr</strong>action to one another. When there is a high enough<br />
concen<strong>tr</strong>ation of negative ions in the air, they will at<strong>tr</strong>act to floating particles in<br />
large numbers. This causes the particle to become too heavy to remain airborne.<br />
As a result, the particle will drop out of the air, keeping them out of the breathing<br />
zone and out of the respiratory system where it can <strong>tr</strong>igger breathing and health<br />
problems.<br />
Benefits of negative ions<br />
> Negative ions increase the flow of oxygen.<br />
> Negative ions purify the air eradicating the smoke and particles in the air.<br />
> Purified air thanks to negative ions result in higher alertness, decreased drowsiness,<br />
and more mental energy.<br />
> Negative ions reduce the effects of the depression, regulate sleeping routines,<br />
make breathing easier and boost the quality of the air.<br />
> Negative ions purify the germs and bacteria from the air.<br />
> Negative ion could neu<strong>tr</strong>alize heavy-fisted static of TV, computer screen and<br />
decrease the harmful effect to eyes.<br />
> Negative ion could entirely neu<strong>tr</strong>alize the abundant static through combing hair,<br />
to make the air more submissive and soft.<br />
2
Installing Chart and Technical Specifications 3<br />
To avoid failure, please assemble all the parts completely before using.<br />
1. Front Guard Nut<br />
2. Front Guard<br />
3. Blade Nut<br />
4. Blade<br />
5. Blade Ring<br />
6. Rear Guard Mounting Nut<br />
7. Rear Guard<br />
8. Motor Shaft<br />
9. Pin<br />
10. Motor<br />
11. Negative Ion<br />
12. LED Display<br />
13. Con<strong>tr</strong>ol Panel<br />
14. Remote Con<strong>tr</strong>ol<br />
15. Power Cord<br />
16. Base<br />
17. Base Nut<br />
Technical Specifications<br />
> Infrared remote con<strong>tr</strong>ol and touch panel<br />
> LED screen<br />
> Negative Ion to purify the air<br />
> Timer of 7,5h (0,5 -7,5 hour)<br />
> 3 speed options (slow - mid - fast )<br />
> Adjustable height and 4 automatic oscillation options (right - left, up - down)<br />
> Protection against overheating<br />
> Transparent blade<br />
> Voltage : 220-240V ~<br />
> Frequency : 50 Hz<br />
> Power : 60W<br />
3
4<br />
Assembly of the Fan<br />
I. Assembling the Stand Fan Body to the Base<br />
1. Take out the stand pole, stand round base and base nut.<br />
2. Match and fix the stand pole to stand round base.<br />
3. Use the base nut to screw the body and round base together tightly.<br />
II. Assembling the Rear Guard<br />
1. Take out the blade cap from the shaft turning it clockwise.<br />
2. Take out the rear guard mounting nut turning it anti-clockwise.<br />
3. Insert the rear guard into the motor matching 3 rods on the front side of the<br />
motor (the handle will direct upwards) to 3 holes of the rear guard.<br />
4. Fasten the rear guard tightly by turning the guard mounting nut clockwise.<br />
III. Assembling the Fan Blade<br />
1. Insert the blade to the shaft and ensure the pin enter the blade slot.<br />
2. Tighten the blade using the blade cap turning anti-clockwise in the direction<br />
"TIGHT" arrow on it.<br />
Note: Proper assembly of the blade is of great importance. Otherwise, the blade<br />
spins in the air and damage the appliance.<br />
IV. Assembling the Front Guard<br />
1. Fix the front guard with the logo in the upright position on the rear guard. Make<br />
sure that they are connected from the upper side.<br />
2. Take the front guard rim to set in groove and fix it with screwdriver.<br />
Note: Do not operate the fan without assembling the guards properly and tightly.<br />
4
Operating Ins<strong>tr</strong>uctions / Operating Through Con<strong>tr</strong>ol Panel 5<br />
The fan can be con<strong>tr</strong>olled by both con<strong>tr</strong>ol panel switch and<br />
remote con<strong>tr</strong>ol provided.<br />
1. OSCILLATION & PITCHING<br />
> Press the SWING button to start normal oscillation from<br />
left to right.<br />
> Press second time to start oscillation from up to down. Up and down osc.<br />
> Press the third time to start double oscillation (the fan<br />
will oscillate in the pattern of figure 8)<br />
> Press the fourth time to stop all the oscillation.<br />
2. ON<br />
Press the ON button to switch on the fan. The button can<br />
also be used for fan speed selection.<br />
Right and left osc.<br />
3. TIMER<br />
Press the TIMER button to run the fan according to the time required. It comes with<br />
7.5 hours automatic timer. Each press of button will add 0.5 hour to running time.<br />
4. SPEED<br />
Press the speed button, choose the wind for LOW, MID and HIGH speed that matches<br />
the light on the con<strong>tr</strong>ol panel.<br />
The button can also be used to switch on the fan.<br />
5. WIND MODES Normal / Natural / Sleep<br />
Normal: Wind blow based on Low / Mid & High Speed.<br />
Natural: Imitate the blow of natural wind based on s<strong>tr</strong>ong and soft wind.<br />
Sleep: The first half an hour after running as s<strong>tr</strong>ong and soft natural wind, it becomes<br />
mid natural wind. The second half an hour it changes to soft natural wind until the<br />
end of the preset time.<br />
6. NEGATIVE ION<br />
To operate press the ION button on the con<strong>tr</strong>ol panel.<br />
ADJUSTING THE FAN ANGLE<br />
> This fan is equipped with free neck. Its fan head can be conveniently positioned in the<br />
vertical and horizontal direction by simply turning the fan head to desired angle.<br />
5
6<br />
Operating Ins<strong>tr</strong>uctions / Operating Through Remote Con<strong>tr</strong>ol<br />
B. Operating Through Remote Con<strong>tr</strong>ol<br />
Please press the ON/SPEED button to start operating the fan.<br />
OFF<br />
Switches off the fan and stands it by.<br />
OSCILLATION & PITCHING<br />
Up and down osc.<br />
> Press the SWING button to start normal oscillation from<br />
left to right.<br />
> Press second time to start oscillation from up to down.<br />
> Press the third time to start double oscillation (the fan<br />
will oscillate in the pattern of figure 8)<br />
> Press the fourth time to stop all the oscillation.<br />
Right and left osc.<br />
ON<br />
Press the ON button to switch on the fan. The button can also be<br />
used for fan speed selection.<br />
TIMER<br />
Press the TIMER button to run the fan according to the time<br />
required. It comes with 7.5 hours automatic timer. Each press of<br />
button will add 0.5 hour to running time.<br />
SPEED<br />
Press the speed button, choose the wind for LOW, MID and HIGH speed<br />
that matches the light on the con<strong>tr</strong>ol panel.<br />
The button can also be used to switch on the fan.<br />
WIND MODES Normal / Natural / Sleep<br />
Normal: Wind blow based on Low / Mid & High Speed.<br />
Natural: Imitate the blow of natural wind based on s<strong>tr</strong>ong and soft wind.<br />
Sleep: The first half an hour after running as s<strong>tr</strong>ong and soft natural wind, it becomes<br />
mid natural wind. The second half an hour it changes to soft natural wind until the<br />
end of the preset time.<br />
NEGATIVE ION<br />
To operate press the ION button on the remote con<strong>tr</strong>ol.<br />
6
Safety Precautions 7<br />
> Make sure the fan and the power cord is not damaged before operating your fan.<br />
In case of a damage consult to your authorized technical service.<br />
> Do not place the fan or any part close to flammable materials and heating appliances.<br />
> Do not install your fan onto wall or ceiling.<br />
> Avoid touching moving parts.<br />
> Never plug the power cord before the installation has been completed.<br />
> Ensure voltage used corresponds with the voltage indicated.<br />
> Place your fan in dry and stable surfaces. Do not use the fan in wet environments<br />
such as bath-tub, swimming pool and bathrooms.<br />
> Unplug your fan from the elec<strong>tr</strong>ic outlet when not operating, moving it from room<br />
to another, installing or uninstalling its parts and before cleaning.<br />
> Supervision is needed when this product is used anywhere near children. The<br />
appliance is not intended for use by children or other persons without assistance<br />
or supervision if their physical, sensory or mental capabilities prevent them from<br />
using it safely.<br />
> For safety reasons, please disconnect the plug from the elec<strong>tr</strong>ical outlet. Do not<br />
pull the plug while the power is on. Always ensure that the plug is fully inserted<br />
into the elec<strong>tr</strong>ic outlet.<br />
> Never handle the power cord with wet hands as this could result in fire or elec<strong>tr</strong>ic<br />
shock.<br />
> Do not disassemble, repair or modify this product on your own. Warranty will be<br />
voided if repair is carried out by unauthorized person/agency.<br />
> Do not stick any finger or objects into the guard.<br />
> Self-Protection Function: Built-in fuse inside the motor will automatically cut off<br />
when the motor temperature becomes too high as to avoid danger of plastic<br />
disfiguration or burning.<br />
7
8<br />
Cleaning and Maintenance<br />
1. Please disconnect the power cord plug from the elec<strong>tr</strong>ic outlet and make sure<br />
that your fan is not operating before cleaning it.<br />
2. Dissemble the fan guard and blade from the fan body before cleaning and<br />
assemble back after drying up.<br />
3. Do not use abrasive detergents. Clean your fan with a soft, damp cloth. Never<br />
wash it with water.<br />
4. Do not immerse in water or any other liquids.<br />
5. The power cord should only be replaced by an authorized technical service.<br />
6. Handle the fan blade with care during cleaning.<br />
7. Please add a few drops o lubricant to the motor base after cleaning to extend<br />
motor life.<br />
Note: In case of any repairs, replacement of cord or plug, or adjustment, please<br />
consult a qualified technician, or take the appliance to an authorized service cen<strong>tr</strong>e.<br />
8
UFO Authorized Services - Technical Service 9<br />
Distinguished Customers,<br />
We fully believe in the importance of presenting you innovative, high quality products<br />
as well as quality services. This user manual has been designed to be closer to<br />
conscious customers like you and produce more effective solutions to your problems.<br />
You may consult to our web-site on our products and the updated technical services<br />
in your neighborhood and their contact details: www.ufo<strong>tr</strong>.com<br />
You may also be a member of UFO Forum in our web-site and express and share<br />
your wishes, concerns and problems with other customers. Your all demands and<br />
problems will be finalized and met as soon as possible.<br />
Consult to nearest UFO Authorized Service which you will find in the enclosed with<br />
this manual on your need of service.<br />
The repair and replacement of the defective parts may only be carried out by UFO<br />
Authorized Services or other persons authorized by SUN.<br />
Please ask for "Technical Service Problem Form" from your Authorized Service.<br />
The Technical Service Problem Form may help you find quicker responses for your<br />
future problems.<br />
Upon purchasing your appliance, have Authorized UFO Dis<strong>tr</strong>ibutor endorsed your<br />
certificate of warranty.<br />
The physical life of your appliance is 10 years (The official duration of stocking spare<br />
parts for the well-functioning of the product).<br />
UFO is at our customers' service with its Authorized Services and Dealers and 7<br />
Regional Directorates.<br />
9
10<br />
Terms of Warranty<br />
This certificate of warranty by SUN does not cover the defects resulting from improper use of the fan.<br />
The warranty does not also cover:<br />
1. Damages and defects due to faulty operating,<br />
2. Damages and defects at the time of loading, discharcing and <strong>tr</strong>ansportation after the delivery of the<br />
product to the consumer,<br />
3. Damages and defects due to low or high voltage and operating the fan with the voltage other than<br />
specified in the label of the product.<br />
4. Damages and defects due to fire, earhquake and lightning,<br />
5. Defects due to infringement of the ins<strong>tr</strong>uctions in the user manual,<br />
6. Damages and defect due to <strong>tr</strong>ansportation of the fan.<br />
7. The warranty is only limited to the defects of the model specified on the barcode within 2 years<br />
following the delivery date specified on the back page of the certificate.<br />
8. The consumer should keep the invoice or an authentic copy of the invoice as well as the certificate<br />
of warranty in case a conflict occurs on the period of warranty since the date of invoice will be considered.<br />
9. The warranty will be voided if the certificate or the original serial number of UFO fan has been falsificated.<br />
10. The certificates lacking the stamp and signature of the selling company are not valid.<br />
All UFO brand products have<br />
certificate.<br />
Supplier of CE Certificate;<br />
Name:Guangzhou Vkan Certification & Testing Institute. All rights reserved. Privacy Statement.<br />
Tel.: +86-20-32293888 Fax: +86-20-32293889, Email: cs@cvc.org.cn Address: No.3, Tiantaiyi Road,<br />
Kaitai Avenue, Science City, Guangzhou, 510663, P. R. C.<br />
IMPORTING COMPANY<br />
This symbol on the product or its packaging indicates that the appliance cannot be <strong>tr</strong>eated as normal<br />
domestic <strong>tr</strong>ash, but must be handed in at a collection point for recycling elec<strong>tr</strong>ic and elec<strong>tr</strong>onic appliances.<br />
Your con<strong>tr</strong>ibution to the correct disposal of this product protects the environment and the health of your fellow<br />
men. Health and the environment are endangered by incorrect disposal. Further information about the recycling<br />
of this product can be obtained from your local town hall, your refuse collection service, or in the store at which<br />
you bought the product. Made In P.R.C.<br />
10
Notlar / Notes
SUN Pazarlama Elk. Makina San. Tic. Ltd. fiti<br />
Perpa Ticaret Merkezi A Blok<br />
Kat: 11 No: 1594 fiiflli / ‹STANBUL / TÜRK‹YE<br />
Tel: +90 212 210 07 72<br />
www.ufo<strong>tr</strong>.com<br />
info@ufo<strong>tr</strong>.com