Instruction manual - elmed
Instruction manual - elmed
Instruction manual - elmed

Create successful ePaper yourself
Turn your PDF publications into a flip-book with our unique Google optimized e-Paper software.
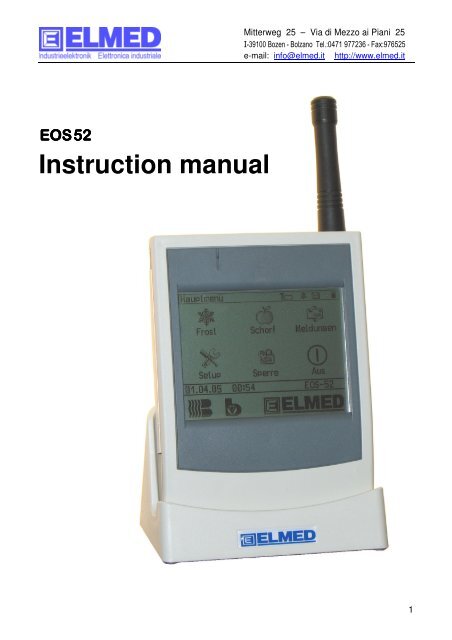
Mitterweg 25 – Via di Mezzo ai Piani 25<br />
I-39100 Bozen - Bolzano Tel.:0471 977236 - Fax:976525<br />
e-mail: info@<strong>elmed</strong>.it http://www.<strong>elmed</strong>.it<br />
EOS 52<br />
<strong>Instruction</strong> <strong>manual</strong><br />
1
Mitterweg 25 – Via di Mezzo ai Piani 25<br />
I-39100 Bozen - Bolzano Tel.:0471 977236 - Fax:976525<br />
e-mail: info@<strong>elmed</strong>.it http://www.<strong>elmed</strong>.it<br />
May 2006<br />
ELMED Elettronica industriale d. A. Rauch – Bolzano<br />
The information in this document can be changed without notice before.<br />
All the registered marks and names are of exclusive property of their owners.<br />
E060503<br />
2
Mitterweg 25 – Via di Mezzo ai Piani 25<br />
I-39100 Bozen - Bolzano Tel.:0471 977236 - Fax:976525<br />
e-mail: info@<strong>elmed</strong>.it http://www.<strong>elmed</strong>.it<br />
Preface<br />
Dear customer,<br />
we thank you very much for purchasing the EOS52 equipment and we hope it can help you<br />
especially in the nights of frost and during the scab time.<br />
Please read carefully this <strong>manual</strong> of instructions before using the EOS52.<br />
If you still have questions about the EOS52 you can contact us or post them in the forum on<br />
our web site: www.<strong>elmed</strong>.it<br />
This <strong>manual</strong> is about the EOS52 connected with the V1.0 software version.<br />
<strong>Instruction</strong>s and warnings<br />
The EOS52 equipment respects the exigencies of the present European and international<br />
norms. Its compliance has been tested.<br />
This <strong>manual</strong> contains detailed information about the EOS52 equipment so that you can use<br />
it in the correct way.<br />
The information contained in this document can be changed without notice before.<br />
The following symbols and writing forms will be used in the whole document as characteristics<br />
of text distinction.<br />
Warning: to indicate a part of the text which must be read very carefully.<br />
<br />
The arrow indicates information explaining how to reach a menu.<br />
tip: to indicate how to use the EOS52 in an even more comfortable way.<br />
To indicate the necessity of an authorization.<br />
Important: indicates important information: if not respected an important data loss, a<br />
breakdown or a wrong alarm survey can follow.<br />
Attention: This symbol informs you about possible dangers for things or people.<br />
3
Mitterweg 25 – Via di Mezzo ai Piani 25<br />
I-39100 Bozen - Bolzano Tel.:0471 977236 - Fax:976525<br />
e-mail: info@<strong>elmed</strong>.it http://www.<strong>elmed</strong>.it<br />
1 Content<br />
4<br />
PREFACE ...................................................................................................3<br />
1 CONTENT .............................................................................................4<br />
2 SAFETY WARNINGS............................................................................6<br />
In general ..................................................................................................................................6<br />
Power supply.............................................................................................................................6<br />
Accumulator..............................................................................................................................6<br />
Eliminating batteries.................................................................................................................6<br />
3 EOS52...................................................................................................7<br />
3.1 EOS52-vision ...................................................................................................... 7<br />
3.2 Use of the accumulator...................................................................................... 8<br />
3.3 Antenna (aerial) and quality of reception ......................................................... 9<br />
Assembly of the external aerial ................................................................................................9<br />
Problems of reception:..............................................................................................................9<br />
4 USE.....................................................................................................10<br />
4.1 Menu structure.................................................................................................. 10<br />
5 MAIN MENU........................................................................................11<br />
Menu structure (Main and secondary) ...................................................................................11<br />
5.1 Frost data .......................................................................................................... 13<br />
5.1.1 Frost graphics...............................................................................................................14<br />
5.1.2 Detail .............................................................................................................................16<br />
5.2 Scab (Venturia inaequalis)............................................................................... 17<br />
5.3 Messages .......................................................................................................... 18<br />
5.3.1 Appointments.................................................................................................................19<br />
5.4 Setup.................................................................................................................. 20<br />
5.4.1 Alarm Setup..................................................................................................................20<br />
5.4.1.1 Time of the alarm beginning „From“ ......................................................................21<br />
Data input window:.................................................................................................................21<br />
5.4.1.2 Alarm ending time „To” ..........................................................................................22<br />
5.4.1.3 Alarm thresholds......................................................................................................23<br />
5.4.1.4 Alarm state...............................................................................................................23<br />
5.4.1.5 The alarm window ...................................................................................................24<br />
Alarm confirmation.................................................................................................................24<br />
5.4.2 Service ...........................................................................................................................25
Mitterweg 25 – Via di Mezzo ai Piani 25<br />
I-39100 Bozen - Bolzano Tel.:0471 977236 - Fax:976525<br />
e-mail: info@<strong>elmed</strong>.it http://www.<strong>elmed</strong>.it<br />
5.4.3 Stations..........................................................................................................................26<br />
5.4.4 Equipment setup ..........................................................................................................27<br />
5.4.4.1 Date and time...........................................................................................................27<br />
5.4.4.2 Aerial setup..............................................................................................................28<br />
5.4.4.3 Display configuration ..............................................................................................28<br />
Intensity and contrast:.............................................................................................................28<br />
The graphic bar:......................................................................................................................28<br />
Display lighting duration and turn off (standby mode):...................................................29<br />
Battery or Net: ........................................................................................................................29<br />
Standard set up:.......................................................................................................................29<br />
Touchscreen (Display calibration and Display test)...............................................................30<br />
5.4.4.4 Language setup ........................................................................................................30<br />
5.4.4.5 Parameters................................................................................................................31<br />
5.4.5 Central (Messages and appointments transmitter) ..................................................32<br />
5.5 Key lock............................................................................................................. 32<br />
5.6 Turning off the equipment ............................................................................... 33<br />
6 AUTHORISATION: .....................................................................33<br />
7 TECHNICAL DATA:............................................................................34<br />
7.1 Hardware:.......................................................................................................... 34<br />
7.2 Software: ........................................................................................................... 35<br />
7.3 Probes and sensors of the weather station Farg2000 (ELMED):.................. 36<br />
5
Mitterweg 25 – Via di Mezzo ai Piani 25<br />
I-39100 Bozen - Bolzano Tel.:0471 977236 - Fax:976525<br />
e-mail: info@<strong>elmed</strong>.it http://www.<strong>elmed</strong>.it<br />
2 Safety warnings<br />
ATTENTION: The following safety warnings must be used to get the personal<br />
safety of the user and to protect the equipment and the working surrounding from<br />
possible danger<br />
In general<br />
• Do not open the equipment on your own for maintenance.<br />
• Do not insert any object in the equipment entrances. A possible short circuit might destroy<br />
the equipment or electrical attacks might derive.<br />
• Take care not to let the equipment fall and do not bump it strongly.<br />
• Do not keep the equipment near a heater or other heat sources<br />
• Do not wet and do not leave it in wet places, near the bath tub, the sink or the pool for example,<br />
• To avoid possible electrical shocks during a storm it is not advisable to use the net feeder.<br />
• Keep the screen clean, removing dust or other agents that might dirty it.<br />
• For general cleaning, use a clean and wet cloth.<br />
Clean the screen if it is dirty<br />
• Do not leave at extreme temperature; do not leave it on a heater or in the car and do not<br />
keep it near a window exposed at the sunlight directly.<br />
Power supply<br />
• Use only the battery-charger/feeder included to charge the EOS52.<br />
Accumulator<br />
• Use only the kind of accumulator suitable for the EOS52. It is the NiMH 1,2V<br />
AA(Mignon) type with a capability of at least 2200mAh.<br />
• Do not cut, burn or destroying the batteries on fire. Eliminate the used batteries according<br />
to the producer instructions or the local<br />
Eliminating batteries<br />
The equipment contains rechargeable batteries of NiMH 1,2V AA(Mignon) kind with<br />
a capability of 2500mAh. The chapter 3.2 „Use of the accumulator“ contains instructions<br />
about how the batteries can be substituted.<br />
Do not throw the batteries in your home rubbish.<br />
6
Mitterweg 25 – Via di Mezzo ai Piani 25<br />
I-39100 Bozen - Bolzano Tel.:0471 977236 - Fax:976525<br />
e-mail: info@<strong>elmed</strong>.it http://www.<strong>elmed</strong>.it<br />
3 EOS52<br />
ATTENTION: Before executing the following instructions, please read carefully the<br />
safety warnings (chapter 2).<br />
3.1 EOS52-vision<br />
1 2 3<br />
4<br />
7<br />
5<br />
8<br />
6<br />
9<br />
Im. 1 EOS52-vision<br />
(1) Turn on/off key, press this key to turn on the equipment and keep it pressed for at<br />
least 4 seconds to turn off the EOS52.<br />
(2) Buzzer gate: the gate must be kept free and clean not to reduce the buzzer volume.<br />
(3) External aerial<br />
(4) Touchscreen display, the equipment is commanded by graphical screen on the<br />
pressure sensible display.<br />
(5) Tension connector: Tension feeder connector.<br />
(6) Serial interface: possibility of connection to the computer (maximum cable length: 3<br />
meters)<br />
(7) Battery cover: It covers the rechargeable batteries.<br />
(8) NiMH AA rechargeable batteries (2500mAh recommended).<br />
(9) Accumulator temperature sensors: to measure the accumulators temperature<br />
during the charging process.<br />
7
3.2 Use of the accumulator<br />
Mitterweg 25 – Via di Mezzo ai Piani 25<br />
I-39100 Bozen - Bolzano Tel.:0471 977236 - Fax:976525<br />
e-mail: info@<strong>elmed</strong>.it http://www.<strong>elmed</strong>.it<br />
Warning: Before using the equipment for the first time it is advisable to charge the batteries<br />
fully.<br />
Kind of accumulator:<br />
Rechargeable batteries (accumulators) NiMH (Nickel-Metall-Hydrid), type "AA" (Mignon).<br />
To have at your disposal for a long time it is advisable to use accumulators with a capability<br />
of at least 2200mAh.<br />
Setting and change of the accumulators<br />
• Turn off the equipment<br />
• Open the cover of the battery box with a suitable<br />
screwdriver<br />
• Put or change the accumulators being careful to<br />
the batteries polarity (Be careful to the temperature<br />
sensor)<br />
Charging the accumulator<br />
Im. 2 Batterie box<br />
• Remove the rubber cover on the tension connector<br />
(Im.1 (7))<br />
• Connect the feeder with the EOS52 equipment<br />
• Insert the feeder in the electric tap.<br />
After 3 hours at most the charging process should be finished.<br />
The charging state can be watched by the corresponding symbol (see:<br />
Symbols → chapter 5).<br />
After charging the EOS52 can be also kept connected to the tension feeder. In that case<br />
the EOS52 is fed by the external feeder and the accumulators are in a state of charge<br />
keeping.<br />
With totally charged batteries (2500mAh) it is possible to use the equipment for a period<br />
of two days. The available time depends on the way of use of the user and by the predefined<br />
setup (see: Display configuration“ → chapter 5.4.3.3).<br />
Warning: The accumulators can be also recharged by an accumulator charter of NiMH<br />
kind available on sale. Eliminating all the accumulators all the data are lost and also date<br />
and time must be inserted again.<br />
ATTENTION: use only the suitable kind of accumulator. Do not use non rechargeable<br />
batteries (for instance: Alcaline). This advice is valid in particular in connection<br />
with the net feeder. The charging of alcaline batteries can cause fires and explosions.<br />
Signal in case of powerless battery:<br />
If the battery is very powerless, the EOS52 gives an advice in form of some straight<br />
acoustic signals. In this case it is time to recharge the batteries.<br />
Otherwise the equipment turns off by itself.<br />
8
Mitterweg 25 – Via di Mezzo ai Piani 25<br />
I-39100 Bozen - Bolzano Tel.:0471 977236 - Fax:976525<br />
e-mail: info@<strong>elmed</strong>.it http://www.<strong>elmed</strong>.it<br />
3.3 Antenna (aerial) and quality of reception<br />
Assembly of the external aerial<br />
• Open the rubber cover of the aerial connector(Im.3)<br />
• Now the external aerial can be screwed on<br />
the aerial connector.<br />
Im. 3 External aerial<br />
Problems of reception:<br />
• Internal or external aerial<br />
Reception is better if you use the external aerial instead of the internal one. In<br />
case of problems on reception it is advisable to mount the external aerial.<br />
• Placing and location<br />
The best reception is obtained when the EOS52 aerial is parallel with the broadcasting<br />
aerial. So it is advisable to keep the EOS52 in a vertical position. The<br />
quality of the reception depends on the place. A little geographic moving can increase<br />
the quality of the reception.<br />
• Reception at home and inside the car<br />
The car covering plate reduces the quality of the reception. Problems can be also<br />
inside your house. A position near a window is the best one.<br />
9
Mitterweg 25 – Via di Mezzo ai Piani 25<br />
I-39100 Bozen - Bolzano Tel.:0471 977236 - Fax:976525<br />
e-mail: info@<strong>elmed</strong>.it http://www.<strong>elmed</strong>.it<br />
4 Use<br />
The equipment contains a touchscreen as visualisation and command element.<br />
The EOS52 is commanded by the symbols and the keys represented on the display.<br />
You can press the “keys” by using a finger or a pen suitable for the touchscreen.<br />
You can enter the desired menu simply pressing on its symbol.<br />
By pressing the Exit key you can go out from each menu.<br />
4.1 Menu structure<br />
The following table shows the menu structure of the EOS52.<br />
Im. 4 Menu structure<br />
The following chapters (from the chapter 5 on) contain more detailed information about the<br />
single menus.<br />
10
Mitterweg 25 – Via di Mezzo ai Piani 25<br />
I-39100 Bozen - Bolzano Tel.:0471 977236 - Fax:976525<br />
e-mail: info@<strong>elmed</strong>.it http://www.<strong>elmed</strong>.it<br />
5 Main menu<br />
Soon after the turn on of the EOS52<br />
with a turn on/turn off (Im.1 (1)) the main<br />
menu appears as shown in the image<br />
(Im. 5).<br />
All the secondary menus can be recalled<br />
by the main menu.<br />
Menu structure (Main and secondary)<br />
The menus are made of different symbols<br />
as follows.<br />
List of symbols<br />
It is always located on the edge at the top.(Imm.5).<br />
• The list contains the following symbols:<br />
Im. 5 Main menu<br />
- The name of the menu (left), for example, “Main menu”<br />
- Symbol of battery, indicating the state of the accumulator. The state can<br />
be: full ( ), used ( ) and empty ( ).<br />
- Net symbol: it is shown when the tension feeder is connected to the<br />
EOS52.<br />
- During the charge the net and the battery symbol are shown. When the<br />
charge is finished the battery symbol disappears and only the net symbol<br />
remains.<br />
- The Mail symbol, indicates that in the secondary menu there is at least<br />
one message not read.<br />
- The alarm symbol shows the alarm survey state. Turned off ( ) and with<br />
the turned on survey ( ). (→ more detail in the chapter 5.4.1 „Alarm Setup“)<br />
- The symbol of aerial is shown if the external aerial has been selected. If<br />
the internal one us used the symbol is not shown (Aerials→ chapter<br />
5.4.4.2).<br />
- With this symbol the quality of the signal is evidenced. A full bar ( )indicates<br />
a very strong signal. A half empty bar ( )appears if the signal is a<br />
little weak and an empty bar ( )indicates the complete loss of any signal.<br />
More details in the chapter(“Service”→ 5.4.2).<br />
• Current state list<br />
It is over on the ELMED logo in the main menu (Imm.5) and over the keys in the secondary<br />
menus. The list includes the current date and time (Date and time can be set<br />
up in the menu ”Setup” → chapter 5.4.3)<br />
In the different secondary menu additional information can be also shown. (Explanations<br />
in the following chapters)<br />
• Symbols field<br />
In the middle of the display you can find symbols with their name. Pressing on the<br />
symbol the requested secondary menu is opened.<br />
11
Mitterweg 25 – Via di Mezzo ai Piani 25<br />
I-39100 Bozen - Bolzano Tel.:0471 977236 - Fax:976525<br />
e-mail: info@<strong>elmed</strong>.it http://www.<strong>elmed</strong>.it<br />
• Keys field<br />
At the end of the display, near the edge (except of the main menu) you can find the<br />
keys field which contains, in the different secondary menus, various symbols with different<br />
functions.<br />
12
Mitterweg 25 – Via di Mezzo ai Piani 25<br />
I-39100 Bozen - Bolzano Tel.:0471 977236 - Fax:976525<br />
e-mail: info@<strong>elmed</strong>.it http://www.<strong>elmed</strong>.it<br />
5.1 Frost data<br />
<br />
The menu „Frost“ can be reached<br />
through the main menu.<br />
To enter the menu of frost containing<br />
the frost graphics and the detailed view<br />
a valid authorization is necessary.<br />
(→chapter 6).<br />
The menu „Frost“ includes a table with every<br />
available station (Im.6)<br />
(the stations can be inserted and configured<br />
in the Setup)<br />
(→ chapter 5.4.2)<br />
The table shows near the station name all the data necessary to<br />
the survey of frost.<br />
- Column „WT“ = wet temperature in celsius grades (°C)<br />
- Column „DT“ = dry temperature in celsius grades (°C)<br />
Im. 6 Frost data<br />
- Column „Wind“ = wind speed in meters per second (m/s)<br />
If available the wind direction is also indicated. „N“ „E“ „S“ „W“ for North,<br />
East, South and West.<br />
- Column „I“ = irrigation A mark ( ) indicates the watered stations.<br />
- Column “A”: = alarm If for a station an alarm has been selected (chapter<br />
5.4.1), a bell is shown ( ).<br />
An already executed alarm is substituted by a ringing bell ( ).<br />
The symbol „-.-“ instead of a temperature or another measured value, means that the<br />
value is not available in the current station.<br />
If instead of the data, nothing is shown the equipment has not received the station data<br />
or more than 20 minutes have passed since the last reception.<br />
The present state list includes the present date and time. On the right side measurement<br />
time is indicated („Data from [hh:mm]“). The indication is referred to the selected station.<br />
A station can be selected thanks to the keys “up” and “down”.<br />
There is also the possibility to select a station pressing over the key. The selected station<br />
is shown in an inverted way with white writing and black background (for example in<br />
the image 6 „Gargazon 1“).<br />
You can also watch the graphic of frost about each station. To see the graphics,<br />
press the key “graphic”.<br />
(→ chapter 5.1.1)<br />
If you press the key Detail the menu with the most detailed information about<br />
the selected station opens.<br />
(→ chapter 5.1.2)<br />
13
Mitterweg 25 – Via di Mezzo ai Piani 25<br />
I-39100 Bozen - Bolzano Tel.:0471 977236 - Fax:976525<br />
e-mail: info@<strong>elmed</strong>.it http://www.<strong>elmed</strong>.it<br />
tip: Hidden keys:<br />
The image 7 shows the hidden keys present<br />
on the screen.<br />
Over and below the table with the stations<br />
you can find 2 keys allowing to browse the<br />
list page by page, up and down. It is very<br />
useful with a long list especially if you want<br />
to go to the end of the list.<br />
5.1.1 Frost graphics<br />
Im. 7 Hidden keys<br />
The frost graphics can be reached through the<br />
menu „Frost“, pressing the key „Graphics“(→ chapter<br />
5.1.0).<br />
The screen is made by a list with two rows on the<br />
top, the graphics in the middle and the keys in the<br />
bottom of the screen. (Im.8).<br />
The list on the top of the left side shows the name of<br />
the menu. In this case “Graphics”. In the following<br />
row you can find the selected station. The right side<br />
includes the measured data interesting regarding<br />
frost.<br />
Im. 8 Frost graphic<br />
- Wet temperature (WT)<br />
- Dry temperature (DT) respectively in celsius grades (°C)<br />
- Wind speed (Wind) in meters per second (m/s)<br />
If available there is also the indications of:<br />
- Wind direction (N E S W) (North, East, South, West).<br />
The keys field includes 4 keys: thanks to them you can select the measured values<br />
shown in the diagram. You can also select:<br />
- WT and DT: Wet temperature and dry temperature: pressing on this key the<br />
diagram shows the two temperatures together in the same graphics. The<br />
thin line belongs to the dry temperature.<br />
- WT: Pressing the key the diagram shows the data curve about wet temperature.<br />
- T2M: the 2-meters temperature is shown in the graphics.<br />
- Wind: this key shows he wind speed in the diagram.<br />
Warning: To indicate which value is presently shown in the diagram, a frame surrounds<br />
the corresponding key, as shown in the Image 8. (WT and DT has been selected).<br />
14
Graphics:<br />
Graphics consists of a diagram on line with X and Y axes.<br />
Mitterweg 25 – Via di Mezzo ai Piani 25<br />
I-39100 Bozen - Bolzano Tel.:0471 977236 - Fax:976525<br />
e-mail: info@<strong>elmed</strong>.it http://www.<strong>elmed</strong>.it<br />
On the X axis (Horizontal axis) time is shown. The range revealed is of three hours<br />
and begins on the left side of the screen with the data, measured three hours ago<br />
and goes to the current measured value.<br />
The diagram also includes some auxiliary rows for time and space axis (X and Y):<br />
between two rows there is a time of 30 minutes.<br />
Warning: All the data older than 3 hours are no longer available so that they cannot<br />
be visualised.<br />
On the axis Y (Vertical Axis) the measured data or temperature in Celsius grades or<br />
wind speed (m/s) are located.<br />
The scale on the Y axis is updated in relation with the minimum and maximum data<br />
so that a very good visualisation is guaranteed.<br />
tip: Hidden keys:<br />
Inside of the frost graphics it is possible to<br />
change the weather station by using the hidden<br />
keys indicated in the image (Im.9).<br />
Pressing on the left side you select the previous<br />
station and on the right side you can select the<br />
following station. The great advantage is to<br />
have soon the available graphic data even<br />
without leaving the menu.<br />
Im. 9 Hidden keys<br />
15
Mitterweg 25 – Via di Mezzo ai Piani 25<br />
I-39100 Bozen - Bolzano Tel.:0471 977236 - Fax:976525<br />
e-mail: info@<strong>elmed</strong>.it http://www.<strong>elmed</strong>.it<br />
5.1.2 Detail<br />
The secondary menu Detail can be reached<br />
through the menu „Frost“, pressing on the<br />
key „Detail“ (→ chapter 5.1.0).<br />
The screen on the menu “Detail” shows extra<br />
measured data. If in a station there is not a sensor<br />
the symbol „-.-“ appears on the screen. (for<br />
ex. in the image10 the wind direction is absent)<br />
The following values can be shown:<br />
- The stations name: (under the name of<br />
the menu: “Detail”)<br />
- WT. (=Wet temperature) in celsius grades (°C)<br />
- DT. (=Dry temperature) in celsius grades (°C)<br />
- T2m. (=Temperature 2-meters) in celsius grades (°C)<br />
- T25. (=Temperature -25cm) in celsius grades (°C)<br />
- Wind speed in meters per second (m/s)<br />
- Wind direction: N E S W for North, East, South, West.<br />
- Moisture. (=Relative moisture) in (%)<br />
- Wetting. from 0 (dry) to 100 (wet)<br />
- Irrigation. „Yes“ or „No“<br />
Im. 10 Detail<br />
- The measurement time (visualisation in the list of the state„ from<br />
[hh:mm]“)<br />
Using the arrow keys, a different station can be selected.<br />
16
Mitterweg 25 – Via di Mezzo ai Piani 25<br />
I-39100 Bozen - Bolzano Tel.:0471 977236 - Fax:976525<br />
e-mail: info@<strong>elmed</strong>.it http://www.<strong>elmed</strong>.it<br />
5.2 Scab (Venturia inaequalis)<br />
The most important data regarding scab can be<br />
reached by the “Main menu”,<br />
pressing on the key “Scab”.<br />
An authorization is needed to watch the current<br />
data(→chapter 6).<br />
These remarkable data are:<br />
- The station name (on the top, on the<br />
left after “Scab”)<br />
- Rain beginning Data [dd.mm.yy] (day.month.year) and time [hh:mm]<br />
(hours:minutes)<br />
- Wetting duration time in hours and minutes (for ex.: 5h 03’)<br />
- Wetting from 0 (dry) to 100 (wet)<br />
- Rain in millimeters (mm) – (from the rain beginning)<br />
- Wind speed in meters per second (m/s)<br />
- T2m (=Temperature 2-meters) in celsius grades (°C)(Current value)<br />
- T2m average (=Temperature 2-meters average) in gradi celsius (°C) – (from<br />
the rain beginning)<br />
- Irrigation “Yes” or „No“<br />
- Measurement time (in the list of the state „Data of [hh:mm]“)<br />
The symbol „-.-“ instead of the measured value indicates that the station has not the<br />
necessary sensors or the data have not been received yet. (for example: rain has not<br />
begun yet).<br />
By the arrow keys you can select another station.<br />
tip: To find the desired station more quickly:<br />
Im. 11 Scab data<br />
If the list contains so many stations, the use of the keys can be a little slow. But if on the<br />
frost menu (→ chapter 5.1) you can select the desired station; also in the scab menu this<br />
station is shown.<br />
17
5.3 Messages<br />
<br />
The secondary menu “Messages” contains messages<br />
and appointments and it can be reached by<br />
the symbol present in the “main menu”.<br />
For the reception of messages and appointments an<br />
authorization is needed. (→chapter 6).<br />
Mitterweg 25 – Via di Mezzo ai Piani 25<br />
I-39100 Bozen - Bolzano Tel.:0471 977236 - Fax:976525<br />
e-mail: info@<strong>elmed</strong>.it http://www.<strong>elmed</strong>.it<br />
Only the data central stations broadcast messages.<br />
Im. 12 Messages<br />
Warning: Only messages sent by a central station activated in the menu Setup<br />
„Central“ (→ chapter 5.4.4) will be received and shown.<br />
The number of available messages is shown in the symbol list. (After the note “Messages:”).<br />
The menu also indicate show many messages have not been read yet by the user<br />
(Im.12).<br />
In the middle of the screen, in the symbol area, the received messages are shown.<br />
Two messages per page, if at least two are available. If there is not any message on the<br />
screen this text appears (no message).<br />
In front of the title an envelope symbol indicates the state of the message. The closed<br />
envelope indicates a not read message while the opened envelope is in front of the already<br />
read messages.<br />
Message not read<br />
Message read<br />
Near the symbol the message object is shown.<br />
The state list shows the length (in pages) of the message on the right side.<br />
The message can be read by pressing on the title of the desired<br />
message. So the screen shows the text and at the bottom,<br />
the arrow keys: by them you can browse up and down<br />
page by page.<br />
Pressing on the keys „Appointments“ (Im.12) the<br />
appointment menu is opened.<br />
(→ chapter 5.3.1)<br />
Im. 13 Content of a message<br />
18
5.3.1 Appointments<br />
The key „Appointments” is indicated in the<br />
menu “Messages”.(→ chapter 5.3).<br />
Mitterweg 25 – Via di Mezzo ai Piani 25<br />
I-39100 Bozen - Bolzano Tel.:0471 977236 - Fax:976525<br />
e-mail: info@<strong>elmed</strong>.it http://www.<strong>elmed</strong>.it<br />
For the reception of the appointments an<br />
authorization is necessary (→chapter 6).<br />
The data central broadcasts the appointments.<br />
The appointments received are listed beginning<br />
from the first basing on date.<br />
The beginning of the description of the appointment<br />
is shown near the date belonging to h same appointment.<br />
Im. 14 Appointment<br />
By using the arrow keys you can select the desired appointment.<br />
Pressing the key Detail (Im.14) a new screen<br />
presents the complete text of the appointment.<br />
(Im.15)<br />
In this window, by the arrow keys the visualised appointment<br />
can be changed.<br />
Im. 15 Description of the<br />
appointment<br />
Warning: In the appointment list only appointments coming from activated centrals<br />
are shown. (→ chapter 5.4.4)<br />
19
5.4 Setup<br />
The Setup can b reached by the main menu<br />
pressing on the key ”Setup”.<br />
The menu Setup contains different secondary<br />
menu, where the user can act all the available<br />
functions.<br />
(Im.16) The secondary menus are:<br />
Mitterweg 25 – Via di Mezzo ai Piani 25<br />
I-39100 Bozen - Bolzano Tel.:0471 977236 - Fax:976525<br />
e-mail: info@<strong>elmed</strong>.it http://www.<strong>elmed</strong>.it<br />
- „Alarms“; (→ chapter 5.4.1)<br />
Setup for frost alarms.<br />
Im. 16 Setup menu<br />
- „Service“ (→ chapter 5.4.2) Here<br />
are the serial number of the EOS52, the software version and the quality of<br />
the reception signal.<br />
- „Stations“ (→ capitolo 5.4.3)<br />
It is possible to select and to order the stations regarding the data about<br />
frost and scab.<br />
- „Setup “; (→ chapter 5.4.4) The equipment configuration can be executed<br />
in this menu. For example, date and hour, language, lighting, etc.<br />
- „Central“. (→ chapter 5.4.5) Selection of the centrals which messages and<br />
appointments will be accepted.<br />
5.4.1 Alarm Setup<br />
The menu can be reached through the<br />
menu Setup („Alarms“ → chapter 5.4).<br />
All the setup regarding alarms can be managed<br />
here. (Im.17)<br />
20<br />
- Time of the alarm beginning:<br />
„From [hh:mm]“<br />
From now on, alarms can be executed.<br />
(→ chapter 5.4.1.1)<br />
Im. 17 Alarm setup<br />
- Time of alarm ending „To<br />
[hh:mm]“<br />
The alarm can be executed until this hour (→ chapter 5.4.1.2)<br />
- Alarm „Threshold“<br />
The alarm thresholds can be fixed for the wet temperature WT. (→ chapter<br />
5.4.1.3)<br />
- Alarm „State“<br />
Full vision of the station state regarding alarms. (→ chapter 5.4.1.4)<br />
- The key „Alarm” [Yes|No] (in the symbol field)<br />
Pressing on this key you can turn on or off the survey of the alarm thresholds.<br />
The same key show the current state, if active or not, with a “Yes” or a<br />
“No”. Moreover the alarm symbol indicates the alarm state. (→ chapter 5<br />
„Symbol list“).<br />
Important: If the alarm key is in state of „No“, no alarm is executed or shown.
5.4.1.1 Time of the alarm beginning „From“<br />
This screen can be recalled in the<br />
menu Alarm Setup, pressing on the key<br />
(„From [hh:mm]“ → chapter 5.4.1).<br />
The image (Im. 18) shows the screen of<br />
data input with a keyboard by hick the beginning<br />
time of the alarm survey is inserted.<br />
Mitterweg 25 – Via di Mezzo ai Piani 25<br />
I-39100 Bozen - Bolzano Tel.:0471 977236 - Fax:976525<br />
e-mail: info@<strong>elmed</strong>.it http://www.<strong>elmed</strong>.it<br />
By setting the beginning and ending time<br />
the period of the alarm survey is established.<br />
(Examples: Table1 on the following<br />
page).<br />
Im. 18 Data input window<br />
Before of the inserted beginning time of the alarm survey no alarm is shown.<br />
This aspect is referred to the wet temperature as for the alarms indicating a<br />
breakdown in a station.<br />
If as beginning or ending time the same hour is inserted (example: beginning<br />
time 00:00 and ending time 00:00) the alarm survey is active during the whole<br />
day, for 24 hours.<br />
Important: To define the period of the survey it s very important to insert the<br />
ending time, too. „To“ (→ chapter 5.4.1.2)<br />
It is important to notice that the survey is active. It can be activated by<br />
an alarm key. ( → chapter 5.4.1).<br />
Data input window:<br />
The data input window contains the description of the entered value, the field of<br />
the entered numbers and the keyboard. (Im.18).<br />
The keyboard is structured as a keyboard recalled by a calculator or a pc. It<br />
consists of:<br />
- 10 numbers 0 to 9,<br />
- a mark “-“ minus, to enter negative values. For example for the alarm<br />
threshold of the wet temperature WT.<br />
- The division mark. If there is a time to enter, the mark „ : “ must be used to<br />
separate hours from minutes. To enter other numbers a full stop must be<br />
used„ . “. (For example, for figures with a comma or for a date [dd.mm.yy]<br />
day month year).<br />
- „ESC“ („Escape“), by this key you can cancel the data input and the data input<br />
window closes.<br />
- „CE“ („Clear entry“), this key cancels the last datum entered.<br />
- „OK“, by this key you can confirm the input and exit the data input menu.<br />
21
5.4.1.2 Alarm ending time „To”<br />
Mitterweg 25 – Via di Mezzo ai Piani 25<br />
I-39100 Bozen - Bolzano Tel.:0471 977236 - Fax:976525<br />
e-mail: info@<strong>elmed</strong>.it http://www.<strong>elmed</strong>.it<br />
This window can be recalled in the Alarm setup menu by pressing the key<br />
(„To [hh:mm]“ → chapter 5.4.1).<br />
The data input screen appears (Im. 18): by that the ending time of the alarm<br />
survey can be defined.<br />
By the definition of beginning and ending time the period where the alarm survey<br />
is active can be established. (Examples: Table1).<br />
Then it is possible to enter the time when alarms are no longer executed.<br />
(Do not forget “:” as separation between hours and minutes.<br />
Some examples as follows:<br />
Begin „From“ End „To“ Duration<br />
20:00 08:00 12 hours (during the night)<br />
08:00 20:00 12 hours (during the day)<br />
23:00 07:00 8 hours<br />
00:00 00:00 24 hours<br />
17:26 17:26 24 hours<br />
Table 1: Alarm time<br />
Important: Out of this time no alarm will be executed!<br />
Warning: If the selected time is over all the confirmed alarms will be put in a beginning<br />
state and are active again at the start of he new alarm survey time.<br />
22
5.4.1.3 Alarm thresholds<br />
The alarm thresholds menu is activated<br />
by the Threshold key in the menu<br />
Alarm Setup („Threshold” chapter 5.4.1)..<br />
Mitterweg 25 – Via di Mezzo ai Piani 25<br />
I-39100 Bozen - Bolzano Tel.:0471 977236 - Fax:976525<br />
e-mail: info@<strong>elmed</strong>.it http://www.<strong>elmed</strong>.it<br />
The table shows all the defined stations<br />
(Im.19).<br />
(The station can be entered in the Setup<br />
menu → chapter 5.4.2)<br />
Im. 19 Alarm thresholds<br />
The column „Alarm“ shows the threshold of the respective station.<br />
The alarm threshold is shown in celsius (°C) grades and it is referred to<br />
the wet temperature (WT)!<br />
If the wet temperature reaches or overcomes the defined threshold the alarm<br />
will be executed.<br />
The stations, as usual, can be selected by the help of the arrow keys.<br />
By the input key, you can open the data<br />
input window and then enter the alarm<br />
threshold (Im. 20). (Description of the data<br />
input window: → chapter 5.3.1.1).<br />
Pressing on the cancel key it is possible to<br />
cancel the alarm threshold.<br />
The symbol „-.-“ indicates that a value has not been<br />
set up.<br />
Im. 20 Input of alarm thresholds<br />
Warning: If for a station an alarm has been activated, an alarm is also executed,<br />
if from the station no more updated data have been received for a period definable<br />
at the menu „Parameters“. ( → chapter 5.4.4.5, Standard: 20 minutes). In<br />
this case the alarm is indicated with the note „Station error“.<br />
5.4.1.4 Alarm state<br />
The State (of alarm) can be found in<br />
the menu Alarm Setup („State“ → chapter<br />
5.4.1).<br />
The screen shows a table (Im.<br />
21), which contains all the stations with an<br />
alarm threshold (→ chapter 5.4.1.3) activated.<br />
The column „State“ contains the following<br />
information:<br />
Im. 21 Alarm state<br />
- The alarm symbols ( ) indicates executed<br />
alarms even if they have been already confirmed. If no alarm has<br />
23
Mitterweg 25 – Via di Mezzo ai Piani 25<br />
I-39100 Bozen - Bolzano Tel.:0471 977236 - Fax:976525<br />
e-mail: info@<strong>elmed</strong>.it http://www.<strong>elmed</strong>.it<br />
been executed for the respective station, the indication is of a Minus mark<br />
(-).<br />
- Time, if present, indicates when the alarm has been executed.<br />
5.4.1.5 The alarm window<br />
<br />
The alarm window automatically appears when<br />
an alarm is executed. (Exception: the alarm<br />
state menu is active).<br />
If an alarm has been executed the alarm window<br />
appears with the list of all the station where some<br />
alarms have been executed.<br />
Im. 22 Alarm window<br />
The window indicates the current wet temperature<br />
(WT) and the defined alarm threshold respectively in Celsius grades. If he alarm<br />
is caused by the absence of data from a station, there is the text „Station error“.<br />
The key „Sound turn off” turns off the alarm sound. However the alarm<br />
is still active and the alarm window is still open.<br />
Alarm confirmation<br />
Only after pressing the key Alarm confirmation, all the alarm present in the window<br />
will be confirmed and the alarm window will be closed.<br />
Confirmed alarms remain turned off until they are again set up to the beginning<br />
state. The alarms can be reviewed in the secondary menu „Alarm state“ (chapter<br />
5.4.1.4 Alarm state).<br />
The set up of the beginning state (Reactivation) of the alarm will be automatically<br />
executed. After that the wet temperature overcomes the alarm threshold of<br />
more than (0,3 °C). The value (0,3 °C) can be changed in the menu “Parameters“<br />
→ chapter 5.4.4.5).<br />
In case that no more data are available from a station, the alarm will reactivate<br />
when the station will send data again.<br />
The alarm will reactive even after a predefined specific period of time.<br />
(→ chapter 5.4.1.1 e 5.4.1.2).<br />
24
Mitterweg 25 – Via di Mezzo ai Piani 25<br />
I-39100 Bozen - Bolzano Tel.:0471 977236 - Fax:976525<br />
e-mail: info@<strong>elmed</strong>.it http://www.<strong>elmed</strong>.it<br />
5.4.2 Service<br />
<br />
Pressing on the key Service in the<br />
Setup menu Setup (→ chapter 5.4).<br />
The service menu screen shows the following<br />
information:<br />
- Serial number:<br />
This is the serial number of the<br />
EOS52. It is unique and is used as<br />
identification.<br />
Im. 23 Service<br />
It is also used for registering and to activate authorization. (→chapter<br />
6).<br />
- Software version:<br />
Here the present software version installed on the EOS52 is shown. In<br />
case of error and the equipment does not work as desired, it is useful that<br />
the software version is indicated in the error description.<br />
- Quality of reception:<br />
The quality of reception is indicated by a graphic bar and a value measured<br />
in mV [mV]. A long bar (high value) indicates a strong signal while a<br />
short bar or its absence indicates a weak signal or the absence of the<br />
same one.<br />
Warning: The data centrals broadcasts at precise intervals, which means<br />
that even the reception quality can be calculated only after the data reception.<br />
- Central:<br />
It is listed the name of the central, which is broadcasting at the moment.<br />
25
Mitterweg 25 – Via di Mezzo ai Piani 25<br />
I-39100 Bozen - Bolzano Tel.:0471 977236 - Fax:976525<br />
e-mail: info@<strong>elmed</strong>.it http://www.<strong>elmed</strong>.it<br />
5.4.3 Stations<br />
To set up the Stations you must press the<br />
key „Stations“ in the menu Setup (→<br />
chapter 5.4).<br />
The menu contains a list of all the available stations<br />
where at most 30 stations can be selected.<br />
Selecting a station:<br />
A station is selected by giving it a number<br />
(1÷30), also establishing the order of the stations<br />
in he tables of the different menus (for example:<br />
frost menu).<br />
Im. 24 Stations<br />
The non selected stations are indicated with the symbol<br />
„--“<br />
Pressing on the input key the data input window<br />
appears.(see Im. 25). Now a number can be<br />
entered. (Data input window description: → chapter<br />
5.3.1.1).<br />
Eliminating a station:<br />
To cancel a station from the list you must enter a zero<br />
“0” as order number.<br />
Im. 25<br />
Input of the order<br />
number<br />
Speciality:<br />
The “holes” in numeration automatically close. If, for example, the station with order<br />
number 3, is cancelled by the list, the number of the following stations will be reduced.<br />
The station with number 4 becomes 3, etc.<br />
If an existing number is given to a station, the “old” number will be not overwritten.<br />
The selected station and all the following stations will be moved a position upwards.<br />
(Only until the place with number 30, the „31“ will be eliminated from the list). So it is<br />
possible to put a station at the beginning or in the middle of the list in every moment.<br />
Arrow keys: browsing by row and by page<br />
By the two arrow keys the stations can be selected row by row, if the<br />
respective key shows the symbol present in the image (Im.24).<br />
Pressing on the key, the function changes and the browsing page by page is<br />
active (9 rows per page). If many stations are present, this function is very<br />
useful to reach quickly the bottom of the list.<br />
26
Mitterweg 25 – Via di Mezzo ai Piani 25<br />
I-39100 Bozen - Bolzano Tel.:0471 977236 - Fax:976525<br />
e-mail: info@<strong>elmed</strong>.it http://www.<strong>elmed</strong>.it<br />
5.4.4 Equipment setup<br />
The equipment setup can be reached<br />
through the setup menu (→ chapter 5.4), by<br />
pressing on the setup key present in this<br />
secondary menu.<br />
This menu (Im.26) offers some possibility to<br />
configure especially the EOS52 with all its parts<br />
(Im.26).<br />
- Date (and time) can be defined here<br />
(→ chapter 5.4.4.1)<br />
Im. 26 Configuration Setup<br />
- Aerial: Selection of the used aerial (internal or external).<br />
(→ chapter 5.4.4.2)<br />
- Display: Intensity, contrast, duration and display calibration<br />
(→ chapter 5.4.4.3)<br />
- Language: Language selection (German or Italian).<br />
(→ chapter 5.4.4.4)<br />
- Parameters: Duration of the tone if the key is pressed, the alarm reactivation<br />
value can be changed.<br />
(→ chapter 5.4.4.5)<br />
5.4.4.1 Date and time<br />
Date and hour can be entered in the secondary<br />
menu through the configuration menu (→<br />
chapter 5.4.3).<br />
After pressing the key „Date“ in the configuration<br />
menu, the data input window appears. (Im.27)<br />
Now you can enter the current date using the following<br />
form: [dd.mm.yy] day, month and year. (Use the full<br />
stop „.“ as separation mark).<br />
Im. 27 Date input<br />
After the termination of the input, another data input<br />
window opens. Now the current time must be entered.<br />
(Im.28).<br />
Time must be entered using the following form:<br />
[hh:mm] hours and minutes (use „:“ as division mark).<br />
(data input window description: → chapter<br />
5.3.1.1).<br />
Im. 28 Time input<br />
27
5.4.4.2 Aerial setup<br />
<br />
The aerial setup is in the menu<br />
Equipment configuration (→<br />
chapter 5.4.3). Press on the key<br />
„Aerial“.<br />
Mitterweg 25 – Via di Mezzo ai Piani 25<br />
I-39100 Bozen - Bolzano Tel.:0471 977236 - Fax:976525<br />
e-mail: info@<strong>elmed</strong>.it http://www.<strong>elmed</strong>.it<br />
The EOS52 has an included internal aerial<br />
and a connector for the external aerial (External<br />
aerial Im.1 (3)). If the reception is very<br />
good you can use the internal aerial. On he<br />
contrary, use the external one.<br />
Im. 29 Aerial setup<br />
The menu „Aerial setup“ (Im.29) indicates,<br />
which aerial is currently selected. („Selected aerial: [internal | external]“).<br />
Pressing on the keys, selection can be changed.<br />
5.4.4.3 Display configuration<br />
The menu equipment configuration (→ chapter 5.4.3) contains the menu<br />
„Display“.<br />
Intensity and contrast:<br />
Pressing on the keys for intensity and contrast<br />
(Im.30) you can modify the display<br />
lighting intensity and the contrast. The respective<br />
setup windows appear with their<br />
graphic bar. (Im.31)<br />
Imm. 30 Configurazione display<br />
The graphic bar:<br />
The graphic bar is filled depending<br />
on the defined value.<br />
Over there is a written notice informing<br />
about what is to be configured<br />
with the current value. The<br />
value is among the minimum and<br />
maximum values shown under the<br />
graphic bar. By using the keys with<br />
“+” and ”-” the value can be changed step by step.<br />
Im. 30 Display configuration<br />
Im.31 Intensity and contrast setup<br />
Alternatively you can press directly on the bar which is filled until the pressure<br />
point.<br />
28
Mitterweg 25 – Via di Mezzo ai Piani 25<br />
I-39100 Bozen - Bolzano Tel.:0471 977236 - Fax:976525<br />
e-mail: info@<strong>elmed</strong>.it http://www.<strong>elmed</strong>.it<br />
Display lighting duration and turn off (standby mode):<br />
Activating the keys „Duration“ and<br />
„Turn off“ (Im.30) the respective<br />
configuration window appears with<br />
its graphic bar. (Im.32)<br />
Configuring these 2 times is par<br />
ticularly important because it allows<br />
you to save electrical energy, Im. 32 Turn off and lighting duration of the display<br />
so that it is useful if your EOS 52 is<br />
fed by batteries.<br />
The lighting duration decides the time during which the light is on if, in the mean<br />
time, the display is not touched again.<br />
The turn off time defines the time when the display will turn off definitely, if not<br />
touched again. Touching again the display the screen turns on and the EOS52<br />
is completely working again. Times must be entered in seconds and the possible<br />
values are from 1 to 255 sec. If a 0 is entered, lighting and display never<br />
turn off.<br />
Battery or Net:<br />
To be able to use the EOS52 for a long time, when it is fed by batteries, it is<br />
necessary to configure the display in a suitable way. The display uses a lot of<br />
the available electrical energy. You can save that reducing the display lighting<br />
duration or to make the display turn on duration shorter. If the EOS52 s connected<br />
to the net by the 12Vdc feeder, the consumption is no so critical.<br />
For this reason in the menus there are 2 graphic bars to define the set up in<br />
both cases. (Im.31 and 32)<br />
The EOS52 realizes which kind of feeling is used and uses the suitable setup.<br />
The table 2 contains some examples for intensity and duration of the display<br />
turn off, showing the respective consumption.<br />
Intensity (0-15)<br />
Turn off in seconds<br />
(for lighting and display)<br />
Consumpt.<br />
Consumption<br />
0 No intensità - 0 Never turns off Very high<br />
1 Minimum intensity Low 15 Turns off after 15 seconds Low<br />
8 Medium intensity Medium 60 Turns off after one minute Medium<br />
15 High intensity High 255 4 min e 15 sec. (max duration) High<br />
Table 2 Consumption: Intensity and duration<br />
Standard set up:<br />
Pressing the key „standard setup“ (Im.30), the program use standard values<br />
for display setup. The values are shown in the images Im.31 and Im.32. The<br />
standard values are a compromise between a low consumption and a long duration<br />
of display turn off.<br />
29
Touchscreen (Display calibration and Display<br />
test)<br />
By the menu „Display test” (Im.30) it is possible to<br />
act a precision test of the touch display. After pressing<br />
on the display in any place, a little panel must appear<br />
in that place.( → Im.33)<br />
If the panel is too far from the pressed point a display<br />
calibration is necessary.<br />
As additional help the pressed point is indicated on<br />
the screen upwards on the left, using he display reso<br />
lution (320x240 pixel) (Im.33)<br />
The display updating it is only necessary when the<br />
display does not work any longer in a precise way.<br />
Mitterweg 25 – Via di Mezzo ai Piani 25<br />
I-39100 Bozen - Bolzano Tel.:0471 977236 - Fax:976525<br />
e-mail: info@<strong>elmed</strong>.it http://www.<strong>elmed</strong>.it<br />
To act the display updating you must press on the<br />
key Display updating in the configuration menu (Key<br />
„Display Updating“. Im.30)<br />
During calibration it is necessary to press 4 times exactly<br />
on the panel indicated on the screen.<br />
(Im.34). To reach a high precision it is advisable to use a touch pen.<br />
5.4.4.4 Language setup<br />
Key Language in the equipment configuration<br />
menu (→ chapter 5.4.3)<br />
Im. 33 Display test<br />
Im. 34 Display calibration<br />
The chosen language is soon active after<br />
being selected by pressing the right key.<br />
(Im.35).<br />
Im. 35 Language<br />
30
5.4.4.5 Parameters<br />
<br />
Pressing on the key „Parameters“ in<br />
the menu Equipment configuration<br />
( → chapter 5.4.3).<br />
Mitterweg 25 – Via di Mezzo ai Piani 25<br />
I-39100 Bozen - Bolzano Tel.:0471 977236 - Fax:976525<br />
e-mail: info@<strong>elmed</strong>.it http://www.<strong>elmed</strong>.it<br />
The menu offers the following setup possibilities:<br />
- Tone duration:<br />
Duration is indicated in ms (milliseconds).<br />
The insertable range is from 0 to<br />
Im. 36 Parameters<br />
255ms.<br />
The longer the duration is, the higher the volume sounds. Here is a table<br />
with some examples:<br />
Duration in ms<br />
Description:<br />
0 Turned off tone: the keys action does not produce any sound<br />
1÷3 Silent beep<br />
4÷31 Beep: short and silent<br />
32÷63 Beep: strong<br />
64÷255 Beep very long and strong<br />
- Cancelling data in case of data absence:<br />
This parameter indicates after how many minutes the received data will be<br />
cancelled, if in the meantime new data have not been received. That can<br />
happen if the EOS52 is out of the reception area. Only the data about frost<br />
and punctuation and of the menu Detail, will be cancelled but not graphics,<br />
diagrams, messages and appointments.<br />
The insertable values are between 10 and 30 minutes.<br />
If, on the contrary, a zero (0) is inserted, the data will never be cancelled.<br />
(Standard = 20min).<br />
By cancelling the old data it is guaranteed that only present data are<br />
shown in the menu. In case that a station with activated survey no longer<br />
receives current data, an alarm will be executed „Station Error“.<br />
Important: If the parameter is set on zero (0), data will not be cancelled,<br />
but no alarm caused by a station error will ever be executed!<br />
- Reactivation of the alarm, if the temperature grows up:<br />
The confirmed alarm will be reactivated so that the temperature will go up<br />
more than the predefined value over the alarm threshold.<br />
It is possible to enter a value between 0,2° and 3,0°C.<br />
(Standard = 0,3°)<br />
More detailed information about the alarm reactivation can be found in the<br />
→ chapter 5.4.1.5 „Alarm window“.<br />
31
5.4.5 Central (Messages and appointments<br />
transmitter)<br />
The menu “Setup” (→ chapter 5.4)<br />
Contains the secondary menu ”central“.<br />
Data central transmit all the weather data and<br />
the messages. The various centrals responsible<br />
for a certain district transmit also interesting<br />
messages for the customers of this area. In the<br />
Mitterweg 25 – Via di Mezzo ai Piani 25<br />
I-39100 Bozen - Bolzano Tel.:0471 977236 - Fax:976525<br />
e-mail: info@<strong>elmed</strong>.it http://www.<strong>elmed</strong>.it<br />
menu it is possible to select the centrals you want<br />
to receive messages and appointments from.<br />
Im. 37 Central<br />
For messages and appointments you can select different centrals.<br />
By the keys, messages and appointments, you can activate a<br />
central or, using the key again, deactivate it again.<br />
For the reception of messages and appointments, authorizations are necessary<br />
(chapter 6).<br />
5.5 Key lock<br />
<br />
The menu Key block can be found in the main menu.<br />
To receive the current data or to execute the alarm survey, the<br />
EOS52 must be always turned on. To avoid the undesired activation<br />
during transportation, you can insert the key block. If the key<br />
block is on, a screen with the symbol “Exit” is shown.<br />
To deactivate the key block, you must press 3 times on the symbol<br />
“Exit” (Im.38). Then the symbol will change position. After this process<br />
the menu can be used again.<br />
Im. 38 Key lock<br />
32
Mitterweg 25 – Via di Mezzo ai Piani 25<br />
I-39100 Bozen - Bolzano Tel.:0471 977236 - Fax:976525<br />
e-mail: info@<strong>elmed</strong>.it http://www.<strong>elmed</strong>.it<br />
5.6 Turning off the equipment<br />
The equipment turns off by pressing the key “Turn<br />
off” in the main menu.<br />
By pressing the key (Im.4 → chapter 5), the turn off screen<br />
appears. (Im.39). You can also turn off the equipment by<br />
pressing again on the symbol shown or you can return to<br />
the main menu.<br />
The equipment can also be turned off by pressing the feeling<br />
key on the side at the equipment, for 4 seconds at least.<br />
Im. 39 Turn off<br />
Important: After turning off the equipment the alarm survey will not be executed<br />
again. All the messages, weather data and diagrams will be cancelled.<br />
The equipment setup is stored permanently, inside the EOS52.<br />
6 Authorisation:<br />
Each menu showing data can request an authorization.<br />
The menus and the windows requesting an authorization are:<br />
• „Frost data“<br />
• „Scab data“<br />
• „Messages“<br />
• „Appointments“<br />
There are different grades of authorization. It is possible, that a user has only the right to<br />
watch the frost data, but not the scab data.<br />
Acquiring rights and authorizations depends on the organization (Beratungsring,<br />
Landesverband), which puts the data at your disposal.<br />
To register your personal EOS52 the serial number indicated in the menu, is needed. „Service“<br />
→ chapter 5.4.2.<br />
33
Mitterweg 25 – Via di Mezzo ai Piani 25<br />
I-39100 Bozen - Bolzano Tel.:0471 977236 - Fax:976525<br />
e-mail: info@<strong>elmed</strong>.it http://www.<strong>elmed</strong>.it<br />
7 Technical data:<br />
Model<br />
7.1 Hardware:<br />
EOS-52<br />
Display Width 3,5 inch<br />
Touchscreen<br />
„key pressure“<br />
Resolution<br />
Display illumination<br />
Pen<br />
Finger<br />
320×240 pixel (black/white)<br />
White LED; 7,0 cd/m²<br />
10÷70 grams<br />
20÷80 grams<br />
Connectors Connector Net 12V DC (500mA)<br />
Serial interface RS-232 (max. cable length: 3m)<br />
Trasmission speed: 57.600 Baud<br />
External aerial<br />
Type: SMA 50Ω<br />
Reception frequency: 458,525MHz<br />
Buzzer Resonance frequency 2300 ± 300Hz<br />
Sound intensity at 10 cm<br />
85dB<br />
Temperature<br />
range<br />
Relative moisture<br />
Usage temperature 0° to 40°C<br />
Preservation temperature -20° to 60°C<br />
10% to 80% (not condensed)<br />
Dimension (without external aerial):<br />
Weight (Without accumulators):<br />
CE symbol (European Union)<br />
EM norm CEE 89/336<br />
(H × W × L) 138mm × 100mm × 28mm<br />
300g<br />
EN55022 class B, EN55024, EN61000-3-2,<br />
EN61000-3-3, EN61000-4-2, EN61000-4-3,<br />
EN61000-4-4, EN61000-4-5, EN61000-4-6,<br />
EN61000-4-11<br />
34
7.2 Software:<br />
Measured values<br />
Frost data:<br />
Scab:<br />
Wet temperature (WT) [°C]<br />
Mitterweg 25 – Via di Mezzo ai Piani 25<br />
I-39100 Bozen - Bolzano Tel.:0471 977236 - Fax:976525<br />
e-mail: info@<strong>elmed</strong>.it http://www.<strong>elmed</strong>.it<br />
Dry temperature (DT) [°C]<br />
Temperature 2-meters (T2m) [°C]<br />
Temperature 25cm (T-25cm) [°C]<br />
Wind speed [m/s]<br />
Wind direction [N/E/S/W]<br />
Relative moisture [%]<br />
Leaves moisture (0÷100)<br />
Irrigation (On/Off)<br />
Measurement time<br />
Rain beginning (Date and time)<br />
Leaves moisture duration (in hours and minutes)<br />
Leaves moisture (0÷100)<br />
Wind speed [m/s]<br />
Temperature 2-meters (T2m) [°C]<br />
Temperature 2-meters average (T2m) [°C]<br />
Measurement time<br />
Duration of frost and scab data visualisation<br />
(adjustable)<br />
10 to 30 min. or<br />
continuously<br />
Frost graphics: limits recording:<br />
3 hours<br />
Stations Maximum available stations number: 252 stations<br />
Among them at most selectable: 30 stations<br />
30 stations<br />
Messages recordable message number 12 messages<br />
Limit number of marks per message:<br />
1600 signs<br />
Appointments recordable appointment number: 20 appointm.<br />
Limit number of marks per appointment:<br />
168 signs<br />
Alarms Per each selected station (30 at most), an alarm level can be fixed.<br />
An alarm is executed only if the wet temperature reaches or is under the<br />
fixed alarm level or if the station is out of work.<br />
Automatic reactivation after the alarm confirmation if the<br />
threshold will be overcome by the settable value.<br />
0.2° to 3.0°C<br />
35
Mitterweg 25 – Via di Mezzo ai Piani 25<br />
I-39100 Bozen - Bolzano Tel.:0471 977236 - Fax:976525<br />
e-mail: info@<strong>elmed</strong>.it http://www.<strong>elmed</strong>.it<br />
7.3 Probes and sensors of the weather station Farg2000 (ELMED):<br />
Abbr. Measurement value Sensor Measurement interval /<br />
WT Wet temperature Platinum temperature sensor;<br />
PT100 4mm×100mm; without<br />
ray protection; with water e-<br />
quipment<br />
DT Dry temperature Platinum temperature sensor<br />
PT100 4mm×100mm; without<br />
ray protection;<br />
Tolerance<br />
-20 to +150°C /<br />
class 1/3 DIN B+<br />
±0,1°C (at 0°C)<br />
-20 to +150°C /<br />
class 1/3 DIN B+<br />
±0,1°C (at 0°C)<br />
Wind Wind speed Star Anemometer 0,4÷40m/s /<br />
Linearity tolerance max.<br />
0,15% (at 32°C)<br />
I Irrigation Pressure switch On or Off<br />
- Leaves moisture Leaves moisture probe 0 (dry) to 100 (wet)<br />
- Rain Downfall sensor Resolution: 0.1mm per tip<br />
±2% at 25mm/hr; ±3% at<br />
50mm/hr<br />
T2m Temperature 2-<br />
meters<br />
RM<br />
Relative moisture<br />
(2m)<br />
Tb25 Temperature-25cm<br />
Platinum temperature sensor<br />
PT100 with ray protection;<br />
Capacitive moisture sensor,<br />
with ray protection<br />
Platinum temperature probe<br />
PT100 6mm×250mm<br />
-200 to +400°C /<br />
class 1/3 DIN B+<br />
±0,1°C (at 0°C)<br />
0 ÷ 100 % r. m. / Tolerance<br />
max. 0,15%<br />
(0 ÷ 98 % r.m.)<br />
-20 a +200°C /<br />
class 1/3 DIN B+<br />
±0,1°C (at 0°C)<br />
- Wind direction Wind direction sensor 0÷360° / 5,625° 64 steps<br />
36
Mitterweg 25 – Via di Mezzo ai Piani 25<br />
I-39100 Bozen - Bolzano Tel.:0471 977236 - Fax:976525<br />
e-mail: info@<strong>elmed</strong>.it http://www.<strong>elmed</strong>.it<br />
NOTE<br />
37