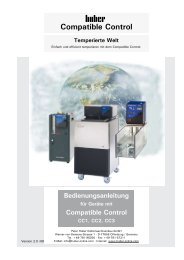
Unichiller in Desktop Housing - HUBER
Unichiller in Desktop Housing - HUBER
Unichiller in Desktop Housing - HUBER

Create successful ePaper yourself
Turn your PDF publications into a flip-book with our unique Google optimized e-Paper software.
Ma<strong>in</strong>tenance<br />
Danger!<br />
Prior to carr<strong>in</strong>g out clean<strong>in</strong>g on the mach<strong>in</strong>e switch off the mach<strong>in</strong>e via the ma<strong>in</strong>s<br />
isolator (36) and disconnect it from the ma<strong>in</strong>s.<br />
There are few user-serviceable parts <strong>in</strong>side the unit. Other than the items listed below,<br />
ma<strong>in</strong>tenance should be carried out by Huber-tra<strong>in</strong>ed and authorised personnel.<br />
Clean<strong>in</strong>g cool<strong>in</strong>g f<strong>in</strong>s (for air cooled mach<strong>in</strong>es with compressors only)<br />
To ensure that the temperature control unit will give the maximum cool<strong>in</strong>g power the<br />
unit has to be freed from dirt (dust) from time to time. Please provide for an<br />
unrestricted air supply (discharge from heat loss, fresh air supply). Keep a distance of<br />
20cm to walls for air cooled units. Identify the position of the air outlet, normally it is to<br />
be found at the front, with some other units it can also be found on the side, the rear or<br />
under the temperature control unit. Remove the air outlet grill to ga<strong>in</strong> access to the<br />
cool<strong>in</strong>g f<strong>in</strong>s. With the help of a brush or vacuum cleaner, you can clean the f<strong>in</strong>s of the<br />
black condenser at the back of the cab<strong>in</strong>et. However, never use po<strong>in</strong>ted objects.<br />
Please see that the condenser f<strong>in</strong>s are not damaged or deformed, as this may impair the<br />
air current.<br />
Clean<strong>in</strong>g the water filter (for water cooled mach<strong>in</strong>es with compressors only)<br />
Depend<strong>in</strong>g on water quality, the filter at the cool<strong>in</strong>g water <strong>in</strong>let has to be cleaned<br />
regularly. Immediately after the cool<strong>in</strong>g water connection there is the cool<strong>in</strong>g water<br />
filter. Close the water supply l<strong>in</strong>es and place a conta<strong>in</strong>er below the cool<strong>in</strong>g water outlet<br />
(27). Use a 17mm spanner (wrench) to remove the filter cover. The metal cool<strong>in</strong>g water<br />
filter is underneath the cover, and can be removed and r<strong>in</strong>sed.<br />
We are pleased to offer service tra<strong>in</strong><strong>in</strong>g for users. Please contact Customer Support<br />
Team for further details.<br />
31