FM EXCITER/TRANSMITTER TECHNICAL MANUAL - Canford Audio
FM EXCITER/TRANSMITTER TECHNICAL MANUAL - Canford Audio
FM EXCITER/TRANSMITTER TECHNICAL MANUAL - Canford Audio

You also want an ePaper? Increase the reach of your titles
YUMPU automatically turns print PDFs into web optimized ePapers that Google loves.
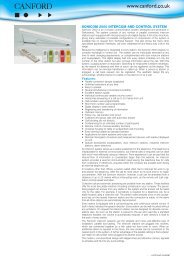
<strong>FM</strong>10<br />
<strong>FM</strong> <strong>EXCITER</strong>/<strong>TRANSMITTER</strong><br />
<strong>TECHNICAL</strong> <strong>MANUAL</strong>
CONTENTS<br />
1 Introduction<br />
2 Safety, Electrical hazard<br />
3 Safety, Toxic hazard<br />
4 Unpacking<br />
5 Controls and Connectors<br />
6 Installation<br />
7 Alignment<br />
8 Specifications<br />
19 How to contact Eddystone Broadcast Limited<br />
10 Technical Section Contents<br />
11 Declaration of conformity<br />
No part of this manual may be reproduced or transmitted in any form or by any means, electronic or mechanical,<br />
including photocopying, recording or information storage and retrieval systems, for any purpose other than the<br />
purchaser's personal use, without the express written permission of sbs.<br />
Information in this document is subject to change without notice and does not represent a commitment on the part of<br />
Eddystone Broadcast Limited. Eddystone Broadcast Limited shall not be liable for any direct, indirect, consequential<br />
or incidental damages as a result of the use or misuse of this equipment, handbook or any related materials.<br />
Page 2
1 Introduction<br />
──────────────────────────────────<br />
The Eddystone Broadcast Limited <strong>FM</strong>10 has been designed for groups looking for<br />
low power <strong>FM</strong> transmission equipment. It can include a high quality deviation limiter<br />
and stereo encoder. With the addition of a low-cost aerial it is all that is needed to get<br />
on air.<br />
Because of the broadband design of the unit, no tuning is required. Frequency setting<br />
is by means of internal, direct reading dial up switches. Output is automatically muted<br />
during lock-up time.<br />
The stereo version is available with its own high quality deviation limiter and coder. This<br />
can be offered as an upgrade for the mono <strong>FM</strong>10. The unit will operate into any SWR<br />
without damage, with an effective VSWR protection circuit which reduces the output<br />
power if necessary to protect the amplifier.<br />
Page 3
2 Safety, Electrical hazard<br />
──────────────────────────────────<br />
This unit contains high voltages which could be fatal. YOU MUST ALWAYS ISOLATE<br />
THE UNIT FROM THE MAINS SUPPLY BY COMPLETELY DISCONNECTING IT<br />
BEFORE ATTEMPTING TO OPEN THE CASE.<br />
THIS EQUIPMENT MUST BE EARTHED.<br />
Do not expose this equipment to rain or any other source of moisture.<br />
In common with all mains operated equipment, only suitably trained competent<br />
personnel should attempt to adjust, modify or repair this equipment or operate it with the<br />
cover removed. In case of query please contact your local agent or Eddystone<br />
Broadcast Limited.<br />
Any unauthorised adjustment, modification or repair of this equipment may invalidate<br />
any warranty and/or safety approvals that apply.<br />
Please read all of this manual and familiarise yourself with the controls before<br />
attempting to use this equipment.<br />
To ensure safety, it is the responsibility of the user to install and operate this equipment<br />
in a manner that is within the manufacturers specifications.<br />
Page 4
3 Safety, Toxic hazard<br />
──────────────────────────────────<br />
This equipment includes devices which contain Beryllium Oxide which is a highly toxic<br />
substance. Inhalation or ingestion of even tiny particles could be injurious to health or<br />
even FATAL!<br />
Extreme care must be exercised when replacing and discarding components which may<br />
contain Beryllium Oxide. If any such device is physically damaged you should seek<br />
expert advice, e.g. by contacting the device's manufacturers.<br />
All such devices must be disposed of in accordance with local regulations. In the UK<br />
your local council will have a toxic waste disposal department who will be able to advise<br />
you. Elsewhere you should contact the responsible authorities.<br />
NEVER DISPOSE OF A DEVICE CONTAINING BERYLLIUM OXIDE WITH GENERAL<br />
WASTE.<br />
Page 5
4 Unpacking<br />
──────────────────────────────────<br />
This package should contain:-<br />
1x<br />
1x<br />
1x<br />
<strong>FM</strong>10 Series broadcast exciter/transmitter<br />
IEC Mains lead<br />
<strong>FM</strong>10 series manual<br />
If any items are missing or damaged please inform your supplier immediately.<br />
Initial Checks<br />
Ensure that the <strong>FM</strong>10 has been set to the correct mains/line voltage for your country.<br />
The standard version is set to 230V.<br />
Page 6
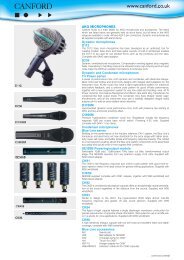
5 Controls and Connectors<br />
──────────────────────────────────<br />
Front Panel:<br />
POWER<br />
LIMIT<br />
Mains power is applied.<br />
The audio input level is high enough for the limiter to reduce its<br />
level (where fitted).<br />
Rear Panel:<br />
<strong>Audio</strong> input<br />
EXT MPX Loop<br />
Monitor<br />
Unbalanced on female BNC connector without internal limiter or<br />
balanced on female XLR connector with optional limiter (pin 2 hot,<br />
3 cold and 1 ground).<br />
Multiplex output (unbuffered) on BNC connector, switchable<br />
multiplex input on BNC connector. If switch is in ON position, the<br />
multiplex is disconnected internally. If switch is in OFF position,<br />
the external multiplex input is disabled and the multiplex signal is<br />
connected internally.<br />
25 way female D-type.<br />
Pin 1 Power supply OK<br />
Pin 2 Forward power OK<br />
Pin 4 Mute RF output<br />
Pin 5 - 24 reserved.<br />
Pin 25 Ground<br />
The power supply OK and forward power OK outputs are open<br />
collector and are normally low/ON in the normal condition. The Mute<br />
input should be grounded to mute the output. This connector is not<br />
normally fitted on cable distribution versions.<br />
O/P Monitor<br />
RF Out<br />
Power<br />
Mains<br />
Monitor of RF output (approx. -40dBc). This output should not be<br />
used to measure harmonic/spurious levels.<br />
50Ω N type female connector.<br />
Multi turn power control.<br />
Filtered IEC male connector with T1A fuse in pull out drawer.<br />
Page 7
6 Installation<br />
──────────────────────────────────<br />
The <strong>FM</strong>10 is normally supplied ready aligned, therefore installation should be straight<br />
forward. Before installation please read the section of this manual about Electrical<br />
safety.<br />
RF leads should be made from high quality low loss cable and connectors of the correct<br />
impedance, using the manufacturers recommended termination techniques. Since<br />
connectors are a source of unreliability in any system, the number of terminations in any<br />
RF lead should be kept to a minimum.<br />
All other cables for audio and control signals should be high quality screened types. For<br />
XLR connectors, the screen should be connected to the connector body.<br />
Page 8
7 Alignment<br />
──────────────────────────────────<br />
The <strong>FM</strong>10 is usually supplied ready aligned and therefore the following steps should not<br />
normally be necessary:-<br />
7.1 Frequency setting<br />
7.2 Output power/level<br />
7.3 Forward power alarm<br />
7.4 Modulator input level<br />
7.5 DLM3 PCB<br />
7.6 LimX PCB<br />
When an automatic change over system is in use (such as the ACU3) this should be<br />
disconnected/overridden such that the <strong>FM</strong>10 operates continuously during the set-up<br />
procedure.<br />
7.1 FREQUENCY SETTING<br />
Setting the frequency is a simple operation. Direct reading dials are located on the<br />
PLL7 PCB. For example, to set a frequency of 107.30MHz, set the 10MHz dial to 0,<br />
the 1MHz dial to 7, the 100kHz dial to 3 and the 12.5kHz dial to 0. For 98.35 set<br />
10MHz dial to 9, the 1MHz dial to 8, the 100kHz dial to 3 and the 12.5kHz dial to 4 (4<br />
x 12.5kHz = 50kHz).<br />
Whilst the Phase Locked Loop is Locking up the modulator output is muted<br />
(indicated by the PLL LOCK LED on the PLL7 PCB). When the <strong>FM</strong>10 is either<br />
powered up or the frequency changed, it will normally take about 5 seconds for the<br />
PLL to lock up. However if the frequency is changed from a high one to one at the<br />
bottom of the band, with the unit in operation, it can take up to 10 seconds for the<br />
PLL to attain lock.<br />
Page 9
7.2 OUTPUT POWER/LEVEL<br />
A small trimmer tool or precision screwdriver will be required to adjust the output power.<br />
The control is located on the rear panel.<br />
The output power should be set using an accurate power meter connected to the RF<br />
output which in turn should be connected to an adequately rated dummy load. If a<br />
dummy load is not available then the <strong>FM</strong>10 could be set up connected to the aerial. In<br />
this case the Output Power control should be set to minimum (anti-clockwise) before<br />
powering up the <strong>FM</strong>10.<br />
7.3 FORWARD POWER ALARM<br />
This setting defines the point at which a forward power fault is indicated at the<br />
Control/Monitor socket (for telemetry and/or operation of an automatic change over<br />
system). This is not adjustable on the <strong>FM</strong>10. It is pre-set to about 3W.<br />
7.4 MODULATOR INPUT LEVEL<br />
The setting of the modulator AUDIO LEVEL control (on the PLL7 PCB) will depend on<br />
the version supplied. For the <strong>FM</strong>10/M please read the section below headed DLM3<br />
PCB and for the <strong>FM</strong>10/S please read the section headed LimX PCB. An accurate<br />
deviation meter will be required, which should be connected to the rear panel RF<br />
monitor socket (or output on the cable distribution version).<br />
Mono/MPX version (no limiter or stereo encoder)<br />
The <strong>FM</strong>10 is normally supplied with the modulator input level set so that an input level<br />
of +8dBu over the range 5Hz to 100kHz (without pre-emphasis) gives a deviation of<br />
75kHz. If a different level is required then it will be necessary to reset the AUDIO<br />
LEVEL control on the PLL7 board. Apply a 400Hz sine wave at the level required for<br />
maximum deviation (normally 75kHz). Adjust the AUDIO LEVEL control to give the<br />
required deviation.<br />
Full details of the alignment procedure are available on request from Eddystone<br />
Broadcast.<br />
Page 10
7.5 DLM3 PCB<br />
1 FET BIAS<br />
Connect an audio input at 400Hz to the Mono input that is below the limit threshold, for<br />
example -20dBu.<br />
Turn R33 fully anti clockwise. Connect an oscilloscope or level meter to U3 pin 7. Turn<br />
R33 slowly clockwise until the level is reduced by 0.1dB. The level will vary whilst R33<br />
is turned.<br />
2 MODULATOR INPUT LEVEL<br />
Connect an audio input at 400Hz to the audio input such that the front panel limit LED is<br />
fully ON. LINK TP1 on the DLM3 PCB to ground. This disables the limiter, leaving the<br />
clipper active. Adjust the AUDIO LEVEL control on the PLL7 PCB to give 75kHz minus<br />
your desired Guard-band of deviation. A typical value would be between 55 and 65<br />
kHz. Disconnect the ground link from TP1.<br />
3 INPUT LEVEL<br />
Connect an audio oscillator to the audio input. Set its output to 400Hz and the output<br />
level to the desired limit threshold. Turn R19 fully anti clockwise. Connect an<br />
oscilloscope to the MPX OUTPUT connector. Turn R19 clockwise and observe that the<br />
peak level shown on the oscilloscope increases. Stop adjusting R19 at the point where<br />
the peak level stops increasing.<br />
Page 11
7.6 LimX PCB<br />
1 FET BIAS<br />
Connect an audio input at 400Hz to the LEFT and RIGHT or mono inputs that is below<br />
the limit threshold, for example -20dBu.<br />
Turn R40 and R31fully anti clockwise. Connect an oscilloscope or level meter to U7 pin<br />
7. Turn R31 slowly clockwise until the level is reduced by 0.1dB. The level will vary<br />
whilst R31 is turned. Connect the oscilloscope/level meter to U6 pin 7. Turn R40<br />
slowly clockwise until the level is reduced by 0.1dB. The level will vary whilst R40 is<br />
turned.<br />
2 MODULATOR INPUT LEVEL<br />
Connect an audio oscillator, level +8dBu at 1kHz to the MPX IN socket and turn the<br />
EXT MPX LOOP switch on (right position). Using a deviation meter, adjust the AUDIO<br />
LEVEL control on the PLL7 PCB to give 75kHz deviation. Return the EXT MPX LOOP<br />
switch to the OFF position (left).<br />
3 LimX OUTPUT LEVEL<br />
Connect an audio input at 400Hz to the LEFT and RIGHT audio inputs such that the<br />
front panel limit LED is fully ON. LINK TP1 on the LimX PCB to ground. This disables<br />
the limiters, leaving the clippers active. Switch the pilot off. Adjust R1 to give 75kHz<br />
minus 6.75kHz minus your desired Guard-band deviation. A typical value would be<br />
between 50 and 60 kHz. Disconnect the ground link from TP1.<br />
4 INPUT LEVEL<br />
Switch the pilot off. Connect an audio oscillator to the left and right inputs. Set its<br />
output to 400Hz and the output level to the desired limit threshold. Turn R15 and R3<br />
fully anti clockwise. Connect an oscilloscope to the MPX OUTPUT connector. Turn<br />
R15 clockwise and observe that the peak level shown on the oscilloscope increases.<br />
Stop adjusting R3 at the point where the peak level stops increasing. Now adjust R15<br />
clockwise until the waveform is a pure sine wave.<br />
5 PILOT LEVEL<br />
Disconnect the audio input. Switch the pilot on. Adjust R86 to give a deviation of<br />
6.75kHz.<br />
In any of the above cases, if an RDS/SCA unit is to be connected, the output level of it<br />
may need re-calibration.<br />
Page 12
8 Specifications<br />
──────────────────────────────────<br />
Frequency range<br />
87.5 to 108 MHz in 50kHz steps<br />
Frequency stability<br />
9 How to contact Eddystone Broadcast Limited<br />
──────────────────────────────────<br />
For all enquiries write to:-<br />
Eddystone Broadcast Limited<br />
26 Arden Road<br />
Arden Forest Industrial Estate<br />
Alcester<br />
Warwickshire<br />
B49 6EP<br />
Or telephone 01789 762278 within the UK, +44 1789 762278 from outside the UK.<br />
Or fax 01789 766033 within the UK, +44 1789 766033 from outside the UK.<br />
Or email sales@eddystone-broadcast.com<br />
Alternatively visit our web site: http://www.eddystone-broadcast.com/<br />
Page 14
10 Technical Section Contents<br />
──────────────────────────────────<br />
10.1 PLL7 Modulator PCB<br />
10.2 PSU15 Power Supply PCB<br />
10.3 DLM3 Limiter PCB (<strong>FM</strong>10/M only)<br />
10.4 LimX Stereo coder (<strong>FM</strong>10/S only)<br />
10.5 <strong>FM</strong>10-PA 10W Power amplifier<br />
Page 15
10.1 PLL7<br />
──────────────────────────────────<br />
The frequency determining element is formed by coil L1 and varicap diodes VD1 and<br />
VD2, together with capacitors C17- C20. These components are used as part of a<br />
cascode oscillator whose output is then buffered by transistor T3. The RF output from<br />
T3 is impedance matched to the base of transistor T5 by RFT1, a 4 to 1 matching<br />
transformer. The high power output from T5 is impedance matched by coils L2 and L3<br />
and associated capacitors to the 50 ohm output socket CON2. These components also<br />
provide harmonic filtering.<br />
The PLL circuit is primarily IC2 which is a serially programmable PLL chip. The<br />
microcontroller IC3 reads the dial switches at switch on and outputs a serial code to the<br />
PLL chip in a format that determines the output frequency that the PLL will try and lock<br />
the transmitter to. The PLL chip outputs control pulses to the loop filter built around op<br />
amp IC4. The loop filter takes the sharp pulses from the PLL chip and converts them<br />
into a smoothed signal ready to apply to the frequency determining components,<br />
varicap diodes VD1 and VD2. IC1 is an analogue switch that shorts out two of the<br />
resistors in the loop filter which enables the transmitter to get on frequency faster.<br />
When the oscillator is on frequency the Analogue switch switches out which greatly<br />
improves the audio response of the transmitter. The microcontroller IC3 determines<br />
when to switch the analogue switch in and out by reading the lock detect signals from<br />
the PLL chip. The microcontroller can also use this information to switch off transistor<br />
T3 with open collector configured T4 which mutes the RF output when the transmitter is<br />
out of lock. LED1 provides visual indication of the PLL locked condition.<br />
The master clock oscillator (OSC1) determines the accuracy of the output frequency. It<br />
is a high stability temperature compensated crystal oscillator (TCXO). The frequency<br />
can be trimmed if required by adjusting the small trimmer located beneath a hole in the<br />
oscillator module.<br />
<strong>Audio</strong> is fed into the modulation input connector CON2. From here the signal passes to<br />
variable resistor VR2 where modulation levels can be set, it is then passed via R29 to<br />
the varicap diodes.<br />
Page 16
Page 17
10.2 PSU15<br />
──────────────────────────────────<br />
Page 18
10.3 DLM3<br />
──────────────────────────────────<br />
Page 19
Page 20
10.4 LimX<br />
──────────────────────────────────<br />
Page 21
Page 22
10.5 <strong>FM</strong>10-PA<br />
──────────────────────────────────<br />
Page 23
11 Declaration of conformity<br />
──────────────────────────────────<br />
Name of Manufacturer:<br />
sbs<br />
Product:<br />
<strong>FM</strong>10 <strong>FM</strong> Exciter<br />
Declaration:<br />
The product described above compiles with the requirements of the Low Voltage Directive<br />
(73/23/EEC) and the protection requirements of the EMC Directive (89/336/EEC) issued<br />
by the Commission of the European Community.<br />
Compliance with these directives implies conformity to the following European Standards:<br />
EN 60065:1998<br />
EN 50081-2:1994<br />
EN 50082-2:1995<br />
Safety requirements for mains operated electronic and<br />
related apparatus for household and similar general<br />
use<br />
Electromagnetic compatibility. Generic emission standard.<br />
Industrial environment<br />
Electromagnetic compatibility. Generic immunity standard.<br />
Industrial environment<br />
Additionally, the product described above complies with all relevant parts of the following<br />
standards:<br />
ETS 300 384:1995 Radio broadcasting systems; Very High Frequency (VHF),<br />
frequency modulated, sound broadcasting transmitters<br />
Signed:<br />
On file<br />
Date of Issue:<br />
16. 05. 2001<br />
for and on behalf<br />
of sbs, UK<br />
Pyers Easton<br />
CEO<br />
Page 24