Natural Gas Conversion Kit - Char-Broil Grills
Natural Gas Conversion Kit - Char-Broil Grills
Natural Gas Conversion Kit - Char-Broil Grills

You also want an ePaper? Increase the reach of your titles
YUMPU automatically turns print PDFs into web optimized ePapers that Google loves.
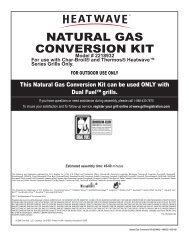
NATURAL GAS<br />
CONVERSION KIT<br />
Model # 4584625<br />
For use with <strong>Char</strong>-<strong>Broil</strong>® RED Series <strong>Grills</strong> Only.<br />
FOR OUTDOOR USE ONLY<br />
This <strong>Natural</strong> <strong>Gas</strong> <strong>Conversion</strong> <strong>Kit</strong> can be used ONLY with<br />
Dual Fuel grills.<br />
If you have questions or need assistance during assembly, please call 1-888-430-7870<br />
To insure your satisfaction and for follow-up service, register your grill online at www.grillregistration.com<br />
Estimated assembly time: 45-60 minutes<br />
The following are trademarks registered by W.C. Bradley Co. in the U.S. Patent and Trademark Office: <strong>Char</strong>-<strong>Broil</strong>®; America's Legendary Barbeque Company®; American Gourmet®; Bandera®;<br />
BrushHawg®; CB940®; <strong>Char</strong>-Diamonds®; <strong>Char</strong>-<strong>Broil</strong> <strong>Char</strong>coal/<strong>Gas</strong>®; DiamondFlame®; Everybody <strong>Grills</strong>®; Everybody Outside®; FastStart®; Fireball®; Firenzy®; FlavorMaster®; Grill2Go®; Grill2Go®<br />
Express®; Grill Lovers®; H20 Smoker®; Keepers of the Flame®; New Braunfels Smoker Company®; Oklahoma Joe's®; Patio Bistro®; Patio Caddie®; Patio <strong>Kit</strong>chen®; Precision Flame®; Quantum®; Santa<br />
Fe®; Sear and Grill®; Sierra®; Signature Series®; The Big Easy®; The Minute Grill®; Trentino®; Wild West Tradition®; and the following marks:<br />
The following are trademarks of W.C. Bradley Co.: Commercial Series; Designer Series; Grill2Go® Advantage; Longhorn; Double Chef; QuickSet; Ready When You Are; Hog and Yard<br />
Bird; You Bring the Party; SureFire; Universal Grill Parts<br />
TEC is a trademark of Tec Infrared <strong>Grills</strong>.<br />
® ®<br />
Protected under one or more of the following U.S. Patents: 4,989,579; 5,421,319; 5,458,309; 5,579,755; 5,996,573; 6,114,666; 6,135,104; 6,209,533; 6,279,566; 6,331,108; 6,484,900; 6,526,876; 6,595,197; 6,640,799; 6,640,803; 6,729,873; 6,739,473;<br />
6,749,424; 6,863,100; 6,935,327; 6,951,213; 6792,935; 7,047,590; D364,535; D372,637; D373,701; D377,735; D383,035; D397,910; D405,643; D406,005; D406,009 ; D413,043; D413,229; D414,982; D415,388; D416,164; D416,441; D417,587;<br />
D417,588; D422,516; D423,876; D428,303; D430,772; D435,396; D436,004; D438,059; D438,060; D438,427; D439,110; D442,505; D443,179; D443,354; D443,464; D447,384; D447,385; D447,909; D448,610; D448,614; D448,615; D448,616;<br />
D448,975; D449,492; D450,544; D451,759; D454,028; D454,031; D455,205; D455,206; D456,202; D456,222; D456,223; D457,789; D458,520; D458,760; D458,802; D459,088; D459,148 D459,149; D459,161; D459,163; D459,586; D459,943;<br />
D460,312; D460,313; D460,318; D461,359; D465,123; D465,693; D466,307; D466,439; D466,752; D473,414; D474,371; D477,498; D477,501; D477,504; D477,506; D477,746; D478,471; D478,472; D480,914; D491,410; D494,009; D494,413;<br />
D498,523; D500,359; D504,048; D530,098; D535,000; Canada: 87,743; 87,744; 97,504; 99,355; 102,037; 104,200; 2,315,567; 2,336,036; France: 010,231; 010,422; 010,590; 010,849; 1,089,646; Germany: 1,089,646; South Korea: 384,565; China:<br />
99,127,066.5; United Kingdom: 2,099,402; 1,089,646. Other Patents Pending.<br />
TM REVISION 00<br />
© 2008 W.C. Bradley Company<br />
© 2008 <strong>Char</strong>-<strong>Broil</strong>, LLC • Columbus, GA 31902 • Printed in USA • Assembly Instructions © 2008<br />
<strong>Natural</strong> <strong>Gas</strong> <strong>Conversion</strong> <strong>Kit</strong> 4584625 • 3498774 •10/31/08
TABLE OF CONTENTS<br />
For Your Safety . . . . . . . . . . . . . . . . . . . . . . . . . . . . . . . . . . . . . . 2<br />
Safety Symbols. . . . . . . . . . . . . . . . . . . . . . . . . . . . . . . . . . . . . . 2<br />
Installation Safety Precautions . . . . . . . . . . . . . . . . . . . . . . . . . . 3<br />
Food Safety . . . . . . . . . . . . . . . . . . . . . . . . . . . . . . . . . . . . . . . . 3<br />
Use and Care. . . . . . . . . . . . . . . . . . . . . . . . . . . . . . . . . . . . . 4-11<br />
Parts List/ Parts Diagram . . . . . . . . . . . . . . . . . . . . . . . . . . . . . 12<br />
Main Burner Assembly. . . . . . . . . . . . . . . . . . . . . . . . . . . . . 13-18<br />
<strong>Natural</strong> <strong>Gas</strong> Hose <strong>Conversion</strong>. . . . . . . . . . . . . . . . . . . . . . . . . .19<br />
Sideburner <strong>Conversion</strong>. . . . . . . . . . . . . . . . . . . . . . . . . . . . . 20-27<br />
Troubleshooting. . . . . . . . . . . . . . . . . . . . . . . . . . . . . . . . . . . . . 28<br />
Call Grill Service Center for Help and Parts<br />
• To order non-warranty replacement parts or accessories<br />
please visit us on the web at www.charbroil.com or call<br />
1-800-888-7870 and one of our friendly and knowledgeable<br />
agents will be glad to assist you.<br />
Safety Symbols<br />
The symbols and boxes shown below explain what each heading<br />
means. Read and follow all of the messages found throughout<br />
the manual.<br />
WARNING<br />
WARNING: Indicates an potentially hazardous situation<br />
which, if not avoided, could result in death or serious injury.<br />
CAUTION<br />
CAUTION: Indicates a potentially hazardous situation or<br />
unsafe practice which, if not avoided, may result in minor<br />
or moderate injury.<br />
DANGER<br />
DANGER: Indicates an imminently hazardous situation<br />
which, if not avoided, will result in death or serious injury.<br />
USE AND CARE<br />
<strong>Natural</strong> <strong>Gas</strong> Connections and Service Regulators<br />
Above 1/2 psi.<br />
Prior to 1998, all residual gas service regulators were<br />
set with an outlet pressure of 7 inches water column.<br />
In the 1998 edition of NFPA 54, the National Fuel <strong>Gas</strong><br />
Code, a change was made allowing service regulators<br />
of 2 and 5 psi.<br />
With this change it was also required that an in line<br />
regulator be connected between the service regulator<br />
and the appliance regulator if the 2 or 5 psi system is<br />
used. This additional regulator is not supplied with the<br />
product.<br />
It is possible for a consumer, making the connection<br />
themselves, or a plumber, not checking, to tap into a 2<br />
or 5 psi line. If a pressure of 2 psi or greater is supplied<br />
to the appliance regulator on certain grills it will shut<br />
down and not deliver any gas to the grill. Other<br />
concerns are the quick disconnect socket and hose<br />
which are only rated to 1/2 psi.<br />
If the quick disconnect socket, hose, and grill are<br />
properly connected and still not getting gas, delivery<br />
pressure needs to be verified. If pressure is greater<br />
than 1/2 psi, make sure that an in line regulator is<br />
present.<br />
Once the grill has been over-pressured, the regulator<br />
may or may not have been damaged. The best practice<br />
is to replace the regulator.<br />
CAUTION:<br />
Read and follow all safety statements, assembly<br />
instructions, and use and care directions before attempting<br />
to assemble and cook.<br />
INSTALLER/ASSEMBLER:<br />
Leave this manual with consumer.<br />
CONSUMER:<br />
Keep this manual for future reference.<br />
WARNING:<br />
Failure to follow all manufacturer’s instructions could result<br />
in serious personal injury and/or property damage.<br />
CAUTION:<br />
Some parts may contain sharp edges – especially as noted<br />
in the manual! Wear protective gloves if necessary.<br />
2
WARNING<br />
CALIFORNIA PROPOSITION 65<br />
1. Combustion by-products produced when using<br />
this product contain chemicals known to the State of<br />
California to cause cancer, birth defects, and other<br />
reproductive harm.<br />
2. This product contains chemicals, including lead<br />
and lead compounds, known to the State of<br />
California to cause cancer, birth defects or other<br />
reproductive harm.<br />
Wash your hands after handling this product.<br />
Installation Safety Precautions<br />
•<br />
Use grill, as purchased, only with LP (propane) gas and the<br />
regulator/valve assembly supplied. A conversion kit must be<br />
purchased for use with natural gas.<br />
•<br />
Grill installation must conform with local codes, or in their<br />
absence of local codes, with either the<br />
National Fuel <strong>Gas</strong><br />
Code, ANSI Z223.1/<br />
NFPA 5<br />
4, <strong>Natural</strong> <strong>Gas</strong> and Propane<br />
Installation Code, CSA B149.1, or Propane Storage and<br />
Handling Code, B149.2, or the Standard for Recreational<br />
Vehicles, ANSI A 119.2/NFPA 1192, and CSA Z240 RV Series,<br />
Recreational Vehicle Code, as applicable.<br />
• All electrical accessories (such as rotisserie) must be<br />
electrically grounded in accordance with local codes, or<br />
National Electrical Code, ANSI / NFPA 70 or Canadian<br />
Electrical Code, CSA C22.1.<br />
Keep any electrical cords and/or<br />
fuel supply hoses away from any hot surfaces.<br />
• This grill is safety certified for use in the United States and/or<br />
Canada only. Do not modify for use in any other location.<br />
Modification will result in a safety hazard.<br />
DANGER<br />
If you smell gas:<br />
1. Shut off gas to the appliance.<br />
2. Extinguish any open flame.<br />
3. Open lid.<br />
4. If odor continues, keep away from the<br />
appliance and immediately call your gas<br />
supplier or your fire department.<br />
CAUTION<br />
For residential use only. Do not use for commercial<br />
cooking.<br />
WARNING<br />
Do not attempt to repair or alter the<br />
hose/valve/regulator for any “assumed” defect. Any<br />
modification to this assembly will void your warranty<br />
and create the risk of a gas leak and fire. Use only<br />
authorized replacement parts supplied by<br />
manufacturer.<br />
Food Safety<br />
Food safety is a very important part of enjoying the outdoor<br />
cooking experience. To keep food safe from harmful bacteria,<br />
follow these four basic steps:<br />
Clean: Wash hands, utensils, and surfaces with hot soapy water<br />
before and after handling raw meat and poultry.<br />
Separate: Seperate raw meats and poultry from ready-to-eat<br />
foods to avoid cross contamination. Use a clean platter and<br />
utensils when removing cooked foods.<br />
Cook: Cook meat and poultry thoroughly to kill bacteria. Use a<br />
thermometer to ensure proper internal food temperatures.<br />
Chill: Refrigerate prepared foods and leftovers promptly.<br />
For more information call: USDA Meat and Poultry Hotline<br />
at 1-800-535-4555 in Washington, DC (202) 720-3333,<br />
10:00 am-4:00 pm .<br />
CAUTION<br />
Using pots larger than 6 quarts in capacity could<br />
exceed weight limit of the<br />
side burner shelf,<br />
resulting in failure<br />
of grill cart<br />
components.<br />
WARNING<br />
1. Do not store or use gasoline or other<br />
flammable liquids or vapors in the vicinity of<br />
this or any other appliance.<br />
2. An LP cylinder not connected for use shall not<br />
be stored in the vicinity of this or any other<br />
appliance.<br />
3
USE AND CARE<br />
DANGER<br />
NEVER store a spare cylinder under or near the applience<br />
or in an enclosed area.<br />
Never fill a cylinder beyond 80% full.<br />
LP Cylinder<br />
The LP cylinder used with your grill must meet the following<br />
requirements:<br />
1. Use LP cylinders only with these required measurements: 12”<br />
(30.5cm) (diameter) x 18” (45.7cm) (tall) with 20 lb. (9kg) capacity<br />
maximum.<br />
2. LP cylinders must be constructed and marked in accordance with<br />
specifications for LP cylinders of thr U.S. Department of<br />
Transportation (DOT) or for Canada, CAN/CSA-B339, cylinders,<br />
spheres and tubes for transportation of dangerous goods.<br />
Transport Canada (TC). See cylinder collar for marking.<br />
3. LP cylinder valve must have:<br />
-Type 1 outlet compatable with<br />
regulator or grill.<br />
-Safety relief valve.<br />
-UL listed Overfill Protection<br />
OPD Hand Wheel<br />
Device (OPD). This OPD safety<br />
feature is identified by a unique triangular hand wheel. Use only<br />
LP cylinders equipped with this type of valve.<br />
4. LP cylinder must be arranged for vapor withdrawal and include<br />
collar to protect LP cylinder valve. Always keep LP cylinder in<br />
upright position during use, transit or storage.<br />
An over filled or improperly stored cylinder is a hazard due<br />
to possible gas release from the safety relief valve.<br />
f you see, smell or hear gas escaping, immediately get<br />
away from the LP cylinder/appliance and call your fire<br />
department.<br />
This could cause an intense fire with risk of property<br />
damage, seriouse injury or death.<br />
LP Cylinder Removal, Transport and Storage<br />
1. Turn OFF all control knobs and LP cylinder valve. Turn<br />
coupling nut counterclockwise by hand only - do not use tools<br />
to disconnect. Loosen cylinder screw beneath bottom shelf,<br />
then lift LP cylinder up and out of cart. Install safety cap onto<br />
LP cylinder valve. Always use cap and strap supplied with<br />
valve. Failure to use safety cap as directed may result in<br />
serious personal injury and/or property damage.<br />
2. A disconnected LP cylinder in<br />
storage or being<br />
LP Cylinder Valve<br />
transported must have a safety cap<br />
installed (as shown). Do not store an LP<br />
cylinder in enclosed spaces such as a<br />
carport, garage, porch, covered patio or<br />
other building. Never leave an LP cylinder<br />
Safety<br />
inside a vehicle which may become overheated Cap<br />
by the sun.<br />
Retainer Strap<br />
3. Do not store an LP cylinder in an area where children play.<br />
LP cylinder in upright position for vapor withdrawal<br />
LP (liquefied Petroleum <strong>Gas</strong>)<br />
LP gas is nontoxic, odorless and colorless when produced. For<br />
Your Safety, LP gas has been given an odor (similar to rotten<br />
cabbage) so that it can be smelled.<br />
LP gas is highly flammable and may ignite unexpectedly when<br />
mixed with air.<br />
LP Cylinder Filling<br />
Use only licensed and experienced dealers.<br />
LP dealer must purge new cylinder before filling.<br />
Dealer should NEVER fill LP cylinder more than 80% of LP<br />
cylinder volume. Volume of propane in cylinder will vary by<br />
temperature.<br />
A frosty regulator indicates gas overfill. Immediately close LP<br />
cylinder valve and call local LP gas dealer for assistance.<br />
Do not release liquid propane (LP) gas into the atmosphere.<br />
This is a hazardous practice.<br />
To remove gas from LP cylinder, contact an LP dealer or call a<br />
local fire department for assistance. Check the telephone<br />
directory under “<strong>Gas</strong> Companies” for nearest certified LP<br />
dealers.<br />
4
LP Cylinder Exchange<br />
Many retailers that sell grills offer you the option of replacing<br />
your empty LP cylinder through an exchange service. Use only<br />
those reputable exchange companies that inspect, precision fill,<br />
test and certify their cylinders. Exchange your cylinder only<br />
for an OPD safety feature-equipped cylinder as described in<br />
the “LP Cylinder” section of this manual.<br />
Always keep new and exchanged LP cylinders in upright position<br />
during use, transit or storage.<br />
Leak test new and exchanged LP cylinders BEFORE<br />
connecting to grill.<br />
LP Cylinder Leak Test<br />
For your safety<br />
Leak test must be repeated each time LP cylinder is exchanged<br />
or refilled.<br />
Do not smoke during leak test.<br />
Do not use an open flame to check for gas leaks.<br />
Grill must be leak tested outdoors in a well-ventilated area, away<br />
from ignition sources such as gas fired or electrical appliances.<br />
During leak test, keep grill away from open flames or sparks.<br />
Use a clean paintbrush and a 50/50 mild soap and water<br />
solution. Brush soapy solution onto areas indicated by arrows in<br />
figure below.<br />
Connecting Regulator to the LP Cylinder<br />
1. LP cylinder must be properly secured onto grill. (Refer to<br />
assembly section of your grill manual).<br />
2. Turn all control knobs to the OFF position.<br />
3. Turn LP cylinder OFF by turning hand wheel clockwise to a<br />
Full Stop.<br />
4. Remove the protective cap from LP cylinder valve. Always use<br />
cap and strap supplied with valve.<br />
Safety Relief Valve<br />
Off<br />
Clockwise<br />
Strap and Cap<br />
OPD Hand Wheel<br />
Type 1 outlet with<br />
thread on outside<br />
Do not use household cleaning agents.<br />
components can result.<br />
Damage to gas train<br />
Do not use a POL transport<br />
plug (plastic part with external<br />
threads)! It will defeat the<br />
safety feature of the valve.<br />
5. Hold regulator and insert nipple into LP<br />
cylinder valve. Hand-tighten the<br />
coupling nut, holding regulator in a<br />
straight line with LP cylinder valve so<br />
as not to cross-thread the connection.<br />
WARNING<br />
Nipple has to be centered<br />
into the LP cylinder valve.<br />
If “growing” bubbles appear do not use or move the<br />
LP cylinder. Contact an LP gas supplier or your fire<br />
department!<br />
5
Straight<br />
Hold coupling nut and regulator<br />
as shown for proper connection<br />
to LP cylinder valve.<br />
Connecting Regulator to the LP Cylinder (Con’t.)<br />
6. Turn the coupling nut clockwise and tighten to a Full Stop.<br />
The regulator will seal on the back-check feature in the LP<br />
cylinder valve, resulting in some resistance. An additional<br />
one-half to three-quarters turn is required to complete the<br />
connection. Tighten by hand only - do not use tools.<br />
NOTE:<br />
If you cannot complete the connection, disconnect regulator and<br />
repeat steps 5 and 6. If you are still unable to complete the<br />
connection, do not use this regulator!<br />
Leak Testing Valves, Hoses and Regulator<br />
1. Turn all control knobs to the OFF position.<br />
2. Be sure regulator is tightly connected to LP cylinder.<br />
3. Completely open LP cylinder valve by turning hand wheel<br />
counterclockwise. If you hear a rushing sound, turn gas off<br />
immediately. There is a major leak at the connection. Correct<br />
before proceeding.<br />
4. Brush soapy solution onto areas circled below.<br />
Never remove threaded orifice<br />
at end of valve during leak<br />
testing of valves.<br />
DANGER<br />
Do not insert any tool or foreign object into the valve outlet<br />
or safety relief valve. You may damage the valve and<br />
cause a leak. Leaking propane may result in explosion,<br />
fire, severe personal injury, or death.<br />
WARNING<br />
Outdoor gas appliance is not intended to be installed in<br />
or on a boat.<br />
Outdoor gas appliance is not intended to be installed in<br />
or on an RV.<br />
Never attempt to attach this grill to the self-contained LP<br />
gas system of a camper trailer or motor home.<br />
Do not use grill until leak-tested.<br />
If a leak is detected at any time, STOP and call the fire<br />
department.<br />
If you cannot stop a gas leak IMMEDIATELY close LP<br />
cylinder valve and call LP gas supplier or your fire<br />
department!<br />
5. If “growing” bubbles appear there is a leak. Close LP cylinder<br />
valve immediately and retighten connections. If leaks cannot<br />
be stopped do not try to repair. Call for replacement parts.<br />
Order new parts by giving the serial, model number and name<br />
and part number of items needed (see parts list) to the Grill<br />
Service Center at 1-888-430-7870.<br />
6. Always close LP cylinder valve after performing leak test by<br />
turning hand wheel clockwise.<br />
6
WARNING<br />
For Safe Use of Your Grill and to Avoid Serious<br />
Injury:<br />
-Do not let children operate or play near grill.<br />
-Keep grill area clear and free from materials that burn.<br />
-Do not block holes in sides or back of grill.<br />
-Check burner flames regularly.<br />
-Use grill only in well-ventilated space. NEVER use in<br />
enclosed space such as carport, garage, porch, covered<br />
patio, or under an overhead structure of ant kind.<br />
-Do not use charcoal or ceramic briquets in a gas grill.<br />
(Unless briquets are supplied with your grill)<br />
-Use grill at least 3 ft. from any wall or surface.<br />
Maintain 10ft. clearance to objects that can catch fir or<br />
sources of ignition such as pilot lights on water heaters,<br />
live electrical appliances, etc.<br />
Apartment Dwellers:<br />
Check with apartment management to learn the<br />
requirements and fire codes for using an LP gas grill in<br />
your apartment complex. If allowed, use outside on the<br />
ground floor with a three (3) foot clearance from walls or<br />
rails. Do not use on or under balconies.<br />
NEVER attempt to light burner with lid closed. A<br />
buildup of non-ignited gas inside a closed grill is<br />
hazardous.<br />
Never operate grill with LP cylinder out of correct<br />
position specified in assembly instructions.<br />
Always close LP cylinder valve and remove coupling<br />
nut before moving LP cylinder from specified<br />
operation position.<br />
Safety Tips<br />
- Before opening LP cylinder valve, check the coupling nut for<br />
tightness.<br />
- When grill is not in use, turn off all control knobs and LP cylinder<br />
valve.<br />
- Never move grill while in operation or still hot.<br />
- Use long-handled barbecue utensils and oven mitts to avoid<br />
burns and splatters.<br />
- Maximum load for sideburner and side shelf is 10 lbs.<br />
- The grease tray must be inserted into grill and emptied after<br />
each use. Do not remove grease tray until grill has completely<br />
cooled.<br />
- Clean grill often, preferably after each cookout. If a bristle brush<br />
is used to clean any of the grill cooking surfaces, ensure no<br />
loose bristles remain on cooking surfaces prior to grilling. It is<br />
not recommended to clean surfaces while grill is hot.<br />
- If you notice grease or other hot material dripping from grill onto<br />
valve, hose or regulator, turn off gas supply at once. Determine<br />
the cause, correct it, then clean and inspect valve, hose and<br />
regulator before continuing. Perform a leak test.<br />
- Keep ventilation openings in cylinder enclosure (grill Cart) free<br />
and clean of debris.<br />
- Do not store objects or materials inside the grill cart enclosure<br />
that could block the flow of combustion air to the underside of<br />
either the control panel or the firebox bowl.<br />
- The regulator may make a humming or whistling noise during<br />
operation. This will not affect safety or use of grill.<br />
- If you have a grill problem see the “Troubleshooting Section” of<br />
your grill manual.<br />
- If the regulator frosts, turn off grill and LP cylinder valve<br />
immediately. This indicates a problem with the cylinder and it<br />
should not be used on any product. Return to supplier!<br />
CAUTION<br />
Putting out grease fires by closing the lid is not possible.<br />
<strong>Grills</strong> are well ventilated for safety reasons.<br />
Do not use water on a grease fire. Personal injury may<br />
result. If grease fire develops, turn knobs and LP cylinder<br />
off.<br />
Do not leave grill unattended while preheating or burning<br />
off food residue on Hi. If grill has not been regularly<br />
cleaned, a grease fire can occur that may damage the<br />
product.<br />
Main Burner Ignitor Lighting<br />
Do not lean over grill while lighting.<br />
1. Turn OFF all <strong>Gas</strong> Burner Control Valves.<br />
2. Turn ON gas source or tank.<br />
3. Open lid during lighting.<br />
4. To ignite turn burner control valve to .<br />
5. Once burner has ignited (use flame viewing ports on front of<br />
control panel to verify ignition), turn knob to desired setting.<br />
6. If ignition does not occur in 5 seconds, turn the burner controls<br />
OFF, wait 5 minutes, and repeat the lighting procedure.<br />
7. Ignite remaining burners by repeating steps 4 through 6 for<br />
each burner.<br />
Lighting instructions continued on next page.<br />
7
8<br />
WARNING<br />
Turn controls and gas source or tank OFF when not<br />
in use.<br />
CAUTION<br />
If ignition does NOT occur in 5 seconds, turn the burner<br />
controls OFF, wait 5 minutes and repeat the lighting<br />
procedure. If the burner does not ignite with the valve<br />
open, gas will continue to flow out of the burner and could<br />
accidently ignite with risk of injury.<br />
Main Burner Match-Lighting<br />
Do not lean over grill while lighting.<br />
1. Open lid during lighting.<br />
2. Place match into match holder (hanging from side of cart).<br />
Light match, place into lighting hole on right or left side of<br />
firebox.<br />
3. Push in and turn far right or far left knob to position. Be<br />
sure burner lights and stays lit.<br />
4. If ignition does not occur in 5 seconds, turn the burner control<br />
knob OFF, wait 5 minutes, and repeat the lighting procedure.<br />
5. Light other burners by pushing knob in and turning to<br />
position.<br />
Warning:<br />
Top cover must be open<br />
when side burner(s) is in<br />
operation.<br />
Side Burner Ignitor Lighting<br />
Do not lean over grill while lighting.<br />
1. Turn OFF all <strong>Gas</strong> Burner Control Valves.<br />
2. Turn ON gas source or tank.<br />
3. To ignite side burner, open side burner cover.<br />
4. Turn side burner knob to , to ignite burner.<br />
5. Once burner has ignited, turn knob to desired setting.<br />
6. If side burner does not light, turn knob to OFF, wait 5<br />
minutes, and repeat the lighting procedure.<br />
Side Burner Match-Lighting<br />
1. Open lid during lighting. Turn on<br />
gas at LP cylinder.<br />
2. Place lit match near burner.<br />
3. Turn side burner knob to .<br />
Burner Flame Check<br />
Remove cooking grates and troughs. Light burners, rotate knobs<br />
from to . You should see a bigger flame in<br />
position than seen on . Perform burner flame check on side<br />
burner, also. Always check flame prior to each use. If only low<br />
flame is seen refer to “Sudden drop or low flame” in the<br />
Troubleshooting Section of your grill manual.<br />
Turning Grill Off<br />
Turn all knobs to OFF position. Turn LP cylinder off by<br />
turning hand-wheel clockwise to a full stop.<br />
Ignitor Check<br />
Turn <strong>Gas</strong> OFF at LP cylinder. Press and hold electronic ignitor<br />
button. “Click” should be heard and spark seen each time<br />
between collector box or burner and electrode. See<br />
“Troubleshooting” in your grill manual if no click or spark.<br />
Valve Check<br />
IMPORTANT: Make sure gas is OFF at LP cylinder before<br />
checking valves. Knobs lock in OFF position. To check valves,<br />
first push in knobs and release, knobs should spring back. If<br />
knobs do not spring back, replace valve assembly before using<br />
grill. Turn knobs to LOW position then turn back to OFF position.<br />
Valves should turn smoothly.<br />
Hose Check<br />
Before each use, check to see if hoses are cut or worn. Replace<br />
damaged hoses before using grill. Use only valve/hose/regulator<br />
specified by manufacturer.<br />
General Grill Cleaning<br />
Do not mistake brown or black accumulation of grease and<br />
smoke for paint. Interiors of gas grills are not painted at the<br />
factory (and should never be painted) . Apply a strong solution<br />
of detergent and water or use a grill cleaner with scrub brush on<br />
insides of grill lid and bottom. Rinse and allow to completely air<br />
dry. Do not apply a caustic grill/oven cleaner to painted<br />
surfaces.<br />
Plastic parts: Wash with warm soapy water and wipe dry. Do<br />
not use citrisol, abrasive cleaners, degreasers or a concentrated<br />
grill cleaner on plastic parts. Damage to and failure of parts can<br />
result.<br />
Porcelain surfaces: Because of glass-like composition, most<br />
residue can be wiped away with baking soda/water solution or<br />
specially formulated cleaner. Use non-abrasive scouring powder<br />
of stubborn stains.<br />
Painted surfaces: Wash with mild detergent or non-abrasive<br />
cleaner and warm soapy water. Wipe dry with a soft nonabrasive<br />
cloth.<br />
Stainless steel surfaces: To maintain your grill’s high quality<br />
appearance, wash with mild detergent and warm soapy water<br />
and wipe dry with a soft cloth after each use. Baker-on grease<br />
deposits may require the use of an abrasive plastic cleaning pad.<br />
Use only in direction of brushed finish to avoid damage. Do not<br />
use abrasive pad on areas with graphics.<br />
Cooking surfaces: If a bristle brush is used to clean any of the<br />
grill cooking surfaces, ensure no loose bristles remain on<br />
cooking surfaces prior to grilling. It is not recommended to clean<br />
cooking surfaces while grill is hot.
CAUTION<br />
SPIDER ALERT!<br />
SPIDER AND WEBS<br />
INSIDE BURNER TUBE<br />
Cleaning the Burner Assembly<br />
Follow these instructions to clean and/or replace parts of burner<br />
assembly or if you have trouble igniting grill.<br />
1. Turn gas OFF at control knobs and LP cylinder.<br />
2. Remove cooking grates and flame tamers.<br />
3. Remove screws and carryover tubes from rear of burners.<br />
4. Remove screw and washers to disengage burner from bracket<br />
on firebox.<br />
5. Remove screws to detach electrode from burner. Electrode<br />
should remain in firebox.<br />
6. Carefully lift each burner up and away from valve openings.<br />
If you notice that your grill is getting hard to light or that the<br />
flame isn’t as strong as it should be, take the time to check and<br />
clean the venturi’s.<br />
CONTROL PANEL<br />
We suggest three ways to clean the burner tubes. Use the one<br />
easiest for you.<br />
A. Bend a stiff wire (a light weight coat hanger works well)<br />
into a small hook. Run the hook through each burner<br />
several times.<br />
VALVE<br />
SPIDER WEBS<br />
INSIDE VENTURI<br />
In some areas of the country, spiders or small insects have been<br />
known to create “flashback” problems. The spiders spin webs, build<br />
nests and lay eggs in the grill’s venturi tubes(s) obstructing the flow of<br />
gas to the burner. The backed-up gas can ignite in the venturi behind<br />
the control panel. This is known as a flashback and it can damage<br />
your grill and even cause injury.<br />
To prevent flashbacks and ensure good performance the burner and<br />
venturi assembly should be removed from the grill and cleaned before<br />
use whenever the grill has been idle for an extended period.<br />
Storing Your Grill<br />
-Clean cooking grates.<br />
-Store in a dry location.<br />
-When LP cylinder is connected to grill, store outdoors in a<br />
well-ventilated space and out of reach of children.<br />
-Cover grill if stored outdoors. Choose from a variety of grill<br />
covers offered by manufacturer.<br />
-Store grill indoors ONLY if LP cylinder is turned off and<br />
disconnected, removed from grill and stored outdoors.<br />
-When removing grill from storage, follow “Cleaning the<br />
Burner Assembly” instructions before starting grill.<br />
B. Use a narrow bottle brush with a flexible handle (do not<br />
use a brass wire brush), run the brush through each<br />
burner tube several times.<br />
C. Wear eye protection: Use an air hose to force air into the<br />
burner tube and out the burner ports. Check each port to<br />
make sure air comes out each hole.<br />
7. Wire brush entire outer surface of burner to remove food<br />
residue and dirt.<br />
8. Clean any blocked ports with a stiff wire such as an open paper<br />
clip.<br />
9. Check burner for damage, due to normal wear and corrosion<br />
some holes may become enlarged. If any large cracks or holes<br />
are found replace burner.<br />
VERY IMPORTANT: Burner tubes must<br />
re-engage valve openings.<br />
See illustration at right.<br />
Burner<br />
Correct<br />
burner-to-valve<br />
engaement<br />
10. Attach electrode to burner.<br />
11. Carefully replace burners.<br />
12. Attach burners to brackets on firebox.<br />
13. Reposition carryover tubes and attach to burners. Replace<br />
flame tamers and cooking grates.<br />
Electrode<br />
9
This unit should be hard plumbed using components that<br />
meet National Fuel <strong>Gas</strong> Code.<br />
WARNING<br />
Do not use flexible gas hose supplied for Drop-in Models.<br />
Connecting Your Grill to the <strong>Natural</strong> <strong>Gas</strong> Source.<br />
4. When the quick disconnect socket and the gas hose are connected,<br />
a valve in the socket opens automatically to permit full gas flow.<br />
When the gas hose is disconnected, the valve in the socket instantly<br />
and positively shuts off the flow of gas. Because the valve in the<br />
socket positively shuts off the flow of gas, the grill can be<br />
disconnected from the gas source by disconnecting the gas hose<br />
from the quick disconnect socket. The socket should be left attached<br />
to the gas source (house piping). Figure C, below, shows properly<br />
connected hose and socket.<br />
1.<br />
A professionally-installed shut-off valve between the supply piping<br />
and the socket is recommended, but not required, by the National<br />
Fuel <strong>Gas</strong> Code. Socket connection must be made outdoors.<br />
2. Coat the gas supply pipe nipple with gas resistant pipe dope or<br />
approved teflon tape. Screw socket onto gas supply pipe (house gas<br />
source) as shown in Figure A below, and wrench-tighten.<br />
CAUTION<br />
The quick disconnect socket should never be connected<br />
to the grill. Direction of gas flow is indicated on the<br />
socket.<br />
Quick disconnect socket<br />
House piping<br />
Figure C<br />
With proper assembly, the gas hose cannot be removed without<br />
pushing the quick disconnect sleeve back. To disconnect, push<br />
sleeve back and pull plug out of sleeve (this automatically shuts off<br />
gas).<br />
Please Note: Hose and assembly are C.S.A. listed for natural gas,<br />
manufactured gas, mixed gas and for liquefied petroleum and for<br />
LP <strong>Gas</strong>-Air mixtures on basis of 0.64 specific gravity for 1000<br />
BTU’s per cubic foot of gas at 0.3 in. water column pressure drop.<br />
Only ANSI Z21.54 approved hoses should be used with this grill.<br />
Figure A<br />
3. Pull back the sleeve on the quick disconnect socket and insert the<br />
unattached end of the gas hose into the socket. Release the sleeve<br />
and continue pushing the hose into the socket until the sleeve snaps<br />
into the locked position. See Figure B.<br />
The appliance and its individual shut off valve must be<br />
disconnected from the gas supply piping system during any<br />
pressure testing on that system at test pressures in excess of 1/2<br />
psig (3.5kPa).<br />
The appliance must be isolated from the gas supply piping system<br />
by closing its individual manual shutoff valve during any pressure<br />
testing of the gas supply piping system at test pressures equal to<br />
or less than 1/2 psi (3.5kPa).<br />
<strong>Gas</strong> hose<br />
Sleeve<br />
Figure B<br />
WARNING<br />
Do not use hard metal piping of any kind to connect this<br />
type of grill to natural gas source. Use only hose<br />
specified by manufacturer. Using hard metal piping or<br />
convoluted metal tubing is an unsafe practice. Movement<br />
of the grill can cause breakage of metal pipe.<br />
10
Leak Testing<br />
1. Turn all grill control knobs to OFF.<br />
2. Be sure gas hose is tightly connected to gas source.<br />
3. Completely open gas source. If you hear a rushing sound, turn<br />
gas off immediately. There is a major leak at the connection.<br />
Correct before proceeding.<br />
4. Brush soapy solution onto area circled below.<br />
CAUTION<br />
CAUTION: Sideburner lid must be open when sideburner<br />
is in operation, if so equipped.<br />
Burner Flame Check<br />
• Remove cooking grates and flame tamers. Light burners,<br />
rotate knobs from HIGH to LOW. You should see a smaller<br />
flame in low position than seen on HIGH. Perform burner flame<br />
check on sideburner also. Always check flame prior to each<br />
use. If only low flame is seen refer to "Sudden drop or low<br />
flame" in the Troubleshooting Section.<br />
HIGH<br />
LOW<br />
5. If “growing” bubbles appear, there is a leak. Close gas<br />
source immediately and tighten connection. If leaks cannot<br />
be stopped do not try to repair. Call for replacement parts.<br />
Order new parts by giving the serial, model number and name<br />
of items needed to the Grill Service Center at 1-800-241-7548<br />
(USA) or 1-800-387-6057 (Canada).<br />
6. Always close gas source after performing leak test.<br />
Safety Tips<br />
When grill is not in use, turn off all control knobs and gas<br />
source.<br />
Hose Check<br />
• Before each use, check to see if hoses are cut, worn or kinked.<br />
Replace damaged hoses before using grill. Use only<br />
valve/hose/regulator specified by manufacturer.<br />
Normal<br />
Hose<br />
Kinked<br />
Hose<br />
Tools required for assembly:<br />
Orifice Removal Tool - Provided<br />
Adjustable Wrench - Not provided<br />
Standard #2 Phillips Screwdriver - Not provided<br />
NOTE: Magnetic tip screwdrivers are recommended, but not required.<br />
Estimated assembly time: 45-60 minutes<br />
11
PARTS LIST/DIAGRAM<br />
Note: Illustrations are not to scale.<br />
Key Qty. Description Part No.<br />
A . . . . . 4 . . . . . Main Burner <strong>Natural</strong> <strong>Gas</strong> Bezel. . . . . . . . . . . . . . . . . . . . . . . . . . . . . . . . . . . . . . . . . . . . 80007893<br />
B . . . . . 1 . . . . . Sideburner <strong>Natural</strong> <strong>Gas</strong> Bezel. . . . . . . . . . . . . . . . . . . . . . . . . . . . . . . . . . . . . . . . . . . . . 80007894<br />
C . . . . . 1 . . . . . Griddle <strong>Natural</strong> <strong>Gas</strong> Bezel. . . . . . . . . . . . . . . . . . . . . . . . . . . . . . . . . . . . . . . . . . . . . . . . 80007886<br />
D . . . . . 1 . . . . . Orifice Driving Tool . . . . . . . . . . . . . . . . . . . . . . . . . . . . . . . . . . . . . . . . . . . . . . . . . . . . 80004378<br />
E . . . . . 1 . . . . . 10 ft., 3/8” <strong>Natural</strong> <strong>Gas</strong> Hose . . . . . . . . . . . . . . . . . . . . . . . . . . . . . . . . . . . 3496263<br />
F. . . . . 4 . . . . . Main Burner NG Orifice - 4 Burner Grill (Yellow Dot- #55). . . . . . . . . . . . . . . . . . . . . 80018401<br />
G . . . . 1 . . . . . Sideburner/Griddle NG Orifice (Red Dot-1.45mm) . . . . . . . . . . . . . . . . . . . . . . . . . . .80007768<br />
H . . . . 3 . . . . . Main Burner NG Orifice - 3 Burner Grill (Black Dot- #54) . . . . . . . . . . . . . . . . . . . . .80007767<br />
I . . . . . 3 . . . . . Main Burner NG Orifice - 3 Burner Grill (No Color Dot- #56) . . . . . . . . . . . . . . . . . . .3499617<br />
J . . . . 4 . . . . .#8 x3/8” Self-Tapping Screw . . . . . . . . . . . . . . . . . . . . . . . . . . . . . . HAB016038CPNBD<br />
A<br />
B<br />
C<br />
#55 Orifice<br />
Yellow Dot<br />
#1.45mm Orifice<br />
Red Dot<br />
#54 Orifice<br />
Black Dot<br />
D<br />
E<br />
F<br />
G<br />
H<br />
#56 Orifice<br />
No Color Dot<br />
I<br />
J<br />
12
Main Burner <strong>Conversion</strong><br />
1<br />
- First, make sure all control knobs are in the OFF position, LP tank valve is closed, and tank is disconnected from regulator and<br />
removed from grill.<br />
- Next, open Lid and remove Warming Rack, Cooking Grates, and Troughs.<br />
Your Grill may differ from illustrations shown. This manual covers 3 & 4 burner grills, use pictures<br />
as reference only.<br />
Warming Rack<br />
Cooking Grates<br />
(3 or 4 depending on Unit purchased)<br />
Trough<br />
Trough<br />
NOTE: Grill lid is shown<br />
removed for clarity. DO NOT<br />
remove the grill lid.<br />
2<br />
Remove Burners<br />
- Remove screws from each burner assembly. There are four (4) screws per burner assembly.<br />
- Lift each burner assembly up and out of the firebox.<br />
Firebox<br />
Remove Burner<br />
Attachment<br />
Screws<br />
(4 per burner)<br />
Burners<br />
shown in place.<br />
(4 burner grill shown.)<br />
Lift and<br />
remove<br />
burner<br />
assembly<br />
from<br />
firebox.<br />
13
Main Burner <strong>Conversion</strong> (Cont.)<br />
3<br />
Install Screws in Burner Venturi Tube<br />
- Locate the screw hole in the burner assembly venturi tube.<br />
- Install one #8x3/8” self-tapping screw into the venturi tube screw hole. Screw should be threaded completely into the hole.<br />
- Repeat for all burner assemblies.<br />
- Lay burner assemblies aside.<br />
Burner assembly<br />
Screw Hole<br />
Install #8x3/8”<br />
Self-Tapping<br />
Screw into<br />
screw hole. Thread<br />
screw COMPLETELY<br />
into the screw hole.<br />
Burner Venturi Tube<br />
4<br />
Remove LP tank Heat Shield<br />
- Open the cabinet doors. Remove any stored items from the cabinet.<br />
- Using a #2 Phillips screwdriver, remove the two #8x3/8” screws that attach the LP Tank Heat Shield to the door brace. Note: The rear of the<br />
LP Tank Heat Shield is held in place with tabs and slots.<br />
- Holding the front of the LP Tank Heat Shield, rotate it down and pull it forward to disengage the rear tabs from the back panel.<br />
- Place the LP Tank Heat Shield on the bottom shelf for storage.<br />
Door Brace<br />
LP Tank<br />
Heat Shield<br />
14<br />
Remove 2 #8x3/8”<br />
screws from LP Tank<br />
Heat Shield.<br />
NOTE: Cabinet doors are shown<br />
removed to enhance clarity<br />
DO NOT remove cabinet doors<br />
LP Tank<br />
Heat Shield<br />
In Stored<br />
Position
Main Burner <strong>Conversion</strong> (Cont.)<br />
5<br />
Remove LP Orifices<br />
- DO NOT completely remove the orifices at this point.<br />
- Insert the Orifice Driving Tool provided with <strong>Kit</strong> into the Firebox Burner opening, engage the tool with the orifice, and loosen each orifice 1-2<br />
turns, counter-clockwise, from its orifice holder.<br />
Firebox<br />
Firebox Burner<br />
Opening<br />
Orifice Driving Tool<br />
Orifice<br />
Top view of 3 burner firebox with<br />
burner assemblies removed.<br />
Firebox Burner<br />
Opening<br />
6<br />
Remove LP Orifices<br />
- Using your fingers in the area illustrated below, unscrew each orifice by hand.<br />
- Save the removed orifices for converting back to LP gas.<br />
Orifice<br />
Using your fingers,<br />
turn the orifice<br />
counter-clockwise<br />
to remove.<br />
Orifice<br />
Holder<br />
Orifice<br />
Holder<br />
Bracket<br />
15
Main Burner <strong>Conversion</strong> (Cont.)<br />
7<br />
Install <strong>Natural</strong> <strong>Gas</strong> (NG) Orifices<br />
- Using your fingers, thread the Main Burner NG Orifices into each orifice holder 2-3 turns, clockwise. Do not fully tighten the orifices at this time.<br />
- If your grill is a 3 Burner Red & Black lid grill use Main Burner NG Orifice - 3 Burner Grill (Black Dot- #54)<br />
- If your grill is a 3 Burner Stainless lid grill use Main Burner NG Orifice - 3 Burner Grill (No Color Dot- #56)<br />
- For a 4 burner grill use Main Burner NG Orifice - 4 Burner Grill (Yellow Dot-#55)<br />
Orifice<br />
Using your fingers,<br />
thread the orifice into<br />
the orifice holder two<br />
turns. (Clockwise)<br />
Orifice<br />
Holder<br />
8<br />
Install <strong>Natural</strong> <strong>Gas</strong> (NG) Orifices<br />
- Insert the Orifice Driving Tool into the Firebox Burner opening, and engage the orifice with the tool.<br />
- Tighten each orifice securely, turning it clockwise. NOTE: Tighten the orifice sufficiently to prevent gas leakage. DO NOT over-tighten<br />
Do not use any tool other than the Orifice Driving Tool!<br />
Firebox<br />
Firebox Burner<br />
Opening<br />
Orifice Driving Tool<br />
Orifice<br />
Top view of 3 burner firebox with<br />
burner assemblies removed.<br />
Engage the Orifice<br />
Driving Tool with<br />
the orifice<br />
16
Main Burner <strong>Conversion</strong> (Cont.)<br />
9<br />
Reinstall Burners<br />
- Place all burner assemblies into place in the firebox, align the burner assembly screw holes with the mating holes in the firebox.<br />
- Carefully insert the #8x3/8” screws through the burner assembly and into the firebox. Insert 4 screws per burner assembly.<br />
- Using a #2 Phillips screwdriver, not provided, barely tighten each screw. DO NOT over-tighten the burner attachment screws. These screws<br />
are used to hold the burner in place. Overtightening will cause problems later when attempting to clean your grill.<br />
Install Burner<br />
Attachment<br />
Screws<br />
(4 per burner)<br />
Firebox<br />
NOTE:<br />
Do not over-tighten<br />
the burner<br />
attachment<br />
screws.<br />
Burners shown in place.<br />
10<br />
Replace Main Burner Bezels and Control Knobs<br />
NOTE: REPLACE ONE BEZEL AT A TIME. DO NOT REMOVE ALL THE BEZELS AT THE SAME TIME.<br />
- Pull the Tube Burner Control Knobs off of Valve Stems.<br />
- Remove screws and washers that secure each Bezel to the Control Panel. Save removed Bezels for converting back to LP Tank <strong>Gas</strong>.<br />
- Install new <strong>Natural</strong> <strong>Gas</strong> Bezels provided with <strong>Kit</strong> (see illustration below) in place of old Bezels onto Control Panel, and secure using previously<br />
removed screws and washers. Assure proper alignment with control knob before fully tightening. Note: New bezels will change the rotation<br />
for the control knob to properly control ignition and flames for your grill.<br />
- Press Control Knobs back onto Valve Stems. Make adjustments needed to Bezels for free movement of Control Knobs.<br />
Screws<br />
Valve<br />
Stem<br />
Bezels<br />
<strong>Natural</strong> <strong>Gas</strong> Bezel<br />
80007893<br />
NOTE: Replace only one<br />
bezel at a time!<br />
Main Burner<br />
Control Knobs<br />
17
Main Burner <strong>Conversion</strong> (Cont.)<br />
11<br />
Reinstall LP Tank Heat Sheild<br />
- Insert tabs without screw holes(at rear of heat shield) into back panel slots.<br />
- Align the tabs with screw holes at the front of the heat shield to the cross brace.<br />
- Carefully insert the #8x3/8” screws through the tabs and into the cross brace.<br />
- Using a #2 Phillips screwdriver, not provided, tighten both screws. DO NOT over-tighten the screws.<br />
Tabs without<br />
screwholes at<br />
rear of Heat<br />
Shield.<br />
Tabs with<br />
screwholes at<br />
front of Heat<br />
Shield.<br />
Insert screws through front tabs<br />
and into door brace,<br />
then tighten.<br />
Door brace.<br />
Insert Tabs<br />
into Slots.<br />
LP Tank Heat<br />
Shield in place.<br />
18
<strong>Natural</strong> <strong>Gas</strong> Hose <strong>Conversion</strong><br />
12<br />
- Manifold connection is located on the right hand side and toward the front and inside of the cart.<br />
- Using a wrench, not provided, remove LP Regulator Hose Assembly from Manifold Connection. Save removed LP Manifold Connection for<br />
converting back to LP Tank <strong>Gas</strong>.<br />
6<br />
Manifold<br />
Connection<br />
LP Regulator<br />
Hose Assembly<br />
Cabinet doors shown removed<br />
for clarity. DO NOT remove<br />
cabinet doors.<br />
13<br />
- Secure the <strong>Natural</strong> <strong>Gas</strong> Hose Assembly using a wrench, not provided, to Manifold Connection.<br />
Manifold<br />
Connection<br />
<strong>Natural</strong> <strong>Gas</strong><br />
Hose Assembly<br />
If you have a model with a sideburner OR<br />
an Outdoor Stove and Griddle<br />
proceed to “Sideburner <strong>Conversion</strong>”<br />
on page 20<br />
19
Sideburner and Outdoor Stove&Griddle <strong>Conversion</strong><br />
NOTE: Your Grill will have one of the TWO sideburner styles shown in this manual. Check your grill to make sure you<br />
follow the correct assembly steps. The assembly steps for the second style of sideburner begins on page 25.<br />
14<br />
- Open the sideburner cover. Remove the griddle and cooking grate. (Sideburner cover not shown for clarity.)<br />
6<br />
- Pull the sideburner control knob off the valve stem. Remove the existing bezel by removing the two screws securing bezel to shelf fascia. Save<br />
the bezel for converting back to LP gas. Save screws for reuse.<br />
- Removing these screws will cause the gas valve to disengage from the back of the shelf fascia. This is normal.<br />
Griddle (If equipped) Cooking Grate<br />
Screws<br />
Bezel<br />
Valve<br />
Stem<br />
Sideburner<br />
Control Knob<br />
Shelf Fascia<br />
Main Burner<br />
Control Knob<br />
15<br />
- Remove the burner cap retainer clip. Pull down on clip from underneath the burner and pull it out through the center of the burner.<br />
- Remove the burner cap and wind diverter by lifting up from the burner.<br />
6<br />
STYLE 1 Sideburner<br />
Burner Cap<br />
Wind Diverter<br />
Pull down on clip<br />
from underneath<br />
burner<br />
Remove clip<br />
through center of<br />
burner<br />
Burner<br />
Burner Cap<br />
Retainer Clip<br />
20
Sideburner and Outdoor Stove&Griddle <strong>Conversion</strong><br />
16<br />
- Remove the ignitor wire from the electrode. Shown in view “A”<br />
6<br />
- Remove the two burner mounting screws and washers from the side shelf pan. Shown in view “B”<br />
- Lift up the burner to disengage the stud from it’s locating hole and maneuver the burner out of the side shelf pan. Shown in view “C”<br />
NOTE: The convoluted gas tubing is flexible and will allow sufficient clearance to complete this conversion. DO NOT twist or crimp the<br />
Convoluted (flexible) <strong>Gas</strong> Tubing. To do so may result in gas leakage<br />
A<br />
B<br />
Locating Stud<br />
Electrode<br />
5mm Silicone<br />
Washer<br />
#10 Lock Washer<br />
#10-24x3/8” Screws<br />
C<br />
Remove Ignitor<br />
wire from<br />
Electrode<br />
Remove Burner<br />
from side burner pan<br />
17<br />
- Locate the Sideburner Venturi underneath the sideburner shelf. The Sideburner Venturi will be suspended by the convoluted gas tubing.<br />
Carefully position the Sideburner Venturi so that you can access the Orifice Holder Bracket screws<br />
- Using a Phillips Screwdriver, remove two #5-40 screws from the Orifice Holder Bracket. Save these screws for reassembly later.<br />
- After removing the #5-40 screws, CAREFULLY pull Orifice Holder Bracket away from the Sideburner Venturi as shown in detail #1.<br />
NOTE: The convoluted gas tubing is flexible and will allow sufficient clearance to complete this conversion. DO NOT twist or crimp the<br />
Convoluted (flexible) <strong>Gas</strong> Tubing. To do so may result in gas leakage.<br />
6<br />
Sideburner<br />
Venturi<br />
Sideburner<br />
Venturi<br />
#5-40<br />
Screws<br />
Convoluted (Flexible)<br />
<strong>Gas</strong> Tubing<br />
Orifice<br />
Holder<br />
Bracket<br />
Orifice<br />
Sideburner<br />
Valve<br />
View from below sideburner shelf.<br />
Convoluted (Flexible)<br />
<strong>Gas</strong> Tubing<br />
Detail #1<br />
Orifice<br />
Holder<br />
Bracket<br />
21
Sideburner and Outdoor Stove&Griddle <strong>Conversion</strong><br />
18<br />
- Using a Phillips Screwdriver, not provided, remove the 4 sideburner pan screws.<br />
- Remove the sideburner pan by lifting it straight up.<br />
- At this point the orifice holder will be loose and more convenient to work with.<br />
NOTE: DO NOT twist or crimp the Corrugated <strong>Gas</strong> Tubing. To do so may result in gas leakage.<br />
6<br />
Orifice Holder<br />
Bracket<br />
View from back corner of side shelf<br />
19<br />
- Using an adjustable wrench, not provided, place the wrench securely on the Orifice Holder in the area shown below.<br />
- While holding the adjustable wrench firmly, use the Orifice Driving Tool to loosen and remove the Orifice by turning it counter-clockwise. 6<br />
- Thread the new Orifice, Sideburner/Griddle NG Orifice (Red Dot- 1.45mm), into the Orifice Holder by hand.<br />
- While holding the adjustable wrench firmly on the Orifice Holder, Tighten the Orifice with the Orifice Driving Tool by turning it clockwise. Tighten<br />
the orifice sufficiently to prevent gas leakage.<br />
DO NOT use any tool other than the Orifice Driving Tool to tighten the Orifice.<br />
Orifice Holder<br />
Bracket<br />
Orifice Holder<br />
Orifice - turn<br />
counter-clockwise<br />
to remove.<br />
Orifice Driving<br />
Tool<br />
Place adjustable wrench<br />
here while removing Orifice.<br />
22
Sideburner and Outdoor Stove&Griddle <strong>Conversion</strong><br />
20<br />
- With the new Orifice installed into the Orifice Holder, push the Orifice Holder Bracket onto the Sideburner Venturi.<br />
- Align the screw hole in the Orifice Holder Bracket and Sideburner Venturi, and using a Phillips Screwdriver, reinstall the #5-40 screw.<br />
NOTE: The convoluted <strong>Gas</strong> Tubing is flexible and will allow sufficient clearance to complete this conversion. DO NOT twist or crimp the<br />
Corrugated <strong>Gas</strong> Tubing. To do so may result in gas leakage.<br />
6<br />
Sideburner<br />
Venturi<br />
5-40 Screw<br />
Orifice<br />
Correct orifice- to-venturi<br />
engagement.<br />
#5-40<br />
Screws<br />
Orifice<br />
Holder<br />
Bracket<br />
Convoluted<br />
<strong>Gas</strong> Tubing<br />
5-40 Screw<br />
Orifice<br />
Holder<br />
Bracket<br />
Sideburner<br />
Valve<br />
View from below sideburner shelf.<br />
21<br />
- Install the Sideburner pan with the 4 sheet metal screws removed previously. Tighten screws only enough to secure sideburner pan. Shown A.<br />
6<br />
- Carefully manuever the burner into position. Shown (B)<br />
NOTE: The convoluted <strong>Gas</strong> Tubing is flexible and will allow sufficient clearance to complete this step. DO NOT twist or crimp the Corrugated<br />
<strong>Gas</strong> Tubing. To do so may result in gas leakage.<br />
- Reinstall 2 #10-24X3/8” screws and washers through sideburner pan and into burner. Shown C.<br />
A<br />
B<br />
C<br />
Reinstall the<br />
Sideburner Pan<br />
Locating Stud<br />
5mm Silicone Washer<br />
#10 Lock Washer<br />
#10-24x3/8” Screws<br />
Reinstall Burner<br />
to side burner pan<br />
23
Sideburner and Outdoor Stove&Griddle <strong>Conversion</strong><br />
22<br />
- Place side burner wind diverter over side burner aligning cutout<br />
- Place burner cap onto side burner and attach side burner cap clip. Shown B.<br />
- Place sideburner cooking grate onto side burner shelf, aligning grate legs with holes in shelf shown A.<br />
- Place griddle onto side burner shelf shown A.<br />
A<br />
Griddle (If equipped)<br />
6<br />
Cooking Grate<br />
B<br />
Locked Position<br />
Burner Cap<br />
Retainer Clip<br />
24
Sideburner and Outdoor Stove&Griddle <strong>Conversion</strong><br />
NOTE: Steps 23 through 26 apply to style 2 sideburner. Disregard these steps if you have a style 1 sideburner.<br />
23<br />
- Open the sideburner cover. Remove the griddle and cooking grate. (Sideburner cover not shown for clarity.)<br />
6<br />
- Pull the sideburner control knob off the valve stem. Remove the existing bezel by removing the two screws securing bezel to shelf fascia. Save<br />
the bezel for converting back to LP gas. Save screws for reuse.<br />
- Removing these screws will cause the gas valve to disengage from the back of the shelf fascia. This is normal.<br />
Griddle (If equipped) Cooking Grate<br />
Screws<br />
Bezel<br />
Valve<br />
Stem<br />
Sideburner<br />
Control Knob<br />
Shelf Fascia<br />
Main Burner<br />
Control Knob<br />
24<br />
- Remove the wingnut from the burner, Shown A.<br />
- Remove the Ignitor wire from the electrode, Shown B.<br />
- Remove the burner from the sideburner pan, Shown C.<br />
A<br />
C<br />
6<br />
Sideburner<br />
Wingnut<br />
CB<br />
Wingnut<br />
Electrode<br />
Sideburner<br />
ignitor wire<br />
NOTE: Sideburner lid not shown for clarity.<br />
25
Sideburner and Outdoor Stove&Griddle <strong>Conversion</strong><br />
25<br />
- Locate the Sideburner Valve underneath the sideburner shelf. The Sideburner Valve will be attached to the Sideburner Fascia.<br />
- Using the supplied Orifice Driving Tool , remove the orifice from the sideburner valve as shown below.<br />
- This style Sideburner is designed to work with <strong>Natural</strong> <strong>Gas</strong> once Orifice is removed. Do not replace any Orifices when using <strong>Natural</strong> <strong>Gas</strong>.<br />
6<br />
B<br />
B<br />
Orifice<br />
Orifice Driving<br />
Tool<br />
Sideburner Valve<br />
Sideburner Fascia<br />
Sideburner Fascia<br />
26<br />
- Reinstall the burner, Shown A.<br />
- Make sure the burner tube is properly aligned with the sideburner valve, Shown B.<br />
- Reinstall the wingnut to the burner stud. Attach the ignitor wire to the electrode. Shown C.<br />
6<br />
A<br />
Sideburner<br />
B<br />
Burner tube<br />
Valve<br />
B<br />
Proper Alignment<br />
C<br />
Wingnut<br />
Electrode<br />
Sideburner<br />
ignitor wire<br />
NOTE: Sideburner lid not shown for clarity.<br />
26
Sideburner and Outdoor Stove&Griddle <strong>Conversion</strong><br />
27<br />
- Place sideburner cooking grate onto side burner shelf, aligning grate legs with holes in shelf. Shown A.<br />
- Place griddle(If equipped) onto side burner shelf. Shown A.<br />
6<br />
Griddle (If equipped)<br />
A<br />
Cooking Grate<br />
28 NOTE: Step 28 applies to both styles of sideburner. You must perform this step in order to complete your grill conversion.<br />
- FOR SIDEBURNER UNITS: Use bezel part number 80007894.<br />
- FOR OUTDOOR STOVE & GRIDDLE UNITS: Use bezel part number 80007886.<br />
- While holding the sideburner valve from the back of the shelf fascia, align the screw holes in the appropriate bezel, shelf fascia and valve.<br />
- Install screws previously removed. Assure proper alignment with control knob before fully tightening the screws. Tighten screws with a #2 Phillips<br />
screwdriver.<br />
- Press the Control Knob back onto the valve stem.<br />
Screws<br />
Bezel Valve<br />
Stem<br />
Griddle natural gas bezel<br />
80007886<br />
Sideburner<br />
Control Knob<br />
Shelf Fascia<br />
Main Burner<br />
Control Knob<br />
Sideburner natural gas bezel<br />
80007894<br />
27
EMERGENCIES: If a gas leak cannot be stopped, or a fire occurs due to gas leakage, call the fire department.<br />
Emergencies<br />
<strong>Gas</strong> leaking from<br />
cracked/cut/burned<br />
hose.<br />
Possible Cause<br />
• Damaged hose.<br />
Prevention/Solution<br />
• Turn off gas at at source. If anything but burned, replace parts. If<br />
burned, discontinue use of product until a plumber has investigated<br />
cause and corrections are made.<br />
Troubleshooting<br />
Problem<br />
Burner(s) will not light<br />
using ignitor.<br />
Possible Cause<br />
GAS ISSUES:<br />
• No gas flow.<br />
Prevention/Solution<br />
• Make sure gas hose is properly connected to grill. If hose is<br />
properly connected, make sure gas source is turned on.<br />
Burner(s) will not<br />
match light.<br />
• See “GAS ISSUES:” .<br />
• Match will not reach.<br />
• Improper method of match-lighting.<br />
• Use long-stem match (fireplace match).<br />
• See “Match-Lighting” section of Grill Use and Care.<br />
Flames blow out.<br />
• <strong>Natural</strong> gas valve not fully open.<br />
• Open <strong>Natural</strong> <strong>Gas</strong> Valve to full open position.<br />
• Inadequate gas pressure.<br />
• Call gas company.<br />
<strong>Char</strong>-<strong>Broil</strong>, LLC ® Columbus, GA 31902 Assembly Instructions © 2008 <br />
28