Epicure Range Cooking Guide - Dacor
Epicure Range Cooking Guide - Dacor
Epicure Range Cooking Guide - Dacor

You also want an ePaper? Increase the reach of your titles
YUMPU automatically turns print PDFs into web optimized ePapers that Google loves.
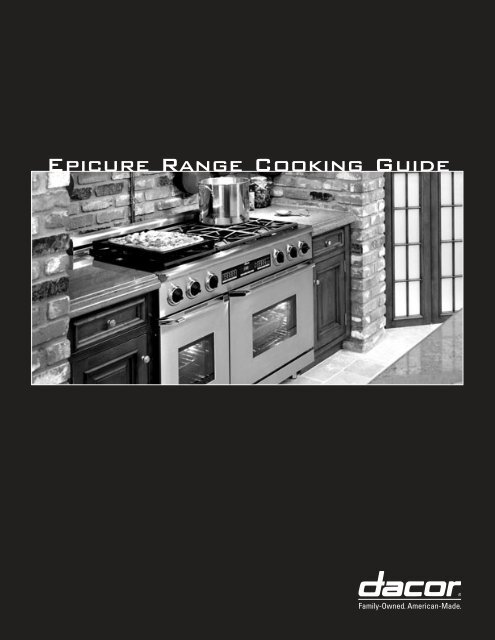
<strong>Epicure</strong> <strong>Range</strong> <strong>Cooking</strong> <strong>Guide</strong><br />
Family-Owned. American-Made.
Sizzling, delicious, restaurant-style flavor right out of your own range! Your new range offers the<br />
best of everything--an easy-to-control gas cooktop gives you great power from the hottest sear to<br />
the lowest simmer. Our patented gas flame broiler gives the perfect combination of moist and sear<br />
from broiled foods. And <strong>Dacor</strong>’s Exclusive 4-part Pure Convection System will give you beautifully<br />
browned, baked and roasted goods.<br />
As you begin cooking on your new <strong>Dacor</strong> range, you’ll find that Pure Convection makes it easier<br />
and more efficient to get wonderful results. Meats will sear beautifully and stay succulently moist.<br />
Cookies and baked goods will rise and brown nicely, even if more than one rack is used at a time.<br />
Included in this guide are useful tips, easy-to-read charts, and over 30 of my favorite recipes. Also<br />
included are a few tried-and-true <strong>Dacor</strong> Family recipes from our founder and 1st chef, Stan Joseph.<br />
This guide will help you maximize the use of your new <strong>Dacor</strong> range. It will help you decide which<br />
mode of cooking will give you the best results, and will also inspire you to create your own favorite<br />
recipes with excellent results. Creating, testing, and preparing this guide has been a personal and<br />
professional pleasure. I know you’ll be pleased with the results of your new range. Special thanks to<br />
my Assistant chef, Heather Kahn-Gisi.<br />
Enjoy cooking on your new range and Bon Appetit!<br />
Leslie L. Sassaman<br />
<strong>Dacor</strong> Corporate Chef
Table of Contents<br />
T<br />
Quick Reference <strong>Guide</strong> . . . . . . . . . . . . . . . . . . . . . . . . . . . . . . . . . . . . . . . . . . . . . . . . . . . . . . . . . . . . . . . . . . . . . . . . . . 1<br />
Selecting a Baking Mode . . . . . . . . . . . . . . . . . . . . . . . . . . . . . . . . . . . . . . . . . . . . . . . . . . . . . . . . . . . . . . . . . . . . . . . . 2<br />
Pure Convection- What It Means . . . . . . . . . . . . . . . . . . . . . . . . . . . . . . . . . . . . . . . . . . . . . . . . . . . . . . . . . . . . . . . . . 3<br />
Baking Tips for Using Convection . . . . . . . . . . . . . . . . . . . . . . . . . . . . . . . . . . . . . . . . . . . . . . . . . . . . . . . . . . . . . . 4-5<br />
ERD30 & ERD48 Notes . . . . . . . . . . . . . . . . . . . . . . . . . . . . . . . . . . . . . . . . . . . . . . . . . . . . . . . . . . . . . . . . . . . . . . . . . . . 5<br />
Multi-rack Baking Tips . . . . . . . . . . . . . . . . . . . . . . . . . . . . . . . . . . . . . . . . . . . . . . . . . . . . . . . . . . . . . . . . . . . . . . . . . . 6<br />
Roasting Tips . . . . . . . . . . . . . . . . . . . . . . . . . . . . . . . . . . . . . . . . . . . . . . . . . . . . . . . . . . . . . . . . . . . . . . . . . . . . . . . . . . . 7<br />
Turkey Tips . . . . . . . . . . . . . . . . . . . . . . . . . . . . . . . . . . . . . . . . . . . . . . . . . . . . . . . . . . . . . . . . . . . . . . . . . . . . . . . . . . 8-10<br />
Gas Infrared Broiling . . . . . . . . . . . . . . . . . . . . . . . . . . . . . . . . . . . . . . . . . . . . . . . . . . . . . . . . . . . . . . . . . . . . . . . . . . . 11<br />
<strong>Cooking</strong> Charts:<br />
Single Rack Baking Chart . . . . . . . . . . . . . . . . . . . . . . . . . . . . . . . . . . . . . . . . . . . . . . . . . . . . . . . . . . . . . . . . . . . .12-14<br />
Multirack Baking Chart . . . . . . . . . . . . . . . . . . . . . . . . . . . . . . . . . . . . . . . . . . . . . . . . . . . . . . . . . . . . . . . . . . . . . . . . .15<br />
Convection Roasting Charts for Meats, Poultry and Fish . . . . . . . . . . . . . . . . . . . . . . . . . . . . . . . . . . . . . . . . . . . . 16<br />
Roasted Vegetable <strong>Guide</strong>lines Chart . . . . . . . . . . . . . . . . . . . . . . . . . . . . . . . . . . . . . . . . . . . . . . . . . . . . . . . . . . . . . 17<br />
Gas Infrared Broiling Chart . . . . . . . . . . . . . . . . . . . . . . . . . . . . . . . . . . . . . . . . . . . . . . . . . . . . . . . . . . . . . . . . . . . . . . 18<br />
Appetizers and Side Dishes<br />
Oven Braised Shrimp Scampi . . . . . . . . . . . . . . . . . . . . . . . . . . . . . . . . . . . . . . . . . . . . . . . . . . . . . . . . . . . .20<br />
Oven Roasted Tiny New Potatoes . . . . . . . . . . . . . . . . . . . . . . . . . . . . . . . . . . . . . . . . . . . . . . . . . . . . . . . . 20<br />
Spinach Artichoke Dip . . . . . . . . . . . . . . . . . . . . . . . . . . . . . . . . . . . . . . . . . . . . . . . . . . . . . . . . . . . . . . . . . . 21<br />
Baked Brie with Caramelized Onions . . . . . . . . . . . . . . . . . . . . . . . . . . . . . . . . . . . . . . . . . . . . . . . . . . . . . .21<br />
Sage Stuffing . . . . . . . . . . . . . . . . . . . . . . . . . . . . . . . . . . . . . . . . . . . . . . . . . . . . . . . . . . . . . . . . . . . . . . . . . . 22<br />
Teriyaki Shrimp Kabobs . . . . . . . . . . . . . . . . . . . . . . . . . . . . . . . . . . . . . . . . . . . . . . . . . . . . . . . . . . . . . . . . . 23<br />
Grilled Asparagus . . . . . . . . . . . . . . . . . . . . . . . . . . . . . . . . . . . . . . . . . . . . . . . . . . . . . . . . . . . . . . . . . . . . . . 24<br />
Thai Vegetable Stir Fry . . . . . . . . . . . . . . . . . . . . . . . . . . . . . . . . . . . . . . . . . . . . . . . . . . . . . . . . . . . . . . . . . . 24<br />
Sauces, Stews and Soups<br />
Stan Joseph’s Vinha D’Alhos . . . . . . . . . . . . . . . . . . . . . . . . . . . . . . . . . . . . . . . . . . . . . . . . . . . . . . . . . . . . 26<br />
Osso Buco . . . . . . . . . . . . . . . . . . . . . . . . . . . . . . . . . . . . . . . . . . . . . . . . . . . . . . . . . . . . . . . . . . . . . . . . . . . . 27<br />
Bordelaise Sauce . . . . . . . . . . . . . . . . . . . . . . . . . . . . . . . . . . . . . . . . . . . . . . . . . . . . . . . . . . . . . . . . . . . . . . .28<br />
Chili Con Carne . . . . . . . . . . . . . . . . . . . . . . . . . . . . . . . . . . . . . . . . . . . . . . . . . . . . . . . . . . . . . . . . . . . . . . . . 28<br />
Quick Breads and Yeast Breads<br />
Mrs. Gleason’s Homemade Yeast Rolls . . . . . . . . . . . . . . . . . . . . . . . . . . . . . . . . . . . . . . . . . . . . . . . . . . . . 30<br />
Lemon Blueberry Muffins . . . . . . . . . . . . . . . . . . . . . . . . . . . . . . . . . . . . . . . . . . . . . . . . . . . . . . . . . . . . . . . 30<br />
Banana Bread . . . . . . . . . . . . . . . . . . . . . . . . . . . . . . . . . . . . . . . . . . . . . . . . . . . . . . . . . . . . . . . . . . . . . . . . . 31<br />
Garlic Bread . . . . . . . . . . . . . . . . . . . . . . . . . . . . . . . . . . . . . . . . . . . . . . . . . . . . . . . . . . . . . . . . . . . . . . . . . . . 32<br />
Hapa French Toast . . . . . . . . . . . . . . . . . . . . . . . . . . . . . . . . . . . . . . . . . . . . . . . . . . . . . . . . . . . . . . . . . . . . . 32<br />
Honey Whole Wheat Bread . . . . . . . . . . . . . . . . . . . . . . . . . . . . . . . . . . . . . . . . . . . . . . . . . . . . . . . . . . . . . 33<br />
Cracked Pepper Foccaccia . . . . . . . . . . . . . . . . . . . . . . . . . . . . . . . . . . . . . . . . . . . . . . . . . . . . . . . . . . . . . . 34<br />
Main Entrees<br />
Pure Convection Prime Rib Roast . . . . . . . . . . . . . . . . . . . . . . . . . . . . . . . . . . . . . . . . . . . . . . . . . . . . . . .36<br />
Roasted Rosemary Lemon Chicken . . . . . . . . . . . . . . . . . . . . . . . . . . . . . . . . . . . . . . . . . . . . . . . . . . . . . . .36<br />
Pure Convection Roasted Turkey . . . . . . . . . . . . . . . . . . . . . . . . . . . . . . . . . . . . . . . . . . . . . . . . . . . . . . 37<br />
Curry Pork Tenderloin . . . . . . . . . . . . . . . . . . . . . . . . . . . . . . . . . . . . . . . . . . . . . . . . . . . . . . . . . . . . . . . . . . 38<br />
Buffalo Chicken Pizza . . . . . . . . . . . . . . . . . . . . . . . . . . . . . . . . . . . . . . . . . . . . . . . . . . . . . . . . . . . . . . . . . . . 39<br />
Hickory Smoked Steaks . . . . . . . . . . . . . . . . . . . . . . . . . . . . . . . . . . . . . . . . . . . . . . . . . . . . . . . . . . . . . . . . . 40<br />
Leftover Grilled Turkey Parmesan Sandwiches . . . . . . . . . . . . . . . . . . . . . . . . . . . . . . . . . . . . . . . . . . . . 40<br />
Salmon Fillets with Lemon Dill Buerre Blanc . . . . . . . . . . . . . . . . . . . . . . . . . . . . . . . . . . . . . . . . . . . . . . 41<br />
Chicken Marsala . . . . . . . . . . . . . . . . . . . . . . . . . . . . . . . . . . . . . . . . . . . . . . . . . . . . . . . . . . . . . . . . . . . . . . . 42
Table of Contents<br />
T<br />
Desserts<br />
Cream Cheese Pound Cake Using Timed Delay Feature . . . . . . . . . . . . . . . . . . . . . . . . . . . .44<br />
Angelfood Cake . . . . . . . . . . . . . . . . . . . . . . . . . . . . . . . . . . . . . . . . . . . . . . . . . . . . . . . . . . . . . . . . . . . . . . . . 45<br />
Lemon Lover’s Cookies . . . . . . . . . . . . . . . . . . . . . . . . . . . . . . . . . . . . . . . . . . . . . . . . . . . . . . . . . . . . . . . . . . 45<br />
Sally’s Oatmeal Cookies . . . . . . . . . . . . . . . . . . . . . . . . . . . . . . . . . . . . . . . . . . . . . . . . . . . . . . . . . . . . . . . . . .46<br />
Sally’s Grandmother’s Ginger Snap Cookies . . . . . . . . . . . . . . . . . . . . . . . . . . . . . . . . . . . . . . . . . . . . . . . . 46<br />
Creamy Pumpkin Pie . . . . . . . . . . . . . . . . . . . . . . . . . . . . . . . . . . . . . . . . . . . . . . . . . . . . . . . . . . . . . . . . . . . . .47<br />
Toasted Coconut Creme Brulee . . . . . . . . . . . . . . . . . . . . . . . . . . . . . . . . . . . . . . . . . . . . . . . . . . . . . . . . . . .48<br />
Common Baking Problems and Solutions . . . . . . . . . . . . . . . . . . . . . . . . . . . . . . . . . . . . . . . . . . . . . . . . . . . . . . 49-50<br />
Weights and Measures . . . . . . . . . . . . . . . . . . . . . . . . . . . . . . . . . . . . . . . . . . . . . . . . . . . . . . . . . . . . . . . . . . . . . . . . .51<br />
Notes . . . . . . . . . . . . . . . . . . . . . . . . . . . . . . . . . . . . . . . . . . . . . . . . . . . . . . . . . . . . . . . . . . . . . . . . . . . . . . . . . . . . . . . . .52
QUICK REFERENCE GUIDE ERD30, ERD36, ERD48, ERD60<br />
Q<br />
TO SET THE CLOCK:<br />
• Press CLOCK on control panel<br />
• Press Up/Down arrows to reach correct time<br />
(Note: “a.m.” and “p.m.” will show while you are setting the time but will not show when the time is displayed on the control panel).<br />
TO BAKE, PURE CONVECTION, OR CONVECTION BAKE:<br />
• Press desired cooking mode<br />
• Press Up arrow to set temperature (oven automatically defaults to 350˚)<br />
• Oven temperature begins counting from 135˚<br />
• When oven is finished preheating, it will tone and you may put food in the oven<br />
TO INCREASE/DECREASE OVEN TEMPERATURES:<br />
• Press selected cooking mode<br />
• Press Up or Down arrows to reach desired new temperature<br />
TO BROIL OR CONVECTION BROIL:<br />
• Press broil mode<br />
• Press Up arrow to set temperature (“HI” equals 555˚).<br />
• The Gas Broiler does not need to be preheated, but works best if you wait a couple of minutes before adding food.<br />
• The electric broiler in the ERD48 companion oven works best if you allow it to preheat about 10 minutes.<br />
TO SET TIMERS:<br />
• Press TIMER 1 or TIMER 2<br />
• Hold down Up arrow to desired time. It will count in seconds first, then scroll faster with more time.<br />
• Release UP arrow, it will begin to count down.<br />
• When time is up, the timer will tone.<br />
• To stop the tone without shutting off the oven, press TIMER 1 or TIMER 2 once.<br />
TO ADD MORE TIME TO THE TIMERS, OR CANCEL THE TIMER BEFORE THE TIME IS UP:<br />
• Press appropriate TIMER 1 or TIMER 2 button.<br />
• To add more time, press Up arrow to desired new time.<br />
• To cancel timer before time is up, press appropriate timer button twice :00 will flash<br />
TO TURN THE OVEN OFF:<br />
• Press CANCEL/SECURE (this function will not turn the oven lights nor the timers off)<br />
TO LOCK THE CONTROL PANEL:<br />
• Press and hold CANCEL/SECURE for 6 seconds. You will hear one beep when activated and OFF will read on the control panel.<br />
• This feature is useful when cleaning the control panel, or preventing accidentally turning the oven on.<br />
TO UNLOCK THE CONTROL PANEL:<br />
• Press and hold CANCEL/SECURE for 6 seconds. You will hear one beep and OFF will disappear from the control panel.<br />
TO SET TIMED DELAY COOKING:<br />
• Be sure the correct time of day is set (a.m. or p.m.)<br />
• Adjust rack positions and set food into oven<br />
• Press cooking mode<br />
• Press Up or Down arrows to set temperature<br />
• Press COOK TIME- this will be the amount of time it takes to cook the food<br />
• Press STOP TIME- this will be the time you would like for the food to be DONE<br />
• You must press STOP TIME in order for this method of cooking to work<br />
• The convection fan and the cooling fan will go on after programming this feature, even if it does not start right away<br />
TO SELF-CLEAN OVEN:<br />
• Remove all oven racks and filter from the oven<br />
• Press SELF CLEAN<br />
• Press Up arrow to set desired amount of time- 2-4 hours<br />
• Door will lock. After it unlatches and cools, wipe up ash with hot, soapy water<br />
1
SELECTING A BAKING MODE<br />
M<br />
PURE CONVECTION<br />
This mode uses the third element, located behind the baffle in the back of the oven cell. Air is circulated by the convection<br />
fan. This cooking mode will provide the most even heat from rack to rack. Use this mode to do any multi-rack baking, roasting,<br />
and complete meals. This mode is especially great for baked goods that are mostly exposed to the convection air in a<br />
shallow baking pan. Souffles, cakes, cookies, pastries and free-form yeast breads (such as French Bread) are a few examples.<br />
When using this mode for roasting, raise the food up on a “v-shaped” rack inside of a roasting pan. This will allow air<br />
to circulate around the roast, lock in juices, and give it a beautiful golden sear, while shortening the cooking time in most<br />
cases.<br />
CONVECTION BAKE<br />
This mode uses the bottom bake element and the fan in the back to circulate the air. There is a no direct heat from the top<br />
and no heat from the rear element. This mode is best for turkeys over 25 pounds, Earthenware-baked items, baking stone<br />
items, or dense items that need bottom heat in order to cook correctly. Lasagna, pizzas, pies, and loaf breads are best in this<br />
mode.<br />
BAKE<br />
This mode uses bottom heat only. There is no heat from the upper element and no heat from the third element. This mode is<br />
best for items baked in a water bath, such as creme brulee, or items that are completely covered. When using bake, use<br />
rack positions 1 or 2 to get the food as close to the heat source as possible. This will help the food bake closer to the stated<br />
times.<br />
BROIL/GRILL<br />
This mode uses the element located in the top of the oven cavity only. There is no need to preheat the broiler before using it.<br />
Foods should be placed 4-6 inches from the surface of the broiler for best results. Center the broiler pan lengthwise, then<br />
push it all the way to the back wall to get the correct broiling position. Smaller cuts of meat, cut vegetables, breads, and<br />
some desserts are best for broiling.<br />
ERD48 COMPANION OVEN ONLY<br />
CONVECTION BROIL<br />
This mode uses the element located in the top of the oven cavity only and heat is circulated by the convection fan. It is an<br />
electric element, and needs a preheat of about 10 minutes in order to cook foods correctly. Center the broiler pan under the<br />
broiler for best results. Fish, vegetables, and garlic bread broil best on convection broil. Larger cuts of meat and poultry are<br />
best on Standard Broil.<br />
2
DACOR’S 4 - PART PURE CONVECTION SYSTEM<br />
<strong>Dacor</strong>’s Pure Convection, simply the very best convection system available today, is a total approach to cooking.<br />
Use this cooking mode when preparing complete meals, and for single or multi-rack baking. Temperatures can be set, in<br />
five-degree increments, from 135-555˚F.<br />
While many convection ovens simply heat air with two elements<br />
in the oven chamber, <strong>Dacor</strong>’s Pure Convection system<br />
utilizes a third heating element. It surrounds the convection<br />
fan, located outside the oven’s cooking area.<br />
Direction of Air Flow<br />
Additionally, a filter and baffle separate the food from the<br />
oven’s heat source. The filter purifies the heated air circulating<br />
throughout the oven, maintaining an extremely clean<br />
cooking environment. The baffle channels the heated air,<br />
circulated by the convection fan, evenly throughout the oven.<br />
Figure 1 - Pure Convection Air Flow<br />
Please refer to this drawing to ensure a recipe’s proper rack position.<br />
Rack positions are recommended throughout the book.<br />
5<br />
454<br />
353<br />
252<br />
151<br />
With <strong>Dacor</strong>’s Pure Convection cooking mode the rear<br />
heating element, mentioned earlier, is the oven’s heating<br />
source. The convection fan draws air from the oven chamber.<br />
It forces the air through the filter and across the hot convection-heating<br />
element. The heated air is directed through<br />
the convection baffle back into the oven chamber. The baffle<br />
then distributes the heated air evenly throughout the oven to<br />
insure uniform cooking results (See figure 1).<br />
The externally heated air, constantly moving throughout the<br />
oven, allows many foods to cook in 10% less time and at temperatures<br />
25˚ lower....saving you both time and energy.<br />
Figure 2 - Oven Rack Positions<br />
<strong>Dacor</strong>’s 4-Part Pure Convection system makes complete meal multi-rack cooking a natural, everyday occurrence. Foods<br />
will cook evenly, from one rack to another, while the system’s filter eliminates the transfer of food flavors/aroma from dish to<br />
dish. The filter also keeps your oven cleaner, longer.<br />
3
Baking Tips for Using Convection<br />
1. In all <strong>Dacor</strong> ovens, oven rack positions count up from the bottom, rack 1 is the bottom; rack 5 is the top.<br />
2. Oven temperatures range from 135˚ - 555˚, and can be set at 5-degree increments.<br />
3. Always allow the oven to preheat fully before adding food. For delicate baked items, it is very important to allow for a<br />
longer preheat to help stabilize the oven temperatures.<br />
4. If using a recipe that requires a “cold oven start,” use the Timed Delay Feature. See recipe in How to Program Timed<br />
Delay Baking or the Use and Care manual for specific instructions.<br />
5. When converting original single-rack recipes to convection recipes, reduce the oven temperature by 25 degrees. Keep<br />
in mind that hot air is circulating around the food in addition to its normal radiant heat. Foods will brown a lot faster than<br />
in conventional ovens, therefore the temperature would need to be reduced.<br />
6. In most cases, your time will also decrease when using convection in single-rack baking. The larger and more dense a<br />
food is, the more time savings you will see.<br />
7. When baking more than one rack of food at a time, however, there is larger cold mass going into the oven. Since the<br />
oven will take longer to recover temperature, there will be an increase in baking times for Multi-rack cooking.<br />
8. The rack positions, temperatures and times in the baking, roasting and broiling charts are recommended. Each recipe<br />
has many variables involved from ingredients to technique and the actual times and temperatures may vary because of<br />
this.<br />
9. Develop a habit of looking through the oven door window instead of opening the door to check food. This will prevent<br />
heat from escaping. In more delicate foods or in multi-racked food cooking, this could make a huge difference in the<br />
evenness of the baked goods. When the oven is completely full and every rack position is used, it has more mass. When<br />
heat is lost by opening the door, the element will come on to compensate for the loss. It will then take longer for the<br />
temperature to come back up to continue cooking the food.<br />
10. Be familiar with your oven timers. These will help you keep an eye on your foods.<br />
11. For best results, measure ingredients carefully and follow tested recipes. This is especially important in baked goods,<br />
which can be more temperamental than other foods.<br />
12. To rise yeast breads in the oven, place the dough in a greased bowl inside of the oven. Cover it, and turn on the halogen<br />
lights. These lights will emit just enough heat to proof yeast breads. Alternately, turn the oven onto Standard Bake at 135˚,<br />
then before placing the dough in the oven, turn the oven off and turn the lights on. The insulation around the oven cell<br />
will retain heat and provide a draft-free environment to rise yeast breads.<br />
RECOMMENDED BAKEWARE:<br />
• If purchasing bakeware, there are two special pans required for convection cooking: low rimmed, light colored aluminum<br />
cookie sheets and a roasting pan with a “V- shaped” rack that fits inside. Almost any bakeware will work in this ovenjust<br />
be sure that if the dish is covered or a thicker, denser pan, use Convection Bake or Standard Bake.<br />
• Use pan size and type recommended by the recipes.<br />
• Shiny, reflective pans are best for cakes, quick breads, muffins, cookies, and pies. This will prevent the crust from<br />
browning too fast, as a darker finish may cause it to do so.<br />
• Medium-gauge aluminum sheets with low sides are best in the convection modes so that the air is able to circulate fully<br />
around the food.<br />
• Bake most frozen foods in their original foil containers, and place on a cookie sheet. Follow the package recommendations<br />
for baking.<br />
4
Baking Tips for Using Convection<br />
• When using glass bakeware, only lower the temperature by 25 degrees (Most glass cookware manufacturers also<br />
recommend lowering the temperature 25 degrees when using their products. It only needs to be lowered once).<br />
PAN PLACEMENT TIPS:<br />
• When placing pans on oven racks, make sure the long side of the pans run left to right and are parallel with the oven<br />
door.<br />
• When using Standard Bake or Convection Bake mode, allow 2 inches of space around all sides of the pan to allow the<br />
heat to rise.<br />
• When using the Convection modes, remember to keep the pans forward and away from the convection filter. This positioning<br />
ensures proper airflow throughout the oven chamber.<br />
• Aluminum foil can be used on the oven racks to catch overspill and can also be used to cover foods during the baking<br />
process in any mode. DO NOT, however, line the bottom of the oven with aluminum foil. Remove foil, along with the oven<br />
racks, during self-cleaning.<br />
ERD30/ERD48/ERD60 COMPANION OVEN NOTES<br />
E<br />
The ERD48 includes a companion oven-which is a fully featured, self-cleaning oven.<br />
Following are a few notes about cooking with this oven:<br />
• Since the oven’s capacity is much smaller, you may find that cook times are much faster. Items cook faster in this oven as<br />
far as roasting and baking.<br />
• Follow the same guidelines as the large oven on selecting baking modes for best results.<br />
• The broiler in this oven is electric. The broiler pan sent with the oven will fit with the shortest end front to back. To center<br />
it correctly, push it all the way to the back.<br />
• Position the broiler pan 4-6 inches from the surface of the food to the surface of the broiler.<br />
• Broil times will increase slightly with the electric broiler. It is also best to preheat the electric broiler for about 10 minutes<br />
for best results.<br />
• The companion oven also offers Convection Broil. This mode works great for fish and broiled vegetables. It sears the fish<br />
beautifully without having to flip it, and vegetables will also sear quickly.<br />
• Thicker cuts of steak or poultry should be cooked on Standard Broil. This will prevent the food from searing rare.<br />
• <strong>Dacor</strong>’s ACS18 cookie sheets or a commercial half sheet pan, measuring 12 x 18” will fit in the ERD48 companion oven.<br />
ERD30/ERD60 NOTES:<br />
• A commercial sized sheet pan, measuring 18 x 25” will fit in the large cell of an ERD36 & ERD48. This type of pan will not<br />
fit in an ERD30/ERD60. <strong>Dacor</strong>’s ACS30- 30” cookie sheets should be used.<br />
• The BTU’s in the broiler of an ERD30/ERD60 is slightly less than the ERD36 & ERD48. Broil times will slightly increase<br />
because of this.<br />
• Baking and roasting times may slightly decrease due to the smaller oven capacity also.<br />
5
Multi-Rack Baking Tips<br />
B<br />
1. Center the pans on the rack for best baking results.<br />
2. Allow oven to preheat an additional 20-30 minutes after the preheat tone when Multi-rack baking delicate items, such<br />
as cookies and cakes. This will help the temperatures to stabilize while reducing the chance for heat loss when opening<br />
the oven door.<br />
3. Load the oven as quickly as is safely possible. This will prevent heat loss due to the open door. Check foods using the<br />
oven lights and through the window.<br />
4. Remove each pan as soon as food is done. All pans do not need to be removed from the oven at the same time.<br />
5. When baking on two racks, use positions 2 and 4; 1 and 3 or 1 and 4. Use rack positions 1, 3, and 5 when baking on three<br />
racks.<br />
6. Adapt a single-rack recipe to multiple-rack baking by increasing time to the baking process. More time is necessary<br />
because the additional cold mass in the oven causes longer temperature recovery time.<br />
7. Always follow the “Bake Ware Selection” tips in your oven’s “Use and Care” manual.<br />
6
<strong>Dacor</strong> Convection Oven Roasting Tips<br />
1. Convert conventional Standard Bake recipes to Convection recipes by reducing the temperature 25 degrees and the cooking time by<br />
10-15%.<br />
2. Always roast meats fat-side up, on a roasting rack, in a shallow pan. Use a pan that fits the size of the food being prepared (use the<br />
broiler pan accompanying your <strong>Dacor</strong> oven.) No basting is required when the fat-side is up. It is not necessary to add water to the pan.<br />
Water causes a steam effect. “Roasting” is a dry-heat process.<br />
3. Place poultry breast-side up in a shallow pan, on a rack, that fits the size of the food being cooked. Once again, you can use the broiler<br />
pan accompanying your oven. Brush poultry with melted butter, or oil, before roasting. This will help seal in juices and aid in the<br />
browning process of meats.<br />
4. Tall- sided pans are not recommended when roasting in convection. They interfere with the oven’s heated air circulation over the food.<br />
A rim of 2-3” is fine if the roast is raised up on a “V-shaped rack.” This will catch any juices and still allow air circulation around the<br />
roast.<br />
5. When using a meat thermometer, insert the stem part of the thermometer halfway into the center of the roast’s thickest portion. For<br />
poultry, insert stem (between the body and leg) into the thickest part of the inner thigh. Avoid touching bone, fat or gristle with the<br />
probe’s tip (It will give you inaccurate readings). After taking an initial temperature reading, insert the probe a 1/2” further. Take<br />
another reading. If the temperature registers below the first reading, continue cooking until desired temperature is reached.<br />
6. It is okay to remove meats from the oven when the temperature reads 5-10˚ F below the desired temperature. The meat continues to<br />
cook after being removed. This is called “carryover” cooking and can be utilized for 10-15 minutes in order to make carving easier and<br />
to help the meats retain their juices.<br />
7. There is no need to foil tent or cover roasted meats in the Pure Convection mode. If this is your preferred method of roasting, however,<br />
use Standard Bake rather than Pure Convection or Convection Bake because the convection air will never reach the food and<br />
will not aid in roasting or searing.<br />
8. Roasting times always vary according to the size, shape and quality of meats and poultry. Less tender cuts of meat are best prepared<br />
in Standard Bake and may require moist cooking techniques. Please follow your favorite cookbook’s recipes for these types of dishes.<br />
9. Lining your roasting pan with foil makes for easy clean up.<br />
7
Holiday Turkey Tips<br />
T<br />
The following are a few turkey tips that might come in handy during the holidays. As a good rule of thumb, plan on serving 1 pound of<br />
turkey per person. This will allow some extras for the big eaters and the fabulous turkey sandwiches for the days after the holidays.<br />
WHAT’S THE LARGEST-SIZED BIRD THAT WILL FIT IN MY OVEN?<br />
OVEN CELL SIZE<br />
Large Cell-ERD30, ERD36,<br />
ERD48, ERD60<br />
TURKEY SIZE-IN POUNDS<br />
30+<br />
Companion Oven-ERD48 17<br />
PLANNING YOUR MEAL: A FEW POINTS TO REMEMBER<br />
• Allow between 1 to 5 days for turkeys to defrost, depending on the size.<br />
• One pound of turkey per person should be plenty.<br />
• Follow recipe suggestions below.<br />
• Time each side dish and the turkey to insure proper preparation, cook time, rest time, and carve time for each item. Plan out which item<br />
will be cooked first and which could be kept warm after cooking.<br />
• Your <strong>Dacor</strong> oven has two timers that are extremely handy for large meals. Set them to remind you when to place the 2nd and 3rd dishes<br />
in the oven or on the cooktop.<br />
PROPER THAWING OF YOUR TURKEY<br />
Frozen turkeys may prevent bacteria from growing, but it does not kill them. Therefore, it is important to keep turkeys out of<br />
the Temperature Danger Zone- 40˚ – 140˚. Never defrost a turkey by placing it on the counter. It can cause foodborne illness.<br />
THERE ARE TWO WAYS TO SAFELY DEFROST A TURKEY:<br />
1. Under refrigeration. This requires adequate refrigerator space, advanced planning, and is the preferred method for defrosting a<br />
turkey. The turkey should be placed on the lowest possible shelf to prevent any juices from spilling into other foods. A high-rimmed pan<br />
( 2-3”) is required to catch any juices. Defrost times will depend on the size of the bird. On average, it will take at least a day or two for<br />
the bird to be completely defrosted. Plan on defrosting and cooking within a two day time period.<br />
2. Using a Large Sink and Running Water. The turkey may be defrosted by placing it in a sink full of running water or in a sink of water that<br />
will be changed every half hour. Ample room is needed for loose particles and overflow. Special care must be taken in cleaning and<br />
sanitizing every tool used in preparation of the turkey. Hot water and a bleach- based cleanser should be used to sanitize the sink and<br />
utensils used.<br />
* Using Pure Convection. You may use Pure Convection at 135˚ to defrost a partially frozen turkey for same-day cooking. Place turkey on<br />
an oven cooking rack. It will take approximately 8-11 minutes per pound to defrost the turkey. This is not recommended with frozen solid<br />
turkeys as it will remain in the Temperature Danger Zone for too long.<br />
8
Holiday Turkey Tips<br />
T<br />
UNSTUFFED TURKEYS<br />
1. Place turkey on a roasting rack in a roasting pan. Use a roasting pan that allows the turkey to rest at least 3/4 above the<br />
sides of the pan. This allows the convection air to flow freely around the bird, giving it a nice, brown sear. It also helps to<br />
lock in the juices inside of the turkey, creating a moist, tasteful product.<br />
2. Pre-heat the oven to 325˚- 350˚. Turkeys 8-25 pounds, use the Pure Convection mode. If it is over 25 pounds, use the<br />
Convection Bake mode. Larger turkeys simply need that bottom heat from Convection Bake in order to cook properly.<br />
3. The best rack position for the turkey is either rack position 1 or 2. If you are roasting only one turkey, place the turkey with<br />
the rack facing side to side. If you are roasting 2 turkeys in one oven cell, two 10 x 13” pans with racks will fit front to back<br />
in the ERD30 and ERD60 ovens; or two 13 x 16” pans with racks will fit in the ERD36 and ERD48 large oven. The turkeys’<br />
cavities should face the window.<br />
4. The time it will take to cook will be approximately 10-12 minutes per pound for an unstuffed bird. Begin checking the<br />
internal temperatures with an instant-read thermometer about 20 minutes before the expected time of completion.<br />
Internal temperatures should read 170˚ in the breast, 180˚ in the thigh.<br />
STUFFED TURKEYS<br />
1. Follow the same baking instructions as above.<br />
2. A turkey under 20 pounds and stuffed should be roasted on Pure Convection. Anything over 20 pounds and stuffed<br />
should be roasted on Convection Bake, and baking times will increase to 14-15 minutes per pound.<br />
3. Always take internal temperatures with an instant-read thermometer of both the turkey and the stuffing to insure safe<br />
serving. Please refer to the chart below for temperature information.<br />
PRODUCT INTERNAL TEMPERATURE MINUTES PER POUND<br />
Turkey-Unstuffed 180 in the thigh 10-12<br />
Turkey-Stuffed 180 in the thigh 14-15<br />
Stuffing 165 10-11<br />
9
Holiday Turkey Tips<br />
T<br />
OTHER HELPFUL HINTS<br />
1. Spray roasting rack and roasting pan with nonstick cooking spray. This will make cleaning up easier.<br />
2. Rinse and pat dry the turkey with paper towels.<br />
3. An olive oil rub helps seal in the juices and aids in browning the turkey.<br />
Please refer to the recipes in the following pages for ideas.<br />
4 It is best to use fresh herbs in the olive oil rub, since dried herbs may brown too quickly.<br />
5. For added flavor, slit the skin at the bottom of the breast to create a “pocket” between the skin and the breast. Insert the olive oil rub<br />
underneath the skin.<br />
6. Chopped onions, carrots, celery, and whole herbs may be inserted into the cavity of the bird. This helps retain moisture while adding<br />
flavor to the turkey. These vegetables can be used to flavor homemade gravy after the turkey has reached its safe internal<br />
temperature.<br />
7. Never discard turkey drippings. It adds flavor to stuffing, makes a great stock for soups and stews, and makes the best gravies and<br />
sauces to serve along with your turkey. If you must discard it, let it cool and scrape into the trash. Do not throw it down the sink, as it<br />
may clog drains.<br />
8. If there are not enough drippings in the bottom of the pan to make your favorite gravy, keep in mind that they are still inside the turkey.<br />
You may need to compensate with additional stock or broth.<br />
9. No basting is necessary when using the Pure Convection mode. If you are using a special sauce or marinade, however, you may<br />
want to baste it a couple of times during the cooking process. Do this during the last hour of cooking.<br />
10. It is better to prepare stuffing on the side, instead of stuffing the turkey. Stuffing adds insulation, making it harder for the stuffing to<br />
reach a safe internal temperature of 165˚, while the turkey may register a much higher temperature, therefore producing a drier<br />
product. It also lengthens the cooking process. Since minimum internal temperatures cannot always be reached, we recommend<br />
cooking a separate casserole dish of stuffing.<br />
11. It is acceptable to cover wings and legs that seem to be browning too quickly with foil. Keep in mind that Convection will brown a<br />
turkey quickly, which will help it to remain moist.<br />
12. If you are completely covering a turkey in a roasting pan or using an oven roasting bag, convection is not necessary. Standard Bake is<br />
the best mode for this type of roasting, simply because the convection air is not able to reach the turkey.<br />
13. Instead of doing one really large bird, try 2 medium- sized birds in one oven cell! In <strong>Dacor</strong>’s oven, you can place two 15 pound turkeys<br />
side-by-side on roasting racks. Think of it: four breasts, four legs- it’s enough for 30 people! Another reason to try this is because the<br />
smaller the bird, the more tender it will be. And the time will remain the same for one bird- 10-12 minutes per pound! Your two birds at<br />
15 pounds each will cook in about 2 hours!<br />
14. Timed Delay <strong>Cooking</strong>- We do not recommend using the time delay function on your oven to cook your turkey. It is hard to keep protein<br />
foods out of the Temperature Danger Zone- from 40˚ – 140˚. In using timed delay, you are allowing a raw turkey to sit in the oven for an<br />
extended period of time, which allows bacteria to grow and a prospective foodborne illness to occur.<br />
15. Most Important Tip of All: Be sure to clean and sanitize every utensil used in preparation of the turkey. This includes cutting boards,<br />
knives, kitchen sinks, and, most importantly, your hands. Hot water and a bleach-based cleanser should be used on utensils, and ashot-as-you-can-stand-it<br />
water and antibacterial soap should be used on your hands.<br />
10
GAS INFRARED BROILING<br />
Broiling is a quick and flavorful way to prepare many foods. In broiling, the heat source radiates from above in the oven cell<br />
to cook foods with a dry and intense heat. This high heat keeps the juices inside the meat while browning the outside. Foods<br />
that can be broiled should be tender, should have some fat content to preserve moisture and flavor, and should be an individual<br />
portion size. Broiling in the oven is completed with the oven door completely shut. Keep in mind that it is normal and necessary<br />
for some smoke to be present to give the food a smoky, barbecued flavor. The broil temperatures and rack positions<br />
may be adjusted.<br />
FOODS THAT CAN BE BROILED:<br />
• Meats, such as beef, chicken, veal, lamb, and pork<br />
• Sausages (Be sure to puncture the skin to prevent bursting)<br />
• Bacon (broiled flat or rolled)<br />
• Seafood (Both fish fillets and shellfish)<br />
• Vegetables that are tender and have a high moisture content, such as onions, zucchini, squash, and peppers<br />
• Garlic breads, toasts, etc.<br />
Thin items should be cooked at high heat and as quickly as possible.<br />
Medium thick items should be started on high heat to sear the food, then finished in a cooler part of the broiler/oven cell by<br />
dropping the rack position down or by lowering the temperature of the broiler.<br />
Thick items should also be started on high heat to sear the food, then finished in the oven at a lower temperature.<br />
Times and temperatures for broiling may vary due to desired doneness of the food. Foods will often have to be flipped half<br />
way through the broiling cycle.<br />
TIPS FOR SUCCESSFUL BROILING:<br />
1. The broiler needs only a few minutes to preheat. It will cycle on and off to maintain the temperature that you have selected.<br />
The element is on when a small red icon that shows “on” with a box around it appears on the control panel.<br />
2. Bring foods to room temperature for about 15-20 minutes before broiling. Chilled foods will reduce the temperature under<br />
the broiler. The product will not brown/ sear as well.<br />
3. To keep meat from curling, slit fatty edges.<br />
4. Trim the outer layer of fat from steaks and chops.<br />
5. Cuts of meat that are too thin (smaller than 1/4”) may dry up too quickly, while foods that are too thick (2” or larger) may<br />
only sear from the outside and remain raw in the center. Please refer to the above section that addresses thin/ thick.<br />
6. For best results, thicker cuts of meat should be placed about 4” – 6” away from the broiler.<br />
7. A 2-part broiler pan (provided with the unit) should always be used. This allows for fats to drip down into the pan below,<br />
reducing smoking and spattering. Using a sheet pan instead of the broiler pan may cause fats to be redirected into the<br />
heat, causing flare-ups.<br />
8. Aluminum foil may be used on the bottom portion of the 2-part broiler pan only. If foil is used on the top slotted piece<br />
(grill), fats are not allowed to drain properly, resulting in flare-ups, smoking, and spattering.<br />
9. It is best to use tongs to flip the food item half way through the cooking process. Piercing the meat with a fork allows<br />
juices to escape.<br />
10. Meats can be brushed with oil or butter to maintain moisture and aid in the searing process.<br />
11. To prevent sticking, lightly grease the broiler grill. Excess grease will result in heavy smoking.<br />
12. Marinating meats, poultry and seafood is an excellent way to retain flavor in broiled foods.<br />
13. Be sure to center the broiler pan underneath the broiler for maximum coverage-center the pan lengthwise, then push it<br />
all the way to the back.<br />
14. Although the broiler is variable in temperature, it is easier to get better results by using appropriate rack positions.<br />
It is an intense heat, so it is easier to control by lowering rack positions.<br />
11
SINGLE RACK BAKING CHART<br />
Please keep in mind that these charts are simply a guide.<br />
Ingredients, temperatures, and cooking method can all affect the timing of various foods.<br />
You may need to vary the time and temperature due to your personal circumstances.<br />
FOOD PAN SIZE MODE/RACK<br />
ANGEL FOOD CAKE 10” tube pan Pure Conv-3<br />
CONV TEMP<br />
&<br />
TIME<br />
350˚<br />
40-45 min<br />
STANDARD BAKE<br />
TIME & TEMP<br />
USE RACK<br />
POSITIOn 1 OR 2<br />
Lowest rack position<br />
350˚<br />
45-50 Min<br />
BACON<br />
Jelly roll pan or half sheet<br />
pan with rim<br />
Pure Conv-3<br />
375˚<br />
20-25 min<br />
400˚<br />
30-35 min<br />
BAGELS, AFTER BOILING Cookie sheet Pure Conv-3<br />
BISCOTTI Cookie sheet Pure Conv-3<br />
BISCUITS Cookie Sheet Pure Conv-3<br />
425˚<br />
15-18 min<br />
350˚<br />
15 min, then 5 min per side<br />
slice into 1/2” pieces<br />
350˚<br />
20 min<br />
450˚<br />
20 min<br />
375˚<br />
30 min, then 5 min per side<br />
slice into 1/2” pieces<br />
375˚<br />
25 min<br />
BLIND-BAKED<br />
PIE CRUST<br />
(UNFILLED)<br />
8”-9” pie dishglass<br />
or metal<br />
Conv Bake-2<br />
375˚<br />
10-12 min<br />
400˚<br />
12-14 min<br />
BLIND-BAKED TART<br />
(UNFILLED)<br />
10” tart pan Pure Conv-3<br />
350˚<br />
15 min<br />
375˚<br />
20 min<br />
BREAKFAST CASSEROLE-<br />
SAUSAGE AND EGG<br />
9” x 13”<br />
ceramic baking dish<br />
Conv Bake-2<br />
350˚<br />
40-45 min<br />
375˚<br />
50-55 min<br />
BROWNIES<br />
8”x 8” square pan<br />
9”x 13” baking dish<br />
Pure Conv-3<br />
325˚<br />
25-30 min<br />
350˚<br />
35-40 min<br />
BUNDT CAKE 8”-10” Bundt pan Conv Bake-2<br />
325˚<br />
50-55 min<br />
350˚<br />
55-60 min<br />
CAKES-CHIFFON OR<br />
SPONGE<br />
Jellyroll pan<br />
Pure Conv-3<br />
350˚<br />
15 min<br />
375˚<br />
20 min<br />
CAKES-CHIFFON OR<br />
SPONGE<br />
10” Tube Pan Pure Conv-3<br />
325˚<br />
35 min<br />
350˚<br />
40 min<br />
CAKES-SPONGE, CHIFFON<br />
8” Round<br />
9” x 13” Baking dish<br />
Pure Conv-3<br />
350˚<br />
18-20 min<br />
375˚<br />
20-25 min<br />
CHEESECAKE 8”-10” springform Conv Bake-2<br />
325˚<br />
1 to 1 1/2 hours<br />
350˚<br />
1 to 1 1/2 hours<br />
CHEESECAKE IN<br />
WATER BATH<br />
8”-10” springform<br />
on cookie sheet<br />
Pure Conv & Conv Bake<br />
not rec<br />
N/A<br />
350˚<br />
1 to 1 1/2 hours<br />
CINNAMON ROLLS Cookie sheet Pure Conv-3<br />
375˚<br />
20-25 min<br />
400˚<br />
25-30 min<br />
12
SINGLE RACK BAKING CHART<br />
FOOD PAN SIZE MODE/RACK<br />
COBBLER Baking dish Pure Conv-3<br />
CONV TEMP<br />
&<br />
TIME<br />
400˚<br />
20-25 min<br />
COFFEE CAKES 9” round pan Pure Conv-3 325˚<br />
40-45 min<br />
STANDARD BAKE<br />
TIME & TEMP<br />
USE RACK<br />
POSITIOn 1 OR 2<br />
425˚<br />
30 Min<br />
350˚<br />
45-50 min<br />
COOKIES (CHOC CHIP, SUGAR,<br />
OATMEAL RAISIN, PEANUT<br />
BUTTER, ETC.)-FROZEN DOUGH<br />
Cookie sheet<br />
Pure Conv-3<br />
325˚ or 350˚<br />
12-15 min<br />
375˚<br />
15-20 min<br />
COOKIES (CHOC CHIP, SUGAR,<br />
OATMEAL RAISIN, PEANUT<br />
BUTTER, ETC.)<br />
REFRIGERATED DOUGH<br />
Cookie sheet<br />
Pure Conv-3<br />
325˚ or 350˚<br />
10-12 min<br />
375˚<br />
12-14 min<br />
CORNBREAD 8”x 8” square pan Pure Conv-3<br />
375˚<br />
20-2 min<br />
400˚<br />
25-3 min<br />
CREME BRULEE<br />
IN WATER BATH<br />
small ceramic baking dishes<br />
on cookie sheet<br />
Std Bake-2<br />
N/A<br />
350˚<br />
55-60 min<br />
CRISPS<br />
(APPLE, FRUIT, ETC.)<br />
Baking dish<br />
Conv Bake-2<br />
350˚<br />
40-45 min<br />
375˚<br />
45 min<br />
CROISSANTS Cookie sheet Pure Conv-3<br />
CUPCAKES 12- cup muffin tin Pure Conv-3<br />
375˚<br />
20-25 min<br />
350˚<br />
20-25 min<br />
400˚<br />
25-30min<br />
375˚<br />
25-30 min<br />
DOUBLE CRUSTED<br />
FRUIT-FILLED PIES<br />
9” pie dish Conv Bake-2<br />
400˚ for 20 min<br />
350˚ for 30-40 min<br />
425˚ for 20 min<br />
350˚ for 40-45 min<br />
ECLAIRS<br />
PROFITEROLES<br />
CREAM PUFFS<br />
Cookie sheet<br />
Std Bake-2<br />
400˚<br />
15-20min<br />
425˚<br />
20-25 min<br />
MACAROONS Cookie sheet Pure Conv-3<br />
MEATBALLS, FROZEN Cookie sheet Pure Conv-3<br />
325˚<br />
20-25 min<br />
350˚<br />
20-25 min<br />
350˚<br />
25-30 min<br />
375˚<br />
30-35 min<br />
MEATLOAF 9”x 5” loaf pan Conv Bake-2 325˚<br />
1 1/2 hrs<br />
350˚<br />
1 1/2 hrs<br />
MERINGUE-COOKIES<br />
Cookie sheet<br />
Pure Conv & Conv Bake<br />
not rec<br />
N/A<br />
200˚-250˚<br />
1 to 3 hours<br />
MERINGUE-PIE TOPPING On top of pie Pure Conv-3<br />
350˚<br />
12 min<br />
375˚<br />
15 min<br />
13
SINGLE RACK BAKING CHART<br />
FOOD PAN SIZE MODE/RACK<br />
MUFFINS 12 cup muffin tin Pure Conv-3<br />
CONV TEMP<br />
&<br />
TIME<br />
350˚<br />
20 min<br />
STANDARD BAKE<br />
TIME & TEMP<br />
USE RACK<br />
POSITIOn 1 OR 2<br />
375˚<br />
20-25 min<br />
PHYLLO Cookie sheet Pure Conv-3 375˚<br />
5 min<br />
400˚<br />
5 min<br />
PIZZA Cookie sheet Conv Bake-2<br />
375˚<br />
10-12 min<br />
400˚<br />
12-14 min<br />
POPOVERS<br />
popover pan or<br />
small glass cups<br />
Pure Conv-3<br />
450˚ for 20 min;<br />
350˚ for 20 min<br />
450˚ for 20 min;<br />
350˚ for 20 min<br />
POUND CAKE 9” x 5” loaf pan Pure Conv-3<br />
350˚<br />
55-60 min<br />
375˚<br />
1 - 1 hr 15 min<br />
PUFF PASTRY Cookie sheet Pure Conv-3<br />
350˚<br />
15 min<br />
375˚<br />
20 min<br />
QUICK BREADS-<br />
BANANA, GINGERBREAD,<br />
BLUEBERRY, ETC.<br />
8”x 8” square pan;<br />
9”x 5” loaf pan<br />
Conv Bake-2<br />
325˚-350˚<br />
50-55 min<br />
350˚-375˚<br />
55-75 min<br />
SAUSAGES<br />
LINKS OR PATTIES<br />
Cookie sheet with rim<br />
Puncture links with a fork<br />
Pure Conv-3<br />
325˚<br />
15-20 min<br />
350˚<br />
20-25 min<br />
SCONES Cookie sheet Pure Conv-3<br />
350˚<br />
15-17 min<br />
375˚<br />
18-20 min<br />
SINGLE CRUSTED<br />
CUSTARD PIES-<br />
PUMPKIN, PECAN<br />
9” pie dish Pure Conv-3<br />
425˚ for 10 min;<br />
325˚ for 30-35 min<br />
450˚ for 10 min;<br />
350˚ for 40-45 min<br />
SOUFFLES<br />
Large souffle dish or<br />
small glass dishes<br />
Pure Conv-3<br />
350˚ for 25 min large dishes<br />
13-14 min for small dishes<br />
375˚ for 30 min large dishes<br />
15 min for small dishes<br />
SWEET BREADS,<br />
STOLLEN<br />
Cookie sheet<br />
Pure Conv-3<br />
350˚<br />
25-30 min<br />
375˚<br />
30-35 min<br />
TART-CHOCOLATE,<br />
LEMON, ETC.<br />
10” tart pan Pure Conv-3<br />
350˚<br />
20-25 min<br />
375˚<br />
25-30 min<br />
TURNOVERS,<br />
PINWHEELS,<br />
DANISH PASTRIES<br />
Cookie sheet<br />
Pure Conv-3<br />
375˚<br />
18-20 min<br />
400˚<br />
20-25 min<br />
YEAST BREAD-FREE FORM<br />
(WHITE, WHEAT, CHALLAH,<br />
RYE, FRENCH, ETC.)<br />
Cookie sheet<br />
Pure Conv-3<br />
350˚<br />
30-35 min<br />
375˚<br />
35-40 min<br />
YEAST ROLLS<br />
Cookie sheet;<br />
9”X13” baking pan<br />
Pure Conv-3<br />
375˚<br />
20-25 min<br />
400˚<br />
25-30 min<br />
YEAST BREAD-RICH BREAD<br />
(ITALIAN, SOURDOUGH,<br />
PUMPERNICKEL)<br />
9”x 5” loaf pan Conv Bake-2<br />
350˚<br />
25-30 min<br />
375˚<br />
30-35 min<br />
14
Multi-RACK BAKING CHART<br />
FOOD<br />
PAN SIZE<br />
Number of<br />
Pans<br />
Best Rack<br />
Mode<br />
Rack<br />
Conv Temp. (F)<br />
Conv Time<br />
(min)<br />
12” ROUND<br />
FROZEN PIZZA<br />
Cookie sheet 2<br />
Conv Bake<br />
(Rotate halfway<br />
through)<br />
2, 4 375˚ 25-30 min<br />
BACON<br />
Cookie sheet<br />
with rim<br />
3 Pure Conv 1, 3, 5 375˚ 30-35 min<br />
BISCOTTI Cookie sheet 2 Pure Conv 2, 4 350˚<br />
25 min, slice<br />
then 5 min per side<br />
BISCUITS Cookie Sheet 2 Pure Conv<br />
1, 3<br />
or<br />
2, 4<br />
350˚<br />
20-25 min<br />
CAKES-SPONGE,<br />
CHIFFON<br />
8” Round 4 Pure Conv 2, 4 350˚ 35-40 min<br />
CINNAMON ROLLS Cookie Sheet 2 Pure Conv 2, 4 375˚ 25-30 min<br />
COOKIES (CHOC CHIP,<br />
SUGAR, OATMEAL<br />
RAISIN, PEANUT BUTTER,<br />
ETC.)-FROZEN DOUGH<br />
Cookie Sheet<br />
2, 3, or 4<br />
Pure Conv<br />
1-4<br />
2, 3, 4<br />
2, 4 or 1, 3<br />
325˚<br />
25-30 min<br />
22-25 min<br />
20-22 min<br />
CUP CAKES 12 cup Muffin Tin 2 Pure Conv 2, 4 350˚ 25-30 min<br />
REFRIGERATED<br />
COOKIE DOUGH<br />
Cookie Sheet 2 Pure Conv<br />
1, 3<br />
or<br />
2, 4<br />
325˚<br />
20-25 min<br />
ECLAIRS, PROFITEROLES,<br />
GOUGERES,<br />
CREAM PUFFS<br />
Cookie Sheet 2 Pure Conv 2, 4 400˚ 25-30 min<br />
FROZEN ENTREES Mfr’s pans 4 Pure Conv 2, 4 350˚ 35-40 min<br />
LAYER CAKE 9” Round Pan 2 Pure Conv 2, 4 325˚ 35-40 min<br />
MEATBALLS,<br />
FROZEN<br />
Cookie sheet<br />
with rim<br />
2 Pure Conv 2, 4 375˚ 25-30 min<br />
MUFFINS 12 cup muffin tin 2 Pure Conv<br />
1, 3<br />
or<br />
2, 4<br />
375˚<br />
20-25 min<br />
ROLLED SUGAR<br />
COOKIES<br />
YEAST BREAD<br />
FREE FORM<br />
Cookie sheet 2 Pure Conv 2, 4 325˚ 15-20 min<br />
Cookie sheet 2 Pure Conv 2, 4 350˚ 35-40 min<br />
YEAST BREAD-<br />
LOAF<br />
9”x 5”Loaf Pan 2<br />
Conv Bake<br />
(Rotate pans<br />
halfway through)<br />
1, 3<br />
or<br />
1, 4<br />
350˚<br />
30-35 min<br />
YEAST ROLLS Cookie sheet 2 Pure Conv 2, 4 350˚ 20-25 min<br />
15
Convection Roasting <strong>Guide</strong>lines for meat, Poultry, & Fish<br />
Type & Cut<br />
Weight<br />
(Lbs.)<br />
Conv<br />
Mode<br />
Conv<br />
Temp. (˚F)<br />
& Rack<br />
Position<br />
Conv<br />
Temp. (˚F)<br />
(Minutes<br />
per LB.)<br />
Standard<br />
Bake Temp.<br />
(˚F)<br />
Standard<br />
Bake Temp.<br />
(Minutes<br />
per LB.)<br />
Min<br />
Internal<br />
Temp (˚F)<br />
BEEF RIB ROAST<br />
-MEDIUM RARE<br />
-MEDIUM<br />
-WELL DONE<br />
BONELESS ROLLED<br />
RUMP ROAST<br />
-MEDIUM<br />
-WELL DONE<br />
4-6 lbs. Pure Conv<br />
4-6 lbs. Pure Conv<br />
350˚<br />
1 or 2<br />
24<br />
26<br />
28<br />
350˚<br />
1 or 2 20<br />
22<br />
375˚ 30<br />
35<br />
40<br />
375˚<br />
25<br />
30<br />
145<br />
160<br />
170<br />
160<br />
170<br />
ROUND TIP ROAST<br />
-MEDIUM<br />
-WELL DONE<br />
3-4 lbs. Pure Conv<br />
350˚<br />
1 or 2<br />
24<br />
25<br />
375˚<br />
28<br />
30<br />
160<br />
170<br />
LEG OF LAMB<br />
WITH BONE<br />
MEDIUM RARE<br />
3-5 lbs. Pure Conv<br />
325˚<br />
1 or 2<br />
24-25 350˚ 30-35 145<br />
BONELESS ROLLED<br />
PORK ROAST<br />
-MEDIUM<br />
-WELL DONE<br />
3-5 lbs. Pure Conv<br />
350˚<br />
1 or 2<br />
24-25<br />
28-30<br />
375˚ 30-35<br />
35-38<br />
155<br />
170<br />
1” THICK PORK<br />
CHOPS<br />
-MEDIUM<br />
-WELL DONE<br />
1-2 lbs. Pure Conv<br />
350˚<br />
1 or 2 N/A<br />
375˚<br />
Total Time:<br />
65-75<br />
minutes<br />
155<br />
170<br />
FULLY-BAKED HAM-<br />
COVERED IN FOIL<br />
4-5 lbs. Not rec N/A N/A<br />
325˚<br />
Total Time:<br />
55-60<br />
minutes<br />
140<br />
WHOLE FRYER<br />
CHICKEN<br />
3-4 lbs. Pure Conv<br />
350˚ or 375˚<br />
1 or 2<br />
Total Time:<br />
1 hour<br />
15 minutes<br />
375˚<br />
Total Time:<br />
2 hours<br />
180<br />
in the thigh<br />
WHOLE ROASTING<br />
CHICKEN<br />
6-7 lbs. Pure Conv<br />
350˚ or 375˚<br />
1 or 2<br />
Total Time:<br />
1 hour<br />
45 minutes<br />
375˚<br />
Total Time:<br />
2 1/2 hours<br />
180<br />
in the thigh<br />
TURKEY<br />
-UNSTUFFED<br />
TURKEY<br />
-STUFFED<br />
8-20 lbs.<br />
20-24 lbs.<br />
24-30 lbs.<br />
8-20 lbs.<br />
20-24 lbs.<br />
24-30 lbs.<br />
Pure Conv<br />
Pure Conv<br />
Conv Bake<br />
Pure Conv<br />
Pure Conv<br />
Conv Bake<br />
325˚<br />
1 or 2<br />
325˚<br />
1 or 2<br />
10-11<br />
12-13<br />
12-13<br />
12-13<br />
13-15<br />
14-15<br />
350˚ 18-20 180<br />
in the thigh<br />
350˚<br />
17-20<br />
22-24<br />
25-27<br />
180<br />
in the thigh<br />
BONELESS TURKEY<br />
BREAST<br />
2-4 lbs. Pure Conv<br />
375˚<br />
1 or 2<br />
Total Time:<br />
30 minutes<br />
400˚<br />
Total Time:<br />
35-40<br />
minutes<br />
170<br />
CORNISH<br />
GAME HENS<br />
4 total Pure Conv<br />
375˚<br />
1 or 2<br />
Total Time:<br />
45-55<br />
minutes<br />
400˚<br />
Total Time:<br />
1 hour<br />
15 minutes<br />
165<br />
in the thigh<br />
FRESH<br />
FISH FILLETS<br />
4 total Pure Conv<br />
350˚<br />
1 or 2<br />
Total Time:<br />
20-25<br />
minutes<br />
375˚<br />
Total Time:<br />
25-30<br />
minutes<br />
N/A<br />
16
Roasted Vegetable <strong>Guide</strong>lines<br />
Food Preparation Mode/Temp (˚F) <strong>Cooking</strong> Time<br />
ASPARAGUS<br />
Snap off woodsy stem.<br />
Blanch in boiling water for 3-4 minutes.<br />
Pure Conv<br />
400˚<br />
10 min<br />
BEETS<br />
Wrap in foil.<br />
Peel after roasting.<br />
Standard Bake<br />
350˚<br />
1 hour<br />
BRUSSELS SPROUTS<br />
Lightly grease casserole dish.<br />
Pure Conv<br />
400˚<br />
45 min<br />
EGGPLANT<br />
Lightly grease casserole dishcube<br />
or slice<br />
Pure Conv<br />
400˚<br />
10-15 min<br />
FENNEL<br />
Lightly grease casserole dish.<br />
Pure Conv<br />
375˚<br />
15-20 min<br />
FRESH BABY CARROTS/<br />
PARSNIPS<br />
Peel and trimleave<br />
whole or cube.<br />
Pure Conv<br />
350˚<br />
30-35 min<br />
GARLIC-WHOLE BULB<br />
Cut top off. Drizzle with olive oil,<br />
salt & pepper. Cover with foil.<br />
Standard Bake<br />
350˚<br />
30-35 min<br />
GREEN BEANS<br />
Lightly grease casserole dish.<br />
Pure Conv<br />
350˚<br />
20-25 min<br />
NEW POTATOES<br />
Scrub & trim or cube.<br />
Lightly grease casserole dish.<br />
Pure Conv<br />
375˚<br />
40-45 min<br />
ONIONS<br />
Peel & cube. Wrap in foil.<br />
Drizzle with olive oil, salt & pepper.<br />
Standard Bake<br />
350˚<br />
40-45 min<br />
POTATOES-BAKING SIZE<br />
1/2 LB. EACH<br />
Scrub potato, poke with fork in center.<br />
Place directly on oven rack.<br />
Pure Conv<br />
375˚<br />
1 hour 15 min<br />
SQUASH BUTTERNUT, ACORN,<br />
PUMPKIN<br />
Halve squash. Rub with vegetable oil.<br />
Place cut side down on cookie sheet.<br />
Pure Conv<br />
375˚<br />
20-25 min<br />
TOMATO<br />
Slice and toss in olive oil & fresh herbs.<br />
Place in single layer on baking rack inside<br />
of cookie sheet.<br />
Pure Conv<br />
350˚<br />
25-30 min<br />
TURNIPS<br />
Wrap in foil.<br />
Peel after roasting.<br />
Standard Bake<br />
350˚<br />
1 hour<br />
ZUCCHINI &<br />
YELLOW SQUASH<br />
Cut lengthwise into 1/4” slices. Place in<br />
lightly greased casserole dish or on cookie<br />
sheet in a single layer.<br />
Pure Conv<br />
350˚<br />
40-45 min<br />
17
TYPE & CUT<br />
1” THICK SIRLOIN BEEF STEAK<br />
-RARE<br />
-MEDIUM<br />
-WELL DONE<br />
3/4” THICK SIRLOIN BEEF STEAK<br />
-RARE<br />
- MEDIUM<br />
-WELL DONE<br />
GAS INFRARED BROILING CHART<br />
WEIGHT<br />
BEST RACK<br />
POSITION<br />
BROILING<br />
TEMP (˚F)<br />
10 ounce 4 HI<br />
10 ounce 4 HI<br />
1ST SIDE<br />
5<br />
6<br />
7<br />
3<br />
4<br />
5<br />
2ND SIDE<br />
4<br />
5<br />
6<br />
2<br />
4<br />
6<br />
1” THICK SIRLOIN STEAK<br />
KABOBS ON SKEWER 12 ounce 4 HI 6 5<br />
FOUR, 1/4” THICK<br />
HAMBURGER PATTIES<br />
-RARE<br />
-MEDIUM<br />
-WELL DONE<br />
1 pound total 3 HI<br />
3<br />
4<br />
5<br />
2<br />
3<br />
4<br />
FOUR BONELESS, SKINLESS<br />
CHICKEN BREASTS 1 pound total 3 HI 4 4<br />
THREE CHICKEN BREASTS WITH BONE 2 1/2 pounds total 3 HI<br />
Start with bone side<br />
up-8<br />
7<br />
CHICKEN PIECES-<br />
LEGS, THIGHS, BREASTS 2 1/2 pounds total 3 HI 6 7<br />
FOUR, 3/4”-1” LAMB RIB CHOPS 12 ounce 4 HI 3 3<br />
LAMB SHOULDER 1 pound 3 HI 8 7<br />
FOUR, 3/4”-1” THICK<br />
PORK LOIN CHOPS 1 1/4 pounds total 3 HI 7 7<br />
FOUR, 1” THICK FRESH<br />
SALMON STEAKS 1 1/2 pounds total 4 HI 4 4<br />
1” THICK FRESH FISH FILLETS 1 pound 4 HI 4 4<br />
1/2” THICK FRESH FISH FILLETS 1 pound 4 HI 3 2<br />
BACON, SLICED 1/2 pound 3 HI 3 3<br />
CALVES LIVER 1/2 pound 3 HI 5 4<br />
GRAPEFRUIT HALVES 4 halves 3 HI 7-9 Do not turn<br />
TOMATO HALVES 4 halves 3 HI 6 Do not turn<br />
GARLIC BREAD 2 large slices 3 500 1-2 Turn if necessary<br />
GRATINEE-BREADCRUMBS OR<br />
CHEESE ON CASSEROLE<br />
CREME BRULEE<br />
9”x13” broil-proof<br />
baking dish<br />
(4) 4 oz broil-proof<br />
baking dishes<br />
3 HI 3-4<br />
4 HI 2-3<br />
18
Appetizers and Side Dish Recipes
Oven Braised Shrimp Scampi<br />
This shrimp works well as an appetizer or can be mixed in with angel hair pasta for a meal.<br />
1/4 cup olive oil<br />
1/4 cup butter<br />
3 pounds large raw shrimp, peeled and deveined<br />
2 Tbsp minced garlic (about 4 cloves)<br />
1 Tbsp minced fresh ginger<br />
1/2 cup Italian parsley, chopped<br />
1/2 to 1 tsp crushed red pepper flakes<br />
1/2 cup dry white wine<br />
1 Tbsp lemon juice<br />
Salt and cracked black pepper, to taste<br />
Preheat your oven to 375˚ on Pure Convection. Add olive oil and butter to a large, ovenproof gratin dish. Melt butter and oil<br />
together in the preheated oven. Remove from oven and stir in shrimp, garlic, ginger, Italian parsley, and crushed red pepper flakes.<br />
Stir to completely coat shrimp. Drizzle with white wine and lemon juice. Place in oven and cook until shrimp becomes pink and<br />
begins to curl, about 15-18 minutes. Stir halfway through the cooking process if needed.<br />
Serves 4.<br />
Oven Roasted Tiny New Potatoes<br />
2 pounds Tiny New or Red Bliss Potatoes<br />
1/4 cup olive oil<br />
2 Tbsp balsamic vinegar<br />
1 Tbsp fresh thyme<br />
1 Tbsp fresh Italian parsley<br />
1 Tbsp fresh basil<br />
5 cloves garlic, minced<br />
Salt and black pepper, to taste<br />
Preheat oven to 400˚ on Pure Convection. After preheat, place an empty 9x13 x2” baking dish in the oven for 10 minutes.<br />
When you add the potatoes, this will prevent them from sticking and will help them brown better. Cut potatoes into 1/2- to 1-inch<br />
quarters and place in a large bowl. In a small bowl, combine olive oil, balsamic vinegar, thyme, Italian parsley, basil, and garlic. Pour<br />
mixture over potatoes and toss potatoes to coat. Season with salt and pepper. Pour potatoes into preheated baking dish. Bake until<br />
potatoes are tender and browned, about 30-35 minutes. Stir the potatoes once or twice during baking.<br />
Makes 4 servings.<br />
RECIPES<br />
20
Spinach Artichoke Dip<br />
8 ounce box frozen chopped spinach or 2 cups fresh chopped spinach<br />
1 (15 ounce) can artichoke hearts<br />
3 cups mayonnaise<br />
1-2 Tbsp garlic, minced<br />
1 cup Parmesan cheese, shredded<br />
Salt and pepper, to taste<br />
Preheat oven to 350˚ on Pure Convection. Rinse and drain frozen or fresh chopped spinach. Drain and roughly chop artichoke<br />
hearts. In a large mixing bowl, combine spinach, artichokes, mayonnaise, garlic, and Parmesan cheese. Season with salt and<br />
pepper. Add mixture to a baking dish. Bake for 15-20 minutes, or until sides bubble and top browns lightly.<br />
Serve with toast points, warm tortilla chips, or fresh chopped vegetables.<br />
Makes 4 cups.<br />
Baked Brie with Caramelized Onions<br />
1 sheet puff pastry dough, thawed<br />
1 wheel of Brie cheese, about 6“ in diameter<br />
1 egg, lightly beaten<br />
1 medium onion, small diced<br />
1 Tbsp butter<br />
Salt and pepper, to taste<br />
Preheat oven to 350˚ on Pure Convection. Cut off top rind of Brie. Place in the center of puff pastry dough. Fold the corners of the<br />
dough above the cheese, until it is completely covered. Make sure there are no uncovered pieces of cheese. Brush puff pastry with<br />
egg. Bake until puff pastry has risen and is a light golden brown. While the puff pastry is baking, prepare the caramelized onions. In<br />
a medium sauté pan, melt butter. Add onions, stirring occasionally, until they reach a golden brown, about 10 minutes. Season with<br />
salt and pepper. Let the Brie sit for a few minutes, then slice the top off the puff pastry and Brie. Stir the caramelized onions into the<br />
soft cheese in the center. Serve with crackers or toast points.<br />
Makes 1 (6 “) round.<br />
RECIPES<br />
21
Sage Stuffing<br />
If using Earthenware, enamel-coated steel, or other heavy ceramic bakeware, use Convection Bake. The heat will transfer better<br />
when using this mode.<br />
12 slices day old bread, cut into 1/2-inch cubes<br />
1/2 cup unsalted butter<br />
1 1/2 cups white onion, chopped<br />
3/4 cup celery, small diced<br />
1/4 cup carrot, small diced<br />
1 large egg, lightly beaten<br />
1 1/4 Tbsp fresh sage, chopped<br />
1 1/4 tsp salt<br />
1/2 tsp ground black pepper<br />
1/2 to 1 cup reserved drippings from turkey pan or chicken stock<br />
Preheat oven according to the chart below. Grease a 9 x 13- inch ceramic baking dish. Place bread cubes on baking sheet and dry<br />
in oven for 10 to 15 minutes. Transfer bread to a large mixing bowl and reserve. Melt butter in large sauté pan. Add onion, celery<br />
and carrot and cook for 5 minutes, until translucent. Add to bread cubes and toss. Add egg and adjust seasonings with sage, salt<br />
and pepper. Add just enough pan drippings to moisten the bread. Pour mixture baking dish and bake until top is brown and a toothpick<br />
inserted in the center comes out clean.<br />
Additional seasonings may be added to the stuffing. Fresh herbs are preferred to dried-they add great color and flavor. Good ones<br />
to try are:<br />
Italian Parsley<br />
Thyme<br />
Oregano<br />
Chives or green onion<br />
Rosemary<br />
Basil<br />
Tarragon<br />
Chervil<br />
Serves 4<br />
PURE CONVECTION CONVECTION BAKE STANDARD BAKE<br />
RACK POSITION Not recommended 2 2<br />
TEMPERATURE (˚F) N/A 325 350<br />
TIME (MINUTES) N/A 30-35 minutes 40-45 minutes<br />
RECIPES<br />
22
Teriyaki Shrimp Kabobs<br />
TERIYAKI SAUCE:<br />
1 cup soy sauce<br />
3 cloves garlic, mashed<br />
2 Tbsp fresh ginger, minced<br />
2 Tbsp sugar<br />
2 stalks green onions, chopped<br />
1 Tbsp sesame seeds<br />
FOR KABOBS:<br />
1 pound large shrimp ( 31 to 40 count), peeled and deveined<br />
1 package cherry tomatoes (about 20)<br />
2 green bell peppers, cut into large pieces<br />
1 large white onion, cut into large pieces<br />
1 (16 oz) can pineapple, cut into chunks<br />
1 package long wooden skewers (about 20 are needed)<br />
Combine all teriyaki sauce ingredients and pour into a 1 gallon, plastic ziploc bag. Add shrimp, tomatoes, green bell peppers, onion,<br />
and pineapple to marinate. Let marinate a minimum of 1 hour (maximum 4 hours) in the refrigerator.<br />
Soak skewers in steeping hot water for 10 minutes. This will prevent them from burning and splintering.<br />
Place oven rack on second highest position. Preheat oven to Broil on “HI”. Lace skewers with shrimp and vegetables, alternating<br />
each. Place about half of them onto broiler pan or sheet pan with rim. Broil on “HI” for 3 minutes, turn skewers over to other side<br />
and continue to broil for another 3-4 minutes. Remove cooked skewers onto serving platter and repeat process with remaining<br />
skewers.<br />
Serves 4.<br />
RECIPES<br />
23
Grilled Asparagus<br />
This recipe uses <strong>Dacor</strong>’s Grill accessory- #AEGR14. The intense cooktop heat gives the asparagus beautiful markings and smoky<br />
flavor. Since the grill is one solid piece and has a high-temperature nonstick coating on it, clean up is easy!<br />
2 bunches asparagus<br />
3-4 cloves garlic, minced<br />
1/4 cup olive oil<br />
Juice of 1 lemon<br />
Sea salt, to taste<br />
Bring a large stock pot of water up to a boil. Meanwhile, break off the woodsy end of the asparagus- hold 2” below the floret end<br />
and snap in two pieces. Wherever it snaps is the woodsy end you want to remove. When the water is boiling, blanch the<br />
asparagus for 3-4 minutes. This allows the asparagus to retain a bright green color and it becomes more digestible. Drop in ice<br />
water for 1 minute. This step can be done one day in advance and refrigerated until use.<br />
In a large ziploc bag or large casserole dish, toss together asparagus, garlic, olive oil, and lemon juice. Let sit for a minimum<br />
15 minutes- maximum 1 hour.<br />
Fix grill accessory onto cooktop and turn both burners to medium high. It is best to start with a medium high temperature to allow<br />
the grill to reach a good temperature (Think “smokin’ hot!) and then adjust the temperature down as needed. With tongs, place<br />
asparagus onto grill. All of it should fit- just line it up next to each other to cover the entire surface of the grill. Let it sit for 3-4<br />
minutes, then use the tongs to turn the asparagus to get browning on all sides. Platter and serve immediately.<br />
Serves 12.<br />
Thai Vegetable Stir Fry<br />
This recipe uses our wok ring accessory (AWR) along with a rounded- bottom wok for quick and flavorful wok cooking.<br />
A 10-piece wok kit is available also- accessory # A30.<br />
FOR SAUCE:<br />
1/2 cup oyster sauce<br />
2 Tbsp cornstarch<br />
2 Tbsp rice vinegar<br />
1 garlic clove, minced<br />
1 Tbsp crushed red pepper flakes<br />
FOR STIR FRY:<br />
2 Tbsp sesame oil<br />
2 red bell peppers, cut into strips<br />
1 green bell pepper, cut into strips<br />
4 carrots, cleaned and cut into 1/8” rounds<br />
4 ribs celery, cut into 1” pieces<br />
2 cups broccoli florets<br />
1 pound green snow peas, threads on sides<br />
peeled off<br />
1/2 medium onion, cut into slices<br />
1 can water chestnuts, drained<br />
In a medium sized bowl, combine oyster sauce, cornstarch, rice vinegar, garlic, and crushed red pepper. Mix well. Set aside. Adjust<br />
wok onto wok ring. Heat on medium high to high. Test by dropping a small amount of water onto wok. If it “dances” and evaporates<br />
quickly, it is ready. Add sesame oil and pick up wok to swirl. Add vegetables. Using two wooden spoons, quickly toss vegetables.<br />
They should be sizzling, but not browning. Continue to toss for four minutes total. Vegetables should be hot and crisp. Add sauce<br />
and allow thickening, about 2-3 minutes. Toss until garlic is fragrant. Serve immediately.<br />
Serves 6.<br />
RECIPES<br />
C<br />
24
Sauces, Stews and Soup Recipes
Stan Joseph’s Vinha D’Alhos<br />
(Portuguese Marinated Pork)<br />
This is a wonderful, flavorful recipe developed by Stan Joseph, <strong>Dacor</strong>’s founder and 1st chef.<br />
It has been a traditional holiday recipe in his family for years, and we are happy to pass it on to you!<br />
4 pound rolled, boneless pork roast<br />
1 cup red or white wine vinegar<br />
2 garlic cloves, mashed or minced<br />
1 tsp ground cumin<br />
1/2 tsp ground allspice<br />
1/2 tsp ground cinnamon<br />
Pinch of ground cayenne pepper<br />
1 Tbsp salt<br />
1 tsp cracked black pepper<br />
In a large casserole dish, mix all of the above ingredients and marinate the pork overnight in the refrigerator. Pierce the roast<br />
several times with a skewer and extend the marinating time an additional 12 hours. Preheat oven to 325˚ on Standard Bake. Place<br />
one rack in position 1, counting up from the bottom. Place roast in a covered roasting pan and braise with marinade. Baste with<br />
marinade once or twice during cooking. The roast’s internal temperature should be 160˚ in the thickest, middle section for medium.<br />
Serves 8.<br />
RECIPES<br />
26
Osso Buco<br />
Osso Buco is traditionally cooked with veal shanks, and is braised over a cooktop for hours and hours to develop the flavor. Since<br />
this stew is completely covered and then placed in the oven, I prefer to use Standard Bake on all oven types. By using this indirect<br />
heat, no scorching occurs on the bottom of the pan, allowing for the true flavor of this delicious stew to come out!<br />
3 1/2- 4 pounds Veal shanks or Beef Shanks (about 3)<br />
Salt and pepper, to taste<br />
1 cup all- purpose flour, for dusting<br />
1/4 cup olive oil<br />
4 stalks celery, cut into large cubes<br />
4 carrots, cut into large cubes<br />
1 large onion, cut into large cubes<br />
4-5 cloves garlic, minced<br />
1 (6-ounce) can tomato paste<br />
1/2 cup red wine<br />
1 cup beef stock<br />
Salt and pepper, to taste<br />
Set oven rack on position 1, counting up from the bottom. Remove all other racks. Preheat oven to Standard Bake at 350˚. Salt and<br />
pepper veal or beef shanks, then dust with flour. Set aside. In a large, ovenproof stockpot with a lid, heat oil. Add veal or beef<br />
shanks and brown them, about 4-5 minutes. Flip over and brown them on the other side. Remove to a plate and set aside. Do not<br />
drain oil from pan. Add celery, carrots, and onion. Cook until translucent, about 5 minutes. Add garlic and stir until fragrant. With a<br />
wooden spoon, stir in tomato paste and cook for a few minutes to get the raw tomato flavor out. Reduce heat to low and “deglaze”<br />
the pan with red wine. Continue to stir and let reduce slightly. Slowly add in beef stock to make a thick sauce. Add shanks back into<br />
sauce. Bring mixture to a boil. Place lid over the stockpot, and place entire stockpot in the oven. Let stew cook in the oven for 1 1/2<br />
hours. Cook until meat falls off the bone.<br />
Serves 8.<br />
RECIPES<br />
27
Bordelaise Sauce<br />
1 1/2 cups beef stock<br />
3/4 cup dry red wine<br />
2 Tbsp shallot, finely chopped<br />
1/2 tsp fresh thyme, crushed<br />
1 bay leaf<br />
3 Tbsp unsalted butter, softened<br />
2 Tbsp all-purpose flour<br />
1 Tbsp chopped fresh parsley<br />
In a medium saucepan, heat 1 Tablespoon butter. Add shallot and cook until soft, about 2 minutes. Add the rest of the butter and<br />
flour. Stir to make a paste. Slowly add in red wine, let thicken. Add in beef stock and bring to a boil. Reduce heat and simmer for<br />
about 5 minutes. Add thyme and bay leaf. Simmer uncovered for 15 to 20 minutes. Remove bay leaf. Stir in parsley. Place on simmer<br />
plate on low until service. Serve warm over beef.<br />
Makes about 2 cups sauce.<br />
Chili con Carne<br />
2 pounds ground beef<br />
Salt and pepper, to taste<br />
1 medium onion, chopped<br />
1 red serrano chili<br />
1 green serrano chili<br />
1 red bell pepper<br />
1 green bell pepper<br />
1 Anaheim chili<br />
5 cloves garlic, chopped<br />
2 Tbsp ground cayenne pepper<br />
1 Tbsp ground cumin<br />
1 Tbsp ground oregano<br />
8 oz. can tomato puree or tomato sauce<br />
1 cup brown veal stock or beef broth<br />
1/2 bottle beer (8 oz.)<br />
14 0z. can diced tomatoes<br />
14 1/2 oz. can pinto beans, drained<br />
1 Tbsp tomato paste, as needed<br />
Salt and pepper, to taste<br />
In an 8-quart stock pot, brown ground beef, drain fat and season with salt and pepper. Meanwhile, remove stems and seeds from<br />
serrano chilis, bell peppers and Anaheim chilis. Finely chop. Add to ground beef along with onion and garlic and cook until fragrant.<br />
Add cayenne, cumin, and oregano. Cook for a couple of minutes. Add tomato puree and cook. “Deglaze” with beer and let reduce<br />
slightly. Add veal or beef stock. Stir in undrained tomatoes and beans. If chili needs to be thickened add tomato paste. Transfer to<br />
a simmer plate and hold for up to 4 hours if needed. Season with salt and pepper.<br />
Makes about 2 quarts.<br />
RECIPES<br />
C<br />
28
Quick Bread and Yeast bread Recipes
Mrs. Gleason’s Homemade Yeast Rolls<br />
2 packages dry yeast<br />
2 cups lukewarm water (between 105-110˚)<br />
1/2 cup sugar<br />
6 1/2- 7 cups all- purpose flour<br />
1 1/2 tsp salt<br />
1 egg, room temperature<br />
1/4 cup plus 2 Tbsp unsalted butter, softened<br />
Combine dry yeast, lukewarm water and sugar in a large mixing bowl. Let sit for 10 minutes or until it becomes foamy and yeast and<br />
sugar dissolve. Add 2 cups of flour and salt. Add 1/4 cup butter and egg. Beat in remaining flour until smooth. Knead for 10 minutes<br />
on a floured surface. Put dough into a greased bowl and cover with a damp cloth. Place in a warm, draft-free environment to rise<br />
for about 1 1/2 to 2 hours before baking. Shape into 2-3 inch balls for rolls. Place in two greased 9 x 13 x 2” pans, spacing them<br />
about 1” apart from each other. Brush rolls with 2 tablespoons melted butter. Cover and let rest for 2 hours before baking. Adjust<br />
oven racks to positions 2 and 4. Preheat oven to 375˚ on Pure Convection. Bake until golden brown.<br />
Makes about 2 dozen rolls.<br />
Lemon Blueberry Muffins<br />
Homemade muffins are very easy to make, and if you have access to fresh blueberries, it will make all the difference in this recipe.<br />
3/4 cup fresh blueberries, rinsed and picked through<br />
1 1/2 cups plus 2 Tablespoons all-purpose flour<br />
2 tsp baking powder<br />
1/4 cup plus 2 Tablespoons sugar<br />
1/2 tsp salt<br />
1 cup milk<br />
1 egg<br />
1/3 cup butter, melted<br />
1 tsp almond extract<br />
Zest of 1 lemon<br />
Preheat oven to 375˚ on Pure Convection. Dredge blueberries in 2 Tablespoons flour- this will help prevent them from sinking to<br />
the bottom of the muffin. Set aside. Combine remaining flour, baking powder, sugar and salt in a mixing bowl. In a separate bowl,<br />
beat together milk, egg, butter, almond extract, and lemon zest. Add to dry ingredients until moistened. Fold in blueberries. Spoon<br />
batter into greased or paper-lined muffin tin. Bake for 15-20 minutes, or until risen and golden brown. Let cool slightly and serve.<br />
Makes 1 dozen.<br />
RECIPES<br />
30
Banana Bread<br />
2 Tbsp ground cinnamon with 1/4 cup sugar<br />
1 Tbsp unsalted butter<br />
3 ripe medium-sized bananas<br />
1 cup butter<br />
2 cups sugar<br />
4 eggs<br />
3 Tbsp milk<br />
1 tsp vanilla<br />
2 cups all- purpose flour<br />
1 tsp baking soda<br />
1/2 tsp baking powder<br />
1/2 tsp salt<br />
1/2 cup chopped walnuts (optional)<br />
Preheat oven according to the chart below. In a small mixing bowl, combine cinnamon and 1/4 cup sugar. Butter a 9 x 5” loaf pan,<br />
then sprinkle half of the cinnamon sugar mixture inside, shaking the pan to coat up the sides. Save the remaining half for the top of<br />
the loaf. In a large mixing bowl, add peeled bananas. Mash the bananas using a fork or a potato masher. Add butter and sugar, stirring<br />
to mix. Add eggs one at a time. Add vanilla. In a medium-sized mixing bowl, combine flour, baking soda and salt. Add to banana<br />
mixture slowly and mix completely. Pour batter into prepared loaf pan. Sprinkle remaining cinnamon and sugar mixture on top of the<br />
batter. Bake until golden brown or until a toothpick inserted in the middle comes out clean.<br />
Makes one loaf (about 10-12 slices).<br />
PURE CONVECTION CONVECTION BAKE STANDARD BAKE<br />
RACK POSITION Not recommended 2 1 or 2<br />
TEMPERATURE (˚F) N/A 325 350<br />
TIME (MINUTES) N/A 55-60 minutes 60-65 minutes<br />
RECIPES<br />
31
Garlic Bread<br />
1 cup butter, softened<br />
5-6 cloves garlic, mashed<br />
1 large shallot, minced<br />
1/2 lemon peel, finely chopped<br />
1/4 -1/2 cup fresh Italian parsley, chopped<br />
1 large loaf French bread, cut in half lengthwise<br />
In a large food processor combine butter, garlic, shallots, lemon peel, and Italian parsley. Evenly spread butter mixture over French<br />
bread halves. Adjust rack to position 3, counting up from the bottom. Turn on broiler and broil bread until golden brown, about 1-2<br />
minutes. Watch the bread carefully as it will burn quickly. Slice and serve warm.<br />
Makes 1 cup compound butter.<br />
Serves 6.<br />
Hapa French Toast<br />
King’s Hawaiian bread, sliced 1/2” thick (makes about 8-10 slices) then cut in half crosswise to make 16-20 slices<br />
5 eggs, beaten<br />
2 cups sugar<br />
1 cup milk<br />
2 Tbsp rum (or 2 teaspoons vanilla extract)<br />
2 cups macadamia nuts, finely ground<br />
1 jar coconut syrup, or any other flavor works, too!<br />
2 Tbsp butter<br />
Combine eggs, sugar, milk and rum in a large shallow dish. Put the ground macadamia nuts in another dish. Preheat griddle on<br />
medium heat for about 7-8 minutes. Dip Hawaiian bread in egg and sugar mixture on both sides, let drain slightly, then dip into<br />
macadamia nuts on both sides. Place on griddle immediately. Fry until nuts and bread begin to caramelize, about 3-4 minutes. Flip<br />
and repeat process on other side. Place syrup in a small saucepan, then on the simmer plate to keep warm.<br />
The macadamia nuts can be ground in a food processor, but “pulse,” do not blend. Macadamia nuts are very high in oil and will<br />
form a paste if processed for too long.<br />
Serves 8-10.<br />
RECIPES<br />
C<br />
32
Honey Wheat bread<br />
This slightly sweet wheat bread turns out beautifully on <strong>Dacor</strong>’s Convection Bake. It rises nicely and has a crispy crust<br />
on the bottom.<br />
2 1/4 cup warm water (105-115˚)<br />
1/2 cup honey<br />
3 Tbsp firmly packed brown sugar<br />
2 packages dry yeast<br />
1 cup instant nonfat dry milk<br />
2 Tbsp butter, melted and cooled<br />
1 egg, lightly beaten<br />
1 tsp salt<br />
2 cups bread flour<br />
5 to 6 cups whole wheat flour<br />
In a large mixer with dough hook attachment, combine warm water, honey, brown sugar and yeast. Mix lightly and let sit until<br />
bubbly, about 5 minutes. Stir in nonfat dry milk, butter, and egg. Turn mixer on low to mix. Add bread flour and salt. Scrape down<br />
the sides of the bowl with a rubber spatula. Add enough wheat flour to make a soft dough. Knead in the mixer for 7-8 minutes, or<br />
turn dough out onto a floured surface and knead by hand for 10 minutes. The dough should be smooth and elastic. Place in greased<br />
bowl, lightly oil the top of the dough and cover. Let rise in a warm, draft-free environment for at least 1 hour or until doubled in size.<br />
Preheat oven according to the charts below. Punch down dough and place on a floured surface. Divide dough in half. Roll half of<br />
the dough with a rolling pin into an 8 x 13 x 1” rectangle. Roll dough from the 8” side lengthwise, as if making a jellyroll, until a loaf<br />
forms. Press to release air bubbles and pinch edges to seal. Repeat with other half of dough. Place loaves seam side down in two<br />
greased 9 x 5” loaf pans. Bake on rack position 2 until loaves rise and brown, and bread sounds hollow when tapped on the bottom.<br />
Remove from loaf pan and cool on baking rack- this will prevent the bottom from becoming soggy. Let cool and slice.<br />
Makes 2 loaves.<br />
PURE CONVECTION CONVECTION BAKE STANDARD BAKE<br />
RACK POSITION Not recommended 2 or 3 1 or 2<br />
TEMPERATURE (˚F) N/A 350 375<br />
TIME (MINUTES) N/A 30-35 minutes 35-40 minutes<br />
RECIPES<br />
33
Cracked Black Pepper Foccaccia<br />
For cracked black pepper, take whole black peppercorns and roughly crush them using the bottom of a sauté pan. You can also<br />
chop them in a coffee grinder or food processor.<br />
2 cups warm water (105-115˚)<br />
1 Tbsp dry active yeast<br />
1/3 cup olive oil plus 1 tablespoon, divided<br />
4 3/4 cups bread flour<br />
1 Tbsp fresh basil, chopped<br />
1 Tbsp fresh oregano, chopped<br />
1/4 cup shredded Parmesan cheese<br />
Sea salt, to taste<br />
1 Tbsp sea salt<br />
In the bowl of a heavy-duty mixer fitted with the dough hook attachment, add warm water and yeast. Let mixture proof until bubbling<br />
and foamy, about 5 minutes. Add olive oil and 2 cups bread flour, set mixer on low to blend. Add remaining flour, then add cracked<br />
black pepper and sea salt. Continue to mix for about 7-8 minutes or until a smooth, elastic dough forms.Scrape dough into a large,<br />
oiled bowl or cover with plastic wrap. Let dough rise in a warm, draft-free area until doubled in volume, about 1 hour.<br />
Lightly oil a 15 x 10 x 1” baking sheet. Slide dough into pan. Using the remaining 1 Tablespoon of oil on your fingertips, stretch dough<br />
to fit inside of the pan. Gently “dock” the dough by making small fingerprints over the surface of the dough. Sprinkle basil, oregano,<br />
and Parmesan cheese over the top of the dough. Cover loosely in plastic wrap and let rise for 30 minutes. Preheat oven on Pure<br />
Convection at 425˚. Bake foccaccia bread until deep golden brown in color, about 30-33 minutes. Transfer to a rack to cool. Slice<br />
into 2 x 2” squares.<br />
Makes 1 (15 x 10”) loaf.<br />
RECIPES<br />
34
Main Entree recipes<br />
43
Pure Convection Rib Roast<br />
This roast cooks best on Pure Convection because it will cook faster and give the roast a beautiful sear.<br />
Be sure to raise the roast on a “V- shaped” rack. This allows the convection air to circulate around the roast.<br />
Approximate Prep time: 10 minutes<br />
Approximate Cook time: About 24-25 minutes per pound<br />
6 pound rib roast, boned and retied (this makes carving easier)<br />
1/4 cup olive oil<br />
1 Tbsp coarse ground kosher salt<br />
1 Tbsp coarse ground black pepper<br />
1/4 cup fresh rosemary, chopped; plus two whole sprigs<br />
10 cloves garlic- 5 cloves minced, 5 cloves slivered<br />
Preheat your <strong>Dacor</strong> oven to 350˚ on Pure Convection. Place one rack in the number two position and remove all others.<br />
Poke the slivered garlic into the roast. Make a rub out of the chopped garlic, olive oil, and rosemary. Rub on the roast to coat. Salt<br />
and pepper to taste.<br />
Spray the roasting pan with nonstick cooking spray, and place two sprigs of fresh rosemary in the bottom of the pan. Place the<br />
roast on a rack tall enough so that most of the roast is above the sides of the roasting pan. The roast should be placed fat- side up.<br />
Cook at 350˚ on Pure Convection for about 2 1/2 to 3 hours, or until internal temperature reaches 145˚ for medium rare, 160˚ for<br />
medium, or 170˚ for well done. Remove from the oven and let rest for 15-20 minutes before carving. Cut and remove the butcher’s<br />
string and lift the roast off the ribs to carve. Slice thinly against the grain and transfer to a serving platter. Serve warm.<br />
Serves 12.<br />
Roasted Lemon Rosemary Chicken<br />
4-5 pound roasting chicken<br />
1 cup Italian parsley, chopped<br />
1/4-1/2 cup fresh rosemary, chopped<br />
1 cup olive oil<br />
1 lemon, halved lengthwise<br />
1 tsp garlic powder<br />
Salt, to taste<br />
Pepper, to taste<br />
Preheat oven to 350˚ on Pure Convection. Clean and dry the chicken. Clean and cut the lemon in half and place inside the chicken<br />
cavity with several rosemary sprigs. Make a rub with Italian parsley, rosemary, and garlic powder. Season the outside of the<br />
chicken with the rub, salt, and pepper. Place on rack in roasting pan. Roast until golden brown and internal temperature reaches<br />
180˚ in the thigh. Cook time should be about 1 hour 30 minutes. Allow chicken to rest 5-10 minutes before carving.<br />
Serves 4.<br />
RECIPES<br />
36
Pure Convection Roasted Turkey<br />
12-15 pound fresh turkey<br />
3/4 cup olive oil<br />
2 Tbsp fresh rosemary, chopped, plus 2 whole sprigs<br />
1 Tbsp fresh thyme, chopped<br />
2 Tbsp fresh sage, chopped<br />
1/2 cup fresh Italian parsley, chopped<br />
Salt, as needed<br />
Black Pepper, as needed<br />
1 white onion, peeled and quartered<br />
Preheat oven to 350˚ on Pure Convection. Place one rack in the number one position and remove all others.<br />
Remove neck and gizzard from the turkey, wash turkey with cold water and dry with paper towels. Set aside.<br />
Chop all fresh herbs, except for two whole sprigs rosemary and mix into the olive oil. Rub the turkey inside the cavity and out with<br />
the olive oil mixture and salt and pepper to taste. Peel and quarter the onion and place in the turkey cavity.<br />
Spray the roasting rack with a nonstick spray. Place the turkey on a rack tall enough so that most of the turkey is above the sides of<br />
the roasting pan. Place turkey in a preheated oven.<br />
Cook the turkey on Pure Convection at 350˚ for approximately 10 minutes per pound or until the internal temperature reaches 180˚<br />
in the thigh. Remove and let rest for 14-15 minutes before carving.<br />
This recipe can be doubled with an additional turkey without adding any cooking time.<br />
Serves 12-15.<br />
RECIPES<br />
37
Curry Pork Tenderloin<br />
2 pork tenderloins, about 3/4 pound each<br />
1/2 cup vegetable oil<br />
2 Tbsp Madras curry powder<br />
1 tsp ground black pepper<br />
1 Tbsp fresh gingerroot, minced<br />
1 Tbsp garlic, minced<br />
Rub pork tenderloin lightly with vegetable oil. Make a rub out of curry powder, black pepper, ginger, and garlic. Rub tenderloins with<br />
spices. Place both on a flat roasting rack in a roasting pan. Cover and refrigerate for at least 1 hour. Preheat oven to 350˚ on Pure<br />
Convection. Cook until internal temperature reaches 155˚. Cook time will be about 30-35 minutes. Let sit for 5-10 minutes before<br />
carving.<br />
Serves 4.<br />
* You may also use a 3-4 pound pork roast with this recipe. Marinate it the same way and cook it at the same temperature.<br />
Cook time will be closer to 2 hours for a roast of this size.<br />
RECIPES<br />
38
Buffalo Chicken Pizza<br />
DOUGH:<br />
1 1/4 cups warm water<br />
1 Tbsp active dry yeast<br />
1/4 tsp sugar<br />
1 Tbsp olive oil<br />
3 cups all-purpose flour<br />
1 tsp salt<br />
TOPPINGS:<br />
2 boneless, skinless chicken breasts<br />
1 Tbsp oil<br />
1/2 cup hot sauce<br />
2 Tbsp butter, melted<br />
1/2 red onion, chopped<br />
2 stalks celery, chopped<br />
1 cup shredded jack cheese<br />
1/2 cup prepared pizza sauce<br />
2 Tbsp cilantro, chopped<br />
1 jar blue cheese dressing<br />
FOR DOUGH:<br />
Place water, yeast and sugar in a bowl. Let the mixture become bubbly and foamy, about 5 minutes. Add oil. Add flour one cup at a<br />
time. Add salt. Knead dough for 10 minutes to form a smooth ball. Place dough in a well-greased bowl that is covered with plastic<br />
wrap and let rise until doubled, about 1 to 1 1/2 hours. Remove dough and shape into (2) 8-inch circles.<br />
Preheat oven according to the chart below. Cut chicken into bite- sized pieces. Heat a sauté pan with oil. Add chicken and cook<br />
until no longer pink. In a small mixing bowl, stir hot sauce and melted butter together. Place chicken pieces into hot sauce mixture.<br />
Divide the pizza sauce between the two pizzas. Sprinkle the chicken, red onion, celery, and shredded jack cheese in that order onto<br />
each pizza. Place on a pizza stone or pizza pan in the oven on rack position 1 and cook until the crust is done underneath and the<br />
cheese is melted, about 20-25 minutes. Top with cilantro. Cut into 6 slices. Serve with blue cheese dressing on the side.<br />
Makes 2, 8-inch pizzas.<br />
PURE CONVECTION CONVECTION BAKE STANDARD BAKE<br />
RACK POSITION Not recommended 1 1<br />
TEMPERATURE (˚F) N/A 400 425<br />
TIME (MINUTES) N/A 20-25 minutes 25-30 minutes<br />
RECIPES<br />
39
Hickory Smoked Steaks<br />
4 New York steaks, about 1” thick (10-12 ounces each)<br />
1 Tbsp hickory smoked salt seasoning<br />
1/2 Tbsp garlic powder<br />
1/2 Tbsp cracked black pepper<br />
Season the steaks liberally with hickory smoked salt, garlic powder, and cracked black pepper. Place steaks on broiler pan. Make<br />
sure oven rack is in position 4, or 4 to 6 inches from the broiler to the surface of the steaks. Turn broiler on to 500˚. Center broiler pan<br />
with steaks under broiler. Place the pan lengthwise and push it all the way to the back. Broil for 5-6 minutes to sear, remove pan<br />
from oven, flip the steaks over and broil for 4-5 minutes. Remove steaks and let sit for 5-10 minutes. Slice and serve.<br />
Serves 4.<br />
Leftover Grilled Turkey Parmesan Sandwich<br />
1/2 cup shredded Parmesan cheese<br />
1 tsp garlic salt<br />
2 eggs<br />
8 slices French or sourdough bread<br />
4 Tbsp butter<br />
8 slices leftover turkey, sliced thin<br />
4 slices Monterey Jack cheese<br />
1 tomato, sliced thin<br />
1 avocado, peeled, seeded and sliced thin<br />
In a shallow dish, combine Parmesan cheese and garlic salt. In a separate shallow dish, lightly beat eggs. Heat <strong>Dacor</strong> griddle or<br />
small nonstick pan or over medium heat. Add 1 tablespoon butter. Dip only one side of the bread into the egg, then in the Parmesan<br />
and garlic mixture. Place onto griddle or pan, dipped side down. Top bread with turkey, Monterey Jack cheese, tomato and<br />
avocado. Dip one side of second slice of bread into egg then Parmesan and garlic mixture. Place on top of sandwich, dipped<br />
side up. Cook sandwich until browned and Monterey Jack cheese is melted, about 3-4 minutes, then flip and repeat on other side.<br />
Repeat process with remaining ingredients, adding more butter as needed. Slice in half and serve warm.<br />
Makes 4 sandwiches.<br />
RECIPES<br />
C<br />
40
Salmon Fillets with Lemon Dill Buerre Blanc<br />
Buerre blanc is a wonderful sauce that is based on butter. It is very delicate and can break easy- meaning that the acids (lemon and<br />
wine) will separate out from the butter. Our simmer plate will hold this delicate sauce for 20 minutes without breaking.<br />
LEMON DILL BUERRE BLANC:<br />
1 tsp lemon juice<br />
1/2 cup dry white wine<br />
1 tsp white wine vinegar<br />
1 cup butter, cut into chunks<br />
1 Tbsp fresh dill, chopped<br />
1 tsp salt<br />
FOR SALMON:<br />
4 Salmon fillets, about 1” thick, cut on the bias or “tranche” cut, about 5-6 ounces each<br />
1/3 cup mayonnaise<br />
Salt and white pepper, to taste<br />
LEMON DILL BUERRE BLANC:<br />
Place white wine and white wine vinegar in a small saucepan. Reduce down to 2 tablespoons. Over low heat, drop chunks of<br />
butter in, one by one and “swirl” to incorporate. Drop the next piece in only as the other has fully melted. This will help the butter<br />
emulsify with the lemon juice and wine. Once all the butter is incorporated, add lemon juice and salt and place the saucepan on a<br />
simmer plate on low. Stir in dill right before service.<br />
SALMON:<br />
Lightly brush each portion of salmon with mayonnaise to coat. This helps to seal in the moisture. Season with salt and white pepper<br />
to taste. Place on ungreased broiler pan. Adjust rack position to 4, counting up from the bottom. Turn gas infrared broiler to “HI.”<br />
The broiler will only take about 2 minutes to get hot enough to cook, and you may place the salmon in after this time. Place the<br />
broiler pan in the oven so it is centered under the broiler- all the way to the back and in the center. Broil fish for 4 minutes, searing<br />
lightly. Flip and repeat on other side.<br />
Pour lemon dill buerre blanc over salmon and serve immediately.<br />
Serves 4.<br />
RECIPES<br />
41
Chicken Marsala<br />
4 boneless, skinless chicken breasts<br />
1/4 cup all purpose flour<br />
1/4 tsp dried marjoram<br />
1/8 tsp salt<br />
1/8 tsp black pepper<br />
1 cup fresh button mushrooms, sliced<br />
2 Tbsp green onions, minced<br />
3 Tbsp unsalted butter, divided<br />
1/4 cup chicken broth<br />
1/4 cup dry Marsala<br />
2 Tbsp fresh Italian parsley, chopped<br />
Place each chicken breast between 2 pieces plastic wrap. Pound lightly to 1/4 inch thickness. Remove plastic wrap. In a shallow<br />
bowl, stir together flour, marjoram, salt, and black pepper. Lightly press chicken pieces into flour mixture on both sides. Set aside.<br />
In a large sauté pan over medium high heat, cook mushrooms and green onions in 1 Tablespoon butter until tender. Remove from<br />
sauté pan. Cook chicken in remaining 2 Tablespoons butter in sauté pan until brown on both sides and no pink appears in the<br />
center- about 3-6 minutes a side. Add in mushrooms and green onions. Add broth and Marsala. Cook, uncovered, for 2 to 3 minutes<br />
or until mushroom mixture thickens slightly, stirring occasionally. Transfer to serving platter. Spoon mushroom mixture over chicken<br />
and garnish with Italian parsley.<br />
Serves 4.<br />
RECIPES<br />
42
Dessert recipes
Cream Cheese Pound Cake<br />
This recipe, along with others that require foods to be cooked in a “cold start” oven or an oven that has not been preheated, works<br />
well on our timed delay baking feature.<br />
* Before using this feature, make sure that the clock has been set to the correct time and the correct a.m. or p.m. settings. This<br />
does not show on the clock display, but it is very important as to what time of day you would like the food completed.<br />
Nonstick cooking spray<br />
1/2 pound butter (2 sticks), softened<br />
1/2 cup vegetable shortening<br />
8 ounces cream cheese, softened<br />
3 cups sugar<br />
Dash of salt<br />
6 eggs<br />
3 cups cake flour<br />
2 Tablespoons vanilla extract<br />
Spray (2) 9 x 5- inch loaf pans with nonstick cooking spray. In a large mixing bowl, combine butter, vegetable shortening, cream<br />
cheese, sugar and salt. Mix together until well creamed. Add eggs 1 at a time mixing after each addition. Add flour 1 cup at a time.<br />
Add vanilla and combine. Divide batter into loaf pans.<br />
Place both loaves in cold oven on rack position 2.<br />
TO SET TIMED DELAY:<br />
• Press Convection Bake mode and the “down” arrow until you reach 325˚.<br />
• Press “Cook Time” button. This refers to “how long will it take the pound cake to cook.” Use the “Up” arrow to enter 55 minutes.<br />
• Finally, press the “Stop Time” button. This refers to “what time do I want this pound cake to be ready.” Use the “Up” arrow to<br />
select the time of day you wish to have dessert.<br />
• If you wish to start the pound cake now, don’t enter a new time into the “Stop Time”, just press “Stop Time” once. You must not<br />
skip this step, or the oven will go through its normal preheat with the broiler. Notice that the 55 minutes has been added into the<br />
“Stop Time” for you.<br />
• When the pound cake is done, 3 tones will sound and you can remove it , let cool, and enjoy your perfectly cooked pound cake.<br />
• If you are not around to hear the tone, the oven will go into a “Hold” mode. It will display “Hold” on the screen and maintain<br />
150˚. The oven is going into a “Hold” mode at 150˚ so that the food will not be in the temperature danger zone (40˚-140˚). Keep in<br />
mind that the pound cake will continue to cook in the hold mode due to the residual heat in the oven, but it will be safe to serve<br />
to your guests. It will remain in this mode for 2 hours.<br />
Makes 2- 9x5 loaves.<br />
RECIPES<br />
44
Angelfood Cake<br />
1 1/2 cups egg whites (10-12 large eggs)<br />
1 1/2 cups sifted powdered sugar<br />
1 cup sifted cake flour<br />
1 1/2 tsp cream of tartar<br />
1 cup granulated sugar<br />
1 tsp almond extract<br />
Preheat oven to 350˚ on Pure Convection. Let egg whites come to room temperature. Sift powdered sugar and cake flour<br />
together. Add cream of tartar to whites. Beat with electric mixer until soft peaks form. Gradually add granulated sugar, beating<br />
until stiff peaks form. Add almond extract. Fold dry mixture into whites 1/4 at a time. Stir with a whisk to incorporate fully. Pour into<br />
ungreased 10” tube pan. Using a rubber spatula, cut through batter to get rid of air pockets. Bake until risen and browned, about<br />
40-45 minutes. Top should spring back and should not be sticky in the folds. Immediately invert on rack, leave in pan.<br />
Cool thoroughly. Loosen sides and remove cake. Let cool and slice to serve.<br />
Makes 1- 10-inch cake (about 12 slices).<br />
Lemon Lover’s Cookies<br />
1 cup butter flavored vegetable shortening<br />
1 1/2 cups sugar<br />
1 Tbsp water<br />
1 1/2 tsp lemon extract<br />
2 Tbsp lemon juice<br />
2 eggs<br />
3/4 cup flaked coconut<br />
2 1/2 cups all purpose flour<br />
1 1/2 tsp cream of tartar<br />
1 tsp baking soda<br />
1/4 tsp salt<br />
1 Tbsp poppy seeds<br />
1 tsp finely grated lemon peel<br />
Preheat oven to 325˚ on Pure Convection. Mix coconut with lemon juice in a small bowl and let sit for 10 minutes. Cream together<br />
vegetable shortening and sugar until fluffy. Mix water, lemon extract, lemon juice with coconut, eggs and lemon peel in a bowl. Add<br />
to shortening mixture. Sift together flour, cream of tartar, baking soda, salt and poppy seeds in a bowl. Add to mixer and beat until<br />
combined. Drop by rounded teaspoonfuls, about 2 inches apart on lightly greased cookie sheet. Bake until lightly browned around<br />
edges, about 12 minutes.<br />
Makes about 2 dozen cookies.<br />
RECIPES<br />
45
Sally’s Oatmeal Cookies<br />
1 cup vegetable shortening<br />
3/4 cup brown sugar<br />
3/4 cup granulated sugar<br />
1 1/4 cups flour<br />
1 tsp baking soda<br />
1/2 tsp salt<br />
1/4 tsp ground allspice<br />
3 cups rolled oats<br />
1/2 cup raisins<br />
1/2 tsp vanilla extract<br />
2 eggs<br />
1/2 cup chopped walnuts, chopped<br />
1/2 tsp ground cinnamon<br />
Preheat oven to 325˚ on Pure Convection. In a mixer, cream together vegetable shortening, brown sugar and granulated sugar.<br />
Add vanilla extract and eggs and beat on low speed. In a small bowl sift together flour, baking soda, salt, cinnamon and allspice.<br />
Gradually add to the mixer. Mix until combined. Stir in rolled oats, raisins and walnuts. Drop by rounded tablespoonfuls on two lightly<br />
greased cookie sheets. Bake until light golden in color, about 11-13 minutes.<br />
Makes about 2 dozen.<br />
Sally’s Grandmother’s Ginger Snap Cookies<br />
1 1/2 cups vegetable shortening<br />
2 cups sugar<br />
2 eggs<br />
1/2 cup molasses<br />
4 cups all-purpose flour<br />
2 tsp baking soda<br />
2 tsp ground cinnamon<br />
2 tsp ground cloves<br />
2 tsp ground ginger<br />
Preheat oven to 325˚ on Pure Convection. Spray cookie sheet with nonstick cooking spray. In a mixer, cream together vegetable<br />
shortening and sugar. Add in eggs one at a time. Add in molasses. In a small bowl, combine flour, baking soda, cinnamon, cloves,<br />
and ginger. Slowly add the flour mixture to the wet mixture. Scrape the sides of the mixture to blend thoroughly. Shape into 1 inch<br />
balls. Place on prepared cookie sheet about 2 inches apart. Bake until golden brown, about 14-15 minutes.<br />
Makes 3 dozen.<br />
RECIPES<br />
46
Creamy Pumpkin Pie<br />
PIE DOUGH:<br />
1 cup all-purpose flour<br />
FILLING:<br />
1 (16 oz) can pumpkin pie filling<br />
TOPPING:<br />
1 1/2 cups sour cream<br />
1/2 cup unsalted butter, cut into cubes<br />
1/2 cup ice cold water<br />
1 (14 oz) can sweetened condensed milk<br />
2 eggs, beaten<br />
2 tsp pumpkin pie spice or 1 tsp cinnamon,<br />
1/2 tsp ginger, 1/2 tsp nutmeg<br />
1/2 tsp salt<br />
2 Tbsp sugar<br />
1 tsp vanilla<br />
2 cups pecan halves, to decorate<br />
For the pie crust, combine flour and salt in a mixing bowl. Cut in cubes of butter to form small pieces, about the size of a pea. Drizzle<br />
in water. Add just enough until the dough forms a ball. Wrap in plastic and refrigerate for 30 minutes. Roll dough out on a floured<br />
surface to fit a 9” round pie dish.<br />
Preheat oven according to the chart below. In a large bowl, combine pumpkin pie filling ingredients until well blended. Pour filling<br />
in pie crust. Bake, then reduce temperature to 350˚. Remove pie from oven and add sour cream topping on top of the pumpkin pie<br />
filling:<br />
For the sour cream topping, combine sour cream, sugar, and vanilla. Spread on top of pie. Decorate top with pecan halves. Bake<br />
for an additional 10 minutes.<br />
Serves 8.<br />
PURE CONVECTION CONVECTION BAKE STANDARD BAKE<br />
RACK POSITION Not recommended 2 2<br />
TEMPERATURE (˚F)<br />
N/A<br />
400 for 10 min,<br />
350 for 20-25 min plus 10 min<br />
425 for 15 min,<br />
350 for 35-40 min plus 10 min<br />
TIME (MINUTES) N/A 40-45 minutes 60 min-1 hour 5 min<br />
RECIPES<br />
47
Toasted Coconut Crème Brulee<br />
(6) 4-ounce broil proof ceramic dishes<br />
2 cups heavy cream<br />
2 cups sweetened flake coconut<br />
5 egg yolks<br />
1/3 cup sugar<br />
1/8 tsp salt<br />
1/2 vanilla bean<br />
1/2 cup superfine sugar* or brown sugar<br />
Preheat oven according to the charts below. Place coconut flakes on a cookie sheet. Toast for about 10 minutes, or until golden<br />
brown. Be careful when opening the oven door to remove the coconut as the oils can burn your eyes.<br />
In a heavy saucepan, heat the heavy cream. Slice down the center of the vanilla bean and add it to the cream. Add the toasted<br />
coconut. Remove from heat and set aside, letting the toasted coconut steep in the cream. In a large mixing bowl, combine egg<br />
yolks, 1/3 cup sugar, and salt. Beat with a whisk until just combined. Strain coconut and vanilla bean out of cream into a bowl, then<br />
slowly whisk together cream into egg mixture. Be sure not to add it too quickly at the beginning, because it will cause the yolks to<br />
curdle. With a fingernail, scrape vanilla beans out of the pod into the cream. Place six 6-ounce broiler- proof custard cups in a<br />
3-quart rectangular baking pan. Pour egg custard mixture evenly into dish and carefully transfer to preheated oven. Using a<br />
measuring pitcher, pour enough hot water into the baking pan around the custard cups to reach half way up the sides of the dishes.<br />
This will act as a buffer to slowly cook the custard without browning. You want the crème brulee to be set but not cooked. Bake<br />
until only about a dime- sized piece in the center of the custard still shakes. Remove from the water bath and cool on an oven rack.<br />
Cover and chill for at least 1 hour up to overnight. Before serving, let custard stand at room temperature for 20 minutes- this will<br />
help prevent the dishes from cracking during the “brulee.” Sprinkle an even layer of superfine sugar or brown sugar over the<br />
surface of the custard, using an index finger to fill it in. Set oven to Standard broil on “HI” and set the oven rack on position 4<br />
(counting up from the bottom). Place custard cups with sugar on them close together on a small cookie sheet. Place pan in the<br />
center of the rack under the broiler all the way to the back, and broil for 4-5 minutes, or until the top browns and creates a hard<br />
shell over the custard. Serve immediately.<br />
* To make your own superfine sugar, grind granulated sugar in a food processor.<br />
Serves 6.<br />
PURE CONVECTION CONVECTION BAKE STANDARD BAKE<br />
RACK POSITION Not recommended Not recommended 2<br />
TEMPERATURE (˚F) N/A N/A 325<br />
TIME (MINUTES) N/A N/A 30-40 minutes<br />
RECIPES<br />
48
Common Baking Problems and Solutions<br />
COOKIES AND BISCUITS BURNED AT THE<br />
BOTTOM<br />
COOKIES AND BISCUITS ARE TOO BROWN<br />
ON TOP<br />
CAKE SIDES ARE BURNT AND CAKES ARE<br />
NOT DONE IN THE CENTER/ CAKES BURST<br />
ON TOP<br />
POOR VOLUME FOR CAKES AND<br />
BAKED GOODS<br />
Oven door opened too often<br />
Dark, absorbent pan was used<br />
Incorrect rack position being used and pan is<br />
too close to the heat source<br />
Standard Bake or Convection Bake mode is<br />
being used<br />
Pan is too large and too close to element<br />
Rack position being used is too high<br />
Oven not fully preheated<br />
The pan’s sides are too high<br />
Oven too hot<br />
Too little flour/Too much liquid<br />
Oven too hot<br />
Set minute timer to shortest recommended<br />
time and look through window to check doneness<br />
Use shiny, reflective pans with low sides<br />
Check cookies by looking through the oven<br />
door’s window instead of opening door<br />
Use recommended rack position and use Pure<br />
Convection<br />
Use smaller pan<br />
Use the rack positions recommended in this<br />
guide<br />
Allow oven to preheat fully before placing<br />
food in the oven<br />
Use recommended pan size<br />
Reduce temperature<br />
Measure ingredients carefully<br />
Lower oven temperature<br />
UNEVEN CAKE SHAPE<br />
CAKE TEXTURE IS TOUGH OR CRUMBLY<br />
COOKIES ARE TOO CRISP<br />
COOKIES ARE TOO SOFT<br />
Batter spread unevenly<br />
Oven rack not level<br />
Too much flour<br />
Too little sugar or shortening<br />
Batter overmixed<br />
Low moisture in product<br />
High sugar and fat content<br />
Thin shape<br />
Baked too long<br />
Too much liquid<br />
Low sugar or fat<br />
Underbaked<br />
Large/ thick shape<br />
Shake pan lightly to evenly out batter<br />
Make sure oven rack is properly in place<br />
Place cakes in center of oven rack for best<br />
results<br />
Decrease flour<br />
Increase sugar or fat<br />
Do not overmix batter- use recommended mix<br />
times<br />
Increase liquid<br />
Decrease sugar or fat<br />
Cut/roll larger pieces<br />
Decrease baking time<br />
Decrease liquid<br />
Increase sugar or fat<br />
Increase cooking time<br />
Cut slightly smaller<br />
49
Common Baking Problems and Solutions<br />
COOKIES ARE TOO CHEWY<br />
Too much egg<br />
High sugar and liquid, but low fat content<br />
The pan’s sides are too high<br />
Overmixed<br />
Decrease egg content<br />
Increase fat content<br />
Use recommended pan size<br />
Do not overmix when adding flour<br />
PIE DOUGH IS TOO TOUGH Overmixing dough Use minimal mixing times when adding<br />
water<br />
PIE DOUGH IS CRUMBLY Not enough water; too much shortening Increase water; decrease fat<br />
PIE DOUGH SOGGY OR RAW ON BOTTOM<br />
PIE DOUGH SHRINKS<br />
PIE FILLING BOILS OUT<br />
Oven temperature too low; not enough bottom<br />
heat<br />
Dough overworked<br />
Too much water<br />
No steam vents cut across the top<br />
Oven temperature too low<br />
Filling hot when put in shell<br />
Crust not sealed; too much filling<br />
Increase temperature<br />
Use Convection Bake or Standard Bake<br />
Use lower rack position<br />
Use minimal mixing times<br />
Decrease water<br />
Cut steam vents in top crust<br />
Increase oven temperature and use<br />
Convection Bake and Standard Bake<br />
Allow filling to cool before adding to pie shell<br />
Seal crust; don’t overfill the pie crust<br />
CURDLING OF CUSTARD OR SOFT FILLINGS Overbaked Decrease baking times<br />
YEAST BREAD SPLIT OR BURST CRUST<br />
BLISTERS ON BREAD CRUST<br />
BREAD TOO DENSE OR CLOSE- GRAINED<br />
Overmixing dough<br />
Oven too hot<br />
Too much liquid<br />
Improper fermentation<br />
Too much salt<br />
Too little liquid<br />
Too little yeast<br />
Underproofed<br />
Use minimal mixing times- just until dough is<br />
elastic<br />
Decrease oven temperature<br />
Decrease liquid<br />
Make sure loaves ferment at correct time and<br />
temperature<br />
Decrease salt<br />
Increase liquid<br />
Increase yeast<br />
Increase proofing time<br />
BREAD CRUST TOO DARK Oven too hot Decrease oven temperature<br />
Allow oven to preheat fully<br />
BREAD CRUST TOO LIGHT Too low temperature Increase temperature<br />
Use lower rack position<br />
Use Standard Bake or Convection Bake<br />
50
3 teaspoons = 1 Tablespoon 1 Tablespoon = 1/2 fluid ounce<br />
4 Tablespoons = 1/4 cup 1 cup = 8 fluid ounces<br />
5 1/3 Tablespoons = 1/3 cup 1 cup = 1/2 pint<br />
8 Tablespoons = 1/2 cup 2 cups = 1 pint<br />
1 pint = 16 fluid ounces 1 quart = 32 fluid ounces<br />
1/2 gallon = 64 fluid ounces 1 gallon = 128 fluid ounces<br />
10 2/3 Tablespoons = 2/3 cup 4 cups = 1 quart<br />
12 Tablespoons = 3/4 cup 2 pints = 1 quart<br />
16 Tablespoons = 1 cup 4 quarts = 1 gallon<br />
GROUND MEAT AND MEAT MIXTURES<br />
F˚<br />
Beef, Pork, Veal, Lamb 160<br />
Turkey, Chicken 165<br />
Fresh Beef, Veal, Lamb<br />
Poultry<br />
Pork<br />
Ham<br />
Weights and Measures<br />
Minimum Safe Internal Temperatures for Various Foods<br />
Medium Rare 145<br />
Medium 160<br />
Well Done 170<br />
Chicken and Turkey, Whole 180<br />
Poultry Breasts, Roast 170<br />
Poultry Thighs, Wings 180<br />
Duck and Goose 180<br />
Medium 160<br />
Well Done 170<br />
Fresh (raw) 160<br />
Pre-cooked (to reheat) 140<br />
Please note that the minimum safe internal temperatures are subject to change. This is due to the changing bacteria and the<br />
temperatures required to eradicate it. Visit the website below for the most current information.<br />
These cooking temperatures are from the USDA Meat and Poultry Hotline<br />
(800) 535-4555 or www.fsis.usda.gov<br />
A WORD ABOUT CARRY-OVER COOKING<br />
After foods are pulled out of the oven, it will continue to cook. Carry-over cooking affects all foods- the larger the item, the longer<br />
the carry- over time. It is best to let the foods rest after it comes out of the oven for 10 to 15 minutes. This will allow meat to retain its<br />
juices and baked goods continue to set, making it easier to carve and cook to a safe temperature to serve.<br />
51
notes<br />
52