Gallery in Red
Gallery in Red
Gallery in Red

Create successful ePaper yourself
Turn your PDF publications into a flip-book with our unique Google optimized e-Paper software.
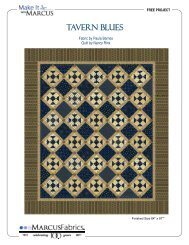
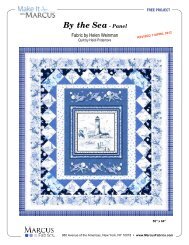
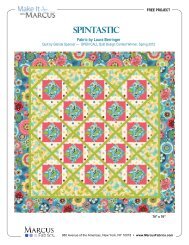
FREE PROJECT<br />
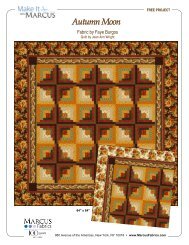
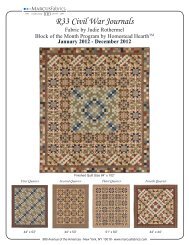
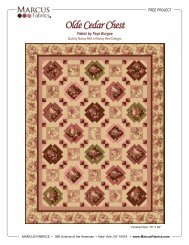
ZtÄÄxÜç |Ç exw II<br />
Fabric by Faye Burgos<br />
Quilt by Jean Ann Wright<br />
92" x 92"<br />
76" x 76"<br />
980 Avenue of the Americas, New York, NY 10018 • www.MarcusFabrics.com
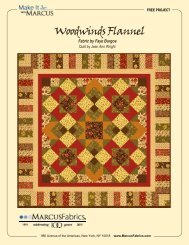
ZtÄÄxÜç |Ç exw II<br />
Fabric by Faye Burgos<br />
Quilt by Jean Ann Wright<br />
PAGE 2 of 3<br />
Quilt<strong>in</strong>g Skill: Beg<strong>in</strong>ner • F<strong>in</strong>ished Quilt Size: 76" x 76" • Block count and size: 9 blocks 14" x 14", 4 corners blocks 6" x 6"<br />
Fabric Requirements and Cutt<strong>in</strong>g Guide<br />
Note: In cutt<strong>in</strong>g “wof” means width of fabric<br />
Fabric A 3515-0111 1-1/2 yards<br />
Cut (7) 6-1/2" x wof strips, sew together end-to-end then cut (4) 6-1/2" x 64-1/2" outside borders<br />
Fabric B 3516-0111 1-1/4 yards<br />
Fussy cut (5) 8-1/2" squares, center<strong>in</strong>g on a rose motif <strong>in</strong> each square<br />
Cut (6) 3-1/2" x wof strips, sew together end-to-end then cut <strong>in</strong>to (2) side borders 3-1/2" x 58-1/2" borders and (2) top/bottom<br />
borders 3-1/2" x 64-1/2"<br />
Fabric C 3516-0173 1 yard<br />
Fussy cut (4) 8-1/2" squares, center<strong>in</strong>g on a rose motif <strong>in</strong> each square<br />
Cut (7) 2-1/2" x wof strips, sew together end-to-end then cut <strong>in</strong>to (2) side borders 2-1/2" x 54-1/2" borders and (2) top/bottom<br />
borders 2-1/2" x 58-1/2"<br />
Fabric D 3517-0111 1-1/4 yard<br />
Cut (8) 3-1/2" strips from length of fabric, recut <strong>in</strong>to (24) 3-1/2" x 14-1/2" sash<strong>in</strong>gs<br />
Cut (4) 6-1/2" squares<br />
Fabric E 3518-0111 1/2 yard<br />
Cut (4) 3-1/2" x wof strips, recut <strong>in</strong>to (32) 3-1/2" x 4” rectangles<br />
Fabric F 3519-0111 1/2 yard<br />
Cut (4) 3-1/2" x wof strips, recut <strong>in</strong>to (40) 3-1/2" x 4" rectangles<br />
Fabric G 3520-0111 1/2 yard<br />
Cut (3) 4-1/2" x wof strips, recut <strong>in</strong>to (20) 4-1/2" squares<br />
Fabric H 3521-0111 1/3 yard<br />
(Cut 2) 4-1/2" x wof strips, recut <strong>in</strong>to (16) 4-1/2" squares<br />
Fabric I 3522-0111 1/3 yard<br />
Cut (2) 3-1/2" x wof strips, recut <strong>in</strong>to (16) 3-1/2" squares<br />
Cut (1) 3-1/2" x wof strip, recut <strong>in</strong>to (16) 3-1/2" x 1-1/2" rectangles<br />
Fabric J 3522-0173 1/3 yard<br />
Cut (2) 3-1/2" x wof strips, recut <strong>in</strong>to (20) 3-1/2" squares<br />
Cut (1) 3-1/2" x wof strip, recut <strong>in</strong>to (20) 3-1/2" x 1-1/2" rectangles<br />
Fabric K 3523-0111 1 yard<br />
Cut (2) 3-1/2" x wof strips, recut <strong>in</strong>to (16) 3-1/2" squares<br />
Cut (8) 2-1/4" x wof strips, sew together end-to-end for b<strong>in</strong>d<strong>in</strong>g<br />
Back<strong>in</strong>g 3517-0111 4-1/2 yards<br />
Cut <strong>in</strong>to 2 equal pieces and sew together selvedge to selvedge<br />
Instructions<br />
Refer to the block diagrams. Block One: position a fabric G 4-1/2" square <strong>in</strong> opposite corners of a fabric B 8-1/2" square. Sew <strong>in</strong> a diagonal l<strong>in</strong>e from<br />
corner to corner on each fabric G square. Trim 1/4" from stitch<strong>in</strong>g l<strong>in</strong>e, fold out triangle and press. Repeat <strong>in</strong> the rema<strong>in</strong><strong>in</strong>g two corners to make the<br />
center of the block. Sew a fabric F 3-1/2" x 4" rectangle to each side of a fabric J 1-1/2" x 3-1/2" rectangle. Make 4 units. Sew one of these units to<br />
each side of the block center. Sew a fabric J 3-1/2" square to each end of the rema<strong>in</strong><strong>in</strong>g two units then sew these units to the rema<strong>in</strong><strong>in</strong>g two sides<br />
of the block. Make 5 blocks.<br />
Block Two: position a fabric H 4-1/2" square <strong>in</strong> opposite corners of a fabric C 8-1/2" square. Sew <strong>in</strong> a diagonal l<strong>in</strong>e from corner to corner on each fabric<br />
H square. Trim 1/4" from stitch<strong>in</strong>g l<strong>in</strong>e, fold out triangle and press. Repeat <strong>in</strong> the rema<strong>in</strong><strong>in</strong>g two corners to make the center of the block. Sew a<br />
fabric E 3-1/2" x 4" rectangle to each side of a fabric I 1-1/2" x 3-1/2" rectangle. Make 4 units. Sew one of these units to each side of the block<br />
center. Sew a fabric I 3-1/2" square to each end of the rema<strong>in</strong><strong>in</strong>g two units; sew these units to the rema<strong>in</strong><strong>in</strong>g two sides of the block. Make 4 blocks.<br />
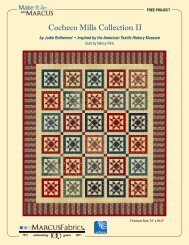
Refer to the Quilt Assembly Diagram (Page 3) for the placement of Blocks One and Blocks Two. Sew the blocks together <strong>in</strong> 3 rows of 3 blocks each,<br />
separat<strong>in</strong>g the blocks with 4 fabric D sash<strong>in</strong>gs. Make 3 rows.<br />
Sew 4 fabric K 3-1/2" squares and 3 fabric D 3-1/2" x 14-1/2" sash<strong>in</strong>gs <strong>in</strong>to a sash<strong>in</strong>g row. Make 4 rows.<br />
Sew the fabric C 2-1/2" x 54-1/2" borders to opposite sides of the quilt top. Sew the fabric C 2-1/2" x 58-1/2" borders to the top/bottom of the quilt top.<br />
Sew the fabric B 3-1/2" x 58-1/2" borders to opposite sides of the quilt top. Sew the fabric B 3-1/2" x 64-1/2" borders to the top/bottom of the quilt top.<br />
Make the corner blocks. Position a fabric K 3-1/2" square <strong>in</strong> opposite corners of a fabric D 6-1/2" square. Trim 1/4" from stitch<strong>in</strong>g l<strong>in</strong>e, fold out triangle<br />
and press. Repeat <strong>in</strong> rema<strong>in</strong><strong>in</strong>g two corners. Make 4 blocks.<br />
Sew a fabric A 6-1/2" x 64-1/2" border to opposite sides of the quilt top. Sew a corner block to each end of the rema<strong>in</strong><strong>in</strong>g fabric A borders, then sew<br />
these borders to the top/bottom of the quilt to complete.<br />
Layer the quilt top, batt<strong>in</strong>g and back<strong>in</strong>g. Quilt the layers together. B<strong>in</strong>d to f<strong>in</strong>ish the outside edges.<br />
MARCUS FABRICS • 980 Avenue of the Americas, New York, NY 10018 • www.MarcusFabrics.com
ZtÄÄxÜç |Ç exw II<br />
Fabric by Faye Burgos<br />
Quilt by Jean Ann Wright<br />
PAGE 3 of 3<br />
Quilt Assembly Diagram<br />
MARCUS FABRICS • 980 Avenue of the Americas, New York, NY 10018 • www.MarcusFabrics.com