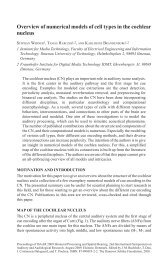
ReSound Aventa 3 User Guide - GN ReSound
ReSound Aventa 3 User Guide - GN ReSound
ReSound Aventa 3 User Guide - GN ReSound

Create successful ePaper yourself
Turn your PDF publications into a flip-book with our unique Google optimized e-Paper software.
1. Calibrate DFS<br />
2. Mute hearing instrument(s)<br />
3. Set up programs and environments<br />
to match your clients lifestyle and<br />
needs. Swap program around,<br />
compare program A/B,<br />
Autorelate and much more<br />
Fit Screen<br />
With hearing instruments connected use the Fit Screen to make adjustment<br />
and fine-tuning. New hearing instruments are automatically fitted<br />
with recommended offsets based on audiogram and target rule.<br />
1<br />
<strong>Aventa</strong> 3 Screen Structure<br />
2<br />
1. Complete menu bar where you’ll<br />
find and access a large number<br />
of <strong>Aventa</strong> 3 functionality.<br />
4. Save your settings to the Hearing<br />
instruments and/or database<br />
(NOAH)<br />
5. Under ”Tools” you’ll find all the<br />
various fitting tools to help you<br />
create the best possible fitting:<br />
* Gain Adjustment<br />
* Advanced Features<br />
* Physical Properties<br />
* <strong>Aventa</strong> <strong>Guide</strong><br />
* Data Logging<br />
* Environmental Optimizer II<br />
* Beeps and Volume Control<br />
6. Click anywhere under ”Wireless”<br />
to access the window where you<br />
manage the wireless connectivity<br />
and pairing of accessories.<br />
5<br />
6<br />
1<br />
2<br />
9<br />
4<br />
7<br />
3<br />
8<br />
3<br />
4<br />
2. The Global Navigation takes you<br />
through the main <strong>Aventa</strong> screens<br />
always providing you with a clear<br />
indication of where you are in the<br />
fitting process<br />
3. Left-hand side navigation incl.<br />
Patient Information, Tools, Wireless<br />
and Feature Summary<br />
4. Multi-media player including<br />
over 200 sound files.<br />
7. The fitting graphs display the<br />
target and response curves, and<br />
the shaded grey area represent<br />
full-on gain and SafeFitting<br />
1 2 3 4 5 6<br />
1 2<br />
8. The gain matrix is where you can<br />
adjust gain and MPO. Use the<br />
up/down arrow to either increase<br />
or decrease the gain.<br />
Compression ratio is also<br />
displayed in the area.<br />
9. Choose between gain increments<br />
of 1 dB, 2 dB or 3 dB.<br />
3 4<br />
Summary Screen<br />
The Summary Screen provides a last look at the instruments and programs<br />
fitted. Here it is also possible to write fitting session comments for<br />
this specific client.<br />
5 6<br />
1. Confirm number of programs<br />
2. Enter session comments<br />
3. Click ”Print” to customize the<br />
Clinician Report and/or the Patient<br />
Handout slip.<br />
1<br />
4. Save to Hearing Instruments<br />
and/or database (NOAH)<br />
5. Close and exit the fitting session<br />
2<br />
3<br />
4 5<br />
12 13