Terminal Guide - Chase Paymentech
Terminal Guide - Chase Paymentech
Terminal Guide - Chase Paymentech
Create successful ePaper yourself
Turn your PDF publications into a flip-book with our unique Google optimized e-Paper software.
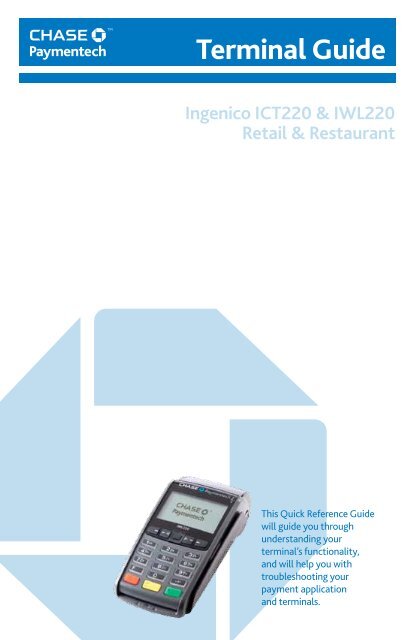
<strong>Terminal</strong> <strong>Guide</strong><br />
Ingenico ICT220 & IWL220<br />
Retail & Restaurant<br />
This Quick Reference <strong>Guide</strong><br />
will guide you through<br />
understanding your<br />
terminal’s functionality,<br />
and will help you with<br />
troubleshooting your<br />
payment application<br />
and terminals.
Key Functions<br />
1<br />
5<br />
7<br />
2<br />
8<br />
3<br />
4<br />
6<br />
9<br />
ICT220 - NAVIGATION<br />
KEY Function<br />
1 F1 – this is a variable key.<br />
2 F2 – press to scroll down.<br />
3 F3 – press to scroll up.<br />
4 F4 – this is a variable key.<br />
Press the keys beneath<br />
the display to navigate<br />
your terminal’s menus.<br />
This chart details<br />
the navigation for<br />
both the contact and<br />
wireless terminals.<br />
IWL220 - NAVIGATION<br />
Contents<br />
GETTING STARTED<br />
Key Functions.......................................................................................3<br />
Navigating Your <strong>Terminal</strong>..................................................................4<br />
Integrated Contactless Technology................................................4<br />
Available Transaction Types .............................................................5<br />
Gift Card Transaction Types (Optional) ........................................6<br />
Sample Transaction Flow Sample: ICT220/IWL220....................7<br />
Available Reports ..............................................................................8<br />
Clerk/Server Management ..............................................................9<br />
Settling the Batch ..............................................................................9<br />
REFERENCE<br />
Common Error Codes.......................................................................10<br />
1<br />
5<br />
7<br />
2<br />
8<br />
KEY<br />
3<br />
4<br />
6<br />
9<br />
Function<br />
KEY<br />
Function<br />
1 F1 – this is a variable key.<br />
2 F2 – this is a variable key.<br />
3 F3 – this is a variable key<br />
used typically to scroll<br />
through a menu.<br />
4 F4 – this is a variable key<br />
used typically to scroll<br />
through a menu.<br />
5 - F Key Press to access the System Menu.<br />
When entering text, press to specify<br />
letters and characters.<br />
6 -# Key Press to access the Admin menu<br />
for reports and management.<br />
7 -Cancel Press to immediately stop the current<br />
activity and return to the idle screen.<br />
8 -Clear/Back Press to stop the current activity and restart the<br />
current activity, such as entering a password.<br />
9 -Enter Press to confirm and continue<br />
with the activity in progress.<br />
3
Navigating<br />
Your<br />
<strong>Terminal</strong><br />
Refer to this section<br />
to find and begin the<br />
transaction or function<br />
you wish to use.<br />
Integrated<br />
Contactless<br />
Technology<br />
We’re committed to<br />
providing you with<br />
the latest technology<br />
to help you make the<br />
most of your payment<br />
processing services.<br />
For added convenience<br />
and security for<br />
both you and your<br />
customers, your<br />
Ingenico device<br />
supports both<br />
contactless and<br />
chip payments.<br />
Begin a transaction<br />
To begin a transaction, press [Enter] to access the main<br />
menu and then select the transaction type you wish to<br />
perform. Your terminal will guide you through the process.<br />
For contactless payments, the customer should touch/tap their<br />
card on or in close proximity to the terminal for a few seconds.<br />
BEGIN OTHER TRANSACTIONS<br />
Press [Enter] and select the type of transaction you wish to perform.<br />
CLERK/SERVER MENU<br />
Press [#] and then select Clerk/Server Menu.<br />
BATCH REVIEW<br />
Press [#] and then select Reports. Choose whether you would<br />
like a detail or summary report, and then specify whether you<br />
would like the report printed or simply displayed on the terminal.<br />
TIP ADJUSTMENTS<br />
Press [Enter] and select Tip Adjustment, if tip processing is enabled.<br />
REPRINT A RECEIPT<br />
To reprint a receipt, select [9] from the main menu<br />
(for retail) or scroll and select [10] (for restaurants).<br />
CONTACTLESS PAYMENTS<br />
Your Ingenico terminal automatically accepts contactless<br />
payments. Your customers can touch or tap their contactless<br />
cards on or near the device to submit account information to the<br />
terminal, removing the need to insert, swipe or manually key.<br />
During a sale transaction, the terminal will display the<br />
“Insert/Swipe/ Tap” prompt and the contactless symbol. At<br />
this time, customers with contactless-enabled cards should<br />
touch/tap their card on or in close proximity to the terminal<br />
for a few seconds. Your terminal will process contactless<br />
payment transactions as if a card were swiped or inserted.<br />
As an added security measure, for transaction amounts over a pre-set<br />
threshold, the terminal will prompt to insert or swipe the card.<br />
Note: Tip functionality requires the card to be inserted or swiped.<br />
Credit Transactions<br />
SALE* A sale transaction using a<br />
credit card; the card is present.<br />
RETURN* Perform a return to refund<br />
money to a cardholder’s account from a<br />
credit sale completed in a closed batch<br />
(i.e., previous day). May also be used<br />
to adjust a previous transaction.<br />
VOID* Perform a void to reverse a credit sale,<br />
force, or return transaction and prevent any<br />
funds from transferring from the cardholder’s<br />
account. Only available for transactions<br />
in the current batch (i.e., same day).<br />
FORCE* Perform a force sale when the terminal<br />
cannot reach the host (<strong>Chase</strong> <strong>Paymentech</strong>)<br />
to authorize a transaction, or to finalize a<br />
Pre-Auth transaction. Contact your voice<br />
authorization center for an authorization<br />
code, and then force the transaction.<br />
PRE-AUTH * An authorization-only<br />
transaction provides an approval, but<br />
does not charge the consumer until<br />
the transaction has been added to the<br />
batch by way of a force transaction.<br />
OPEN/CLOSE TAB (restaurant only)<br />
A transaction for a specific,<br />
predetermined dollar amount.<br />
Debit Transactions<br />
DEBIT SALE A sale transaction using a debit<br />
card and PIN; the card must be present.<br />
DEBIT RETURN Perform a debit return to<br />
refund money to a cardholder’s account<br />
from a debit sale completed in a previous<br />
batch; the card must be present.<br />
To initiate<br />
Press [Enter]<br />
and then select<br />
[0] - Sale.<br />
Press [Enter]<br />
and then<br />
select [1] -<br />
Return. Enter<br />
Supervisor<br />
password.<br />
Press [Enter]<br />
and then Scroll<br />
to or select<br />
[3] - Void.<br />
Press [Enter]<br />
and then Scroll<br />
to or select<br />
[4] - Force.<br />
Press [Enter]<br />
then Scroll to<br />
or select [8]<br />
- Pre-Auth.<br />
Press [Enter]<br />
and then<br />
select Tab.<br />
To initiate<br />
Press [Enter]<br />
and select<br />
[0] - Sale.<br />
Press [Enter]<br />
and then<br />
select [1] -<br />
Return. Enter<br />
Supervisor<br />
password.<br />
Available<br />
Transaction<br />
Types<br />
Your terminal<br />
supports various<br />
transaction types.<br />
Refer to this section<br />
for information on<br />
what transactions are<br />
available, when to<br />
use them, and how to<br />
begin the transaction.<br />
*Purchase and<br />
Commercial cards<br />
are supported.<br />
4 5
Gift Card<br />
Transaction<br />
Types (Opt.)<br />
If you are<br />
participating in the<br />
<strong>Chase</strong> <strong>Paymentech</strong><br />
gift card program,<br />
your terminal<br />
supports various<br />
stored value card<br />
transaction types.<br />
Refer to this section<br />
for information<br />
on what gift card<br />
transactions are<br />
available and when<br />
to use them.<br />
To begin a Gift Card<br />
transaction, press<br />
[Enter] and select<br />
Gift (does not<br />
apply to a void).<br />
Gift Card Transactions (Optional)<br />
ISSUANCE Adds value to the gift card<br />
account. This transaction can be used to<br />
issue and activate a new card, or to reload<br />
an active card with incremental value.<br />
ACTIVATION/BLOCK ACTIVATION<br />
Create a consumer’s gift card account by<br />
assigning value to a card. One or more<br />
gift cards can be activated at one time.<br />
Activations can only be performed on cards<br />
that have not been previously activated.<br />
REDEMPTION Decreases the value stored<br />
on the consumer’s gift card account. This<br />
transaction is performed when a consumer<br />
uses the card to purchase goods or services.<br />
VOID Remove a gift card transaction<br />
from the terminal’s open batch. The void<br />
will communicate to the gift card host<br />
that the transaction is being reversed.<br />
BALANCE INQUIRY Print a receipt<br />
that displays the customer’s available<br />
gift card balance, without changing it<br />
FORCE Perform a force redemption,<br />
activation or issuance when the<br />
terminal cannot reach the gift card<br />
host with a valid approval code from<br />
the voice authorization centre.<br />
To initiate<br />
Press [0]<br />
- Issuance/Add.<br />
Press [7]<br />
to select<br />
Activation<br />
or press<br />
[8] - Block<br />
Activation.<br />
Press [1]<br />
- Redemption.<br />
Without<br />
entering the<br />
Gift menu,<br />
press [Enter]<br />
and select<br />
[3] - Void.<br />
Press [2] -<br />
Balance Inquiry.<br />
Press [5] to<br />
select Issuance<br />
or press [6]<br />
- Redemption.<br />
Display<br />
Enter Sale<br />
Amount<br />
$0.00<br />
Action<br />
From the IDLE screen,<br />
Press [0] to initiate a sale.<br />
Key the amount of the sale on<br />
the iCT220 and press [Enter].<br />
Swipe/Key Card.<br />
Sale $1:00 Swipe / Insert / Tap / Key Swipe, insert, tap,<br />
or key the card.<br />
Yes<br />
Visa Credit Selected<br />
Verifying Card<br />
Confirm Amount<br />
$1.00<br />
ENTER PIN<br />
******<br />
Processing…<br />
Do Not Remove Card<br />
Approved<br />
Removed Card<br />
No<br />
No action required.<br />
Press [F1] for Yes or [F4] for No.<br />
Enter PIN and press [OK].<br />
<strong>Terminal</strong> connects to host.<br />
No action required.<br />
Receipt prints and approval<br />
is displayed. Press [Enter] to<br />
print the Customer copy.<br />
Sample<br />
Transaction<br />
Flow Sample:<br />
ICT220/IWL220<br />
ADD TIP A gift card redemption<br />
transaction for the amount of the<br />
tip, if tip processing is enabled.<br />
Press [3] -<br />
Add Tip.<br />
6 7
Available<br />
Reports<br />
Reports: Admin Menu<br />
Reports: Admin Menu<br />
To access, press [#] and then [0] and select Reports Menu.<br />
[1] ADD ID<br />
Adds new clerks or servers to your terminal. You<br />
will be prompted to create an ID and a password,<br />
if enabled, for each new clerk/server.<br />
[2] DELETE IDs<br />
Removes all or a single clerk/server from the terminal.<br />
[3] PRINT ID LIST<br />
Prints a report of clerks/servers currently signed on.<br />
[4] AUTO ADD CLERK / SERVER<br />
This feature allows you to automatically add new<br />
clerks/servers during a transaction. If you toggle<br />
the feature off, then the terminal will not allow a<br />
transaction unless a valid clerk-server ID is entered.<br />
[5] CLERK PROMPT<br />
Enable this feature to have the terminal prompt<br />
for a clerk/server ID during each transaction.<br />
[6] CLERK WORDING<br />
This feature allows you to alternate the terminal’s<br />
verbiage from “clerk,” “server” or “cashier.”<br />
Clerk/Server<br />
Management<br />
A report is like a<br />
snapshot in time of<br />
business activities.<br />
Use this data to<br />
help you make<br />
business decisions.<br />
[1] Detail Report Prints detail information for each<br />
transaction and a totals summary for each card type and issuer.<br />
[2] Summary Report Prints totals<br />
by card type and card issuer.<br />
[3] Clerk/Server Summary Prints a<br />
summary report by all or one clerk/server.<br />
[4] Open Pre-Auth Report Prints a list of all<br />
open pre-auth transactions stored in the terminal.<br />
[5] Unadjusted Tip Report Prints a list of<br />
unadjusted transactions by clerk/server, if enabled.<br />
[6] OPEN TAB REPORT Prints a list of current open tabs<br />
[7] EMV Report Prints reports related to EMV chip<br />
transactions, parameters, statistics and key settings.<br />
Accessible through the<br />
Admin menu, Clerk/<br />
Server management<br />
allows you to manage<br />
IDs and passwords.<br />
Press [#] to access<br />
the Admin menu and<br />
[1] - Server Menu.<br />
[8] Recent Error Report Displays a log of<br />
recent terminal and/or transaction errors.<br />
ABOUT SETTLEMENT<br />
A settlement operation is used to close the current batch and<br />
open a new batch for logging and accumulating transactions.<br />
Your Ingenico terminal uses a <strong>Terminal</strong> Capture System<br />
(TCS), meaning it stores transactions throughout the<br />
day and sends batch totals of sales and refunds to the<br />
host (<strong>Chase</strong> <strong>Paymentech</strong>) after the close of business.<br />
There are two settlement options:<br />
1 - MANUAL SETTLEMENT<br />
If your terminal is set to manually settle, press [Enter]<br />
and scroll to or select [9] - Settlement from the<br />
main menu, then follow the prompts displayed.<br />
2 - AUTO SETTLEMENT<br />
If your terminal is set to automatically settle, it will<br />
automatically settle transactions in the current batch at<br />
a specific, predetermined time, within a 24-hour period.<br />
When configured, auto settlement begins any time after<br />
the set time occurs if there are transactions in the batch.<br />
For example, if auto settlement time is set to 22:30:00<br />
(10:30 p.m.) then auto settlement occurs any time<br />
after 22:30:00. If the terminal is turned off before<br />
the set time, and turned on again (usually the next<br />
morning), auto settlement occurs at that time.<br />
Settling the<br />
Batch<br />
Reports: Gift Card<br />
Reports: Gift Card<br />
To access, press [Enter] and scroll to or select [5] -<br />
Gift. Press [4] to open the Gift Reports menu.<br />
[1] Gift Card Detail Report Prints detailed information for<br />
each transaction and a summary report of transaction types.<br />
Your transactions must<br />
be “settled” daily. Read<br />
this section to ensure<br />
the settlement process<br />
operates smoothly.<br />
[2] Gift Card Summary Report<br />
Prints totals by transaction type.<br />
[3] Clerk/Server Gift Card Report<br />
Prints a gift card detail report by clerk/server that<br />
includes transaction type, amount and total.<br />
8 9
Common<br />
Error<br />
Codes<br />
In the event that your<br />
terminal displays<br />
an error, refer to<br />
these error codes to<br />
troubleshoot your<br />
terminal. If the code<br />
you are experiencing<br />
is not shown, retry<br />
the transaction, or if<br />
possible, manually<br />
enter the account<br />
number. If the error<br />
persists, contact<br />
Merchant Support<br />
at 1.800.265.5158<br />
Code Description Action<br />
Batch Near<br />
Max Settle<br />
Batch<br />
Can’t Read<br />
Chip Swipe<br />
Allowed<br />
Remove<br />
Card<br />
Tap Failed<br />
Please<br />
Insert<br />
Or Swipe<br />
Card<br />
Password<br />
Locked Out<br />
Press Enter<br />
Pin Tries<br />
Exceeded<br />
The batch capacity<br />
of the terminal<br />
is nearly full.<br />
A chip card was<br />
inserted in the<br />
chip reader, but<br />
could not be read.<br />
A contactless chip<br />
card was tapped<br />
however the<br />
amount is over<br />
the contactless<br />
transaction limit.<br />
More than four<br />
invalid attempts<br />
have been made<br />
to enter the admin<br />
password.<br />
The chip card<br />
has recorded too<br />
many invalid PIN<br />
entry attempts.<br />
Complete the<br />
transaction and settle<br />
as soon as possible.<br />
The card can now be<br />
swiped on the terminal.<br />
Insert the card.<br />
The admin account<br />
will be locked out<br />
for 30 minutes<br />
or another admin<br />
account may reset<br />
the locked account.<br />
Request another<br />
form of payment.<br />
Code Description Action<br />
Amount<br />
Exceeds<br />
Card<br />
Balance<br />
Limit=$X.Xx<br />
Exceeds<br />
Amount<br />
Authorized<br />
Limit=$X.Xx<br />
Invalid<br />
Amount<br />
Displayed if a prepaid<br />
card is used for<br />
Auth Only, Pre-auth<br />
or Open Tab, and is<br />
partially approved<br />
(or fully approved<br />
but with $0<br />
remaining balance<br />
on the card), during<br />
completion.<br />
Displayed if the<br />
final amount<br />
exceeds the<br />
original amount<br />
authorized on an<br />
Open Tab or<br />
Pre-Auth<br />
transaction. This<br />
message may<br />
appear when<br />
closing the Open<br />
Tab or completing<br />
the Pre-Auth<br />
transaction.<br />
An amount greater<br />
than the cash<br />
back limit, or the<br />
ceiling limit for<br />
sale or offline<br />
transactions, will<br />
generate this error.<br />
Process completion,<br />
close tab or force sale<br />
with the originally<br />
approved amount on<br />
the Auth Only,<br />
Pre-auth or Open Tab.<br />
A new transaction<br />
can be processed with<br />
another card to satisfy<br />
any balance owing.<br />
Process completion<br />
or close tab with the<br />
originally approved<br />
amount on the<br />
Pre-auth or Open Tab,<br />
or void the original<br />
transaction and<br />
re-authorize for the<br />
full amount owing.<br />
Retry the transaction<br />
with an amount<br />
within the limit.<br />
10 11
Merchant Support<br />
1.800.265.5158<br />
WKCA-016-EN ING-Tel, RR 07/12


