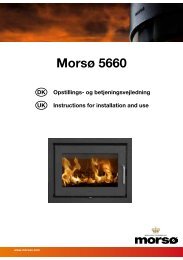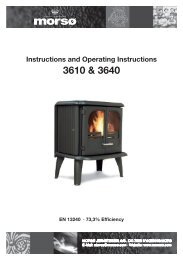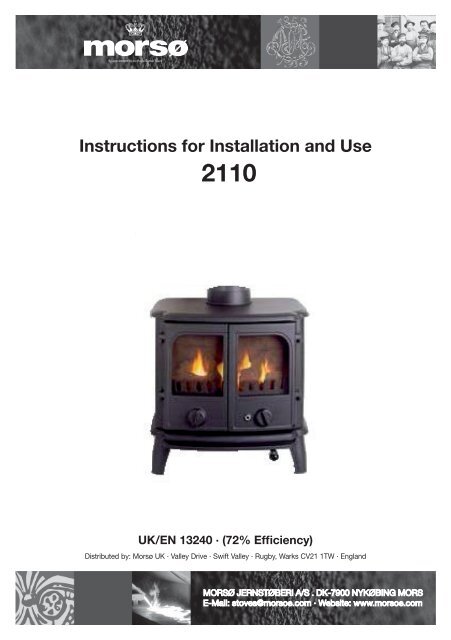
Instructions For Installation And Use 2110 - Stoves Online
Instructions For Installation And Use 2110 - Stoves Online
Instructions For Installation And Use 2110 - Stoves Online

You also want an ePaper? Increase the reach of your titles
YUMPU automatically turns print PDFs into web optimized ePapers that Google loves.
<strong>Instructions</strong> for <strong>Installation</strong> and <strong>Use</strong><br />
<strong>2110</strong><br />
UK/EN 13240 · (72% Efficiency)<br />
Distributed by: Morsø UK · Valley Drive · Swift Valley · Rugby, Warks CV21 1TW · England<br />
MORSØ JERNSTØBERI A/S . DK-7900 NYKØBING MORS<br />
E-Mail: stoves@morsoe.com · Website: www.morsoe.com
Enjoy your new Morsø stove!<br />
Morsø, the largest stove manufacturer in Denmark,<br />
has been making cast-iron stoves of the highest<br />
quality since 1853. By carefully following the instructions<br />
below, we are certain that you will enjoy<br />
many years of comfortable warmth from your new<br />
Morsø stove.<br />
CONTENTS<br />
1.0 Installing your Morsø stove Page<br />
1.1 Unpacking the stove 3<br />
1.2 Installing the stove 3<br />
1.3 Chimneysweep 3<br />
1.4 Stove placement/clearance requirements 3<br />
1.5 The chimney 4<br />
1.6 Pipe connections 5<br />
1.7 Connecting to a masonry chimney 6<br />
1.8 Connecting to a steel chimney 6<br />
1.9 Draft conditions 7<br />
2.0 Firing the stove 8<br />
2.1 Lighting instructions and fuelling intervals 9<br />
3.0 Routine stove maintenance 12<br />
3.1 External maintenance 12<br />
3.2 Internal maintenance 12<br />
3.3 Cleaning the stove 13<br />
4.0 Alternative fuel types 14<br />
Additional accessories<br />
Morsø also offers a comprehensive line of floor plates and accessory products that can facilitate<br />
the safe and efficient operation and maintenance of your Morsø stove.
1.0 Installing your Morsø stove<br />
1.1 Unpacking the stove<br />
<strong>2110</strong>: After removing the outer packaging, unbolt the combustion chamber from the wooden<br />
pallet and place it gently on its back. The cardboard packaging can be placed underneath to<br />
prevent marring. Remove the leg pack from the stove and bolt each leg/panel securely to the<br />
underside of the base on the combustion chamber, using the bolts provided (found inside the<br />
stove).<br />
We recommend that two people perform the assembly and installation procedure.<br />
The Morsø <strong>2110</strong> weighs 125 kg.<br />
The stove is intended for intermittent use.<br />
1,2 Installing the stove<br />
The stove and chimney installations MUST comply to all current National and Local Building<br />
Regulations; your approved Morsø dealer or your local building control officer can advise<br />
regarding this. Ultimately, it is you and your installer who is responsible that the installation<br />
complies.<br />
1.3 Chimney sweep<br />
It may also be wise to consult your local chimney sweep before installing the stove. After your<br />
stove has been installed, it is advisable to have the chimney checked and swept at least once<br />
a year. In any case, if your chimney has not been used for some time, it should be inspected<br />
for cracking, bird nests, etc. before it is put back into use.<br />
1.4 Stove placement/clerance requirements<br />
Minimum Clearance requirements apply if the stove is placed near to combustible materials.<br />
Permitted clearances to combustible materials are also indicated on the data plate on the rear<br />
of the stove.<br />
Min. afstand til brandbart materiale:<br />
Ovn type<br />
Bag ovnen (A) Ved Ovnens sider (B) Above the stove Møbleringsafstand<br />
Morsø <strong>2110</strong><br />
uisoleret røgrør 200 mm 400 mm 500 mm 800 mm
In situations where the stove is to be fitted into a brick or non-combustible recess, we recommend<br />
that the stove is installed with at least 10 cm clearance to the wall, this will allow room<br />
air to circulate around the stove; also the maintenance of the outside stove is easier. When<br />
applied to masonry, a layer of wallpaper is normally classified as a non-combustible surface.<br />
On the floor<br />
National and Local Building Regulations must again be observed when considering the type,<br />
thickness and area of the hearth to be used in the installation. The hearth temperature under<br />
safety test was less than 65°C.<br />
One should of course always make certain that the underlying floor surface can bear the<br />
weight of the stove.<br />
Clearance to furniture and soft furnishings<br />
We recommend that the stove be installed 800 mm from furniture. Serious consideration<br />
should also be given to positioning of any furniture that could be adversely affected by heat.<br />
The clearances to combustible materials in front of the stove should be a minimum of 800<br />
mm. When lit, a wood-burning stove gets hot and therefore adequate protect must be provided,<br />
particularly in situations where there is a safety risk to children or the infirm. A suitable<br />
safety guard around the stove should be considered.<br />
The stoves handle also gets hot when the stove is lit, which is why a safety glove is included<br />
with the stove.<br />
In the event that a chimney fire occurs resulting from faulty operation or prolonged use of<br />
damp wood fuel, close the air vents completely and contact your local fire department immediately.<br />
1.5 The chimney<br />
Only if National or Local Regulations permit are you permitted to connect a stove into a chimney<br />
that is shared by another appliance. YOU MUST be aware of any applicable Regulations<br />
in this respect.<br />
The wood-burning stove must never be connected to a chimney to which a gas-burning stove<br />
or appliance is connected.<br />
An efficient modern stove places heavy demands on the chimney, and you should have the<br />
chimney regularly swept and inspected by your approved chimney sweep.<br />
The cross-sectional area of the chimney (at its narrowest point) must comply with National<br />
and Local Building Regulations. Generally, the area needed for a Morsø wood-burning stove<br />
installation should measure at least 175 cm2 (150 mm diameter).<br />
An over-sized chimney is generally hard to keep warm and results in poor draft. In cases<br />
where there is an oversized masonry chimney, it is recommended that the chimney be lined<br />
using an appropriate chimney lining system with the correct internal diameter.<br />
With respect to the chimney termination, all chimneys should terminate in accordance with<br />
National and Local Building Regulations.<br />
Note that National and Local Regulations also apply with regard to the placement of chimneys<br />
and flues in connection with thatched roofs. See the section on Draft Conditions, 1.9.<br />
The chimney or flue system must be equipped with access doors for inspection and cleaning.<br />
The size of the cleaning door in the chimney must at least equal to that of the cross-sectional<br />
area of the chimney.
1.6 Fluepipe connections<br />
The stove comes standard with a flue collar (1) at the top and a cast-iron cover mounted on<br />
the cast-iron back panel behind the convection back panels. If you want to install the stove<br />
with a rear flue exit remove the knock out section of the convection back panel with steady<br />
hammer taps to the small bridge which holds the knock out in place. Remove the flue collar<br />
from the stove, unbolt the cast-iron cover from the back panel and install it in the top plate.<br />
Centre the flue collar in the hole on the back side of the stove and bolt it securely in place<br />
with the bolts and clamps provided.<br />
Make sure that the baffle plate (2), the fire bricks and<br />
the riddling are positioned correctly.
1.7 Connecting the stove to a masonry chimney<br />
A wall sleeve should be bricked securely into the wall of the chimney at the appropriate height<br />
and the stovepipe inserted centrally. The pipe must not extend into the actual chimney opening,<br />
but rather must reach only to the inside of the chimney aperture. The gap between the<br />
stovepipe and sleeve must be sealed using glass fibre packing rope.<br />
Only use stovepipe components that comply to National and Local Building Regulations.<br />
1.8 Connecting to a stainless steel insulated chimney system<br />
If your installation involves taking the chimney straight up and through the ceiling, you must<br />
comply with National, Local Building Regulations or flue manufacturers instructions concerning<br />
clearances to combustible materials such as walls, floor joists and ceilings. The joint between<br />
the stove flue collar and the stovepipe must also be sealed using the glass fibre rope<br />
provided. It is important that the insulated flue system is properly supported both at ceiling<br />
level and at roof level. THE STOVE MUST NOT BEAR THE WEIGHT OF THE CHIMNEY SYS-<br />
TEM (See chimney manufacturer’s instructions). Excessive weight on the stove will inhibit expansion<br />
and could lead to damage of the stove top. Damage caused to the stove in this way<br />
would not be covered by the manufacturers guarantee.<br />
In the event that a chimney fire occurs resulting from faulty operation or prolonged use of<br />
damp wood fuel, close the air vents completely and contact your local fire department immediately.<br />
Be aware of the following:<br />
Cleaning procedure: Discuss this with chimney sweep or qualified installer prior<br />
to or during the stove installation<br />
Chimney draft: If the chimney draft is naturally poor it is better to install the flue<br />
from the top of the stove so as to minimise any internal resistance of the flue<br />
gases.<br />
Avoid having any more than 2 bends in the flue system and limit the length of<br />
the offset between bends.<br />
Fresh air supply<br />
A wood-burning stove requires air for combustion and therefore you may need<br />
to install additional ventilation to the room, especially so in well insulated<br />
houses. If the air supply i inadequate the chimney draft may be too weak, with<br />
the possible result that the stove will not burn properly; smoke spillage may<br />
also occur during the refuelling process.<br />
On a positive note, a properly installed wood-burner will give even the most efficient<br />
houses a pleasant and natural ventilation.
1.9 Draft conditions<br />
If smoke spillage occurs when the fire door is opened, it is probably due to poor chimney<br />
draft. This type of stove requires at least 12 pa of chimney draft to achieve satisfactory<br />
combustion and smoke spillage prevention. However, in cases where the stove door is<br />
opened too vigorously you could expect that slight smoke spillage may occur.<br />
The flue gas temperature at the rated output is 302° C relative to 20°C.<br />
If you have any doubts, you may want to have your installer measure the draft in the chimney.<br />
Draft conditions<br />
The chimney’s draft is the resulting effect within the flue caused by the difference<br />
in temperature within the flue and the cooler temperature outside. Other<br />
factors that can influence the level of draft include the length of the flue, insulation<br />
of the chimney, adverse weather conditions or tall buildings or trees nearby<br />
the flue terminal.<br />
Poor draft occurs when:<br />
• The atmospheric temperature difference is too low, e.g. a poorly insulated<br />
chimney. If the chimney is excessively cool, it may help to ‘prime’ the flue before<br />
the fire is lit Just place a screwed-up sheet of newspaper in the flueways<br />
of the stove and ignite.<br />
• The outside temperature is too high, e.g. during the summer months.<br />
• There is no air movement (wind) outside.<br />
• The chimney is not tall enough, with the result that the terminal sits in the lee<br />
of the roof surface or in the vicinity of tall trees or neighbouring buildings. These<br />
conditions are also associated with downdraft where the flue gases are<br />
pushed back down the chimney.<br />
• Flue draft is diluted by residual air entering the chimney, e.g. due to inadequate<br />
fluepipe joints or leaks at the cleaning door or flue collar.<br />
• Unsealed, unused fireplaces are connected to the chimney.<br />
• The flue is blocked, e.g. by soot, due to inadequate cleaning, loose debris or<br />
even a birds nest.<br />
• The house is too tightly sealed (see section on Fresh air supply).<br />
A good draft is achieved when:<br />
• The temperature difference between the chimney and outside is high. This also<br />
applies during firing, when the need is greatest.<br />
• The weather is clear and there is a good wind.<br />
• The chimney is of the proper height, i.e. minimum 4 meters over the stove and<br />
the termination adequately clear of the roof line.
2.0 FIRING THE STOVE/USING YOUR STOVE<br />
<strong>For</strong> wood firing, the shaking grate and the door valves should always be closed. Primary air is<br />
only used for alternative fuel firing.<br />
Pre-heated secondary air is added to the combustion process over the glass, and controlled<br />
using the handle underneath the hot ash box.<br />
The stove’s rated heat output is 8 kW. The efficiency is 72%. Your new Morsø stove is ENtested<br />
and recommended to be fired with wood.<br />
N.B!<br />
Wood is a material that contains a great deal of gas (approximately 75 %). The gases<br />
are released when the wood is lit and heated up. <strong>For</strong> this reason, it is important<br />
that the gases are ignited quickly after stoking.<br />
If the wood just lies smouldering, especially after re-stoking, a lot of smoke is<br />
created, which, in the worst case, may cause an explosive ignition of the gasses,<br />
resulting in damage to the stove.<br />
In order to ignite the gases that are released from the wood, and to keep clear,<br />
lasting flames during the combustion process, it is important to let in the required<br />
quantity of oxygen (air supply) at all times.<br />
The setting of the air supply, the method of ignition and the lighting intervals depend<br />
on the draught in the chimney, the wind and weather, the amount of heat required,<br />
the fuel, etc. This means that it may take some time before you get to know<br />
the correct functioning of the stove under any given circumstances.<br />
Although you can fire your Morsø stove with almost all kinds of wood, you should<br />
not fire with wet wood, or unseasoned wood. Wood ought to be stored under a roof<br />
for at least 1 year, and preferably 2 years, with free access to wind. Wood should<br />
be chopped as soon as possible after felling if it is to dry quickly. The wood can be<br />
used once the moisture content is less than 20%. During the EN test, all stoves are<br />
tested with wood with a moisture content of (16 ± 4)%.<br />
Never use driftwood, as it usually has a high salt content, which damages both the<br />
stove and the chimney. Impregnated and painted wood and chipboard emit poisonous<br />
smoke and fumes, so they should not be used as fuel either.<br />
Please note that liquid fuel may not be used in the stove.<br />
Pieces of wood with a diameter greater than 10 cm should always be chopped.<br />
The pieces of wood should be short enough to be able to lie flat over the layer of<br />
embers, with air at both ends.<br />
The maximum length of fuel in the stove is 40 cm.<br />
The maximum quantity of fuel is 2.5 kg/hour (max. 3 pieces of wood each time you<br />
re-stoke).<br />
The first few times you light the stove, the fire should be moderate, so that the<br />
heat-resistant paint can harden before firing more vigorously. During the hardening<br />
phase, the paint may develop obnoxious smoke and smell the first time it is lit,<br />
which is very normal. Make sure that the room is well ventilated during this period.
2.1 Lighting and refuelling intervals<br />
A lot of air is needed when first lighting the stove. When starting with a totally cold stove, it<br />
may be helpful to leave the doors ajar (2-3 cm) during the first few minutes; the secondary air<br />
intake should be fully open - handle underneath the ash lip. In cases of poor chimney draft,<br />
the initial lighting process may be improved by adding more primary air (via the air control<br />
inlets on the doors). Please note; excessive primary air may lead to temporary smoke discolouration<br />
on the inner fire bricks and the glass panels. Therefore, it is recommended that<br />
primary air only be added during the lighting process.<br />
Wood fuel burns well when placed onto an ash bed on the grate of the stove. To achieve this<br />
you should burn roughly 1-2 kg of dry kindling the first time you light the stove. You should<br />
build and maintain the ash bed to a thickness of approximately 1 cm.<br />
1. A layer of embers will form rapidly if the stove is<br />
lit with 2 - 4 fire lighters or 7 - 10 rolled up sheets<br />
of newspaper, underneath roughly 1 kg of dry<br />
kindling.<br />
2. Fully open the secondary air by sliding the<br />
control handle to the left (controlled using the<br />
handle underneath the ash lip)<br />
3. After the paper/kindlings have caught fire, leave<br />
the fire door ajar about 2-3 mm so that the<br />
chimney draws well.<br />
4. After 5-10 minutes the chimney draft should be<br />
established, at this point close the fire doors. If all<br />
the necessary conditions are met, a nice layer of<br />
embers will start to accumulate after another 15<br />
- 20 minutes.
5. Refuelling of your stove should be done while there<br />
are still glowing embers in the bed. Spread the embers<br />
across the bottom, but concentrated mostly towards<br />
the front of the stove.<br />
6. Place three pieces of fuel weighing roughly 0.6 kg and<br />
measuring about 25 cm in length across the embers in<br />
one layer, with spacing of roughly 1 cm between the<br />
pieces of wood.<br />
7. When the secondary air supply (handle under the ash<br />
lip) is opened all the way and the doors is closed, the<br />
new fuel will ignite in a few minutes.<br />
8. Once the new fuel has taken, adjust the secondary air<br />
amount to the desired setting; optimal combustion will<br />
continue until glowing charcoals are produced.<br />
Under normal chimney draft conditions, expect to refuel<br />
your stove every 60 - 70 minutes.<br />
9. A new charge of wood can be added by repeating steps<br />
5 & 6.<br />
10
The stove door should normally be opened gently the first 2 - 3 centimetres, then you should<br />
wait until the pressure has equalised before opening the door all the way. This technique will<br />
prevent smoke from getting out, particularly when there is a poor draught.<br />
The stove door should never be opened when the stove is being fired vigorously.<br />
Once the wood has burned out, it becomes glowing charcoal. If a good layer of embers has<br />
already formed on top of a sufficient layer of ash, the stove can keep warm for a very long<br />
time, not least due to the favourable qualities of the cast iron.<br />
We would strongly recommend that you do not leave your stove alit at night.<br />
It harms the environment, and constitutes very poor use of the wood, as the<br />
gases in the wood do not ignite at the low temperature, but settle as soot<br />
(unburned gases) in the chimney and stove. Extreme conditions, such as<br />
poor draught in the chimney, large quantities of wood or wet wood, may, in<br />
the worst-case scenario, cause an explosive ignition.<br />
When firing in the summer period, when there is minimal need for heat, the<br />
combustion will be poor. The stove provides too much heat, so the combustion<br />
should be reduced. But always remember to make sure that there are<br />
lasting flames until the wood becomes charcoal. If you want a weaker fire,<br />
stoke up using less wood.<br />
If you fire the stove using wet wood, a lot of the fuel’s thermal energy will be<br />
spent forcing the water out of the wood, without releasing any heat to the<br />
stove. This incomplete combustion results in a layer of soot being left in the<br />
stove, pipe and chimney.<br />
Comparison between wood-burning and oil-burning<br />
Type of wood (moisture content 20%)<br />
No. of cubic metres per 1000 litre of oil<br />
Oak 7.0<br />
Beech 7.0<br />
Ash 7.2<br />
Sycamore 7.5<br />
Birch 8.0<br />
Elm 8.9<br />
Common spruce 10.4<br />
Silver fir 10.9<br />
11
3.0 ROUTINE STOVE MAINTENANCE<br />
3.1 External maintenance<br />
The surface of the stove is painted with heat-resistant Senotherm paint. If the stove is used<br />
too vigorously, the painted surface may take-on a greyish tinge. It is easily maintained by simply<br />
vacuuming the surface with a soft brush attachment and applying two light layers of paint.<br />
Morsø stoves are painted in Morsø dark grey. The touch-up paint is available either as aerosol<br />
spray or as regular brush-on.<br />
3.2 Internal maintenance<br />
Ceramic glass<br />
If the stove is used and installed onto a flue with the correct draft, very little or no deposits<br />
should appear on the ceramic glass. It is usual for soot deposits to appear during long slumbering<br />
fires however, once the fire has re-established a good operating temperature, these<br />
deposits should burn off.<br />
If the glass window becomes thoroughly covered in soot due to faulty operation or poor draft,<br />
the soot can be easily removed using, e.g. Morsø Glass Cleaner, but please ensure that the<br />
glass is cold before cleaning. Avoid fuelling the stove with wood that is so long that it presses<br />
against the glass when the door is closed.<br />
Reasons for sooted glass window:<br />
- fuel is too wet (green)<br />
- pieces of fuel/uncut wood are too thick<br />
- operating temperature of the stove is too low<br />
- too much air coming through bottom grate<br />
- POOR CHIMNEY DRAFT<br />
Internal cast-iron parts and/or wear components<br />
The shaking grate, baffle plate and other internal components that are in direct contact with<br />
the fire are all constituted as ‘wear’ components or consumables, as, they are exposed to the<br />
most wear. When used properly, these parts will last for many years, but overly vigorous use<br />
will naturally shorten the lifespan. The aforementioned parts are all easily replaceable.<br />
If the baffle plate is damaged or warped and is not replaced in time, the top plate could become<br />
subject to excessively high temperatures, which may lead to damage.<br />
Note: that no unauthorised alterations to the stove design should be undertaken, and<br />
always ensure that any replacement parts purchased are be Morsø original parts.<br />
Reasons for premature wear of internal parts<br />
- Stove being used/fired too vigorously<br />
- Too much air passing through the bottom grate<br />
- <strong>Use</strong> of excessively dry wood (wood from old furniture)<br />
- Excessive debris collection on baffle plate or inner fireback (see section on cleaning)<br />
- Ash level too high in the ash pan (see section on ash<br />
12
Gaskets<br />
The rope gaskets in the door will need regular inspection in order to ensure and maintain full<br />
control of your stove’s burning rate; over time the rope gaskets will harden and will become<br />
less airtight; at this point you will need to remove and replace with new. <strong>Use</strong> only the genuine<br />
Morsø gasket kit, which comes with detailed replacement instructions.<br />
NOTE:<br />
Normal wear components (inner parts) are not covered by Morsø’s 10-year guarantee.<br />
Maintenance products (Spare Parts, Glass Cleaner, Paint, Gasket Kit, etc) are all available<br />
from your authorised Morsø dealer.<br />
3.3 Cleaning the stove<br />
During normal use and sweeping of your stove and chimney, a layer of ash, soot or debris<br />
can form, particularly on the top of the baffle plate or inner fireback. Any deposits allowed<br />
to build-up over time will have an insulating effect on these parts, thus restricting expansion;<br />
this will ultimately result in a shorter lifespan. The chrome-iron baffle plate and inner fireback/<br />
bricks can easily be removed from the stove and should be regularly checked for debris and<br />
cleaned. You must ensure that your chimney sweep removes all soot and debris from the<br />
stove after the sweeping process.<br />
Your chimney should be swept at least once a year; however a regular inspection of your<br />
stovepipe and chimney will determine whether a more frequent approach should be adopted.<br />
Ash<br />
In order to achieve the highest combustion temperature possible when burning solely wood,<br />
it is important that a 1cm deep bed of ash is established on top of the grate area. Excess ash<br />
should be removed by simply agitating the grate by moving the riddling rod on the outside<br />
of the stove; surplus ash will fall into the ash pan below the grate where it can be easily and<br />
safely removed.<br />
Be sure to empty the ash pan before it gets completely full; if the ash level reaches the underside<br />
of the grate, air flow through the grate will be restricted and will lead to over-heating and<br />
premature wear of the grate parts.<br />
When emptying the ash pan always dump the waste ash into a metal container (dustbin)<br />
where it can fully cool before being taken away by your refuse collector. Ash from a wood-<br />
Maintenance parts for <strong>2110</strong><br />
Description<br />
Product Code<br />
Riddling Grate 44162500<br />
Grate Frame 44132200<br />
Baffle 44181400<br />
Front Grate 44180721<br />
Glass 790721<br />
Door Glass Kit 62904200<br />
Side brick 790920<br />
13
4.0 Alternative fuel types<br />
Your new Morsø stove is EN-approved for burning wood.<br />
However, the stove is capable of burning other solid fuels as manufactured smokeless coal<br />
or good quality anthracite (stove nuts). If you fire your stove with any fuel other than wood, it<br />
may help to use coal insert/fuel economisers (available for most models), which simply fit into<br />
the left and right sides of the firebox. Designed primarily to guide the solid fuel over the grate<br />
area they also slightly reduce the firebox capacity allowing you to have smaller fires.<br />
This is an additional accessory and can be purchased from your authorised Morsø dealer.<br />
BITUMINOUS HOUSE COAL SHOULD NEVER BE USED IN YOUR STOVE.<br />
Lighting with solid fuel<br />
Install the coal insert (where available) into the left and right sides of the firebox.<br />
All stove models are supplied with 1 front grate bar, however in the case of the 1400 series<br />
an optional second front grate bar can be purchased from your Authorised Morsø Dealer. A<br />
second front grate bar will allow for a deeper fire bed and a longer burn time.<br />
IN ALL MODELS NEVER LOAD THE FUEL ABOVE THE FRONT GRATE BAR LEVEL.<br />
All air vents must be fully open during the lighting process.<br />
Start by placing 5-10 crumpled sheets of newspaper or 2 Morsø firelighters on the grate of<br />
the stove; then carefully spread approximately 1 kg of well-dried kindling on the top. Light the<br />
paper/firelighters. Once the kindling has fully ignited, gradually add a small quantity of solid<br />
fuel, adding a little bit more once it has ignited. Continue in this manner until the entire grate<br />
is covered with glowing coals. The level of fuel in the stove should never exceed the level of<br />
the front grate(s). Once the bottom half of the fuel bed is glowing, you should partly close the<br />
bottom vent (on the door). Once the stove has reached your desired temperature you can<br />
maintain the output by opening further for more heat or closing for less heat. The top air regulator<br />
must always be open just enough so that the flames burn almost clearly and the ceramic<br />
glass window stays clean.<br />
Note: In cases where smokeless fuels containing petrocoke are burned, a pale<br />
greyish layer may be deposited on the inner glass surface when the stove is<br />
lit. Fuels containing a high content petrocoke may cause a glistening in the<br />
surface of the ceramic glass. Although visible, the structure of the glass will<br />
remain intact and the stove safe. Glass is not covered by the manufacturer’s<br />
10-year guarantee.<br />
14
In order to maintain the combustion process, the entire grate area must remain covered by<br />
glowing coals. If the coal layer is too shallow you will have less heat and it would not be necessary<br />
to supply air via the top vent.<br />
You must empty the ash pan whenever it becomes full. Different fuels have different ash content<br />
and therefore the regularity of the de-ashing process can vary.<br />
Fuel storage<br />
Your fuel supply should always be stored in a suitable, weather-tight coal bunker. These are<br />
usually available through your approved coal merchant.<br />
15
Morsø Jernstøberi A/S - 21.09.2006 - 72183500<br />
MORSØ JERNSTØBERI A/S . DK-7900 NYKØBING MORS<br />
E-Mail: stoves@morsoe.com · Website: www.morsoe.com