Soft Foot and Top Plane Flatness Checks for ... - Ariel Corporation
Soft Foot and Top Plane Flatness Checks for ... - Ariel Corporation
Soft Foot and Top Plane Flatness Checks for ... - Ariel Corporation
You also want an ePaper? Increase the reach of your titles
YUMPU automatically turns print PDFs into web optimized ePapers that Google loves.
ENGINEERING REFERENCE<br />
The contents of this document are proprietary <strong>and</strong> confidential. They are the<br />
property of <strong>Ariel</strong> <strong>Corporation</strong> <strong>and</strong> may not be disclosed, reproduced, or used <strong>for</strong><br />
manufacture in part or in whole without written permission from <strong>Ariel</strong> <strong>Corporation</strong>.<br />
<strong>Soft</strong> <strong>Foot</strong> <strong>and</strong> <strong>Top</strong> <strong>Plane</strong> <strong>Flatness</strong> <strong>Checks</strong> <strong>for</strong><br />
Proper Main Bearing Bore Alignment in<br />
Reciprocating Compressors<br />
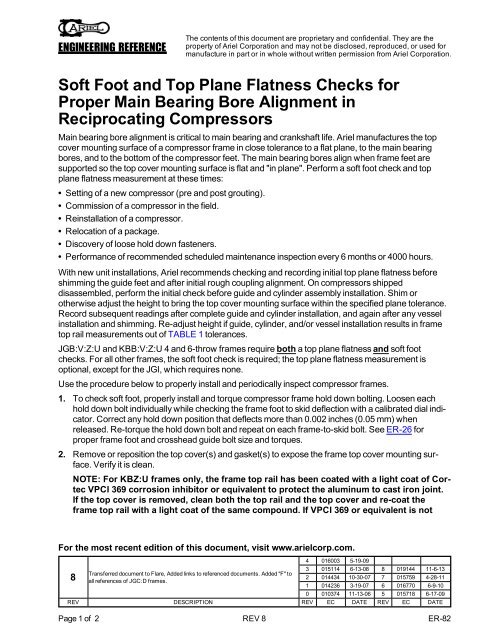
Main bearing bore alignment is critical to main bearing <strong>and</strong> crankshaft life. <strong>Ariel</strong> manufactures the top<br />
cover mounting surface of a compressor frame in close tolerance to a flat plane, to the main bearing<br />
bores, <strong>and</strong> to the bottom of the compressor feet. The main bearing bores align when frame feet are<br />
supported so the top cover mounting surface is flat <strong>and</strong> "in plane". Per<strong>for</strong>m a soft foot check <strong>and</strong> top<br />
plane flatness measurement at these times:<br />
• Setting of a new compressor (pre <strong>and</strong> post grouting).<br />
• Commission of a compressor in the field.<br />
• Reinstallation of a compressor.<br />
• Relocation of a package.<br />
• Discovery of loose hold down fasteners.<br />
• Per<strong>for</strong>mance of recommended scheduled maintenance inspection every 6 months or 4000 hours.<br />
With new unit installations, <strong>Ariel</strong> recommends checking <strong>and</strong> recording initial top plane flatness be<strong>for</strong>e<br />
shimming the guide feet <strong>and</strong> after initial rough coupling alignment. On compressors shipped<br />
disassembled, per<strong>for</strong>m the initial check be<strong>for</strong>e guide <strong>and</strong> cylinder assembly installation. Shim or<br />
otherwise adjust the height to bring the top cover mounting surface within the specified plane tolerance.<br />
Record subsequent readings after complete guide <strong>and</strong> cylinder installation, <strong>and</strong> again after any vessel<br />
installation <strong>and</strong> shimming. Re-adjust height if guide, cylinder, <strong>and</strong>/or vessel installation results in frame<br />
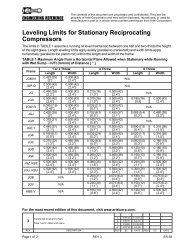
top rail measurements out of TABLE 1 tolerances.<br />
JGB:V:Z:U <strong>and</strong> KBB:V:Z:U 4 <strong>and</strong> 6-throw frames require both a top plane flatness <strong>and</strong> soft foot<br />
checks. For all other frames, the soft foot check is required; the top plane flatness measurement is<br />
optional, except <strong>for</strong> the JGI, which requires none.<br />
Use the procedure below to properly install <strong>and</strong> periodically inspect compressor frames.<br />
1. To check soft foot, properly install <strong>and</strong> torque compressor frame hold down bolting. Loosen each<br />
hold down bolt individually while checking the frame foot to skid deflection with a calibrated dial indicator.<br />
Correct any hold down position that deflects more than 0.002 inches (0.05 mm) when<br />
released. Re-torque the hold down bolt <strong>and</strong> repeat on each frame-to-skid bolt. See ER-26 <strong>for</strong><br />
proper frame foot <strong>and</strong> crosshead guide bolt size <strong>and</strong> torques.<br />
2. Remove or reposition the top cover(s) <strong>and</strong> gasket(s) to expose the frame top cover mounting surface.<br />
Verify it is clean.<br />
NOTE: For KBZ:U frames only, the frame top rail has been coated with a light coat of Cortec<br />
VPCI 369 corrosion inhibitor or equivalent to protect the aluminum to cast iron joint.<br />
If the top cover is removed, clean both the top rail <strong>and</strong> the top cover <strong>and</strong> re-coat the<br />
frame top rail with a light coat of the same compound. If VPCI 369 or equivalent is not<br />
For the most recent edition of this document, visit www.arielcorp.com.<br />
8<br />
Transferred document to Flare, Added links to referenced documents. Added "F" to<br />
all references of JGC:D frames.<br />
4 016003 5-19-09<br />
3 015114 6-13-08 8 019144 11-6-13<br />
2 014434 10-30-07 7 015759 4-28-11<br />
1 014236 3-19-07 6 016770 6-9-10<br />
0 010374 11-13-06 5 015718 6-17-09<br />
REV DESCRIPTION REV EC DATE REV EC DATE<br />
Page 1 of 2 REV 8 ER-82
ENGINEERING REFERENCE<br />
available, use marine grade grease. Apply only a light coat of the corrosion inhibitor; do<br />
not allow excess material to flow into the frame when the top cover is installed.<br />
3. To check top plane flatness, use measurement equipment<br />
with a published accuracy of +0.001 inches<br />
(0.025 mm) over the distance required to measure the<br />
entire length of both frame rails. Measure the top surface<br />
of both sides of the frame rails at each anchor<br />
bolt (see FIGURE 1), or between each pair of anchor<br />
bolts <strong>for</strong> frames with pairs of anchor bolts (see FIG-<br />
URE 2). Readings between any two adjacent points<br />
must be within 0.002 in. (0.05 mm). For proper alignment,<br />
total accumulated out of plane flatness must be<br />
within TABLE 1 tolerances.<br />
NOTE: If the unit will not be restarted immediately,<br />
re-preserve the unit in a manner appropriate<br />
to the time duration until restart.<br />
The contents of this document are proprietary <strong>and</strong> confidential. They are the<br />
property of <strong>Ariel</strong> <strong>Corporation</strong> <strong>and</strong> may not be disclosed, reproduced, or used <strong>for</strong><br />
manufacture in part or in whole without written permission from <strong>Ariel</strong> <strong>Corporation</strong>.<br />
TABLE 1 <strong>Top</strong> <strong>Plane</strong> <strong>Flatness</strong> Tolerances<br />
Compressor Frame a<br />
JGM:N:P:Q/1/2. JG:A/2/4,<br />
JGR:J/2<br />
JGA/6, JGR/4, JGJ/4/6,<br />
JGH:E:K:T:C:D:F:Z:U/2/4,<br />
JGB:V/4 a ,KBZ:U/2/4, KBB:V/4<br />
JGE:K:T/6, JGC:D:F/6,<br />
JGZ:U/6, JGB:V/6,<br />
KBB:V:Z:U/6<br />
Tolerance<br />
Inch (mm)<br />
0.004 (0.10)<br />
0.006 (0.15)<br />
0.008 (0.20)<br />
a. Underlined frames require both soft foot <strong>and</strong> top<br />
plane flatness checks.<br />
FIGURE 1 <strong>Flatness</strong> Check Locations <strong>for</strong> Frames with Single Anchor Bolts<br />
FIGURE 2 <strong>Flatness</strong> Check Locations <strong>for</strong> Frames with Pairs of Anchor Bolts<br />
Page 2 of 2 REV 8 ER-82


