

O Scale Trains Magazine Online
O Scale Trains Magazine Online
O Scale Trains Magazine Online

You also want an ePaper? Increase the reach of your titles
YUMPU automatically turns print PDFs into web optimized ePapers that Google loves.
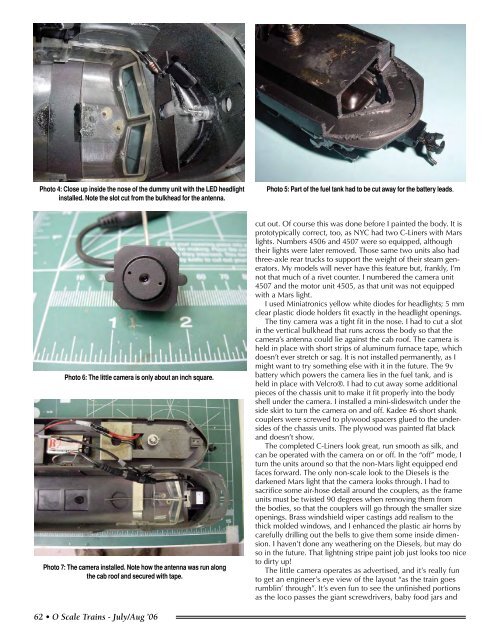
Photo 4: Close up inside the nose of the dummy unit with the LED headlight<br />
installed. Note the slot cut from the bulkhead for the antenna.<br />
Photo 5: Part of the fuel tank had to be cut away for the battery leads.<br />
Photo 6: The little camera is only about an inch square.<br />
Photo 7: The camera installed. Note how the antenna was run along<br />
the cab roof and secured with tape.<br />
cut out. Of course this was done before I painted the body. It is<br />
prototypically correct, too, as NYC had two C-Liners with Mars<br />
lights. Numbers 4506 and 4507 were so equipped, although<br />
their lights were later removed. Those same two units also had<br />
three-axle rear trucks to support the weight of their steam generators.<br />
My models will never have this feature but, frankly, I’m<br />
not that much of a rivet counter. I numbered the camera unit<br />
4507 and the motor unit 4505, as that unit was not equipped<br />
with a Mars light.<br />
I used Miniatronics yellow white diodes for headlights; 5 mm<br />
clear plastic diode holders fit exactly in the headlight openings.<br />
The tiny camera was a tight fit in the nose. I had to cut a slot<br />
in the vertical bulkhead that runs across the body so that the<br />
camera’s antenna could lie against the cab roof. The camera is<br />
held in place with short strips of aluminum furnace tape, which<br />
doesn’t ever stretch or sag. It is not installed permanently, as I<br />
might want to try something else with it in the future. The 9v<br />
battery which powers the camera lies in the fuel tank, and is<br />
held in place with Velcro®. I had to cut away some additional<br />
pieces of the chassis unit to make it fit properly into the body<br />
shell under the camera. I installed a mini-slideswitch under the<br />
side skirt to turn the camera on and off. Kadee #6 short shank<br />
couplers were screwed to plywood spacers glued to the undersides<br />
of the chassis units. The plywood was painted flat black<br />
and doesn’t show.<br />
The completed C-Liners look great, run smooth as silk, and<br />
can be operated with the camera on or off. In the “off” mode, I<br />
turn the units around so that the non-Mars light equipped end<br />
faces forward. The only non-scale look to the Diesels is the<br />
darkened Mars light that the camera looks through. I had to<br />
sacrifice some air-hose detail around the couplers, as the frame<br />
units must be twisted 90 degrees when removing them from<br />
the bodies, so that the couplers will go through the smaller size<br />
openings. Brass windshield wiper castings add realism to the<br />
thick molded windows, and I enhanced the plastic air horns by<br />
carefully drilling out the bells to give them some inside dimension.<br />
I haven’t done any weathering on the Diesels, but may do<br />
so in the future. That lightning stripe paint job just looks too nice<br />
to dirty up!<br />
The little camera operates as advertised, and it’s really fun<br />
to get an engineer’s eye view of the layout “as the train goes<br />
rumblin’ through”. It’s even fun to see the unfinished portions<br />
as the loco passes the giant screwdrivers, baby food jars and<br />
62 • O <strong>Scale</strong> <strong>Trains</strong> - July/Aug ’06


