

O Scale Trains Magazine Online
O Scale Trains Magazine Online
O Scale Trains Magazine Online

Create successful ePaper yourself
Turn your PDF publications into a flip-book with our unique Google optimized e-Paper software.
O <strong>Trains</strong><br />
<strong>Scale</strong><br />
July/Aug 2006 u Issue #27<br />
Celebrating<br />
the art of<br />
1:48 modeling<br />
US $6.95 • Can $8.95<br />
Display until Aug. 31, 2006
Celebrating<br />
the art of<br />
1:48 modeling<br />
Issue #27<br />
July/Aug 2006<br />
Art Director<br />
Jaini Giannovario<br />
jaini@oscalemag.com<br />
Contributors<br />
Ted Byrne<br />
Bobber Gibbs<br />
Mike Cougill<br />
Carey Hinch<br />
Vol. 5 - No. 4<br />
Publisher<br />
Joe Giannovario<br />
jag@oscalemag.com<br />
Editor<br />
Brian Scace<br />
brian@oscalemag.com<br />
Advertising Manager<br />
Jeb Kriigel<br />
jeb@oscalemag.com<br />
Customer Service<br />
Spike Beagle<br />
Hobo D. Hirailer<br />
Roger C. Parker<br />
Neville Rossiter<br />
Subscription Rates: 6 issues<br />
US - Standard Mail Delivery<br />
US$35<br />
US - First Class Delivery (1 year only) US$45<br />
Canada/Mexico<br />
US$55<br />
Overseas<br />
US$80<br />
Visa, MC, AMEX & Discover accepted<br />
Call 610-363-7117 during<br />
Eastern time business hours<br />
Dealers contact Kalmbach Publishing, 800-558-<br />
1544 ext 818 or email tss@kalmbach.com<br />
Advertisers call for info.<br />
O <strong>Scale</strong> <strong>Trains</strong> ISSN 1536-9528<br />
www.oscalemag.com<br />
Published bimonthly (6 times a year) by<br />
O <strong>Scale</strong> <strong>Trains</strong> <strong>Magazine</strong><br />
PO Box 238, Lionville PA 19353-0238<br />
© 2006 OST All Rights Reserved<br />
Printed in the U.S.A.<br />
Contributors: O <strong>Scale</strong> <strong>Trains</strong> welcomes your feature articles,<br />
photos, and drawings. Such material should be sent to the<br />
above address for possible publication. If we accept, you will<br />
be notified immediately. For more information concerning<br />
article preparation guidelines, please send an SASE to the<br />
above address and request our “Guide For Authors” or visit our<br />
website at: www.oscalemag.com.<br />
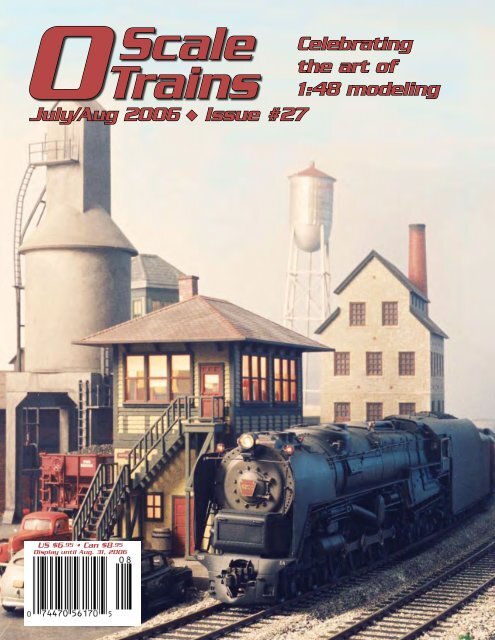
Cover & Centerspread: Harry Hieke, Jr. reworked this Custom Brass<br />
PRR S-2 for a customer. All the hatches that should open, open on<br />
both the locomotive and the tender. Anything that should slide, slides.<br />
The engine has literally hundreds of added detail parts. But, the most<br />
special feature of the locomotive is a working water scoop on the<br />
tender. Harry describes how he made that work in this issue. Both<br />
the cover and centerspread photos were staged and photographed<br />
by Jeb Kriigel of Get Real Productions. Harry painted and lettered the<br />
locomotive.<br />
Features<br />
4 A Working Water Scoop<br />
Learn how Harry Hieke, Jr., made a static detail in to a working feature.<br />
13 Canadian Pacific Ice House<br />
Got reefers? If so, you need this neat structure by Tom Houle.<br />
23 Building a Small O <strong>Scale</strong> Layout — Part 10<br />
Mike Culham adds an interior to the structure built last issue.<br />
28 OST 2K6 3rd Annual Digital Photo Contest<br />
Try your hand at winning one of this year’s prizes. It’s free!<br />
40 Building Lauther’s Perfect Pickles — Part 1<br />
Need an industry for that pickle car we built in OST #9 or the vinegar tank<br />
we built in OST #22? Martin Brechtbiel has the solution.<br />
48 Idea File: Grain Elevators<br />
Mike Cougill surveys some small grain elevators with an eye toward<br />
scratchbuilding one in a future article.<br />
58 Snap-on Hi-Rail to <strong>Scale</strong> Coupler Adapter<br />
An easy conversion project by Nick Pulskamp.<br />
60 The Creation of a Cam-Liner<br />
This project started out in one direction but ended up in another. John<br />
Fryant explains how it happened and show us the result.<br />
Departments<br />
9 Easements for the Learning Curve – Brian Scace<br />
26 The Art of Finescale – Mike Cougill<br />
29 Confessions of a HiRailer – Hobo D. Hirailer<br />
30 Reader Feedback – Letters to the Editor<br />
33 Narrow Minded – Bobber Gibbs<br />
34 PoweringUp – Ted Byrne<br />
38 Traction Action – Roger C. Parker<br />
50 Modern Image – Carey Hinch<br />
53 Product News & Reviews<br />
64 Modeler’s Shelf<br />
67 Advertiser Index<br />
68 Buy-Sell-Trade Ads<br />
68 Events Listing<br />
70 Observations – Joe Giannovario<br />
July/Aug ’06 - O <strong>Scale</strong> <strong>Trains</strong> •
A Working Water Scoop<br />
Harry Hieke, Jr.<br />
Water scoops were used on larger Northeastern roads. There<br />
is a good write-up, along with a photo and diagram, in Kalmbach’s<br />
Steam Locomotive Cyclopedia Vol. 1 (Page 21). Page 230<br />
shows a good photograph of an NYC-style scoop. It has been<br />
documented that NYC Hudsons and Niagaras could scoop water<br />
at 80 mph (up to 4000 gallons at a time) using the PT-4 and PT-<br />
5 pedestal tenders. The scoop actuator must have lowered and<br />
retracted very quickly, as the fireboy had 17 seconds to drop the<br />
scoop, scoop the water, then raise it again. Most railroads using<br />
trackpans had either blue or lunar-white lights at the beginning<br />
and end of the pans. I can’t imagine the damage that could be<br />
caused by lowering the scoop too quickly or raising the scoop<br />
too late. (A ramp was usually built at each end to minimize fouling;<br />
they are an interesting detail to add to your trackage –ed).<br />
There were at least two different types of scoops used. The<br />
PRR, Reading, and CNJ used one type, most closely represented<br />
by a Precision <strong>Scale</strong> part (#4166). The NYC used the type closely<br />
represented by a different Precision casting (#40419). Precision<br />
<strong>Scale</strong> also makes a water scoop control (Part #4766), which is<br />
normally located on the forward edge of the water leg of the tender<br />
on the engineer’s side, usually protected by a shield.<br />
Although the Precision <strong>Scale</strong> part layout shows an NYC<br />
PT-type tender, actual NYC prints show a much different piping<br />
arrangement. I would assume the water scoop system had<br />
its own reservoir, tapped into the engine air and located in the<br />
tender. Scoops usually had an air cylinder, located next to the<br />
scoop assembly itself, which controlled the scoop through a<br />
series of levers and reversing rods located inside the tender.<br />
For the purpose of this article, I’m going to start with the PSC<br />
#4166. A much simpler assembly than the NYC-style scoop, it<br />
lends itself more readily to kitbashing. The most difficult part<br />
of this assembly is not the scoop modification or the cylinder<br />
modification, but the actual linkage, fulcrum rod, bellcrank and<br />
reversing rod assembly.<br />
Photo 1 shows a #4166 as it comes from PSC. There are two<br />
main pieces, the scoop assembly and the control rod assembly.<br />
The photo also shows the cylinder assemblies we’ll be using<br />
(Precision <strong>Scale</strong> #1276 or Back Shop #BC 324, basically a 9” to<br />
12” cylinder which can be floor mounted).<br />
Photos 2 and 3 shows the completed mechanisms installed in<br />
a PRR S2 long-distance tender. You can see the actuator mechanism<br />
inside the tender, and the scoop and cylinder on the tender<br />
2<br />
3<br />
1<br />
• O <strong>Scale</strong> <strong>Trains</strong> - July/Aug ’06<br />
bottom. The first step is to actually (and carefully) “dis-articulate”<br />
the scoop and control arm mechanisms from their cast-in-place<br />
position into the various components.<br />
Photo 4 shows the various tools required to cut the side
earing hinges from the scoop assembly, namely a Dremel (or<br />
similar) tool with a thin cutoff wheel or circular saw blade. A<br />
4<br />
fixed model saw, or circular-type saw with a two inch Gyros<br />
blade attached works, too. The idea here is to preserve the maximum<br />
thickness on the side bearing hinge assembly, because it<br />
will be used in the future. It is also necessary to get an precise<br />
parallel cut along the long axis on the scoop. The Gyros blades<br />
are approximately 0.007” thick, whereas Dremel’s small cutoff<br />
wheel, in its virgin state, is 0.022” thick. I like to save my old<br />
Dremel cutoff wheels that have been “pre thinned” by side cutting<br />
in a polishing mode. These can be thinned down to 0.018”,<br />
which is sufficient for this project. For better control while cutting<br />
the scoop assembly, solder it to a brass plate. This, in turn, is<br />
used to fixture the assembly for cutting, whether using a Dremel<br />
tool or a fixed circular saw. The idea here is to have as many fingers<br />
after the cut as you had before the cut. Figure 1 shows both<br />
the scoop assembly and the bottom plate control rod assembly<br />
before and after cutting.<br />
Now, we need to drill a whole bunch of holes to serve as<br />
bearings for the various hinge pins. Figure 2 shows the location<br />
and size of these holes. It is important that your bearing joints<br />
have no “slop”; the amount of motion is so slight and freeplay<br />
in each successive joint is additive. If your joints have too much<br />
play, by the time the motion gets from the scoop down to the<br />
cylinder piston there will be no apparent motion in the cylinder.<br />
I encountered this problem and I reversed it by making the hinges<br />
as tight as possible. To keep things as slop-free as possible, I<br />
used 0.024” diameter piano wire for all of the hinge pins, and<br />
use clearance drill #70 for the holes.<br />
Now, drill the forward control yoke and the plate itself for the<br />
insertion of the control rods. These are larger holes, and probably<br />
a #58 or #56 drill should be used for these. The clearance<br />
here is actually not critical and should be fairly loose to provide<br />
for smooth motion. I used 0.042” brass round stock here, which<br />
is available from K&S at most hobby shops. I use Radio Shack<br />
silver bearing solder (0.015” diameter, part number 64035e) and<br />
Oatey liquid soldering flux to prep surfaces.<br />
Figure 3 shows the assembled and fabricated control rod/<br />
yoke assemblies, as well as the completed working scoop. It is<br />
important not to wick any solder down the hinge pin into the<br />
main scoop body. To prevent this, I coat the holes in the body<br />
with oil. You can also just use a little bit of solder and control<br />
your heat. For this job I used a Link LPT200 micro-torch which I<br />
purchased from Home Depot for about $20.00. This is a sturdy<br />
instrument, takes a great deal of abuse, has a controllable flame,<br />
July/Aug ’06 - O <strong>Scale</strong> <strong>Trains</strong> •
and a piezo lighter allowing for one-handed operation.<br />
The next step is to center-bore a cylinder to accept the 0.042”<br />
rod. I would drill all the way through the cylinder initially. This<br />
should also have plenty of freeplay and probably a #56 drill or<br />
larger would be necessary for this. Figure 4 shows the drilled<br />
out cylinder, the push rod, and fabricated clevis assembly. Now,<br />
it’s time to drill a hole on the floor of the tender. This should be<br />
approximately 1/16” by 3/8” in size. The hole should fit directly<br />
over the clevis of the cylinder. In my case, I gave the cylinder a<br />
little over a 1/8” of motion. Anything less than this is not visible<br />
and more non-realistic.<br />
Figure 5 shows a drawing of the remaining parts on the inside<br />
of the tender. Before you panic, there are only three parts to be<br />
made and there is one fixed part. Here again, all of the holes<br />
should be #70. The pins used are all 0.024” diameter piano wire<br />
and the tubes to bear the pins are all 0.045” inside diameter<br />
(Special Shapes #TT-61). I used two truck springs to provide<br />
• O <strong>Scale</strong> <strong>Trains</strong> - July/Aug ’06<br />
return pressure for the scoop, as shown. By the way, this mechanism<br />
can be radio controlled, controlled by DCC, or with a<br />
solenoid if desired. A pitfall to be careful of here is getting solder
inside the brass tube. A way to avoid this is<br />
simply to pre-tin the tube and then cut off<br />
the ends to provide a fresh brass end rather<br />
than a solder-coated end. I used this technique<br />
throughout the construction of the<br />
clevises and the hinge bearing pins.<br />
To suit the individual application, the<br />
degree of motion can be varied by changing<br />
the lever arms of the various rods. This particular<br />
scoop has a maximum scoop motion that<br />
is a downward throw of 5/16”, and the actual<br />
cylinder shaft moves approximately 1/8”.<br />
Good luck and have fun playing with<br />
your working water scoop. You’ll have<br />
tremendous bragging rights over your colleagues,<br />
and most certainly be the first kid<br />
in the neighborhood to have one (unless,<br />
of course, your neighbor is my customer).<br />
If you dare to attempt this project, feel free<br />
to contact me if you run into problems. As<br />
always, happy modeling.<br />
u<br />
Illustrations by Carey Hinch<br />
Parts List<br />
PSC# 4166 Scoop Assembly<br />
PCS# 1276 Cylinder Assembly<br />
Special Shapes TT61X Tube<br />
Special Shapes 1/16" x 1/32" Bar (flat)<br />
Special Shapes 1/16" x 1/8 Bar" (flat)<br />
Special Shapes 0.022" Piano Wire<br />
K&S 0.045" Round Bar<br />
Springs (2) 1/16" x 1/4"<br />
www.modelbuildingservices.com<br />
Assembled buildings<br />
from any manufacturer’s kit.<br />
Kitbashed, painted and detailed...<br />
“Just Like Real!”<br />
Kit by Bars Mills Models<br />
Model Building Services<br />
Models built by Stu Gralnik<br />
264 Marret Rd • Lexington MA 02421<br />
Ph: 781-860-0554<br />
stu@modelbuildingservices.com<br />
NORM’S<br />
O SCALE<br />
<strong>Trains</strong> & More<br />
Buy, Sell, Trade!<br />
www.normsoscale.com<br />
info@normsoscale.com<br />
41 Roosevelt Trail, Route<br />
302. S. Casco, ME 04077<br />
Ph: 207-655-2550<br />
Irish Tracklayer<br />
Now available: a rail insulator .010"<br />
thick for code 148 rail, $2.00 inc. S&H.<br />
Check our website for brass steam<br />
and diesel castings.<br />
Under development: a highly detailed<br />
double slip switch, complete with<br />
switch motors. A true plug and play<br />
installation.<br />
WWW.IRISHTRACKLAYER.COM<br />
2682 West Palo Alto Ave<br />
Fresno, CA 93711<br />
October 14 & 15, 2006<br />
Maryland State Fairgrounds<br />
Timonium, MD<br />
Hours: Sat 9-4; Sun 10-4<br />
Show Admission: $7 per person<br />
July/Aug ’06 - O <strong>Scale</strong> <strong>Trains</strong> •
E-Z Command ® DCC System<br />
Item No. 44902<br />
MSRP: $106.00 • SHIPPING NOW<br />
• E-Z Command ® control center<br />
• 1 amp AC wall pack power supply<br />
• connects to any track system<br />
• DVD format video instructions<br />
Unsure about DCC? Bachmann invites you to put your mind at<br />
ease with E-Z Command, the next step in digital command<br />
control. In partnership with Lenz Elektronik GmbH,<br />
Bachmann incorporates the latest digital technology to bring<br />
modelers a DCC system that is both easy to use and affordable.<br />
With a simplified programming process and intuitive controls,<br />
E-Z Command gives modelers digital mastery of speed, lighting,<br />
direction, and sound activation functions of multiple<br />
locomotives, employing plug-and-play compatibility with both<br />
existing DC systems and NMRA-compliant DCC railroads.<br />
The E-Z Command Walk-Around Companion, Walk-Around<br />
Companion Connector Panel, and 5 Amp Power Booster round<br />
out Bachmann’s E-Z Command line, allowing you to get your<br />
digital railroad up and running in no time. So take it easy! Visit<br />
your local hobby retailer to learn more about the<br />
E-Z Command system and other exciting model<br />
railroading products by Bachmann.<br />
Easy and Affordable DCC<br />
Control Speed, Direction,<br />
Lighting, and Sound Activation<br />
Plug-and-Play Compatibility<br />
Simple Programming<br />
E-Z Command ®<br />
Walk-Around Companion<br />
Item No. 44907 • MSRP: $94.00<br />
E-Z Command ®<br />
Walk-Around Connector Panel<br />
Item No. 44908 • MSRP: $35.50<br />
E-Z Command ®<br />
5 Amp Power Booster<br />
Item No. 44910<br />
MSRP: to be announced<br />
Bachmann <strong>Trains</strong> • 1400 East Erie Avenue • Philadelphia, PA • www.bachmanntrains.com<br />
• O <strong>Scale</strong> <strong>Trains</strong> - July/Aug ’06
The Control Thing<br />
Things have changed quickly in the control system<br />
world, since our last issue. Atlas O has dropped the 2-Rail<br />
TMCC option and is (as this is written) going with a preinstalled<br />
QSI sound/DCC system, instead. There’s been a<br />
lot of snarling, wailing, and gnashing of teeth going on,<br />
so here’s a couple thoughts from a clear (been on the<br />
Wagon for, oh, three hours now!) head. There are a couple<br />
of options for you guys and gals who feel left holding<br />
the bag with a lot of TMCC two-rail Diesel power, and no<br />
ball to go to anymore. I’m not getting into the dogfight<br />
about changing systems again, so realize that these are<br />
just options for the confirmed or committed TMCC types.<br />
I’ll throw in a bit of a review, here, for Option 1. I got a<br />
couple of RS-1s back from Mike Reagan at Train-America<br />
Studios the other week. They did a pretty frisky turnaround<br />
on them, and they run very nicely with the rest of<br />
my Diesel fleet, which is all TMCC equipped. (You see,<br />
I’m in the same boat you are.) This is certainly a viable<br />
option, as these guys know the system and can install the<br />
stuff you need in the tightest of quarters. Mike says that<br />
these installations are not limited to just Atlas Diesels,<br />
but can be made in just about anything you have. Anyhow,<br />
the installations were neatly done, without banging<br />
anything up, and they fired up flawlessly. Mike now has<br />
my GP-35 to upgrade with EOB, and an SD-40 for a complete<br />
installation job. I’m quite pleased with the work and<br />
workmanship.<br />
Option 2 came up during a talk with Jim Weaver (from<br />
Atlas) at the York show this spring. Since Atlas is continuing<br />
with TMCC for our 3-Rail brethren (and sistren), you<br />
have the option of ordering a 3-Rail TMCC locomotive,<br />
then ordering up a pair of two-rail trucks, spacer blocks<br />
for the pilots, and scale couplers. Jim told me that these<br />
can be had, available from Atlas. Unscrew the threerail<br />
trucks, unsolder the pickup wires (mark ‘em, so you<br />
don’t mix them up and fry anything!), re-attach the pilots<br />
with the spacer blocks, add your couplers, and screw the<br />
trucks on. Check with Atlas first, but I believe it can be<br />
done pretty simply. I’ll try this stunt myself and see if it’s<br />
as simple as I make it sound.<br />
Option 3 is more of a reminder than an option, but<br />
Weaver still (as of this writing) offers two-rail Diesel<br />
power with TMCC. We’ll all just have to watch this<br />
and see where it goes. Meanwhile, as benchwork goes<br />
together at Scace’s New Digs, it’s still in the plan to block<br />
the railroad and have plug-in/plug-out power sources and<br />
control systems. Like the previous iteration, I’ll be able to<br />
run my main emphasis of 1940s steam power with Locolink<br />
(filtered DC source), steam power on good ol’ cabcontrol<br />
(variable DC source), or lock the doors for some<br />
Diesel-era memories using the TMCC system I’d committed<br />
many a unit to (AC source). Just jack ‘em out and jack<br />
‘em in. Who knows, maybe I’ll have a small roster with<br />
DCC someday.<br />
The Car Thing<br />
This one comes up quite often, so I’ll throw in my<br />
$0.02 worth one more time. There’s lots of angst about<br />
the fact that all these neat diecast vehicles are 1/43 scale,<br />
and our trains are 1/48 scale. Once again, I say, “Measure<br />
‘em!” I can’t vouch for the modern-era stuff, but I<br />
can throw my dog in the ‘30s – ‘50s era fight with some<br />
thoughts and some facts.<br />
I believe that the mid-1930s through mid 1950s stuff<br />
was bigger than many folks think. I have a 12”/1’ scale<br />
1940 Chevy in my garage. I can’t see over the fool thing,<br />
so your little plastic guys shouldn’t be able to see over<br />
theirs. I’ve measured out a few of the diecast offerings,<br />
and they’re just not consistently in scale. You neurotics<br />
can get out on the Web and find the wheelbases for just<br />
about anything ever made. Then, holster up a scale rule<br />
for the hunt, and you should be good to go. For the rest<br />
of us, a couple figures in your pocket makes a dandy<br />
perspective check. Just put a standing Arttista figure next<br />
to your prospective purchase, and you’ll get a feel. Just<br />
remember, after a couple decades of little cars in your<br />
garage it’s easy to forget how big a Chevy sedan really<br />
was. You might want to go to a car show or two and reacquaint<br />
yourself with the cars from your chosen era. You<br />
might be a bit surprised.<br />
You will find some that are just too big. I’ve found a<br />
perfectly huge collection of vehicles that feel right, and<br />
are actually undersized for 1/43 (It would appear that<br />
the car collectors aren’t quite as anal as we tend to be.) I<br />
surely wouldn’t want to stuff an Arttista man, especially<br />
wearing the obligatory period headgear, in one of those<br />
1/50 Greyhounds that are widely available. That scale<br />
disparity between the figures and that bus is an incredible<br />
visual jar for me. My unsolicited advice? Don’t believe<br />
the box when it says 1/43, or 1/50, or whatever. Measure<br />
the fool thing, either with a scale rule or with an eye<br />
and a figure. There’s more useful stuff out there than you<br />
would otherwise think if you actually trusted these folks<br />
to make ‘em to the scale printed on the box.<br />
Stop the Wagon; I’m getting’ off!<br />
Let’s go Exploring!<br />
u<br />
July/Aug ’06 - O <strong>Scale</strong> <strong>Trains</strong> •
10 • O <strong>Scale</strong> <strong>Trains</strong> - July/Aug ’06
Central’s Latest Releases<br />
GP38-2, GP40-2, SD40-2, SD40T-2 & SD45T-2<br />
How To:<br />
Get Started in<br />
2-Rail<br />
GP40-2<br />
The finest in modern O <strong>Scale</strong> Brass. 2 or 3-Rail operation. Machined<br />
brass frames and fuel tanks, Pittman motor with dual flywheels. Your<br />
choice of gear ratios, wheelsets, detail parts, etc. Custom built to your<br />
specs. Kits $650 - $800. Custom built, painted and lettered $1100<br />
to $1400.<br />
Central Locomotive Works<br />
PO Box 1231 • Hesperia CA 92340<br />
ph 760-244-9222 • fax 760-244-9322<br />
e-mail clw2000@earthlink.net<br />
www.centrallocomotiveworks.com<br />
<strong>Scale</strong><br />
Realistic • Accurate • Affordable<br />
Come Discover Modern O-<strong>Scale</strong> Models<br />
at These 2-Rail O-<strong>Scale</strong> Meets<br />
Visit www.oscalekings.org for links to many 2-rail O-scale sites.<br />
This ad runs twice a year, so check it in 6 months for<br />
meets that have been added or changed dates.<br />
For an illustrated brochure please send an LSSAE #12 envelope to:<br />
O <strong>Scale</strong> Kings, 304 Christopher Place, Union, MO 63084-2931.<br />
Ad sponsored by O <strong>Scale</strong> Kings & the 2-rail O scale meets listed at right.<br />
DM&M Railroad Company<br />
Hand-built O <strong>Scale</strong> telegraph poles and<br />
accessories or custom-built to order. See<br />
the review in O <strong>Scale</strong><br />
<strong>Trains</strong> <strong>Magazine</strong>,<br />
issue #26.<br />
Contact us for orders<br />
or a custom quote:<br />
DM&M RR Co.<br />
5931 Endicott Rd<br />
Columbus OH 43229<br />
www.dmmrailroad.com<br />
614-554-2959<br />
we have O scale laser cut wood kits, from depots to<br />
residences... check us out on the web at<br />
www.bantamodelworks.com<br />
or send $7 for a ful color catalogue<br />
banta modelworks<br />
421 Hopkins Road, Dummerston, VT 05301<br />
February 16 - 17, 2007, San Francisco, CA area<br />
17th Annual O <strong>Scale</strong> West Meet<br />
LSSAE for information to:<br />
O <strong>Scale</strong> West, Dept. OSK<br />
876 Boyce Avenue<br />
Palo Alto, CA 94301-3003<br />
July 17 - 23, 2006, Parsippany, NJ<br />
2006 O <strong>Scale</strong> National Convention<br />
LSSAE for information to:<br />
Robert Lavezzi C/O New York Society of Model Engineers<br />
341 Hoboken<br />
Carlstadt, NJ 07072<br />
September 22 - 23, 2006, Indianapolis, IN area<br />
Indianapolis Midwest "O" <strong>Scale</strong> Fall Meet<br />
LSSAE for information to:<br />
James Canter, Dept. OSK<br />
1203 Rotherham Lane<br />
Beech Grove, IN 46107-3323<br />
October 7 - 8, 2006, Oklahoma City, OK area<br />
Southwest O <strong>Scale</strong> Meet<br />
LSSAE for information to:<br />
George B. Wallace, Dept. OSK<br />
11937 Stratford Drive<br />
Oklahoma City, OK 73120<br />
VALLEY<br />
MODEL TRAINS<br />
PO BOX 1251, Wappingers Falls, N.Y. 12590<br />
Credit Card Orders Welcome<br />
Order/Info(845)297-3866 Fax(845)298-7746<br />
Laser-Art Structures O Laser Cut kits<br />
462<br />
Kit includes appropriate<br />
signs and coal bin.<br />
401<br />
A comfortable,<br />
convenient<br />
cottage home<br />
of six rooms,<br />
with Tower<br />
462 Flagstop Station O... 5" x 6" x 4" ............39.98 36.00<br />
401 Tower House O.. 10" x 7" x 12" .........179.99 161.98<br />
The prototype<br />
480<br />
for the kit was<br />
built at Clark’s,<br />
near Campbell<br />
Hall, NY on the<br />
New York,<br />
Ontario &<br />
Western RR.<br />
480 The Creamery O.....12" x 7" x 5".......199.98 179.98<br />
Crow River Products O....Crafstman kits<br />
Includes additional<br />
walls to increase<br />
the size of the<br />
main building.<br />
(Tree not<br />
included)<br />
305B<br />
305B Barrett and Sharp.16"x16" approx .....265.00 225.00<br />
315<br />
Bar Mills Models O.. Laser Wood Kits with details<br />
934 944<br />
934 Saulena's Tavern O.... 5 3/4" x 11" net 99.98<br />
944 Majestic Hardwar & Feed O 9” x 12”net 169.98<br />
Rusty Stumps.. HO Limited Edition Kits<br />
K4502<br />
O56<br />
The Fall Creek Freight Depot<br />
is a laser cut craftsman kit.<br />
22' x 46' Footprint 5-1/2x11-1/2<br />
K4503<br />
K4502 Backwoods Water Tower O .............net 79.95<br />
K4503 Fall Creek Freight Depot O... ..........net 69.95<br />
Downtown Deco.... O Limited Edition Hydrocal Kits<br />
The two buildings, Johnny Stechino's &<br />
Big Ed's, have a bit of something for everyone.<br />
Vehicle and figures not included<br />
This kit consists of CRP 305 Sylvester<br />
Supply Co. and the 305D Barrett &<br />
Sharp Diorama Kit.<br />
Includes 307<br />
Stainless Steel<br />
Industrial<br />
Smoke Stack<br />
and an<br />
Eyebrow<br />
Monitor for<br />
roof detail<br />
This kit makes an eye-popping diorama<br />
Twin Drum Hoisting<br />
Winch O… The hoisting<br />
unit is based on a unit<br />
built by American Hoist<br />
& Derrick. Although not<br />
an exact replica of the<br />
unit it's best features<br />
are included in this<br />
unpainted model kit.<br />
Sale 62.60<br />
Electric Winch / Car<br />
Puller O - 12.00<br />
40<br />
40 Johnny Stechino's & Big Ed's O ......89.95 81.00<br />
Add $6.00 S&H in 48 States • Others pay actual<br />
postage cost • N.Y. residents add 8.25% sales tax.<br />
(prices are subject to change w/o notice)<br />
www.valleymodeltrains.com<br />
Now order online! valleymodeltrains.com Visit our website to see hundreds of HO and O <strong>Scale</strong> Craftsman Kits valleymodeltrains.com Now order online!<br />
July/Aug ’06 - O <strong>Scale</strong> <strong>Trains</strong> • 11
M<br />
ullet River<br />
odel Works<br />
118 Huson Ct. • Plymouth, WI 53073<br />
Phone 920-892-8159<br />
WWW.mulletrivermodelworks.com<br />
Chicago & Northwestern<br />
Caboose<br />
> Laser cut plywood body with working windows<br />
> Full interior with roof ribs and purlins<br />
> Separate doors can be modeled in the open position<br />
> Urethane underframe<br />
> Decals for CNW, CStP M&O, and W&NW<br />
> Three different versions<br />
O <strong>Scale</strong><br />
Kit #403004 Late version with no end windows $120.00<br />
Kit #403005 Early version with end windows $120.00<br />
Kit #403006 Original all wood underframe $120.00<br />
12 • O <strong>Scale</strong> <strong>Trains</strong> - July/Aug ’06
Canadian<br />
Pacific<br />
Icehouse<br />
Tom houle<br />
I like smallish structures. They fit<br />
nicely on my modest O <strong>Scale</strong> layout, and<br />
don’t overpower my locos and rolling<br />
stock. I spotted this CPR icehouse while<br />
searching through an old stack of Model<br />
Railroader magazines. The icehouse ran<br />
as a one-page article titled “CPR Standard<br />
No. 2 Icehouse” in the March, 1978<br />
issue. The article had a prototype drawing<br />
by Harold W. Russell and a few paragraphs<br />
of text ostensibly by the Model<br />
Railroader staff. What caught my eye<br />
was the outside staircase and louvered<br />
cupola details. It was a simple structure<br />
with details that wouldn’t challenge my<br />
scratchbuilding skills. I also had a string<br />
of wood-sided reefers and no icehouse to<br />
service them.<br />
The icing on the cake was its size. The<br />
structure was 40’ long and 32’ deep. In<br />
O <strong>Scale</strong> that’s an 8” x 10” footprint. I had<br />
no idea icehouses were ever built that<br />
small. All the icehouses I’ve ever seen, in<br />
prototype or kit form, were much longer<br />
with elevated platforms that could ice<br />
several cars at a time. Apparently, the<br />
Canadian Pacific saw a need for a single<br />
car icehouse. In any case, this beauty<br />
was perfectly suited for an unoccupied<br />
siding at a bend in my layout.<br />
According to the MR article text, Mr.<br />
Russell drew the structure from 1914<br />
Canadian Pacific drawings. The structure<br />
has four bays, with a total ice capacity<br />
of 318 tons; small as icehouses go. Additional<br />
bays could be added in 12’ increments<br />
to increase icing capacity. MR says<br />
an average reefer needs about five tons<br />
of ice in chunk form. With its 318 ton<br />
capacity, this icehouse is not likely to run<br />
out of ice while servicing the handful of<br />
reefers I operate on my branch line.<br />
Interested? Let’s get started. I like to<br />
gather all of the basswood stock I need<br />
ahead of time. That way, when I’m in<br />
the middle of a sub-assembly at 9:00 at<br />
night, I don’t find myself running out of<br />
critical material before I finish whatever<br />
it is I’m working on. I began construction<br />
with the cupola, as I thought those louvers<br />
might be a bit pesky. I like to get the<br />
pesky stuff out of the way first.<br />
Cupola Construction<br />
I began by breaking out my Northwest<br />
Short Line Chopper and jigging it<br />
to cut 32 louvers for the four sides of the<br />
cupola. The louvers are cut from Evergreen<br />
0.020” x 0.125” styrene strip. The<br />
cupola end louvers are cut 27/32” long.<br />
The cupola side louvers are cut 15/16”<br />
long. As shown in Photos 1 and 2, and<br />
in Figure 1 (see page 17) , the louvers<br />
slide into grooves notched into the 1/16”<br />
x 1/8” louver frames. The whole process<br />
of cutting the grooves, pinning down the<br />
louver frames over the drawing, and then<br />
1<br />
sliding each louver into its set of grooves<br />
is kind of tedious. A pair of tweezers<br />
helped me set the louvers in place. Bear<br />
with it. It’s what we scratchbuilders do,<br />
and you’ll end up with a respectable<br />
looking louvered cupola. Visitors to your<br />
layout might even take a second close<br />
look at your cupola and mutter, “How’d<br />
you do that?”<br />
My inclination when doing this sort of<br />
thing is to throw away a piece if it doesn’t<br />
quite fit and just re-do it. I believe that’s<br />
part of what makes great modelers great.<br />
They aren’t necessarily more talented<br />
than us peons but they are persistent and<br />
willing to toss-and-repeat until they get it<br />
right. A tiny dot of slow-setting CA glue<br />
at the end of each louver will secure the<br />
louvers to the louver frame.<br />
When the louver sub-assemblies were<br />
done, I cut out the cupola sides and<br />
ends from 1/32” basswood sheet. The<br />
louver frames were carefully positioned,<br />
and then glued to the inside faces of the<br />
cupola ends and sides. Before you assem-<br />
2<br />
July/Aug ’06 - O <strong>Scale</strong> <strong>Trains</strong> • 13
le the four sides into a finished cupola,<br />
you’ll have to taper the outside faces<br />
of the louver frames. Without the taper,<br />
there won’t be room for the corners to<br />
come together. Note that the cupola end<br />
walls fit between the sidewalls. I made<br />
up a right-angle jig to ensure my cupola<br />
was square when I glued it up.<br />
This cupola has a hipped roof. The soffits<br />
that extend beyond the four cupola<br />
sides are cut from 1/32” and 1/16” basswood<br />
sheet. This sandwiched construction<br />
replicates the stepped soffit of the<br />
prototype. Soffit construction should be<br />
clear in my drawings. To facilitate attachment<br />
of the four roof hips, I cut triangular<br />
internal supports from 1/16” basswood<br />
sheet and glued them to the sub-roof. The<br />
four triangular roof panels were cut from<br />
1/32" basswood and glued to the internal<br />
roof supports. This completes the cupola.<br />
Walls Construction<br />
The side- and end walls of the icehouse<br />
(see Figures 2 & 3, Page 18) are<br />
covered with 6” drop siding, which I replicated<br />
with Northeastern <strong>Scale</strong> Lumber<br />
1/16” thick x 1/8” scribed basswood. I<br />
used 6” wide sheets to minimize buttjoints.<br />
There are no windows in this structure<br />
and only two doors (see Photo 3). I<br />
cut in and framed the upper and lower<br />
3<br />
laminate 1/8” sheet or just use 3/16”<br />
sheet if that’s what you have on hand.<br />
The floor sits between the side- and end<br />
walls. You’ll have to lightly notch the corners<br />
to clear the four 1/8” square corner<br />
trim strips. When the floor was cut to the<br />
correct width and length, I drew a lengthwise<br />
center line. This center line ensured<br />
the end walls were centered to the floor<br />
when I glued them to the floor. The end<br />
walls are attached before the sidewalls.<br />
Make sure the end walls are vertical<br />
and at right angles to the floor. I taped a<br />
square to the floor to make sure my walls<br />
were plumb.<br />
The sidewalls were next. First I glued<br />
the sidewalls to the edges of the floor<br />
before I glued the corners. I taped the<br />
outside corners of the four walls together<br />
to hold the corners in alignment. When I<br />
was satisfied with the fit-up of the corner<br />
trim strips, I ran a bead of slow-setting CA<br />
glue along each inside corner. The glue<br />
wicked its way into the corner joints. I<br />
reinforced the corner glue joints with<br />
another application of CA glue and baking<br />
soda sprinkled onto the still-wet glue.<br />
The four walls and floor were finished<br />
up with a pair of 1/8” x 1/4” ridgepoles<br />
tapered to meet at the ridge (see Photo<br />
4). Another pair of these strips was glued<br />
between the end walls just above the<br />
4<br />
to increase the foundation height. The CP<br />
drawing specifies the height from railhead<br />
to icing platform deck as 12’ 2-1/2”<br />
(3” to 3-3/64” in O <strong>Scale</strong>).<br />
Upper and Lower Platform Construction<br />
Photos 5 – 7 show how I built up my<br />
platforms and then attached them to the<br />
front wall. My drawings (Figure 4, Page<br />
19) depict the scale prototype structure.<br />
The upper icing platform consists of two<br />
6” x 9” stringers which support 2 x 6<br />
joists on 24” centers. The upper decking<br />
is 1-1/2” x 6” planks that run the length<br />
of the deck. Note where the joists are<br />
doubled or “sistered”. The lower platform<br />
has 1-1/2” x 3” planks over large beams<br />
which rest directly on the layout. These<br />
lower platform planks run at right angles<br />
to the upper deck planking.<br />
I began with the upper deck. I used<br />
a copy of the drawing as my plan. To<br />
ensure the joists were on center, I built<br />
the deck upside down. First, I cut and<br />
then pinned down on edge all the joists<br />
and then I added the two 1/8” x 3/16”<br />
stringers. Like the joists, the stringers<br />
were set on edge. When everything was<br />
aligned, I wicked slow-setting CA glue<br />
into every joint. Since the upper platform<br />
decking was to be left unpainted and<br />
aged with AIM Products Quick-Age solution,<br />
I didn’t add the decking. The deck-<br />
5<br />
door openings while the walls were still<br />
in the flat. To simulate the trim around<br />
the sides and tops of the door openings,<br />
I glued in strips of 1/16” x 1/8” strip.<br />
The door trim is set flush with the siding.<br />
The doors are cut from the same siding<br />
stock as the walls. Note that the door<br />
grooves run vertically. When the doors<br />
were glued in place, I added Grandt Line<br />
hinges. As it turns out, these hinges are<br />
dead ringers for the riveted strap-iron<br />
hinges used by the CPR. Sometimes you<br />
get lucky and don’t have to scratchbuild<br />
these things. The two sidewalls, at their<br />
ends, received 1/8” square corner trim<br />
strips. These trim strips are glued flush<br />
with the outside faces of the sides. The<br />
end wall peaks received 1/16" x 1/ 8"<br />
trim strips. The 1/16” faces should face<br />
the outsides of the end walls.<br />
I made up a floor from two 3” widths<br />
of 1/4” basswood sheet. You could also<br />
14 • O <strong>Scale</strong> <strong>Trains</strong> - July/Aug ’06<br />
tops of the sidewalls. These strips provide<br />
a generous gluing surface for the roof. I<br />
block-sanded the strips so that the roof<br />
panels fit snugly over the end peaks and<br />
sidewalls. The tops of the sidewalls were<br />
angled and block-sanded to match the<br />
angle of the roof.<br />
I added 3/16” thick foundation strips<br />
under the floor. The foundation strips<br />
are recessed 1/32” from the face of the<br />
siding. The foundation height should be<br />
adjusted to suit your roadbed and rail<br />
height. I use Code 100 rail, and 5/32”<br />
thick ties that lie right on the benchwork.<br />
Consequently, a 3/16” foundation height<br />
sets my icing platform at the prototype<br />
height. If you use roadbed beneath your<br />
ties and/or a taller rail height, you’ll need<br />
6<br />
7
ing would go on after the platform was<br />
attached to the front wall and the structure<br />
had been painted.<br />
The lower platform was built right side<br />
up over a copy of the plan. After the four<br />
support beams were pinned down over<br />
the plan, I cut the decking from 1/32”<br />
thick 1/16” scribed basswood sheet.<br />
You’ll need to edge-glue several pieces to<br />
complete the lower platform decking. I<br />
would have left off the decking until after<br />
the structure was painted, but the lower<br />
decking had to be in place before I could<br />
add the 6” square (1/8” square) platform<br />
support posts.<br />
I built the two platforms into a single<br />
unit before I attached them to the front<br />
wall. See Photos 5 – 7 for details. First, I<br />
cut the eight 1/8” square posts that support<br />
the upper platform. Then, I pinned<br />
down the rear edges of both platforms<br />
over the decking plan. I made sure the<br />
two platforms were perfectly vertical<br />
before the eight posts were slid into place<br />
and glued to the upper platform stringers<br />
and the lower platform decking. At this<br />
time, I should have added the 1/16” x<br />
3/16” diagonal sway braces to the front<br />
of the platform assembly. For no good<br />
reason, I overlooked this detail until the<br />
structure was finished. I had to add them<br />
afterward. That’s why you don’t see them<br />
in the unpainted photos. The finished<br />
platforms were then glued to the front<br />
of the structure. To allow a little time for<br />
the platforms to be correctly positioned<br />
before the glue set up, I used Elmer’s<br />
White Glue to attach them.<br />
Staircase Construction<br />
I followed Harold Russell’s excellent<br />
drawing of the staircase and duplicated<br />
it exactly in basswood. If you don’t care<br />
to scratchbuild the staircase, Plastruct<br />
has risers and treads that should work.<br />
You’ll still have to build up the railing.<br />
Staircase construction began with the two<br />
risers. Before I cut the risers, I checked<br />
the height on my model from the upper<br />
platform to the bottom edge of the foundation.<br />
Small dimensional differences<br />
from the drawing can creep in, and the<br />
angular slant of the staircase risers will<br />
compound an error. The top tread on<br />
the staircase should sit 3/16” below the<br />
upper decking.<br />
The easiest way to make the risers<br />
is to lay out the tread notches and riser<br />
outlines on a sheet of 1/32” basswood.<br />
When you have the lines drawn, cut the<br />
tread, right angles first, and then cut the<br />
riser outlines. A fresh #11 X-Acto blade<br />
will ensure that your cuts are clean, with<br />
no crushed wood. See Photos 8 – 12 for<br />
clarity.<br />
The treads are 1/32” x 3/16” basswood<br />
8<br />
9<br />
10<br />
11<br />
12<br />
strip. I cut mine to a uniform length on<br />
my Northwest Short Line Chopper. The<br />
risers were then pinned in place, on edge<br />
and the correct distance apart. A block at<br />
the bottom end of the risers lined them<br />
up. A pair of tweezers made short work<br />
of gluing the treads to the risers. It’s really<br />
much easier to do than it sounds.<br />
The staircase railing was built in one<br />
piece, right over the plan, using basswood<br />
strips as specified on the plan<br />
(Figure 5, page 20). When the railing<br />
was done, I glued the 1/16” square posts<br />
to the outside riser and then glued the<br />
assembled staircase to the side of the<br />
building. The building, sans roof and<br />
cupola, is now complete.<br />
Roof, Cupola Installation, and Paint<br />
The CP prototype has minimal roof<br />
overhang. The 6” rafters were boxed in<br />
with fascia and soffit trim boards. To replicate<br />
this feature, I used 1/8” thick basswood<br />
sheet for the roof panels. I hid the<br />
exposed end-grain at the peak ends with<br />
1/32 x 1/8” basswood trim strips (Figure<br />
6, Page 17).<br />
After gluing up and cutting the two<br />
roof panels to size, I beveled their upper<br />
edges so that they met neatly at the ridge.<br />
The roof panels were glued in place with<br />
Elmer’s White Glue and held down with<br />
masking tape while the glue cured. I<br />
recommend the tape because the white<br />
glue can warp the panels just enough to<br />
impart some curl before the glue sets.<br />
I measured the footprint of my cupola,<br />
then marked that outline onto the roof.<br />
Two Zona-saw cuts were made, crossgrain<br />
to the roof ridge, then down into<br />
the roof. I made the remaining two cuts<br />
with an X-Acto knife. I cut the roof opening<br />
slightly undersized and then trimmed<br />
the opening so the cupola slid snugly<br />
into the opening. I plumbed the cupola<br />
and glued it in place with slow-setting<br />
CA glue.<br />
We’re now ready to paint the structure<br />
(except for the roof), and upper and<br />
lower platform decking. Then I’ll show<br />
you a neat way to replicate asphalt roofing<br />
shingles. At this juncture, I masked off<br />
the entire roof, the upper platform joists,<br />
and the lower platform decking. I left the<br />
eaves and roof ends exposed for painting.<br />
My research on the correct colors for<br />
CP icehouses began at CPR’s archives<br />
website, migrated to Ted Culotta’s excellent<br />
Steam Era Freight Car Yahoo discussion<br />
group, and then the CPRSIG<br />
(Canadian Pacific Special Interest Group)<br />
Yahoo group. See the references at the<br />
end of the article for the Internet links.<br />
Overall, I received several responses<br />
which varied by sender. I’m sure much of<br />
the variation is due to the different locations<br />
where these icehouses were built<br />
and the span of time over which these CP<br />
structures were in use.<br />
Jo-Anne Colby, at the CP archives, says<br />
the body and trim of the icehouses were<br />
brown. The upper body and eaves were<br />
a cream color. Roofing was dark gray<br />
asphalt shingles. A CPSIG contributor<br />
suggested using red oxide, as the builders<br />
bought their paint locally and likely<br />
July/Aug ’06 - O <strong>Scale</strong> <strong>Trains</strong> • 15
would have used common barn paint.<br />
Another CPSIG contributor said that, in<br />
1919, CP structure colors were brown<br />
with dark gray (black) trim and doors.<br />
Windows and eaves were painted cream.<br />
Roofing was asphalt shingles over tar<br />
paper unless “ready roofing” was available.<br />
A third CPSIG contributor said, in<br />
the ‘50s (my modeling era), the icehouses<br />
were painted boxcar red with roof brown<br />
trim. If there were windows, the windows<br />
were painted a cream color. A fourth<br />
CPSIG contributor said that, in eastern<br />
Canada, the roofing shingles were definitely<br />
black.<br />
Confusing? Perhaps, but then again<br />
maybe not. One can imagine the color<br />
changes that would have occurred over a<br />
50-year span as icehouses were painted<br />
and repainted and roofing was replaced.<br />
Since my CP icehouse is sited in the mid-<br />
1950s period, I elected to paint my structure<br />
with oxide red paint. I went with<br />
black shingles, though I was tempted to<br />
paint them Floquil SP Lark Light Gray. I<br />
used Floquil 130601 spray can primer.<br />
For some reason the label says it’s Zinc<br />
Chromate Primer, which implies to me a<br />
greenish-yellow hue, not the red oxide<br />
which it is.<br />
After spraying the entire structure with<br />
the Floquil primer, I removed the roof<br />
and decking masking tape and brush<br />
painted the door hinges with Floquil<br />
Old Silver. At this point, I laid down the<br />
upper platform decking. It’s cut from<br />
1/32” x 1/8” scribed basswood sheet.<br />
Note that these boards run the length of<br />
the platform. I then applied several coats<br />
of AIM Products’ Quick-Age solution to<br />
both upper and lower decks. I also drybrushed<br />
and streaked the boards with<br />
heavily thinned gray paint to really dirty<br />
up and weather the decks.<br />
That done, we’re ready to shingle the<br />
roof. Prop a ladder against the eaves and<br />
let’s do some roofing. Don’t forget to<br />
bring the nails and your roofing hammer.<br />
Asphalt Roofing<br />
Photos 13 – 15 show the roofing progress<br />
as we go. The first thing I did on the<br />
unpainted basswood roof panels was to<br />
lay out the shingle lines. I drew the first<br />
line 3/8” up from the lower edge of the<br />
roof. The remaining lines were spaced<br />
and drawn 3/16” apart as I progressed<br />
upward to the ridge. These lines serve to<br />
guide and keep the shingle lines straight.<br />
I use 180-grit waterproof black sandpaper<br />
to replicate asphalt shingles. I lay<br />
out and then cut strips of this sandpaper<br />
3/8” wide the length of the sandpaper. I<br />
cut enough shingle strips to do the entire<br />
roof. As I recall, I cut about 38 or so strips<br />
for this job. After cutting the sandpaper<br />
16 • O <strong>Scale</strong> <strong>Trains</strong> - July/Aug ’06<br />
into strips with an X-Acto knife and steel<br />
straight edge, I sandwiched and aligned<br />
four strips. With a pair of scissors, I cut<br />
notches 3/16” deep into the four strips<br />
every 1/4” or so, to simulate the shingle<br />
notches and breaks. I vary the cut spacing<br />
so the shingle breaks alternate from<br />
row to row.<br />
I began at the bottom edge of the roof<br />
with a starter strip, just like you’d do a<br />
real roofing job. For glue, I like Aleene’s<br />
Original Tacky Glue from Duncan Enterprises.<br />
This glue is available at craft<br />
stores. I find this glue better suited than<br />
Elmer’s White Glue when I’m doing a lot<br />
of gluing to basswood. Too much Elmer’s<br />
can cause warping of thin basswood.<br />
Aleene’s Original Tacky Glue dries clear<br />
and flexible and won’t warp basswood.<br />
Lay each shingle strip down so that the<br />
cut lines do not align. What you want<br />
is row-to-row staggered cut lines. With<br />
the cupola already in place, you’ll need<br />
to shingle around it. Depending on the<br />
humidity, the shingles may try to curl. If<br />
13<br />
14<br />
15<br />
this occurs, lay down strips of masking<br />
tape to hold the shingles while the glue<br />
cures. The tape will come up easily after<br />
the glue has set. When all of the shingles<br />
were down, I capped the ridge with a<br />
1/2” wide strip, folded in half lengthwise<br />
into a V shape. I didn’t shingle the cupola<br />
roof. On my model, its galvanized roofing<br />
painted black.<br />
I painted the shingles with two unthinned<br />
brush coats of Floquil Engine<br />
Black. Any shingle color is possible. I’ve<br />
brush painted and sprayed my sandpaper<br />
shingles with any number of solvent<br />
paints and acrylics. As long as the shingles<br />
are firmly glued down, they won’t<br />
curl when you paint them.<br />
I brush painted the foundation with<br />
Delta Ceramcoat Acrylic Mudstone paint,<br />
which I use for all my simulated concrete.<br />
It’s inexpensive and available in<br />
craft stores in about a thousand different<br />
colors. I use Delta Ceramcoat acrylics<br />
for painting most of my basswood structures.<br />
I would have brushed it onto the<br />
icehouse, but the staircase and platforms<br />
lent themselves more to spraying than<br />
brushing.<br />
So that completes construction on the<br />
CP Standard No. 2 icehouse. I hope you<br />
enjoy yours as much as I do mine. It’s<br />
on my layout now, servicing a short but<br />
needy line-up of ice-hungry reefers. u<br />
References<br />
STMFC-subscribe@yahoogroups.com<br />
cpsig-subscribe@yahoogroups.com<br />
Model Railroader March, 1978 “CPR<br />
Standard No. 2 Icehouse” by Harold<br />
W. Russell<br />
Bill of Materials<br />
Northeastern <strong>Scale</strong> Lumber<br />
1/8” x 1/4” strip<br />
1/8” x 3/16” strip<br />
1/16” x 3/16” strip<br />
1/8” sqr. strip<br />
3/32” sqr. strip<br />
1/32” x 1/8” strip<br />
1/32” x 1/16” strip<br />
1/32” plain sheet<br />
1/32” thick 1/16” scribed sheet<br />
1/32” thick 1/8” scribed sheet<br />
1/16” thick 1/8” scribed 6” wide sheet<br />
Midwest Products<br />
1/8” x 4” basswood sheet<br />
1/4” x 4” basswood sheet<br />
Evergreen styrene<br />
0.020” x 0.125” strip<br />
Grandt Line<br />
#3524 hinges
Roofing<br />
180-grit waterproof sandpaper 8-1/2<br />
x 11 sheet<br />
Paint<br />
Floquil Spray Can Primer #130601<br />
Floquil Engine Black<br />
Floquil Old Silver<br />
Delta Ceramcoat Acrylic – Mudstone<br />
AIM Products Quick-Age Weathering<br />
Solution<br />
NB: The drawings are not to scale. Exact<br />
measurements are shown (in inches) on<br />
each figure.<br />
3 9 ⁄16<br />
Figure 6: ROOF PANELS<br />
1 1 ⁄8<br />
5<br />
⁄8<br />
10 3 ⁄16<br />
1<br />
⁄8 BASS SHT.<br />
1<br />
⁄32 x 1 ⁄8<br />
BASS<br />
STRIP<br />
Figure 1: CUPOLA CONSTRUCTION<br />
1<br />
⁄32 BASSWOOD<br />
1 1 ⁄32<br />
1<br />
1<br />
⁄8 SHT.<br />
ROOF<br />
1 1 ⁄16<br />
END<br />
1 1 ⁄8<br />
SIDE<br />
DRIP<br />
STRIP<br />
29<br />
⁄32<br />
1<br />
⁄32<br />
BASS<br />
1<br />
⁄32 BASSWOOD<br />
1<br />
⁄16 BASSWOOD<br />
1 1 ⁄2<br />
CUPOLA ROOF PANEL<br />
4 REQUIRED<br />
1 3 ⁄8<br />
CUPOLA<br />
TRIM<br />
FASCIA<br />
1 7 ⁄16<br />
CUPOLA<br />
SUB-<br />
ROOF<br />
1 3 ⁄8<br />
1 7 ⁄16<br />
15<br />
⁄16<br />
1 1 ⁄32<br />
1 1 ⁄32<br />
1<br />
⁄16 x 1 ⁄8 BASSWOOD<br />
NOTCHED 1/32 DEEP<br />
13<br />
⁄16<br />
1<br />
⁄32 x 1 ⁄8 LOUVERS<br />
July/Aug ’06 - O <strong>Scale</strong> <strong>Trains</strong> • 17
Figure 2: END WALLS CONSTRUCTION<br />
6 1 ⁄8<br />
4 7 ⁄16<br />
5 3 ⁄4<br />
Figure 3: SIDE WALLS CONSTRUCTION<br />
1<br />
⁄16 SQR 1<br />
⁄16 x 1 ⁄8 TRIM<br />
1<br />
⁄8 SQR. CORNER<br />
SIDES ONLY<br />
13<br />
⁄16<br />
4 7 ⁄16<br />
1<br />
⁄8 x 3 ⁄16<br />
DECK STRINGER<br />
LOCATION<br />
1<br />
⁄8 SQR.<br />
INNER<br />
PLATFORM<br />
SUPPORTS<br />
3<br />
DECK TOP<br />
18 • O <strong>Scale</strong> <strong>Trains</strong> - July/Aug ’06<br />
9 5 ⁄8<br />
GRANDT LINE #3524<br />
HINGES<br />
1<br />
⁄16 THICK x 1 ⁄8 SCRIBED<br />
NORTHEASTERN BASSWOOD
1⁄16 x 3 ⁄16<br />
SWAY<br />
BRACE<br />
CORNER<br />
2<br />
2<br />
Figure 4: DECK CONSTRUCTION<br />
10 9 ⁄16<br />
1⁄16 x 3 ⁄16 x 2 JOISTS<br />
9 7 ⁄8<br />
1⁄8 SQR.<br />
POSTS<br />
1⁄8 x 3 ⁄16<br />
DECK BEAM<br />
CORNER<br />
3 7 ⁄16<br />
1⁄4 x 11 ⁄32<br />
LOWER<br />
BEAM<br />
1⁄8 x 11 ⁄32<br />
10 1 ⁄16<br />
10 9 ⁄16<br />
1⁄8 x 3 ⁄16 BEAMS<br />
UNDERSIDE UPPER DECK - PLANVIEW<br />
10 1 ⁄16<br />
1⁄32 DECKING<br />
1⁄16 x 3 ⁄16 STUDS<br />
25 REQUIRED<br />
1⁄4 x 11 ⁄32 BEAMS<br />
UNDERSIDE LOWER DECK - PLANVIEW<br />
1⁄8 x 11 ⁄32 BEAM<br />
2<br />
3 3 ⁄32<br />
July/Aug ’06 - O <strong>Scale</strong> <strong>Trains</strong> • 19
Figure 5: STAIR CASE<br />
3 5 ⁄32 1<br />
⁄32 x 7 ⁄32<br />
RISER<br />
2 REQUIRED<br />
1<br />
⁄16 SQR.<br />
POSTS<br />
1<br />
⁄32 x 1 ⁄16 RAILING<br />
1<br />
⁄32 x 3 ⁄16 TREADS<br />
17 REQUIRED<br />
1<br />
⁄32 x 1 ⁄8<br />
1<br />
⁄32 x 1 ⁄4<br />
3 13 ⁄16<br />
7<br />
⁄8<br />
3 13 ⁄16<br />
1<br />
⁄4<br />
Nickel Plate Models<br />
O <strong>Scale</strong> models, parts, decals, newsletter for Nickel Plate and related roads.<br />
NKP War Emergency Cabooses<br />
Road Numbers 1343-1362, brass, from Ajin.<br />
Beautiful. Limited run. Unpainted: $279. Factorypainted<br />
“High Speed Service”.<br />
$369 each plus $15 shipping. Parts, O5w and<br />
Proto48 trucks also available<br />
NKP 1900 Series Flat Cars<br />
Exclusive from Red Caboose. Painted, six new<br />
numbers, also painted black and unlettered.<br />
Assembled, metal wheels. $45.00 each, plus $7<br />
shipping; $255 for six-car set, plus $20 shipping.<br />
Upcoming Projects<br />
NKP Rider Cars (Converted Boxcars)<br />
NKP/NYC 40 Ton Double Sheathed Box Cars<br />
Brass from Ajin. Limited runs.<br />
NKP/WLE Wood Caboose Kit $105<br />
Exclusive to NPM by Mullet River Model Works<br />
Nickel Plate Hudsons<br />
Coming in brass from Weaver. Reserve now<br />
through Nickel Plate Models for 2006 delivery.<br />
Write, call or email for order form, product list<br />
or NKP O <strong>Scale</strong> newsletter.<br />
Nickel Plate Models<br />
13732 Lakeside Dr<br />
Clarksville MD 21029<br />
301-854-3200<br />
nkp48@aol.com<br />
check our website at trainresource.com<br />
20 • O <strong>Scale</strong> <strong>Trains</strong> - July/Aug ’06<br />
Deichman’s Depot<br />
ATLAS O <strong>Scale</strong> 2-Rail<br />
0451-1 C&O RSD-4/5 w/DCC $206.95<br />
7488 C&O USRA Steel Rebuilt Box $46.70<br />
7490 MoPac USRA Steel Rebuilt Box $46.70<br />
7627 Chessie Caboose $63.70<br />
7632 Gt. Northern Caboose $62.00<br />
7680 Pitts. & Lake Erie Caboose $63.70<br />
7743 Mother’s Cocoa 40' Wd Reef $65.95<br />
9103 Merch. Biscuit 40' Wd Reef $53.50<br />
9122 Harding Butter 40' Wd Reefer $65.95<br />
9154 Oak Grove Butter 40' Wd Reefer $53.50<br />
9159 Mathieson 40' Wood Reefer $65.95<br />
9311 TH&B DS Wood Box $45.00<br />
9505 Bar-Bee 40’ Steel Reefer $49.25<br />
9660 Shippers Car Line 8K Tank $50.95<br />
7021/22 #7.5 Turnouts, each $52.75<br />
7024/25 #5 Trunouts, each $47.95<br />
S&H $8.00 for 1 car, $9.00 for 2 cars,<br />
$10.00 for 3 or more cars.<br />
NEW CUSTOM RUN<br />
9183 Penn Canning Co-op 40' Wood Reefer<br />
$68.95 plus $8.00 S&H, comes in two #’s.<br />
Due in May 2006. Place your order now!<br />
Deichman’s Depot<br />
110 Ivyside Dr, York PA 17402<br />
Ph: 717-755-1108 • Fax: 717-840-9650<br />
deichmansdepot@suscom.net<br />
www.deichmansdepot.com<br />
T-BONE MODELS<br />
“O”<br />
<strong>Scale</strong><br />
CUSTOM PAINTING & REPAIR<br />
Dealer for Pacific Limited<br />
Sunset & Weaver<br />
T-Bone Models James Christensen<br />
32264 Cleveland<br />
Cottage Grove, OR 97424-9381<br />
email tbone@epud.net<br />
541-942-5237<br />
Send SASE for information<br />
Repairs - Sales - Installations<br />
Standard & Narrow Gauges<br />
Figures - Couplers - Tools - Lubes<br />
Sound & DCC Equipment - Building Kits<br />
Wood & Styrene - Weathering Supplies<br />
Shows: Parsippany, NJ 7/19-22<br />
National ‘O’ <strong>Scale</strong> Convention @ Hilton Hotel<br />
New Haven, CT 8/20<br />
All <strong>Scale</strong> Train Show @ City Wide Field House<br />
plus CT, MA, MI, MD, NY, OH, RI, PA contact for list<br />
Special & Mail Orders Credit Cards<br />
Products to make your railroad better !<br />
C r u s a d e r<br />
R A I L S E R V I C E S<br />
5920 Houghton St., Phila. Pa. 19128<br />
215-482-7530 crusaderrail@verizon.net
P&D<br />
31280 Hobby Shop P&D Hobby F Unit Sale<br />
Model shown is #8001<br />
Groesbeck, ‐<br />
Fraser, MI 48026<br />
586-296-6116<br />
Open Mon-Fri 10-8,<br />
Sat 10-6, Sun 12-5<br />
Fax: 586-296-5642<br />
www.pdhobbyshop.com<br />
POWERED F “A” Units: Reg. $350, SALE $289.99<br />
#7001 EMD F3-Ph4, F7-Ph1 early , 36" low fans, 36" dynamic<br />
brake, 2 portholes, horiz grilles<br />
#8001 EMD F7-Ph1 late, F7-Ph2, 36" low fans, 48" dynamic<br />
brake, 2 portholes, Farr (vert) grilles (shown above)<br />
#9001 EMD F9, 36" fans, 48" dynamic brake, 2 portholes,<br />
Farr (vert) grilles<br />
UNPOWERED F “A” Units: Reg. $225, SALE $189.99<br />
#7002 EMD F3-Ph4, F7-Ph1 early , 36" low fans, 36" dynamic<br />
brake, 2 portholes, horiz grilles<br />
#8002 EMD F7-Ph1 late, F7-Ph2, 36" low fans, 48" dynamic<br />
brake, 2 portholes, Farr (vert) grilles<br />
#9002 EMD F9, 36" fans, 48" dynamic brake, 2 portholes,<br />
Farr (vert) grilles<br />
F Unit “A” Body KITS: reg. $99.95, on sale $82.99<br />
#7000 EMD F3-Ph4, F7-Ph1 early , 36" low fans, 36" dynamic<br />
brake, 2 portholes, horiz grilles<br />
#8000 EMD F7-Ph1 late, F7-Ph2, 36" low fans, 48" dynamic<br />
brake, 2 portholes, Farr (vert) grilles<br />
#9000 EMD F9, 36" fans, 48" dynamic brake, 2 portholes,<br />
Farr (vert) grilles<br />
POWERED F “B” Units: Reg. $315, SALE $264.99<br />
#3001 EMD F3-Ph3, F7-Ph1, 36" low fans, 36" dynamic<br />
brake, 3 portholes, horiz grilles<br />
#4001 EMD F7-Ph1 (late), F7-Ph2, F9, 36" low fans, 48"<br />
dynamic brake, 2 portholes, Farr (vert) grilles<br />
UNPOWERED F “B” Units: Reg. $200, SALE $169.99<br />
#3002 EMD F3-Ph3, F7-Ph1, 36" low fans, 36" dynamic<br />
brake, 3 portholes, horiz grilles<br />
#4002 EMD F7-Ph1 (late), F7-Ph2, F9, 36" low fans, 48"<br />
dynamic brake, 2 portholes, Farr (vert) grilles<br />
F Unit “B” Body KITS: reg. $94.99, on sale $79.99<br />
#3000 EMD F3-Ph3, F7-Ph1, 36" low fans, 36" dynamic<br />
brake, 3 portholes, horiz grilles<br />
#4000 EMD F7-Ph1 (late), F7-Ph2, F9, 36" low fans, 48"<br />
dynamic brake, 2 portholes, Farr (vert) grilles<br />
All kits include brass etched grills, appropriate detailed<br />
parts, and preformed grab irons for indicated model.<br />
These kits include only the parts above the frame.
Sumpter<br />
Valley<br />
Depot<br />
135 NW Greeley Avenue,<br />
Bend OR 97701<br />
● Specializing in O <strong>Scale</strong> 2-rail<br />
model trains since 1985<br />
● We buy or consign brass model<br />
collections<br />
● Model reservations gladly<br />
accepted<br />
● Prompt, courteous service<br />
East Gary<br />
Car Co.<br />
Dept OST<br />
3828 St. Joseph Ct<br />
Lake Station IN 46405<br />
They’re Back!<br />
Former Indianapolis Car Company sides<br />
are now available from new tooling.<br />
Parts #100 & #200<br />
$3.00 each<br />
Orders under $50 please add $4.50 for postage and<br />
handling. SASE for updated list.<br />
Check our website for latest<br />
O <strong>Scale</strong> Listings<br />
www.sumptervalley.com<br />
trainman@callatg.com<br />
Tel: 541/382-3413<br />
Fax:541/389-7237<br />
Hours:<br />
Mon. thru Fri 8:30 AM - 5PM<br />
and sometimes on Saturdays<br />
Advertise in O <strong>Scale</strong> <strong>Trains</strong>! Reach 2-Rail<br />
and 3-Rail scale modelers who want what<br />
you have to sell. Contact Jeb Kriigel<br />
(jeb@oscalemag.com).<br />
NEW<br />
NYC/MDT<br />
40’ STEEL REEFER<br />
Additional Atlas O Special Runs Coming Soon:<br />
Jersey Central GP-9 • Great Northern steel-rebuilt box car (red)<br />
NYC “Pacemaker” AAR Box Car (black/white logo) • PRR Produce 36’ Wood Reefer<br />
Available in four road numbers,<br />
#8514 (3 Rail), #9514 (2 Rail)<br />
amhobbiesonline.com<br />
PayPal<br />
22 • O <strong>Scale</strong> <strong>Trains</strong> - July/Aug ’06<br />
3-Rail<br />
$55.95*<br />
2-Rail<br />
$58.95*<br />
AM Hobbies<br />
6 Delmar Ridge Drive<br />
Wellsboro, PA 16901<br />
(570) 723-1824<br />
amhobbies@hotmail.com<br />
*Shipping:$5.95 for one or two cars; $6.95 for three or four cars
Building a Small O <strong>Scale</strong> Layout<br />
Part Ten<br />
Michael Culham<br />
In Part 9, I had mentioned that our building was finished,<br />
but decided that it needed an interior. In this issue, I will be<br />
showing you how to make the interior for John Crapper Plumbing<br />
Supplies. One of the nice things about O <strong>Scale</strong> is that the<br />
buildings and<br />
1<br />
windows are<br />
big enough<br />
to be able to<br />
see the interior.<br />
I have<br />
started putting<br />
interiors<br />
in some of my<br />
foreground<br />
buildings. As<br />
this structure<br />
is a plumbing<br />
supply house,<br />
I decided to<br />
do a simple<br />
interior that only showed the front of the store with its order<br />
desk and showroom (Photo 1). Interiors do not have to be highly<br />
detailed, as you only need the suggestion that something is<br />
inside the building,<br />
Making an Interior<br />
The first thing you’ll need is the floor, so measure the area<br />
you want to cover and<br />
2<br />
3<br />
4<br />
lay it out on a piece of<br />
0.060” styrene sheet,<br />
then cut out the floor<br />
(Photo 2). You will have<br />
to make the floor the<br />
same height as the bottom<br />
of the door. To do<br />
this, glue some styrene<br />
strips to the bottom of<br />
the floor to bring it to the<br />
correct height (Photo 3).<br />
With this done, test fit it<br />
in place (Photo 4). Next,<br />
cut out the walls from a<br />
piece of 0.040” styrene<br />
sheet. I measured the<br />
height from the floor to<br />
the top of the tabs that<br />
hold the roof in place,<br />
then measured from<br />
these same tabs to the<br />
back of the front wall.<br />
Then I measured the distance<br />
between the two<br />
tabs on the sidewalls.<br />
This gave me the dimensions<br />
for the walls. Once<br />
the wall sections where<br />
cut out, I laid them flat in<br />
a line on my work desk,<br />
holding them in place<br />
with pieces of masking<br />
tape (Photo 5). This<br />
5<br />
makes it easier to do the<br />
kickboards, chair-rail and<br />
door trim, all made from<br />
strip styrene.<br />
With all the trim<br />
finished, I was ready to<br />
paint the walls. I used<br />
cream and reddish brown<br />
colors. Once the paint<br />
6<br />
is dry, add any signs you<br />
want to, then glue the<br />
walls to the floor (Photos<br />
6 and 7). The tile floor<br />
effect was created on my<br />
computer using the same<br />
program that I used to<br />
make signs, and was then<br />
printed out on paper. The<br />
pattern was cut out to fit<br />
the area and glued to the<br />
7<br />
floor with white glue.<br />
The Sales Counter and<br />
Details<br />
The next thing to<br />
be made was the sales<br />
counter, which I made<br />
from 0.040” styrene<br />
sheet (Photo 8). The<br />
counter was made 3’<br />
high and 3’ deep. I made<br />
a space at one end of the<br />
8<br />
counter for the swinging<br />
half door. The counter<br />
was painted in the same<br />
reddish-brown paint used<br />
on the wall assemblies,<br />
then glued in place with<br />
CA glue once the paint<br />
was dried. The front<br />
sales-showroom was now<br />
ready for details. This is<br />
where I used the Berkshire Valley bathtub, and radiator kits, and<br />
one of the Walthers’ toilets with a scratch built toilet tank. I then<br />
put some pieces of brass wire on the counter to represent pipe.<br />
Some pieces of paper were also used for the invoices. Once this<br />
was all done, I added some people. The interior was now finished<br />
(Photos 9 and 10).<br />
The Finished Building<br />
The finished interior was glued in place using liquid plastic<br />
cement (Photos 11 and 12). I always put my initials and the date<br />
someplace on anything I build, hence the “MC 05” on the back<br />
of the wall. Put the roof back on, but don’t glue it. You will want<br />
to remove it to put in lighting later. In Photo 13, the building is<br />
ready to put on the layout. Once we do that, our scene is complete.<br />
Interiors add that little something that makes a building<br />
look more complete, Not every building needs them, just some<br />
July/Aug ’06 - O <strong>Scale</strong> <strong>Trains</strong> • 23
9<br />
of the foreground ones you’d like to highlight. Give it a try.<br />
The Completed Scene<br />
Remember, back in Part 7, we had this vacant area on the<br />
layout that looked so boring and empty (Photo 14). Now, with<br />
some scenery and a good-looking structure and few details,<br />
14<br />
10<br />
it looks more like part of a real scene (Photos 15 and 16). It<br />
doesn’t take much to create this. By using the techniques that I<br />
have shown you, it’s quite easy.<br />
In Part 11 of this series, I will carry on with how to make<br />
structures for your layout. This time, I will show you how to<br />
make a large factory building using DPM wall modules. I will be<br />
showing you how to design a building using these wall sections<br />
and how to assemble them, as well as painting, weathering, and<br />
how to create the mortar effects between the bricks. u<br />
11<br />
12<br />
15<br />
13<br />
16<br />
24 • O <strong>Scale</strong> <strong>Trains</strong> - July/Aug ’06
Eagle’s Nest<br />
Paint Work — 2 week<br />
delivery possible*<br />
Miniatures<br />
Brass Work — 4 week<br />
delivery possible*<br />
• Custom Painting • Brass Detail Upgrading •<br />
• DCC Installation • Repowering •<br />
• Sound Systems •<br />
Japanese Quality by an American Craftsman<br />
Eagle’s Nest Minatures<br />
Harry A. Hieke, Jr.<br />
harrys_trains@comcast.net<br />
856-625-5506<br />
*Ask about our premium payment plan!<br />
Buy⁄Sell⁄Trade<br />
WSM PRR Q2, 4-4-6-4, N/P, OB, Excellent...............................................$1,950.00<br />
WSM PRR J1a, 2-10-4, C/P, OB.................................................................$1,750.00<br />
USH NKP 2-8-4, C/P or N/P OB, ea............................................................$1,350.00<br />
Weaver Brass WP GS64, 4-8-4, F/P, LN, OB................................................$795.00<br />
USH C&O 2-8-4, C/P, Runs good, OB........................................................$1,375.00<br />
MG NYC J1e, 4-6-4, Nice, N/P, NOB..........................................................$1,275.00<br />
PSC #16145 PRR B6sb 0-6-0, C/P, OB.......................................................$1,250.00<br />
USH PRR M1a, 4-8-2, C/P, OB...................................................................$1,375.00<br />
PSC #17107-1 Crown Heisler, New OB (#4 of 11)......................................$1,795.00<br />
MG B&O 2-8-8-4, C/P, NOB.......................................................................$2,250.00<br />
USH IHB 0-8-0, LN, OB, Beautiful Paint......................................................$895.00<br />
MG PRR E6 4-4-2, N/P, NOB, Can Motor.................................................$1,075.00<br />
Weaver Streamlined PRR K4, F/P, LN, OB..................................................$895.00<br />
USH NYC H10, 2-8-2, Mint, N/P, OB.........................................................$1,475.00<br />
USH PRR K4 4-6-2, C/P, NOB.......................................................................$950.00<br />
CB PRR T1 4-4-4-4, C/P LN OB.................................................................$1,995.00<br />
USH NYC L4b, 4-8-2, Mint, OB.................................................................$1,250.00<br />
OM BNSF C44-9W, F/P LN OB..................................................................$1,875.00<br />
OM BNSF SD70MAC, F/P, OB...................................................................$1,875.00<br />
OM N&W C630 High Hood, FM Trucks, New, OB..................................$1,195.00<br />
GEM Rdg 0-6-0 Camelback, Ptd, not ltd, OB..............................................$700.00<br />
IHM 42T Climax TCW Tks, F/P NOB, test run...........................................$800.00<br />
Jim Hackworth<br />
MODEL TRAINS<br />
(and Subsidiary JH Consulting)<br />
2631 Edgevale Road, Columbus OH 43221-1113<br />
Phone:614-4514517 Fax:6144514557<br />
Email: jhmtrains@msn.com • Web: www.jhmtrains.com<br />
Consignments<br />
USH ATSF 4-8-4, C/P, Wtd, NOB...............................................................$1,595.00<br />
OM PRR PAPBPA Set, Late Run, F/P, New..............................................$3,990.00<br />
MG PRR N5 Caboose, N/P, OB......................................................................$250.00<br />
GEM PRR A5 0-4-0, runs good, C/P, OB......................................................$625.00<br />
SS N&W J 4-8-4 Rebuilt w/Sound, C/P, OB..............................................$1,500.00<br />
Yoder GE 44T, F/P, Not Ltd, New OB...........................................................$299.00<br />
OM #0133 Gilpin Shay, F/P, New, OB........................................................$1,200.00<br />
OM ATSF Erie Built “B” Unit, F/P, New......................................................$899.00<br />
OM UP Alco PAPB F/P, LN, NOB, late run...............................................$2,395.00<br />
PSC C&O 50’ Express Car, F/P Tri-color, New, OB.....................................$339.00<br />
PRB 50' Airslide F/P BN, New, OB................................................................$295.00<br />
PRB 40' Airslide F/P BN, New, OB................................................................$295.00<br />
PSC #16145 PRR B6sb, C/P, OB.................................................................$1,250.00<br />
PSC PRR N6b, OS Cupola, N/P, OB..............................................................$295.00<br />
PRB Sealand Gunderson D. Stack, set, LN, OB........................................$1,495.00<br />
PRB Thrall TTX D. Stack, set, F/P, LN. OB..............................................$1,495.00<br />
PRB BN Gunderson D. Stack, set, LN, OB................................................$1,495.00<br />
PRB #4712D CRR Caboose (ATSF Style), LN, OB......................................$295.00<br />
MG PRR N8 Caboose, N/P, NOB...................................................................$250.00<br />
Alco PRR N6a, C/P or N/P, each....................................................................$225.00<br />
SEND LSASE FOR LARGE LIST OF MG/USH KTM ITEMS<br />
Layaway Available<br />
LSASE for Complete List<br />
Shipping 6% - $6.00 Min., $12.00 Max<br />
Ohio Residents Add 6.75% Sales Tax<br />
Estates⁄Liquidations<br />
Collection Reductions<br />
July/Aug ’06 - O <strong>Scale</strong> <strong>Trains</strong> • 25
The Art of Finescale<br />
Michael Cougill<br />
26 • O <strong>Scale</strong> <strong>Trains</strong> - July/Aug ’06<br />
Little Things<br />
As we take a big picture look at finescale modeling, I’d like<br />
to focus in a little tighter and look at some small details that<br />
can set a layout apart from the ordinary. In the photo below<br />
we’re looking down Canal Road from the crossing of the I&W’s<br />
Whitewater Secondary, our connection with CSX.<br />
The thing to notice here are the crossbucks. I made them<br />
from Evergreen <strong>Scale</strong> Models styrene using dimensions from a<br />
PRR Standards book. I did the lettering on my computer and<br />
attached it with Walthers Goo. I got extra fancy and added<br />
some nut and bolt details, since these are right at the front of<br />
the layout. I wanted to tell a story here, so I made the foreground<br />
upright out of some Code 125 rail I had laying around.<br />
The story goes that a driver had to swerve to avoid a deer one<br />
night and hit the sign. The always cost-conscious I&W management<br />
simply replaced it with the length of rail, since the sign<br />
itself wasn’t too damaged. I might add some tire skid marks to<br />
the road someday.<br />
The diamond shaped highway sign in the background is<br />
styrene, too; the lettering also done on the computer. I got the<br />
dimensions by measuring a real sign near my house. The model<br />
sign reads, “HIDDEN DRIVE”. The road goes over a slight rise<br />
at this point, creating a partial blind spot for a driveway coming<br />
in on the other side. The road extends into the background by<br />
means of a photo that was cropped to match the modeled scenery<br />
and secured to the backdrop with double sided tape.<br />
Another trick of the artist’s trade was to force the perspective<br />
of the road by tapering it toward the background. At the<br />
tracks, it’s full O <strong>Scale</strong> dimension at 22’ wide. Where it meets<br />
the wall I used S <strong>Scale</strong> proportions, again, 22’. The highway<br />
sign is also a bit undersized. The actual front to back distance<br />
from the crossing to the wall is<br />
only 14-1/2”. Not real deep, but<br />
the forced perspective makes it<br />
seem further.<br />
There is a culvert just to the<br />
right of the road that carries<br />
runoff from the drainage ditch<br />
under the track. It’s clogged with<br />
melting snow at this point, so it’s<br />
hard to see. The technique I used<br />
to make these is so bonehead<br />
simple that I’m certain someone<br />
else has done it before, so I’m<br />
not claiming the credit for it. I<br />
just cut a piece of heavyweight<br />
aluminum foil to the desired<br />
width and wrapped it, dull side<br />
out, around a fine threaded<br />
carriage bolt to make the corrugations.<br />
This was simpler than<br />
trying to bend commercial corrugated<br />
stock into<br />
a rounded shape<br />
since the corrugations<br />
would be<br />
crushed or otherwise<br />
deformed.<br />
You could make<br />
any diameter of<br />
culvert needed,<br />
depending on the<br />
size of the bolt.<br />
The whole process<br />
took longer<br />
to think up than<br />
to do. I glued the<br />
two culvert halves to each side of the roadbed with full strength<br />
white glue, being certain to line them up with each other, then<br />
added ballast to blend everything together. You could leave the<br />
foil in its natural color for a new culvert or paint it for an older<br />
one. A little weathering and it’s done. How simple is that?<br />
You may also notice that there is some fresh ballast on the<br />
right of the crossing. This is story telling again. Maintenanceof-way<br />
crews recently did some track work here, fixing a low<br />
spot from a “mud-pumper”, a crosstie where the ballast washed<br />
away or became encrusted with mud from poor drainage. They<br />
often occur near road crossings, from water and silt draining off<br />
the road. Details like these are not expensive or time consuming.<br />
They just need an observant eye and attention to the little<br />
things that can have a big impact.<br />
Best regards, Mike<br />
u
Ron’s Books<br />
P.O. BOX 714, HARRISON, NY 10528<br />
(914)967-7541 11AM to 10PM EST<br />
FAX (914)967-7492 24HR<br />
YOUR ONE STOP BOOK AND DVD SHOP<br />
Discount Prices & NEVER a<br />
Shipping Charge within the U.S.*<br />
Check our updated, fully secure Web site regularly for<br />
specials available only on the web: www.ronsbooks.com<br />
e-mail us at: ronsbooks@aol.com<br />
“WHAT’S NEW?”<br />
Alco’s FA – Running in the Shadow - Rutherford . . . . . . . . . . . . . . .55.50<br />
Amtrak in the Heartland . . . . . . . . . . . . . . . . . . . . . . . . . . . . . . . . . . . . .45.50<br />
Atlas of No. Amer. RRs – Maps from the Golden Age – Yenne . . .32.50<br />
BNSF Railway 2006 Loco Review & Diagrams-Del Grosso . . . . .45.00<br />
BNSF Railway – Southern Calif. Style, Cajon Pass -Del Grosso . .48.50<br />
Brookville Locomotives Then & Now . . . . . . . . . . . . . . . . . . . . . . . . .36.50<br />
Burlington Northern Santa Fe - MBI . . . . . . . . . . . . . . . . . . . . . . . . . .46.00<br />
Canadian Pacific Railway - Murray . . . . . . . . . . . . . . . . . . . . . . . . . . .32.00<br />
Canadian Pacific Steam in Color Vol 1 Montreal & East . . . . . . . . .48.50<br />
Canadian Pacific Steam in Color Vol 2 Montreal & West . . . . . . . .48.50<br />
Canadian Trackside Guide 2006 . . . . . . . . . . . . . . . . . . . . . . . . . . . . .22.50<br />
Canadian Trolleys in Color Vol 1 Eastern Canada – Halperin . . . .48.50<br />
Central of Georgia Steam Locomotives & <strong>Trains</strong> – Langley . . . . . .23.75<br />
Chicago & North Western Pass. <strong>Trains</strong> of 400 Fleet Photo Archive . . .27.50<br />
Chicago North Shore & Milwaukee Railway in Color Vol 1 . . . . . . .48.50<br />
Death Rode the Rails-Amer. RR Accidents & Safety 1828-1965-Aldrich 55.50<br />
Denver & Rio Grande Western- L Class 2-8-8-2 Pictorial Vol 1 . . .26.50<br />
Detroit Street Railways . . . . . . . . . . . . . . . . . . . . . . . . . . . . . . . . . . . . .19.50<br />
Dow’s Dictionary of Railway Quotations – Dow . . . . . . . . . . . . . . . .41.00<br />
EMD Early Road Switchers: GP7-GP20 Locomotives . . . . . . . . . .23.50<br />
Erie Lackawanna in Color – Vol 6 Brennan Photography . . . . . . . .48.50<br />
Erie Lackawanna Through Passenger Service in Color Vol 1 . . . .48.50<br />
Georgia Short Line Railroad Album – Langley . . . . . . . . . . . . . . . . .20.50<br />
Greater Erie Trolleys . . . . . . . . . . . . . . . . . . . . . . . . . . . . . . . . . . . . . . .19.50<br />
Hard Coal & Coal Cars – Hauling Anthracite on the NYO&W . . . .51.50<br />
History of Evansville Indianapolis & Terre Haute Railroad-Reed . . . . . .20.50<br />
Illinois Central Color Pictorial Vol 2 – Downey . . . . . . . . . . . . . . . . . .55.50<br />
Indiana Rail Road Company . . . . . . . . . . . . . . . . . . . . . . . . . . . . . . . .41.50<br />
Laurel Line – Anthracite Region, PA – reprint s/c . . . . . . . . . . . . . . .37.50<br />
Logging Railroads of the Adirondacks – Gove . . . . . . . . . . . . . . . . .46.50<br />
Logging RRs of Weyerhaeuser’s Vail–McDonald Operation . . . . .46.50<br />
N & W Giants of Steam – Jefferies revised and expanded . . . . . . .55.50<br />
Narrow Gauge in the Sheepscot Valley Vol 5 s/c . . . . . . . . . . . . . . .32.50<br />
New Haven Passenger <strong>Trains</strong> – Lynch . . . . . . . . . . . . . . . . . . . . . . .32.00<br />
New Haven Railroad’s Old Colony Division Vol 2 . . . . . . . . . . . . . . .19.50<br />
New York Central Color Pictorial Vol 3 – Sweetland . . . . . . . . . . . .55.50<br />
New York Central Steam on the Harlem and Putnam Divisions . .19.50<br />
North American Steam Locomotive Builders . . . . . . . . . . . . . . . . . . .40.50<br />
Ogden Rails- Strack h/c . . . . . . . . . . . . . . . . . . . . . . . . . . . . . . . . . . . . .49.75<br />
The Old Hook & Eye . . . . . . . . . . . . . . . . . . . . . . . . . . . . . . . . . . . . . . .32.50<br />
Old Maud (B&O) – A Life & Times – Ames . . . . . . . . . . . . . . . . . . . .56.50<br />
Railroad Cities – Jersey City, NJ . . . . . . . . . . . . . . . . . . . . . . . . . . . . .19.50<br />
Railroading in Downtown Chicago 1958-1969 – Olmsted . . . . . . .18.50<br />
Rails to Paradise . . . . . . . . . . . . . . . . . . . . . . . . . . . . . . . . . . . . . . . . . . .62.00<br />
Railway Prototype Cyclopedia Vol 13 . . . . . . . . . . . . . . . . . . . . . . . . .23.50<br />
The RGS Story Vol 12 – Locomotives & Rosters . . . . . . . . . . . . . . .70.50<br />
Rio Grande Car Plans – Wayner – reprint . . . . . . . . . . . . . . . . . . . . .20.50<br />
Rocky Mountain RRs Vol 2- Durango to Alamosa & Salida . . . . . .44.50<br />
Santa Fe Chiefs – Yenne . . . . . . . . . . . . . . . . . . . . . . . . . . . . . . . . . . .32.00<br />
Santa Fe Steam Pictorial Vol 10 3800 Class 2-10-2 Part 1 . . . . . .26.50<br />
Scranton Road – Life & Times of Edward Baker Sturges . . . . . . . .19.50<br />
Seaboard Air Line & Family Lines Railroad 1967-86- Griffin . . . . . .32.50<br />
Slow <strong>Trains</strong> Down South – Daily ‘Cept Sunday – V1 Ferrell . . . . . .55.50<br />
Slow <strong>Trains</strong> Down South – Deep in Dixie – Vol 2 Ferrell . . . . . . . . .55.50<br />
Southern Pacific Color Guide to Frt. & Pass. Equipment V2 . . . . . .48.50<br />
Southern Pacific Color Guide to Frt. & Pass. Equipment V3 . . . . . .48.50<br />
Southern Pacific Daylight Locomotives – Church . . . . . . . . . . . . . . .65.50<br />
Southern Pacific Historic Diesels Vol 12 . . . . . . . . . . . . . . . . . . . . . .30.50<br />
Southern Pacific Passenger <strong>Trains</strong> Color History . . . . . . . . . . . . . . .32.00<br />
Southern Railway Through Passenger Service in Color . . . . . . . . .48.00<br />
Stairway to the Stars –Colorado Annual #26 . . . . . . . . . . . . . . . . . . .41.00<br />
Steam Over Donner – Pictorial History of Donner Pass-Still . . . . . .26.50<br />
Texas & New Orleans Color Pictorial – Goen . . . . . . . . . . . . . . . . . .55.50<br />
Tourist <strong>Trains</strong> 2006 . . . . . . . . . . . . . . . . . . . . . . . . . . . . . . . . . . . . . . . .18.50<br />
Tracks of the New York Subway . . . . . . . . . . . . . . . . . . . . . . . . . . . . .38.00<br />
Trackside Around British Columbia 1966 – 1982 . . . . . . . . . . . . . . .48.50<br />
Trackside Around Charlottesville, VA 1967-1984 . . . . . . . . . . . . . . .48.50<br />
Trackside Around Duluth 1957-1960 . . . . . . . . . . . . . . . . . . . . . . . . .48.50<br />
Trackside Around Kansas 1950-1975 – Stagner . . . . . . . . . . . . . . .48.50<br />
Trackside Around Louisville 1948-1958 - Fravert . . . . . . . . . . . . . . .48.50<br />
Trackside Around New Jersey 1968-1983 – Yanosey . . . . . . . . . .48.50<br />
Trackside in Appalachia with Gene Huddleston . . . . . . . . . . . . . . . .48.50<br />
Trackside in Search of Northern New England Steam - Canfield . . . . . .48.50<br />
Trackside in the Erie Lackawanna NJ Commuter Zone . . . . . . . . .48.50<br />
Trackside Milwaukee Road East or West - Boyd each . . . . . . . . . .48.50<br />
Trackside Reading Anthracite Country - Plant . . . . . . . . . . . . . . . . .48.50<br />
<strong>Trains</strong> to Yosemite- Burgess . . . . . . . . . . . . . . . . . . . . . . . . . . . . . . . .61.50<br />
Tri-State Traction–Interurban Trolleys of SW MO, SE KS & NE OK . . . .27.50<br />
Two-Foot Cyclopedia Plan Book . . . . . . . . . . . . . . . . . . . . . . . . . . . . .25.50<br />
Union Pacific Equipment – Reprinted - Kratville . . . . . . . . . . . . . . . .45.50<br />
Union Pacific in Southern California 1880-1990 – Duke . . . . . . . . .47.50<br />
West Side Belt Route – Worley . . . . . . . . . . . . . . . . . . . . . . . . . . . . . .27.50<br />
Western Pacific in Color . . . . . . . . . . . . . . . . . . . . . . . . . . . . . . . . . . . .48.50<br />
*$18.00 MINIMUM order for free shipping in the USA. Send $3.00 for latest<br />
list. All orders must be paid in U.S. funds. NY residents please add correct<br />
sales tax. Print your name, address and phone number. Credit card<br />
users add card number and expiration date. Allow 4 weeks for delivery. For delivery<br />
outside of USA please add $8.00 for the first book and $3.00 for each additional<br />
book. Make checks payable to Ron’s Books. Only inquiries which include a<br />
SASE will be answered. Prices subject to change. WE BUY COLLECTIONS<br />
The Public Delivery Track<br />
Clearance & Stock items<br />
Locomotives - 2 rail<br />
Atlas.. Call for special diesel blow-outs<br />
RS-1..Rut, CNJ, NH, RI, AA, LIRR, WT..$249-$309<br />
SD-35..WM, N&W, SOU, CNJ, B&O..$249-$309<br />
GP-35's..GMO, RDG, WM, NKP, PRR, BN..$249-$309<br />
Dash 8's..CSX, NYSW, UP, SP, BNSF..$249-$309<br />
SW's..Raritan..$229. LV, Reading........$249<br />
CNJ, NYC SW's..$289. Custom Lackawanna..$299<br />
MTH..PRR H-3..$649, K-4..$599 CNJ P-47..$749<br />
Weaver....U25b....PRR, EL, MILW....$189-$199<br />
VO-1000..blowout..B&O, CNJ, GN, LV, WM..$189<br />
RS-11..C&O, DWP, CNW, MEC, PRR, SOU..$199<br />
USRA Light Pacific..WM, N&W, B&M, MEC, MILW..$495<br />
Shaft drive RS-3's, FA/FB's..............$99-$150<br />
Passenger Sets<br />
Golden Gate..P70 4 car set..PRR, LIRR..$359-$379<br />
B70, PB70....& 80' heavyweight sets..........call<br />
Box Cars - 2 rail<br />
Pecos River..NYC, SOU, NKP, WAB, CBQ, SF..$35<br />
Atlas..40' Wood..B&O, C&O, CBQ, CNJ, CNW, Erie<br />
NYC, NW, PRR, D&H, Rdg, WM, others....$40<br />
40' "trainman"..BAR, CNJ, Rdg, ATSF, CBQ, ACL<br />
UP, RI, B&M, GN, LN, NYC, PRR, IC, MEC..$36<br />
50'..MILW, D&H, NYC, MKT, SOU, L&N, NH, WM..$50<br />
53'..Aloha, Purina, B&M, Evans, CNW, FEC..$37<br />
60'..B&O, EL, RG, SOU, N&W, WM, GTW..$35-$45<br />
Weaver..ACL, ACY, BAR, B&O, B&M, CBQ, CIM, CNJ<br />
CN, C&O, CP, CV, CR, D&H, DTSL, EL, GN, IC, MEC,<br />
LV, L&N, MEC, MP, NYC, N&W, NH, NYSW, PC, PHD,<br />
PRR, Rbox, Rutland, ADN, B&H, UP, SF.more..$20-$30<br />
Refrigerator Cars - 2 rail<br />
Weaver/Crown..B&M, BN, CV, CN, NYC, REA,<br />
Whitehouse, Dubuque, Nrn Refrig, Wescott, Hoods<br />
Harding, Whitings, West Indies, Beer Cars, more..$25<br />
Atlas..36' & 40' woodside..Kreys, Kingans, Century,<br />
Robin Hood, Merchants, Nash, Atlas beer, Phoenix,<br />
Eatmor, Selecto, Hardy, Pluto, Nuckolls, more..$49<br />
Erie, NYC, CNW, ATSF, other "good" ones..$65<br />
40' plug door..NH, PRR, WM, WP, DTI, REA<br />
FGE, CNJ, NP, ATSF, NYC, SSW, ART.....$36<br />
Covered Hoppers - 2 rail<br />
Weaver PS-2..BN, CBQ, CNW, CP, CR, CSX, DLW<br />
C&O, EL, LV, NH, NYC, PRR, SLSF, WAB, UP, BNSF<br />
Jack Frost, Bakers Choc., Linde, Imco, more..$20-$25<br />
50' Centerflow or PS-2CD..CR, CP, LV, NYC, PRR, RI,<br />
Rainbow, Dupont, ADM, Amoco, Arco, UP, more..$20-$25<br />
Atlas....Custom Cylindrical..DLW or CNJ..........$45<br />
Cylindrical..WGrace, GN, PRR, WAB, NYC..$35-$40<br />
Airslide..LV, DH, CSX, PRR, Brachs, F'stone..$35-$40<br />
PS-4427..PRR, LV, others..just a few in stock...$50<br />
Hopper Cars - 2 rail<br />
Atlas..Composite..B&O, CBQ, Clinchfield, undec..$39<br />
Fishbelly..NS..$37. LV, Reading, CNJ, D&H..$45<br />
H21a..PC blk or ylw..$45. Ore cars..BLE, DMIR, CN..$27<br />
Weaver..2, 3, 4-bay..CBQ, CR, D&H, DLW, Erie, EL, IC,<br />
NH, NYC, NKP, NW, PRR, WM, NYSW, Indiana Power,<br />
CNW, UP, Reading, FEC, Chessie, MStL, more..$20-$30<br />
Tank Cars - 2 rail<br />
Weaver..Jack frost, GULF, BN, Trusweet, ADM, Army<br />
Ethyl, Diamond, Hercules, Bakers, Pennsalt..$25-$30<br />
Atlas..60'..Propane, CNTX, GLNX, ACFX, more..$37-$45<br />
8K..Bakelite, SHPX, Shell, Dow, Phila Quartz..$50-$55<br />
11K..Warren, Sunray, Spencer, Fuelane, Shell, undec..$50<br />
Flat Cars, Stock Cars<br />
Atlas..Stock..Armour, CNW, B&O, PRR, undec..$30<br />
89' flats..FEC, a few more..$50. TTX Front runner..$40<br />
Weaver..Stock cars..Erie, Rdg, PRR, CP, T&P..$20-$25<br />
Flats..ATSF, D&H, Rdg, Erie, LV, BN, TTX, Army...$25<br />
Gondolas - 2 rail<br />
Atlas..40' composite..PRR, NYC, SOU, SP, B&M..$51<br />
50'..B&O, CNJ, GN, NW, NYC, PRR, Rdg, UP, LV..$36<br />
Wvr..CNJ, PRR, LV, RI, SF, UP, Rdg, NW, SOU..$27<br />
Cabeese - 2 rail, 3 rail scale<br />
Weaver..B&M, CR, NYC, Reading, Chessie, LV, D&H,<br />
Erie, EL, PRR, MMID, Monon, ICG, N&W, more..$25-$40<br />
K-line..Bay wind..$48. MTH N8, N5c, NE'rn..$45-$55<br />
Atlas..CR, Chessie, NKP, RFP, Rutland, GM&O,<br />
DRGW, ATSF, SOO, BN, GN, Shawmut..$45-$65.<br />
e-mail us at pdtrains@earthlink.net<br />
PO Box 1035 • Drexel Hill, PA 19026<br />
610-259-4945 • VISA•MC•DISC•AMEX<br />
TM<br />
Bonds<br />
hundreds of<br />
materials including<br />
wood, stone, metal,<br />
ceramic and more!<br />
Incredibly strong and<br />
100% waterproof!<br />
1-800-966-3458 • www.gorillaglue.com<br />
Extra Thick.<br />
Extra Stick.<br />
New Gorilla Tape sticks to things<br />
ordinary tapes simply can’t – metal,<br />
glass, brick, stucco, wood and more.<br />
1-800-966-3458 • www.gorillatape.com<br />
July/Aug ’06 - O <strong>Scale</strong> <strong>Trains</strong> • 27<br />
TM
2K6 O <strong>Scale</strong> <strong>Trains</strong><br />
3rd Annual Digital Photo Contest<br />
The Categories<br />
• Steam locomotive<br />
• Diesel locomotive<br />
• Narrow Gauge/Industrial<br />
• Traction (New category this year!)<br />
The Rules<br />
• You may only enter ONE category<br />
of the contest<br />
• You may enter a maximum of<br />
TWO (2) photos in that category.<br />
• Image must include O <strong>Scale</strong><br />
equipment befitting the category.<br />
• Image must be submitted in digital<br />
JPEG format.<br />
• Images must be at least 250 dpi<br />
but not more than 300 dpi and at<br />
least 4 x 5 inches.<br />
• Image must be emailed to: jag@<br />
oscalemag.com<br />
• All submissions become the property<br />
of O <strong>Scale</strong> <strong>Trains</strong> <strong>Magazine</strong>.<br />
• Images must be submitted by<br />
midnight, August 1, 2006<br />
• Winners will be announced and<br />
winning images published in OST<br />
Issue #29, Nov/Dec 2006.<br />
Additional Details<br />
• All photos MUST be submitted by<br />
email<br />
• Photos DO NOT have to be taken<br />
with a digital camera. You may<br />
take a photo with a wet-film camera,<br />
scan it into your computer,<br />
and then submit it.<br />
• Four winners will be picked by<br />
judges in each of the four categories.<br />
• Prizes<br />
Steam: MTH ICRR 2-8-0,<br />
Proto-<strong>Scale</strong> 3-2<br />
Diesel: Weaver V01000, 2<br />
rail, undec.<br />
NG/Indust.: Bachmann On30<br />
2-8-0<br />
Traction: An unpowered trolley<br />
kit from East Gary Car Co., and<br />
a Western Hobbycraft trolley.<br />
Don’t wait! Enter now.<br />
28 • O <strong>Scale</strong> <strong>Trains</strong> - July/Aug ’06
Adapting to Change<br />
I once attended a sales meeting where the sales<br />
manager was lecturing the sales force about change<br />
and adapting to changing market conditions. While he<br />
was discussing the topic, he distributed toy dinosaurs<br />
(not 1:48 scale) to each attendee. He pointed out that<br />
you either change and adapt to conditions, or you<br />
become a dinosaur. He emphasized the point further<br />
by knocking the toy off its feet and off his podium. As<br />
we watched the model fall to the floor we realized that<br />
adapting to change is not necessarily a bad thing; it is<br />
crucial to survival. The dinosaur could not adapt and<br />
became extinct.<br />
I am a HiRailer in transition. HiRailers are accustomed<br />
to change. They have been adapting and changing<br />
their model railroads from the time their trains left<br />
the station at Gitgo. Even the definition of a HiRailer<br />
suggests change and adaptability, “three-rail O Gauge<br />
trains operating in a realistic environment”. HiRailers<br />
represent one of the largest segments in the hobby<br />
today. They are becoming a major force in model railroading.<br />
In fact, OST’s publisher, recently opined that<br />
HiRailers now represent about 40-50% of this magazine’s<br />
subscribers. They have developed an insatiable<br />
appetite for scale and realism. Their interests have<br />
grown beyond the toy train venue to appreciate the art<br />
of 1:48 modeling.<br />
Manufacturers are paying close attention to this<br />
interest group and actually listening to their comments<br />
about model prototype fidelity. This group lobbies for<br />
more details, more scale looking products, and more<br />
realistic models. They are not shy about voicing their<br />
wants and desires. They are not afraid to stand up and<br />
be counted. That is a good thing. That is very positive.<br />
HiRailers actually help drive the O <strong>Scale</strong> market. As a<br />
result, O <strong>Scale</strong> has more choices and products available<br />
today than ever before.<br />
Several manufacturers produce locomotives and rolling<br />
stock that are available to both 3-Rail and 2-Rail<br />
operation. Manufacturers require some minimum number<br />
for production. Some even base that production<br />
decision on the pre-order count. Some projects have<br />
been cancelled as a result. A product has to sell in significant<br />
numbers in order to be produced. Gone are the<br />
days when model trains were mass-produced in record<br />
high production numbers. Because of their pre-orders,<br />
HiRailers play a significant part in the process.<br />
This represents a major scale movement that is<br />
underway. It is driving the O Gauge market (scale and<br />
semi-scale trains running on three-rail track) and it is<br />
influencing the O <strong>Scale</strong> (scale models operating on<br />
two-rail track) segment of the hobby. Realistic modeling,<br />
detailing, kit building, weathering, and kitbashing<br />
all fall into place. Attention to detail and model fidelity<br />
to prototype are key elements and DO get noticed. The<br />
HiRailer’s appetite for scale and realism provides the<br />
numbers and drive for more choices for O <strong>Scale</strong> modelers.<br />
This is only a good thing.<br />
As a HiRailer in transition this Hobo acknowledges<br />
his friends in the HiRail community. Their encouragement,<br />
support, and suggestions over the years have<br />
been very helpful. Operating model trains in a realistic<br />
environment has always been my goal.<br />
Years ago that same sales manager quipped, “If you<br />
are not the lead dog the view never changes.” HiRailers<br />
tend to be restless, ahead of the pack, always looking<br />
for ways to improve their modeling. That’s what happened<br />
to me one day while looking through some open<br />
boxcar doors. I had an epiphany and realized that the<br />
very realistic environment could become even more<br />
realistic if I operated my railroad on two-rail track.<br />
Whoa! I was struck.<br />
My focus is now on O <strong>Scale</strong> and how I can transition<br />
that railroad with its locomotives, rolling stock, buildings,<br />
and track, without breaking the bank. That is my<br />
challenge. It is a big step, but my quest for realism has<br />
led me here. I am not the lead dog, but I am far enough<br />
ahead to see that the O <strong>Scale</strong> view is constantly changing.<br />
I am making a lot of new friends and finding a lot<br />
of old HiRail friends over in "scale-land".<br />
How far will the HiRailers go in their search for realism?<br />
That is the question. Change is inevitable. There is<br />
a lot going on in this great hobby. Keep an open mind<br />
for new ideas and new ways of doing things. After all,<br />
who wants to live in the land of giants and be content<br />
being a dinosaur?<br />
u<br />
July/Aug ’06 - O <strong>Scale</strong> <strong>Trains</strong> • 29
Round and Round<br />
If I may, I’d like to take “friendly exception” to<br />
some comments made by Hobo D. Hirailer in<br />
his recent column, “Going Around and Around<br />
and Around” (OST #25)<br />
Hobo seems to feel that his HiRailer<br />
friends like to run their trains just “for fun”<br />
whereas some 2-Railers take their trains<br />
“seriously”, using the adjective in a somewhat<br />
condescending sense.<br />
Okay, we “serious” 2-Railers can take a<br />
ribbing as well as the next guy, and what<br />
kind of dope wouldn’t agree that this, after<br />
all, is just a hobby and it should be “fun”?<br />
But the same could be said for any pursuit<br />
in life! I tell my sons that if you have “fun”<br />
in your career, you are likely to be better<br />
at it, or at minimum will do better because<br />
others will enjoy working with you. But<br />
you also must be “good” at your job.<br />
I believe Hobo is confusing types of<br />
people with types of model railroading.<br />
There are some people who are “fun”;<br />
they make you laugh and they are almost<br />
always “up”. Some of these people are<br />
HiRailers and some are 2-Railers. Then<br />
there are the “serious” types who perhaps<br />
have certain other burdens to deal with<br />
which prevent them from being “fun” and<br />
“up” as much as even they would like.<br />
Some of these people are Hi-Railers and<br />
some are 2-Railers.<br />
But there is another aspect to “seriousness.”<br />
If “fun” is all you are looking for<br />
from your hobby, then you are a dilettante.<br />
There’s nothing wrong with being a dilettante,<br />
like people who “fool around” with<br />
the piano but aren’t really capable because<br />
they don’t really know how to read music<br />
or play subtle and sublime pieces because,<br />
well, they are too difficult, too “serious”<br />
and it’s not “fun” learning this stuff.<br />
But for many “serious” 2-Railers, model<br />
railroads are more than just a layout of<br />
tracks to run trains on. They serve other<br />
functions, the result of which of course<br />
is “fun”, but “fun” is just the beginning,<br />
there’s so much more to it. For some of us,<br />
it’s the fulfillment of a long dream. To have<br />
some kind of outlet, right in our home, for<br />
our “love of trains”.<br />
For some of us it’s the recreation of<br />
long-gone scenes or trains we recall from<br />
our childhood or our pasts, places and<br />
times we wish we could revisit but now<br />
can only be revisited in miniature.<br />
For some of us it’s the challenge of figuring<br />
out how to build that special model we<br />
have a craving for; a model which perhaps<br />
we can’t purchase anywhere and which<br />
30 • O <strong>Scale</strong> <strong>Trains</strong> - July/Aug ’06<br />
therefore must be made from scratch or in<br />
some other fashion.<br />
For some of us it’s the intricate game, or<br />
dance, of operating our layouts as if they<br />
served real industries and real commuters,<br />
with timetables and operating rules.<br />
For some of us it’s the “art” of model<br />
railroading, creativity in 1:48.<br />
There are undoubtedly many more;<br />
everyone has his and her personal reason,<br />
and “fun” is always taken for granted. If<br />
“fun” is your primary or even only reason<br />
for model railroading, well, more power<br />
to you. But most of us want to get “good”<br />
at our pursuit. Just as learning to be a better<br />
pianist requires the investment of your<br />
time and effort, to become a better model<br />
railroader, your investment will have to be<br />
made in a somewhat “serious” way.<br />
Now, seriously, isn’t that fun?<br />
Andy Romano, Crestline, Calif. (via email)<br />
PS: Hobo also says “A lot of 2-Rail guys<br />
do have layouts but they are very difficult<br />
to see since they often exist only in their<br />
minds.” I do not find this to be true either.<br />
I am a serious 2-Rail guy, and Hobo is<br />
welcome to visit my fun layout at [http://<br />
trainutz.com/ironbound.shtml]<br />
Scace responds: Andy, Hobo, et al:<br />
Perhaps a second (or is it third) opinion,<br />
for what it’s worth…<br />
I think you both are hitting around a<br />
note that needs to be hit just a little harder,<br />
so I’ll smack it. The key word here, in my<br />
most humble (yeah, right) opinion, is “satisfaction”.<br />
Many find their comfort level on<br />
the satisfaction scale in the “fun” regime,<br />
as Hobo notes. Others find their satisfaction<br />
level somewhere in those categories<br />
that Andy cites such as prototypical operation,<br />
reproducing a snapshot of history (my<br />
personal favorite), or the satisfaction of<br />
scratchbuilding something no-one else has<br />
done to a level no-one else has achieved.<br />
So Hobo, Andy, your not-so-humble<br />
Editor, and all of us should remember a<br />
couple things. First, our hobby has plenty<br />
of diverse areas where one can find their<br />
personal “satisfaction”. That’s why we<br />
come to the trough. Second, and closely<br />
related, is to avoid the trap that snaps<br />
when we think that our “satisfaction”<br />
choice should be the choice for all.<br />
Let’s be careful out there.<br />
Oops! We goofed.<br />
Received OST #26 today and as normal,<br />
a great issue. There is one error: On page<br />
61 you state that the Model Railroad Handbook,<br />
Fawcett, 1951 was the only time Joe<br />
Fischer described his construction methods.<br />
Not true, the Sept. and Oct. 1949 issues of<br />
Model Railroader had a two part article,<br />
basically the same as the one in the Fawcett<br />
publication. I built a short combine to run<br />
with my Lionel at that time. I still have the<br />
original articles and the combine.<br />
Charlie Flichman<br />
Scace writes: Charlie, thanks to you,<br />
and several other folks, for catching us up<br />
on Joe’s article in MR. When we started<br />
this project a year or so ago, we ran him<br />
through the index that now appears on<br />
[index.mrmag.com]. Joe only appeared listed<br />
in the Handbook, and the 1949 article<br />
wasn’t there (We’re careful about that sort<br />
of thing!) so we missed it.<br />
Please let us know whether you want<br />
more resurrected articles from the past<br />
(that have application for today’s O <strong>Scale</strong>r)<br />
on occasion. I have another one in mind<br />
already, and it isn’t in the MOAI (Mother of<br />
all Indexes) either! The MR index is a wonderful<br />
resource; something of this kind of<br />
breadth is bound to have a couple holes in<br />
it, so keep me honest!<br />
O <strong>Scale</strong> Generations Comment<br />
Brian Scace wrote some pointed comments<br />
in Issue #26 “Observations” concerning,<br />
mostly, command control. But the<br />
message went a little further in comparing<br />
the differences in his (and my) generation<br />
of “doing it all” in building our railroad as<br />
compared to the newer generation accepting<br />
most everything already built. Well,<br />
some building is required, of course, but<br />
that is often just adding a few details to a<br />
car, locomotive, or a structure rather than<br />
starting the whole thing from scratch.<br />
Brian mentions that the “newer railroaders<br />
don’t have the time to spend<br />
wiring receivers and speakers let alone<br />
building kits and scratchbuilding.” True<br />
enough, as that does describe our lives<br />
today with technology as it is and fast<br />
advancing to be even more complex. Time<br />
is precious when one is supporting a family<br />
and trying to get ahead in the job. But<br />
then, wasn’t it the same when we were<br />
younger even though the technology may<br />
have been a lot less sophisticated? Family<br />
and work was just as important then<br />
as now. And time spent on building that<br />
RR was allotted in small increments when<br />
time allowed.<br />
When I first started in becoming a<br />
model railroader in the mid 50s as a<br />
young hard charging sergeant of Marines,<br />
married with a family, time and money<br />
wasn’t always there to pursue that growing<br />
interest in all things railroad. But it<br />
was done, and mostly by scratchbuilding<br />
as it was sure a lot cheaper than buying<br />
it already made. MR, in every issue<br />
back then, had scratchbuilding articles
ecause that was the norm during those<br />
days. Remember Eric Stevens “Dollar Car”<br />
projects? Or brass locomotives built at the<br />
“kitchen table” using a hand rotary drill<br />
to turn domes and stacks? Even electronic<br />
throttles were scratchbuilt as evidenced by<br />
the numerous articles in Model Railroader<br />
and Railroad Model Craftsman. I built a<br />
couple of these, they worked, and I don’t<br />
know anything about electronics! But the<br />
philosophy is different now. “Why build it<br />
when I can buy it already made?” There<br />
are certainly more model products out<br />
there now than there ever was when we<br />
were younger and probably a little more<br />
affordable with today’s personal incomes<br />
than it used to be.<br />
But still, scratchbuilding and “doing it<br />
all” has slowly drifted away from what it<br />
once was. Most everything I have is built<br />
from scratch with only a few kits and they<br />
are usually modified in some respect. I have<br />
written a few published articles on some of<br />
my projects but I suspect, broadly speaking,<br />
that the majority of modelers today are not<br />
much interested in the details of carving<br />
brass and styrene for a complete model or<br />
the research involved in getting the details<br />
right. It’s a new generation!<br />
Enjoyed your editorial on O <strong>Scale</strong> Generations,<br />
Brian! It was well said.<br />
Tom Mix , Capt. USMC ret.,<br />
Monument, Colo.<br />
Brian writes: I can agree with Tom’s<br />
comments, with a few more of my own<br />
of course. There’s another component<br />
to this that needs be brought out. As an<br />
example, I still have the first locomotive<br />
I ever scratchbuilt (It’s awful, and it isn’t<br />
for sale at any price!) I built it under the<br />
tutelage of some of the old prewar crowd,<br />
now long gone. From their perspective, my<br />
use of decals was a sacrilege! Why didn’t I<br />
hand-letter it, the way it was supposed to<br />
be done?<br />
Simple. Decals were available to me,<br />
but not to them in their formative years. I<br />
regarded decals as an available tool; they<br />
regarded them as a cop-out. The generation<br />
behind me doesn’t have to scratchbuild<br />
or modify everything like I did. Now<br />
their available ready-to-run stuff becomes<br />
my cop-out. We scratchbuilt, first from<br />
necessity, and then (after we got good at<br />
it) for pleasure. That first locomotive was<br />
not fun. It wasn’t even satisfying. It was,<br />
however, very formative. These young<br />
hard-chargers come from a different set of<br />
formatives, so the perspectives are different<br />
yet honestly held. I can respect that.<br />
BF&M<br />
Baldwin Forge & Machine<br />
Box 5, Baldwin MD 21013<br />
How can we help you? Custom machine<br />
work, 3-R to 2-R conversions for steam,<br />
diesel or electric. Driver castings<br />
machined. General repairs to O <strong>Scale</strong> locomotives.<br />
Call Joe, evenings 7 to 9 PM.<br />
410-592-5275 or rrjjf@aol.com<br />
FOX HOLLOW MINING Co.<br />
set on flat<br />
surface or<br />
mountain<br />
side, fully<br />
detailed<br />
loading<br />
bays.<br />
KIT #404<br />
First in<br />
a series<br />
of companion<br />
building.<br />
Laser cut wood. Designed for easy assembly.<br />
Footprint: 23"L x 11"W<br />
M DEL TECH, Inc.<br />
for the SERIOUS modeler<br />
X 15"H. MORE INFO CALL<br />
7289 WESTFIELD ROAD<br />
MEDINA, OHIO 44256<br />
PHONE 800 264-9845<br />
July/Aug ’06 - O <strong>Scale</strong> <strong>Trains</strong> • 31
AMERICAN "0" SCALE<br />
PROFESSIONAL<br />
SERVICES<br />
Low-cost consignment sales.<br />
Purchase and sell quality “0” <strong>Scale</strong> brass and custom model trains.<br />
VISA, MasterCard & Lay-a-ways Accepted. Call for Terms.<br />
WE BUY BRASS TRAINS<br />
✰ Estate and collection liquidations<br />
✰ Locating services<br />
✰ Purchases of your new, used & unwanted equipment<br />
✰ Consignment sales<br />
✰ Layout dismantling services<br />
✰ Auction services<br />
✰ Collections Purchased<br />
✰ Cash Paid for new & used trains<br />
Call days or early evenings...<br />
Bill Davis<br />
Email bdavis148@aol.com<br />
Phone/Fax (262) 560-1619<br />
American “0” <strong>Scale</strong> Professional Services<br />
PO Box 575<br />
Waukesha, Wl 53187-0575<br />
32 • O <strong>Scale</strong> <strong>Trains</strong> - July/Aug ’06
Narrow Minded<br />
Bobber Gibbs<br />
For as long as I can remember, I wanted to be able<br />
to hear the appropriate locomotive and railroad sounds<br />
when I operated my trains, whether steam, Diesel, gas<br />
or electric. In 1950, my first American Flyer 4-6-2 Pacific<br />
had an internal sound piston that made an acceptable<br />
chuffing sound, so I placed the whistling billboard just<br />
before the grade crossing near the station and I can still<br />
remember those exciting sound effects.<br />
When I turned to HO, and then to O <strong>Scale</strong>, I played<br />
cassettes of recorded railroad yard sounds through speakers<br />
under my layouts, but that was not quite what I hoped<br />
for. I wanted sound to be heard from the locomotives,<br />
and for the<br />
models to sound<br />
like their big<br />
brothers. I wanted<br />
all the whistles<br />
and horns<br />
to be slightly<br />
different so that<br />
each locomotive<br />
took on its own<br />
character.<br />
After PFM introduced their control and sound systems,<br />
I purchased two complete sets. I was pleased with the<br />
sounds that emanated from my On3 locomotives, but<br />
I was pretty much limited to operating one locomotive<br />
per block unless I was double-heading two similar units.<br />
Even my old Magoffin sound system provided acceptable<br />
sound effects, but it also had similar limitations and<br />
it eventually went out of production. I tried several other<br />
steam and Diesel sound generators and found them<br />
unsatisfactory, and not compatible with each other.<br />
With my layouts, I always build in lots of operations<br />
that can involve and entertain several operators. I derive<br />
the most satisfaction from the light-hearted banter that is<br />
part of any operating session. When Digital Command<br />
Control was introduced, it seemed to be just what I<br />
wanted. Each operator could control the movements and<br />
sounds of his own locomotive as he walked along with<br />
his train.<br />
Only a few years ago, it was predicted that DCC and<br />
sound generators could be combined and made small<br />
enough to install a single decoder and speaker into the<br />
tiniest of power units. I was delighted when the NMRA<br />
and the manufacturers worked together to develop<br />
industry standards. Now, it seems that there are so many<br />
different DCC and sound systems to choose from that<br />
one hardly knows where to start or when is the best<br />
time to jump in. Well, the time was determined for me<br />
when a prominent discounter began selling the excellent<br />
BLI On30 C16 with DCC and sound for under $120. I<br />
bought two of them and stumbled into the new world of<br />
DCC without even owning a control system. Now, a few<br />
months later, I have to think that my timing was just right.<br />
Upon investigating, I learned that the Bachmann E-Z<br />
Command Digital Command Control System is a decent<br />
entry-level package that can get you into DCC with minimum<br />
expense. Lately, it has been available on Ebay for<br />
around $60. When the Walk-Around Companion and<br />
Connector Panel became available, I bought one to allow<br />
two operators to control up to nine DCC-equipped locomotives<br />
and one analog (DC) unit. Additional Companions<br />
can be added as necessary. Bachmann has included<br />
DCC in all three of their latest On30 models, including<br />
the tiny Davenport diesel, the Rail Truck and the 2-8-0<br />
Consolidation (See my review in this issue.) They have<br />
not introduced sound yet, but their DCC models are configured<br />
so that they can be operated on DC or DCC with<br />
no modifications. Moreover, the new Consolidation can<br />
often be bought on Ebay for under $130, the Rail Truck<br />
for around $80 and the Davenport for around $40. Most<br />
On3 modelers quickly learned that the Rail Truck can be<br />
re-gauged to On3 by simply sliding the wheels out on the<br />
axles.<br />
I believe that there are currently more On30 modelers<br />
than all the other O <strong>Scale</strong>s combined, including traditional<br />
standard-gauge, P48, On3 and On2. Bachmann <strong>Trains</strong><br />
has earned its place at the front of the On30 parade by<br />
producing high quality and low priced narrow-gauge<br />
products for thousands of new O <strong>Scale</strong>rs.<br />
At this time, I can report that having three narrowgauge<br />
locomotives with DCC and sound, and nine more<br />
with DCC only, has added to my pleasure immensely and<br />
I am a happy operator. I expect that most manufacturers<br />
will offer all of their new locomotives with DCC and<br />
sound in the near future. Soon, when the Bachmann fiveamp<br />
booster becomes available, it will be time to start<br />
installing DCC and sound in some of my standard-gauge<br />
locomotives. I might want a better or more expensive<br />
DCC system in the future, but for now I’m satisfied with<br />
what I have. With one-amp decoders now available for<br />
around $10, it might be time for you to start thinking seriously<br />
about moving your railroad into the Digital Age.<br />
Happy trains to you from Bobber<br />
u<br />
July/Aug ’06 - O <strong>Scale</strong> <strong>Trains</strong> • 33
After spending several issues of OST discussing power supplies,<br />
I would like to return to the “PoweringUp” column and<br />
something simple. Of course, by simple I mean profound.<br />
But first, I want to pass along one piece of information. Those<br />
of you who read the smaller scale magazines are familiar with<br />
QSI, who builds DCC controllers and sound systems. QSI has<br />
appointed American Hobby Distributors (AHD) for exclusive<br />
distribution and support of their Quantum locomotive sound<br />
system. The word is that they are going to enter the O <strong>Scale</strong><br />
market in the fall. They won’t say any more at this time (at least<br />
to me) but there should be more information in a few months.<br />
Now, on to my main topic for this month. I would like to<br />
consider the “Illusions of O <strong>Scale</strong> Modeling”. I don’t mean the<br />
fact that O <strong>Scale</strong> is 1/48 of life size. That is purely mechanical.<br />
We have to go beyond that and play tricks on our senses.<br />
For example, I model the DL&W Railroad, and one of their<br />
major achievements was the set of four concrete arch bridges<br />
completed in the early 1900s. I have to use selective compression<br />
to model their Tunkhannock Creek viaduct because it was<br />
2375 feet long. In O <strong>Scale</strong>, it would be about 50’ long, longer<br />
than my house. But I’m not here to talk about bridges; in this<br />
magazine, I usually go on about electrical/electronic aspects of<br />
modeling, and that is what I want to do now.<br />
Light Illusions<br />
When I was at O <strong>Scale</strong> West, I visited Tom Towner’s layout<br />
in San Jose. Like in many model layouts, he uses spotlights in<br />
the ceiling. Tom mentioned that he had to replace some burned<br />
out bulbs and, by mistake, bought the daylight-style fluorescent<br />
bulbs that screw into ordinary outlets. The difference was just<br />
dramatic; his scenery looked completely different. He emphasized<br />
this, because he had a branch that went into an adjacent<br />
room and it still had normal (yellow) incandescent lights. Your<br />
eyes could do an A-B test by just walking back and forth. These<br />
bulbs are made by Sylvania (and probably others), and a 23-watt<br />
bulb gives as much light as a 100-watt incandescent bulb. They<br />
repay you by saving energy and, with summer coming up, they<br />
save air conditioning. Be sure to look for daylight bulbs; all fluorescent<br />
bulbs are not daylight.<br />
By the way, there is a well-known principle in architecture<br />
that you cannot have light unless you have dark. That’s obvious<br />
once you think about it; the dark area creates the bounds<br />
for the lighted area. You might want to try experimenting with<br />
this on your layout by turning off some spotlights and see how<br />
it emphasizes the places that are still lit up. Tom went a step<br />
further by using one incandescent spot to take the place of the<br />
sun. You can see the two kinds of light. He says he would have<br />
done his scenery differently if he had known about this at the<br />
beginning.<br />
Sound Illusions<br />
Brian Scace, our editor, tends to make comments that keep<br />
me honest. Recently he complained (Me? Complain? –ed) about<br />
locomotive sounds. Now I am a convert to locomotive sounds,<br />
so of course I try to convert everyone. But actually he is correct.<br />
You can have, and many do have, too much sound. If I can hear<br />
the train at the other end of the layout, then the sound is unrealistic<br />
because that is supposed to be miles away. And if I can<br />
hear the engineer and fireman talking, it is unrealistic because I<br />
cannot hear them in real life.<br />
Part of the track on my layout goes into, along, and out of a<br />
bookcase (Don’t ask; it’s a complicated story.) From the railroad<br />
side, the bookcase is a tunnel and it allowed me to experiment<br />
with sound. It was dramatic as the train came out of the tunnel.<br />
The sound appeared as the train appeared just as it would with<br />
a real train. Just as above, where you cannot have light with<br />
having dark, you cannot have sound without having quiet. Anyone<br />
can perform this same experiment by creating a temporary<br />
tunnel. This can be just a large cardboard box with track openings<br />
in each end, set over the track (in my case two tracks). You<br />
can glue pieces of paper towel on the inside to make it absorb<br />
sound better. Then your train will announce itself as it comes<br />
into town. Even better, it would be nice for the trains to go<br />
through a rock cut before entering a town, in order to provide a<br />
separated sound zone.<br />
I can’t avoid mentioning the idea of cutting notches in your rail<br />
every 9-3/4 inches (the length of 39’ rails in O <strong>Scale</strong>) at the places<br />
where visitors stand. They will be startled and amazed as they hear<br />
the “clickety-clack” of old time railroads as the train passes them. Of<br />
course you’ll need to use steel wheels to make this work.<br />
The real point is that you’ll have to design the light and the<br />
sound on your layout to create the illusion of reality, the same<br />
as you design any other aspect of the layout. These are so profound<br />
because the average person doesn’t know that they are<br />
being influenced by what you have done.<br />
Reality Illusions<br />
My final point is not electrical, and I didn’t create it. At O <strong>Scale</strong><br />
West, I purchased two of the show cars (I never buy just one of anything.<br />
That’s not realism, it’s the “L” word; real trains have groups of<br />
like cars.) They are 40’ outside braced boxcars made by Atlas, with<br />
weighted and detailed undercarriages and steel wheels. Each car<br />
weighs about 18 oz. I brought them home and set them on a siding.<br />
As I walk by I nudge them, and they roll a few feet so realistically<br />
that they give a dramatic feeling of reality. They act like they have<br />
the mass of real boxcars, not toys. They are not twice as realistic as<br />
HO. It is more like the eight times difference that the volume would<br />
suggest. Have you noticed this? To me this is an instance of the<br />
Unique Mystique of O <strong>Scale</strong>.<br />
u<br />
34 • O <strong>Scale</strong> <strong>Trains</strong> - July/Aug ’06
Denver, Pa. Saturday, August 5, 2006<br />
Held at the Denver Fire Hall, 4th and Locust Sts. in Denver, Pa.<br />
July/Aug ’06 - O <strong>Scale</strong> <strong>Trains</strong> • 35
Traction Action<br />
Roger C. Parker<br />
Modeling the Baltimore Terminal of the Washington,<br />
Baltimore, and Annapolis<br />
Reader email is one of the nicest aspects about writing this column.<br />
Gerald Brothers, a reader in South Dakota, recently contacted<br />
me, and we’ve gotten to emailing back and forth about favorite<br />
traction books. He mentioned one of his favorites, Every Hour on<br />
the Hour, a Chronicle of the Washington, Baltimore, and Annapolis<br />
Electric Railroad, by John R. Merriken and Leroy O. King.<br />
He mentioned several maps of terminals in the book. I was<br />
about to go online to order a copy, when my wife asked, “What’s<br />
wrong with the copy downstairs?” She was right; I already had a<br />
copy! (Oh well. It’s only money.)<br />
The maps were as good as promised. The line’s namesake terminals<br />
in Baltimore and Washington cry out to be modeled. The<br />
Baltimore terminal, shown below, is the larger of the two. It had<br />
four stub-end tracks, plus a turning loop and three passing tracks.<br />
The Washington terminal, to be described in the next issue, takes<br />
up less space and contains a loop with three tracks.<br />
Baltimore Terminal<br />
Notable elements of the Baltimore terminal include the large<br />
covered platforms for both the stub tracks as well as the loop. The<br />
structure covers both the boarding areas as well as the tracks, creating<br />
an interesting “tunnel effect” as the trains enter and emerge.<br />
Yet, since the sides of the platform are open, trains are easy to<br />
access if required.<br />
Less-than-carload (LCL) freight and express played a major role<br />
in the Washington, Baltimore, and Annapolis’ revenues. Accordingly,<br />
there is a long freight siding along the bottom of the terminal.<br />
Since the majority of the terminal trackage is paved, the ties used<br />
on the freight track will form an interesting contrast. In addition, the<br />
freight track is on a slope about four feet higher than the passenger<br />
tracks, heightening the contrast.<br />
We opted to include the driveway in front of the freight house<br />
in the terminal module. This provides space for a variety of trucks<br />
awaiting loading and unloading. Interest in the foreground could be<br />
enhanced by paving the driveway with cobblestones or bricks. If<br />
space is at a premium, the driveway could be reduced in width.<br />
Note the two inspection pits. How would today’s litigious society,<br />
and OSHA, feel about open pits in the middle of a terminal<br />
without fencing? Were people more careful in those days?<br />
Like several of the terminals described in previous columns,<br />
building flats and painted backgrounds can be used to create an<br />
urban atmosphere. One of the nicest aspects of this terminal is that<br />
it’s situated in a “box canyon” with buildings on three sides, focusing<br />
the viewer’s attention on the terminal.<br />
Operations<br />
The original terminal could accommodate almost 50 cars at<br />
a time. We’ve applied some selective compression and, accordingly,<br />
capacity is reduced. Yet, there’s still room for a half dozen<br />
two, three, and four-car passenger trains, plus a string of express<br />
and freight cars, to be on hand at any given time. That’s certainly<br />
enough space to showcase your favorite equipment, and still operate<br />
trains into and out of the facility.<br />
u<br />
38 • O <strong>Scale</strong> <strong>Trains</strong> - July/Aug ’06
Custom Building, Repair & Painting Services Available Buy-Sell-Trade, Consignments-Appraisals, eBay Sales<br />
Website: www.alleghenyscale.com • Email: oscale@alleghenyscale.com<br />
470 Schooley’s Mountain Road, Suite 8-117, Hackettstown, New Jersey 07840 • Voice - (908) 684-2070 • Fax - (908) 684-8911<br />
Steam Locomotives<br />
WS C&O T1 2-10-4 UP New .........................................................................................................$1,995<br />
Weaver NH I5 4-6-4 FP New, Late Version, Streamlined .............................................................$925<br />
Oriental N&W Auxiliary Water Tender FP New, Lights ..............................................................$450<br />
PSC NYC F-12 4-6-0 FP New, 7000 Gallon Tender ....................................................................$1,295<br />
SS NYC K-5 Pacific UP L/N ............................................................................................................$775<br />
WS PRR J1 2-10-4 UP New ..........................................................................................................$1,995<br />
Key PRR J1a 2-10-4 FP New, w/o Antenna .................................................................................$2,995<br />
USH PRR K4 4-6-2 CP L/N, Correct Boiler ................................................................................$1,095<br />
USH PRR K4 4-6-2 CP Good, Early Run .......................................................................................$595<br />
PSC PRR K4 4-6-2 Standard UP New, Prewar - 130p75 tender ...............................................$1,150<br />
WS PRR M1 4-8-2 CP New, Backhead Detail .............................................................................$1,095<br />
OMI PRR M1b 4-8-2 Modernized FP L/N ..................................................................................$1,250<br />
WVR PRR T1 4-4-4-4 Duplex FP L/N, Early Porthole Version ................................................$1,350<br />
PSC SP AC-12 Crown 2-8-8-2 FP New, Crown Model, No. 4294 ..............................................$4,995<br />
SS 3rd SP F3 2-10-2 FP New, 2 Rail .............................................................................................$1,195<br />
USH SP MT-3 4-8-2 CP Mint, Never Assembled .........................................................................$1,250<br />
USH SP MT-4 4-8-2 CP New, Weathered .....................................................................................$1,595<br />
GPM SP S-12, S-14 0-6-0 Switchers FP New, Eight Versions Reserve<br />
GEN 4-4-2 Atlantic Kit UP New, 3 Section Dulux Kit ...................................................................$325<br />
WS UP Big Boy 4-8-8-4 UP New, Late Run .................................................................................$2,595<br />
Key UP Challenger 4-6-6-4 UP New, Late Coal Version ............................................................$3,150<br />
Key UP FEF-2 4-8-4 UP New, Coal Version, Rare - 1 of 10 .......................................................$2,650<br />
USH USRA 0-8-0 Switcher UP New ................................................................................................$695<br />
PSC Westside Lbr. Co. Shay No. 15 - On3 UP New, 60 Ton, 3 Truck Shay ..............................$2,250<br />
OMI WM I-2 Decapod 2-10-0 CP New .......................................................................................$2,195<br />
Diesel Locomotives<br />
OMI AT&SF SD75M FP New, Warbonnet ..................................................................................$2,195<br />
C&LS C&O ALCO RSD-12 CP L/N, 2 Available, No. 6702, No. 6705 .....................................$1,095<br />
OMI DL&W EMD FT A-B UP New ............................................................................................$1,350<br />
BLW D&RGW 2 Car Prospector Set FP L/N .............................................................................$1,495<br />
RYM GE 44 Ton Diesel Switcher UP New, Phase IV .....................................................................$300<br />
CNJB LIRR B1 Electric Switchers, Pair CP EX, No Box, LIRR Version, Nos, 334-335 ...........$595<br />
OMI NYC RF-16 Sharknoses A-B-A UP Mint, 3 Unit Set .........................................................$2,225<br />
Key NYC EMD F7 A-B FP New, 1st Run, Lightning Stripe ......................................................$2,195<br />
OMI NYC FM H-12-44 FP New, Lightning Stripe .....................................................................$1,245<br />
Key PRR ALCO PA-PB FP New, Tuscan 5 Stripe ......................................................................$2,450<br />
Key PRR EMD F3 A Unit FP New, Last run, Brunswick Freight .............................................$1,150<br />
Key PRR EMD F7 A-B FP New, 1st run, Brunswick Freight ....................................................$2,000<br />
Atlas PRR FM Erie Built A-B FP New, 2nd Run, Passenger Version ..........................................$725<br />
Key SP ALCO PA-PB FP New, Daylight .....................................................................................$2,550<br />
Key SP EMD E7 A-B FP New, 1st Run, Daylight .......................................................................$2,395<br />
Key UP EMD F7 A-B FP L/N, 1st Run ........................................................................................$1,895<br />
PSC V&T McKeen Car FP New, No. 22 ......................................................................................$1,095<br />
C&LS VGN FM Trainmaster FP New, Phase I, No. 67 ..............................................................$2,175<br />
Other<br />
AMLT PRR 8 Car 1938 Broadway Set UP Built Up styrene Kits w/trucks ................................$695<br />
SSIDE PRR P85 Streamline Coach FP Dulux Gold, 2 Available .................................................$595<br />
PSC Pullman Troop Kitchen Car UP New, PSC 16333 .................................................................$350<br />
PSC Railway Express 50’ Express Reefer UP New, PSC No. 16123 .............................................$275<br />
W&R NP 24 Ft. Wood Caboose FP New, Full Interior, Several Versions ....................................$375<br />
Grabowski PRR N5c Cabin Car UP New, w/Antenna ..................................................................$250<br />
Kohs PRR N5c Cabin Car - Version 4a FP New, Tuscan and Black, w/Antenna .......................$625<br />
OMI Baldwin <strong>Scale</strong> Test Car UP New .............................................................................................$200<br />
PSC Erie 50 Ton Covered Hopper UP New ....................................................................................$300<br />
PSC N&W 70 Ton H4 Triple Hopper CP New ...............................................................................$325<br />
PLTD P&LE - NYC USRA Design Steel Box Car UP New, PL-1600 ..........................................$350<br />
PSC PRR GLa Twin Hopper UP New ............................................................................................$195<br />
PLTD PRR H21a Quad Hopper UP New, PL-850 .........................................................................$195<br />
PLTD PRR H22 Quad Hopper UP New, 1 of 60 Built, PL-1950 ..................................................$275<br />
OMI PRR H31c Twin Hopper CP EX, Clemens Paint ..................................................................$200<br />
PLTD PRR R7 Outside Braced Reefer UP New ............................................................................$325<br />
PRB SP Greenville 70’ Gondola FP New, Waffle Side ...................................................................$250<br />
OMI UP 350 Ton Coaling Tower UP New ....................................................................................$2,295<br />
Hotchkiss Clear Case Display Cases New, Many Styles - Sizes ....................................................Call<br />
July/Aug ’06 - O <strong>Scale</strong> <strong>Trains</strong> • 39
Building Lauther’s Perfect Pickles - Part I<br />
Martin Brechtbiel<br />
The Design<br />
I wanted to incorporate a pickle plant in my evolving plans<br />
for my version of a branch line of the Cumberland Valley RR<br />
that survived into the 1930s. Having completed my two pickle<br />
tank cars and a vinegar tank car, their logical destination would<br />
then be a pickle plant, very loosely based on a picture of the<br />
Heinz plant in the city of Chambersburg, PA. This brick structure<br />
was very large and extensive, and I had yet to locate an<br />
adequate number of views that would let me accurately build<br />
it. Additionally, much of my layout is more rural, so wooden<br />
structures would be in the majority. I did manage to locate an<br />
O <strong>Scale</strong> kit (Wabash Valley Hometown Series, I think), but only<br />
after I had already started my building. I also found that there<br />
was a simple plastic kit in HO that apparently passed through<br />
several brand names. The two that I acquired were from IHC<br />
and Tyco, yet were identical in all regards. These kits provided<br />
the spark for getting started. While my building, Lauther’s Perfect<br />
Pickles, may have a passing superficial resemblance, I think<br />
the rest is unique.<br />
The Materials<br />
The vast majority of the construction used commercial scale<br />
lumber from various sources (primarily Kappler and Northeastern<br />
<strong>Scale</strong> Lumber), some other commercial building materials,<br />
as well as a number of detail parts. The sources for all materials<br />
are listed throughout this article. The board-by-board style of<br />
construction is also fairly close to the techniques for building on<br />
the 1:1 scale, with the exception that various glues assemble the<br />
parts rather than real mortar, bolts, and nails.<br />
The Foundation and Base<br />
Just like any good structure, the entire building needs a good<br />
foundation. This fictional building was planned to reside on my<br />
Cumberland Valley & Metal branch line operating in Franklin<br />
County, PA. A common foundation style seen in that area is<br />
built of cut fieldstone or limestone blocks. Only a small portion<br />
of the foundation would be visible after “planting” this building<br />
into the scenery. Options included variations on plaster castings<br />
or blocks, but I chanced across another commercial material,<br />
Dr. Ben’s Baby Building Blocks. These come with a rough edge<br />
on four sides, and are of uniform thickness so they can be easily<br />
stacked into a wall. They also are a blue-grey color that nicely<br />
mimics limestone, and appear to originate from some sort of tiling<br />
material that can be easily cut with a pair of nippers.<br />
The foundation for the main building was then constructed of<br />
these building blocks with an outside dimension of just over 30’<br />
x 40’ (I’ll use scale feet and inches except as noted.) with three<br />
courses of stone tightly fitted together with staggered joints.<br />
These went together very quickly and smoothly with CA glue.<br />
I should note that I built the entire structure working on a sheet<br />
of plate glass. It provides a very flat surface, and allows a razor<br />
or scalpel to release any errantly glued pieces of the foundation.<br />
The foundation for the adjacent boiler house was constructed<br />
similarly, with outside dimensions of just over 24’ x 14’; this was<br />
only two courses high to obtain a step down between the two<br />
connected structures (Photo 1). The foundation of the one wall<br />
extends an additional seven feet to ultimately support a trellis<br />
wall and the rafters for the boiler house. The two foundations<br />
were attached initially by a little dab of Walthers Goo to set<br />
them in place with the boiler house foundation located ten feet<br />
north from the South wall. At this point, I want to define the<br />
compass as it pertains to this project. The wall with the porch is<br />
“South”, the opposite trackside wall is “North”, the boiler house<br />
is on the “East” wall, leaving the sheltered tanks at the “West”<br />
wall (Photo 1 and Figure 1 on Page 44).<br />
1<br />
40 • O <strong>Scale</strong> <strong>Trains</strong> - July/Aug ’06
2<br />
Sill plates of HO 6” x 22” were CA’d on top of the foundations.<br />
Side sills of 1/16” x 3/16” dimensional lumber were added<br />
next making a 30’ x 40’ box for the main building and an adjacent<br />
24’ x 14’ box for the boiler house on top of the sill plates.<br />
With these set in place, floor joists of 1/16” x 3/16” dimensional<br />
lumber were inserted between the side sills, spaced at two feet<br />
on center running north-south. With the supports for the floor<br />
complete, both areas were floored over with 1/16” thick Northeastern<br />
<strong>Scale</strong> Lumber scribed siding (3/32” spacing) and secured<br />
with CA (Photo 1).<br />
The Front Porch<br />
The “front porch” was started with a frame of 1/16” x 5/32”<br />
dimensional lumber, essentially a 40’ x 8’ box with a 1/16” x<br />
5/32” center joist that was then decked over with individual HO<br />
3” x 12” boards. Support posts for the porch were made from<br />
HO 8” x 10” cut to bring the surface of porch flush with the<br />
level of the flooring of the main building. These were applied<br />
to the perimeter away from the main building. Diagonal bracing<br />
was added, tying the porch legs together, which were fashioned<br />
from HO 3” x 12”. The ramp (3-3/4’ x 13’) was fashioned from<br />
the same framing and decking materials and the angles at each<br />
end were sanded to fit. The ramp was secured with a combination<br />
of CA and Walthers Goo. The exterior framing of the porch<br />
was dressed up with Grandt Line #23 nut-bolt-washer (nbw)<br />
castings. The deck entire assembly was then attached to the<br />
south facing side sill of the main building with CA.<br />
Building the First Floor<br />
The first floor walls of the main building were constructed<br />
board-by-board as sub-units, and the four finished walls were<br />
then assembled to enclose the first floor. I had initially planned<br />
to use commercial clapboard siding, but this building material<br />
was quickly abandoned as the wall thickness seemed to be too<br />
thick. Normally, this might not be a consideration but, since I<br />
intended for this structure to have a fully detailed and accessible<br />
interior, the scribed siding would not be accurate and the walls<br />
needed to be dimensionally acceptable to the eye.<br />
All four of these pre-assembled wall units were assembled<br />
as 2 x 4 stud walls, with 7¾’ long studs spaced on two-foot<br />
centers, and a 4 x 4 on each end (Figure 2, Page 44). Doubling<br />
of the studs below the support for each window, and to support<br />
the header over each window was included in all walls as needed.<br />
The North wall was 40’ long and the studs were “adjusted”<br />
to accept four Grandt Line #5031 windows. The South wall was<br />
also 40’ long and had the framing set to accept a #5031 window<br />
and three Grandt Line #4040 freight doors as depicted in Photo<br />
2. The East wall is a 29½’ long wall unit that fit in between the<br />
North and South walls. There was one large window in the center<br />
of the wall that was made from two #3702 windows merged<br />
together. The West wall is also a 29½’ wall unit that also fits in<br />
between the North and South walls. There was one opening for<br />
a modified Grandt Line #3604 door that was cut down slightly<br />
to the size of the door framing. There were also two 4 x 4s set<br />
into the framing to provide a surface to tie this wall into the<br />
North and South boiler house walls. An additional 2 x 4, next to<br />
these 4 x 4s, provides an attachment surface for clapboard siding<br />
(Figure 2 and Photo 2).<br />
I intended to have a full-interior detailed structure, so finishing<br />
the interior walls for at least the first floor was necessary.<br />
The intent was to add “plaster” to these walls. To accomplish<br />
this, all four wall units for the first floor interior framing were<br />
given a very quick application of CA and a sheet of 0.005” clear<br />
Evergreen styrene was attached. Then, the assembly was laid<br />
flat on the glass, under a board with a lead weight, until the glue<br />
set. After the glue was well set, the excess styrene was trimmed<br />
off with a sharp scalpel to meet the wall dimensions, and the<br />
window and door openings were cut out (Photo 3).<br />
Next, I installed all of the interior window and door opening<br />
trim. The South wall doorways were finished with HO 1” x<br />
10” and the single window frame with HO 2 x 6. The West wall<br />
large window opening was trimmed out with HO 1” x 10” and<br />
the joint where the window castings were modified was filled<br />
with matching lumber. The North wall window openings were<br />
finished with HO 2 x 6. With this phase completed, all of these<br />
interiors were then brush painted with two coats of Polly S Aged<br />
White to simulate an old finished plaster interior (Photo 3).<br />
The exterior of the four first floor wall units was finished in<br />
individual clapboards. This method created realistically thick<br />
walls. An HO 2 x 8 kick-out board was glued at the base of<br />
the walls and clapboards of HO 1” x 16”, no more than 12’ in<br />
length, were used with staggered joints. The ends of the individual<br />
clapboards on the East and West walls were left approximately<br />
nine inches long to provide material for forming an<br />
appropriate overlap where the ends of these walls would join to<br />
the 4 x 4s of the North and South walls. The openings for all of<br />
the windows and doors were very carefully trimmed and each<br />
window or door casting was test fit in place prior to assembly of<br />
the first floor walls as a unit (Photo 3).<br />
The first floor walls were then assembled onto the floor First,<br />
carefully glue (CA) the North and South walls to the edges of<br />
their respective location on the floor. Make sure to set these as<br />
close to 90° to the floor and parallel to each other 29-1/2’ apart.<br />
The East and West walls were then carefully glued (CA) to the<br />
floor, and inserted in between the North and South walls. Glue<br />
was added on their ends to contact the 4 x 4 ends of the North<br />
and South walls. The excess overlapping clapboards were then<br />
very carefully trimmed off with a brand new scalpel blade.<br />
3<br />
July/Aug ’06 - O <strong>Scale</strong> <strong>Trains</strong> • 41
Building the Exterior Vinegar Tanks<br />
Two large exterior holding tanks were assembled with<br />
board-by-board staves over solid interior forms. Four 3.5”<br />
diameter wood circles were cut out of one inch pine using a<br />
hole saw on the drill press. A 5/16” center hole was drilled in<br />
each. A 15’ length of 5/16” dowel was glued (yellow carpenter’s<br />
glue) into each base circle. Then, I slid the second circle<br />
down over the dowel, leaving five feet protruding above the<br />
top of the pine (Photo 4 and Figure 3 on Page 45). Staves were<br />
made from HO 3” x 14” scale lumber that was Goo’d to the<br />
Grey, Rust, and Aged White. A final light overspray of Floquil<br />
Grimy Black was added, since they are under cover from the<br />
weather (Photo 6).<br />
4<br />
6<br />
circular form. This size of scale lumber was just about right for<br />
the barrel radius, and the casual observer won’t notice that the<br />
staves are not beveled. The barrel band hoops were fashioned<br />
from Special Shapes 1/16” x 3/32” brass stock. The brass was<br />
pre-rolled into shape, marked with a 1-1/2’ overlap, clamped,<br />
and soldered for a press fit over the staves. The overlap section<br />
in each hoop was drilled with a #70 bit for three Grandt<br />
Line #23 nbw’s in each band. These nbw’s were CA’d in place<br />
and the excess was trimmed off, after which the hoops were<br />
installed on the barrels spaced roughly equidistant (Photo 5).<br />
In addition to the barrel bands, nine cables were also added<br />
Building the Attached Boiler House<br />
The North wall of the boiler house is a 24’ long wall unit,<br />
again pre-assembled with 2 x 4 studs. The studs are 7-3/4’ high,<br />
set on two-foot centers with a 4 x 4 on the ends. The 4 x 4s on<br />
the ends were used to join this wall to the East wall of the boiler<br />
house, and also to the East wall of the main building where a<br />
4 x 4 was left for this purpose. The framing was set to accept a<br />
Grandt Line #5031 window and a modified #3601 door that had<br />
the door framing “adjusted” (Photo 7 and Figure 4 on Page 46 ).<br />
7<br />
5<br />
around these barrels. To do this, nine Grandt Line #48 hoop<br />
fasteners were each threaded with #0 surgical silk secured<br />
with CA. Groups of three were Goo’d to the barrel equidistant<br />
between each barrel band. The length of surgical silk was then<br />
wrapped around the barrel and the end secured on the hoop<br />
fastener with CA. The barrels were then stained with a mystery<br />
mixture of Minwax (a mystery since the bottle is continually<br />
topped off with whatever color I find first and/or thinner). The<br />
hoops were painted with Polly S Steam Black, and various<br />
stains added with washes of Roof Brown, Milwaukee Road<br />
The East wall of the boiler house is 33’ long, assembled with<br />
7-3/4’ long 2 x 4 studs on two-foot centers. Again, a 4 x 4 on the<br />
end forms the end post at the south end of the wall to join with<br />
the lattice/trellis exterior wall that also supports the roof rafters.<br />
There is also an interior 4 x 4 in this wall to join with the South<br />
wall, along with an additional 2 x 4 to support attachment of the<br />
board & batten exterior. The framing was also set to accept a<br />
#5031 window.<br />
The South wall of the boiler house is 24’ long, minus the<br />
width of the East wall. This wall fits “inside” of the East wall of<br />
the boiler house while joined to the East wall of the main building.<br />
This was again assembled with 7-3/4’ long 2 x 4 studs set<br />
on two-foot centers with a 4 x 4 on the ends. The framing was<br />
set to accept a modified #3601 Grandt Line door, again after the<br />
supplied framing has been “adjusted”, and four modified windows<br />
of unknown origin from the “junk” box that were glued<br />
42 • O <strong>Scale</strong> <strong>Trains</strong> - July/Aug ’06
8<br />
together to assemble a single unit. All of these castings were<br />
painted with Polly S Aged White, glazed with microscope cover<br />
slip glass cut with a diamond tip scribe, and installed right after<br />
the exterior sheathing was completed (since later access would<br />
be limited).<br />
The exterior of the boiler house walls were finished off with<br />
board-and-batten siding made from individual HO scale 1” x<br />
24” and 2 x 4 boards that extended down over the side sills<br />
prior to the walls being mounted on the flooring of the boiler<br />
house. An “interior” portion of the East wall, exposed inside of<br />
the slatted exterior trellis wall, was also finished off with this<br />
same board-and-batten sheathing. An HO 8” x 12” was added<br />
to the end of this wall for the header of the trellis part of the slatted<br />
exterior wall to rest on (Photo 8).<br />
Installation of these three walls for the boiler house was done<br />
starting with the North wall. It was first secured to the floor and<br />
to the anchoring 4 x 4 of the main building East wall with CA.<br />
The West wall was then installed, secured to the floor and to<br />
the North boiler house wall, being careful to keep it square and<br />
plumb while running out to the end of that foundation extension.<br />
The South boiler house wall was then slid in between<br />
the East wall of the main building and the previously secured<br />
East wall of the boiler house, and glued in place with CA. The<br />
exposed southern end post of the East wall was doubled on the<br />
interior side of the East wall with scrap wood. This brings the<br />
thickness of this post up to nearly the width of the foundation.<br />
The addition to that post provides the tie-in of the exterior trellis<br />
wall and support beam for the rafters of the boiler house.<br />
Lattice Exterior Wall<br />
The uprights/supports for the lattice/trellis exterior wall were<br />
made from HO 8” x 12” wood, spaced equidistant between<br />
the boiler house East wall and the free end of the lattice wall.<br />
Note that the lattice wall comes adjacent, but actually does not<br />
directly attach to the East wall of the main building. An HO 4’ x<br />
12” beam extends from the end support post of the East boiler<br />
house wall and rests on these supports. This beam then provides<br />
support for the rafters. The lattice or trellis boards were<br />
made from HO 3” x 10” lumber. The east ends of the trellis<br />
boards extend to attach to the HO 8” x 12” end-post of the boiler<br />
house East wall. The joints of these boards were dressed up<br />
with Grandt Line #1 nbw’s. The ceiling, over the area extending<br />
from the South wall to the lattice/trellis header, was closed in<br />
with scrap 1/32” thick Northeastern 3/32” spaced scribed siding<br />
(Photo 9 and Figure 5 on page 46).<br />
Boiler House Rafters<br />
The roof rafters were made from 1/16” x 5/32” dimensional<br />
lumber. They are quite simple, with the two roof rafters resting<br />
on a single center support up from the traversal beam (Figure<br />
6 on Page 46). These were set to match the spacing of the lattice/trellis<br />
supports, then additional rafters were added equidistant<br />
between those. The far western rafter was not attached to<br />
the main building. Instead, the roofing later ties this structure<br />
into the siding of the main building with flashing. I’ll cover the<br />
roofing issues in Part 2. Soffit boards were inserted between<br />
the rafters (1/16” x 3/16” scrap dimensional lumber). A chimney<br />
platform was made from 1/32” scrap, spanning two rafters near<br />
the main building. The chimney was built up on this platform,<br />
well above the rafters and capped with additional Dr. Ben’s<br />
building blocks. Stone steps at each door of the boiler house<br />
were also built from Dr. Ben’s building blocks.<br />
Roofing<br />
The boiler house roof was gap-sheathed with HO 1” x 24”<br />
material for a metal roof. I’ll return to how the entire building<br />
was roofed with metal standing-seam roofing material later, as<br />
all the roof sheathing and finishing was done as a unit.<br />
The First Floor Interior<br />
The interior of the first floor was fitted out at this point, as<br />
later access would be limited. Berkshire Valley supplied the<br />
desk, file cabinets, books, chairs, stove, coal bin, shelving<br />
unit, buckets, and barrels. The interior also features a modified<br />
Grandt Line door between the two buildings, the two cucumber<br />
washing, sorting, and preparation troughs, and the “elevator” to<br />
take barrels upstairs (Photo 10). The large washing basins were<br />
built from sheet copper formed and soldered into shape, then<br />
“wrapped” in 1/32” dimensional lumber with HO 6” x 12” legs<br />
9<br />
10<br />
continued on page 45<br />
July/Aug ’06 - O <strong>Scale</strong> <strong>Trains</strong> • 43
44 • O <strong>Scale</strong> <strong>Trains</strong> - July/Aug ’06
and supports under the basins. Drains (a washer soldered to a<br />
length of brass tubing) were added in the center of the basins<br />
that run down into a hole in the floor. A Berkshire Valley hand<br />
water pump was added at each end of the basin. These were<br />
extended with brass tubing so that they would mount into the<br />
floor. The entire assembly was painted with Polly S Green, with<br />
the work surface stained with Pecan MinWax. The stove was set<br />
on a metal pan (0.005” styrene painted with Floquil Platinum<br />
Mist), then a length of brass tubing (painted with Polly S Steam<br />
Black) that fit snugly over the stovepipe was added. This stovepipe<br />
extends up through the second floor and up to the roof<br />
where a smokejack casting was installed.<br />
The elevator was made from scrap wood with 3/64” brass<br />
angle (from Structural Shapes) cut, bent and soldered into a<br />
framework which has a chain linkage for hoisting and lowering.<br />
The winch is planned for installation on the second floor with<br />
a ceiling beam mounted pulley. The winch and pulley arrangement,<br />
for hoisting the lift, was made from scrap wood and a<br />
collection of odds and ends of castings from the scrap box. All<br />
of the “ladies” working on the cucumbers were Langley castings<br />
that were handpainted with a variety of Polly S colors, while the<br />
remaining figures were from Arttista. Cucumbers were created<br />
from short grain rice that was briefly soaked in water for about<br />
15 minutes and drained. Then, green food coloring was added<br />
until I got to a shade of green that looked cucumberish. These<br />
“cucumbers” were then laid out to dry on a paper towel, after<br />
which they given an overspray of both Dullcoat and Glosscoat.<br />
Loose cucumbers were secured with Goo, as were most of<br />
the other detail parts and castings. Barrels from Berkshire Valley<br />
were filled with cucumbers, secured in place with dilute<br />
carpenter’s glue. All of these parts had to be prepared, cleaned,<br />
painted / stained, and placed appropriately into the first floor<br />
space. The floor and all exposed wood surfaces were stained<br />
with Pecan Minwax.<br />
Well, this now seems like an opportune spot to take a break,<br />
having described how the entire first floor of the structure was<br />
built, including the interior. I’ll pick up from here in the next<br />
installment, to describe how the second floor, the roof structure,<br />
the second floor interior, and the exterior finishing were done.<br />
to be continued...<br />
July/Aug ’06 - O <strong>Scale</strong> <strong>Trains</strong> • 45
46 • O <strong>Scale</strong> <strong>Trains</strong> - July/Aug ’06
PRR P70 COACHES (ABS)<br />
“The GGD cars are the the only true scale coaches you can buy at that price point. “<br />
“He ran his set of 8, P-70's behind his GG-1 and they were not only beautiful but ran perfectly.”<br />
“Absolutely stunning train!” “Lighted Interior with Seats and Figures, WOW!”<br />
IN STOCK<br />
2 Rail P70 4 Car Sets are Available Now, While Supplies Last<br />
Machined Metal Wheels, Nickel Plated, Kadee Ready Mounts<br />
PRR B70 BAGGAGE - BM70 BAGGAGE/RPO - PB70 COMBINE (ABS)<br />
Order the Perfect Mail Train: 1 Baggage 1 Baggage/RPO and 1 Combine. Or if you like,<br />
order (2) Baggage alone, or 2 Bag./RPO alone or (2) Combines alone. Combine comes with<br />
interior seats with separately painted arm rests, passenger figures, All have operating doors<br />
and constant voltage overhead lighting. New die cast trucks (3DP1 Roller Bearing) and<br />
replaceable 3 rail coupler, with Kadee <strong>Scale</strong> couplers for true scale appearance on your<br />
layout. These cars are luxuriously detailed, reserve your set today. Call your dealer or get on<br />
the web to reserve direct. Also available in LIRR (must reserve).<br />
(1) Baggage, (1) RPO, (1) Combine: $379.95 + $30 S&H<br />
(2) Baggage - $279.95 + $20 S&H or (2) RPO - $279.95 + $20 S&H or (2) Combine - $279.95 +$20 S&H<br />
International Shipping at Cost<br />
www.goldengatedepot.com / FAX: (408) 904-5849<br />
July/Aug ’06 - O <strong>Scale</strong> <strong>Trains</strong> • 47
“Prairie Skyscrapers, Midwest Sentinels.” Whatever<br />
you call them, the grain elevators and feedmills that<br />
used to grace nearly every small town in farm country are fast<br />
disappearing in the wake of changing farm economics and giant<br />
agri-business conglomerates. Yet, some outstanding examples<br />
remain throughout the country. My part of Indiana still holds<br />
quite a few, and I’m sure that other regions across the country<br />
have similar treasures. Their simple boxy shapes would be easy<br />
to model, with either scribed styrene or wood for the walls and<br />
some homemade or commercial corrugated tin siding from<br />
K & S Metals or Plastruct. Both manufacturers also make a wide<br />
range of structural shapes that would be useful for the elevator<br />
leg and distribution piping. Small buildings like these often fit<br />
into the model scene nicely, lending character and revenue to<br />
our operations. You’d better get to them with your camera and<br />
notepad fast however. They won’t be around for long. Here are<br />
a few of my favorites from close to home.<br />
Photos 1 and 2<br />
Knightstown, IN: Located on the former Pennsylvania<br />
Railroad’s St. Louis mainline, a few miles west of Richmond,<br />
Indiana, the Knightstown Elevator is still very much in business,<br />
although everything is shipped by truck now. The PRR’s mainline<br />
was elevated through town just behind the building. There’s<br />
evidence that a spur track once dropped down from the main to<br />
serve the elevator.<br />
1<br />
Idea File:<br />
Grain Elevators<br />
Mike Cougill<br />
3<br />
4<br />
Photos 3 and 4<br />
New Lisbon, IN: Here’s another going operation, located on<br />
a former Nickel Plate branch that came south out of Muncie,<br />
split at New Castle, with lines running southeast to Connersville<br />
and south to Rushville. The elevator was served by a doubleended<br />
siding with a capacity of 13 cars. Everything goes by<br />
truck now.<br />
5<br />
2<br />
6<br />
48 • O <strong>Scale</strong> <strong>Trains</strong> - July/Aug ’06
Photos 5 and 6<br />
Mays, IN: Located on the other NKP branchline (now abandoned),<br />
from New Castle to Rushville, Indiana the Mays elevator<br />
still serves the needs of the farm country surrounding this tiny<br />
East Central Indiana community. A general store is located next<br />
door, forming a time warp scene from the good ol’ days.<br />
7<br />
Photos 8 and 9<br />
Millville, IN: Does it get any more classical than this? Believe<br />
it or not, this was photographed in 2002! Located on another<br />
former PRR line out of Richmond, Indiana, (now Norfolk<br />
Southern), this timeless prairie sentinel stands tall in the mostly<br />
flat landscape surrounding it. It’s a true gem. The Liar’s Bench<br />
(Photo 9) is a “must-have” detail on any model.<br />
10<br />
Photo 7<br />
Gem, IN: is another tiny town along U.S. 40 just east of<br />
Indianapolis. This facility is on the same PRR line as the Knightstown<br />
elevator. The tracks were in the foreground of this scene.<br />
The long narrow footprint would lend itself nicely to a shelfstyle<br />
layout. Many elevators added large storage silos and other<br />
modern grain handling and drying equipment in the late ‘60s<br />
and early ‘70s. Depending on the era of your railroad, you could<br />
omit them to save space.<br />
8<br />
Photo 10<br />
Cedar Grove, IN: Here’s a real small town beauty. Located<br />
on the Indiana and Ohio’s branchline from Valley Junction,<br />
Ohio, to Brookville, Indiana, this nifty little feed mill was also<br />
served by a double-ended team track (recently removed). It has<br />
hardly been modernized.<br />
I modeled this one for my Indiana and Whitewater. That will<br />
have to be the subject of another article, however. u<br />
New! O <strong>Scale</strong> Birney<br />
This is a true O <strong>Scale</strong> 1:48 model. The die was<br />
made from the drawings of a real Birney!<br />
9<br />
The model comes with a complete interior, less power<br />
truck and lighting package: $35.95. We expect a 4-wheel<br />
power truck kit in mid-April, followed by the lighting kit.<br />
Pa Heritage Models Ltd.<br />
715 Ridgeway Road, Birdsboro, PA 19508<br />
www.paheritagemodels.com<br />
July/Aug ’06 - O <strong>Scale</strong> <strong>Trains</strong> • 49
Modern Accountability<br />
The biggest part of model railroading is the train.<br />
That seems pretty obvious to most of us, I believe. The<br />
train is the reason we build benchwork, run wires, and<br />
layer on scenery materials. The train is also the reason<br />
many of us like to follow prototype operations and<br />
schedules. As if there weren’t enough things to study<br />
when modeling miniature worlds, we also have to add<br />
our own stack of paperwork for car routing. There is a<br />
joy in it all when you follow the rules and complete a<br />
switchlist for a session of model operation. Following<br />
a prototype operation schedule is a busy task in itself,<br />
and adding more work for the crews and dispatcher<br />
seems as though it would start to detract from the fun<br />
of the hobby – the train.<br />
The major railroads across this land have added new<br />
safety and security procedures to train crew operations.<br />
These new procedures must be followed when a train<br />
crew requests blocks or gives up blocks of track on the<br />
mainline. New operational authority numbers are given<br />
by the dispatcher to train crews that operate within a<br />
specific territory. It’s like a password for accessing a<br />
given territory. When requesting blocks or giving up<br />
blocks of mainline track, this authority number must<br />
be read first for the action to be valid. Authority numbers<br />
can be added to your dispatcher orders with ease,<br />
and it doesn’t require a change to the overall operating<br />
session. The authority number is simply a four, five,<br />
or six-character number, assigned to each train crew,<br />
that they hold until they clear a subdivision. By adding<br />
a blank line to your switch list or track warrant, you<br />
can duplicate this authority action. It would follow this<br />
example, “CSX 232-22, authority number 5135, date<br />
7/10/2006, has a clear track, South, in the Birmingham<br />
Mineral Sub.” It will bring an aspect of modern prototype<br />
railroading to your model operation that is currently<br />
a big issue – security.<br />
Tragically, humans do make errors. The absolute<br />
worst place to make them is on a railroad. To combat<br />
crew errors, railroads are adopting a new permission<br />
based system of accountability for operating switch<br />
machines. It is simple and very easy to understand. The<br />
train crew just asks the dispatcher for permission to use<br />
a given switch machine. The switch machine location<br />
is given in the form of a milepost reading, or may have<br />
a given designation like “XX”-100 where “XX” may be<br />
the subdivision name like CSXMS-100. Simply, this<br />
stands for the CSX Mineral Subdivision switch number<br />
100. The train crew records the time of this “granting<br />
of permission” on the train paperwork, as does<br />
the dispatcher in his log. When the crew finishes the<br />
operation, they notify the dispatcher of the final switch<br />
machine position. If the train crew fails to call the dispatcher<br />
after some allotted time, the dispatcher is going<br />
to call the train crew for an update. The permission to<br />
operate a switch machine must be read, along with any<br />
given instructions a track warrant or block order may<br />
carry. If no switch machines were to be operated, that<br />
must also be noted in the final track warrant or block<br />
order. Mimicking this practice in your operating sessions<br />
will bring another aspect of modern railroading<br />
practice – accountability.<br />
In our world of fancy computer gadgets and gizmos,<br />
human interaction is still needed for making critical<br />
decisions. Computers can remotely operate switch<br />
machines, code information from prying hackers, and<br />
locate any train at any moment. The purpose of these<br />
new procedures is safety, security, and accountability.<br />
A computer device may be the back-up alarm,<br />
if a switch is not returned to the normal position, by<br />
alerting both the crew and dispatcher. It is prone to<br />
failure, and expensive to implement in remote territory.<br />
A human can be on the spot at any time and visually<br />
confirm a switch position, but it’s the interaction of<br />
this person with the switch machine that requires the<br />
accountability. Attaining verbal permission for operating<br />
any switch, when not under control by the dispatcher,<br />
is just plain safe and makes a fine addition to a<br />
model operating session.<br />
In the next issue we’ll take a look at modern train<br />
consists. Are the cars in a train in some random order<br />
because of destination, safety, or just how they got<br />
sorted at the yard?<br />
Happy Railroading.<br />
u<br />
50 • O <strong>Scale</strong> <strong>Trains</strong> - July/Aug ’06
THE WESTERN RESERVE “O” SCALE TRAIN SHOW<br />
CLEVELAND, OHIO<br />
Saturday, November 4, 2006 9:30 am - 2:30 pm<br />
Admission: $5.00 6’ Tables - $35.00<br />
LAKELAND COMMUNITY COLLEGE<br />
I90 and ST.RT. 306 (S.E. Corner)<br />
Held in the Auxiliary Gym / Athletic Center<br />
24 Hr. Police • Public Welcome • Free Parking • 2-rail “O” scale only • Please no other gauges<br />
SORRY NO PASSES ACCEPTED AT THIS SHOW • THIS SHOW IS NOT AFFILIATED WITH THE WESTERN RESERVE O SCALE COMMITTEE WHO ANNUALLY PUT ON A SIMILAR SHOW<br />
BOB FRIEDEN - 9695 CHILLICOTHE ROAD - KIRTLAND, OHIO 44094 - 440-256-8141 - FAX: 440-256-1749<br />
2-Rail Locomotives<br />
MTH 2-Rail Locomotives<br />
ATSF Northern $1150<br />
CNJ Blue Comet $1200<br />
CNW Streamlined Hudson $900<br />
C&O Greenbrier $975<br />
NKP Berkshire $1100<br />
PRR Centipedes $1250<br />
PRR T-1 #6110 $1200<br />
N&W Class A 2-6-6-4 $1150<br />
SP AC-6 Cab Fwd $975<br />
SP 4-8-4 Daylight $1250<br />
UP Big Boy 4-8-8-4 $1350<br />
UP Gas Turbine 3 units $850<br />
WVP&P Shay $1000<br />
ATSF F3 Warbonnet paint $500<br />
C&O F3 A-B-A $550<br />
NYC F3 A-B-A Lightning Stripe $650<br />
Alaska F3 A-B-A $550<br />
T&P GP9 $325<br />
Weaver 2-Rail Brass<br />
PRR K4 F/P, Early $1100<br />
PRR K4 C/P ’35-’41 scheme $1400<br />
PRR K4 C/P ’42-’57 scheme $1400<br />
PRR L1 F/P $950<br />
RDG G1sas Crusader #117 or #118 $1200<br />
RDG Crusader 5-car passenger set as-built $750<br />
RDG Crusader 5-car set with corrected glazing<br />
and shades $950<br />
Other 2-Rail Brass<br />
USH PRR K4 C/P Full Striping $1650<br />
USH NYC Dreyfus Hudson<br />
custom ptd first scheme $1850<br />
OMI MILW 4-4-2 Hiawatha C/P #1 $1750<br />
PSC SOU Ps4 F/P Cresc Ltd. #1393 $2500<br />
SS Pioneer Zephyr 3 cars $1500<br />
3-Rail <strong>Scale</strong> Steam<br />
Weaver<br />
PRR S/L K-4 Torpedo $1,100<br />
PRR Std K-4 F/P $950<br />
PRR K-4 C/P Early Low Tdr Striping $1,450<br />
PRR K-4 C/P 36-41 Condensed Ltr $1,250<br />
PRR K-4 C/P 41-47 Expanded Ltr $1,250<br />
PRR K-4 C/P 47-57 Modern Solid Pilot $1,350<br />
PRR A-5 0-4-0 F/P $800<br />
PRR A-5 0-4-0 C/P Dull $900<br />
RDG G-1 4-6-2 $850<br />
RDG G-1sas Crusader $1,100<br />
RDG Matching Crusader Cars $600<br />
SAL C/P USRA 0-6-0 Sound $750<br />
SOU C/P 4-8-2 Grn, Stripes $1,500<br />
B&O C/P T-3 W/Vandy Sound, Smoke $1,750<br />
WM H-7 C/P Dull Alt # $750<br />
C&O 2-8-0 C/P Dull $750<br />
UP ’49er S/L 4-6-2 $1,100<br />
Williams<br />
PRR E-6 C/P Late #6513 $950<br />
PRR E-6 C/P PRSL $950<br />
PRR B-6 C/P Dull #5244 $750<br />
PRR L-1 C/P Dull Dg’ Tdr $950<br />
Railroad Collectibles<br />
PRR L-1 C/P West Tdr $1,100<br />
PRR K-4 Custom Modern #646<br />
Sound, Smoke $1,250<br />
SOU Ps-4 Custom W/Elesco<br />
Green w/Stripes $1,250<br />
N&W Class A 2-6-6-4 Detailed $1,350<br />
Westside Brass<br />
RF&P<br />
Custom, Governor 3-Rail Conversion<br />
Sound Smoke Stripes, Logo, Etc. $2,750<br />
Sunset/3rd Rail<br />
PRR H-6 C/P Late Scheme $975<br />
PRR H-6 C/P PRSL $1,075<br />
PRR E-6 F/P Sound $1,150<br />
PRR P5a Mod Electric $950<br />
SP 4-4-2 Std $1,000<br />
SP 4-4-2 F/P Daylight $1,150<br />
UP 4-4-2 F/P $1,050<br />
PRR Turbine – Upgraded $1,000<br />
B&M R-1 4-8-2 Late Scheme $1,300<br />
UP Big Boy W/ Sound $1,950<br />
ATSF Northern $1,200<br />
GN S-2 4-8-4 Glacier $1,200<br />
MTH<br />
RF&P 2-8-4 Custom Modified W/Striping $1,450<br />
ACL<br />
4-8-4 Custom Mod 8-Wheel<br />
Tender #1801 $1,650<br />
C&O 4-8-4 Greenbrier $975<br />
C&O Custom Greenbrier Early #605 $1,250<br />
DM&IR Yellowstone $1,650<br />
N&W Class A Custom #1216 Correct<br />
& Detailed $1,500<br />
N&W Streamlined J 4-8-4 $1,100<br />
NYC Dreyfus Hudson $975<br />
UP Northern #8444 $1,250<br />
PRR T-1 Duplex #6110 $1,250<br />
CNW S/L Hudson $800<br />
ACL Custom 4-6-2 $750<br />
ERIE Custom Superdetailed K-5<br />
w/Vandy Tdr $1,650<br />
RDG I-10 2-8-0 $975<br />
PRR Custom G-5 #5720 W/Brass Tdr $1,100<br />
PRR K-4 Modified As K-3 C/P #9999 $1,000<br />
3-Rail <strong>Scale</strong> Electric<br />
Atlas<br />
SEPTA AEM-7 $299<br />
Weaver<br />
PRR GG1-Tuscan 1 Stripe $850<br />
PRR GG1-Silver $850<br />
Williams<br />
PRR GG1-Bruns 5 C/P dull $475<br />
PRR GG1-Tuscan 5 C/P dull $475<br />
PRR GG1- Tuscan dummy $200<br />
Sunset<br />
PRR P5A modified-sound $800<br />
Lionel<br />
DL&W MU pwd & dummey $650<br />
DL&W MU combine/coach dum $550<br />
L.I.R.R. custom pwd dum-Tuscan $900<br />
MTH<br />
MILW Bipolar $775<br />
NH E3B $700<br />
NH EP-3-M’Ginnis $875<br />
PRR GG1-Tuscan 5 $675<br />
ConRl GG1, Blue $700<br />
KLine<br />
NH EP5 $350<br />
RDG MU 70' TT green pwr/dum $375<br />
RDG MU 70' Blue/Wht pwr/dum $425<br />
PRSL MU 60' Tuscan w/poles $400<br />
3-Rail <strong>Scale</strong> Diesel<br />
Atlas<br />
AMTK DASH 8 #509 $395<br />
C&O RS-1 $375<br />
N&W SD-35 $375<br />
MTH<br />
Alaska F-3 A-B-A $550<br />
ATSF F-3 A-B-A $700<br />
C&O F-3 A-B-A $650<br />
Monon F-3 A-B Black/Gold C/P $475<br />
RI F-3 A-B-B-A $800<br />
B&O E-6 A-B, custom fixed closed pilot $750<br />
B&O E-8 A-B-A $650<br />
NYC E-8 A-A custom l/s $700<br />
PRR E-8 A-A custom Bruns 5 Stripe $700<br />
PRR E-8 A-A custom Tuscan 5 Stripe $700<br />
SAL E-8 A-B-A Citrus Scheme $650<br />
ATSF DL-109A/B, custom fixed closed pilot $650<br />
MILW DL-109 $300<br />
NH DL-109/110-Custom pilot, scale cplr $650<br />
SOU DL109/110-cust. ptd, fixed pilot $700<br />
PRR Centipedes-5 Stripe $1,000<br />
SAL Centipede-sngl unit Pass. $375<br />
SA Centipede-sngl unit Frt. $400<br />
L&N GP7 custom paint, early scheme $550<br />
RDG GP7 cust pt, 1st scheme #600 $475<br />
RDG GP7 cust. pt, no dynam. #660 $525<br />
RDG Trainmaster 1st scheme #860 $550<br />
RDG S-2 1st scheme $325<br />
PRSL AS-616 custom #6000 $475<br />
C&NW DASH 9 $275<br />
GM&O GP-38 $300<br />
FEC BL-2 $350<br />
RI E-8 A-B-A $695<br />
Weaver<br />
B&O VO 1000 $199<br />
B&O E8 AA $375<br />
C&O RS-3 $250<br />
C&O RSD5 $250<br />
C&O GP-38 $275<br />
C&O U23B-CUSTOM PT $300<br />
UP E-8 AA $375<br />
KLine<br />
B&O F-7 A-B-A $550<br />
RDG F-7 A-B-A $550<br />
ATSF B unit $175<br />
UP E-8A $200<br />
RDG Custom F-7 AA #900/902 $400<br />
RDG Set w/GP-38 $575<br />
RDG Set w/F-7AB $625<br />
Railroad Collectibles, 86 W. Johnson St., Philadelphia, PA 19144<br />
Voice: 215-438-4330 • Fax: 215-438-7322 • Email:oguage.railroad@verizon.net<br />
July/Aug ’06 - O <strong>Scale</strong> <strong>Trains</strong> • 51
k
NEWS: Atlas O 378 Florence Avenue, Hillside,<br />
New Jersey 07205 USA<br />
www.atlaso.com<br />
The second issue of Atlas’ online newsletter, The Atlas<br />
RR Report, which debuted in December 2005, is now available<br />
at the company’s websites, www.atlasrr.com, and www.<br />
atlaso.com. Each issue contains news, features, product<br />
information and forecasts, interviews and insights from Atlas<br />
experts, and much more. Ongoing features include “From<br />
the Vault”, a nostalgic peek at priceless, surprising and often<br />
amusing items from Atlas’ past, “Showtime!” a discussion of<br />
hobby shows and previews of where Atlas will travel next,<br />
and “Rumors and Rampant Speculation”, where misinformation<br />
is tackled and debunked. To find The Atlas RR Report,<br />
look for the icon at the top of the Atlas Model and Atlas O<br />
home pages.<br />
Product News & Reviews<br />
NEWS: #674 Pullman 50 ton Flat Car, MSRP: $70<br />
Chooch Enterprises, Inc., PO Box 1200, Maple Valley, WA<br />
98038<br />
425-788-8680 • www.choochenterprises.com<br />
Chooch’s new Ultra <strong>Scale</strong> II flat cars come with all the<br />
details, less trucks and couplers. The car is cast in two resin<br />
pieces; the highly detail floor is separate from the one-piece<br />
body. This car was created by master car builder, Gene<br />
Deimling. The kit features brand new tooling for the brake<br />
wheel and stake pockets. The kit is in limited production.<br />
Visit the Chooch website (or call) to order and for details<br />
about which roads used these cars.<br />
NEWS: C&O Trust Plate Decals, MSRP: $3.15 ppd.<br />
Great Decals, PO Box 994, Herndon VA 20172<br />
www.greatdecals.com<br />
Bill Mosteller sends word that he is now offering C&O<br />
trust plate decals in white. Each set provides 12 pairs of<br />
plates. Six pairs are suitable for cars bought in the 1930s and<br />
six pairs for cars bought in the 1940s. Major credit cards<br />
accepted. Dealer inquiries welcome. Virginia residents must<br />
include sales tax.<br />
NEWS: BTS One-Niters<br />
B.T.S., PO Box 856, Elkins WV 26241<br />
304-637-4510 • www.btsrr.com<br />
There are many things that are more complex than a simple<br />
detail casting, and yet much less work than the easiest small<br />
building kit. They are the things that can be finished in just one<br />
evening of model building... One-Niters!<br />
Outhouse, Standard - O #13004 $8.95<br />
Laser-cut wood outhouses of a standard design. Complete<br />
with the one hole inside, and the moon on the positionable<br />
door. Each package contains two outhouses.<br />
Outhouse, Gents & Ladies - O #13005 $8.95<br />
Laser-cut wood outhouses with special designs in the door<br />
- the moon is the ladies and the star is for the gents. Seems<br />
years ago few people could read, so inns used these symbols.<br />
The men’s outhouse fell into disrepair faster, and men are more<br />
likely to simply use the woods anyway, so the gents outhouse<br />
was not always replaced. These are complete with the one<br />
hole inside and positionable door. Each package contains one<br />
of each style.<br />
Rocking Chair - O #13006 $6.95<br />
Laser-cut rocker that is right for any front porch. Each package<br />
contains four rockers.<br />
Clothes Line - O #13007 $7.95<br />
Clothes line posts could be found behind every house up<br />
until a few years ago. Each package contains four laser-cut<br />
wood posts and line.<br />
Upright Piano - O #13008 $7.95<br />
Laser-cut wood is the only way to<br />
go to have a good-looking decorative<br />
piano. Each package contains<br />
one piano and stool.<br />
July/Aug ’06 - O <strong>Scale</strong> <strong>Trains</strong> • 53
Product News & Reviews<br />
REVIEW: C&O Allegheny (2-6-6-6), MSRP $1799.95,<br />
2- or 3-Rail.<br />
Sunset/3rd Rail, 37 S Fourth St, Campbell, CA 95008<br />
408-866-5764 [www.3rdrail.com]<br />
reviewed by Joe Giannovario<br />
The Prototype<br />
In the early 1940s, the C&O decided it was time to replace<br />
the aging fleet of H-7 2-8-8-2s hauling coal over the mountains<br />
to the Eastern seaboard docks. Management’s initial thought<br />
was to go back to Lima for additional T-1 2-10-4s. Lima, however,<br />
had a different idea. They pitched a new design for a heavy,<br />
six-coupled, single expansion, articulated locomotive. The<br />
engine was so big that its firebox had to ride on a six-wheeled<br />
trailing truck. C&O like the design and ordered the first batch of<br />
ten to be delivered in December of 1941.<br />
Classed H-8, the 2-6-6-6 was named the Allegheny for the<br />
mountains it had to climb. These locomotives were, arguably,<br />
the largest and heaviest articulateds ever built. The Allegheny<br />
had 67” drivers for speed, a huge boiler with a 9’ x 15’ firebox,<br />
22-1/2” x 33” cylinders, and a boiler pressure of 260 psi.<br />
There is some question whether these behemoths were put to<br />
efficient use by the C&O. For an excellent discussion, see “Fast-<br />
Freight Articulateds”, in the 2004 Classic <strong>Trains</strong> Special Edition<br />
#2, Steam Glory (Kalmbach Publishing).<br />
The H-8s were built in batches. The Sunset model represents<br />
the last batch, built between October and December 1948.<br />
These “late model” Alleghenies were built a bit differently than<br />
the other batches with major differences in cab windows, stack,<br />
eccentric crank, bell, and a host of other minor changes. These<br />
changes, along with photos and drawings, can be found in<br />
Huddleston and Dixon’s The Allegheny: Lima’s Finest (Hundman<br />
Publishing).<br />
The Model<br />
Sunset sent us a 2-Rail DC model. Inside the box was a<br />
certificate that noted the model was #10 of 17. A plate on the<br />
bottom of the locomotive carries the same info. I checked with<br />
Scott Mann at Sunset, since this sounded like a very low production<br />
quantity. Scott clarified that there are 17 each of locomotives<br />
numbered 1645 through 1659. Of each batch of 17,<br />
nine are 2-Rail. If you cotton to a particular locomotive number,<br />
make your decision soon. Our test model was numbered 1648.<br />
I checked the model against plans in The Locomotive Cyclopedia,<br />
Vol. 1 (Hundman Publishing). With the exception of a<br />
few discrepancies in the chassis, the model is very accurate<br />
as to placement of major appliances, domes, etc. As I have<br />
noted in past reviews there is always an engineering trade-off<br />
between accuracy and operability. To be most compatible with<br />
most O <strong>Scale</strong> layouts, some accuracy has to be sacrificed. In<br />
this model it is the driver wheelbase. I measured the drivers to<br />
be exactly the 67” of the prototype, but the driver wheelbase<br />
(i.e., the spacing between each main driver) was three scale<br />
inches longer than it should be. That adds up to a scale foot<br />
overall. I also measured an extra foot between the rear wheel<br />
of the trailing truck and the tailbeam of the chassis. There were<br />
some minor differences at the front of the engine, too. Overall,<br />
there is an extra 2’ 6” of length added to accommodate the<br />
scale driver size and operate on modest curves. The fit and finish<br />
of the model was excellent. The paint was flawless, as we<br />
have come to expect, and the lettering was crisp.<br />
This model was straight-DC, 2-Rail, so there were no “bells<br />
and whistles”, literally. However, this model has a feature seen<br />
only in some high-end custom-built locomotives, operating<br />
reversing gear. When the model moves forward, the valve gear<br />
moves to the forward position (if it’s not already there), and<br />
vice-versa in reverse. In addition, all of the opening hatches and<br />
moving windows we expect are included on this model.<br />
Operations<br />
I ran the Allegheny on the OST layout and put it through<br />
its paces. For a big articulated, the locomotive had no trouble<br />
negotiating 48” radius curves, nor a #5 crossover. It did have<br />
a bit of a problem on a superelevated 80” curve. While the<br />
front engine is free to articulate from side-to-side, there’s not<br />
much vertical play in the chassis and I experienced an occasional<br />
derailment in one spot. Perhaps my track needs work,<br />
but my other locomotives do not show any problem in that<br />
same location.<br />
I hooked up the amp- and voltmeters and found the engine<br />
was drawing 1.7 amps at seven volts on a three percent<br />
upgrade and 1.3 amps on the downgrade. As hard as I tried to<br />
get a slow crawl, this was not possible. The locomotive would<br />
start to crawl forward and then stall. It took over two amps to<br />
get the engine out of the stall. While I was inspecting and measuring<br />
the locomotive after my operational tests, I noticed the<br />
front gearbox cover was crooked. I could see the axle bushing<br />
sticking out from under the cap. Aha! I have found the bind and<br />
the reason for the high current draw. I removed the cap and<br />
swapped it end-for-end. It seemed to install properly this way.<br />
On retest, the engine ran much smoother and did not bind.<br />
However, the current draw remained unchanged.<br />
I queried Scott Mann about the current draw. The reversing<br />
valve gear works by friction and is most likely the cause of the<br />
higher current draw. Scott says the manual that comes with the<br />
Allegheny has instructions on how to adjust the amount of friction<br />
needed for the valve gear to work. Since I’m not keeping<br />
54 • O <strong>Scale</strong> <strong>Trains</strong> - July/Aug ’06
this loco, I did not attempt the adjustment.<br />
As with other Sunset/3rd Rail engines, the Allegheny has<br />
lit markers on the tender and class lamps on the engine, plus<br />
reversing headlamp and backup lights. These come on fully at<br />
around five volts.<br />
My Opinion<br />
The C&O Allegheny is one of the most-produced locomotives<br />
in O <strong>Scale</strong>. At one point there were three O <strong>Scale</strong> models<br />
from three different importers on the market at the same time.<br />
It is a very popular model and there will be another coming<br />
soon from another major importer. Sunset/3rd Rail has made<br />
its bones by importing brass steam locomotive models at prices<br />
that are affordable (where “affordable” here is a relative term;<br />
$1800 ain’t cheap). This model is well-made and looks great.<br />
REVIEW: Dremel Stylus Battery Powered Motor Tool; MSRP<br />
$69.99; Dremel Work Station; MSRP $44.99<br />
Dremel/ Robert Bosch Tool, 4915 21st Street, Racine, WI 53406<br />
www.dremel.com<br />
reviewed by Brian Scace<br />
Dremel has announced a couple of additions to their tool<br />
line that I have found to be quite interesting. Now, I love tools.<br />
Being a locomotive builder, Dremels have been a mainstay for<br />
many years, and some of mine are probably true antiques.<br />
The Stylus (Photo A)<br />
On the left, we have<br />
the newest battery powered<br />
motor tool, the Stylus.<br />
I admit having some<br />
misgivings about this<br />
one, for two reasons.<br />
First, the battery is integral<br />
with the tool, so you<br />
can’t swap out spares<br />
when the first one runs<br />
a little dry. Second, the<br />
pistol grip shape struck<br />
me as unwieldy, at first<br />
blush.<br />
Since I was in the<br />
process of dis-assembling<br />
the railroad I had<br />
in storage, getting ready<br />
to re-build it in my new basement, I had a golden opportunity<br />
to run the Stylus off against a Dremel 770, the standard battery<br />
powered motor tool many of you are familiar with. The task<br />
was a daunting one, cutting nickel-silver rail. Lot’s of it. I armed<br />
myself with the Stylus, and my un-hired help with the 770.<br />
The Stylus beat my 770 (even with its spare battery) hands<br />
down. First, it’s a ramp-able speed tool, rather than a twospeed<br />
tool. Second, the battery never died during a full day of<br />
rail-cutting; I just dropped ‘er back in the charger when I put<br />
it down after a cut, and it lasted all day long. You have to get<br />
used to the very high speed/low torque behavior, compared<br />
to the 770. Once you get the hang of it, it cuts rail cleanly and<br />
very quickly.<br />
The pistol-grip shape turns out to be OK, too. I thought it<br />
would be in the way doing this job, but merely holding the Stylus<br />
inverted allows you to get the nose down close to the work<br />
and still have a steady hold on the tool.<br />
The tool comes with a basic array of wheels, accepts my<br />
rather vast collection of standard Dremel collets, and has an<br />
A<br />
Except for some minor correctible problems, it runs well, too.<br />
On the other hand, the gearbox cap should never have been<br />
assembled the way it was and should never have passed visual<br />
inspection. Operating reversing gear is a slick feature, but I’d<br />
rather have a smoother mechanism. Were this my locomotive,<br />
I’d loosen the adjustment so the reversing gear wouldn’t move<br />
at all. With only nine of each road number available in 2-Rail,<br />
that means there are only 135 of these models available. Sunset’s<br />
Allegheny is big, brutish and a great looking model. C&O<br />
fans should be happy with this one.<br />
integral Lithium-Ion battery.<br />
The speed range is<br />
B<br />
5000-25,000 RPM, compared<br />
to a 15,000 RPM<br />
maximum for the 770.<br />
The Workstation (Photo B)<br />
On the right, we have<br />
the new Workstation.<br />
This thing is a bit of a<br />
sleeper, too. It consists<br />
of a drill-press arrangement,<br />
a bit-holder (They<br />
call it a “Crow’s Nest”),<br />
and an extendable column<br />
designed to hold<br />
one of Dremel’s flex-shaft<br />
machines.<br />
The drill-press features<br />
a rotating head, so you<br />
can orient your Dremel<br />
from straight down to 90 degrees sideways. Something I like<br />
is the fact that, unlike my old Dremel press, this is not a risingtable<br />
machine with a wheel, but a moving head machine with<br />
a rack and lever control. Much better.<br />
The press holds any Dremel with the standard threaded<br />
nose, such as my 395 shown in the second photo. Cord management<br />
has been thought out, with places to clip the cord on<br />
the left side of the head.<br />
Although I’ve shown the “crow’s nest” in the position cited<br />
in the instructions, I found it to be just plain in the way. Once I<br />
moved it to the very bottom of the column, under the head, it<br />
became very handy. You’ll need to try a few configurations to<br />
decide if it’s useful, and where it can live. The base is cut for<br />
tee-clamps, and I would suggest you make use of them.<br />
The pay-off for me is the extension for a flex-shaft machine.<br />
The top of the extension matches the hanger for my old 232<br />
Moto-flex, and I found the Workstation to be a nice space-saver<br />
in my new shop. Again, cord management has been thought<br />
out nicely, so I can use the 395 mounted in the press while the<br />
flex-shaft machine is hung, and visa-versa (Photo B). Rubber<br />
caps are supplied for those of you who don’t use a flex-shaft,<br />
so the top of the column can be neatly covered over and the<br />
extension not used. I found the ability to load this guy up with<br />
both tools a valuable space-saver for me, hence worth the<br />
price of admission.<br />
I love tools. These may have a place in your shop, too.<br />
July/Aug ’06 - O <strong>Scale</strong> <strong>Trains</strong> • 55
Product News & Reviews<br />
REVIEW: Baldwin Catalog On30 2-8-0, MSRP: $245<br />
Bachmann Industries, Inc. 1400 W. Erie Ave. Philadelphia, PA<br />
19124<br />
[www.bachmanntrains.com]<br />
reviewed by Bobber Gibbs<br />
The old news is that, once again, Bachmann has delivered<br />
another winner for On30 and On3 modelers with its new and<br />
distinctive 2-8-0 Consolidation. The new news is that, rather<br />
than copying one of the usual Colorado three-footers that<br />
many narrow-gaugers are familiar with, Bachmann has created<br />
a unique model of a genuine Baldwin thirty-incher, one of four<br />
ordered in 1909 for the Mexican Railroad. They were woodburners<br />
with a tractive force of 18,000 pounds, a bit larger<br />
than the D&RG C16 class.<br />
However, these Baldwins had outside frames and could<br />
negotiate a curve radius of 197 feet and grades of 2.5 per cent.<br />
By 1920, Number 12 had been converted to burn oil, and it<br />
continued in service until 1957. It was then purchased and<br />
moved to the Edaville Railroad in South Carver, Massachusetts.<br />
In 1992, a private operator bought it and, after a complete<br />
rebuild in 1999, it went to the Alder Gulch Short Line, a real<br />
thirty-inch gauge tourist operation between Virginia City and<br />
Nevada City in Montana. The 96-year-old prototype is in better-than-new<br />
condition, and the model is simply superb.<br />
The best news is that this model will operate on Direct Current<br />
(DC) or Digital Command Control (DCC), right out of the<br />
box. It also demonstrates that Bachmann’s E-Z Command<br />
DCC equipment (not included) is perfectly adequate for<br />
their On30 DCC models, which now include the Consolidation,<br />
the Davenport and the new Rail Truck.<br />
Bachmann has included a number of extra parts so you<br />
can create your own distinctive model. You can install a<br />
straight stack in place of the balloon stack, or go with a<br />
coal load, wood load or oil tank for the tender. You can<br />
switch a cowcatcher for the switcher pilot, or change the<br />
front wheels from spoked to solid. This is a heavy model,<br />
so it tracks nicely, runs slowly, and goes through Peco<br />
turnouts without hesitation. There are several roadnames<br />
to choose from, but I prefer the undecorated model which<br />
allows me to apply my own lettering.<br />
The 2-8-0 easily pulled 35 cars (I had no room to add more<br />
on my test oval.) It is geared for a realistic top speed. I understand<br />
that it is not a difficult operation to modify this model to<br />
36-inch gauge, but I have not yet seen it done. If it is easy to<br />
do, then Bachmann has deeply enriched the lives of all On30<br />
modelers and I expect that a more than a few of these Consolidations<br />
will wind up operating on On3 layouts. The On30<br />
model will negotiate a 15” radius curve, but looks better on<br />
wider curves. Note that the full-size engine required a minimum<br />
radius of about 200’, or about 48” in O <strong>Scale</strong>.<br />
It must be noted that, while the suggested list price is $245,<br />
you can find it for $160 - $145 in many discount outlets. This<br />
model is a beauty and can be dressed up in so many different<br />
coats that it should please every taste. It also deserves notice<br />
that the future for On30 is sure to include larger and larger<br />
locomotives, which will call for full-length cars and curves of<br />
larger radius that may render many current layouts too small.<br />
The very aspect of more operation in a smaller space that<br />
attracted me to On30 ten years ago is falling by the wayside,<br />
and larger layouts will be necessary to accommodate larger<br />
equipment. I suppose this is a natural evolution for any scale,<br />
and I will have to find a way to incorporate my larger On30<br />
locomotives with some dual-gauge trackage on my standardgauge<br />
layout.<br />
For those who crave larger locomotives, I have to wonder<br />
how Bachmann <strong>Trains</strong> can top this Consolidation. Incorporating<br />
DCC and sound into all new products would do it for me.<br />
REVIEW: Trackside on the Pennsylvania, Vol. 2; ISBN 0-9655365-<br />
6-4, MSRP: $16.95<br />
Published by Highlands Station Inc., 2600 S Parker Rd, Ste 1-211,<br />
Aurora CO 80015<br />
888-338-1700<br />
reviewed by Joe Giannovario<br />
Highlands Station, publisher of Model Railroading magazine,<br />
has published a second volume of PRR standard drawings.<br />
This volume includes structures such as signal and<br />
switch buildings, passenger stations, yard and shop buildings<br />
and much more. Most of the plans are in HO <strong>Scale</strong> and<br />
some of the larger are rendered in N <strong>Scale</strong>. All the plans<br />
were compiled and drawn by Jeff Scherb, who authored the<br />
first volume in this series. (Scherb is also the originator of<br />
the all-time model railroad magazine index now at [index.<br />
mrmag.com]).<br />
The book is done in a horizontal format, which lends<br />
itself nicely to the drawings. There are 96 pages covering<br />
almost any type of railroad related structure you might<br />
need. While these are PRR-specific plans, they will work<br />
for almost any railroad. I’m going to use one of the wooden<br />
engine house plans for my N&W branch service facilities.<br />
I reviewed the first volume in OST #6 and feel that Volume<br />
2 is every bit as useful, if not more so, than the first.<br />
Trackside on the Pennsylvania, Vol. 2 is available direct from<br />
Highlands Station or at your local hobby shop.<br />
56 • O <strong>Scale</strong> <strong>Trains</strong> - July/Aug ’06
REVIEW: Proto-Switch Switch Stand, MSRP: $2.99 per pair plus shipping.<br />
Motiveworks Hobbies, 1205 16th Street, Pleasant Grove, AL 35127<br />
www.proto-switch.com<br />
reviewed by Joe Giannovario<br />
Motiveworks has produced this nifty little trackside detail for the modern model railroader. You get a pair of stands per package with a<br />
choice of handles, straight or triangular. The straight is the more common type seen. Our samples came with one of each type handle.<br />
The parts are molded in plastic and are very clean with no evidence of flash. Everything fit together very well. The instructions tell you to<br />
drill a hole with a #62 drill to mount the handle. I found it easier to start the hole with a much smaller bit and the finish up with the larger bit.<br />
Other than the drill bit, all you need is tweezers (to hold the parts) and liquid plastic glue to assemble these stands. In fact, it took longer to<br />
paint them than assemble them.<br />
These are non-operating items but, with a little ingenuity, I think the targets<br />
could be made to move with the switch points.<br />
Okay, I do have one gripe. The instructional text on the package is way too<br />
small to read. I’m nearsighted and still had trouble. Other than that minor complaint,<br />
these are a very nice detail.<br />
NEWS: Keystone Model Works PRR H21 Quad Hoppers; MSRP: see text.<br />
Keystone Model Works, P.O. Box 143, New Cumberland, PA 17070-0143<br />
www.keystonemodelworks.com<br />
Keystone Models Works is now shipping its PRR H21 quad hoppers. Currently available are several versions of the H21a, and the<br />
H21b and H21e rebuilds. This run of cars represents the “sawtooth” H21 hoppers with Westinghouse AB brakes. The “shallow<br />
hopper” and KD brake versions, as well as fully detailed PRR 2E-F2 70 Ton Crown trucks, will be available at a later date. The<br />
models are available as “S” series cars at $359 with working draft gear and scale couplers, and as “K” series cars at $328 for use<br />
with Kadee O <strong>Scale</strong> couplers.<br />
July/Aug ’06 - O <strong>Scale</strong> <strong>Trains</strong> • 57
Snap-on Hi-Rail to <strong>Scale</strong> Coupler Adapter<br />
A One-Hour Project with Near-Zero Cost<br />
Nick Pulskamp<br />
There’s been talk lately about ways to facilitate transitioning<br />
from Hi-Rail to <strong>Scale</strong>, and specifically about ways to pull tworail<br />
scale equipment with existing three-rail power (on T-section<br />
track, of course.) Here’s one convenient way to use Lionel<br />
steamers.<br />
You’re familiar with Lionel’s post-war freight trucks with<br />
remote couplers that have a plate armature mounted under the<br />
plate that holds the coupler (the truck labeled PT-1 or 479-1 and<br />
the armature that is activated by an electro-magnet in a remote<br />
control track assembly #480-25). The coupler-holding plate is<br />
what we’ll use. Find one that has lost the armature, yet still has<br />
the axle-gripping fingers intact. Next, find a scale coupler that<br />
will work with the scale rolling stock you want to pull. Remove<br />
the Lionel coupler from its mounting plate and attach the scale<br />
coupler using the rivet hole left by the Lionel coupler. A 2-56<br />
bolt/nut works well. Don’t tighten the bolt up all the way; let the<br />
scale coupler swivel, but not droop.<br />
Take the post-war Lionel eight-wheel tender you plan to<br />
use to pull those beautiful scale cars and carefully remove the<br />
coupler assembly. Spread the sideframes enough to remove the<br />
axles, remove the plate assembly from the axles, and put the<br />
wheelsets back on the truck without the coupler mount.<br />
Here’s the important part. Both coupler mounts (the stock<br />
Lionel one you just removed and the scale mount) will be modified<br />
identically to become “snap-on” coupler assemblies. Then,<br />
when you want to go back to pulling some regular Lionel cars,<br />
just snap off the scale coupler plate and snap on the regular<br />
coupler plate. Here’s how to do it.<br />
Note the four “fingers” that are bent over the axle slots. The<br />
fingers at the back (B) end stay as they are. The frame just inside<br />
of these fingers is trimmed away as shown in the photo. This<br />
way the axle can now be slid into the “slot” without bending the<br />
break. If you need to adjust the coupler height, do what you do<br />
for your Lionel couplers – bend the coupler mounting plate.<br />
You’re no doubt way ahead of me at this point. Anyway,<br />
changing the tender from Lionel-pulling to scale-pulling is simply<br />
a matter of snapping off one coupler plate and snapping on<br />
the other. The first time will take maybe five seconds. After that<br />
it’ll get quicker.<br />
One more thing. As long as you have a scale coupler on a<br />
tender, why not put a scale coupler on a pilot? Now you can<br />
couple this engine to another scale coupler-equipped tender,<br />
and double-head two steamers.<br />
Double-heading steam locomotives is a pleasure few Lionel<br />
fans (like I always will be) have experienced. Once you have run<br />
fingers or removing the wheelset from the truck. Do this to both<br />
coupler mountings.<br />
The fingers at the front (A) end are a little tricky. They need to<br />
be bent, as shown in the photo, so as to act as snap fittings when<br />
the coupler plate is slid onto the rear axle and rotated up to snap<br />
the front axle into the front axle channel. Try to bend these fingers<br />
as few times as possible: this metal fatigues easily and can<br />
two steamers pulling together at the head end of a train, you’ll<br />
begin to understand one of the new dimensions of pleasure<br />
scale operation can give. You might even find yourself at least<br />
mentally transitioning to 2-Rail, as I have.<br />
It starts with little steps and leads wherever you want to go.<br />
What a great hobby!<br />
u<br />
58 • O <strong>Scale</strong> <strong>Trains</strong> - July/Aug ’06
®<br />
O GP15 LOCOMOTIVE<br />
Chessie System*, Conrail, Norfolk Southern, Union Pacific †<br />
3-Rail and 2-Rail $239.95, 3-Rail with TMCC $389.95<br />
O 40’ SLIDING DOOR BOX CAR<br />
Atlantic Coast Line* , Burlington, Rock Island, Union Pacific † ,<br />
Bangor & Aroostook, Pennsylvania, Pittsburgh & Lake Erie (NYC)*, Reading<br />
3-Rail $39.95 2-Rail $42.95<br />
O 52’6” GONDOLA<br />
Chessie System*, Conrail, Lehigh Valley, Southern, Chesapeake & Ohio*,<br />
Pennsylvania, Reading, Union Pacific † 3-Rail $39.95 2-Rail $42.95<br />
O 40’ STOCK CAR<br />
Chesapeake & Ohio*, CP Rail, Santa Fe, Union Pacific † (Yellow)<br />
Great Northern, M-K-T † , Rio Grande † , Union Pacific † (Box Car Red)<br />
3-Rail $39.95 2-Rail $42.95<br />
O 40’ PLUG DOOR BOX CAR<br />
American Refrigerator Transit † , Cotton Belt † , New York Central, Pennsylvania,<br />
Fruit Growers Express*, Jersey Central, Northern Pacific, Santa Fe<br />
3-Rail $39.95 2-Rail $42.95<br />
O EXTENDED VISION CABOOSE<br />
Chessie System*, Conrail, Norfolk Southern, Union Pacific † , Chesapeake & Ohio*,<br />
Chicago & North Western † , Cotton Belt † , Santa Fe 3-Rail $39.95 2-Rail $42.95<br />
378 Florence Avenue • Hillside, NJ 07205<br />
www.atlastrainman.com • www.atlaso.com • 908-687-9590<br />
July/Aug ’06 - O <strong>Scale</strong> <strong>Trains</strong> • 59
The Creation of a Cam-Liner<br />
John Fryant<br />
What’s a Cam-Liner? A Fairbanks-Morse C-Liner with a TV<br />
camera in its nose, of course. The project didn’t start with that<br />
goal in mind, however, so I’ll begin at the beginning. Like many<br />
of us, some years ago I became the proud owner of a set of<br />
used Rivarossi F-M C-Liner Diesels, purchased at a train show.<br />
My original intent was to convert the loco into a super-detailed<br />
contest model with see-through fan and dynamic brake grilles,<br />
separate handrails and grab irons, constant voltage headlights,<br />
and other assorted goodies. I also bought one of the conversion<br />
kits from Central Locomotive Works which consisted of a Pittman<br />
can motor, gear driven wheel sets and universals for four<br />
axles, and a brass frame. Being an NYC fan, I naturally wanted<br />
to finish it in a lightning stripe paint job. NYC had more of these<br />
Diesels than any other railroad. I may have even ridden behind<br />
one of these units, having traveled as a teen-ager on both the<br />
Ohio State Limited and the Cincinnati Mercury.<br />
The locos and conversion kit sat in storage for about ten years,<br />
with occasional openings of boxes and inspirational thoughts.<br />
One thing I did accomplish during this time was the assembly of<br />
the motor and frame of the drive conversion kit and installation<br />
into one of the two A-units. I also purchased a reference book, C-<br />
Liners, by David R. Sweetland, published in 1996 by Withers Publishing,<br />
528 Dunkle School Rd., Halifax, PA 17032. This volume is<br />
a very necessary aid for a project such as this.<br />
Recently, I bought a set of P & D Hobbies F-unit kits. I built,<br />
painted, and decaled them in the classic NYC lightning stripe<br />
paint job. They turned out beautifully, and my compliments to<br />
P & D for producing such gorgeous models. In the process of<br />
painting the F-units, the light bulb of inspiration lit up above my<br />
head, “As long as I’ve got all this paint and airbrush equipment<br />
out, why not paint those C-Liner bodies too?” Great idea! Prior<br />
to applying the paint, however, some modifications had to be<br />
made, so I found myself off on a whole new project. Some of<br />
my original goals for the models were abandoned, no contest<br />
models with see-through screen grilles or real glass windows. I<br />
did still want real three-dimensional railings and grabs, and the<br />
pilots needed to be modified to reduce the oversize coupler<br />
openings.<br />
So with knives, chisels and sandpaper I went to work. All<br />
of the cast-on handrails and grabs were carefully carved and<br />
chiseled off. styrene inserts and backing pieces were made to<br />
reduce the oversized coupler openings, and then cemented in<br />
place. Filler putty hid all the seams and dings. Horns, headlights<br />
and window glazing were carefully removed. The holes in the<br />
lower body sides where the tabs from the chassis fit were covered<br />
with pieces of 0.010 styrene sheet and a coat of primer<br />
covered all. Then, each body shell was given two coats of Badger<br />
Modelflex NYC dark gray. The next step was the lightning<br />
stripes. To my knowledge no one makes these decals specifically<br />
for C-Liners, so I used Micro-<strong>Scale</strong> #48-92 Alco PA decals.<br />
They will work on the F-M units with some cuttin’ and splicin’<br />
around the nose area. Short lengths were cut from the stripes<br />
forward of the cab doors and these were used to extend the<br />
vertical stripes at the bottom of the nose. The side stripes had<br />
to be lengthened a bit, but I had some straight stripes left over<br />
from the F-unit decals (Micro-<strong>Scale</strong> # 48-421) which worked<br />
perfectly for that. Some of the decals had to be cut away around<br />
the ladders below the cab doors and these areas touched up<br />
with paint. I had to mix up a light gray to match the decal color.<br />
A box of tissue and a bottle of Solvaset later, the decaling was<br />
done and the paint touched up.<br />
All of the cab and side door railings and grabs were fabricated<br />
from brass wire and inserted into holes drilled in the plastic<br />
shells. This was a bit of tedium, but the end result was worth<br />
the effort. All of the railings were carefully attached with CA<br />
after the decaling was done, as it would have been impossible<br />
to apply the decals with them in place. When everything was<br />
thoroughly dry, the body shells were over-sprayed with Model-<br />
Master Semi-Gloss Lacquer overcoat, giving them a nice newly<br />
painted out-of-shop appearance. The truck side frames were<br />
60 • O <strong>Scale</strong> <strong>Trains</strong> - July/Aug ’06
Photo 1: Power and dummy units side by side. Note the vast amount of plastic<br />
that had to be cut away to install the CLW conversion drive.<br />
Photo 2: Power unit undercarriage and body showing the styrene strips<br />
glued to the undersides of the trucks.<br />
Photo 3: Close-up of the diaphragms between the units and the new wire handrails.<br />
sprayed with Testors Silver, and the cab window frames<br />
were carefully painted with dull aluminum using a small<br />
flat brush. The rigid plastic diaphragms between the units<br />
were removed and flexible rubber ones from Precision<br />
<strong>Scale</strong> were installed in their place.<br />
Installing the CLW gear-drive axles in the power trucks<br />
proved to be more of a challenge than I anticipated. The<br />
conversion kit did not include any instructions for adapting<br />
the new axles and gears into the Rivarossi trucks.<br />
Owners of these Diesels know that Rivarossi designed the<br />
power trucks with built-in motors which are rather puny<br />
and noisy. Converting them to take the CLW axles and<br />
gearboxes was (for me) impossible. The only parts usable<br />
were the truck sideframes. I removed these from the<br />
motor units, and drilled out the axle holes to take short<br />
pieces of brass tube which became bearings for the axles.<br />
The biggest challenge was getting the conversion kit<br />
bolsters attached to the truck sideframes. Using a drill<br />
press and an end mill, I carefully milled out an area in the<br />
center of each frame to take a 1/16” thick piece of phenolic.<br />
This, in turn, had a hole bored through it to take a<br />
short piece of brass tube that exactly fit through the hole<br />
in the bolster. The tube was epoxied through the hole in<br />
the phenolic and this assembly was epoxied to each side<br />
frame. With this accomplished, the sideframes were rejoined<br />
around the axle units and the bolsters snapped into<br />
the brass tube. Short pieces of Evergreen square styrene<br />
tube were used to re-enforce the joints where the frames<br />
were glued back together. Pieces of 0.040” styrene sheet<br />
were glued across the bottoms of the sideframes for rigidity.<br />
It worked! However, there was now no power pickup<br />
as the CLW gear drives are non-conductive. I could have<br />
made some brass wipers to pick up current through the<br />
axles, but it was far easier to let the dummy A-unit do the<br />
job. Its original Rivarossi trucks and wheels were retained<br />
but with the motors and worms removed. The pickups<br />
and headlight were wired through a Miniatronics four-pin<br />
mini plug-and-socket to the motor in the other A-unit.<br />
Since the units can never be operated separately, I used a<br />
simple drawbar coupling between them, rather than normal<br />
couplers.<br />
Sometime during the course of this now-complex project,<br />
I got the idea to put a mini-TV camera in the nose of<br />
the non-powered unit as there were gobs of space inside<br />
the body. At the same, time I envisioned making the loco<br />
battery powered and radio controlled. Having had many<br />
years experience with scale model R/C boats, I had the<br />
components on hand to try this, which I did... and it<br />
worked, but not well enough. The speed-direction control<br />
unit I used wasn’t very sensitive to low speed running, and<br />
there was too much interference in my train room for the<br />
transmitter and receiver to work without “glitching”. So<br />
it was back to track power, but I still thought the camera<br />
idea was feasible as I had seen these tiny mini-cams demonstrated<br />
at train shows. The unit I purchased is available<br />
from many hobby sources. The mini-TV camera sends a<br />
signal to a small receiver which, in turn, is plugged into<br />
the “video in” socket on a TV set. Everything needed to<br />
run the unit is included except for a 9V battery to power<br />
the camera and the TV set, of course. If it is desired to use<br />
track power for the camera, an adapter is available.<br />
To provide a scale looking opening in the Diesel’s nose<br />
for the camera lens, I used a left over Mars light from my<br />
F-unit kit. This was cut down so it would match the area<br />
of the door in the C-Liner’s nose, which was then carefully<br />
July/Aug ’06 - O <strong>Scale</strong> <strong>Trains</strong> • 61
Photo 4: Close up inside the nose of the dummy unit with the LED headlight<br />
installed. Note the slot cut from the bulkhead for the antenna.<br />
Photo 5: Part of the fuel tank had to be cut away for the battery leads.<br />
Photo 6: The little camera is only about an inch square.<br />
Photo 7: The camera installed. Note how the antenna was run along<br />
the cab roof and secured with tape.<br />
cut out. Of course this was done before I painted the body. It is<br />
prototypically correct, too, as NYC had two C-Liners with Mars<br />
lights. Numbers 4506 and 4507 were so equipped, although<br />
their lights were later removed. Those same two units also had<br />
three-axle rear trucks to support the weight of their steam generators.<br />
My models will never have this feature but, frankly, I’m<br />
not that much of a rivet counter. I numbered the camera unit<br />
4507 and the motor unit 4505, as that unit was not equipped<br />
with a Mars light.<br />
I used Miniatronics yellow white diodes for headlights; 5 mm<br />
clear plastic diode holders fit exactly in the headlight openings.<br />
The tiny camera was a tight fit in the nose. I had to cut a slot<br />
in the vertical bulkhead that runs across the body so that the<br />
camera’s antenna could lie against the cab roof. The camera is<br />
held in place with short strips of aluminum furnace tape, which<br />
doesn’t ever stretch or sag. It is not installed permanently, as I<br />
might want to try something else with it in the future. The 9v<br />
battery which powers the camera lies in the fuel tank, and is<br />
held in place with Velcro®. I had to cut away some additional<br />
pieces of the chassis unit to make it fit properly into the body<br />
shell under the camera. I installed a mini-slideswitch under the<br />
side skirt to turn the camera on and off. Kadee #6 short shank<br />
couplers were screwed to plywood spacers glued to the undersides<br />
of the chassis units. The plywood was painted flat black<br />
and doesn’t show.<br />
The completed C-Liners look great, run smooth as silk, and<br />
can be operated with the camera on or off. In the “off” mode, I<br />
turn the units around so that the non-Mars light equipped end<br />
faces forward. The only non-scale look to the Diesels is the<br />
darkened Mars light that the camera looks through. I had to<br />
sacrifice some air-hose detail around the couplers, as the frame<br />
units must be twisted 90 degrees when removing them from<br />
the bodies, so that the couplers will go through the smaller size<br />
openings. Brass windshield wiper castings add realism to the<br />
thick molded windows, and I enhanced the plastic air horns by<br />
carefully drilling out the bells to give them some inside dimension.<br />
I haven’t done any weathering on the Diesels, but may do<br />
so in the future. That lightning stripe paint job just looks too nice<br />
to dirty up!<br />
The little camera operates as advertised, and it’s really fun<br />
to get an engineer’s eye view of the layout “as the train goes<br />
rumblin’ through”. It’s even fun to see the unfinished portions<br />
as the loco passes the giant screwdrivers, baby food jars and<br />
62 • O <strong>Scale</strong> <strong>Trains</strong> - July/Aug ’06
Photo 8: Nose of the power unit showing the added on railings and grabs<br />
Photo 9: View through the camera lens.<br />
other assorted junk lying at trackside. I have one long section<br />
of track that passes under the scenery, so if anything ever goes<br />
awry in there I can at least run the Cam-Liner in to see what<br />
the problem is. Watching the “TV train” is a great draw for the<br />
grandkids, too.<br />
u<br />
Photo 10: The Cam-Liners on the author’s layout.<br />
July/Aug ’06 - O <strong>Scale</strong> <strong>Trains</strong> • 63
MODELERS SHELF<br />
Tom Kabele sent these photos<br />
of his Delaware & Hudson<br />
locomotives. D&H pacific, #608,<br />
was scratch built by Frank Miller,<br />
and painted and detailed by Tom.<br />
The second engine is a D&H<br />
Northern, #302. It was the last<br />
D&H Northern under steam. It<br />
started as an Overland UP FEF-1,<br />
and was modified by Tom Harley.<br />
He scratchbuilt the tender. It was<br />
painted and detailed by Tom<br />
Kabele. Both engines have DCC<br />
and sound.<br />
64 • O <strong>Scale</strong> <strong>Trains</strong> - July/Aug ’06
Mr. Fleetwood Shawe sent this photo over from the UK. The loco is an M.T.H. PRR H3 converted to run on Mr. Shawe’s<br />
outdoor garden O <strong>Scale</strong> railroad using radio control. Mr Shawe has been in O <strong>Scale</strong> for over 75 years!<br />
ARMSTRONG TOOL & SUPPLY<br />
▲ Flush Cut Rail Cutter (P/N PLR<br />
791.00), List Price, $33.95. OST Ad<br />
Special, $30! Deluxe rail cutter made<br />
of hardened steel to handle even the<br />
most difcult track. Cuts Code 148<br />
rail easily.<br />
The Tippi Foam Cutter: $39.00. Includes four different shapes of ▲<br />
blades for multiple cutting options. Trigger activated On/Off switch<br />
provides quick heat up, Shatter resistant handle.<br />
For other modeling tools, check our website: www.armstrongtool.com<br />
Armstrong Tool & Supply Co, 31747 W Eight Mile Rd, Livonia, MI 48152<br />
800-446-9694 • FAX 248-474-2505 • armstools@hotmail.com<br />
Remote<br />
Control Systems<br />
of New England<br />
Sales and Service East of Mississippi<br />
Remote Controls for “O” <strong>Scale</strong><br />
<strong>Trains</strong>. Batteries, Chargers,<br />
Sound Systems, and Installations.<br />
Systems starting at $249<br />
Don Sweet<br />
Phone: (603) 321-1347<br />
Email: dsweet@rcs.mv.com<br />
www.remotecontrolthrottles.com<br />
Big 4 Jct.<br />
Trackside “O” Specialties<br />
PO Box 234 • Danville IN 46122<br />
317-272-4690 • BigFourJct@aol.com<br />
We will be at the<br />
following “O” meets in 2006:<br />
July 19-23 – O National in NJ<br />
August 5 – Denver, PA<br />
September 22-23 - Indianapolis, IN<br />
November 10 – Kirtland OH<br />
NEW 2006 Catalog, $1.00<br />
Stevenson Preservation Lines<br />
O Gauge Kits and Parts from past<br />
Master Modelers<br />
Catalog 2005 Price: $3.00<br />
Baldwin Model Locomotive Works<br />
Lobaugh<br />
Adams & Sons<br />
Lenoir<br />
Kansas City Kit<br />
Hines Lines<br />
Alexander<br />
Pearce Tool Co.<br />
Bob Stevenson, 2326 230th St. Boone, IA 50036<br />
July/Aug ’06 - O <strong>Scale</strong> <strong>Trains</strong> • 65
Nos. 16001-18500 O SCALE/PROTO 48 • Kit #124/124-P … $49.95<br />
•Based on 1917 prototype built<br />
by Mt. Vernon Car Co.<br />
•Double sheath with Dreadnought ends<br />
•Steel underframe<br />
•Andrews trucks<br />
•Kit includes couplers and decals<br />
Also available –<br />
SACRAMENTO NORTHERN<br />
Boxcar Nos. 2301-2350<br />
Kit #125/125-P … $49.95<br />
Coming soon – SP Sugar Beet Gondola<br />
2K6 O <strong>Scale</strong> <strong>Trains</strong><br />
3rd Annual Digital Photo Contest<br />
see page 28 for details<br />
O <strong>Scale</strong> <strong>Trains</strong> mth august 06.qxp 5/5/2006 4:08 PM Page 1<br />
In 1916, the self-proclaimed Standard<br />
Railroad of the World - stubbornly independent<br />
and known for its home-grown<br />
motive power - began building perhaps<br />
the most modern 0-4-0's ever constructed.<br />
The 47 engines in the A5s class<br />
were right at home in the narrow streets<br />
and tight corners of industrial and wharf<br />
areas, particularly in Philadelphia, New<br />
York, and Baltimore.<br />
While not the first A5s to grace O gauge<br />
rails, we believe the M.T.H. version is the<br />
most detailed, feature-laden, and smooth<br />
running model of this Pennsy shifter ever<br />
built. Researched with the help of the<br />
Pennsylvania Railroad Technical and<br />
Historical Society, the M.T.H. A5s is<br />
based on engine number 1587 as she<br />
appeared in Atlantic City circa 1950.<br />
Despite its diminutive size, this model<br />
comes outfitted with the full range of<br />
Premier Proto-Sound® 2.0 locomotive<br />
features, including an unmatched complement<br />
of lighting, sound and command<br />
control functions.<br />
Find your Nearest Dealer at<br />
www.mthtrains.com<br />
© 2006 M.T.H. Electric <strong>Trains</strong><br />
DIMINUTIVE SHIFTERS<br />
0-4-0 Switcher Loaded With All The Bells & Whistles<br />
Pennsylvania 0-4-0 A-5 Switcher Steam Engine (Hi-Rail Wheels)<br />
20-3173-1 w/Proto-Sound® 2.0 $599.95<br />
Pennsylvania 0-4-0 A-5 Switcher Steam Engine (<strong>Scale</strong> Wheels)<br />
20-3173-2 w/Proto-Sound® 2.0 $599.95<br />
Pennsylvania Reading & Seashore 0-4-0 A-5 Switcher Steam Engine (Hi-Rail Wheels)<br />
20-3174-1 w/Proto-Sound® 2.0 $599.95<br />
Pennsylvania Reading & Seashore 0-4-0 A-5 Switcher Steam Engine (<strong>Scale</strong> Wheels)<br />
20-3174-2 w/Proto-Sound® 2.0 $599.95<br />
Long Island 0-4-0 A-5 Switcher Steam Engine (Hi-Rail Wheels)<br />
20-3175-1 w/Proto-Sound® 2.0 $599.95<br />
Long Island 0-4-0 A-5 Switcher Steam Engine (<strong>Scale</strong> Wheels)<br />
20-3175-2 w/Proto-Sound® 2.0 $599.95<br />
66 • O <strong>Scale</strong> <strong>Trains</strong> - July/Aug ’06
Allegheny <strong>Scale</strong> Models 11<br />
Allegheny <strong>Scale</strong> Models 39<br />
Amer. Prof. O <strong>Scale</strong> Services 32<br />
AM Hobbies 22<br />
Armstrong Tool & Supply 65<br />
Atlas O 31<br />
Atlas O 59<br />
Atlas O<br />
IBC<br />
Auel Industries 31<br />
Bachmann <strong>Trains</strong> 8<br />
Baldwin Forge & Machine 31<br />
Banta Modelworks 11<br />
Big 4 Jct 65<br />
BTS 10<br />
Buffalo Creek Graphics 7<br />
Central Locomotive Works 11<br />
Clever Bros. 22<br />
Crusader Rail Services 20<br />
Custom Signals 39<br />
Deichman's Depot 20<br />
East Gary Car Co. 22<br />
Get Real Productions 67<br />
Golden Gate Depot 47<br />
Gorilla Glue 27<br />
Great <strong>Scale</strong> Model Train Show 7<br />
Hackworth Model <strong>Trains</strong> 25<br />
House of Duddy 32<br />
Indianapolis O <strong>Scale</strong> Meet 12<br />
Irish Tracklayer 7<br />
Just <strong>Trains</strong> 69<br />
Keil-Line Products 22<br />
Key Imports 35<br />
Korber 12<br />
LaBelle Woodworking Co. 22<br />
Model Building Services 7<br />
Model Tech 31<br />
M.T.H. Electric <strong>Trains</strong> 66<br />
Mullett River 12<br />
NCE Corp 32<br />
Nickel Plate Models 20<br />
Old Pullman 35<br />
Overland Models 52<br />
PA Heritage Models 49<br />
P&D Hobby Shop 21<br />
Precision <strong>Scale</strong> Co. IFC<br />
Proto-Switch 39<br />
Public Delivery Track 27<br />
Railroad Collectibles 51<br />
RCS of NE 65<br />
Rons Books 27<br />
San Juan Car Co. 66<br />
SMR <strong>Trains</strong> 65<br />
Stevenson Preservation Lines 65<br />
Sumpter Valley Depot 22<br />
Suncoast Models 25<br />
Sunset⁄3rd Rail<br />
BC<br />
T Bone Models 20<br />
Turner Model Works 31<br />
Valley Model <strong>Trains</strong> 11<br />
Weaver 63<br />
Advertisers Index<br />
DM&M Railroad Co. 11<br />
Norm’s O <strong>Scale</strong> 7<br />
Western Reserve O <strong>Scale</strong> Meet 51<br />
Eagles Nest Miniatures 25<br />
O <strong>Scale</strong> Kings 11<br />
Eastern O <strong>Scale</strong>rs 35<br />
O <strong>Scale</strong> Realty 31<br />
July/Aug ’06 - O <strong>Scale</strong> <strong>Trains</strong> • 67
Buy–Sell–Trade Events<br />
Buy-Sell-Trade ads are $5 for 30 words plus your address information. Additional words are $0.25 each. Subscribers are permitted one free ad per subscription<br />
cycle. All B-S-T ads are prepaid. You may send ads by postal service with a check or money order. Ads sent by email or called in must use a credit<br />
card. See our contact info on page 2.<br />
FOR SALE: Sunset C&O 2-10-4, new in box; Sunset UP early<br />
Challenger, coal version, new in box. Call 410-488-4259 between 6 and<br />
9 pm Eastern time.<br />
WANTED: Joe Fischer cars. American Standard hvywt baggage and<br />
pullmans. PSC 10 sect. Pullmans w/AC. Mail only, please. Jim Seacrest,<br />
PO Box 6397, Lincoln, NE 68506-0397<br />
WANTED: Lobaugh WWII era. Westbrook boxcars only. Ortl Ltd/AN<br />
CB&Q waycars, 3 or 4 window RTR. Mail only, please. Jim Seacrest, PO<br />
Box 6397, Lincoln, NE 68506-0397<br />
WANTED: PSC PRR X29 boxcar #15467 and similar #15453, Pac Ltd 32<br />
ARA boxcar #5000A, CN cabooses, Crown B&M ob boxcar, Reynold<br />
(Athearn) 50’ PRR and NKP 50’ boxcars. Mail only, please. Jim Seacrest,<br />
PO Box 6397, Lincoln, NE 68506-0397<br />
Intermountain, Key, Keystone, Max Gray, NJ Custom Brass, Overland,<br />
Pacific Limited, PRB, Precision <strong>Scale</strong>, Sunset, US Hobbies... now<br />
stocking Intermountain HO. The BrassRoundhouse.com. Phone: 727-<br />
391-3135. John Clemens, 5273 97 Way N, St. Petersburg, FL 33708<br />
FREE O SCALE LIST: List of O <strong>Scale</strong> shows for 2006. Send LSSAE to Bob<br />
Retallack, Dept OST06, 2224 Adner Ct, Columbus, OH 43220.<br />
FOR SALE: USH NYC J3a Hudson, OMI PRR E8, Sunset Pacific Coast<br />
3-truck Shay, Atlas WM SD-35, EL SW8, Weaver PRR RSD-12, Pullman-<br />
Bradley coaches two car set GM&O, CLW U25b. Bob Burns, call<br />
330-758-1561<br />
WANTED: Central Loco Works C&O T1 2-10-4 kit in any condition. Call<br />
or write. Ph: 540-672-5270, Charles H Berterman, 18241 Beech Tree<br />
Dr, Orange, VA 22960-2767<br />
July 2006<br />
2-8: Philadelphia, Pennsylvania<br />
Independence Junction 2006 NMRA National Convention at the Pennsylvania<br />
Convention Center, 1101 Arch St, Philadelphia, PA 19107, 215-<br />
418-4700.<br />
19-22: Parsippany, New Jersey<br />
2006 O <strong>Scale</strong> National Convention sponsored by the New York Society<br />
of Model Engineers, celebrating their 80th anniversary as the oldest club<br />
in America. Convention held at the Hilton Hotel, One Hilton Ct, Parsippany<br />
NJ 07054. Special room rate: $119 per night single or double occp.<br />
Call 1-800-hiltons or register at the hilton website [http://www.parsippany.hilton.com].<br />
Full convention registration is $40 per person. Tables<br />
are $40 each. See the convention website for more details. Call 201-<br />
939-9212, or email. Contact [06oscalenat@comcast.net]<br />
August 2006<br />
5: Denver, Pennsylvania<br />
Eastern O <strong>Scale</strong>rs 2-Rail swap meet held at the Denver Fire Hall, 4th &<br />
Locust Sts. 9:00 am – 1:00 pm. Admission $5; (spouses & children under<br />
14 are free), $16 for the first table (includes one admission) and $12 for<br />
each additional table. Dealer’s set-up Friday evening 6:00 pm to 9:00<br />
pm and Saturday morning 7:00 am to 9:00 am Info/reservations, SASE<br />
to, EOS, PO Box 1781, Bensalem PA 19020; (215) 639-3864. Bring an<br />
index card with your name, address, etc., for $1 off your admission.<br />
Contact [eostrains@comcast.net].<br />
12: Lenexa, Kansas<br />
NMRA Turkey Creek Division Meet, Lenexa Community Center 13420<br />
Oak St. 8:30 am to 2:00 pm. Admission $5; under 12 free; in advance<br />
$4. Info and registration form: Paul Richardson, 816-866-4043. Contact<br />
[paul@purgatoryanddevilriver.com].<br />
September 2006<br />
16-17: Dothan, Alabama<br />
Wiregrass Annual Model RR show and sale at the National Peanut Festival<br />
Fairgrounds, US 231 S, Dothan, AL. Admission: $5 adults, children<br />
under 12 are free. Open from 9 am to 5 pm on Saturday and from 10 am<br />
68 • O <strong>Scale</strong> <strong>Trains</strong> - July/Aug ’06<br />
FOR SALE: Surplus kits and other rolling stock, well-crafted and R-T-<br />
R. Also surplus 1/43rd scale vehicles. O <strong>Scale</strong> News issues 112-162,<br />
excellent condition $125 for the set. Call Tom 541-447-0341.<br />
WANTED: Wisconsin Dells MINIRAMA items and information including<br />
slides and old home movies of the operation. Contact Jeff Haertlein, PO<br />
Box 328, North Freedom WI 53951. Phone 608-522-3326 between 3PM<br />
- 7PM Central time.<br />
VAN BUREN, ARKANSAS. Area’s neatest hobby store from Z to O, new<br />
and used. Visit Dave’s Hobby Shop at 600 Main St in the Anhauser<br />
Busch Building or online at [www.daveswebshop.com], 479-471-0750.<br />
FOR SALE: AN SF F-3 A-B Warbonnet NOB; AN (2) F-3 B undec w/can mtr<br />
NOB; MG ATSF 2-10-4, OB; MG SP AC-4, OB; OVL UP SD-40-2 #3483<br />
w/o anti-climber OB; OVL UP Dash 8-40CW #9375 widenose, OB; OVL<br />
UP SD60M #6117,OB; USH SP GS-4 #4450 C/P Mars Lite OB; USH UP<br />
4-8-2 Unptd L/N OB very rare; PFM Hillcrest #10 Climax Ptd OB; LOB SP<br />
S-12 0-6-0 w/cust. Saus. Tndr NOB; SSM SP-2 #5021 4-10-2 New OB; PSC<br />
PRR K-8a Stock Car NEW OB; PSC PRR K7b Dbl Dr Stock Car Brown No<br />
Ltrs New OB. WANTED: OVL 0772.1 UP Long Turbine Extra Tender OB;<br />
OVL UP Big Blow Gas Turbine Last Run OB. Bill Gallagher: Phone/FAX:<br />
707-539-0861 modelrr@sonic.net.<br />
FOR SALE: Kohs PRR K-4, “as-built” version, $3450 in unopened box.<br />
Fine <strong>Scale</strong> Models PRR Broadway Limited passenger cars, $600 each.<br />
Bob Lowery, 215-887-7049.<br />
FOR SALE: USH GS4, 4-8-4, test run only, unptd, OB, $1600. USH<br />
SD45 SF Y&B, OB, $500. <strong>Scale</strong> Craft SP P13 4-6-2, $700 plus shipping.<br />
Call Don at 203-322-9847.<br />
to 4 pm on Sunday. Contact Danny Lewis, 491 Ashley Circle, Dothan,<br />
AL 36305, PH: 334-792-0728. Sponsored by the Wiregrass Heritage<br />
Chapter of the National Railway Historical Society. Contact [dannylws@<br />
yahoo.com].<br />
22-23: Indianapolis, Indiana<br />
Indianapolis O <strong>Scale</strong> Fall Meet. Two day O <strong>Scale</strong> swap meet with over<br />
250 tables in one large hall. New and collectible 2-Rail trains and products<br />
available. Also includes model contest and display layouts. Registration<br />
by August 15 gets custom name tag. Dealer tables $40 by 8/15/05,<br />
$45 after that date. Admission $15 per person, good for both days. Contact<br />
Jim Canter for more information: 1203 Rotherham Ln, Beech Grove,<br />
IN 46107, 317-782-3322. Contact [jcanternkp@aol.com].<br />
October 2006<br />
14: Gardner, Massachusetts<br />
Southern New England Model RR Club’s O <strong>Scale</strong> train show on Saturday<br />
at the United Methodist Church, 161 Chestnut St., Gardner, Mass., from<br />
9:30 am to 4:00 pm. White Elephant table, sales & exhibits, operating<br />
layout, model display area, door prizes, food on site. 6 ft. vendor tables<br />
$15 before Labor Day, $20 after, 8 ft. vendor tables $20 before Labor<br />
Day, $25 after, setup 6:30 to 9:30 am. Admission: $5.00, $8.00 Family<br />
max. Contact: Larry Grant, (508) 337-6661 Contact [BigBrotherLar@<br />
netzero.net].<br />
November 2006<br />
4: Wind Gap<br />
Eastern O <strong>Scale</strong>rs 2-rail swap meet at the Plainfield Fire Hall, 6480 Sullivan<br />
Trail 9:00 am – 1:00 pm. Admission $5; (spouses & children under<br />
14 are free), $16 for the first table (includes one admission) and $12 for<br />
each additional table. Dealer’s set-up Friday evening 6:00 pm to 9:00<br />
pm and Saturday morning 7:00 am to 9:00 am Info/reservations, SASE<br />
to, EOS, PO Box 1781, Bensalem PA 19020; (215) 639-3864. Bring an<br />
index card with your name, address, etc., for $1 off your admission.<br />
Contact [eostrains@comcast.net].<br />
For a more complete list of events, visit the OST website at<br />
[http://www.oscalemag.com].
There’s a whole bunch of stuff on my mind and I’ll try to cover it in<br />
this space this issue.<br />
Digital Photo Contest<br />
We’re running our digital photo contest again, and this year we again<br />
have some great prizes to award. Please take a look at page 28 for all the<br />
details. The deadline for submissions is August 1.<br />
DCC Technology Moves In<br />
There’s been a whole-lotta chatter, both on- and offline, about Atlas<br />
O’s decision to drop support for 2-Rail TMCC in favor of DC/DCC utilizing<br />
QSI sound. At about the same time, Sunset/3rd Rail announced it<br />
will be using QSI sound in select O <strong>Scale</strong> locomotives and is considering<br />
offering DCC-ready 2-Rail locomotives if there is enough demand. Sunset<br />
has not offered 2-Rail TMCC. Lionel has not offered any 2-Rail TMCC and<br />
shows no signs of paying any attention to 2-Rail at all. M.T.H. has its own<br />
proprietary DCS control system. Weaver offers 2-Rail locomotives with<br />
and without TMCC sound, as well as 3-Rail TMCC equipped locomotives.<br />
With two major players (Sunset for steam locomotives and Atlas O for<br />
Diesels) offering DCC equipped, or DCC-ready locomotives, O <strong>Scale</strong>rs<br />
are being dragged, kicking and screaming, into the 21st century, and it’s<br />
about time, too. The Hi-Railers have had the lock on the most fun parts of<br />
O <strong>Scale</strong> for too long, i.e., sound and command operations. In the smaller<br />
scales, DCC is the accepted standard for command and control.<br />
Some people still have a low opinion of DCC for O <strong>Scale</strong> (our honored<br />
Editor being one of them) based on past experience. The DCC manufacturers<br />
haven’t exactly had O <strong>Scale</strong>rs beating down their doors looking<br />
for higher-current decoders. Even if we were, we’re such a small segment<br />
of the total DCC market, it was likely not profitable to make them.<br />
Now, however, with two manufacturers willing to put DCC into their<br />
2-Rail offerings, the market opens up for the manufacturers and users, as<br />
well.<br />
Why did Atlas drop 2-Rail TMCC? There are several answers. Sales<br />
didn’t meet the per-piece minimums at the factory. Then there is the<br />
license fee to Lionel, slim pickings for licensed TMCC sounds, and some<br />
uncertainty about what will happen with Lionel in bankruptcy. Plus, DCC<br />
is an open architecture, with no license required to use it, unlike TMCC<br />
or M.T.H.’s DCS.<br />
What, DCC is expensive, you say? Well, somehow Atlas is selling their<br />
Gold DC/DCC-equipped Diesels for only $20 more than the Silver DCCready.<br />
If you already have the base station, that’s a real bargain!<br />
Perhaps what’s needed is for one of the DCC manufacturers to put<br />
together a simple user interface that will simplify DCC use for O <strong>Scale</strong>.<br />
We’ve seen Bachmann’s EZ-DCC for HO and their On30 offerings. That’s<br />
the right direction, but it does not have enough current capability for<br />
standard-gauge O <strong>Scale</strong>. Maybe all we really need is an O <strong>Scale</strong> current<br />
booster for the EZ-DCC system (and my wish is granted — see the new<br />
Bachmann ad on page 8). I heard that Maerklin has something called the<br />
Central Station that uses a touch-screen to run their trains. That’s another<br />
possible approach to simplify DCC. I guess what I’m looking for is the<br />
Macintosh among the PCs of DCC, the DCC “...for the rest of us.”<br />
O <strong>Scale</strong> National and the NMRA<br />
The NMRA has approached the O <strong>Scale</strong> community, through the O<br />
<strong>Scale</strong> Kings organization, with the idea of rolling the O <strong>Scale</strong> National<br />
convention into the NMRA National. John Roberts, the NMRA President,<br />
is an O <strong>Scale</strong>r. Mike Brestel, who serves on the NMRA Board, is also an<br />
O <strong>Scale</strong>r. Roberts and Brestel sent their inquiry to Rod Miller, who is the<br />
President of the O <strong>Scale</strong> Kings. Rod told me the OSKers board was pessimistic<br />
about the idea but that they were continuing talks with the NMRA to<br />
surface issues about logistics, finances and, yes, politics. At this time there<br />
is no host for the O <strong>Scale</strong> National on the horizon for 2009. Should it come<br />
to pass that no one stands up for 2009 at this year’s banquet, then maybe<br />
merging the O <strong>Scale</strong> National with the NMRA National, even if only for<br />
one year, might make some sense.<br />
I can think of a few reasons both for and against merging our convention<br />
with the NMRA National. On the plus side, we’d expose O <strong>Scale</strong> to a<br />
much larger audience of potential newcomers, mostly people moving up<br />
from HO and N <strong>Scale</strong>s. Also, there is economy of scale. With a lot more<br />
people in attendance, it might be less expensive to attend.<br />
On the negative side, I can see O <strong>Scale</strong> getting lost in the shuffle of<br />
the larger crowd. Manufacturers that serve more than just O <strong>Scale</strong> (like<br />
Atlas, Bachmann, and now M.T.H.) might be hard pressed to bring out the<br />
O <strong>Scale</strong> goodies when the majority of the crowd will want to see their<br />
HO and N <strong>Scale</strong> wares. The NMRA National is more likely to be held in<br />
larger cities (like Philadelphia this year), and that means rooms could be<br />
more expensive than we’re used to paying. In the end, it will have to be<br />
the O <strong>Scale</strong> community at-large that decides. I’m interested in what you<br />
think about this idea. Write me or email and let me know.<br />
Visit the OST Forum<br />
The OST Forum has been up and running for a couple months now<br />
and many of you have registered so you are able to post your comments.<br />
I invite those of you who have not visited our Forum to do so. It gives<br />
you the opportunity to talk back directly to our regular feature writers. A<br />
great opportunity would be to post your comments at the Forum about<br />
the NMRA proposal I talked about above. This entire column will be<br />
posted on the Forum by the time you read this. You can go to there and<br />
enter your comments and see what others have posted, too. I’ll be notified<br />
automatically anytime one of you posts and, if necessary, I can reply<br />
directly. When we have lots of comments, I’ll edit them and fold them<br />
into the Letters column here in the magazine for those that don’t have<br />
online access.<br />
Bear in mind, this also works for any of the columnists posted at the<br />
Forum. Anything you write there will be sent to them directly. It’s a great<br />
way to communicate your feelings and opinions to our writers.<br />
A Testimonial<br />
I ran into Don Squires of Armstrong Tool Co., at the Indy meet last<br />
September. I asked if he had a diagonal cutter tough enough to cut<br />
through Code 148 rail. He pointed me to a tool display and suggested I<br />
try one of the cutters there. Ed Duddy graciously provided a piece of rail<br />
to nip. The cutter Don had suggested went through the rail like butter.<br />
Ed cautioned me that many times a cutter will work great when new, but<br />
will get dull with repeated use. In that regard, I’ve held my tongue while<br />
I used the cutter working on the layout. Now I feel I can recommend the<br />
PLR 791.00 cutter. It works great and should be in every O <strong>Scale</strong>r’s tool<br />
box. Don is offering the rail cutter at a special price to OST readers. See<br />
his ad under Armstrong Tools in this issue. If you order one, tell him you<br />
saw his ad in OST.<br />
Keep Hiballin’<br />
u<br />
70 • O <strong>Scale</strong> <strong>Trains</strong> - July/Aug ’06
ATLASOSCALE - Box Cars! Hoppers! AVAILABLE NOW!<br />
www.atlaso.com<br />
ATLASOEVANSDPDBOXCAR<br />
New Paint Schemes & Road Numbers!<br />
• True 1/4” scale dimensions & details<br />
• Separately-applied ladders, brake wheel, safety platform, door bars<br />
and door handles<br />
• Accurate painting & lettering<br />
Check out these NEW Paint Schemes!<br />
• Bend Millwork Company, Fort Vancouver Plywood,<br />
Minneapolis Northfield & Southern<br />
For more information on the Evans DPD Box Car, visit:<br />
www.atlaso.com/oevans5.htm<br />
ATLASO3BAYCYLINDRICALHOPPER<br />
New Paint Schemes & Road Numbers!<br />
• Separately-applied grab irons & brake detail<br />
• Opening hatches & realistic see-through roof walks<br />
• Sprung die-cast 100-ton roller-bearing trucks with rotating<br />
bearing caps.<br />
Check out these NEW Paint Schemes!<br />
• CSX*, Cumberland Chemical, Hercules, USI Petrothene<br />
For more information on our Cylindrical Hopper, go to:<br />
www.atlaso.com/o3bayhoppers.htm<br />
*CSX Licensed Product<br />
To find an Atlas O dealer, go to http ://www.atlaso.com/locator/locator.asp or call 1-800-TRACK-A-1 (1-800-872-2521)<br />
For the NEW 2006 Spring/Summer Atlas O <strong>Scale</strong> Locomotive & Freight Car Catalog, please send $5 ($7 outside the US) to the address shown below.<br />
ATLAS O, LCC • 378 Florence Avenue • Hillside, NJ 07205
SUNSET MODELS INC<br />
37 South Fourth Street<br />
Campbell, CA 95008<br />
phone 408-866-1727<br />
fax to 408-866-5674<br />
www.3rdrail.com<br />
JUST ANNOUNCED<br />
Southern Pacific AM-2<br />
Born as MM-2 in the early 1900s, 12 of<br />
these articulated Mallets were upgraded<br />
with superheaters and Worthington feed<br />
water heaters and a 4 wheel pilot truck.<br />
These 4-6-6-2s were reclassified as<br />
AM-2s. Sunset Models is proud to<br />
announce a very collectible and super<br />
detailed version of the SP AM-2.<br />
Coming in 2007 for under $1799.95<br />
Great Northern M-2 2-6-8-0<br />
A true Mallet type as originally<br />
constructed by Baldwin in 1910 was<br />
Great Northern's M class 2-6-8-0. In<br />
1926-27 these M-1 engines were rebuilt<br />
by GN as simple articulated M-2's<br />
Sunset Models is proud to announce a<br />
very collectible and super detailed<br />
version of the Great Northern M-2.<br />
Coming in 2007 for under $1799.95<br />
CB&Q M-4a 2-10-4 “Colorado”<br />
The Burlington's M-4s were built in<br />
1927-35 by Baldwin Locomotive Works.<br />
They tipped the scales at 504,570<br />
pounds locomotive weight, and at<br />
83,300 pounds of tractive effort they<br />
were without doubt the Burlington's<br />
heaviest and heftiest steam engines.<br />
Coming in 2007 for $1499.95<br />
Also: CB&Q Wooden Cabooses $219.95<br />
PRR K-5 Pacific WOW!<br />
These K5s were larger than the K4 and<br />
were PRR's attempt at competing with<br />
other roads Hudsons. With larger boiler<br />
diameter, bells mounted on their<br />
smokebox fronts and Caprotti valve<br />
gear, this is a very unique locomotive.<br />
Two engine numbers available.<br />
Sunset is proud to announce the<br />
“Crown” Series of Sunset engines, the<br />
Super Detailed PRR K-5s.<br />
Coming 2007 for $1199.95<br />
COMING IN 2007!


