How to Fit Spring Operated Roller Blinds - Merit Blinds
How to Fit Spring Operated Roller Blinds - Merit Blinds How to Fit Spring Operated Roller Blinds - Merit Blinds
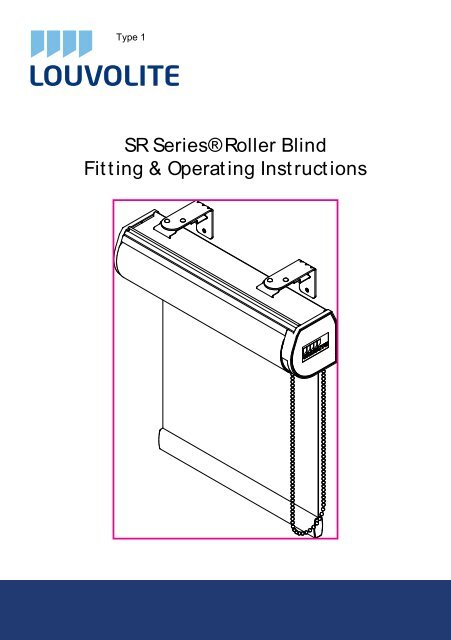
Type 1 SR Series® Roller Blind Fit t ing & Operat ing Inst ruct ions
- Page 2 and 3: Fitting the blind SR Series® Rolle
- Page 4 and 5: Lost Tension on the Spring If you h
- Page 6: Type 3 3. “Soft-raise” spring o
Type 1<br />
SR Series® <strong>Roller</strong> Blind<br />
<strong>Fit</strong> t ing & Operat ing Inst ruct ions
<strong>Fit</strong>ting the blind<br />
SR Series® <strong>Roller</strong> Blind<br />
<strong>Fit</strong> t ing & Operat ing Inst ruct ions<br />
Carefully unwrap the blind from its wrapping.<br />
Then check the brackets as these could be a different style for each end.<br />
The brackets are universal and can be fixed in a <strong>to</strong>p, faced or side fixed position.<br />
<strong>Fit</strong>ting the brackets<br />
Measure the fabric width of the roller blind and place your bracket 35mm (1.375”)<br />
wider than this measurement with two screws in each bracket, making sure the<br />
brackets are correct for that side of the blind and are level.<br />
<strong>Fit</strong>ting the System 32 SR® without a s<strong>to</strong>p<br />
The spring end is always on the left side and with the fabric rolling from the back of the<br />
blind.<br />
With the blind rolled in the upper most position push fit the blind in<strong>to</strong> the opposite end<br />
bracket from the spring. (Fig.1)<br />
Then making sure the locating lugs on the end of the spring side is in the lowest position,<br />
(Fig. 2) place the blind in<strong>to</strong> the spring end bracket.<br />
Release the pin (do not pull all the way out) from the front side of the spring.<br />
Attach the metal clip. (Fig. X)<br />
Your blind has been pre-tensioned and is now ready <strong>to</strong> operate. (Fig.3)<br />
Fig. 1 Fig. 2 Fig. 3
Type 2<br />
<strong>Fit</strong> ting the System 32 SR® with a s<strong>to</strong>p<br />
The spring end is always on the left side and with the fabric rolling from the back of<br />
the blind.<br />
With the blind rolled in the upper most or at the desired <strong>to</strong>p height position, push fit the<br />
blind in<strong>to</strong> the s<strong>to</strong>p end which is opposite end bracket from the spring. (Fig.4)<br />
Then making sure the locating lugs on the end of the spring side is in the lowest<br />
position, place the blind in<strong>to</strong> the spring end bracket. (Fig.5)<br />
Release the pin (do not pull all the way out) from the front side of the spring.<br />
Attach the metal clip. (Fig. X)<br />
Your blind has been pre-tensioned and is now ready <strong>to</strong> operate and will s<strong>to</strong>p at the<br />
desired <strong>to</strong>p position. (Fig.6)<br />
Fig. 4 Fig. 5 Fig. 6
Lost Tension on the <strong>Spring</strong><br />
If you have lost all the tension on the blind, ensure the front locating pin is IN (Fig. 7).<br />
Remove the metal clip. (Fig. X)<br />
Gently remove the blind from the brackets and roll back up by hand, then replace it<br />
back in<strong>to</strong> the brackets AND RELEASE THE PIN (Fig.8) and pull down <strong>to</strong> the drop,<br />
(Fig 9) then test <strong>to</strong> see if the blind returns <strong>to</strong> the <strong>to</strong>p, if not pull the blind down and lock off,<br />
DEPRESS THE LOCKING PIN AND gently remove the blind and roll up by hand. Replace back<br />
in<strong>to</strong> the brackets and test again with the locating pin at the front,<br />
REMEMBERING TO RELEASE THE LOCKING PIN BEFORE OPERATION.<br />
Attach the metal clip. (Fig. X)<br />
Lost Top Posit ion on the Blind<br />
If your blind has a <strong>to</strong>p s<strong>to</strong>p in it and you lose the position of the <strong>to</strong>p s<strong>to</strong>p and the<br />
fabric is not s<strong>to</strong>pping at the desired raised position and it is continuing going round<br />
the tube, it can be reset.<br />
To reset, lock the blind at the desired raised position then insert the locking pin in<strong>to</strong> the<br />
spring. (Fig.10 & Fig. 11)<br />
Remove the metal clip. (Fig. X)<br />
Removing the blind from its brackets, then turn the idle end pin of the blind in a clockwise<br />
direction until it s<strong>to</strong>ps (Fig. 12)<br />
Then replace blind in<strong>to</strong> the brackets and remove the locking pin and operate as normal.<br />
Attach the metal clip. (Fig. X)<br />
Fig. 7 Fig. 8 Fig. 9
Fine Tuning the Drop Without Removing the Blind<br />
Pull the blind down <strong>to</strong> the nearest position of the drop required.<br />
Now push in the locating pin at the front end of the spring <strong>to</strong> lock the blind off<br />
Whilst the blind is still in the brackets grip the fabric section of the blind push the blind <strong>to</strong><br />
the right side 3mm (normally <strong>to</strong> the right if in a standard blind)<br />
Then you will be able <strong>to</strong> rotate the blind either way in 20mm increments<br />
Rotate this and the blind will move <strong>to</strong> suit the new drop then release the blind<br />
Release the locating pin at the front of the blind<br />
Operate the blind as normal<br />
Fine Tuning the Speed<br />
Pull the blind down half way<br />
Now push in the locating pin at the front end of the spring <strong>to</strong> lock the blind off<br />
Whilst the blind is still in the brackets grip the fabric section of the blind push the blind <strong>to</strong><br />
the right side 3mm (normally <strong>to</strong> the right if in a standard blind)<br />
Then you will be able <strong>to</strong> rotate the blind either way<br />
Rotate this <strong>to</strong>wards you and it will increase the speed.<br />
Rotate it away from you and it will decrease the speed<br />
Release the locating pin at the front of the blind<br />
Operate the blind as normal<br />
Fig. 10<br />
Fig. 12<br />
Fig. 11
Type 3<br />
3. “Soft-raise” spring operation<br />
3a. Insert the cross-shaped opening of the<br />
spring, on the LH side of the blind in the<br />
bracket. If you have ordered your blind <strong>to</strong> be<br />
“reverse rolled” (cloth rolling <strong>to</strong> room side),<br />
the cross shaped opening should be<br />
mounted <strong>to</strong> the RH bracket. (The positioning<br />
of the cross on<strong>to</strong> the brackets is not<br />
important).<br />
3b. Bring the bearing end of the blind <strong>to</strong> the lip<br />
of the bracket. Align the slot on the bearing<br />
with edge of the bracket. Gently push the<br />
bearing in<strong>to</strong> the bracket until a ‘click’ is<br />
heard. This can be done either from the <strong>to</strong>p<br />
or under side.<br />
3b. Insert the plastic covers over the mounting<br />
brackets.<br />
3a<br />
3c<br />
4. ‘Non Softraise’ spring operation<br />
4a<br />
3b<br />
You will have been supplied with two<br />
brackets. A'pin' end bracket (4a) an a<br />
'spring' end bracket (4b).<br />
4b<br />
If your roller cloth is rolling upwards with the<br />
fabric nearest the window, the 'spring' end<br />
bracket should be mounted on the left. If<br />
your roller fabric is 'reverse rolled' the<br />
'spring' end bracket should be mounted on<br />
the right. Note: the 'pin' end bracket has<br />
three holes for the pin, depending on<br />
whether the bracket is <strong>to</strong>p or face fixed and<br />
fitted on the left or right. The 'pin' should<br />
always be fitted in<strong>to</strong> the lower hole.<br />
Mark the position of your brackets, allowing<br />
a little clearance between the roller and the<br />
brackets. Drill and plug as necessary and fix<br />
in<strong>to</strong> position. Locate the pin end in<strong>to</strong> it's<br />
bracket first. The spring end is located<br />
starting with the rectangular pin in a<br />
horizontal position. Slide the pin in<strong>to</strong> the<br />
'cross' hole from the rear if face fitting, the<br />
<strong>to</strong>p if <strong>to</strong>p fixing. The pin should be located<br />
so that it sits in the bot<strong>to</strong>m of the cross.<br />
Your blind is now ready <strong>to</strong> be operated. If<br />
there is a problem with the tension of your<br />
roller, see the '<strong>Spring</strong> Operation' section<br />
later in these instructions.<br />
INSTALLATION OPTIONS<br />
Installation with mounting clips<br />
5. Fix the mounting clips against the wall or<br />
ceiling (always drill holes first, before fixing<br />
screws). Take account of the maximum distances<br />
between the clips, as indicated in the drawing.<br />
5a. Mounting <strong>to</strong> ceiling (type 20 only)<br />
The clip should be fixed on the ceiling so<br />
that the screw is (almost) centred in the slot and<br />
the lip points <strong>to</strong>wards the rear.<br />
5b. Mounting <strong>to</strong> the wall (type 20/ 30/ 35)<br />
The clip should be fixed <strong>to</strong> the wall so that<br />
the screw is (almost) centred in the slot and the<br />
lip points downwards.<br />
5c. Mounting <strong>to</strong> ceiling (type 30/ 35)<br />
Mark off the position of the brackets on the<br />
ceiling, drill holes for the screws and fix the<br />
brackets in place.<br />
Make sure that the brackets are fully parallel<br />
<strong>to</strong> each other.<br />
Maintain the same maximum distances as<br />
for the mounting clips (see steps 4-5).


