3200050 - Dolomite Microfluidics
3200050 - Dolomite Microfluidics
3200050 - Dolomite Microfluidics

You also want an ePaper? Increase the reach of your titles
YUMPU automatically turns print PDFs into web optimized ePapers that Google loves.
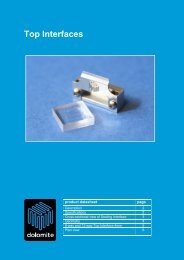
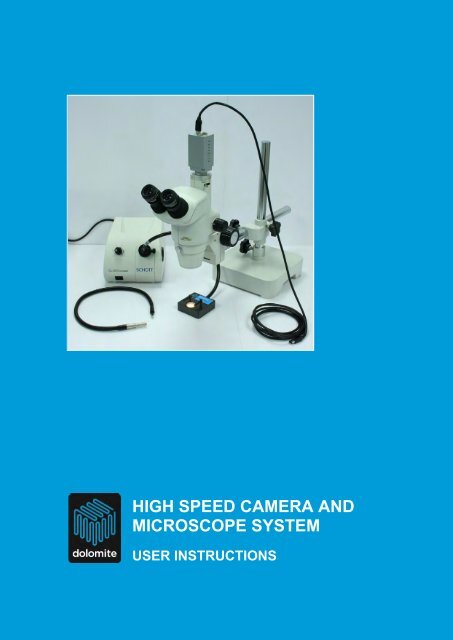
HIGH SPEED CAMERA AND<br />
MICROSCOPE SYSTEM<br />
USER INSTRUCTIONS
The <strong>Dolomite</strong> Centre Ltd.<br />
Contents<br />
1 System Components 3<br />
2 Microscope Set-up 4<br />
3 Microscope Stage Set-up 5<br />
4 Illuminator Set-up 6<br />
5 High Speed Camera Set-up 7<br />
6 Image Capture and Conversion Software 8<br />
6.1 PixeLINK Capture OEM 8<br />
6.2 VirtualDub (freeware) 8<br />
6.2.1 Importing a video file 8<br />
6.2.2 Changing the FPS 9<br />
6.2.3 Changing the brightness/contrast 10<br />
6.2.4 Saving the video file 10<br />
6.3 Quick Media Convertor (freeware) 10<br />
7 Application Examples 12<br />
<strong>3200050</strong> Mitos High Speed Camera and Microscope System - user instructions.doc Page 2 of 13
The <strong>Dolomite</strong> Centre Ltd.<br />
1. System Components<br />
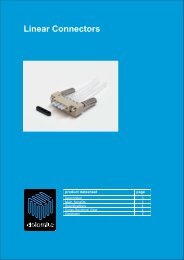
The High Speed Camera and Microscope System contains the following components:<br />
High speed 1.3 MP<br />
FireWire.A camera<br />
Microscope with 6.7x –<br />
50x magnification range<br />
150W halogen<br />
illuminator<br />
Gooseneck<br />
light guide<br />
Microscope stage for<br />
microfluidic chips<br />
6-pin<br />
FireWire<br />
cable<br />
<strong>3200050</strong> Mitos High Speed Camera and Microscope System - user instructions.doc Page 3 of 13
The <strong>Dolomite</strong> Centre Ltd.<br />
2. Microscope Set-up<br />
10x eyepiece<br />
C-mount for<br />
camera<br />
attachment<br />
Optical path<br />
switching lever<br />
Microscope<br />
stand with<br />
adjustment<br />
in x, y & z<br />
Zoom 0.67x to 5x<br />
115 mm<br />
working<br />
distance<br />
Focus<br />
Optical path switching<br />
lever position for microscope<br />
viewing<br />
Notes on microscope use:<br />
<br />
<br />
<br />
<br />
Ensure optical path switching lever is in the position<br />
shown in the image on the left.<br />
Adjust stand to approximately the right height before<br />
focussing.<br />
Eyepieces can be adjusted sideways to fit the user.<br />
Do not use the microscope with the illuminator at full<br />
brightness.<br />
<strong>3200050</strong> Mitos High Speed Camera and Microscope System - user instructions.doc Page 4 of 13
The <strong>Dolomite</strong> Centre Ltd.<br />
3. Microscope Stage Set-up<br />
Flexible fibre<br />
optic light guide<br />
Light guide<br />
adjustment<br />
screw<br />
Stage clips<br />
Positions for stage clips<br />
Notes on microscope stage use:<br />
<br />
<br />
<br />
<br />
Stage clips can be inserted into 2 different positions to accommodate samples with<br />
different footprints.<br />
Stage clips can be adjusted to 4 different height positions to accommodate<br />
samples with different heights.<br />
The flexible fibre optic light guide is supplied fixed in place to give the highest<br />
brightness. If required, the brightness can be decreased and size of bright spot<br />
increased by releasing the adjustment screw and adjusting the light guide position.<br />
Place the chip onto the stage with the area of interest central over the light source.<br />
Stage clip height adjustment<br />
Chip placed on microscope stage<br />
<strong>3200050</strong> Mitos High Speed Camera and Microscope System - user instructions.doc Page 5 of 13
The <strong>Dolomite</strong> Centre Ltd.<br />
4. Illuminator Set-up<br />
Light guide<br />
insertion port<br />
Control for<br />
continuous<br />
dimming from<br />
0 – 100 %<br />
On / off switch<br />
Filter slide<br />
Gooseneck<br />
(semi rigid)<br />
light guide<br />
Diagram showing the main features of the illuminator<br />
Notes on illuminator use:<br />
<br />
<br />
The dimming control will generally be in position 1 – 2 for use with the microscope.<br />
When the high speed camera is in operation then maximum brightness may be<br />
required.<br />
When illumination from above or the side is required, then the gooseneck light<br />
guide can be used in place of the microscope stage and flexible light guide.<br />
<strong>3200050</strong> Mitos High Speed Camera and Microscope System - user instructions.doc Page 6 of 13
The <strong>Dolomite</strong> Centre Ltd.<br />
5. High Speed Camera Set-up<br />
Optical path switching lever<br />
position for camera use<br />
Notes on High Speed Camera use:<br />
<br />
<br />
<br />
<br />
Download “PixeLINK Capture OEM” software from www.pixelink.com<br />
Screw camera into C-mount on microscope. Camera can be rotated to obtain the<br />
correct image orientation.<br />
Check that optical path switching lever is in the correct position as shown above.<br />
Connect 6-pin Firewire.A cable from “status” port on the camera to a PC and use<br />
software for image capture.<br />
<strong>3200050</strong> Mitos High Speed Camera and Microscope System - user instructions.doc Page 7 of 13
The <strong>Dolomite</strong> Centre Ltd.<br />
6. Image Capture and Conversion Software<br />
6.1 PixeLINK Capture OEM<br />
The PixeLINK Capture OEM software is used to capture high speed videos and still<br />
images. Full documentation is available at www.pixelink.com, but the following notes on<br />
use may be helpful.<br />
<br />
<br />
<br />
<br />
<br />
<br />
<br />
Turn on advanced mode: View / Advanced mode. This gives you access to the<br />
region of interest tab (ROI). As you reduce the size of the ROI the number of<br />
frames per second (fps) available to you increases. For example, at 1280x1024<br />
only ~17fps are available, at 320x240 this increases to ~319fps and at 160x96 this<br />
increases further to ~1000fps.<br />
A histogram of the image is available: View / Histogram.<br />
Increasing Gamma and Gain can improve brightness, but decrease image quality.<br />
Gamma defaults to 1.<br />
Exposure time. Increasing the exposure time increases the brightness but<br />
decreases the frames per second available.<br />
Frames per Second. At high frames per second the image will get very dark, as<br />
the exposure tends towards 0.04ms. In this case, the illuminator should be at full<br />
power. Warning: DO NOT LOOK DIRECTLY AT THE FIBRE OPTIC. By reducing<br />
the ROI to, for example 160x96, footage at >1000fps can be achieved.<br />
Image Capture. This section, under the basic controls tab, allows the user to<br />
choose the type of file (still image or video) they want to capture and for videos,<br />
the number of frames. Videos must be captured as AVI files. These files are large,<br />
so long periods of video should not be captured.<br />
File names. Check the Increment File Name After Capture and the files will<br />
save in the form Image1, Image2 etc, OR change the name of the file after each<br />
video is captured. Otherwise, previous files will be overwritten.<br />
6.2 VirtualDub (freeware)<br />
After capturing high speed video, it may be necessary to slow the footage down and<br />
perform other editing operations such as brightness adjustment. This can be achieved<br />
with VirtualDub, free software available for download from the internet.<br />
6.2.1 Importing a video file<br />
Open the folder that contains the video file. Drag and drop the video for editing into the<br />
VDub window.<br />
<strong>3200050</strong> Mitos High Speed Camera and Microscope System - user instructions.doc Page 8 of 13
The <strong>Dolomite</strong> Centre Ltd.<br />
Drag & Drop<br />
VDub displays two windows: the input window on top and the output window below.<br />
These can be turned on and off in the View tab.<br />
6.2.2 Changing the FPS<br />
Video / Frame Rate… (or Ctrl + R)<br />
Source rate adjustment / Change frame rate to (fps): ENTER DESIRED FPS<br />
<br />
To play back the footage at this new fps click play output button (below). The<br />
input can also be played for comparison.<br />
Rewind<br />
Play Input Play Output<br />
Previous/Next Frame<br />
<strong>3200050</strong> Mitos High Speed Camera and Microscope System - user instructions.doc Page 9 of 13
The <strong>Dolomite</strong> Centre Ltd.<br />
6.2.3 Changing the brightness / contrast<br />
Video / Filters… (or Ctrl + F)<br />
<br />
<br />
<br />
<br />
<br />
Add<br />
Brightness/contrast / OK<br />
Click to show preview and adjust as desired<br />
Click OK and OK<br />
On returning to the filters window, double click on the filter to edit it, or click<br />
„Delete‟ to remove it. Further filters can be added using the above process.<br />
6.2.4 Saving the video file<br />
File / Save as AVI… (or press F7)<br />
6.3 Quick Media Convertor (freeware)<br />
To decrease the file size of large video files, conversion to a different format is required.<br />
Quick Media Convertor is free software available for download from the internet that can<br />
be used for this function.<br />
2<br />
4<br />
1<br />
3<br />
5<br />
<strong>3200050</strong> Mitos High Speed Camera and Microscope System - user instructions.doc Page 10 of 13
The <strong>Dolomite</strong> Centre Ltd.<br />
1. Drag and drop the file to be converted.<br />
2. Select a file type.<br />
3. Custom size. Right click on the video file and select „Technical info on the media<br />
file‟ to display the current width and height, which can be entered in the relevant<br />
boxes. Ignore the ‘Capture a picture at:’ box.<br />
4. Select a target directory. This is where the file will be saved.<br />
5. Start Conversion. Progress towards completion will be displayed.<br />
It is recommended that the original .avi file is kept for future conversions.<br />
<strong>3200050</strong> Mitos High Speed Camera and Microscope System - user instructions.doc Page 11 of 13
The <strong>Dolomite</strong> Centre Ltd.<br />
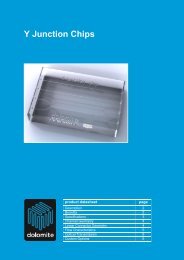
7. Application Examples<br />
High Speed Camera and Microscope System in use with the Advanced Droplet System<br />
High Speed Camera and Microscope System in use with the Droplet Emulsion System<br />
<strong>3200050</strong> Mitos High Speed Camera and Microscope System - user instructions.doc Page 12 of 13
The <strong>Dolomite</strong> Centre Ltd.<br />
<strong>3200050</strong> Mitos High Speed Camera and Microscope System - user instructions.doc Page 13 of 13