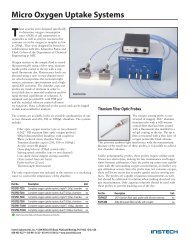
110 / 210 Fiber Optic Oxygen Monitor - Instech Laboratories, Inc.
110 / 210 Fiber Optic Oxygen Monitor - Instech Laboratories, Inc.
110 / 210 Fiber Optic Oxygen Monitor - Instech Laboratories, Inc.

Create successful ePaper yourself
Turn your PDF publications into a flip-book with our unique Google optimized e-Paper software.
Load the software using the Password provided.<br />
Software<br />
Installation<br />
The following files are included on the CD<br />
provided:<br />
<strong>110</strong>-<strong>210</strong> Manual v6.pdf Operating manual<br />
Websetup.exe<br />
Sets up and installs software<br />
Intake Demo<br />
Used as oxygen partial pressure<br />
or content calculator-old DOS<br />
program but front end is useful<br />
SAD500 Serial Port Interface Version<br />
You have this version if the unit shipped with a round<br />
DIN to DB9 RS-232 cable.<br />
The SAD500 Serial Port Interface is a<br />
microprocessor-controlled A/D converter for serial<br />
port connection or stand-alone operation. The<br />
SAD500 can be used to interface to desktop or<br />
portable PCs, PLCs and other devices that support the<br />
RS-232 communication protocol. The following are<br />
directions for setting up your SAD500. Because A/D<br />
converter installation goes hand-in-hand with<br />
software installation, you will find directions for<br />
installing OOISensors Software in this section as<br />
well.<br />
Interface the SAD500 to your PC<br />
Interfacing the SAD500 to a desktop or portable PC<br />
is simple.<br />
1. If your <strong>110</strong> or <strong>210</strong> came equipped with a<br />
SAD500 mounted onto your spectrometer,<br />
simply connect the 6-pin DIN end of the serial<br />
cable to the SAD500 and the DB9 end to your<br />
PC.<br />
2. For either configuration, note the serial port<br />
number (also called COM Port) on the PC to<br />
which you are interfacing. (Older PCs may not<br />
have numbered ports.)<br />
3. Plug the +12VDC wall transformer into an outlet<br />
and connect it to the power jack on the rear of<br />
the monitor unit.<br />
ADC1000-USB Interface Version<br />
Overview<br />
Do not attach USB cable until software has been<br />
loaded.<br />
Attach USB cable to computer and monitor.<br />
Windows should recognize USB connection.<br />
Only now should you run the software.<br />
This is the newer of the two versions and will ship<br />
with units after Jan. 1, 2002. This version requires a<br />
USB port on your computer and is shipped with the<br />
appropriate USB cable.<br />
1. Plug 12VDC power supply to rear of monitor<br />
unit. You may leave this turned off at this time.<br />
2. Plug the flat end of the USB cable into the<br />
computer and leave the monitor end of the cable<br />
unconnected for now.<br />
Install OOISensors<br />
Before installing OOISensors, make sure that no<br />
other applications are running. Also, make sure you<br />
have the OOISensors password, which can be found<br />
on the CD cover. During installation, you will have to<br />
enter this password.<br />
1. Execute Websetup.exe . At the "Welcome"<br />
dialog box, click Next><br />
2. At the "Destination Location" dialog box, accept<br />
the default or choose Browse to pick a directory.<br />
Click Next><br />
3. At the "Backup Replaced Files" dialog box,<br />
select either Yes or No. We recommend<br />
choosing Yes. If you select Yes, you can choose<br />
Browse to pick a destination directory. Click<br />
Next>.<br />
4. Select a Program Manager Group. Click Next>.<br />
At the "Start Installation" dialog box, click<br />
Next>.<br />
5. At the "Installation Complete" dialog box,<br />
choose Finish>. Restart your computer after<br />
installation is complete.<br />
6. You may wish to create a shortcut and drag it to<br />
the desktop.<br />
Configuring for SAD500<br />
After restarting your computer, turn the monitor unit<br />
on and then start OOISensors.<br />
The first time you run OOISensors after installation,<br />
you will need to initialize some parameters.<br />
12