
Create successful ePaper yourself
Turn your PDF publications into a flip-book with our unique Google optimized e-Paper software.
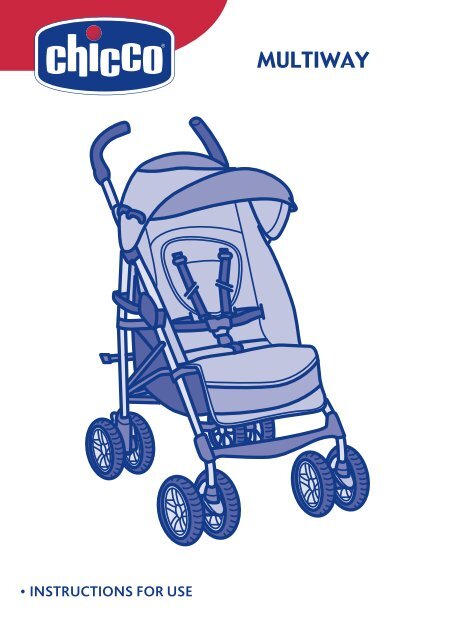
<strong>MULTIWAY</strong><br />
<br />
<br />
• INSTRUCTIONS FOR USE
IMPORTANT: KEEP FOR FUTURE REFERENCE - READ CAREFULLY<br />
1<br />
2<br />
3A<br />
1A<br />
3B<br />
4<br />
5<br />
6A 6B 7<br />
8 9<br />
10A<br />
2
10B<br />
11 12A<br />
12B 13A 13B<br />
14A 14B 15<br />
16<br />
17 18<br />
3
19<br />
20<br />
21<br />
22<br />
23<br />
24<br />
4
GB<br />
<strong>MULTIWAY</strong><br />
IMPORTANT WARNING<br />
IMPORTANT: READ THESE INSTRUCTIONS CAREFULLY BEFORE<br />
USE AND KEEP THEM FOR FUTURE REFERENCE. YOUR CHILD’S<br />
SAFETY MAY BE AFFECTED IF YOU DO NOT FOLLOW THESE<br />
INSTRUCTIONS.<br />
WARNING: BEFORE USE, REMOVE AND DISPOSE OF ALL PLASTIC<br />
BAGS AND PACKAGING MATERIALS AND KEEP THEM OUT OF<br />
REACH OF CHILDREN.<br />
WARNINGS<br />
• WARNING: It may be dangerous to leave your child unattended.<br />
• WARNING: A CHILD’S SAFETY IS YOUR RESPONSIBILITY.<br />
• WARNING: Children should be harnessed in at all times and<br />
should never be left unattended.<br />
• WARNING: The child should be clear of moving parts while<br />
making adjustments.<br />
• This vehicle requires regular maintenance by the user.<br />
• Overloading, incorrect folding and the use of non-approved accessories<br />
may damage or break this vehicle.<br />
• WARNING: before assembly, check that the product and all of<br />
its components have not been damaged during transportation.<br />
Should any part be damaged do not use, and keep out of reach<br />
of children.<br />
• WARNING: This vehicle is intended for use for children aged<br />
between 0 and 36 months of age and up to weighing up to 15<br />
kg.<br />
• It is recommended that the backrest should be used in its most<br />
reclined position for children from birth to 6 months of age.<br />
• WARNING: Ensure that all the locking devices are engaged before<br />
use. In particular, ensure that the stroller is locked in the<br />
open position, by checking that the rear locking device is effectively<br />
locked.<br />
• Do not overload the storage basket. Maximum weight 3 kg.<br />
• Do not carry more than one child at a time.<br />
• Do not use accessories, spare parts, or any component not supplied<br />
or approved by the manufacturer, as they may make the<br />
stroller unsafe.<br />
• WARNING: Any load attached to the handle affects the stability<br />
of the pushchair<br />
• WARNING: the use of the crotch strap and safety harness is<br />
necessary to guarantee the safety of your child. Always use the<br />
crotch strap in combination with the waist belt.<br />
• Ensure that the person using the stroller knows how to use it<br />
safely.<br />
• WARNING: when opening or closing the stroller, ensure that<br />
your child is at a safe distance. Do not attempt to open or close<br />
the stroller with a child on board. Ensure that during these<br />
operations, the movable parts of the stroller do not come into<br />
contact with your child.<br />
• Always apply the brakes whenever the stroller is stationary.<br />
• WARNING: never leave the stroller on a sloped surface with a<br />
child on board, even with the brakes applied.<br />
• Do not let other children play unattended close to the stroller or<br />
climb on it.<br />
• To prevent the risk of choking, do not give to your child, or place<br />
near it, any objects with strings.<br />
WARNING: Do not use the stroller on stairs or elevators: it<br />
could cause the loss of control of the stroller. Pay special attention<br />
when manoeuvring the stroller up or down pavements or a<br />
step.<br />
• If the stroller is left exposed to direct sunlight for a long time, allow<br />
it to cool before placing your child in it. Prolonged exposure<br />
to direct sunlight may cause the materials and fabric to fade.<br />
• Do not use the product if some of its parts are broken, torn or<br />
missing.<br />
• WARNING: When it is not used, the stroller must be kept away<br />
from the reach of children.<br />
5<br />
• WARNING: This product is not suitable for running or skating.<br />
• Prevent the stroller from coming into contact with salt water. It<br />
may cause the formation of rust.<br />
• Do not use the stroller on the beach.<br />
• WARNING: This product must only be pushed by an adult.<br />
CLEANING AND MAINTENANCE<br />
The cleaning and maintenance of this product must be carried out on a<br />
regular basis by the user. The cleaning and maintenance of the stroller<br />
must only be carried out by an adult.<br />
Cleaning<br />
The cover is not removable. Clean the fabric parts with a damp sponge<br />
and neutral detergent. Please refer to the care label. Periodically wipe<br />
clean plastic parts with a soft damp cloth. Always dry the metal parts<br />
to prevent the formation of rust if the stroller has come into contact<br />
with water.<br />
Wash by hand in cold water<br />
Do not bleach.<br />
Do not tumble dry<br />
Do not iron.<br />
Do not dry clean.<br />
Maintenance<br />
Lubricate the moving parts only if necessary, with a light application of<br />
a silicone based lubricant. Regularly check the condition of the wheels<br />
and, keep them clean of dust and sand. To avoid friction that may<br />
prevent the correct operation of the stroller, ensure that all the movable<br />
plastic parts placed along the metal frame are clean of dust, dirt or sand.<br />
Keep the stroller in a dry place.<br />
GENERAL INSTRUCTIONS<br />
HOW TO ASSEMBLE THE WHEELS<br />
1.Fit the front wheel unit to the stroller and lock it into position (diag.<br />
1). Repeat this operation for the other wheel unit. Subsequently<br />
insert the rear wheels as indicated in diagram 1A, pushing down<br />
until they are locked into place.<br />
WARNING: Before use, ensure that the wheel units are safely<br />
locked into position.<br />
HOW TO OPEN THE STROLLER<br />
WARNING: When opening the stroller, ensure that your child,<br />
or other children, are at a safe distance. Ensure that during these<br />
operations, the movable parts of the stroller do not come into<br />
contact with your child.<br />
2. Hold the stroller by the handles in a vertical position, with the<br />
wheels facing forward (diag. 2).<br />
3. Release the closing device (diag. 3 a) and push the front part of<br />
the stroller forward (diag. 3 b).<br />
4. Push the rear primary locking mechanism downward with your<br />
foot (diag. 4).<br />
WARNING: Before use, ensure that the stroller is locked in the<br />
open position, by checking that the locking mechanism, at the rear<br />
of the stroller, is effectively locked.<br />
HOW TO USE THE SAFETY HARNESS<br />
This stroller has a 5-point safety harness featuring two shoulder straps,<br />
two adjustment holes, a waist strap and a crotch strap with buckle.<br />
WARNING: When using the safety harness with children from birth<br />
up to approximately 6 months of age, it is necessary to first fit the<br />
shoulder straps through the two adjustment holes.<br />
5. After sitting your child in the stroller, fasten the safety harness<br />
(diag. 5), first inserting the two prongs (A) into the hole located<br />
on the shoulder straps (B) and then into the buckle (C); Adjust
the height of the shoulder straps, ensuring that they adhere to<br />
the child’s shoulders correctly. Always ensure that the harness is<br />
fastened correctly.<br />
To unfasten the waist strap, press and pull the side prongs.<br />
WARNING: Children should be harnessed in at all times. To ensure<br />
your child’s safety, it is necessary to always use the safety harness.<br />
For extra safety, “D” rings are provided for the attachment of a<br />
separate safety harness approved to BS6684 (diag. 5-D). The “D”<br />
rings are located on the left and right waist straps of the 5-point<br />
safety harness.<br />
HOW TO ADJUST THE BACKREST<br />
The backrest can be adjusted to 5 positions.<br />
6. To adjust the inclination of the backrest to the desired position,<br />
press the button located on the backrest; Release the button to<br />
lock the backrest in the nearest position. To raise the backrest<br />
simply push it in an upward direction. (6a, 6b).<br />
WARNING: The child’s weight can make these operations difficult.<br />
HOW TO ADJUST THE LEG REST<br />
The stroller’s leg rest can be adjusted to offer extra comfort to your child.<br />
7. Press simultaneously the two catches located under the seat, as<br />
shown in diagram 7, to adjust the leg rest to the desired position.<br />
REAR BRAKES<br />
The rear wheels have linked brakes, which can be applied<br />
simultaneously to the two rear wheels by using only one pedal.<br />
8. To apply the brakes, push one of the two levers located at the<br />
centre of the rear wheels in a downward direction, as shown in<br />
diagram 8.<br />
9. To unlock the braking system, push one of the two levers located<br />
at the centre of the rear wheels in an upward direction, as shown<br />
in diagram 9.<br />
WARNING: Always apply the brakes whenever the stroller is<br />
stationary. Never leave the stroller on a sloped surface, with a child<br />
onboard, even with the brakes applied.<br />
WARNING: After operating the brake lever, ensure that the brakes<br />
have been correctly applied to both of the rear wheel units.<br />
SWIVEL WHEELS<br />
The stroller has front swivel wheels.<br />
10. To unlock the swivel wheels, raise the lever located between the<br />
two wheels (diag. 10a). Use the swivel wheels on smooth surfaces.<br />
To lock the wheels, push the lever in a downward direction (diag.<br />
10b).<br />
WARNING: the swivel wheels make the stroller easier to<br />
manoeuvre; it is recommended to use locked wheels to guarantee<br />
the safe use of the stroller (on gravel, unpaved roads, etc.).<br />
WARNING: Both wheels must always be locked or unlocked at the<br />
same time.<br />
STORAGE BASKET<br />
The stroller is equipped with a storage basket.<br />
11. Fit the storage basket by fastening the straps around the<br />
stroller’s frame, in the positions shown in diagram 11.<br />
WARNING: Do not load the storage basket with weights over 3<br />
Kg.<br />
SUMMER/WINTER HOOD<br />
The stroller can be fitted with summer / winter hood.<br />
12. To fit the hood, fasten the plastic clip in the positions located<br />
at the fixing pivots (diag. 12a), then fasten the rear Velcro straps as<br />
shown in diagram 12b.<br />
WARNING: the hood must be fixed on both sides of the stroller.<br />
Ensure that the hood is correctly secured into position.<br />
13. Open the hood as shown in diagram 13a, and lock it by pressing<br />
the two side calliper shaped mechanisms (diag. 13b).<br />
14. To close the hood, raise the two side calliper shaped mechanisms<br />
(diag. 14a) and pull the front part of the hood towards you, as<br />
shown in diagram 14b.<br />
6<br />
15. The hood can become a summer sun-canopy. The rear panel<br />
may be removed by unfastening the zip and Velcro straps on the<br />
sides, as shown in diagram 15.<br />
HOW TO CLOSE THE STROLLER<br />
WARNING: When closing the stroller, ensure that your child, or<br />
other children, are kept at a safe distance. Ensure that during these<br />
operations the moveable parts of the stroller do not come into<br />
contact with your child. Before closing the stroller, ensure that the<br />
storage basket is empty and that the hood is closed.<br />
16. To close the stroller, first fold the hood following the instructions<br />
shown in point 14. Then raise the rear primary locking mechanism<br />
with your hand, using the handle located at the centre of the<br />
locking mechanism (diag. 16).<br />
17. Release the secondary lock, by pressing the pedal placed of the<br />
right side of the stroller’s frame with your foot (diag. 17).<br />
18. To close the stroller completely, push the handles forward (diag.<br />
18).<br />
19. The stroller has an automatic locking system. Close the stroller<br />
ensuring that the closing device located on the side of the stroller<br />
is locked correctly. This operation prevents the accidental opening<br />
of the stroller (diag. 19).<br />
ACCESSORIES<br />
WARNING: The accessories described below may not be available<br />
for some versions of this product. Please read carefully the<br />
instructions on the accessories available for the model purchased.<br />
Insert pillow<br />
20. To use the insert pillow, fasten the upper Velcro strap at the rear<br />
of the backrest, then insert the safety harness of the stroller into<br />
the holes located at the rear of the pillow (diag. 20).<br />
Rain cover<br />
WARNING: Take maximum care when using the rain cover.<br />
21. To fit the rain cover, fasten the straps around the stroller’s<br />
frame, in the positions shown in diagram 21. After use, leave the<br />
rain cover to air dry if it is wet.<br />
WARNING: Do not use the rain cover if the stroller is not fitted<br />
with the hood or sun canopy to prevent the risk of suffocation.<br />
WARNING: To prevent the risk of overheating or suffocation, never<br />
leave the stroller under the sun with the rain cover fitted to it.<br />
Fleece footmuff<br />
Some versions have a fleece footmuff, which is ideal in cold<br />
weather.<br />
22. Place the fleece footmuff into the seat of the stroller, inserting<br />
the safety harness into the holes, as shown in diagram 22.<br />
23. Attach the upper part of the fleece footmuff with the specific<br />
device, as shown in diagram 23.<br />
WARNING: Always use the fleece footmuff with the safety harness<br />
inserted through the appropriate holes.<br />
24. The fleece footmuff can be used as a legcover. Remove the<br />
rear part using the practical zip, and fix the legcover to the frame<br />
fastening the press studs (diag. 24)<br />
WARNING: The pictures and instructions contained in the booklet<br />
refer to the complete stroller model. Some of the components<br />
and functions described here may not be available for the model<br />
purchased.<br />
FOR FURTHER INFORMATION, PLEASE CONTACT:<br />
<strong>Chicco</strong> UK Ltd<br />
Prospect Close<br />
Lowmoor Road Business Park<br />
Kirkby in Ashfield<br />
Nottinghamshire NG17 7LF<br />
Customer Services Helpline Tel: 01623 750870<br />
(office hours only)<br />
www.chicco.com
46 060945 000 930 78476.L.2<br />
0-36 <br />
BS 7409 : 1996<br />
EN 1888 : 2003<br />
ARTSANA S.p.A. - Via Saldarini Catelli, 1 - 22070 Grandate (CO) - Italy<br />
Tel. (+39) 031 382 111 - Fax (+39) 031 382 400 - www.chicco.com