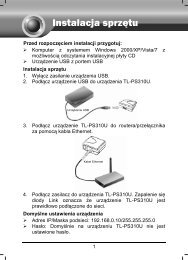
TL-WR542G 54M Wireless Router - TP-Link
TL-WR542G 54M Wireless Router - TP-Link
TL-WR542G 54M Wireless Router - TP-Link

Create successful ePaper yourself
Turn your PDF publications into a flip-book with our unique Google optimized e-Paper software.
Chapter 2. Connecting the <strong>Router</strong><br />
2.1 System Requirements<br />
‣ Broadband Internet Access Service (DSL/Cable/Ethernet)<br />
‣ One DSL/Cable modem that has an RJ45 connector (you do not need it if you connect the<br />
router to the Ethernet)<br />
‣ Each PC in the LAN needs a working Ethernet Adapter and an Ethernet cable with RJ45<br />
connectors<br />
‣ TCP/IP protocol must be installed on each PC<br />
‣ Web browser, such as Microsoft Internet Explorer 5.0 or later, Netscape Navigator 6.0 or later<br />
2.2 Installation Environment Requirements<br />
‣ Do not place in direct sunlight or near a heater or heating vent<br />
‣ Do not cluttered or crowded. There should be at least 2 inches (5 cm) of clear space on all<br />
sides of the router<br />
‣ Well ventilated (especially if it is in a closet)<br />
‣ Operating temperature: 0 ℃ ~40 ℃ (32 ℉ ~104 ℉ )<br />
‣ Operating Humidity: 10%~90%RH, Non-condensing<br />
2.3 Connecting the <strong>Router</strong><br />
Before you install the router, you should connect your PC to the Internet through your broadband<br />
service successfully. If there is any problem, please contact your ISP. After that, please install the<br />
router according to the following steps. Don't forget to pull out the power plug and keep your<br />
hands dry.<br />
1. Power off your PC, Cable/DSL Modem, and the router.<br />
2. Locate an optimum location for the router. The best place is usually near the center of the<br />
area in which your PC will connect wirelessly. The place must accord with the Installation<br />
Environment Requirements.<br />
3. Adjust the direction of the antenna. Normally, upright is a good direction.<br />
4. Connect the PC(s) and each Switch/Hub in your LAN to the LAN Ports on the router, shown<br />
in Figure 2-1. (If you have the wireless NIC and want to use wireless function, you can skip<br />
this step.)<br />
6