RTDVD1-EN receiver - Radio Shack
RTDVD1-EN receiver - Radio Shack
RTDVD1-EN receiver - Radio Shack

Create successful ePaper yourself
Turn your PDF publications into a flip-book with our unique Google optimized e-Paper software.
SURROUND<br />
PRESET +<br />
PHONES<br />
mp3<br />
D IGITAL<br />
BAND/APP<br />
BASS/TREBLE<br />
RPT/PGM TEST<br />
TUNE - TUNE +<br />
It is important to read this instruction book prior to using your new product for the first time.<br />
Es importante leer este manual antes de usar por vez primera su euipo.<br />
VOLUME<br />
u s e r m a n u a l<br />
<strong>RTDVD1</strong>
IMPORTADOR<br />
Comercializadora Thomson de Mexico, S.A. de C.V.<br />
Miguel de Cervantes Saavedra No. 57<br />
Col. Granada<br />
Mexico D.F. C.P. 11520<br />
Telefono: 52 54 53 73<br />
R.F.C.: CTM-980723-KS5<br />
POWER<br />
Thomson multimedia Inc.<br />
10330 N.Meridian St.<br />
Indianapolis, IN 46290<br />
© 2001 Thomson multimedia Inc.<br />
Trademark(s) © Registered<br />
Marca(s) © Registrada(s)<br />
Marque(s) © Deposée<br />
55179020 (<strong>EN</strong>/F/E)<br />
www.rca.com<br />
SOURCE<br />
PRESET -
MusicMatch TM Software<br />
RCA is among the first Consumer Electronics companies to have adopted the MP3 format, starting with<br />
the release of its MP3 player, Lyra, into the market. (www.rca.com and www.lyrazone.com). RCA is<br />
proud of its initial success and has developed the competencies to enlarge its offering to other products<br />
like Discman and this System. RCA thanks you for your purchase of this System which aims at giving you<br />
tremendous pleasure while listening to your favorite music. In addition to this great System, RCA is<br />
proud to offer you the Music Match CD-ROM, which will assist you in managing your MP3 music library!<br />
The MusicMatch Jukebox<br />
This music management software, to be installed on your PC, allows you to compress music files recorded from you audio CDs into MP3<br />
format and stores them on your PC.<br />
• It makes the search and download of Internet music easier,<br />
• It allows for the management of compressed music and the creation of your own playlist,<br />
• The Jukebox is a true audio player installed on your PC,<br />
• It gives access to thousands of net radios available on the web today.<br />
You can download music files encoded in MP3 from several Internet sites like www.mp3.com, www.thomson-music.com.<br />
PLAYING MP3<br />
• Use .mp3 as the extension when converting audio files into MP3 for saving onto CD-R(W) or CD-ROM, e.g. Rocky08.mp3. Do not use<br />
any other extension e.g. .doc, .pdf.<br />
• Do not use the .mp3 extension for other text or non-audio data files as this may result in serious malfunction and harmful noise interference.<br />
<strong>EN</strong>
FCC Information<br />
This device complies with Part 15 of the FCC Rules.<br />
Operation is subject to the following two<br />
conditions: (1) This device may not cause harmful<br />
interference, and (2) this device must accept any<br />
interference received, including interference that<br />
may cause undesired operation.<br />
This equipment has been tested and found to<br />
comply with the limits for a Class B digital device,<br />
pursuant to Part 15 of the FCC Rules. These limits<br />
are designed to provide reasonable protection<br />
against harmful interference in a residential<br />
installation. This equipment generates, uses and<br />
radiates radio frequency energy and, if not installed<br />
and used in accordance with the instruction, may<br />
cause harmful interference to radio communications.<br />
However, there is no guarantee that interference<br />
will not occur in a particular installation.<br />
In accordance with FCC requirements, changes or<br />
modifications not expressly approved by Thomson<br />
multimedia Inc. could void the user’s authority to<br />
operate this product.<br />
This device generates and uses radio frequency (RF)<br />
energy, and if not installed and used properly, this<br />
equipment may cause interference to radio and<br />
television reception.<br />
If this equipment does cause interference to radio<br />
or television reception (which you can determine by<br />
unplugging the unit), try to correct the interference<br />
by one or more of the following measures:<br />
• Re-orient the receiving antenna (that is, the<br />
antenna for the radio or television that is<br />
"receiving" the interference).<br />
• Move the unit away from the equipment that is<br />
receiving interference.<br />
• Plug the unit into a different wall outlet so that<br />
the unit and the equipment receiving interference<br />
are on different branch circuits.<br />
If these measures do not eliminate the interference,<br />
please consult your dealer or an experienced<br />
radio/television technician for additional<br />
suggestions.<br />
Also, the Federal Communications Commission has<br />
prepared a helpful booklet, "How To Identify and<br />
Resolve <strong>Radio</strong> TV Interference Problems." This<br />
booklet is available from the U.S. Government<br />
Printing Office, Washington, DC 20402. Please specify<br />
stock number 004-000-00345-4 when ordering<br />
copies.<br />
This product complies with DHHS Rules 21 CFR<br />
Subchapter J. Applicable at the date of<br />
manufacture.<br />
WARNING: TO PREV<strong>EN</strong>T FIRE<br />
OR ELECTRICAL SHOCK HAZARD,<br />
DO NOT EXPOSE THIS PRODUCT<br />
TO RAIN OR MOISTURE.<br />
For Your Safety<br />
The AC power plug is polarized<br />
(one blade is wider than the<br />
other) and only fits into AC<br />
power outlets one way. If the<br />
plug won’t go into the outlet<br />
completely, turn the plug over<br />
and try to insert it the other<br />
way. If it still won’t fit, contact<br />
a qualified electrician to<br />
change the outlet, or use a different one. Do not<br />
attempt to bypass this safety feature.<br />
CAUTION: TO PREV<strong>EN</strong>T ELECTRIC SHOCK,<br />
MATCH WIDE BLADE OF PLUG TO WIDE SLOT,<br />
FULLY INSERT.<br />
For Your Records<br />
In the event that service should be required, you<br />
may need both the model number and the serial<br />
number. In the space below, record the date and<br />
place of purchase, and the serial number:<br />
Model No.<br />
Remote Control No. CRK76AF1<br />
Date of Purchase<br />
Place of Purchase<br />
Serial No.<br />
Service Information<br />
This product should be serviced only by those specially<br />
trained in appropriate servicing techniques.<br />
For instructions on how to obtain service, refer to<br />
the warranty included in this Guide.<br />
THE LIGHTNING<br />
FLASH AND ARROW-<br />
HEAD WITHIN THE<br />
TRIANGLE IS A<br />
W ARNING SIGN<br />
ALERTING YOU OF<br />
"DANGEROUS<br />
VOLTAGE" INSIDE<br />
THE PRODUCT.<br />
CAUTION<br />
RISK OF ELECTRIC SHOCK<br />
DO NOT OP<strong>EN</strong><br />
CAUTION: TO REDUCE THE<br />
RISK OF ELECTRIC SHOCK,<br />
DO NOT REMOVE COVER<br />
(OR BACK). NO USER-<br />
SERVICEABLE PARTS IN-<br />
SIDE. REFER SERVICING<br />
TO QUALIFIED SERVICE<br />
PERSONNEL.<br />
SEE MARKING ON BOTTOM / BACK OF PRODUCT<br />
THE EXCLAMATION<br />
POINT WITHIN THE<br />
TRIANGLE IS A<br />
WARNING SIGN<br />
ALERTING YOU OF<br />
I M P O R T A N T<br />
INSTRUCTIONS<br />
ACCOMPANYING<br />
THE PRODUCT.
Table of Content<br />
FCC Information<br />
Getting Started<br />
Unpacking the DVD Receiver . . . . . . . . .2<br />
Unpacking the Speakers . . . . . . . . . . . . .2<br />
Inserting Batteries into Remote Control .3<br />
Set Up and Maintenance of the<br />
Receiver . . . . . . . . . . . . . . . . . . . . . . . . . .3<br />
Protect your Components from<br />
Overheating . . . . . . . . . . . . . . . . . . . . . . .3<br />
Connecting to Audio-Visual<br />
Components . . . . . . . . . . . . . . . . . . . . . .4<br />
Digital Connection . . . . . . . . . . . . . . . . .5<br />
Connecting Antennas . . . . . . . . . . . . . . .5<br />
Connecting the Speakers . . . . . . . . . . . . .6<br />
Connecting the Subwoofer . . . . . . . . . . .6<br />
Positioning your Speaker . . . . . . . . . . . . .7<br />
Front Speaker Placement . . . . . . . . . . . . .7<br />
Preferred Surround Placement . . . . . . . .8<br />
Advanced Surround Setting . . . . . . . . . .8<br />
Test Tone / Channel Balance . . . . . . . . . .9<br />
Connecting for Power . . . . . . . . . . . . . . .9<br />
Using Headphones . . . . . . . . . . . . . . . . . .9<br />
Factory Setting . . . . . . . . . . . . . . . . . . . . .9<br />
Operating your Receiver<br />
Receiver Controls . . . . . . . . . . . . . . . . . .10<br />
Your Remote Control . . . . . . . . . . . . . . .11<br />
Display . . . . . . . . . . . . . . . . . . . . . . . . . .12<br />
Switching On/Off . . . . . . . . . . . . . . . . . .13<br />
Selection of Audio/Video Source . . . . . .13<br />
Using the Remote to Control Additional<br />
Components . . . . . . . . . . . . . . . . . . . . . .14<br />
Advanced Sound Control<br />
Sound Enhancement Systems . . . . . . . .15<br />
Fine Setting of Components . . . . . . . . .16<br />
Fine Setting of the Speakers . . . . . . . . .17<br />
Advanced Setting . . . . . . . . . . . . . . . . .17<br />
DVD Player<br />
Basic Playback Features . . . . . . . . . . . . .19<br />
Quick Search . . . . . . . . . . . . . . . . . . . . .19<br />
Freeze Frame and Frame Advance . . . .19<br />
Slow Motion Playback (DVD only) . . . . .20<br />
On-Screen Banner Display . . . . . . . . . . .20<br />
Setup Menu . . . . . . . . . . . . . . . . . . . . . .25<br />
CD/MP3 Player<br />
MP3 Recommendations . . . . . . . . . . . . .30<br />
Loading and Playing an Audio CD . . . .30<br />
On-Screen Banner Display for CD<br />
Playback . . . . . . . . . . . . . . . . . . . . . . . . .32<br />
On-Screen Display for MP3 playback . . .35<br />
<strong>Radio</strong><br />
Operating the <strong>Radio</strong> . . . . . . . . . . . . . . .37<br />
Troubleshooting Tips . . . . . . . . . .39<br />
Care and Maintenance . . . . . . . . .41<br />
Remote Codes<br />
Cable Codes . . . . . . . . . . . . . . . . . . . . . .42<br />
VCR Codes . . . . . . . . . . . . . . . . . . . . . . .42<br />
TV Codes . . . . . . . . . . . . . . . . . . . . . . . .43<br />
Satellite Receivers . . . . . . . . . . . . . . . . .44<br />
Audio (RCA only) . . . . . . . . . . . . . . . . . .44<br />
Laser disc Players . . . . . . . . . . . . . . . . . .44<br />
Language Codes . . . . . . . . . . . . . .45<br />
Limited Warranty (US) . . . . . . . . .46<br />
Limited Warranty (Canada) . . . . .47<br />
1<br />
<strong>EN</strong>
Getting Started<br />
Unpacking the DVD Receiver<br />
You should receive the following items:<br />
2<br />
POWER<br />
SOURCE SURROUND<br />
PRESET - PRESET +<br />
PHONES<br />
mp3<br />
One Pig-Tail<br />
antenna wire<br />
Unpacking The Speakers<br />
One DVD <strong>receiver</strong> unit<br />
DIGITAL<br />
BAND/APP<br />
RPT/PGM<br />
TREBLE<br />
TUNE - TUNE +<br />
One external AM loop<br />
antenna<br />
• one instruction book;<br />
• one safety leaflet;<br />
• one Quick Connection Guide<br />
• MusicMatch TM Software CD<br />
• one set of speakers including 1 set of left and right front<br />
speakers, 1 centre speaker, 1 subwoofer and 1 set of left<br />
and right rear speakers.<br />
FRONT SPEAKERS C<strong>EN</strong>TER SPEAKER<br />
SUBWOOFER<br />
VOLUME<br />
+ -<br />
+ -<br />
One pair of “AA”<br />
batteries<br />
one video cable (single wire)<br />
with yellow RCA connectors;<br />
• 6 speaker cables including:<br />
1 X blue/black cable<br />
for center speaker<br />
REAR SPEAKERS<br />
(SURROUND SOUND) 2 X grey/black cable<br />
for rear speakers<br />
VCR 1<br />
ON OFF<br />
TV<br />
DVD VCR 2 AM•FM SAT•CABLE<br />
V O L<br />
CD<br />
MUTE<br />
GUIDE•RDM<br />
INPUT SEEK ANT-FMS<br />
REVERSE PLAY FORWARD<br />
RECORD<br />
/ C H +<br />
OK<br />
FUNCTION<br />
C H -<br />
TAPE<br />
M<strong>EN</strong>U CLEAR<br />
1 2 3<br />
4 5 6<br />
7 8 9<br />
0<br />
INFO<br />
STOP PAUSE<br />
V O L<br />
G O B A C K • D I S C<br />
AUDIO DIGIT AL LEVEL SURR<br />
/<br />
SHIFT<br />
C C C<br />
C C<br />
REPEAT RANDOM PROGRAM<br />
SUBTITLE LANG ANGLE FRAME<br />
u n i v e r s a l<br />
One RCA Universal<br />
Remote Control<br />
(CRK76AF1)<br />
2 X red/black cable<br />
for front speakers<br />
1 X brown/black<br />
cable for subwoofer
Inserting Batteries into Remote Control<br />
Insert two AA(R6) batteries according to the + and - signs<br />
on the battery compartment. To use the remote control,<br />
point it directly at your <strong>receiver</strong>.<br />
Set up and Maintenance of the Receiver<br />
IMPORTANT NOTE<br />
• Provide spaces for sufficient ventilation as indicated<br />
below. If the space is insufficient, the unit may overheat<br />
resulting in malfunction and shorter life time.<br />
10 cm/<br />
4"<br />
5 cm/<br />
2"<br />
POWER<br />
SOURCE SURROUND<br />
PRESET - PRESET +<br />
PHONES<br />
mp3<br />
10 cm/4"<br />
10 cm/4"<br />
10 cm/<br />
4"<br />
• Do not connect to the AC power cords until all connections<br />
are completed.<br />
• Do not use your set immediately after transferring it from<br />
a cold place to a warm place: there is risk of condensation.<br />
• Do not expose your set to water and excessively high<br />
temperatures.<br />
• After having disconnected your set, clean the case with a<br />
soft cloth, or with a slightly damp leather chamois. Never<br />
use strong solvents.<br />
DIGITAL<br />
BAND/APP BASS/TREBLE<br />
RPT/PGM<br />
TUNE - TUNE +<br />
VOLUME<br />
Getting Started<br />
Protect your Components from<br />
Overheating<br />
• Do not block ventilation holes in any component.<br />
Arrange the components so that air can circulate freely.<br />
• Do not stack components directly on top of each other.<br />
• Allow adequate ventilation when placing your components<br />
in a stand.<br />
• Place the <strong>receiver</strong> near the top shelf of the stand so<br />
heated air rising from it will not affect other components.<br />
About CDR, CDRW, Audio MP3, Compact<br />
Disk Audio (CDA), DVD Video, DVD Audio<br />
This model <strong>RTDVD1</strong> is compatible to play CDR,<br />
CDRW, Audio MP3, Compact Disk Audio (CDA),<br />
Video Compact Disk (VCD) and DVD Audio.<br />
When playback a DVD-Audio disk, this model is<br />
able to play any Dolby Digital 5.1 (AC3) Surround<br />
mix content only, but not the DVD-Audio Advanced<br />
Resolution Surround sound (6 channels) or Stereo<br />
sound (2 channels) content.<br />
Please watch the format of your disk and read the<br />
disk information for further contents information.<br />
NOTES ON CD-R/RW DISC<br />
This unit is compatible with CD-RW/ CD-R discs for<br />
playback.<br />
• Do not affix any type of labels to either side<br />
(recordable or labeled side) of a CD-R/RW disc as<br />
this may result in the unit malfunctioning.<br />
• To avoid damages to the CD-R/RW disc, do not<br />
open the disc compartment door while the disc is<br />
being read.<br />
• Do not load an unrecorded CD-R/RW disc into the<br />
unit. This may take a longer time to read the disc.<br />
• Playback capability for CD-RW discs may<br />
vary due to variations in the quality of the<br />
CD-RW disc and the recorder used to create<br />
the disc.<br />
3<br />
<strong>EN</strong>
Getting Started<br />
Connecting to Audio-Visual Components<br />
4<br />
ANALOG INPUT<br />
Alternatively, if you have no VCR or SAT, you can<br />
connect any other compatible components like<br />
TAPE player, TV to your DVD <strong>receiver</strong> via the<br />
VCR/SAT input.<br />
L<br />
R<br />
SAT<br />
VCR<br />
to AUDIO OUT (VCR)<br />
to AUDIO IN (VCR)<br />
VCR SAT<br />
IN OUT IN<br />
COAXIAL<br />
IN<br />
to VIDEO OUT (VCR)<br />
to VIDEO IN (VCR)<br />
S A T<br />
OPTICAL<br />
IN<br />
A U D I O DIGITAL AUDIO<br />
OPTICAL<br />
OUT<br />
S-VIDEO<br />
S-video provides the best connection for the video portion of the signal.<br />
When connecting S-video cable, a Composite video cable (yellow RCA<br />
connector) must also be used. If you use a S-video cable to connect<br />
any audio-visual components to your DVD <strong>receiver</strong>, you must also use<br />
a S-video cable between your TV and <strong>receiver</strong>.<br />
¥ VCR audio/video out will have output signal in SAT, DVD/CD and<br />
TUNER modes. When VCR (source) is selected, there will be no<br />
audio/video signal from VCR audio/video out.<br />
AUDIO OUT (SAT)<br />
OPTICAL OUT (SAT)<br />
to VIDEO OUT (SAT)<br />
to S-VIDEO OUT (if available)<br />
to S-VIDEO IN (if available)<br />
VIDEO<br />
VCR IN<br />
VCR OUT<br />
to VIDEO IN (TV)<br />
SAT<br />
IN<br />
MON<br />
OUT<br />
DIGITAL INPUT<br />
Connect components<br />
capable of outputing<br />
Dolby Digital (e.g. SAT)<br />
or standard PCM (CD)<br />
format digital signals.<br />
Read section on "Input<br />
Signal Setting" under<br />
"Advanced Sound<br />
Control" carefully to<br />
adjust the matching<br />
input settings.<br />
DIGITAL AUDIO<br />
DIGITAL OUTPUT<br />
Connect components<br />
capable of recording<br />
digital signals (e.g. MD,<br />
CD recorder player)<br />
equiped with a optical<br />
input.<br />
TV
Digital Connections<br />
If you have a SAT <strong>receiver</strong> DVD player or CD player with a<br />
digital output, you can make use of an optical digital connecting<br />
cord (not supplied) or coaxial digital connecting<br />
cord (not supplied) to carry the audio portion of the signal<br />
and enjoy Dolby Digital or digital stereo sound quality. One<br />
optical or coaxial cable is needed for each SAT <strong>receiver</strong>,<br />
DVD player or CD player. When optical or coaxial cable is<br />
used, the analog audio cables are still needed if recording<br />
through a tape or VCR is desired. This <strong>receiver</strong> provides one<br />
optical and one coaxial digital input for the connection of<br />
your components. Please connect your components (e.g.<br />
DVD, SAT or CD) to the appropriate digital inputs and<br />
select the appropriate source (see below).<br />
NOTE<br />
Read instructions carefully when connecting components to<br />
the <strong>receiver</strong>.<br />
Digital In Jacks can accept Dolby Digital (AC-3), or PCM signals<br />
when compatible components are connected.<br />
R<br />
R<br />
SAT<br />
SPEAKERS<br />
C<strong>EN</strong>TER SUB<br />
FRONT<br />
REAR<br />
Optical and coaxial cables carry only the audio<br />
portion of the signal. A video connection must also<br />
be established by connecting a video cable to the<br />
(SAT) video input.<br />
L<br />
L<br />
AM LOOP<br />
FM 75‰<br />
This device complies with part 15 of the FCC rules. Operaton is<br />
subject to the following two conditions: (1) This device may not<br />
cause harmful interference, and (2) This device must accept any<br />
interference received, including interference that may cause<br />
undesired operations<br />
OPTICAL DIGITAL IN (AUDIO)<br />
Optical Fiber Cable<br />
Connect to optical digital output of DVD, CD,<br />
SAT or other compatible devices.<br />
SAT / DVD / CD Player<br />
COAXIAL DIGITAL IN (AUDIO)<br />
Connect to coaxial digital output<br />
of DVD, CD, SAT or other<br />
compatible devices.<br />
SAT / DVD / CD COAXIAL<br />
IN<br />
Manufactured under licence from Dolby Laboratories.<br />
"Dolby", "Pro Logic 2" and the double-D symbol are<br />
trademarks of Dolby Laboratories. Confidential AUDIO VIDEO RECEIVER<br />
Unpublished Works. ' 1992-1997 Dolby Laboratories, POWER SOURCE: 120V 60Hz<br />
Inc. All rights reserved.<br />
POWER CONUMPTION: 300W<br />
REFER INQUIRIES TO:<br />
VCR SAT THOMSON MULTIMEDIA INC.<br />
MANAGER CONSUMER RELATIONS,<br />
1<br />
IN OUT IN P.O. BOX 1976, INDIANAPOLIS, IN46206<br />
MADE IN CHINA<br />
L<br />
S A T<br />
R<br />
COAXIAL<br />
IN<br />
OPTICAL<br />
IN<br />
OPTICAL<br />
OUT<br />
SPEAKERS A U D I O DIGITAL AUDIO VIDEO<br />
S A T<br />
VCR IN<br />
VCR OUT<br />
OPTICAL<br />
IN<br />
SAT<br />
IN<br />
MON<br />
OUT<br />
OPTICAL<br />
OUT<br />
DIGITAL AUDIO<br />
OPTICAL DIGITAL OUT<br />
Connect to recording<br />
device like CD, CDRW<br />
player, DVD recorder,<br />
mini disc etc.<br />
110V 60Hz<br />
Getting Started<br />
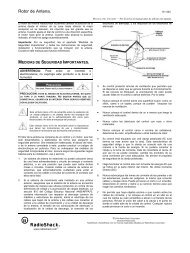
Connecting the Antennas<br />
R<br />
R<br />
C<strong>EN</strong>TER SUB<br />
FRONT<br />
REAR<br />
The AM and FM antennas connect to the AM and FM terminals<br />
on the system’s back panel.<br />
They must be hooked up in order to receive clear reception.<br />
AM Loop Antenna and FM Indoor Antenna<br />
1. Uncoil the AM Antenna wire.<br />
2. Press down on the Antenna tab to open the terminal<br />
(Refer to the illustration on the bottom of page 6)<br />
HINT<br />
L<br />
L<br />
AM LOOP<br />
FM 75‰<br />
This device complies with part 15 of the FCC rules. Operaton is<br />
subject to the following two conditions: (1) This device may not<br />
cause harmful interference, and (2) This device must accept any<br />
interference received, including interference that may cause<br />
undesired operations<br />
GND<br />
White<br />
AM LOOP<br />
FM 75 Ω<br />
Manufactured under licence from Dolby Laboratories.<br />
"Dolby", "Pro Logic 2" and the double-D symbol are<br />
trademarks of Dolby Laboratories. Confidential AUDIO VIDEO RECEIVER<br />
Unpublished Works. ' 1992-1997 Dolby Laboratories, POWER SOURCE: 120V 60Hz<br />
Inc. All rights reserved.<br />
POWER CONUMPTION: 300W<br />
REFER INQUIRIES TO:<br />
VCR SAT THOMSON MULTIMEDIA INC.<br />
MANAGER CONSUMER RELATIONS,<br />
1<br />
IN OUT IN P.O. BOX 1976, INDIANAPOLIS, IN46206<br />
MADE IN CHINA<br />
L<br />
S A T<br />
R<br />
COAXIAL<br />
IN<br />
• For FM reception, extend antenna to its full<br />
length and arrange the Antenna at different parts<br />
of the room until the reception is optimized.<br />
• For AM reception, rotate the antenna<br />
horizontally to get better reception.<br />
OPTICAL<br />
IN<br />
OPTICAL<br />
OUT<br />
SPEAKERS A U D I O DIGITAL AUDIO VIDEO<br />
VCR IN<br />
VCR OUT<br />
SAT<br />
IN<br />
MON<br />
OUT<br />
110V 60Hz<br />
5<br />
<strong>EN</strong>
Getting Started<br />
Connecting the Speakers<br />
Speakers<br />
There are 6 speakers equipped with the unit (2 front, 1 center,<br />
2 rear, 1 subwoofer). In order to enjoy good surround<br />
effects all six speakers need to be connected to the <strong>receiver</strong><br />
For better sound quality, Center speaker, rear speakers and<br />
Subwoofer should also be connected. Adding center and<br />
rear speakers will enhance surround effects. Adding a<br />
Subwoofer will increase bass response.<br />
If you want to enjoy full range of sound effects, it is a must<br />
to use the subwoofer with the speakers to maintain adequate<br />
bass signal.<br />
Speaker cords<br />
1 for each speaker, is<br />
needed for connection. Twist<br />
the stripped ends of speaker<br />
cord about 2/3 inch (15 mm).<br />
Press down on the tab to<br />
open the terminal and insert<br />
the wire. Snap the tab closed.<br />
6<br />
C<strong>EN</strong>TER SPEAKER<br />
FRONT SPEAKER<br />
BLUE / BLACK<br />
BROWN / BLACK<br />
RED / BLACK<br />
C<strong>EN</strong>TER SUB<br />
RED / BLACK<br />
FRONT<br />
R<br />
L<br />
GREY / BLACK GREY / BLACK<br />
REAR SPEAKER<br />
R<br />
L<br />
REAR<br />
SPEAKERS<br />
SUBWOOFER<br />
REAR SPEAKER<br />
FRONT SPEAKER<br />
Antenna and Speaker<br />
Wire Connection<br />
Push Speaker terminal tab<br />
down to insert wire.<br />
Release tab to lock wire in<br />
the terminal.<br />
NOTE: Make sure the insulation<br />
is completely removed from the<br />
ends of the Antenna and<br />
speaker wires at all connection<br />
points.<br />
To ease speaker connections, the speaker cords and the terminals<br />
are color-coded.<br />
• Red/Black (Front Speakers),<br />
• Blue/Black (Center Speaker)<br />
• Grey/Black (Rear Speakers).<br />
• Brown/Black (Subwoofer)<br />
Connect the speaker wire (red/black wire) to the back of L,<br />
R front speakers (red / black terminals) and to the corresponding<br />
color terminals on the rear of the <strong>receiver</strong>. Do the<br />
same for center speaker (with blue/black terminal), rear<br />
speakers (with grey/black terminals) and the subwoofer<br />
(with brown/black terminal).<br />
Speaker Polarity<br />
When connecting the speakers, make sure the polarities<br />
(“+” speaker wire to “+” on the <strong>receiver</strong>) of speaker wires<br />
and terminals are matched. If the cords are reversed, the<br />
sound will be distorted and will lack bass (“out of phase”<br />
effect).<br />
Connecting the Subwoofer<br />
Connect the subwoofer with the speaker wire (brown/<br />
black) provided.
Positioning your speaker<br />
1 Left, Right (Front Speakers)<br />
They carry primarily music and sound effects<br />
2 Center<br />
In surround mode, the center speaker carries much of the<br />
dialogue as well as music and effects. It should be set<br />
between the left and right speakers.<br />
3 Surround (Rear Speakers)<br />
Their overall sound balance should be as close as possible<br />
to the front speakers. Proper placement is vital to establish<br />
an evenly distributed sound field.<br />
Subwoofer<br />
A subwoofer is designed to reproduce powerful low bass<br />
effects (explosions, the rumble of spaceships, etc.) which<br />
dramatically heightens involvement with the action on the<br />
screen. It is therefore recommended to connect subwoofers<br />
when small speakers are used.<br />
Magnetic shielding<br />
Speakers placed less than two feet from the TV set must be<br />
magnetically shielded in order to prevent picture distortion.<br />
Front and center speakers provided with <strong>RTDVD1</strong> are<br />
magnetically shielded to protect your TV set.<br />
It is not recommended to place the rear speakers near the<br />
TV set.<br />
3<br />
3<br />
Courtesy Dolby Laboratories<br />
Front Speaker Placement<br />
Even if you can't duplicate this ideal home theater setup<br />
exactly, the suggestions for speaker placement that follow<br />
will help you get good results.<br />
1<br />
1<br />
2<br />
Getting Started<br />
Alignment<br />
Align the center speaker evenly with (A), or slightly behind<br />
(B), the left and right speakers, but not ahead of them.<br />
Courtesy Dolby Laboratories<br />
Advanced Setting<br />
Angle<br />
Placing the left and right speakers to form a 45-degree<br />
angle with your favorite viewing position will duplicate the<br />
soundtrack mixer's perspective.<br />
Courtesy Dolby Laboratories<br />
Height<br />
The mid- and high-frequency drivers of the three front<br />
speakers should be as close as possible to the same height.<br />
This often requires placing the center speaker directly atop<br />
(A) or beneath (B) the TV set.<br />
A<br />
B<br />
Courtesy Dolby Laboratories<br />
7<br />
<strong>EN</strong>
Getting Started<br />
Preferred surround placement<br />
Location<br />
If possible, place surround speakers to either side of the listening<br />
area, not behind it.<br />
Height<br />
If space permits, install surrounds 2-3 feet above viewers.<br />
This helps to minimize localization effects.<br />
Aiming<br />
Aiming surrounds straight across the room, not down at<br />
viewers, helps create a more open, spacious surround sound<br />
field.<br />
8<br />
Courtesy Dolby Laboratories<br />
Courtesy Dolby Laboratories<br />
Courtesy Dolby Laboratories<br />
Advanced Setting<br />
Alternative Surround Placement<br />
Rear wall<br />
If rear wall mounting is the only choice, aim the speakers at<br />
each other (A), towards the front (B) or even towards the<br />
sidewalls (C, D). Experiment with placement until surround<br />
sounds seem to envelop you, rather than coming from<br />
behind you.<br />
Courtesy Dolby Laboratories<br />
No adjacent walls<br />
Surrounds can go on stands facing each other to approximate<br />
the preferred sidewall mounting (A), or to the sides<br />
or rear of the viewing area aimed upwards. In the latter<br />
case, they can go right on the floor, or preferably, a few<br />
feet off the floor such as on end tables (B).<br />
Courtesy Dolby Laboratories
Test Tone / Channel balance<br />
Channel balance<br />
Your <strong>receiver</strong> is equipped with a test signal generator for<br />
balancing the channels. As the signal "travels" from channel<br />
to channel, adjust the level controls until each channel<br />
plays at the same loudness level. (details see operation of<br />
test/setup)<br />
Courtesy Dolby Laboratories<br />
Level adjustment & surround channel level<br />
expectation<br />
Even though you adjust the surround channel to be as loud<br />
as the others on the test signal, you'll find that on actual<br />
program material the surround channel is usually much<br />
lower than the front. Don't be tempted to readjust the surround<br />
level; program producers use surround mostly for<br />
subtle atmosphereics and ambience, and only rarely for<br />
special effects. A good surround mix doesn't call attention<br />
to itself; if it did, it would soon become distracting.<br />
NOTE<br />
The system is equipped with Dolby Digital, and<br />
manufactured under License from Dolby<br />
Laboratories.<br />
Dolby Digital<br />
Manufactured under<br />
license from Dolby<br />
Laboratories. “Dolby”,<br />
“Pro Logic”, “Pro Logic II”<br />
and the double-D symbol are trademarks of Dolby<br />
Laboratories. Copyright 1992-1997 Dolby Laboratories,<br />
Inc. All Rights Reserved.<br />
Getting Started<br />
Connecting for Power<br />
Make sure you connect all your other<br />
electronic components and the<br />
speakers before plugging your<br />
<strong>receiver</strong> into the outlet. Plug the<br />
power cord in the wall outlet,<br />
matching the wide blade of the plug<br />
with the wide slot in the outlet. Be<br />
sure to insert the plug completely.<br />
Using Headphones<br />
To listen privately through your audio<br />
system, use the PHONES jack on the<br />
<strong>receiver</strong>. However, make sure you turn<br />
down the volume before you put on<br />
the headphones. Increase the volume<br />
to the desired level after headphones<br />
are in place.<br />
Once headphones are connected, “HEADPHONE DOWNMIX<br />
2 CHANNEL” will scroll on display. This feature automatically<br />
converts multi-channel outputs to 2 channel stereo for<br />
your listening pleasure.<br />
Hearing Comfort & Well-Being<br />
• Do not play your headset at a high volume. Hearing<br />
experts advise against continuous extended play.<br />
• If you experience a ringing in your ears, reduce volume<br />
or discontinue use.<br />
Factory Setting<br />
The <strong>RTDVD1</strong> is preset to the following setting when you<br />
first turn on the power<br />
Source = DVD/CD<br />
Volume setting = 45 dB<br />
Bass & Treble = 0 dB<br />
Restore to Factory Settings<br />
You can always restore all settings back to its original state.<br />
When the <strong>receiver</strong> is in STANDBY mode, press accordingly<br />
on the main unit to restore all settings back to factory<br />
default :<br />
PRESET - PRESET + BASS/TREBLE<br />
NOTE<br />
All preset radio stations and surround sound setting<br />
will be lost after factory setting is restored.<br />
9<br />
<strong>EN</strong>
Operating Your Receiver<br />
POWER<br />
SOURCE SURROUND<br />
PRESET - PRESET +<br />
Receiver Controls<br />
PHONES<br />
mp3<br />
1. POWER / STANDBY<br />
• To turn the unit on/ off. When the system is turned on, the<br />
unit will go to Standby mode, then press the SOURCE button<br />
on the unit to power the unit up in the last mode used.<br />
• When the unit is in standby mode, press the Source button to<br />
power on the unit.<br />
2. Source Buttons<br />
• To select input source. For example, DVD/CD, VCR1 etc.<br />
• Press and hold for delay settings.<br />
3. SURROUND<br />
• Press repeatedly to select the surround sound setting or<br />
Digital Sound Processor (DSP) mode you want. Refer to<br />
“Advanced Sound Control” on page 16.)<br />
• Press and hold to activate speaker Test Tone, use the<br />
Adjustment buttons on the remote to adjust the settings.<br />
4. PRESET - / SKIP REVERSE<br />
• To move back to the beginning/previous preset memory<br />
location in tuner mode.<br />
• To skip to the beginning/previous track in CD mode and the<br />
beginning/previous chapter in DVD mode (only while playing).<br />
5. PRESET + / SKIP FORWARD<br />
• To go to the next preset memory location in tuner mode.<br />
• To skip to the next track in CD mode and the next chapter in<br />
DVD mode (only while playing).<br />
6. BAND /APP / RPT / PGM<br />
• In Tuner mode, press to select between radio BANDS or press<br />
and hold to enter AUTO PROGRAM mode.<br />
• In DVD/CD mode, press to select among REPEAT options (only<br />
while playing) or press and hold to enter PROGRAM mode<br />
(only in stop mode).<br />
10<br />
1 4 2 3 5 11 13<br />
12 8 6 7 9 10<br />
14<br />
DIGITAL<br />
BAND/APP<br />
RPT/PGM<br />
TREBLE<br />
TUNE - TUNE +<br />
7. TREBLE<br />
• To adjust TREBLE, press this button and turn the volume knob<br />
to adjust level.<br />
• Press and hold for Random function in CD/MP3 playback.<br />
8. TUNE - / FAST REVERSE<br />
• In tuner mode, press to tune down on the radio frequency or<br />
press and hold to to search down .<br />
• In CD and DVD mode, press to fast reverse.<br />
Press repeatedly to vary the speed of fast reverse.<br />
• In pause mode, press for slow reverse.<br />
9. TUNE + / FAST FORWARD<br />
• In tuner mode, press to tune up the radio frequency or press<br />
and hold to search down.<br />
• In CD and DVD mode, press to fast forward.<br />
Press repeatedly to vary the speed of fast forward.<br />
• In pause mode, press for slow forward.<br />
10. VOLUME<br />
Turn the knob to adjust volume level.<br />
11. PLAY/PAUSE<br />
To play and pause DVD/CD playback.<br />
12. STOP/ EJECT<br />
To stop DVD/CD playback. Press to eject disc tray.<br />
13. Display<br />
To display current status of the <strong>receiver</strong>.<br />
VOLUME<br />
14. PHONES<br />
Plug your headphones (not supplied) into it for your private<br />
enjoyment. Speakers will be off when phones are inserted.
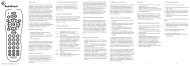
Your Remote Control<br />
Please be sure you have inserted the batteries into the remote<br />
control (see relevant section on page 3.) You can test it by<br />
pressing any button. If it works, the red LED will light.<br />
4<br />
5<br />
9<br />
NOTE<br />
VCR 1<br />
DVD<br />
V O L<br />
CD<br />
MUTE<br />
GUIDE•RDM<br />
RECORD<br />
1. ON/OFF<br />
To turn on or off the <strong>receiver</strong> and other auxiliary components (see page 14<br />
“Using the Remote to Control Additional Components”).<br />
2. Source Buttons<br />
To turn on and select various audio/ video sources.<br />
3. CH+, CH- (Channel Buttons)<br />
To select programmed stations in TUNER mode.<br />
To skip to the next or previous chapter or track in DVD, CD & MP3 mode.<br />
4. VOL (Volume Buttons)<br />
To adjust the volume.<br />
VCR 2<br />
ON OFF<br />
/ C H +<br />
TV<br />
INPUT SEEK ANT-FMS<br />
REVERSE PLAY FORWARD<br />
STOP PAUSE<br />
AUDIO DIGIT AL LEVEL<br />
/<br />
SHIFT<br />
OK<br />
FUNCTION<br />
C H -<br />
TAPE<br />
M<strong>EN</strong>U CLEAR<br />
1 2 3<br />
4 5 6<br />
7 8 9<br />
0<br />
AM•FM<br />
SAT•CABLE<br />
SURR<br />
V O L<br />
G O B A C K • D I S C<br />
INFO<br />
C C C<br />
C C<br />
REPEAT RANDOM PROGRAM<br />
SUBTITLE LANG ANGLE FRAME<br />
u n i v e r s a l<br />
The remote button NPUT•SEEK does not work.<br />
1<br />
2<br />
3<br />
6<br />
7<br />
8<br />
10<br />
14<br />
13<br />
12<br />
11<br />
Operating Your Receiver<br />
5. MUTE<br />
To mute all audio outputs.<br />
6. SHIFT<br />
To access second function features. (Function features controlled by the<br />
SHIFT key are colour coded to have the same colour as the word “SHIFT”.<br />
7. Adjustment Buttons<br />
Press SHIFT then OK/FUNCTION, the display will toggle among:<br />
NOTE: Do not press the SHIFT key when in Tuner mode.<br />
• Preset EQ (Stereo only),<br />
• SLEEP Mode<br />
• DIM Mode<br />
• NIGHT Mode (Dolby Digital Only).<br />
When the display shows the setup you want to change, press the left and<br />
right arrow buttons beside OK button to make changes, then press OK to<br />
finalize your choice.<br />
8. Number Buttons<br />
• In Tuner mode, to select a preset station.<br />
• In DVD/CD mode, to select a track to be played (Audio CD only).<br />
• For separate RCA 5 disc CD Player, to select track or DISC. (Must use the<br />
SHIFT button to select Disc)<br />
9. M<strong>EN</strong>U<br />
• In Tuner mode:<br />
- Press AM/FM<br />
- Press to store desired frequency in memory. The flashing word MEMORY<br />
in red will appear in display. Input your desired channel number while the<br />
word is still flashing and the frequency will be stored. (For details, refer to<br />
"Storing <strong>Radio</strong> Stations” under “Manual Preset” on page 38)<br />
• In DVD mode, press for menu setup for DVD title.<br />
10. Operation Buttons<br />
• TUNER, press AM/FM on the remote to enter tuner mode.<br />
Press REVERSE and FORWARD keys to tune down or up the radio frequency.<br />
• DVD/CD, press DVD to enable PLAY, RECORD, STOP and PAUSE keys. The<br />
remote control currently operates most Thomson, RCA and GE products,<br />
but it can be programmed to operate devices from other manufacturers<br />
(For details, refer to “Using the Remote to Control Additional Components”<br />
on page 14.<br />
11. AUDIO/SUBTITLE<br />
• Press AUDIO/SUBTITLE To select between left, right and stereo channel<br />
when playing VCD.<br />
• Press SHIFT then AUDIO/SUBTITLE to turn on or off the subtitle function<br />
or press and hold AUDIO/SUBTITLE to access the subtitle menu for DVD<br />
mode.<br />
12. DIGITAL/LANG<br />
• Select the way your SAT external audio/video devices are connected to the<br />
<strong>receiver</strong> (Analog, Optical or Coaxial) through the SAT audio input.<br />
• Press SHIFT then DIGITAL/LANG to access the title language selection<br />
menu.<br />
13. LEVEL/ANGLE<br />
• Press to adjust the volume of individual speaker. Press repeatedly and the<br />
display will toggle among different channels (Left front speaker, Right front<br />
speaker, Center speaker, Left rear speaker, Right rear speaker, and<br />
Subwoofer). Press the left and right arrow buttons beside OK button for<br />
adjustment.<br />
• Press SHIFT then LEVEL/ANGLE to select different screen display angles.<br />
14. SURR (Surround Sound Control)/FRAME<br />
• Press to change the surround sound settings. The display will toggle<br />
among any stereo modes (DOLBY DIGITAL, DOLBY PL II MOVIE, DOLBY PL II<br />
MUSIC, DOLBY PRO LOGIC, DOLBY 3 STEREO, AR<strong>EN</strong>A, JAZZ, THEATER, STA-<br />
DIUM, DISCO, STEREO)<br />
• Press SHIFT then SURR/FRAME to activate STILL step backward.<br />
(For details, refer to section “Advanced Sound Control” on page 15.)<br />
After using AUDIO, DIGITAL, LEVEL or SURR keys on the<br />
remote control in DVD/CD function mode, you must press<br />
the DVD/CD or SHIFT key to use other DVD keys.<br />
11<br />
<strong>EN</strong>
Operating Your Receiver<br />
Display<br />
DVD<br />
VCD<br />
CD<br />
MP3<br />
DIGITAL<br />
PRO.LOGIC<br />
INTRORANDOM<br />
DVD / VCD / CD / MP3<br />
• Unit in DVD, VCD, CD or MP3 mode.<br />
DIGITAL<br />
• Audio output is in Dolby Digital mode. (For DVD and<br />
SAT coaxial / optical inputs only)<br />
PRO.LOGIC<br />
• Audio output is in Dolby PL II Movie, Dolby PL II Music<br />
or Dolby Prologic mode.<br />
INTRO<br />
• Track sampling activated.<br />
RANDOM<br />
• Random playback mode activated.<br />
• Currently in playback mode.<br />
• Currently in pause mode.<br />
PAR<strong>EN</strong>TAL LOCK<br />
• Parental lock is on and a password is required to view<br />
DVDs above a specific rating level.<br />
12<br />
TITLE<br />
• Title number for DVD playback.<br />
TRACK<br />
• Track number being played.<br />
CHAP<br />
L C R<br />
LS LFE RS<br />
• Chapter location at which DVD is currently at.<br />
AUTO<br />
• Auto programming in tuner mode is activated<br />
PROG.<br />
• Program mode is activated.<br />
TUNED<br />
• Tuner station detected.<br />
ST<br />
• Tuner stereo signal detected.<br />
REPEAT / REPEAT 1 / REPEAT ALL<br />
REPEAT FOLDER (MP3 only)<br />
• CD, MP3 and DVD in repeat mode.<br />
KHz / MHz<br />
• Tuner frequency unit.<br />
C<br />
• Speaker Icons.
Switching on /off<br />
• To switch on the <strong>receiver</strong>, press POWER button on the<br />
<strong>receiver</strong> once to enter standby mode. Press SOURCE<br />
button on the <strong>receiver</strong> or one of the source buttons on the<br />
remote control to power on the <strong>receiver</strong>. (See illustration<br />
below)<br />
ER<br />
SOURCE<br />
• Standby: when the <strong>receiver</strong> is on, press the<br />
ON/OFF on the remote to return to standby mode.<br />
• To switch off the unit completely, press the POWER<br />
button on the <strong>receiver</strong>.<br />
NOTE<br />
POWER<br />
SURROUND<br />
PRESET - PRESET +<br />
PRE<br />
Your <strong>receiver</strong> has a back up memory to keep your<br />
settings like preset radio station for about 2 weeks<br />
in case electricity cut occurs. If the <strong>receiver</strong> is<br />
unplugged for more than 2 weeks, all the settings<br />
will be lost and re-setting will be necessary.<br />
VCR 1<br />
DVD<br />
VCR 1<br />
DVD<br />
CD<br />
CD<br />
ON OFF<br />
TV<br />
VCR 2 AM•FM SAT•CABLE<br />
/ C H +<br />
ON OFF TV<br />
TAPE<br />
VCR 2 AM•FM SAT•CABLE<br />
/ C H +<br />
TAPE<br />
Operating Your Receiver<br />
Selection of Audio/Video source<br />
When one of the audio/video source is selected, the audio<br />
and video input corresponding to the name will be<br />
activated.<br />
The <strong>receiver</strong> acts as a switching device between all the<br />
sources that are plugged into it.<br />
WER<br />
SOURCE<br />
SURROUND<br />
PRESET - PRESET +<br />
Example 1:<br />
If you connect a VCR player to the VCR input (audio +<br />
video) on the <strong>receiver</strong> and press the SOURCE button<br />
until VCR1/ANL shows on the display. You will be able to<br />
have the sound and image transmitted by the VCR.<br />
ER<br />
SOURCE<br />
SURROUND<br />
PRESET - PRESET +<br />
Example 2:<br />
Based on example 1, the VCR input is selected. If SAT is<br />
selected, image and sound from the SAT <strong>receiver</strong> source<br />
will replace the VCR.<br />
ER<br />
SOURCE<br />
SURROUND<br />
PRESET - PRESET +<br />
VCR 1<br />
DVD<br />
CD<br />
VCR 1<br />
DVD<br />
CD<br />
VCR 1<br />
DVD<br />
CD<br />
ON OFF TV<br />
VCR 2 AM•FM SAT•CABLE<br />
/ C H +<br />
ON OFF TV<br />
VCR 2 AM•FM SAT•CABLE<br />
/ C H +<br />
TAPE<br />
ON OFF TV<br />
VCR 2 AM•FM SAT•CABLE<br />
/ C H +<br />
TAPE<br />
TAPE<br />
13<br />
<strong>EN</strong>
Operating your Receiver<br />
You can connect up to 2 audio/video sources to this<br />
amplifier:<br />
Source button Corresponding connector<br />
(remote control) (<strong>receiver</strong> back panel)<br />
- DVD/CD built-in<br />
- FM/AM built-in<br />
- SAT SAT IN (audio / video)<br />
- VCR VCR IN (audio / video)<br />
When a source is selected, the source name will be shown<br />
on the display.<br />
Example: Press VCR to select VCR as the source to the<br />
amplifier.<br />
DVD DIGITAL<br />
VCD PRO.LOGIC<br />
CD<br />
MP3<br />
INTRORANDOM<br />
Using the Remote to Control Additional<br />
Components<br />
You can set your remote to control other components (like<br />
TV, VCR, etc.). What you need is to encode them in<br />
advance (not necessary for recent RCA & Proscan models).<br />
1. Turn on the component to be programmed.<br />
2. Look up the brand and corresponding code number in<br />
the code list from page 42 to 44.<br />
14<br />
NOTE<br />
L C R<br />
LS LFE RS<br />
1. Your <strong>receiver</strong> has a built in tuner. Just connect<br />
the appropriate antenna on the back of the <strong>receiver</strong><br />
and you will be able to listen to radio stations.<br />
(See details in Tuner section)<br />
2. The <strong>receiver</strong> is also equipped with DVD/CD<br />
player. Press the SOURCE button on the main unit<br />
or DVD button on the remote to activate the feature.<br />
3. Other sources can be connected to this unit<br />
(VCR, SAT etc).<br />
4. Refer to the "Connecting To Audio-Visual<br />
Components" section for details on connection.<br />
3. Press and hold the corresponding Source Button (like<br />
VCR1, SAT/CABLE, TV) on the remote while entering the<br />
code from the code list using the Number Buttons.<br />
VCR 1<br />
DVD<br />
CD<br />
ON OFF TV<br />
VCR 2 AM•FM SAT•CABLE<br />
/ C H +<br />
TAPE<br />
4. Release the component<br />
button, then press ON•OFF<br />
to see if the component<br />
will turn off.<br />
M<strong>EN</strong>U CLEAR<br />
1 2 3<br />
C C C<br />
4 5 6<br />
C C<br />
7 8 9<br />
REPEAT RANDOM PROGRAM<br />
INPUT SEEK ANT-FMS<br />
REVERSE PLAY FORWARD<br />
5. If this does not work, repeat steps 3 and 4 by trying to<br />
use the next code (if available) listed for the brand of your<br />
component until the component responds to the remote<br />
command.<br />
NOTE<br />
HINT<br />
VCR 1<br />
DVD<br />
CD<br />
0<br />
ON OFF<br />
TV<br />
VCR 2 AM•FM SAT•CABLE<br />
Once your remote is encoded, you can press<br />
ON/OFF on the remote once to turn off the component<br />
and then followed by the second time<br />
quickly to turn off the <strong>receiver</strong> (i.e. this unit). If you<br />
only want the <strong>receiver</strong> to be turned off, select FM/<br />
AM while the unit is ON before pressing ON/OFF.<br />
/ C H +<br />
This remote may not operate all models of the<br />
brands shown.<br />
If batteries are removed from the battery compartment<br />
of the remote control, all memory will be<br />
lost. You need to re-enter all<br />
previously programmed codes again.<br />
The buttons on the remote may not work<br />
correspondingly with those on other brand components.<br />
Experiment with the remote and your components<br />
to see which buttons work. If only a few<br />
functions operate, check to see if another code set<br />
will work with more buttons.<br />
TAPE
Sound Enhancement Systems<br />
This <strong>receiver</strong> is equipped with several built-in sound<br />
enhancement systems.<br />
Dolby Pro Logic II and Dolby 3 Stereo<br />
The Pro Logic II mode uses the built-in circuit to steer the<br />
Left, Center, Right and Surround left and right channel<br />
audio signals and uses all five speakers to play both stereo<br />
and Dolby Pro Logic program source, such as TV and VCR.<br />
Dolby Pro Logic II includes Dolby Pro Logic II Movie, Dolby<br />
Pro Logic II Music and Dolby Pro Logic.<br />
Use this mode to suit the type of program (such as VCR).<br />
[<br />
Front Left Speaker Center Speaker<br />
Front Right Speaker<br />
Rear Left Speaker<br />
Listening<br />
Zone<br />
Subwoofer<br />
Rear Right Speaker<br />
This surround system reproduces theater-like surround<br />
sound from Dolby-encoded software.<br />
The 3 Stereo mode will redirect the Surround signals to the<br />
front left and right speakers when only the front and<br />
center speakers are used.<br />
Front Left Speaker Center Speaker<br />
Front Right Speaker<br />
Listening<br />
Zone<br />
Advanced Sound Control<br />
Dolby Digital<br />
The Dolby Digital mode lets you enjoy full digital<br />
surround from software processed in the Dolby Digital format.<br />
Dolby Digital provides better sound quality and more<br />
powerful presence than conventional Dolby Surround.<br />
This unit is equipped with Dolby Digital 5.1-channel so<br />
that you can enjoy enhanced full digital surround sound.<br />
Being different from Dolby Pro Logic in which only four<br />
channels ( Front Left, Front Right, Centre and Rear ) are<br />
used, the new system provides stereo separation of the rear<br />
speakers (Rear-Right, Rear-Left ). These 5 channels, together<br />
with the subwoofer channel for bass sounds ( counted as<br />
0.1 channel ), constitute as 5.1-Channel ( or 6 Channels )<br />
Input for Dolby Digital that brings you the most sophisticated<br />
sound enjoyment.<br />
15<br />
<strong>EN</strong>
Advanced Sound Control<br />
Stereo<br />
The Stereo mode uses the two main channel outputs from<br />
the front speakers.<br />
DSP (Digital Sound Processor)<br />
These digital sound effects resemble sounds in a real<br />
environment such as Arena, Jazz, Theater, Stadium and<br />
Disco. DSP automatically converts analog audio signals to<br />
digital ones which enables you to adjust the sound without<br />
degrading the sound quality. Different modes will give you<br />
different feel of size and type of listening environment.<br />
(Not available in Dolby Digital (DVD))<br />
Night Mode<br />
By using Dynamic Range Compression technology (pressing<br />
SHIFT and OK), you can enjoy enhanced Dolby Digital sound<br />
quality at night without interrupting your roommates or<br />
neighbors. Night Mode will compress the difference in volume<br />
between normal voices and sound like explosions,<br />
while still enjoying a Dolby Digital enable component (DVD,<br />
SAT). Night Mode can be activated by pressing the SHIFT<br />
button then the OK button repeatedly until NORMAL<br />
appears on the display. While Normal is still on the display,<br />
press the LEFT or RIGHT Adjustment buttons on the remote<br />
control,around the OK button, on the remote control until<br />
you select the desired mode. Night mode can also be activated<br />
by pressing the AUDIO button, then OK button<br />
repeatedly then LEFT or RIGHT Adjustment buttons. There<br />
are three modes (NORMAL, SOFT, SOFTER) for you to<br />
choose the extents of compression.<br />
Fine Setting of the Components<br />
The <strong>receiver</strong> has pre-selected the best surround mode for<br />
you once you turn on the unit by pressing the SOURCE<br />
Buttons (like DVD/CD, SAT) directly. The default surround<br />
modes for different components are as tabled below.<br />
If you decide to change the surround mode, you can press<br />
the SURROUND repeatedly to toggle among the different<br />
surround mode choices and select the one you want.<br />
For Digital Signal (2ch PCM), or analog signal , VCR1,<br />
Tuner:<br />
Dolby PL II Movie Dolby PL II Music Dolby PL<br />
Dolby 3 Stereo Arena Jazz Theater<br />
Stadium Disco Stereo<br />
For Digital Signal (Dolby Digital)<br />
Dolby Digital Dolby 3 Stereo Stereo<br />
Default Settings<br />
The <strong>receiver</strong> will keep the last selection in memory as long<br />
as it doesn’t enter standby mode.<br />
16<br />
Source/ If Digital Input<br />
Source/ (optical or coaxial) If PCM If Analog Input<br />
Input is selected bitstream selected<br />
DVD/CD Dolby Digital PRO-LOGIC II PRO-LOGIC 2 MOVIE<br />
MOVIE<br />
SAT Dolby Digital/ PRO-LOGIC II PRO-LOGIC 2 MOVIE<br />
MOVIE<br />
VCR N/A N/A PRO-LOGIC 2 MOVIE<br />
TUNER N/A N/A PRO-LOGIC 2 MOVIE<br />
Input Signal Setting<br />
The <strong>receiver</strong> defaults to the most convenient settings for<br />
your easiest use (see table).<br />
By default, SAT (satellite) is set to analog input. If you wish<br />
to change the input formats, follow the steps below:<br />
1. Press SOURCE on the main unit until SAT appears on the<br />
display or press the SAT source buttons on the remote<br />
control.<br />
2. Press DIGITAL on the remote control to toggle among<br />
optical/ coaxial/ analog to match your connection. Your<br />
selection will be stored automatically.<br />
Every time you press the source button, the input setting<br />
(e.g. SAT/ ANL) will be shown on display for a few seconds.<br />
SOURCE<br />
SAT<br />
VCR1<br />
FM/AM<br />
NOTE<br />
SOURCE<br />
SAT<br />
DVD/CD<br />
VCR1<br />
DEFAULT INPUT (as seen on display)<br />
Analog (SAT/ ANL)<br />
Analog (VCR1/ ANL)<br />
Built-in Tuner<br />
Only SAT input setting can be changed to coaxial or<br />
optical.<br />
AVAILABLE INPUT<br />
ANL/Optical/Coaxial<br />
Built-in<br />
ANL/ - / -<br />
Digital Input: Coaxial (COAX) / Optical (OPT)<br />
Select this setting to play digital signals from a DVD, CD, LD<br />
player, or SAT. (SAT mode only)<br />
CAUTION!<br />
DO NOT CONNECT A LD PLAYER WITH RF<br />
COAXIAL OUTPUT TO YOUR COAXIAL INPUT.<br />
Analog Input<br />
Select this setting to play analog signals from a cassette<br />
deck, VCR or SAT.<br />
NOTE<br />
SAT and VCR are just generic names. You can connect<br />
other compatible audio/video components to these<br />
inputs like TV, TAPE, MINI DISC, CD-RW player, etc.
Fine Setting of the Speakers<br />
If you use all the speakers provided, all the basic settings<br />
have been set.<br />
However, to make the surround sound more effective and<br />
suit the acoustic conditions in your listening room, you<br />
need to delay the signal from some of the speakers. Such<br />
channel delay compensates for center or surround speakers<br />
that are closer to listening position than the front<br />
speakers. You can make use of the SOURCE button to<br />
adjust the speakers’ relative loudness.<br />
The TEST button<br />
Recommend to set the surround to one of the Dolby<br />
setting so that all speakers will be selected. To activate the<br />
Test Tone, press and hold the SURROUND button. A short<br />
noise will be heard in each speaker one by one. The<br />
speaker producing the noise at that moment will flash on<br />
the Speaker icon and be displayed on the VFD. The speaker<br />
being displayed can then be adjusted by using the LEFT or<br />
RIGHT arrows on the remote to desired level. To get out of<br />
Test Tone, just press SURROUND button and the setting<br />
will be saved.<br />
SOURCE<br />
SURROUND<br />
PRESET - PRESET +<br />
Advanced Setting<br />
Factory Default Setting<br />
The <strong>receiver</strong> speaker distance default settings are the<br />
following:<br />
Front<br />
Left<br />
Lch<br />
L/S<br />
Rear<br />
Left<br />
mp3<br />
Center<br />
Cch<br />
Front speakers (L/R) 15 ft<br />
Center speaker (Cch) 15 ft<br />
Rear speaker (SUR) 10 ft<br />
MUTE<br />
GUIDE•RDM<br />
Front<br />
Right<br />
Rch<br />
R/S<br />
Rear<br />
Right<br />
/<br />
SHIFT<br />
OK<br />
C H -<br />
FUNCTION<br />
M<strong>EN</strong>U CLEAR<br />
1 2 3<br />
G O B A C K • D<br />
INFO<br />
C C C<br />
Advanced Sound Control<br />
Speaker Configurations<br />
You can also change the delay of the speakers by pressing<br />
and holding the SOURCE button.<br />
Available Selections:<br />
Front Speaker distance 3-40 ft<br />
Center Speaker distance 0-40 ft<br />
Rear Speaker distance 0-40 ft<br />
Pressing SOURCE repeatedly while the display is still<br />
showing speaker distance setup. Set speaker selections or<br />
speakers’ distance by pressing PRESET +/ PRESET - on the<br />
main unit or the LEFT / RIGHT arrows on the remote<br />
control.<br />
NOTE<br />
• Always use the subwoofer for optimum sound<br />
quality.<br />
17<br />
<strong>EN</strong>
Advance Sound Control<br />
• Speaker distance: For optimum surround experience<br />
measure the distance between the speaker and your<br />
favorite listening position.<br />
1. Press and hold SOURCE for 3 seconds<br />
2. While the Display is showing FRNT 15 FT, press PRESET +<br />
or PRESET - on the main unit or LEFT or RIGHT arrow on<br />
the remote control to adjust the delay setting.<br />
3. Press SOURCE once to move to the next delay setting.<br />
4. Repeat step 2 to set up the next speaker<br />
5. When set up is done, wait for 5 seconds to automatically<br />
save your settings or press any source key to save your<br />
selection and set up mode.<br />
18<br />
SOURCE<br />
WER<br />
WER<br />
SURROUND<br />
PRESET - PRESET +<br />
SOURCE<br />
SURROUND<br />
PRESET - PRESET +<br />
mp<br />
SOURCE<br />
SURROUND<br />
PRESET - PRESET +<br />
MUTE<br />
GUIDE•RDM<br />
/<br />
SHIFT<br />
OK<br />
C H -<br />
FUNCTION<br />
G O B A C K • D I S<br />
INFO<br />
M<strong>EN</strong>U CLEAR<br />
1 2 3<br />
Speaker Icons<br />
The <strong>receiver</strong> shows you the speakers’ settings on the display<br />
with the following icons:<br />
C<br />
LFE<br />
Front Speakers<br />
Center Speaker<br />
Rear Speakers<br />
Subwoofer Present<br />
Displaying Program Formats<br />
When a digital source is playing, the <strong>receiver</strong> will automatically<br />
switch to the proper surround mode and indicates on<br />
the speaker icons on the right-hand side of the display. (See<br />
diagram)<br />
C<br />
It is important to note, however, that not all Dolby Digital<br />
sources are encoded with the full complement of five channels<br />
plus LFE*. Speaker icons show how many and which<br />
speaker you have enabled (See “Fine Setting of the<br />
Speakers”) and the letters inside the speaker icons show<br />
which channel is present in the source information. For<br />
example, the diagram shown means you have all the five<br />
speakers and subwoofer enabled and the digital sources<br />
you played have five channels plus LFE complemented.<br />
(Dolby Digital 5.1 Channels)<br />
* LFE stands for Low Frequency Effect. The indication “LFE”<br />
appears if the digital source contains LFE information. In<br />
this case, the bass signal will be delivered to the subwoofer,<br />
offering more dynamic deep bass sound effects. If the letter<br />
is flashing, the signal is either too weak or just gone.
Basic Playback Features<br />
1. Press SOURCE on the main unit until “DVD/CD” appears<br />
on the display or DVD source key on the remote to select<br />
DVD/CD input source.<br />
ER<br />
DVD DIGITAL<br />
VCD PRO.LOGIC<br />
CD<br />
MP3<br />
INTRORANDOM<br />
2. Open disc tray for loading<br />
discs with label side facing<br />
up. Press again to close it.<br />
DIGITAL<br />
3. Press PLAY/PAUSE on the unit or PLAY on the remote<br />
control to start playback<br />
BAND/AP<br />
RPT/PGM<br />
• Press PLAY/PAUSE on the unit or PAUSE to pause playing<br />
during playback. Press PLAY/PAUSE on the main unit or<br />
PLAY on the remote to resume normal playback.<br />
SURROUND<br />
PRESET +<br />
mp3<br />
REPEAT RANDOM PROGRAM<br />
INPUT SEEK ANT-FMS<br />
REVERSE PLAY FORWARD<br />
STOP PAUSE<br />
SUBTITLE LANG ANGLE FRAME<br />
• Press SKIP REVERSE to go back to the previous chapter<br />
or SKIP FORWARD to move to the next chapter.<br />
SOURCE<br />
SOURCE<br />
SURROUND<br />
PRESET - PRESET +<br />
SURROUND<br />
PRESET - PRESET +<br />
mp3<br />
RECORD<br />
AUDIO DIGIT AL LEVEL SURR<br />
V O L<br />
CD<br />
MUTE<br />
DE•RDM<br />
VCR 1<br />
DVD<br />
CD<br />
0<br />
u n i v e r s a l<br />
/ C H +<br />
/<br />
SHIFT<br />
ON OFF TV<br />
VCR 2 AM•FM SAT•CABLE<br />
/ C H +<br />
C H -<br />
TAPE<br />
INFO<br />
TAPE<br />
V O L<br />
G O B A C K • D I S C<br />
L C R<br />
LS LFE RS<br />
TUNE -<br />
DVD Player<br />
• Press STOP once to stop playback and go into resume<br />
mode.<br />
NOTE<br />
DIGITAL<br />
Quick search<br />
BAND/APP<br />
RPT/PGM<br />
TUNE -<br />
1. While playing a disc, press REVERSE on the remote control<br />
to scan backwards through the disc. Press FORWARD<br />
on the remote for scanning forward.<br />
Press repeatedly to change searching speed to 1,2 or 3<br />
times for VCD and 1,2,3 or 4 for DVD.<br />
2. Press PLAY at any time to resume normal playback.<br />
C<br />
7 8 9<br />
REPEAT RANDOM PROGRAM<br />
INPUT SEEK ANT-FMS<br />
REVERSE PLAY FORWARD<br />
AUDIO DIGIT AL LEVEL SURR<br />
0<br />
C<br />
SURROUND<br />
PRESET +<br />
Freeze frame, frame advance and frame<br />
backward<br />
1. Press PAUSE to freeze picture during playback. Each time<br />
you press again, the picture advances one frame.<br />
2. Press PAUSE repeatedly to move forward in still frame.<br />
3. Press SHIFT then press SURR/FRAME repeatedly to move<br />
backward in still frame. (DVD only)<br />
SURROUND<br />
PRESET +<br />
mp3<br />
RECORD<br />
4. Press PLAY to resume normal playback.<br />
REPEAT RANDOM PROGRAM<br />
INPUT SEEK ANT-FMS<br />
REVERSE PLAY FORWARD<br />
STOP PAUSE<br />
AUDIO DIGIT AL LEVEL SURR<br />
0<br />
SUBTITLE LANG ANGLE FRAME<br />
RESUME MODE:<br />
The next time PLAY is pressed, the unit will begin<br />
playback at the location where it was last stopped.<br />
Press STOP on the remote control to cancel the<br />
resume mode.<br />
1 1<br />
RECORD STOP 2 PAUSE<br />
RECORD<br />
mp3<br />
REPEAT RANDOM PROGRAM<br />
INPUT SEEK ANT-FMS<br />
REVERSE PLAY FORWARD<br />
STOP PAUSE<br />
AUDIO DIGIT AL LEVEL SURR<br />
0<br />
SUBTITLE LANG ANGLE FRAME<br />
u n i v e r s a l<br />
19<br />
<strong>EN</strong>
DVD Player<br />
Slow motion playback<br />
1. Press PLAY/PAUSE on the main unit or PAUSE in the<br />
remote control to freeze the picture during playback.<br />
2. Advance picture in slow motion. Press FAST FORWARD<br />
on the unit or FORWARD on the remote control for slow<br />
motion in forward direction and FAST REVERSE or<br />
REVERSE (DVD only) in reverse direction.<br />
Press repeatedly to change speed to 1/16 times, 1/8 times,<br />
1/4 times and 1/2 times.<br />
3. Press PLAY/PAUSE on the main unit or PLAY on the<br />
remote control to resume normal playback.<br />
20<br />
A L<br />
SURROUND<br />
PRESET +<br />
SURROUND<br />
PRESET +<br />
BAND/APP<br />
RPT/PGM<br />
mp3<br />
BASS/TREBLE<br />
TUNE - TUNE +<br />
mp3<br />
7 8 9<br />
REPEAT RANDOM PROGRAM<br />
INPUT SEEK ANT-FMS<br />
REVERSE PLAY FORWARD<br />
RECORD<br />
7 8 9<br />
REPEAT RANDOM PROGRAM<br />
INPUT SEEK ANT-FMS<br />
REVERSE PLAY FORWARD<br />
RECORD<br />
STOP PAUSE<br />
AUDIO DIGIT AL LEVEL SURR<br />
STOP PAUSE<br />
AUDIO DIGIT AL LEVEL SURR<br />
0<br />
SUBTITLE LANG ANGLE FRAME<br />
0<br />
SUBTITLE LANG ANGLE FRAME<br />
C<br />
7 8 9<br />
REPEAT RANDOM PROGRAM<br />
RECORD<br />
STOP PAUSE<br />
AUDIO DIGIT AL LEVEL SURR<br />
0<br />
INPUT SEEK ANT-FMS<br />
REVERSE PLAY FORWARD<br />
SUBTITLE LANG ANGLE FRAME<br />
C<br />
On-screen banner display<br />
You can access the on-screen banner display during playback<br />
to select many playback features. Each feature is illustrated<br />
with an icon. However, each banner display feature<br />
is available only if the disc was created with that particular<br />
feature.<br />
An invalid icon appears on the screen when you<br />
select an icon that does not function. Also, the icon<br />
is “grayed out” to tell you so.<br />
Title Audio<br />
General use<br />
Chapter Subtitles Bookmarks<br />
Title icon is being<br />
highlighted in<br />
this example<br />
Camera angles Disc type<br />
1. Press INFO on the remote control during playback to<br />
show on-screen banner.<br />
2. Use the LEFT or RIGHT arrows on the remote control to<br />
move cursor on the banner. Selected feature icon will be<br />
highlighted.<br />
3. Press OK to open menu under selected feature.<br />
V<br />
MUTE<br />
GUIDE•RDM<br />
C H -<br />
M<strong>EN</strong>U CLEAR<br />
MUTE<br />
GUIDE•RDM<br />
/<br />
SHIFT<br />
OK<br />
FUNCTION<br />
C H -<br />
INFO<br />
L<br />
G O B A C K • D I S C<br />
M<strong>EN</strong>U CLEAR<br />
MUTE<br />
GUIDE•RDM<br />
/<br />
SHIFT<br />
OK<br />
FUNCTION<br />
G O B A C K • D I S C<br />
INFO<br />
1 2 3<br />
/<br />
SHIFT<br />
OK<br />
C H -<br />
FUNCTION<br />
G O B A C K • D I S C<br />
INFO<br />
M<strong>EN</strong>U CLEAR<br />
1 2 3<br />
Time<br />
indicator
Selecting a title<br />
1. Refer to previous page “General use” to open the title<br />
menu.<br />
2. Enter title number using the number keys on the remote<br />
control. Add 0 in front of single-digit title number<br />
(e.g. 9 = 09).<br />
NOTE<br />
Selecting a chapter<br />
M<strong>EN</strong>U CLEAR<br />
1 2 3<br />
4 5 6<br />
7 8 9<br />
INPUT SEEK ANT-FMS<br />
REVERSE PLAY FORWARD<br />
1. Refer to previous page “General use” to open the title<br />
menu.<br />
2. Enter chapter number using the number keys on the<br />
remote control. Add 0 in front of single-digit chapter<br />
number (e.g. 9 = 09)<br />
NOTE<br />
C C C<br />
C C<br />
REPEAT RANDOM PROGRAM<br />
Some discs have one title only.<br />
Selecting audio language<br />
1. Refer to the previous page “General use” to open the<br />
title menu.<br />
0<br />
M<strong>EN</strong>U CLEAR<br />
1 2 3<br />
C C C<br />
4 5 6<br />
C C<br />
7 8 9<br />
REPEAT RANDOM PROGRAM<br />
0<br />
INPUT SEEK ANT-FMS<br />
REVERSE PLAY FORWARD<br />
The chapter feature will not work if the disc is not<br />
formatted with separate chapters.<br />
DVD Player<br />
2. Press SHIFT and DIGITAL/LANG or OK repeatedly until<br />
the audio language you want appears on the banner.<br />
V O L<br />
MUTE<br />
GUIDE•RDM<br />
3. Press INFO to exit.<br />
NOTE<br />
C H -<br />
This feature only works if the disc was created with<br />
multiple audio tracks.<br />
Selecting subtitle language<br />
INFO<br />
1. Refer to previous page “General use” to open the subtitle<br />
menu.<br />
2. Press OK to select and confirm subtitle language.<br />
3. Press SHIFT and AUDIO/SUBTITLE repeatedly to turn<br />
subtitle on or off.<br />
V O L<br />
MUTE<br />
GUIDE•RDM<br />
4. Press INFO to exit.<br />
NOTE<br />
/<br />
SHIFT<br />
OK<br />
FUNCTION<br />
/<br />
SHIFT<br />
OK<br />
C H -<br />
FUNCTION<br />
V O L<br />
G O B A C K • D I S C<br />
INFO<br />
MUTE<br />
GUIDE•RDM<br />
/<br />
SHIFT<br />
OK<br />
C H -<br />
FUNCTION<br />
G O B A C K • D I S C<br />
INFO<br />
M<strong>EN</strong>U CLEAR<br />
V O L<br />
G O B A C K • D I S C<br />
1 2 3<br />
REVERSE<br />
RECORD<br />
PLAY FORWARD<br />
STOP PAUSE<br />
AUDIO DIGIT AL LEVEL SURR<br />
V O L<br />
SUBTITLE LANG ANGLE FRAME<br />
MUTE<br />
GUIDE•RDM<br />
u n i v e r s a l<br />
INPUT SEEK ANT-FMS<br />
REVERSE PLAY FORWARD<br />
RECORD<br />
OK<br />
C H -<br />
FUNCTION<br />
V O L<br />
G O B A C K • D I S C<br />
INFO<br />
STOP PAUSE<br />
AUDIO DIGIT AL LEVEL SURR<br />
SUBTITLE LANG ANGLE FRAME<br />
u n i v e r s a l<br />
This feature only works if the disc was created with<br />
subtitles.<br />
/<br />
SHIFT<br />
21<br />
<strong>EN</strong>
DVD Player<br />
Selecting camera angle<br />
1. Refer to page 20 “General use” to open the camera<br />
angle menu.<br />
2. Press SHIFT and LEVEL/ANGLE to select the camera<br />
angle you want.<br />
3. Press INFO to exit.<br />
22<br />
V O L<br />
MUTE<br />
GUIDE•RDM<br />
NOTE<br />
/<br />
SHIFT<br />
OK<br />
C H -<br />
FUNCTION<br />
V O L<br />
G O B A C K • D I S C<br />
INFO<br />
REVERSE<br />
RECORD<br />
PLAY FORWARD<br />
STOP PAUSE<br />
AUDIO DIGIT AL LEVEL SURR<br />
SUBTITLE LANG ANGLE FRAME<br />
u n i v e r s a l<br />
This feature only works if the disc was created with<br />
multiple angles.<br />
Using bookmarks<br />
The bookmark feature allows you to mark a point on the<br />
disc that you can go to quickly. You can store up to 9<br />
bookmarks.<br />
Adding bookmarks<br />
1. Refer to Page 20 “General use” to open the bookmark<br />
menu.<br />
2. Use the arrows on the remote to move the cursor (yellow<br />
frame) to the “Mark” check line, then press OK to add<br />
bookmark when you reach the scene you want to do so.<br />
MUTE<br />
GUIDE•RDM<br />
C H -<br />
M<strong>EN</strong>U CLEAR<br />
1 2 3<br />
G O B A C K • D I S<br />
INFO<br />
3. To add another bookmark, move the cursor to the right<br />
with arrow button and then press OK when you reach<br />
another scene you want to do so.<br />
4. Move cursor to the door icon and then press OK<br />
to exit menu.<br />
Recalling bookmarks<br />
1. Refer to page 20 “General use” to open the bookmark<br />
menu.<br />
2. Use the arrows on the remote to move cursor (yellow<br />
frame) to the “Go To” check line and to the bookmarked<br />
scene you want to recall.<br />
3. Press OK to recall bookmarked scene.<br />
4. Move cursor by using the arrows to the door icon<br />
and then press OK to exit menu.<br />
Clearing bookmarks<br />
/<br />
SHIFT<br />
OK<br />
FUNCTION<br />
C C C<br />
The bookmarks are cleared each time a disc is removed<br />
from the player or when the power is turned off<br />
completely.<br />
If all 9 bookmarks are in use, you can still mark new scenes<br />
but the previous bookmarks will be erased starting from<br />
the earliest one.<br />
MUTE<br />
GUIDE•RDM<br />
/<br />
SHIFT<br />
OK<br />
C H -<br />
FUNCTION<br />
INFO<br />
M<strong>EN</strong>U CLEAR<br />
1 2 3<br />
G O B A C K • D I S<br />
C C C
Repeat (During Playback Only)<br />
1. During playback, press the RPT/PGM button on the<br />
main unit or SHIFT and 7/REPEAT repeatedly on the<br />
remote control to select among the repeat modes - Repeat<br />
Disc > Repeat Title > Repeat Chapter > Repeat Off ><br />
(Repeat Disc). Selected mode is displayed in the banner<br />
display on screen.<br />
TAL<br />
BAND/APP<br />
RPT/PGM<br />
NOTE<br />
Program playback<br />
Edit program<br />
BASS/TREBLE<br />
TUNE - TUNE +<br />
1 2 3<br />
C C C<br />
4 5 6<br />
7 8 9<br />
REPEAT RANDOM PROGRAM<br />
INPUT SEEK ANT-FMS<br />
REVERSE PLAY FORWARD<br />
RECORD<br />
STOP PAUSE<br />
Random playback is not available in DVD mode.<br />
1. In stop mode, press and hold RPT / PGM on the main<br />
unit or SHIFT and 9/PROGRAM to display program edit<br />
playlist.<br />
V O L<br />
MUTE<br />
GUIDE•RDM<br />
/<br />
SHIFT<br />
OK<br />
TAL<br />
C H -<br />
FUNCTION<br />
V O L<br />
G O B A C K • D I S C<br />
INFO<br />
BAND/APP<br />
RPT/PGM<br />
BASS/TREBLE<br />
TUNE - TUNE +<br />
C<br />
0<br />
INPUT SEEK ANT-FMS<br />
REVERSE PLAY FORWARD<br />
C<br />
M<strong>EN</strong>U CLEAR<br />
1 2 3<br />
C C C<br />
4 5 6<br />
C<br />
7 8 9<br />
REPEAT RANDOM PROGRAM<br />
0<br />
C<br />
DVD Player<br />
2. The box under “Title” will be highlighted automatically.<br />
Use the arrows on the remote to select title and chapter.<br />
MUTE<br />
GUIDE•RDM<br />
/<br />
SHIFT<br />
OK<br />
C H -<br />
FUNCTION<br />
G O B A C K • D I S C<br />
INFO<br />
M<strong>EN</strong>U CLEAR<br />
1 2 3<br />
3. “Add” will be highlighted automatically after chapter is<br />
selected. Press OK to add selected track and chapter(s) onto<br />
playlist.<br />
4. Move to highlight “Play” (start program playback) or<br />
“Done” (return normal playback with program saved), then<br />
press OK to start program playback or return to stop mode.<br />
GUIDE•RDM<br />
NOTE<br />
SHIFT<br />
OK<br />
FUNCTION<br />
INFO<br />
M<strong>EN</strong>U CLEAR<br />
1 2 3<br />
C C C<br />
4 5 6<br />
MUTE<br />
GUIDE•RDM<br />
/<br />
SHIFT<br />
OK<br />
C H -<br />
FUNCTION<br />
INFO<br />
M<strong>EN</strong>U CLEAR<br />
1 2 3<br />
G O B A C K • D I S<br />
C C C<br />
MUTE<br />
GUIDE•RDM<br />
/<br />
SHIFT<br />
OK<br />
C H -<br />
FUNCTION<br />
INFO<br />
M<strong>EN</strong>U CLEAR<br />
1 2 3<br />
MUTE<br />
GUIDE•RDM<br />
G O B A C K • D I S<br />
C C C<br />
/<br />
SHIFT<br />
OK<br />
C H -<br />
FUNCTION<br />
INFO<br />
M<strong>EN</strong>U CLEAR<br />
1 2 3<br />
G O B A C K • D I S<br />
C C C<br />
You can select at maximum 32 items by repeating<br />
steps 2 - 3.<br />
23<br />
<strong>EN</strong>
DVD Player<br />
Delete program<br />
1. In stop mode, press and hold RPT / PGM on the main<br />
unit or SHIFT and 9/PROGRAM to display program edit<br />
playlist.<br />
2. Use the arrows on the remote to select and highlight the<br />
programmed item you want to delete on the playlist.<br />
3. Highlight “Delete” and then press OK to delete item.<br />
4. Repeat steps 2 and 3 to delete additional items.<br />
5. Use the arrows to select and highlight “Play” (start program<br />
playback) or “Done” (return to normal playback with<br />
program saved) and then press OK.<br />
Insert chapter<br />
1. In stop mode, press and hold RPT / PGM on the main<br />
unit or SHIFT and 9/PROGRAM to display program edit<br />
playlist.<br />
2. Use the UP or DOWN arrows to select and highlight item<br />
on the playlist where you want to insert a chapter before<br />
it.<br />
24<br />
MUTE<br />
GUIDE•RDM<br />
MUTE<br />
GUIDE•RDM<br />
MUTE<br />
GUIDE•RDM<br />
/<br />
/<br />
SHIFT<br />
OK<br />
C H -<br />
M<strong>EN</strong>U CLEAR<br />
1 2 3<br />
C H -<br />
FUNCTION<br />
INFO<br />
M<strong>EN</strong>U CLEAR<br />
1 2 3<br />
/<br />
SHIFT<br />
OK<br />
SHIFT<br />
OK<br />
FUNCTION<br />
C H -<br />
FUNCTION<br />
M<strong>EN</strong>U CLEAR<br />
1 2 3<br />
G O B A C K • D I S<br />
INFO<br />
C C C<br />
G O B A C K • D I S<br />
C C C<br />
G O B A C K • D<br />
INFO<br />
C C C<br />
3. Use the LEFT and RIGHT arrows to select Title or<br />
Chapter, then the UP and DOWN arrows to select the<br />
number.<br />
4. Use the LEFT and DOWN arrows to highlight “Insert”<br />
and then press OK.<br />
MUTE<br />
GUIDE•RDM<br />
SHIFT<br />
OK<br />
FUNCTION<br />
M<strong>EN</strong>U CLEAR<br />
1 2 3<br />
5. Use the arrow buttons to highlight “Play” (start program<br />
playback) or “Done” (return to normal playback with program<br />
saved) and then press OK.<br />
Cancel program<br />
G O B A C K •<br />
INFO<br />
C C C<br />
MUTE<br />
GUIDE•RDM<br />
Program will be cancelled when;<br />
1. disc tray is opened;<br />
2. power is turned off;<br />
3. STOP is pressed twice. The red PGM indicator will disappear<br />
on display and player will resume normal playback<br />
mode. Nevertheless, the program will remain in memory<br />
and can be recalled by pressing PROGRAM again.<br />
/<br />
SHIFT<br />
OK<br />
C H -<br />
FUNCTION<br />
M<strong>EN</strong>U CLEAR<br />
1 2 3<br />
G O B A C K • D<br />
INFO<br />
C C C<br />
MUTE<br />
GUIDE•RDM<br />
/<br />
SHIFT<br />
OK<br />
C H -<br />
FUNCTION<br />
INFO<br />
M<strong>EN</strong>U CLEAR<br />
1 2 3<br />
G O B A C K • D I S<br />
C C C
Set up menu<br />
NOTE<br />
General use<br />
1. Press M<strong>EN</strong>U in stop mode to display the set up menu on<br />
screen. The menu shows current settings.<br />
NOTE<br />
After using AUDIO, DIGITAL, LEVEL or SURR keys<br />
on the remote control in DVD/CD function mode,<br />
press the DVD/CD or the SHIFT key to use other<br />
DVD keys.<br />
if you press during disc playback, the disc’s own<br />
menu will be displayed.<br />
2. Use arrow buttons to highlight options and press OK to<br />
open selected menu.<br />
MUTE<br />
GUIDE•RDM<br />
C H -<br />
M<strong>EN</strong>U CLEAR<br />
1 2 3<br />
GUIDE•RDM<br />
SHIFT<br />
OK<br />
FUNCTION<br />
M<strong>EN</strong>U CLEAR<br />
1 2 3<br />
4 5 6<br />
3. Press LEFT arrow to go back to the previous menu or<br />
press GO BACK•DISC to exit the setup menu completely.<br />
MUTE<br />
GUIDE•RDM<br />
/<br />
SHIFT<br />
OK<br />
FUNCTION<br />
/<br />
SHIFT<br />
OK<br />
C H -<br />
FUNCTION<br />
G O B A C K • D I S C<br />
INFO<br />
M<strong>EN</strong>U CLEAR<br />
1 2 3<br />
G O B A C K • D I S<br />
INFO<br />
C C C<br />
INFO<br />
C C C<br />
C C<br />
MUTE<br />
GUIDE•RDM<br />
/<br />
SHIFT<br />
OK<br />
C H -<br />
FUNCTION<br />
INFO<br />
M<strong>EN</strong>U CLEAR<br />
V O L<br />
1 2 3<br />
MUTE<br />
GUIDE•RDM<br />
G O B A C K • D I S<br />
C C C<br />
/ C H +<br />
/<br />
SHIFT<br />
OK<br />
C H -<br />
V O L<br />
G O B A C K • D I SC<br />
INFO<br />
Audio language<br />
DVD Player<br />
This step will define the default audio language. Choosing<br />
an audio language from the on-screen banner display will<br />
only overwrite this setting temporarily.<br />
NOTE<br />
If language selected is not available on disc, the<br />
language designated as default by each disc will<br />
be selected..<br />
1. Refer to “General use” to open audio language menu.<br />
2. Use UP and DOWN arrows to select language and then<br />
press OK.<br />
For languages other than options available:<br />
3. Press DOWN to select “Other” and then press OK.<br />
4. Enter language code into boxes and then select OK to<br />
return to main menu. Press OK on the remote.<br />
M<strong>EN</strong>U CLEAR<br />
1 2 3<br />
C C C<br />
4 5 6<br />
C C<br />
7 8 9<br />
REPEAT RANDOM PROGRAM<br />
0<br />
INPUT SEEK ANT-FMS<br />
REVERSE PLAY FORWARD<br />
MUTE<br />
GUIDE•RDM<br />
/<br />
SHIFT<br />
OK<br />
C H -<br />
FUNCTION<br />
INFO<br />
M<strong>EN</strong>U CLEAR<br />
1 2 3<br />
G O B A C K • D I S<br />
C C C<br />
25<br />
<strong>EN</strong>
DVD Player<br />
Subtitle language<br />
This step will define the default subtitle language.<br />
Choosing a subtitle language from the on-screen banner<br />
display will only overwrite this setting temporarily.<br />
1. Refer to page 25 “General use” to open subtitle language<br />
menu.<br />
2. Press UP and DOWN arrow to select language and then<br />
press OK.<br />
For languages other than options available:<br />
3. Move down and select “Other” and then press OK.<br />
26<br />
NOTE<br />
If language selected is not available on disc, the<br />
language designated by each disc as default will be<br />
selected.<br />
MUTE<br />
GUIDE•RDM<br />
/<br />
SHIFT<br />
OK<br />
C H -<br />
FUNCTION<br />
G O B A C K • D I S C<br />
INFO<br />
M<strong>EN</strong>U CLEAR<br />
1 2 3<br />
MUTE<br />
GUIDE•RDM<br />
/<br />
SHIFT<br />
OK<br />
C H -<br />
FUNCTION<br />
M<strong>EN</strong>U CLEAR<br />
1 2 3<br />
G O B A C K • D I S<br />
INFO<br />
C C C<br />
4. Enter language code into boxes and then select OK to<br />
return to main menu. Press OK button on the remote.<br />
M<strong>EN</strong>U CLEAR<br />
1 2 3<br />
C C C<br />
4 5 6<br />
C C<br />
7 8 9<br />
REPEAT RANDOM PROGRAM<br />
INPUT SEEK ANT-FMS<br />
REVERSE PLAY FORWARD<br />
Menu language<br />
0<br />
This step will define the language of menus and other<br />
short messages shown on screen.<br />
1. Refer to page 25 “General use” to open menu language<br />
menu.<br />
2. Use the UP and DOWN arrows to scroll the selections<br />
and select the language and then press OK to return to<br />
main menu.<br />
MUTE<br />
GUIDE•RDM<br />
/<br />
SHIFT<br />
OK<br />
C H -<br />
FUNCTION<br />
INFO<br />
M<strong>EN</strong>U CLEAR<br />
1 2 3<br />
G O B A C K • D I S<br />
C C C
Rating (Parental control)<br />
This step will disable the playing of some DVDs (especially<br />
U.S. type) which are not suitable for some audience, e.g.<br />
children. Such kind of DVDs is encoded with a specific rating<br />
level. If the rating level of the disc is higher than the<br />
preset level (to be set in this step), the playing will be prohibited<br />
unless the password (see next step) is entered.<br />
1. Refer to page 25 “General use” to open the rating menu.<br />
2. Use the UP or DOWN arrows to highlight the rating that<br />
would require a password to play. Press OK to return to<br />
main menu. Ratings highlighted in blue require password.<br />
MUTE<br />
GUIDE•RDM<br />
/<br />
SHIFT<br />
OK<br />
C H -<br />
FUNCTION<br />
G O B A C K • D I S C<br />
INFO<br />
M<strong>EN</strong>U CLEAR<br />
1 2 3<br />
The rating systems is based on information encoded on the<br />
DVD disc being played, so movies may carry a rating symbol,<br />
the disc may or may not contain that rating in its software.<br />
In addition to the five standard (MPAA) rating symbols<br />
of “G” (level 2), “PG” (Parental Guidance, level 4),<br />
“PG13” (Parental Guidance and 13 years old, level 4), “R”<br />
(Restricted, level 6) and ”NC17” (from 17 years old, level 7),<br />
the DVD will accommodate a total of 8 rating steps, as set<br />
by the DVD makers. These additional steps allows for more<br />
critical control of program playback for all audiences.<br />
Level 8: All DVDs can be played (Factory preset).<br />
Level 7 to 2: DVDs for general audiences/ children can be<br />
played.<br />
Level 1: DVDs for children can be played, DVDs for adults/<br />
general audiences are prohibited.<br />
MUTE<br />
GUIDE•RDM<br />
/<br />
SHIFT<br />
OK<br />
C H -<br />
FUNCTION<br />
M<strong>EN</strong>U CLEAR<br />
1 2 3<br />
G O B A C K • D I S<br />
INFO<br />
C C C<br />
Password<br />
Set password<br />
DVD Player<br />
To disable the viewing of rated DVDs, a four-digit password<br />
must be selected.<br />
1. Refer to page 25 “General use” to open the “Set<br />
Password” menu.<br />
2. Select “Set Password” and press OK.<br />
3. Use the number buttons to enter password and then<br />
press OK.<br />
4. Repeat step 3 to confirm password.<br />
27<br />
<strong>EN</strong>
DVD Player<br />
Change password<br />
Current password must be entered first to change<br />
password.<br />
1. Refer to page 25 “General use” to open the password<br />
menu.<br />
2. Use the number buttons to enter password and then<br />
press OK.<br />
3. Use the UP and DOWN arrows to select “Change<br />
Password” and then press OK.<br />
28<br />
NOTE<br />
• When incorrect password is entered, new<br />
password menu appears and you can enter and<br />
confirm password again.<br />
• A lock icon shows on unit display when password<br />
is required to view rated discs.<br />
Important: keep the password in a safe place or<br />
remember it reliably as access to rated discs or<br />
rating/ password menus requires the correct<br />
password.<br />
M<strong>EN</strong>U CLEAR<br />
1 2 3<br />
C C C<br />
4 5 6<br />
C C<br />
7 8 9<br />
REPEAT RANDOM PROGRAM<br />
0<br />
INPUT SEEK ANT-FMS<br />
REVERSE PLAY FORWARD<br />
MUTE<br />
GUIDE•RDM<br />
/<br />
SHIFT<br />
OK<br />
C H -<br />
FUNCTION<br />
G O B A C K • D I S C<br />
INFO<br />
M<strong>EN</strong>U CLEAR<br />
1 2 3<br />
MUTE<br />
GUIDE•RDM<br />
/<br />
SHIFT<br />
OK<br />
C H -<br />
FUNCTION<br />
INFO<br />
M<strong>EN</strong>U CLEAR<br />
1 2 3<br />
G O B A C K • D I S<br />
C C C<br />
MUTE<br />
GUIDE•RDM<br />
/<br />
SHIFT<br />
OK<br />
C H -<br />
FUNCTION<br />
M<strong>EN</strong>U CLEAR<br />
1 2 3<br />
G O B A C K • D I S<br />
INFO<br />
C C C<br />
4. Use the number buttons to enter new password and<br />
then press OK.<br />
5. Repeat the above step to confirm password and return<br />
to password menu. Use the LEFT arrow to return to the<br />
main menu.<br />
Clear password<br />
1. Refer to page 25 “General use” to open the password<br />
menu.<br />
2. Use the number buttons to enter password and then<br />
press OK.<br />
3. Move up or down the menu using the UP or DOWN<br />
arrows and select “Clear Password”. Press OK to clear password.<br />
Use the LEFT arrow to return to the main menu.
TV aspect<br />
This step selects the TV aspect, wide-screen (16:9) or<br />
conventional (4:3).<br />
1. Refer to page 25 “General use” to open the TV aspect<br />
menu.<br />
2. Use the UP or DOWN arrows to select TV aspect and<br />
then press OK to return to main menu.<br />
MUTE<br />
GUIDE•RDM<br />
If you have a wide-screen (16:9) TV, choose “16:9<br />
Widescreen”.<br />
- For 16:9 movie you will get<br />
- For 4:3 movie you will get<br />
/<br />
SHIFT<br />
OK<br />
C H -<br />
FUNCTION<br />
G O B A C K • D I S C<br />
M<strong>EN</strong>U CLEAR<br />
1 2 3<br />
If you have a conventional (4:3) TV,<br />
- if you select 4:3 letterbox for 16:9<br />
movie, you will get<br />
- if you select 4:3 Pan Scan for 16:9<br />
movie, you will get (the left and right<br />
edges are hidden)<br />
- for 4:3 movie, for both selections, you<br />
will get<br />
INFO<br />
MUTE<br />
GUIDE•RDM<br />
/<br />
SHIFT<br />
OK<br />
C H -<br />
FUNCTION<br />
INFO<br />
M<strong>EN</strong>U CLEAR<br />
1 2 3<br />
G O B A C K • D I S<br />
C C C<br />
DVD Player<br />
29<br />
<strong>EN</strong>
CD / MP3 Player<br />
The CD/MP3 playback function works in a similar way as<br />
the features available for DVD .<br />
Press SOURCE on the main unit or DVD source key on the<br />
remote to select DVD/CD input source.<br />
ER<br />
30<br />
MP3 Recommendations<br />
NOTE<br />
DVD DIGITAL<br />
VCD PRO.LOGIC<br />
CD<br />
MP3<br />
INTRORANDOM<br />
• Use .mp3 as the extension when converting<br />
audio files into MP3 for saving onto CD-R(W) or<br />
CD-ROM, e.g. Rocky08.mp3. Do not use any other<br />
extension e.g. .doc, .pdf.<br />
• Do not use the .mp3 extension for other text or<br />
non-audio data files as this may result in serious<br />
malfunction and harmful noise interference.<br />
• Many common CD creator softwares can make<br />
files compatible for the system but do not forget<br />
to finalize your disc after creation. This set cannot<br />
read DirectCD recordings.<br />
•In order to get audio CD quality, you need to<br />
record your MP3 CD at 128 kbps. You can record<br />
up to 256 kbps. Beyond 256 kbps, the unit might<br />
not read the CD.<br />
• Do not combine CD Audio and MP3 tracks onto<br />
a CD-R(W) or CD-ROM. The player will only<br />
playback CD audio tracks from mixed CD formats.<br />
• ID3 tag (Album, song, artist name) is not<br />
supported.<br />
• If over 400 items (songs/folders) are on the disc,<br />
only the first 400 songs can be played.<br />
• Resume function does not operate in MP3 mode.<br />
SOURCE<br />
SURROUND<br />
PRESET - PRESET +<br />
VCR 1<br />
DVD<br />
CD<br />
ON OFF TV<br />
VCR 2 AM•FM SAT•CABLE<br />
/ C H +<br />
TAPE<br />
L C R<br />
LS LFE RS<br />
Loading and playing an audio CD<br />
1. Press STOP/EJECT button on the front panel to open the<br />
disc tray. Place disc on the disc tray with the label side<br />
facing up. Press STOP/EJECT again to close disc tray.<br />
DIGITAL<br />
The disc will be read to detect whether an audio CD or<br />
MP3 CD has been inserted.<br />
2. Playback begins automatically after the disc has been<br />
read.<br />
An audio CD CD or MP3 icon MP3<br />
will show on the left<br />
of the display.<br />
3. Press PLAY/PAUSE on the main unit or PAUSE on the<br />
remote control to pause playback. Press PLAY/PAUSE again<br />
on the main unit or PLAY on the remote to resume normal<br />
playback.<br />
OUND<br />
ET +<br />
NOTE<br />
mp3<br />
DVD DIGITAL<br />
VCD PRO.LOGIC<br />
CD<br />
MP3<br />
INTRORANDOM<br />
If the CD is a MP3 audio CD, reading may take up<br />
to 2 minutes.<br />
BA<br />
RECORD<br />
RP<br />
T<br />
REPEAT PROGRAM<br />
INPUT SEEK ANT-FMS<br />
REVERSE PLAY FORWARD<br />
STOP PAUSE<br />
AUDIO DIGIT AL LEVEL SURR<br />
0<br />
SUBTITLE LANG ANGLE FRAME<br />
u n i v e r s a l<br />
L C R<br />
LS LFE RS
4. Press SKIP REVERSE on the main unit or CH- on the<br />
remote to return to the previous track. Press SKIP FOR-<br />
WARD on the main unit or CH + on the remote to go to<br />
the next track.<br />
SOURCE<br />
5. Press STOP/EJECT on the main unit or STOP on the<br />
remote control to end playback.<br />
Quick scan<br />
SURROUND<br />
PRESET - PRESET +<br />
mp<br />
1. Press and hold FAST FORWARD or FAST REVERSE on<br />
the main unit or FORWARD or REVERSE on the remote to<br />
scan through a track quickly during playback. To change<br />
speed to 1, 2 or 3 times, press repeatedly during scan.<br />
Quick scan does not work on MP3 music.<br />
T AL<br />
2. Press PLAY on the main unit or the remote to resume<br />
normal playback.<br />
OUND<br />
SET +<br />
NOTE<br />
BAND/APP<br />
RPT/PGM<br />
DIGITAL<br />
BASS/TREBLE<br />
TUNE - TUNE +<br />
BAND<br />
RPT/<br />
TUN<br />
V O L<br />
CD<br />
MUTE<br />
IDE•RDM<br />
RECORD<br />
/ C H +<br />
/<br />
SHIFT<br />
C H -<br />
STOP PAUSE<br />
TAPE<br />
INFO<br />
V O L<br />
G O B A C K • D I S C<br />
INPUT SEEK ANT-FMS<br />
REVERSE PLAY FORWARD<br />
AUDIO DIGIT AL LEVEL SURR<br />
0<br />
SUBTITLE LANG ANGLE FRAME<br />
u n i v e r s a l<br />
When playback is interrupted, the location at<br />
which it stopped will be memorized.<br />
Playback will resume at the position it was last<br />
stopped. Resume playback does not work on MP3<br />
music.<br />
mp3<br />
C<br />
7 8 9<br />
REPEAT RANDOM PROGRAM<br />
INPUT SEEK ANT-FMS<br />
REVERSE PLAY FORWARD<br />
RECORD<br />
STOP PAUSE<br />
AUDIO DIGIT AL LEVEL SURR<br />
0<br />
SUBTITLE LANG ANGLE FRAME<br />
C<br />
RECORD<br />
C<br />
7 8 9<br />
INPUT SEEK ANT-FMS<br />
REVERSE PLAY FORWARD<br />
STOP PAUSE<br />
AUDIO DIGIT AL LEVEL SURR<br />
0<br />
C<br />
REPEAT RANDOM PROGRAM<br />
Repeat<br />
CD / MP3 Player<br />
There are 3 repeat options for CD playback.<br />
Repeat DISC Repeat Track Repeat Folder Standard play<br />
(for MP3) (for MP3)<br />
REPEAT REPEAT TRACK REPEAT OFF<br />
(for audio CD)<br />
The corresponding icon will be shown on the top of the<br />
display.<br />
1. Press RPT/PGM on the main unit or SHIFT and number<br />
7 / REPEAT repeatedly to toggle among repeat options.<br />
When playing an audio CD Repeat can only be activated<br />
while playing.<br />
V O L<br />
MUTE<br />
GUIDE•RDM<br />
Random<br />
/<br />
SHIFT<br />
OK<br />
C H -<br />
FUNCTION<br />
INFO<br />
V O L<br />
G O B A C K • D I S C<br />
M<strong>EN</strong>U CLEAR<br />
1 2 3<br />
4 5 6<br />
7 8 9<br />
INPUT SEEK ANT-FMS<br />
REVERSE PLAY FORWARD<br />
STOP PAUSE<br />
1. Press and hold TREBLE on the main unit or press SHIFT<br />
and number 8 / RANDOM for random<br />
playback.<br />
V O L<br />
MUTE<br />
GUIDE•RDM<br />
GITAL<br />
/<br />
SHIFT<br />
OK<br />
C H -<br />
FUNCTION<br />
INFO<br />
V O L<br />
G O B A C K • D I S C<br />
BAND/APP<br />
RPT/PGM<br />
BASS/TREBLE<br />
TUNE - TUNE +<br />
C C C<br />
C<br />
REPEAT RANDOM PROGRAM<br />
RECORD<br />
M<strong>EN</strong>U CLEAR<br />
INPUT SEEK ANT-FMS<br />
REVERSE PLAY FORWARD<br />
RECORD<br />
0<br />
1 2 3<br />
C C C<br />
4 5 6<br />
C<br />
7 8 9<br />
REPEAT RANDOM PROGRAM<br />
0<br />
C<br />
C<br />
STOP PAUSE<br />
31<br />
<strong>EN</strong>
CD / MP3 Player<br />
On- screen banner display for CD playback<br />
General use<br />
1. Press INFO on the remote control to hide and show<br />
on- screen banner. (Only audio CD banner)<br />
2. Use the LEFT / RIGHT arrow keys to move cursor on the<br />
banner. Selected feature icon will be<br />
highlighted.<br />
3. Press OK to open menu under selected feature.<br />
32<br />
Track Intro<br />
icon<br />
Bookmarks Disc type<br />
Time display mode<br />
V O L<br />
MUTE<br />
GUIDE•RDM<br />
MUTE<br />
GUIDE•RDM<br />
MUTE<br />
GUIDE•RDM<br />
/<br />
SHIFT<br />
OK<br />
/<br />
SHIFT<br />
OK<br />
C H -<br />
FUNCTION<br />
/<br />
SHIFT<br />
OK<br />
C H -<br />
FUNCTION<br />
C H -<br />
FUNCTION<br />
M<strong>EN</strong>U CLEAR<br />
1 2 3<br />
G O B A C K • D I<br />
INFO<br />
C C C<br />
V O L<br />
G O B A C K • D I S C<br />
INFO<br />
M<strong>EN</strong>U CLEAR<br />
1 2 3<br />
G O B A C K • D I S<br />
INFO<br />
C C C<br />
Time indicator<br />
Selecting a track<br />
1. Refer to “General use” to open the track<br />
menu.<br />
2. Enter track number. Add 0 in front of single-digit track<br />
number (e.g. 9 = 09).<br />
NOTE<br />
M<strong>EN</strong>U CLEAR<br />
1 2 3<br />
C C C<br />
4 5 6<br />
C C<br />
7 8 9<br />
REPEAT RANDOM PROGRAM<br />
INPUT SEEK ANT-FMS<br />
REVERSE PLAY FORWARD<br />
IntroScan (Only for audio CDs)<br />
IntroScan plays the first few seconds of each track.<br />
1. Refer to “General use” to open the IntroScan<br />
menu. IntroScan will start automatically after you<br />
have pressed OK.<br />
0<br />
You must be in playback mode for track selection.<br />
Shortcut: enter track number directly using<br />
number buttons to select a track during playback.<br />
2. Press OK again, PLAY or PLAY/PAUSE on the main unit<br />
to end IntroScan. The track that you stopped at will be<br />
played normally.<br />
OUND<br />
SET +<br />
mp3<br />
NOTE<br />
C<br />
7 8 9<br />
REPEAT RANDOM PROGRAM<br />
INPUT SEEK ANT-FMS<br />
REVERSE PLAY FORWARD<br />
RECORD<br />
STOP PAUSE<br />
AUDIO DIGIT AL LEVEL SURR<br />
IntroScan ends when all the tracks have been<br />
played.<br />
0<br />
C
Bookmarks (Audio CDs Only)<br />
The bookmark feature allows you to select certain points<br />
on the disc where you want to jump to quickly. 9<br />
bookmarks can be selected.<br />
Adding Bookmarks (Audio CDs Only)<br />
1. Refer to “General use” on page 32 to open the<br />
bookmark menu.<br />
2. Use the arrow keys to move the cursor (green frame) to<br />
the “Mark” check line, then press OK to add bookmark<br />
when you reach the point you want to do so.<br />
MUTE<br />
GUIDE•RDM<br />
C H -<br />
M<strong>EN</strong>U CLEAR<br />
1 2 3<br />
3. To add another bookmark, move the cursor to the right<br />
and then press OK when you reach another point you want<br />
to do so.<br />
4. Move cursor to the door icon and then press OK<br />
to exit menu.<br />
Recalling bookmarks<br />
1. Refer to “General use” on page 32 to open the<br />
bookmark menu.<br />
2. Use the UP arrow to move the cursor (green frame) to<br />
the “Go To” check line and use the LEFT or RIGHT arrow to<br />
the bookmarked point you want to recall.<br />
3. Press OK to recall bookmarked point.<br />
MUTE<br />
GUIDE•RDM<br />
/<br />
SHIFT<br />
OK<br />
FUNCTION<br />
G O B A C K • D I S<br />
INFO<br />
C C C<br />
/<br />
SHIFT<br />
OK<br />
C H -<br />
FUNCTION<br />
G O B A C K • D I S C<br />
INFO<br />
M<strong>EN</strong>U CLEAR<br />
1 2 3<br />
4. Use the arrow buttons to move cursor to the door<br />
icon and then press OK to exit menu.<br />
MUTE<br />
GUIDE•RDM<br />
/<br />
SHIFT<br />
OK<br />
C H -<br />
FUNCTION<br />
INFO<br />
M<strong>EN</strong>U CLEAR<br />
MUTE<br />
GUIDE•RDM<br />
1 2 3<br />
G O B A C K • D I S<br />
C C C<br />
/<br />
SHIFT<br />
OK<br />
C H -<br />
FUNCTION<br />
G O B A C K • D I S C<br />
INFO<br />
M<strong>EN</strong>U CLEAR<br />
1 2 3<br />
Clearing bookmarks<br />
CD / MP3 Player<br />
The bookmarks are cleared each time a disc is removed<br />
from the player or when the power is turned off<br />
completely.<br />
If all 9 bookmarks are in use, you can still mark new points<br />
but the previous bookmarks will be erased.<br />
Time display (Audio CDs Only)<br />
1. Refer to “General use” on page 32 to open the time<br />
display menu.<br />
2. Press OK repeatedly to switch among "Track Elapsed",<br />
"Track Remain" , “Disc Elapsed” and “Disc Remain” time<br />
during playback. Selected mode shows on banner.<br />
Repeat and random features<br />
MUTE<br />
There are 5 options for this feature.<br />
1. Repeat Track – plays one track over repeatedly.<br />
2. Repeat Disc – plays the disc you have selected or being<br />
played at the moment over repeatedly.<br />
3. Random - plays tracks randomly on one disc. (Audio CD<br />
only)<br />
4. Random Repeat Disc - plays tracks randomly and over<br />
repeatedly on disc. (Audio CD only)<br />
5. Repeat Off – Ends the repeat function.<br />
Press SHIFT and 7 / REPEAT for repeat modes.<br />
V O L<br />
Press SHIFT and 8 / RANDOM for random modes.<br />
V O L<br />
MUTE<br />
GUIDE•RDM<br />
MUTE<br />
GUIDE•RDM<br />
NOTE<br />
/<br />
SHIFT<br />
OK<br />
C H -<br />
FUNCTION<br />
/<br />
SHIFT<br />
OK<br />
C H -<br />
FUNCTION<br />
GUIDE•RDM<br />
/<br />
SHIFT<br />
OK<br />
C H -<br />
FUNCTION<br />
G O B A C K • D I S C<br />
INFO<br />
M<strong>EN</strong>U CLEAR<br />
INFO<br />
1 2 3<br />
V O L<br />
G O B A C K • D I S C<br />
V O L<br />
G O B A C K • D I S C<br />
INFO<br />
M<strong>EN</strong>U CLEAR<br />
1 2 3<br />
C C C<br />
4 5 6<br />
7 8 9<br />
REPEAT RANDOM PROGRAM<br />
INPUT SEEK ANT-FMS<br />
REVERSE PLAY FORWARD<br />
Select among the 5 options until the desired one<br />
shows on banner.<br />
C<br />
M<strong>EN</strong>U CLEAR<br />
INPUT SEEK ANT-FMS<br />
REVERSE PLAY FORWARD<br />
0<br />
1 2 3<br />
C C C<br />
4 5 6<br />
C<br />
7 8 9<br />
REPEAT RANDOM PROGRAM<br />
0<br />
C<br />
C<br />
<strong>EN</strong>
CD / MP3 Player<br />
Program playback<br />
Edit program<br />
1. In stop mode, press and hold RPT / PGM on the main<br />
unit or SHIFT 9 / PROGRAM on the remote control to display<br />
program edit playlist.<br />
2. The box under “TRACK” will be highlighted. Press UP or<br />
DOWN arrow buttons or number buttons to select track.<br />
Press OK.<br />
3. “Add” will be highlighted automatically after track is<br />
selected. Press OK to add selected track onto playlist.<br />
34<br />
V O L<br />
MUTE<br />
GUIDE•RDM<br />
MUTE<br />
GUIDE•RDM<br />
/<br />
SHIFT<br />
OK<br />
IGITAL<br />
C H -<br />
FUNCTION<br />
/<br />
SHIFT<br />
OK<br />
C H -<br />
FUNCTION<br />
V O L<br />
G O B A C K • D I S C<br />
INFO<br />
M<strong>EN</strong>U CLEAR<br />
1 2 3<br />
G O B A C K • D I S<br />
INFO<br />
C C C<br />
MUTE<br />
GUIDE•RDM<br />
BAND/APP<br />
RPT/PGM<br />
BASS/TREBLE<br />
TUNE - TUNE +<br />
/<br />
SHIFT<br />
OK<br />
C H -<br />
FUNCTION<br />
M<strong>EN</strong>U CLEAR<br />
1 2 3<br />
G O B A C K • D I<br />
INFO<br />
C C C<br />
M<strong>EN</strong>U CLEAR<br />
1 2 3<br />
C C C<br />
4 5 6<br />
C<br />
7 8 9<br />
REPEAT RANDOM PROGRAM<br />
0<br />
INPUT SEEK ANT-FMS<br />
REVERSE PLAY FORWARD<br />
C<br />
M<strong>EN</strong>U CLEAR<br />
1 2 3<br />
C C C<br />
4 5 6<br />
C C<br />
7 8 9<br />
REPEAT RANDOM PROGRAM<br />
0<br />
INPUT SEEK ANT-FMS<br />
REVERSE PLAY FORWARD<br />
4. Repeat steps 2 and 3 to add additional tracks to the program.<br />
5. Move to highlight “Play” (start program playback) or<br />
“Done” (return to normal playback with program saved)<br />
and then press OK to confirm program playback.<br />
NOTE<br />
Delete Program<br />
1. In stop mode, press and hold RPT / PGM on the main<br />
unit or SHIFT 9 / PROGRAM on the remote control to display<br />
program edit playlist.<br />
2. Use the LEFT or RIGHT arrow to select Playlist, then use<br />
the UP or DOWN arrows to select and highlight the<br />
programmed track you want to delete on the playlist.<br />
3. Use the arrow buttons to highlight “Delete” and then<br />
press OK to delete track.<br />
4. Highlight “Play” (to start program playback) or “Done”<br />
(to return to normal playback with program saved) and<br />
then press OK.<br />
Insert track<br />
1. In stop mode, press and hold RPT / PGM on the main<br />
unit or SHIFT 9 / PROGRAM on the remote control to display<br />
program edit playlist.<br />
2. Use the arrows to highlight item on the playlist where<br />
you want to insert a track before it.<br />
3. Refer to “Edit program” to select a track to be inserted.<br />
4. Highlight “Insert” and then press OK<br />
5. Highlight “Play” (start program playback) or “Done”<br />
(return to normal playback with program saved) and then<br />
press OK.<br />
Cancel program<br />
You can select at maximum 32 items by repeating<br />
steps 2 - 3.<br />
Program will be cancelled when;<br />
1. disc tray is opened;<br />
2. power is turned off;<br />
3. STOP is pressed twice. The red PGM indicator will<br />
disappear on display and player will resume normal playback<br />
mode. Nevertheless, the program will remain in memory<br />
and can be recalled by pressing PROGRAM again.
On- screen display for MP3 playback<br />
Refer to “General Use” on page 32 for basic operations.<br />
Normal Play<br />
File mode<br />
1. Use the UP or DOWN<br />
arrow buttons on the remote<br />
to select the file you wish to<br />
begin playing.<br />
2. Press PLAY on the main unit or on the remote control to<br />
start playback. If you are currently playing, then press OK<br />
button to select a different MP3 to play. All the files or<br />
folders will be played starting with the one you have<br />
selected.<br />
OUND<br />
SET +<br />
mp3<br />
Playback stops when all files have been played.<br />
MUTE<br />
GUIDE•RDM<br />
C<br />
7 8 9<br />
REPEAT RANDOM PROGRAM<br />
INPUT SEEK ANT-FMS<br />
REVERSE PLAY FORWARD<br />
RECORD<br />
STOP PAUSE<br />
AUDIO DIGIT AL LEVEL SURR<br />
0<br />
/<br />
SHIFT<br />
OK<br />
C<br />
C H -<br />
FUNCTION<br />
M<strong>EN</strong>U CLEAR<br />
1 2 3<br />
G O B A C K • D I S<br />
INFO<br />
C C C<br />
Folder mode<br />
1. Use the arrow buttons on<br />
the remote to select the<br />
folder you wish to play.<br />
CD / MP3 Player<br />
2. Press OK to enter the folder and PLAY when in stop<br />
mode or OK when currently playing to begin playback of<br />
all the files in the folder.<br />
OUND<br />
SET +<br />
mp3<br />
Playback stops when all files have been played.<br />
3. To exit a folder, use the arrow buttons to select the<br />
RETURN arrow then press OK.<br />
MUTE<br />
GUIDE•RDM<br />
/<br />
SHIFT<br />
OK<br />
C H -<br />
FUNCTION<br />
INFO<br />
M<strong>EN</strong>U CLEAR<br />
1 2 3<br />
RECORD<br />
G O B A C K • D I S<br />
C C C<br />
C<br />
7 8 9<br />
REPEAT RANDOM PROGRAM<br />
INPUT SEEK ANT-FMS<br />
REVERSE PLAY FORWARD<br />
STOP PAUSE<br />
AUDIO DIGIT AL LEVEL SURR<br />
0<br />
C<br />
35<br />
<strong>EN</strong>
CD / MP3 Player<br />
Program Play<br />
1. In stop mode, press and hold RPT / PGM on the main<br />
unit or SHIFT and 9/PROGRAM on the remote to access<br />
the program display.<br />
The “PROG.” icon will show on the display.<br />
2. Use the UP and DOWN arrows on the remote to select<br />
the folder on the left that you wish to add to the program<br />
list.<br />
3. Press OK to move the file or folder to the right<br />
programming list.<br />
4. Once all the files or folders have been selected, Press<br />
PLAY to being program playback.<br />
36<br />
OUND<br />
SET +<br />
V O L<br />
MUTE<br />
GUIDE•RDM<br />
MUTE<br />
GUIDE•RDM<br />
D IGITAL<br />
/<br />
SHIFT<br />
OK<br />
C H -<br />
FUNCTION<br />
C H -<br />
INFO<br />
V O L<br />
G O B A C K • D I S C<br />
M<strong>EN</strong>U CLEAR<br />
1 2 3<br />
mp3<br />
/<br />
SHIFT<br />
OK<br />
FUNCTION<br />
G O B A C K • D I S C<br />
INFO<br />
BAND/APP<br />
RPT/PGM<br />
BASS/TREBLE<br />
TUNE - TUNE +<br />
M<strong>EN</strong>U CLEAR<br />
1 2 3<br />
C C C<br />
4 5 6<br />
C<br />
7 8 9<br />
REPEAT RANDOM PROGRAM<br />
INPUT SEEK ANT-FMS<br />
REVERSE PLAY FORWARD<br />
MUTE<br />
GUIDE•RDM<br />
RECORD<br />
C<br />
RECORD<br />
/<br />
SHIFT<br />
OK<br />
0<br />
C<br />
STOP PAUSE<br />
7 8 9<br />
REPEAT RANDOM PROGRAM<br />
INPUT SEEK ANT-FMS<br />
REVERSE PLAY FORWARD<br />
STOP PAUSE<br />
AUDIO DIGIT AL LEVEL SURR<br />
0<br />
C H -<br />
FUNCTION<br />
M<strong>EN</strong>U CLEAR<br />
1 2 3<br />
C<br />
G O B A C K • D I S<br />
INFO<br />
C C C<br />
5. Press STOP or RPT / PGM on the main unit or STOP or<br />
SHIFT 9/PROGRAM to end program playback.<br />
6. To play program again, press and hold RPT / PGM on<br />
the main unit or SHIFT 9/PROGRAM while in stop mode to<br />
reactivate program playback. Press PLAY to begin.<br />
Delete a specific File or Folder from Program List<br />
1. In stop mode, use the LEFT or RIGHT arrows to select<br />
program list, then use the UP or DOWN arrows to select<br />
file to be deleted and press CLEAR to delete.<br />
Delete All<br />
V O L<br />
MUTE<br />
GUIDE•RDM<br />
MUTE<br />
GUIDE•RDM<br />
DIGITAL<br />
/<br />
SHIFT<br />
OK<br />
C H -<br />
FUNCTION<br />
C H -<br />
M<strong>EN</strong>U CLEAR<br />
INFO<br />
V O L<br />
G O B A C K • D I S C<br />
BAND/APP<br />
RPT/PGM<br />
TUNE -<br />
D IGITAL<br />
RECORD<br />
BAND/APP<br />
RPT/PGM<br />
BASS/TREBLE<br />
TUNE - TUNE +<br />
1 2 3<br />
C C C<br />
4 5 6<br />
7 8 9<br />
REPEAT RANDOM PROGRAM<br />
INPUT SEEK ANT-FMS<br />
REVERSE PLAY FORWARD<br />
STOP PAUSE<br />
1. In stop mode, use the LEFT or RIGHT arrows to select<br />
“ALL CLEAR” icon and press OK to clear all.<br />
MUTE<br />
GUIDE•RDM<br />
/<br />
SHIFT<br />
OK<br />
FUNCTION<br />
INFO<br />
1 2 3<br />
G O B A C K • D<br />
C C C<br />
/<br />
SHIFT<br />
OK<br />
C H -<br />
FUNCTION<br />
INFO<br />
M<strong>EN</strong>U CLEAR<br />
1 2 3<br />
G O B A C K • D I S<br />
C C C<br />
GUIDE•RD<br />
C<br />
MUTE<br />
GUIDE•RDM<br />
0<br />
C<br />
OK<br />
FUNCTION<br />
SHIFT<br />
OK<br />
FUNCTION<br />
INFO<br />
M<strong>EN</strong>U CLEAR<br />
1 2 3<br />
C C C<br />
4 5 6<br />
C C<br />
INFO<br />
M<strong>EN</strong>U CLEAR<br />
1 2 3<br />
G O B A C K •<br />
C C C
Operating the <strong>Radio</strong><br />
The <strong>receiver</strong> has a built-in tuner that allows for AM/FM<br />
radio function.<br />
Manual tuning<br />
1. Connect the FM and AM antenna accordingly (see<br />
"Connecting the Antenna" on page 5 section for details)<br />
2. Press POWER on the main unit.<br />
3. Press SOURCE until tuner mode is selected or press<br />
AM/FM on the remote control.<br />
WER<br />
4. To select band, press the BAND/APP on the main unit or<br />
AM/FM button on the remote again to toggle between<br />
AM/FM mode.<br />
When an FM station broadcast Stereo sound, ST is displayed.<br />
D IGITAL<br />
SOURCE<br />
BAND/APP<br />
RPT/PGM<br />
SURROUND<br />
PRESET - PRESET +<br />
BASS/TREBLE<br />
TUNE - TUNE +<br />
POWER<br />
VCR 1<br />
DVD<br />
O L<br />
CD<br />
VCR 1<br />
DVD<br />
CD<br />
PR<br />
ON OFF TV<br />
VCR 2 AM•FM SAT•CABLE<br />
/ C H +<br />
ON OFF TV<br />
VCR 2 AM•FM SAT•CABLE<br />
/ C H +<br />
TAPE<br />
TAPE<br />
V O<br />
<strong>Radio</strong><br />
5. Tune the stations by pressing TUNING + or - on the<br />
main unit or FAST FORWARD or FAST REVERSE on the<br />
remote control repeatedly until the desired station is<br />
found.<br />
Alternatively, you can press and hold the respective buttons<br />
for about one second to activate the automatic SEARCH<br />
function. In this mode the <strong>receiver</strong> will automatically tune<br />
frequencies until it finds a station<br />
T AL<br />
6. Repeat steps 5 to tune another radio station.<br />
Select sound effect if needed by pressing SURROUND or<br />
SURR/FRAME sound (see "Advance sound section" on<br />
page 15 and 16 for details)<br />
SOURCE<br />
BAND/APP<br />
RPT/PGM<br />
SURROUND<br />
PRESET - PRESET +<br />
BASS/TREBLE<br />
TUNE - TUNE +<br />
DVD DIGITAL<br />
VCD PRO.LOGIC<br />
CD<br />
MP3<br />
INTRORANDOM<br />
NOTE<br />
mp3<br />
7 8 9<br />
REPEAT RANDOM PROGRAM<br />
INPUT SEEK ANT-FMS<br />
REVERSE PLAY FORWARD<br />
RECORD<br />
INPUT SEEK ANT FMS<br />
REVERSE PLAY FORWARD<br />
RECORD<br />
STOP PAUSE<br />
AUDIO DIGIT AL LEVEL SURR<br />
0<br />
SUBTITLE LANG ANGLE FRAME<br />
L C R<br />
LS LFE RS<br />
STOP PAUSE<br />
AUDIO DIGIT AL LEVEL SURR<br />
SUBTITLE LANG ANGLE FRAME<br />
u n i v e r s a l<br />
1. If there is interference, modify the location<br />
of the antenna until the optimal sound is heard.<br />
TV and other electronic devices could be the<br />
cause of interferences so try to position the<br />
antenna away from them.<br />
2. Weak signal can affect the "auto Search<br />
function". Adjust the antenna for better reception<br />
for more efficient search.<br />
37<br />
<strong>EN</strong>
<strong>Radio</strong><br />
Storing radio stations:<br />
The <strong>receiver</strong> can store up to 30 radio stations in memory.<br />
You can enter every single radio station yourself or the<br />
<strong>receiver</strong> can store all available radio station automatically<br />
in an ascending order.<br />
Automatic preset storing :<br />
1. Press BAND/APP on the main unit or AM/FM repeatedly<br />
on the remote control to select the FM band.<br />
2- Press and hold<br />
BAND/APP/RPT/PGM for 3<br />
seconds to start automatic<br />
preset programming.<br />
“AUTO” will be<br />
flashing during the<br />
automatic storing process.<br />
<strong>Radio</strong> frequencies will be browsed and radio stations<br />
stored automatically. When all available radio stations are<br />
stored or if all 30 memory locations are full, the auto preset<br />
will stop.<br />
Manual preset<br />
1. Select the band by pressing AM/FM repeatedly<br />
2. Tune to a radio station (see "Manual tuning" on page 37<br />
above for details)<br />
38<br />
IGITAL<br />
BAND/APP<br />
RPT/PGM<br />
BASS/TREBLE<br />
TUNE - TUNE +<br />
DVD DIGITAL<br />
VCD PRO.LOGIC<br />
CD<br />
MP3<br />
INTRORANDOM<br />
NOTE<br />
DIGITAL<br />
VCR 1<br />
DVD<br />
CD<br />
ON OFF TV<br />
VCR 2 AM•FM SAT•CABLE<br />
Weak signal can affect the "Automatic Preset<br />
Storing function" efficiency. Adjust the antenna<br />
for the best reception for more efficient search.<br />
/ C H +<br />
BAND/APP<br />
RPT/PGM<br />
TAPE<br />
BASS/TREBLE<br />
TUNE - TUNE +<br />
L C R<br />
LS LFE RS<br />
3. Press M<strong>EN</strong>U on the remote control. "PROG" will appear<br />
on the display<br />
DVD DIGITAL<br />
VCD PRO.LOGIC<br />
CD<br />
MP3<br />
INTRORANDOM<br />
GUIDE•RDM•PTY<br />
4. While the word "PROG " is still flashing, input your<br />
desired preset number (1-30) using the numeric keys on the<br />
remote control to store the radio station.<br />
DVD DIGITAL<br />
VCD PRO.LOGIC<br />
CD<br />
MP3<br />
INTRORANDOM<br />
Retrieving preset stations<br />
M<strong>EN</strong>U CLEAR<br />
1 2 3<br />
4 5 6<br />
INFO•RDS<br />
1. Press SOURCE on the unit or AM/FM on the remote<br />
control to enter tuner mode<br />
OK<br />
FUNCTION<br />
M<strong>EN</strong>U CLEAR<br />
1 2 3<br />
C C C<br />
4 5 6<br />
C C<br />
7 8 9<br />
REPEAT RANDOM PROGRAM<br />
0<br />
INPUT SEEK ANT-FMS<br />
REVERSE PLAY FORWARD<br />
L C R<br />
LS LFE RS<br />
L C R<br />
LS LFE RS<br />
2. Press PRESET + or PRESET - on the unit or CH+ or CH -<br />
on the remote control to tune up or down preset channels.<br />
SOURCE<br />
SURROUND<br />
PRESET - PRESET +<br />
m<br />
V O L<br />
CD<br />
MUTE<br />
DE•RDM<br />
/ C H +<br />
/<br />
SHIFT<br />
C H -<br />
TAPE<br />
INFO<br />
V O L<br />
G O B A C K • D I S C
Power<br />
No power ?<br />
• Correctly connect the AC Power Cord to an AC Outlet.<br />
Power is switching off automatically ?<br />
• If the player is not used, i.e. no key pressed for 30 minutes,<br />
it automatically switches to standby (Auto Power Off).<br />
Press the SOURCE key to switch the player on again.<br />
The keys do not activate the functions they control (unit<br />
and / or remote control).<br />
• Set the STANDBY key to OFF (light on) and back to ON<br />
again. Alternatively, turn off the power, disconnect the<br />
power plug and then re-connect it (The player may not be<br />
operating properly due to lightning, static electricity or<br />
some other external factors).<br />
• If keys still do not activate the functions they control<br />
even when the above mentioned corrective actions are<br />
taken, contact your RCA retailer.<br />
Video and audio<br />
There is no picture ?<br />
• Turn on the TV set.<br />
• Check connections.<br />
• Make the correct input selection on the TV set.<br />
The picture is distorted or shakes during search, forward<br />
or reverse.<br />
• Search, forward or reverse playback generates a slight<br />
distortion, but this is not a malfunction.<br />
There is no sound or it can hardly be heard ?<br />
• Make sure the speakers are connected.<br />
• Make sure the MUTE button is not on.<br />
• Check connections.<br />
• Make the correct audio input selection and volume<br />
adjustment on the TV set or hifi system (e.g. AV selector).<br />
• There is no sound during a pause (still picture), still picture<br />
advance, or slow playback.<br />
• Disc is defaulted to DTS.<br />
No "Surround" sound ?<br />
• Check speaker configuration in the menu.<br />
Noise interference appears on the TV, while watching a<br />
TV program and the DVD player is left on ?<br />
• Turn off DVD player.<br />
• The TV is too close to the audio system.<br />
Volume level differences playing different disc types<br />
(DVDs, audio / video CDs).<br />
• Adjust the master volume .<br />
No audio from one channel.<br />
• Check the speaker level setting.<br />
• Check the speaker wire or cable connections.<br />
Troubleshooting Tips<br />
Remote control<br />
The remote control does not work ?<br />
• Load the batteries with their polarities (+ and –) aligned<br />
correctly.<br />
• Batteries are low. Replace with new ones.<br />
• Point the remote control to the front of the player.<br />
• Operate the remote control within an 26 ft range from<br />
the player.<br />
• Remove any obstacles between the remote control and<br />
the red LED on the player.<br />
The invalid icon appears on-screen ?<br />
• When invalid icon appears on-screen, it indicates that you<br />
have pressed the wrong key, because :<br />
1. The DVD’s does not allow it.<br />
2. The DVD's does not propose this option /e.g., angles.<br />
3. The function is not available on that part of the<br />
disc.<br />
4. You have requested a title or chapter number or<br />
search time that is not available.<br />
TV or video recorder cannot be operated with the remote<br />
control.<br />
• Not all models can be operated with the supplied universal<br />
remote control.<br />
No picture or the picture shown is not that of the DVD<br />
player.<br />
• Switch off the other video device connected to the AV<br />
jack of the player.<br />
Playback<br />
Playback does not start when the PLAY key is pressed ?<br />
• Make sure that the disc (single sided) is loaded correctly<br />
with the title label facing up.<br />
• Make sure you are in the proper source mode.<br />
Playback stops immediately after the PLAY key is<br />
pressed ?<br />
• This player can play DVDs, Video CDs and Audio and MP3<br />
CDs only, check that your disc corresponds to one of these<br />
formats.<br />
• If the disc is dirty, wipe it with a soft and clean cloth.<br />
• Condensation occurred inside the player. Leave it at room<br />
temperature for 1 to 2 hours.<br />
Disc cannot be played.<br />
• Wipe the disc clean.<br />
• Use a RCA lens cleaner.<br />
• The disc's region No. differs from your player's region No.<br />
Search forward & reverse playback does not work ?<br />
• Some DVDs have segments where search forward &<br />
reverse playback functions do not work.<br />
39<br />
<strong>EN</strong>
Troubleshooting Tips<br />
Subtitle, language, camera angle etc.<br />
Disc menu operation and contents may differ from disc to<br />
disc. Please refer to the instructions accompanying the disc.<br />
There are no subtitles ?<br />
• Check that the subtitle is recorded on the disc.<br />
• Subtitles disappear from the TV screen. See page 21 to<br />
display subtitles.<br />
Subtitle (or language) setting cannot be changed ?<br />
• The disc being played has been recorded in only one<br />
language.<br />
• Depending on the type of DVD, some segments limit<br />
language selection.<br />
The picture is not displayed in the correct format on the<br />
TV (4 x 3 or 16 x 9)<br />
• According to your TV, make the correct "TV Screen"<br />
setting in the set-up menu (page 29).<br />
The camera angle cannot be changed with the angle<br />
button ?<br />
• This function does not work when a DVD has not been<br />
recorded with a multi-camera angle system. Some DVDs use<br />
a multi-camera angle system only in certain portions of the<br />
DVD.<br />
The menu language is not the one you want ?<br />
• The menu language for your player has not been set during<br />
set-up.<br />
• Your preferred menu language on a DVD disc (if<br />
available) has not been set during set up.<br />
Audio (spoken) and / or subtitle language is not the one<br />
selected during the initial player set-up ?<br />
• If the audio or subtitle language is not available on the<br />
DVD disc, the language selected during initial player set-up<br />
will not be heard or seen. The disc's priority language<br />
(default language) is selected automatically. If you want<br />
another language, press menu during playback, if the disc<br />
has its own language selection menu (Refer to page 21).<br />
<strong>Radio</strong><br />
STEREO indicator is off.<br />
• Adjust the antenna.<br />
The signal is Mono. Severe hum or noise.<br />
• The signal is too weak. Connect an external antenna.<br />
40<br />
Equipment Specifications <strong>RTDVD1</strong>:<br />
AMPLIFIER SECTION:<br />
All 5 channels:<br />
<strong>RTDVD1</strong>: each 32W at 6 ohm. 010% THD @1 kHz<br />
Subwoofer channel: 40w at 6Ω<br />
Muting Attenuation: 65dB<br />
Frequency Response: 40Hz to 20kHz +/-3dB<br />
Signal to Noise Ratio: 65dB (Bypass mode)<br />
VIDEO SECTION:<br />
Input ( Sensitivity/ Impedance ):1Vp-p/ 75ohm<br />
Output (Level/ Impedance): 1Vp-p/ 75 ohm<br />
Frequency Response: 10Hz to 6MHz at +/- 3dB<br />
Signal to noise ratio: 40dB<br />
Crosstalk @3.58MHz: 40dB<br />
AM TUNER SECTION:<br />
Frequency Response: 80Hz – 2kHz +/-6dB<br />
Usable Sensitivity: 800uV/m @ S/N 20dB<br />
Signal to Noise: 38dB<br />
Image Ratio: 27dB @ 1000kHz<br />
IF Rejection: 35dB<br />
FM TUNER SECTION:<br />
Frequency Response: 40Hz – 15kHz +/-3dB<br />
Quieting: 24dBu<br />
Signal to Noise: 60dB(stereo) / 65dB(mono)<br />
Image Ratio: 40dB<br />
IF Rejection: 50dB
Disconnect the audio system from the power source before<br />
performing any maintenance.<br />
Cleaning<br />
Clean the exterior of the system using a soft dust cloth.<br />
The player<br />
CAUTION! This system operates with a laser. It must be<br />
opened by only a qualified technician.<br />
• Never move the player during playback.<br />
• Never put more than one discs on a tray or put a disc<br />
slipping out of the guide area.<br />
Handling discs<br />
• Do not touch the signal surfaces.<br />
• Hold discs by the edges, or by<br />
one edge and the hole.<br />
Thomson Digital<br />
• Do not affix labels or adhesive tapes to the label surfaces.<br />
• Do not scratch or damage the label. Discs rotate at high<br />
speeds inside the player.<br />
• Do not use damaged (cracked or warped) discs.<br />
Cleaning discs<br />
• Dirty discs can cause poor<br />
sound and visual quality. Always<br />
keep discs clean by wiping them<br />
gently with a soft cloth from<br />
the inner edge toward the outer perimeter. Never wipe the<br />
disc in a circular motion since circular scratches are likely to<br />
occur and could cause noise during playback.<br />
• If a disc becomes dirty, wet a soft cloth in water, wring it<br />
out well, wipe the dirt away gently, and then remove any<br />
water drops with a dry cloth.<br />
• Do not use record cleaning sprays or antistatic agents on<br />
discs. Also, never clean discs with benzene, thinner, or other<br />
volatile solvents which may cause damage to disc surface<br />
Disc lens care<br />
• When your disc lens gets dirty it can also cause the system<br />
to output poor sound and visual quality. To clean the lens<br />
you will need to purchase a disc lens cleaner which can<br />
maintain the output sound and visual quality of your<br />
system. For instructions on cleaning the disc lens, refer to<br />
the ones accompanying the lens cleaner.<br />
Important battery information<br />
• Remove the batteries to avoid leakage if you do not use<br />
your remote control for more than one month.<br />
• Discard leaky batteries immediately as leaking batteries<br />
may cause skin burns or other personal injuries.<br />
• Dispose of batteries in the proper manner, according to<br />
provincial and local regulations.<br />
• Any battery may leak electrolyte if mixed with a different<br />
battery type, if inserted incorrectly, if all batteries are not<br />
replaced at the same time, if disposed of in fire, or if an<br />
attempt is made to charge a battery not intended to be<br />
recharged.<br />
Video Disc<br />
Care and Maintenance<br />
Safety precautions<br />
• Never open the cabinet under any circumstances. Any<br />
repairs or internal adjustments should be made only by a<br />
trained technician.<br />
• Never operate this product with the cabinet removed.<br />
• Do not touch the player with wet hands. If any liquid<br />
enters the player cabinet, take the player to a trained technician<br />
for inspection.<br />
• This player uses a laser to read the data on the disc. The<br />
laser mechanism corresponds to the cartridge and stylus of<br />
a record player. Although this product incorporates a laser<br />
pick-up lens, it is completely safe when operated according<br />
to directions.<br />
• Discs rotate at high speed inside the player. Do not use<br />
damaged, warped, or cracked discs.<br />
• Do not touch the pick-up lens which is located inside the<br />
disc compartment. Also, to keep dust from collecting on<br />
the pick-up lens do not leave the compartment door open<br />
for an extended period of time. If the lens becomes dirty,<br />
clean it with a soft brush, or use an air blower brush<br />
designed for camera lenses.<br />
Headset safety<br />
• Do not play your headset at a high volume. Hearing<br />
experts warn against extended high-volume play.<br />
• If you experience a ringing in your ears, reduce volume or<br />
discontinue use.<br />
• You should use extreme caution or temporarily discontinue<br />
use in potentially hazardous situations.<br />
• Even if your headset is an open-air type designed to let<br />
you hear outside sounds, don’t turn up the volume so high<br />
that you are unable to hear what is around you.<br />
Don’t infringe<br />
This product should only be used for the purposes for<br />
which it is sold, that is, entertainment, violating no copyright<br />
law. Any attempts to use this product for which it is<br />
not intended is unlawful and therefore not condoned by<br />
Thomson multimedia Inc.<br />
The descriptions and characteristics given in this document are given as a<br />
general indication and not as a guarantee. In order to provide the highest<br />
quality product possible, we reserve the right to make any improvement or<br />
modification without prior notice. The English version serves as the final<br />
reference on all products and operational details should any discrepancies<br />
arise in other languages.<br />
41<br />
<strong>EN</strong>
Remote Codes<br />
CABLE CODES<br />
ABC 5002, 5003, 5004, 5005, 5006, 5009, 5053<br />
ANTRONIX 5008, 5009<br />
ARCHER 5008, 5009, 5010, 5011<br />
CABLET<strong>EN</strong>NA 5008<br />
CABLEVIEW 5008<br />
C<strong>EN</strong>TURY 5011<br />
CITIZ<strong>EN</strong> 5011<br />
COLOUR VOICE 5012, 5013<br />
COMTRONICS 5014, 5015<br />
CONTEC 5016<br />
EASTERN 5017<br />
GARRARD 5011<br />
GC ELECTRONICS 5009<br />
GEMINI 5018, 5019, 5049<br />
G<strong>EN</strong>ERAL INSTRUM<strong>EN</strong>T 5003<br />
HAMLIN 5020, 5021, 5022, 5035, 5045<br />
HITACHI 5003<br />
HYTEX 5002<br />
JASCO 5011<br />
JERROLD 5003, 5005, 5007, 5018, 5023,<br />
5024, 5046, 5053<br />
MAGNAVOX 5025<br />
MEMOREX 5026<br />
MOVIE TIME 5002, 5027, 5028<br />
NSC 5002, 5027, 5028<br />
OAK 5002, 5016, 5029<br />
PANASONIC 5048, 5052<br />
PARAGON 5026<br />
PHILIPS 5011, 5012, 5013, 5019, 5025,<br />
5030, 5031, 5032<br />
PIONEER 5033, 5034<br />
PULSAR 5026<br />
RCA 5047, 5049, 5052<br />
REALISTIC 5009, 5049<br />
REGAL 5022, 5035<br />
REG<strong>EN</strong>CY 5017<br />
REMBRANDT 5003<br />
RUNCO 5026<br />
SAMSUNG 5014, 5034<br />
SCI<strong>EN</strong>TIFIC ATLANTA 5006, 5036, 5037, 5038<br />
SIGNAL 5014, 5018<br />
SIGNATURE 5003<br />
SL MARX 5014<br />
SPRUCER 5052<br />
STARCOM 5007, 5018, 5053<br />
STARGATE 5014, 5018<br />
STARQUEST 5018<br />
TANDY 5040<br />
TELEVIEW 5014<br />
TOCOM 5004, 5023, 5041<br />
TOSHIBA 5026<br />
TUSA 5018<br />
TV86 5027<br />
UNIKA 5008, 5009, 5011<br />
UNITED ARTISTS 5002<br />
UNITED CABLE 5053<br />
UNIVERSAL 5008, 5009, 5010, 5011<br />
VIDEOWAY 5044<br />
VIEWSTAR 5015, 5025, 5027, 5040<br />
Z<strong>EN</strong>ITH 5026, 5050, 5051<br />
42<br />
VCR CODES<br />
ADMIRAL 2131<br />
ADV<strong>EN</strong>TURA 2026<br />
AIKO 2027<br />
AIWA 2002, 2026<br />
AKAI 2003, 2004, 2005, 2007, 2008, 2111, 2112,<br />
2113<br />
AMERICAN HIGH 2021<br />
ASHA 2013<br />
AUDIO DYNAMICS 2009, 2010<br />
AUDIOVOX 2014<br />
BELL & HOWELL 2011<br />
BEAUMARK 2013<br />
BROKSONIC 2012, 2025<br />
CALIX 2014<br />
CANDLE 2013, 2014, 2015, 2016, 2017,<br />
2018, 2019<br />
CANON 2021, 2022, 2114<br />
CAPEHART 2020, 2110<br />
CARVER 2062<br />
CCE 2027, 2061<br />
CITIZ<strong>EN</strong> 2013, 2014, 2015, 2016, 2017,<br />
2018, 2019, 2027<br />
COLORTYME 2009<br />
COLT 2061<br />
CRAIG 2013, 2014, 2023, 2061<br />
CURTIS-MATHES 2000, 2002, 2009, 2013, 2016,<br />
2018, 2021, 2022, 2024, 2115<br />
CYBERNEX 2013<br />
DAEWOO 2015, 2017, 2019, 2025, 2026,<br />
2027, 2028, 2110<br />
DAYTRON 2110<br />
DBX 2009, 2010<br />
DIM<strong>EN</strong>SIA 2000<br />
DYNATECH 2002, 2026<br />
ELECTROHOME 2014, 2029<br />
ELECTROPHONIC 2014<br />
EMERSON 2002, 2012, 2014, 2015, 2021, 2024, 2025,<br />
2026,<br />
2029, 2030, 2032, 2033, 2034, 2035, 2036,<br />
2037,<br />
2038, 2039, 2040, 2041, 2042, 2044, 2045,<br />
2047,<br />
2065, 2105, 2113, 2116, 2117, 2130<br />
FISHER 2011, 2023, 2048, 2049, 2050, 2051, 2052,<br />
2118<br />
FUJI 2021, 2119<br />
FUNAI 2002, 2026<br />
GARRARD 2026<br />
GE 2000, 2001, 2013, 2021, 2022, 2053, 2115,<br />
2120<br />
GOLDSTAR 2009, 2014, 2018, 2054, 2121<br />
GRADI<strong>EN</strong>TE 2026<br />
HARLEY DAVIDSON 2026<br />
HARMAN KARDON 2009<br />
HARWOOD 2061<br />
HEADQUARTER 2011<br />
HITACHI 2002, 2055, 2056, 2057, 2107,<br />
2111, 2120, 2122<br />
HI-Q 2023<br />
INSTANT REPLAY 2021<br />
JCI 2021<br />
JC P<strong>EN</strong>NEY 2009, 2010, 2011, 2013, 2014,<br />
2021, 2022, 2055, 2056, 2058,<br />
2059, 2060, 2107, 2118<br />
J<strong>EN</strong>S<strong>EN</strong> 2055, 2056, 2111<br />
JVC 2009, 2010, 2011, 2018, 2058,<br />
2111, 2123<br />
K<strong>EN</strong>WOOD 2009, 2010, 2011, 2016, 2018,<br />
2058, 2111, 2123<br />
KLH 2061<br />
KODAK 2014, 2021<br />
LLOYD 2002, 2026<br />
LOGIK 2061<br />
LXI 2014<br />
MAGNAVOX 2021, 2022, 2062, 2063, 2104,<br />
2108, 2124<br />
MAGNIN 2013<br />
MARANTZ 2009, 2010, 2011, 2016, 2018,<br />
2021, 2058, 2062, 2064<br />
MARTA 2014<br />
MASUSHITA 2021<br />
MEI 2021
MEMOREX 2002, 2011, 2013, 2014, 2021, 2023, 2026,<br />
2104, 2131<br />
MGA 2029, 2065, 2113<br />
MGN TECHNOLOGY 2013<br />
MIDLAND 2053<br />
MINOLTA 2055, 2056, 2107<br />
MITSUBISHI 2029, 2055, 2056, 2065, 2066, 2067, 2069,<br />
2070, 2071, 2072, 2073, 2074, 2106, 2113,<br />
2123<br />
MONTGOMERY WARD 2075, 2131<br />
MOTOROLA 2021, 2131<br />
MTC 2002, 2013, 2026<br />
MULTITECH 2002, 2013, 2016, 2026, 2053, 2061<br />
NEC 2009, 2010, 2011, 2016, 2018, 2058, 2064,<br />
2076, 2078, 2079, 2111, 2123<br />
NIKKO 2014<br />
NOBLEX 2013<br />
OLYMPUS 2021<br />
OPTIMUS 2014, 2131<br />
OPTONICA 2096<br />
ORION 2035<br />
PANASONIC 2021, 2022, 2109, 2125, 2126, 2127<br />
P<strong>EN</strong>TAX 2016, 2055, 2056, 2107, 2120<br />
P<strong>EN</strong>TEX RESEARCH 2018<br />
PHILCO 2021, 2022, 2062, 2063<br />
PHILIPS 2021, 2062, 2096, 2124<br />
PILOT 2014<br />
PIONEER 2010, 2055, 2080, 2081, 2123<br />
PORTLAND 2016, 2017, 2019, 2110<br />
PROSCAN 2000, 2001<br />
PROTEC 2061<br />
PULSAR 2104<br />
QUARTER 2011<br />
QUARTZ 2011<br />
QUASAR 2021, 2022, 2125<br />
RCA 2000, 2001, 2003, 2013, 2021, 2055, 2056,<br />
2082, 2083, 2084, 2085, 2086, 2087, 2088,<br />
2089, 2090, 2091, 2107, 2115, 2120, 2125<br />
RADIOSHACK/REALISTIC 2002, 2011, 2013, 2014, 2021, 2022, 2023,<br />
2026, 2029, 2049, 2050, 2096, 2131<br />
RADIX 2014<br />
RANDEX 2014<br />
RICOH 2128<br />
RUNCO 2104<br />
SAMSUNG 2005, 2013, 2015, 2033, 2053, 2112<br />
SANKY 2104, 2131<br />
SANSUI 2010, 2092, 2111, 2123<br />
SANYO 2011, 2013, 2023<br />
SCOTT 2012, 2015, 2025, 2032, 2035, 2038, 2065,<br />
2093, 2116<br />
SEARS 2011, 2014, 2021, 2023, 2048, 2049, 2050,<br />
2051, 2055, 2056, 2107, 2118<br />
SHARP 2002, 2017, 2029, 2094, 2095, 2096, 2131<br />
SHINTOM 2004, 2056, 2061, 2098<br />
SHOGUN 2013<br />
SIGNATURE 2002, 2131<br />
SINGER 2021, 2061, 2128<br />
SONY 2002, 2004, 2098, 2099, 2119, 2128<br />
STS 2021, 2107<br />
SYLVANIA 2002, 2021, 2022, 2026, 2062, 2063, 2065,<br />
2124<br />
SYMPHONIC 2002, 2026<br />
TANDY 2002, 2011<br />
TASHIKO 2014<br />
TATUNG 2058, 2111<br />
TEAC 2002, 2026, 2058, 2085, 2111<br />
TECHNICS 2021, 2109<br />
TEKNIKA 2002, 2014, 2021, 2026, 2100, 2129<br />
TMK 2013, 2024, 2047<br />
TOSHIBA 2015, 2049, 2051, 2055, 2065, 2093, 2116<br />
TOTEVSION 2013, 2014<br />
UNITECH 2013<br />
VECTOR RESEARCH 2009, 2010, 2015, 2016<br />
VICTOR 2010<br />
VIDEO CONCEPTS 2009, 2010, 2015, 2016, 2113<br />
VIDEOSONIC 2013<br />
WARDS 2002, 2013, 2014, 2015, 2021, 2023, 2026,<br />
2029, 2055, 2056, 2061, 2096, 2101, 2102,<br />
2103, 2107, 2116, 2131<br />
XR-1000 2021, 2026, 2061<br />
YAMAHA 2009, 2010, 2011, 2018, 2058, 2111<br />
Z<strong>EN</strong>ITH 2004, 2098, 2104, 2119, 2128<br />
TV CODES<br />
Remote Codes<br />
ABEX 1172<br />
ADMIRAL 1001, 1173<br />
ADV<strong>EN</strong>TURA 1174<br />
AIKO 1016<br />
AKAI 1002<br />
ALLERON 1046<br />
AMTRON 1038<br />
ANAM NATIONAL 1003, 1038<br />
AOC 1004, 1005, 1006, 1007, 1175, 1176<br />
AUDIOVOX 1038<br />
BELCOR 1004<br />
BELL & HOWELL 1001, 1083, 1162<br />
BRADFORD 1038<br />
BROKWOOD 1004<br />
CANDLE 1004, 1006, 1008, 1174<br />
CAPEHART 1175<br />
CELEBRITY 1002<br />
C<strong>EN</strong>TURION 1009<br />
CITIZ<strong>EN</strong> 1004, 1006, 1008, 1016, 1038, 1105, 1171,<br />
1174, 1177<br />
CLAIRTONE 1176<br />
COLORTYME 1004, 1006<br />
CONCERTO 1004, 1006<br />
CONTEC/CONY 1012, 1013, 1014, 1038, 1176<br />
CRAIG 1038<br />
CROWN 1038, 1171<br />
CURTIS MATHES 1000, 1004, 1006, 1015, 1105, 1162, 1171<br />
CXC 1038<br />
DAEWOO 1004, 1005,1006, 1016, 1017, 1018, 1127,<br />
1171<br />
DAYTRON 1004, 1006, 1171<br />
DIM<strong>EN</strong>SIA 1000<br />
DUMONT 1004, 1151<br />
DYNATECH 1178<br />
ELECTROBAND 1002, 1176<br />
ELECTROHOME 1003, 1004, 1006, 1019, 1022<br />
EMERSON 1004, 1006, 1012, 1014, 1023, 1024,<br />
1025, 1026, 1027, 1028, 1029, 1030,<br />
1031, 1032, 1033, 1034, 1035, 1036, 1037,<br />
1038, 1039, 1041, 1042, 1043, 1044, 1046,<br />
1047, 1123, 1124, 1162, 1171, 1176, 1177,<br />
1179, 1191<br />
<strong>EN</strong>VISION 1004, 1006<br />
FISHER 1048, 1049, 1050, 1051, 1162, 1180<br />
FUJITSO 1046<br />
FUNAI 1038, 1046<br />
FUTURETEC 1038<br />
GE 1000, 1003, 1004, 1006, 1022, 1052, 1054,<br />
1055, 1087, 1164, 1165, 1166, 1167, 1168,<br />
1181<br />
GIBRALTER 1004, 1151<br />
GOLDSTAR 1004, 1005, 1006, 1012, 1019, 1056, 1057,<br />
1058, 1155, 1156, 1171, 1172<br />
GRUNDY 1038, 1046, 1171<br />
HALLMARK 1004, 1006<br />
HARVARD 1038<br />
HITACHI 1004, 1006, 1012, 1013, 1059, 1060, 1061,<br />
1135, 1136, 1137, 1138, 1139, 1140, 1141,<br />
1142, 1143, 1144, 1145, 1146, 1148, 1150,<br />
1179<br />
IMA 1038<br />
INFINITY 1062<br />
JANEIL 1174<br />
JBL 1062<br />
JCB 1002<br />
JC P<strong>EN</strong>NY 1000, 1004, 1005, 1006, 1008, 1022, 1052,<br />
1054, 1058, 1063, 1064, 1072, 1087, 1105,<br />
1128, 1171, 1172, 1181<br />
J<strong>EN</strong>S<strong>EN</strong> 1004, 1006<br />
JVC 1012, 1013, 1054, 1060, 1065, 1066, 1067,<br />
1089, 1157, 1158, 1159, 1182<br />
43<br />
<strong>EN</strong>
Remote Codes<br />
KAWASHO 1002, 1004, 1006<br />
KAYPANI 1175<br />
K<strong>EN</strong>WOOD 1004, 1006, 1019<br />
KLOSS NOVABEAM 1068, 1069, 1174, 1183<br />
KTV 1038, 1070, 1171, 1176, 1177<br />
LOEWE 1062<br />
LOGIK 1083<br />
LUXMAN 1004, 1006<br />
LXI 1000, 1006, 1049, 1062, 1071, 1072, 1073,<br />
1162, 1181<br />
MAGNAVOX 1004, 1006, 1008, 1019, 1062, 1068, 1069,<br />
1074, 1075, 1076, 1077, 1088, 1089, 1130,<br />
1131, 1132, 1133, 1134, 1183, 1184<br />
MAJESTIC 1083<br />
MARANTS 1062<br />
MARANTZ 1004, 1006, 1062, 1078<br />
MEGATRON 1006, 1059<br />
MEI 1176<br />
MEMOREX 1001, 1006, 1082, 1083, 1162<br />
MGA 1004, 1005, 1006, 1019, 1022, 1051, 1079,<br />
1080, 1082<br />
MIDLAND 1054, 1151, 1171, 1172, 1181<br />
MINUTZ 1052<br />
MITSUBISHI 1004, 1005, 1006, 1019, 1022, 1051, 1079,<br />
1080, 1081, 1082, 1082, 1083, 1125<br />
MONTGOMERY WARD 1083<br />
MOTOROLA 1003, 1173<br />
MTC 1004, 1005, 1006, 1105, 1176, 1178<br />
MULTITECH 1038, 1178<br />
MULTIVISION 1084<br />
NAD 1006, 1071, 1072, 1185<br />
NEC 1003, 1004, 1005, 1006, 1089<br />
NIKKO 1006, 1016<br />
NTC 1016<br />
ONWA 1038<br />
OPTIMUS 1185<br />
OPTONICA 1095, 1173<br />
ORION 1035, 1191<br />
PANASONIC 1003, 1054, 1062, 1170<br />
PHILCO 1003, 1004, 1005, 1006, 1008, 1012, 1019,<br />
1062, 1068, 1069, 1074, 1075, 1077, 1183,<br />
1184<br />
PHILIPS 1003, 1004, 1008, 1012, 1019, 1062, 1068,<br />
1069, 1074, 1075, 1076, 1086, 1087, 1088,<br />
1089<br />
PILOT 1004, 1171<br />
PIONEER 1004, 1006, 1090, 1091, 1092, 1179, 1185<br />
PORTLAND 1004, 1005, 1006, 1016, 1171<br />
PRICE CLUB 1105<br />
PRISM 1054<br />
PROSCAN 1000, 1181<br />
PROTON 1004, 1006, 1012, 1093, 1175<br />
PULSAR 1151<br />
PULSER 1004<br />
QUASAR 1003, 1054, 1070, 1094<br />
RADIO SHACK/REALISTIC 1000, 1004, 1006, 1012, 1038, 1049, 1095,<br />
1162, 1171, 1172<br />
RCA 1000, 1003, 1004, 1005, 1006, 1007, 1019,<br />
1096, 1098, 1099, 1100, 1101, 1102, 1103,<br />
1129, 1179, 1181, 1187, 1188, 1190<br />
RHAPSODY 1176<br />
RUNCO 1151<br />
SAMPO 1004, 1006, 1171, 1172, 1175<br />
SAMSUNG 1004, 1005, 1006, 1012, 1015, 1019, 1104,<br />
1105, 1106, 1171, 1172<br />
SAMSUX 1171<br />
SANSUI 1191<br />
SANYO 1004, 1048, 1049, 1050, 1080, 1107, 1108,<br />
1162, 1169, 1180, 1189<br />
SCOTCH 1006<br />
SCOTT 1004, 1006, 1012, 1024, 1035, 1038, 1046<br />
SEARS 1000, 1004, 1006, 1013, 1019, 1046, 1048,<br />
1049, 1050, 1051, 1066, 1071, 1072, 1109,<br />
1110, 1162, 1180, 1181, 1189<br />
SHARP 1004, 1006, 1012, 1029, 1095, 1111, 1112,<br />
1113, 1122, 1171, 1173<br />
SHOGUN 1004<br />
SIGNATURE 1001, 1083, 1115<br />
44<br />
SIMPSON 1008<br />
SONIC 1176<br />
SONY 1002<br />
SOUNDESIGN 1004, 1006, 1008, 1038, 1046<br />
SQUAREVIEW 1189<br />
SSS 1004, 1038<br />
STARLITE 1038<br />
SUPRE-MACY 1174<br />
SUPREME 1002<br />
SYLVANIA 1004, 1006, 1008, 1019, 1062, 1068, 1069,<br />
1074, 1075, 1076, 1077, 1088, 1116, 1161,<br />
1183, 1184<br />
SYMPHONIC 1033, 1038, 1189<br />
TANDY 1173<br />
TATUNG 1003, 1178<br />
TECHNICS 1054<br />
TECHWOOD 1004, 1006, 1054<br />
TEKNIKA 1004, 1005, 1006, 1008, 1012, 1013, 1016,<br />
1038, 1046, 1076, 1082, 1083, 1105, 1170,<br />
1171<br />
TELECAPTION 1117<br />
TMK 1004, 1006<br />
TOSHIBA 1049, 1071, 1072, 1089, 1105, 1109, 1117,<br />
1118, 1160, 1162<br />
TOTEVISION 1171<br />
UNIVERSAL 1052, 1087<br />
VICTOR 1066, 1182<br />
VIDTECH 1004, 1005, 1006<br />
VIKING 1174<br />
WARDS 1000, 1001, 1004, 1005, 1006, 1019, 1024,<br />
1033, 1046, 1052, 1062, 1069, 1074, 1075,<br />
1076, 1083, 1087, 1088, 1095, 1119, 1120,<br />
1184<br />
YAMAHA 1004, 1005, 1006, 1019<br />
Z<strong>EN</strong>ITH 1004, 1083, 1151, 1152, 1153, 1154<br />
Satellite Receivers<br />
CHAPPARAL 5056, 5057<br />
DRAKE 5058, 5059<br />
GE SATELLITE RECEIVER 5000, 5001<br />
G<strong>EN</strong>ERAL INSTRUM<strong>EN</strong>TS 5060, 5061, 5062<br />
PANASONIC SATELLITE RECEIVER<br />
5075<br />
PRIMESTAR DBS 5076<br />
PROSCAN SATELLITE RECEIVER<br />
5000, 5001<br />
RCA SATELLITE RECEIVER 5000, 5001<br />
REALISTIC 5063<br />
SONY SATELLITE RECEIVER 5072<br />
STS1 5064<br />
STS2 5065<br />
STS3 5066<br />
STS4 5067<br />
TOSHIBA 5068<br />
TOSHIBA SATELLITE RECEIVER 5073<br />
UNID<strong>EN</strong> SATELLITE RECEIVER 5069<br />
Audio (RCA/Dimensia only)<br />
AM/FM 4003<br />
AUX 4004<br />
PHONO 4005<br />
CD 4007<br />
TAPE 4006<br />
Laser disc Players<br />
PROSCAN 2001<br />
RCA 2001
For audio track and subtitle selection, see p.25,26.<br />
Abkhazian 6566<br />
Afar 6566<br />
Afrikaans 6570<br />
Albanian 8381<br />
Amehanie 6577<br />
Arabic 6582<br />
Armenian 7289<br />
Assamese 6583<br />
Aymara 6588<br />
Azerbaijani 6590<br />
Bashkir 6665<br />
Basque 6985<br />
Bengali, Bangla 6678<br />
Bhutani 6890<br />
Bihari 6672<br />
Bislama 6673<br />
Breton 6682<br />
Bulgarian 6671<br />
Burmese 7789<br />
Byelorussian 6669<br />
Cambodian 7577<br />
Catalan 6765<br />
Chinese 9072<br />
Corsican 6779<br />
Croatian 7282<br />
Czech 6783<br />
Danish 6865<br />
Dutch 7876<br />
English 6978<br />
Esperanto 6979<br />
Estonian 6984<br />
Faeroese 7079<br />
Fiji 7074<br />
Finnish 7073<br />
French 7082<br />
Frisian 7089<br />
Galiean 7176<br />
Georgian 7565<br />
German 6869<br />
Greek 6976<br />
Greenland 7576<br />
Guarani 7178<br />
Gujarati 7185<br />
Hausa 7265<br />
Hebrew 7387<br />
Hindi 7273<br />
Hungarian 7285<br />
Icelandic 7383<br />
Indonesian 7378<br />
Interlingua 7365<br />
Interlingue 7369<br />
Inupiaic 7375<br />
Irish 7165<br />
Italian 7384<br />
Japanese 7465<br />
Javanese 7487<br />
Kannada 7578<br />
Kashmiri 7583<br />
Kazakh 7575<br />
Kanyarwanda 8287<br />
Kirghiz 7589<br />
Kirundi 8278<br />
Korean 7579<br />
Kurdish 7585<br />
Laothian 7679<br />
Latin 7665<br />
Latvian, Leltish 7684<br />
Lingala 7678<br />
Lithuanian 7684<br />
Macedonian 7775<br />
Malagasy 7771<br />
Malay 7783<br />
Malayalam 7776<br />
Maltese 7784<br />
Maori 7773<br />
Marathi 7782<br />
Moldavian 7779<br />
Mongolian 7778<br />
Naru 7865<br />
Nepali 7869<br />
Norwegian 7879<br />
Occitan 7967<br />
Oriya 7982<br />
Oroma (Atan) 7977<br />
Punjabi 8065<br />
Pashto, Pushao 8083<br />
Persian 7065<br />
Polish 8075<br />
Portuguese 8084<br />
Quechua 8185<br />
Ahaero- Romance 8277<br />
Romanian 8279<br />
Russian 8285<br />
Samoan 8377<br />
Sangbo 8371<br />
Sanskrit 8365<br />
Sents Gaelic 7168<br />
Serbian 8382<br />
Servo-Croatian 8372<br />
Sesotho 8384<br />
Setswana 8478<br />
Sindhi 8368<br />
Singhalese 8373<br />
Siswati 8383<br />
Slovak 8375<br />
Slovenian 8376<br />
Somali 8379<br />
Spanish 6983<br />
Sudanese 8385<br />
Swahili 8387<br />
Swedish 8386<br />
Tagalog 8476<br />
Tajik 8471<br />
Tamil 8465<br />
Language Codes<br />
Tatar 8484<br />
Telugu 8469<br />
Thai 8472<br />
Tibetan 6679<br />
Tigrinya 8473<br />
Tonga 8479<br />
Tsonga 8483<br />
Turkish 8482<br />
Turkmen 8475<br />
Twi 8487<br />
Ukrainian 8575<br />
Urdu 8582<br />
Uzbek 8590<br />
Vietnamese 8673<br />
Volapuk 8679<br />
Welsh 6789<br />
Wolaf 8779<br />
Xhosa 8872<br />
Yiddish 7473<br />
Yoruba 8979<br />
Zulu 9085<br />
45<br />
<strong>EN</strong>
Limited Warrranty (US)<br />
What your warranty covers:<br />
• Defects in materials or workmanship.<br />
For how long after your purchase:<br />
• One year from date of purchase for labor and parts<br />
• The warranty period for rental units begins with the first<br />
rental or 45 days from date of shipment to the rental firm,<br />
whichever comes first.<br />
What we will do:<br />
• Pay any Authorized RCA Audio Service Center the labor<br />
charges to repair your unit.<br />
• Pay any Authorized RCA Audio Service Center for the<br />
new or, at our option, refurbished replacement parts<br />
required to repair your unit.<br />
How you get service:<br />
• Take your unit to any Authorized RCA Audio Service<br />
Center. To identify your nearest Authorized RCA Audio<br />
Service Center, ask your dealer, look in the Yellow Pages, or<br />
call 1-800-336-1900.<br />
• Show the Authorized Service Center Representative your<br />
evidence of purchase date or first rental.<br />
• Pick up your unit when repairs are completed.<br />
• Proof of purchase in the form of a bill of sale or receipted<br />
invoice which is evidence that the product is within the<br />
warranty period must be presented to obtain warranty<br />
service. For rental firms, proof of first rental is also<br />
required.<br />
What your warranty does not cover:<br />
• Customer instruction. (Your Owner’s Manual describes<br />
how to install, adjust, and operate your unit. Any additional<br />
information should be obtained from your dealer.)<br />
• Installation and related adjustments.<br />
• Signal reception problems not caused by your unit.<br />
• Damage from misuse or neglect.<br />
• Cleaning of audio heads.<br />
• Batteries.<br />
• A unit that has been modified or incorporated into other<br />
products or is used for institutional or other commercial<br />
purposes.<br />
• A unit purchased or serviced outside the U.S.A.<br />
• Acts of nature, such as but not limited to lightning damage.<br />
Product Registration:<br />
• Please complete and mail the Product Registration Card<br />
packed with your product. It will make it easier to contact<br />
you should it ever be necessary. The return of the card is<br />
not required for warranty coverage.<br />
46<br />
Limitation of Warranty:<br />
• THE WARRANTY STATED ABOVE IS THE ONLY WAR-<br />
RANTY APPLICABLE TO THIS PRODUCT. ALL OTHER<br />
WARRANTIES, EXPRESS OR IMPLIED (INCLUDING ALL<br />
IMPLIED WARRANTIES OF MERCHANTABILITY OR FIT-<br />
NESS FOR A PARTICULAR PURPOSE) ARE HEREBY DIS-<br />
CLAIMED. NO VERBAL OR WRITT<strong>EN</strong> INFORMATION<br />
GIV<strong>EN</strong> BY THOMSON MULTIMEDIA INC., ITS AG<strong>EN</strong>TS<br />
OR EMPLOYEES SHALL CREATE A GUARANTY OR IN<br />
ANY WAY INCREASE THE SCOPE OF THIS WARRANTY.<br />
• REPAIR OR REPLACEM<strong>EN</strong>T AS PROVIDED UNDER THIS<br />
WARRANTY IS THE EXCLUSIVE REMEDY OF THE CON-<br />
SUMER. THOMSON MULTIMEDIA INC. SHALL NOT BE<br />
LIABLE FOR INCID<strong>EN</strong>TAL OR CONSEQU<strong>EN</strong>TIAL DAM-<br />
AGES RESULTING FROM THE USE OF THIS PRODUCT OR<br />
ARISING OUT OF ANY BREACH OF ANY EXPRESS OR<br />
IMPLIED WARRANTY ON THIS PRODUCT. THIS DIS-<br />
CLAIMER OF WARRANTIES AND LIMITED WARRANTY<br />
ARE GOVERNED BY THE LAWS OF THE STATE OF INDI-<br />
ANA. EXCEPT TO THE EXT<strong>EN</strong>T PROHIBITED BY APPLIC-<br />
ABLE LAW, ANY IMPLIED WARRANTY OF MER-<br />
CHANTABILITY OR FITNESS FOR A PARTICULAR PUR-<br />
POSE ON THIS PRODUCT IS LIMITED TO THE APPLICA-<br />
BLE WARRANTY PERIOD SET FORTH ABOVE.<br />
How State Law relates to warranty:<br />
• Some states do not allow the exclusion nor limitation of<br />
incidental or consequential damages, or limitations on how<br />
long an implied warranty lasts, so the above limitations or<br />
exclusions may not apply to you.<br />
• This warranty gives you specific legal rights, and you also<br />
may have other rights that vary from state to state.<br />
If you purchased your unit outside the United<br />
States:<br />
• This warranty does not apply. Contact your dealer for<br />
warranty information.<br />
Service calls which do not involve defective materials<br />
or workmanship are not covered by this warranty.<br />
Costs of such service calls are the sole responsibility<br />
of the purchaser.
What your warranty covers:<br />
• Defects in materials or workmanship.<br />
For how long after your purchase:<br />
• One year from date of purchase for labor and parts<br />
• The warranty period for rental units begins with the first<br />
rental or 45 days from date of shipment to the rental firm,<br />
whichever comes first.<br />
What we will do:<br />
• Pay any Authorized RCA Audio Service Center the labor<br />
charges to repair your unit.<br />
• Pay any Authorized RCA Audio Service Center for the<br />
new or, at our option, refurbished replacement parts<br />
required to repair your unit.<br />
How you get service:<br />
• Take your unit to any Authorized RCA Audio Service<br />
Center. To identify your nearest Authorized RCA Audio<br />
Service Center, ask your dealer, look in the Yellow Pages, or<br />
call 1-800-336-1900.<br />
• Show the Authorized Service Center Representative your<br />
evidence of purchase date or first rental.<br />
• Pick up your unit when repairs are completed.<br />
• Proof of purchase in the form of a bill of sale or receipted<br />
invoice which is evidence that the product is within the<br />
warranty period must be presented to obtain warranty<br />
service. For rental firms, proof of first rental is also<br />
required.<br />
What your warranty does not cover:<br />
• Customer instruction. (Your Owner’s Manual describes<br />
how to install, adjust, and operate your unit. Any additional<br />
information should be obtained from your dealer.)<br />
• Installation and related adjustments.<br />
• Signal reception problems not caused by your unit.<br />
• Damage from misuse or neglect.<br />
• Cleaning of audio heads.<br />
• Batteries.<br />
• A unit that has been modified or incorporated into other<br />
products or is used for institutional or other commercial<br />
purposes.<br />
• A unit purchased or serviced outside Canada.<br />
• Acts of nature, such as but not limited to lightning damage.<br />
Product Registration:<br />
• Please complete and mail the Product Registration Card<br />
packed with your product. It will make it easier to contact<br />
you should it ever be necessary. The return of the card is<br />
not required for warranty coverage.<br />
Limited Warranty (Canada)<br />
Limitation of Warranty:<br />
• THE WARRANTY STATED ABOVE IS THE ONLY WAR-<br />
RANTY APPLICABLE TO THIS PRODUCT. NO VERBAL OR<br />
WRITT<strong>EN</strong> INFORMATION GIV<strong>EN</strong> BY THOMSON MULTI-<br />
MEDIA LTD., ITS AG<strong>EN</strong>TS OR EMPLOYEES SHALL CRE-<br />
ATE A GUARANTY OR IN ANY WAY INCREASE THE<br />
SCOPE OF THIS WARRANTY.<br />
• REPAIR OR REPLACEM<strong>EN</strong>T AS PROVIDED UNDER<br />
THIS WARRANTY IS THE EXCLUSIVE REMEDY OF THE<br />
CONSUMER. THOMSON MULTIMEDIA LTD. SHALL NOT<br />
BE LIABLE FOR INCID<strong>EN</strong>TAL OR CONSEQU<strong>EN</strong>TIAL DAM-<br />
AGES RESULTING FROM THE USE OF THIS PRODUCT.<br />
EXCEPT TO THE EXT<strong>EN</strong>T PROHIBITED BY APPLICABLE<br />
PROVINCIAL LAW, ANY IMPLIED WARRANTY OF MER-<br />
CHANTABILITY OR FITNESS FOR A PARTICULAR PUR-<br />
POSE ON THIS PRODUCT IS LIMITED TO THE APPLICA-<br />
BLE WARRANTY PERIOD SET FORTH ABOVE.<br />
How Provincial Laws relates to warranty:<br />
• This warranty gives you specific legal rights which are in<br />
addition to statutory warranties that may vary from<br />
Province to Province.<br />
If you purchased your unit outside Canada:<br />
• This warranty does not apply. Contact your dealer for<br />
warranty information.<br />
Service calls which do not involve defective materials<br />
or workmanship are not covered by this warranty.<br />
Costs of such service calls are the sole responsibility<br />
of the purchaser.<br />
47<br />
<strong>EN</strong>