SANYO DENKI Servo Amplifier SANMOTION R and Pro-face AGP-3 ...
SANYO DENKI Servo Amplifier SANMOTION R and Pro-face AGP-3 ...
SANYO DENKI Servo Amplifier SANMOTION R and Pro-face AGP-3 ...

You also want an ePaper? Increase the reach of your titles
YUMPU automatically turns print PDFs into web optimized ePapers that Google loves.
<strong>SANYO</strong> <strong>DENKI</strong> <strong>Servo</strong> <strong>Amplifier</strong> <strong>SANMOTION</strong> R<br />
<strong>and</strong> <strong>Pro</strong>-<strong>face</strong> <strong>AGP</strong>-3****-CA1M/LT<br />
Connection <strong>Pro</strong>cedure<br />
Instruction Manual<br />
Version1.0 (2009.2.25)
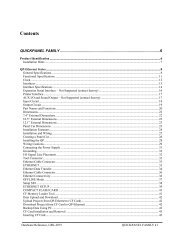
Table of Contents<br />
1 Applicable devices..................................................................................................................................... 1<br />
2 Installation of GP-<strong>Pro</strong> EX version 2.5....................................................................................................... 1<br />
3 Creation of screens/programs .................................................................................................................... 1<br />
4 Setting up CANopen in GP-<strong>Pro</strong> EX 2.5 .................................................................................................... 1<br />
4.1 Displaying the I/O Driver setting screen........................................................................................ 1<br />
4.2 Importing the EDS file ................................................................................................................... 2<br />
4.3 Adding a slave................................................................................................................................4<br />
4.4 Slave configuration......................................................................................................................... 4<br />
4.4.1 PDO: Mapping input <strong>and</strong> output .................................................................................................... 5<br />
4.4.2 Allocating I/O variables to the I/O tree .......................................................................................... 7<br />
4.5 Master configuration ...................................................................................................................... 8<br />
4.5.1 Setting a baud rate .......................................................................................................................... 8<br />
5 Details of settings with the software........................................................................................................ 10<br />
5.1 Catalog manager........................................................................................................................... 10<br />
5.1.1 Device operations......................................................................................................................... 10<br />
5.1.2 Catalog operations.........................................................................................................................11<br />
5.2 Slave configuration....................................................................................................................... 12<br />
5.2.1 Parameters (PDO settings) ........................................................................................................... 12<br />
5.2.2 Advanced error control................................................................................................................. 15<br />
5.2.3 Advanced object configuration..................................................................................................... 16<br />
5.3 Master configuration .................................................................................................................... 17<br />
5.3.1 Network settings........................................................................................................................... 17<br />
5.3.2 Error control overview ................................................................................................................. 18<br />
5.3.3 Advanced object configuration..................................................................................................... 18<br />
6 PDO protocol, SDO protocol................................................................................................................... 19<br />
6.1 PDO (<strong>Pro</strong>cess Data Object) protocol............................................................................................ 19<br />
6.2 SDO (Service Data Object) protocol............................................................................................ 19<br />
7 I/O driver instructions.............................................................................................................................. 20<br />
7.1 SDOR, SDOW ............................................................................................................................. 20<br />
7.2 DGMT, DGSL.............................................................................................................................. 22<br />
8 Transferring I/O firmware........................................................................................................................ 22<br />
9 <strong>AGP</strong>-3****-CA1M/LT unit..................................................................................................................... 23<br />
9.1 Offline menu................................................................................................................................. 23<br />
10 Precautions ................................................................................................................................... 25<br />
11 Installation of <strong>SANMOTION</strong> R servo amplifier ..................................................................................... 26<br />
11.1 Hardware structure ....................................................................................................................... 26<br />
11.2 Cabling example........................................................................................................................... 27<br />
11.3 Connector pin assignment ............................................................................................................ 27<br />
11.4 Status display on the front panel of the servo amplifier ............................................................... 28<br />
11.4.1 7-segment LED ............................................................................................................................ 28<br />
11.4.2 Red <strong>and</strong> green LED on CN3......................................................................................................... 29<br />
11.5 Node-ID........................................................................................................................................ 31<br />
11.6 Bit rate (transmission baud rate) <strong>and</strong> bus length .......................................................................... 31<br />
11.7 About the EDS file <strong>and</strong> the revision level of the servo amplifier................................................. 32
1 Applicable devices<br />
This manual refers to the following devices <strong>and</strong> equipment:<br />
- <strong>SANYO</strong> <strong>DENKI</strong> servo amplifier <strong>SANMOTION</strong> R<br />
- <strong>Pro</strong>-<strong>face</strong> <strong>AGP</strong>3400-T1-D24-CA1M<br />
- <strong>Pro</strong>-<strong>face</strong> GP-<strong>Pro</strong> EX version 2.5<br />
- <strong>Pro</strong>-<strong>face</strong> USB transfer cable CA3-USBCB-01 (for transfer of screen data)<br />
[MEMO]<br />
For information on display unit models supporting CANopen, see the GP3000 Series Hardware<br />
Manual or the LT3000 Series Hardware Manual.<br />
2 Installation of GP-<strong>Pro</strong> EX version 2.5<br />
1) Insert the GP-<strong>Pro</strong> EX installation CD into the PC, <strong>and</strong> the SET UP MENU window will appear.<br />
2) Select “GP-<strong>Pro</strong> EX,” <strong>and</strong> the Microsoft .NET Framework 2.0 set up window will appear. Follow the<br />
Wizard to install Microsoft .NET Framework 2.0.<br />
3) The GP-<strong>Pro</strong> EX 2.5-InstallShield Wizard window will appear. Follow the directions.<br />
- Enter the Serial Number (11 digits) on the Customer Information window.<br />
- Enter the Key-Code.<br />
- Follow the direction of the Wizard to install.<br />
3 Creation of screens/programs<br />
1) When you start up GP-<strong>Pro</strong> EX, the [Welcome to GP-<strong>Pro</strong> EX] window will appear. Select [New].<br />
2) In the [Display Unit] setting screen, set the [Series] to GP-34**Series <strong>and</strong> the [Model] to<br />
<strong>AGP</strong>-3400T-CA1M.<br />
[MEMO]<br />
If you select the LT3000 series for the display unit, the [I/O Driver] setting window will be shown<br />
next. Please select [CANopen Driver] from the pull-down menu.<br />
3) In the [Device/PLC] setting screen, click [New Logic] or [New Screen].<br />
4) Create screens <strong>and</strong>/or a logic program.<br />
4 Setting up CANopen in GP-<strong>Pro</strong> EX 2.5<br />
4.1 Displaying the I/O Driver setting screen<br />
1) Select the [View] menu -> [Work Space] -> [System Settings].<br />
2) In the [System Settings] window, click [I/O Driver] in the Peripheral Settings area, <strong>and</strong> the [I/O<br />
Driver] screen will be shown.<br />
[MEMO]<br />
If you are using the LT3000 series, open the [External Driver] tab.<br />
1
4.2 Importing the EDS file<br />
This section shows the procedure to import the EDS file of a <strong>SANMOTION</strong> R slave unit.<br />
1) In the [I/O Driver] screen, click [Catalog manager].<br />
2) Click [Import].<br />
2
3) The [Open] dialog box will appear. Specify the sanyo_rco.eds file in the save-in location. Click<br />
[Open], <strong>and</strong> the file will be registered into the [Catalog manager].<br />
4) Click [Close].<br />
3
4.3 Adding a slave<br />
1) In the [I/O Driver] screen, click [Settings], <strong>and</strong> the [Network configuration] window will appear.<br />
2) Select the item whose Key is sanyo_rco from the [Registered devices] list <strong>and</strong> click [Add slave], <strong>and</strong><br />
“R_CANopen <strong>Servo</strong> <strong>Amplifier</strong>” will be added in the [Assigned slaves] list.<br />
4.4 Slave configuration<br />
- Click [Slave configuration].<br />
- The [Slave configuration] dialog box will appear.<br />
4
4.4.1 PDO: Mapping input <strong>and</strong> output<br />
Set PDOs (<strong>Pro</strong>cess Data Objects), as continuous communication data.<br />
The following table shows an overview of the object directory as per the CANopen agreement.<br />
Index (hex)<br />
1000-1FFF<br />
2000-5FFF<br />
6000-9FFF<br />
A000-FFFF<br />
Object<br />
Communication <strong>Pro</strong>file Area<br />
Manufacturer Specific <strong>Pro</strong>file Area<br />
St<strong>and</strong>ardized Device <strong>Pro</strong>file Area<br />
Reserved for further use<br />
[MEMO]<br />
For the details of the objects, refer to the <strong>SANMOTION</strong> R instruction manuals.<br />
1) As an example of inputs, select “Index = 0x6064.0” (Position_actual_value) from the list of the<br />
[Available objects from device profile] in the [Parameters] tab.<br />
2) If you select “TPDO1” in the [Configured objects], the [Map] button will be enabled.<br />
5
3) Click [Map], <strong>and</strong> “[0x6064.0] Position_actual_value” will be appended under “TPDO1.”<br />
4) Set the [Data representation] in the [Setting] area to “Dword.”<br />
5) As an example of outputs, select “Index = 0x607A.0” from the list of the [Available objects from<br />
device profile” on the [Parameters] tab.<br />
6) Select “RPDO1” in the [Configured objects] <strong>and</strong> click [Map], <strong>and</strong> “[0x607A.0] Target_position” will<br />
be appended under “RPDO1.”<br />
7) Set the [Data representation] in the [Setting] area to “Dword” <strong>and</strong> click [OK].<br />
Then click [OK] in the [Network configuration] window, <strong>and</strong> it will be closed <strong>and</strong> the [I/O Driver]<br />
screen will be shown.<br />
6
4.4.2 Allocating I/O variables to the I/O tree<br />
Allocate I/O variables after the PDO settings (mapping).<br />
1) Click [I/O Screen] in the [I/O Driver] screen.<br />
2) The [R_CANopen <strong>Servo</strong> <strong>Amplifier</strong>] tree will be shown. As an example, allocate a variable<br />
“ActualPositon” to an item “Position_actual_value” (an object at the actual position), which is under<br />
“TPDO1.” To set a variable, double click the corresponding variable field <strong>and</strong> enter the variable.<br />
[MEMO]<br />
By pointing the cursor on the red marked area <strong>and</strong> dragging, you can change the column width.<br />
3) In the same way, set a variable “TargetPosition” to an item “Target_position” (an object at the target<br />
position), which is under “RPDO1.”<br />
4) Click [CANopen Driver] to return to the [I/O Driver] screen.<br />
7
4.5 Master configuration<br />
- In the [I/O Driver] screen, click [Settings].<br />
4.5.1 Setting a baud rate<br />
In the Master configuration, you can make baud rate settings.<br />
1) In the [Network configuration] window, click [Master configuration].<br />
[MEMO]<br />
To set the baud rate on the slave unit, use R-SETUP - Setup Software made by <strong>SANYO</strong> <strong>DENKI</strong>.<br />
For the details, refer to the manuals for the servo amplifier.<br />
The factory default of the baud rate on the servo amplifier is 500 kbps.<br />
8
2) In the [Master configuration] dialog box, specify the [Baud rate].<br />
[IMPORTANT]<br />
The baud rate cannot be set to 800 kbps when connecting with <strong>SANMOTION</strong> R.<br />
If you set it to 800 kbps, a transmission speed error will occur between the <strong>SANYO</strong> servo amplifier<br />
<strong>and</strong> the Digital display unit.<br />
9
5 Details of settings with the software<br />
5.1 Catalog manager<br />
5.1.1 Device operations<br />
* Import<br />
Imports an EDS (Electronic Data Sheet) file.<br />
The EDS file is registered in the Catalog manager of GP-<strong>Pro</strong> EX <strong>and</strong> the contents in the EDS file is<br />
shown in the Catalog manager.<br />
* Delete<br />
Deletes a designated device from the catalog in GP-<strong>Pro</strong> EX.<br />
* Rename<br />
Allows you to rename the key of a device registered in the catalog.<br />
The name of the key when importing an EDS file is the EDS file name without the extension.<br />
Up to 256 characters<br />
* Export<br />
Exports contents in a device registered in the catalog as an EDS file.<br />
10
5.1.2 Catalog operations<br />
* Export<br />
Exports registered devices into one file (a catalog file; *.cat).<br />
By doing so, it will be easier to make the same environment in another PC.<br />
* Import<br />
Imports a catalog file.<br />
11
5.2 Slave configuration<br />
5.2.1 Parameters (PDO settings)<br />
Up to 8 bytes (64 bits) of data can be assigned per PDO.<br />
The transmission type can be set by each PDO.<br />
- In the [Network configuration] window, click [Slave configuration]. In the [Slave configuration]<br />
dialog box, select “TPDO0” in the [Configured objects] <strong>and</strong> click [Settings].<br />
The [TPDO configuration] dialog box will appear.<br />
* Asynchronous event<br />
A PDO is received immediately when an event occurs regardless of the SYNC signal.<br />
For 254, this is defined by the manufacturer.<br />
For 255, this is defined in the device profile.<br />
* Acyclic synchronous / Cyclic synchronous<br />
A PDO is sent synchronizing in synchronization with the SYNC signal flowing into the network.<br />
For the cyclic synchronous, whose SYNC cycle rate can be set from 1 to 240, when 1 is set, a PDO is<br />
sent for every SYNC object.<br />
When 3 is set, a PDO is sent each time that three SYNC signals flow into the network.<br />
12
* Event timer, Inhibit time<br />
The Event timer <strong>and</strong> the Inhibit time can be set when the transmission type is set to Asynchronous event.<br />
The Event timer is the setting to send data consistently as well as when it changes.<br />
The Inhibit time is the setting to inhibit the increase of communication load by continuous data change.<br />
* Identity settings<br />
The master unit makes an identity check between the device information (the contents of the imported<br />
EDS file) <strong>and</strong> the actual slave unit when communication starts.<br />
Items to be checked are as follows.<br />
- Device type<br />
- Vender ID<br />
- <strong>Pro</strong>duct code<br />
- Revision number<br />
When connecting to a <strong>SANMOTION</strong> R, only the following can be checked. (Depending on the<br />
description of the EDS file)<br />
- Device type<br />
- Vender ID<br />
If the item(s) cannot be identified, an error code “150: Identity error of an optional slave” will be<br />
displayed on the GP/LT unit.<br />
13
* Restore<br />
Tells the master unit whether or not to restore, or write, the parameters of slave units on occasions such<br />
as when a communication cable is disconnected <strong>and</strong> the system is recovered.<br />
If you select “None,” the slave units will operate retaining the output signals.<br />
Select from the following two items for the parameter restoration.<br />
- None: Parameters are not restored.<br />
- All (default): All parameters are restored.<br />
14
5.2.2 Advanced error control<br />
* HeartBeat<br />
Each node (the master <strong>and</strong> slaves) sends heartbeat messages.<br />
By monitoring (receiving) heartbeat messages, the master can check each node is active.<br />
The producer is the one that sends messages, <strong>and</strong> the consumer is the one that receives the messages.<br />
Currently, HeartBeat is recommended over NodeGuard.<br />
In the [Network configuration] window, click [Slave configuration] to set the heartbeat in the [Advanced<br />
Error Control] tab.<br />
[Remark]<br />
The heartbeat can be set in the Master configuration dialog box normally.<br />
Set the [Global heartbeat timing] on the [Network settings] tab <strong>and</strong> click [Apply] to apply the setting<br />
to all slaves.<br />
15
* NodeGuard<br />
The master unit monitors slaves by polling (guarding) for the time of the Guard time multiplied by the<br />
Life time factor.<br />
5.2.3 Advanced object configuration<br />
The Advanced Object Configuration tab shows the object list of the slave units.<br />
The contents of objects vary depending on the type of the slave unit.<br />
16
5.3 Master configuration<br />
5.3.1 Network settings<br />
* Baud rate<br />
Select the baud rate of the master unit.<br />
50 kbps to 1000 kbps (default: 250 kbps)<br />
* Global SYNC period<br />
Set the send cycle time of SYNC messages.<br />
0 (disabled), 3 to 32767ms (default: 50ms)<br />
* Global heartbeat timing<br />
To check, or monitor, whether the slave unit is active or not, use the heartbeat or the node guarding.<br />
50 to 21844ms (default: 200ms)<br />
* NMT inhibit time<br />
This is the setting to inhibit the master unit to send NMT messages continuously.<br />
NMT st<strong>and</strong>s for “Network Management.”<br />
0 to 3276.7ms (default: 5ms)<br />
17
* On Error Control Event of a m<strong>and</strong>atory slave<br />
Select from the following 3.<br />
- Stop all nodes<br />
- Reset all nodes<br />
- Treat the slave individually (default)<br />
If you select [Treat the slave individually], each slave unit sends the reset signal, instead of the master<br />
unit sending the reset signal by broadcast.<br />
5.3.2 Error control overview<br />
The Error Control Overview tab allows you to check the list of the node monitor (Heartbeat / Node<br />
guard).<br />
5.3.3 Advanced object configuration<br />
The Advanced Object Configuration tab shows the list of objects in the master unit.<br />
18
6 PDO protocol, SDO protocol<br />
6.1 PDO (<strong>Pro</strong>cess Data Object) protocol<br />
The PDO protocol is used for communicating data such as digital inputs <strong>and</strong> outputs continuously.<br />
6.2 SDO (Service Data Object) protocol<br />
The SDO protocol is used for communicating data that does not need to be sent continuously, such as<br />
infrequent changes of setting values.<br />
Data assigned to SDOs are communicated by the SDO instructions (SDOR, SDOW) of the logic program.<br />
19
7 I/O driver instructions<br />
7.1 SDOR, SDOW<br />
Reads from / writes to objects of the slave unit.<br />
SDOR (SDO Read)<br />
S1: index number of the object<br />
S2: sub index number of the object<br />
S3: node ID<br />
S4: length (byte number) of the object access<br />
S5: location to store read data (offset number of #L_IOMasterDrv[])<br />
D1: error code<br />
20
SDOW (SDO Write)<br />
S1: index number of the object<br />
S2: sub index number of the object<br />
S3: node ID<br />
S4: length (byte number) of the object access<br />
S5: location to store data to be written (offset number of #L_IOMasterDrv[])<br />
D1: error code<br />
21
7.2 DGMT, DGSL<br />
Reads the status of the master unit / slave unit.<br />
DGMT (Diagnostic Master)<br />
D1: status information<br />
D2: event information<br />
DGSL (Diagnostic Slave)<br />
S1: node ID<br />
D1: slave diagnostic information<br />
8 Transferring I/O firmware<br />
Firmware for the CANopen board is not yet installed in CANopen units for the <strong>AGP</strong>-3****-CA1M/LT by<br />
factory default. The firmware is transferred <strong>and</strong> written during the first screen data transfer.<br />
This I/O firmware is written when the unit is restarted after transferring the project file.<br />
22
9 <strong>AGP</strong>-3****-CA1M/LT unit<br />
9.1 Offline menu<br />
In the Offline mode, you can check the communication status when the master unit <strong>and</strong> the slave unit are<br />
connected. To enter the Offline mode, touch either the upper right <strong>and</strong> lower left corners or the upper left<br />
<strong>and</strong> lower right corners (within 40 pixels of the edges) of the panel in this order within 0.5 second.<br />
[MEMO]<br />
For the details of the Offline mode, refer to the Maintenance/Troubleshooting manual of GP-<strong>Pro</strong> EX.<br />
23
* Master Diagnostics, Master Configuration & Events<br />
These menus have the same contents as the DGMT instruction does, which is one of the I/O driver<br />
instructions.<br />
The Master Diagnostics screen includes status information <strong>and</strong> the Master Configuration & Events<br />
screen includes event information.<br />
* Slave Diagnostics<br />
This menu has the same contents as the DGSL instruction does, which is one of the I/O driver<br />
instructions.<br />
You can select the status of the slaves <strong>and</strong> check nodes in the list.<br />
24
10 Precautions<br />
- The maximum number of objects that can be assigned to each PDO is 4.<br />
This is not because GP-<strong>Pro</strong> EX has such a restriction, but because of the definition in the <strong>SANMOTION</strong> R<br />
EDS file.<br />
Therefore, you cannot assign more than 5 objects even if the data size of one object is less than 8 bytes.<br />
- The EDS file defines that the <strong>SANMOTION</strong> R’s object “0x1200” (1 st server SDO parameter) is a read-only<br />
object, <strong>and</strong> if you read data via SDO communication, an error occurs; the SDO error code is “0602 0000h:<br />
Object does not exist in the object dictionary.”<br />
As for the object “0x1200,” reading data via SDO communication causes an error, however, connection with<br />
a GP/LT unit will not be affected by this.<br />
25
11 Installation of <strong>SANMOTION</strong> R servo amplifier<br />
11.1 Hardware structure<br />
This section introduces the servo amplifier’s parts name, referring to RS1□03AL.<br />
Battery space<br />
Parts inside the cover<br />
Setup software<br />
communication connector<br />
Cover open<br />
Battery<br />
connector<br />
RS1A03AL <br />
7-segment LED<br />
Switch for<br />
Node-ID number<br />
Analog monitor<br />
connector<br />
Main power supply LED<br />
(CHARGE, red)<br />
Control power, main power<br />
supply input connector<br />
Control power status<br />
LED (POWER, green)<br />
CANopen I/F<br />
connector (RJ45)<br />
<br />
External regenerative resistor,<br />
DC reactor connector<br />
Connector for upper device<br />
input/output signals<br />
<strong>Servo</strong> motor power connector<br />
Sensor signal connector<br />
<strong>Pro</strong>tective ground terminal<br />
For the information on pin assignment of each connector other than the CANopen inter<strong>face</strong> connector, see<br />
<strong>SANMOTION</strong> R with CANopen Inter<strong>face</strong> Instruction Manual (M0007951.)<br />
For the information on pin assignment of the CANopen inter<strong>face</strong> connector, see the following pages.<br />
26
11.2 Cabling example<br />
* From the CAN Host<br />
Drive1<br />
Drive2<br />
Drive3<br />
CAN_H<br />
CAN_H<br />
CAN_H<br />
CAN_L<br />
CAN_L<br />
CAN_L<br />
CAN_GND<br />
CAN_GND<br />
CAN_GND<br />
Terminator<br />
Terminator<br />
Terminator<br />
CAN_H<br />
CAN_H<br />
CAN_H<br />
CAN_L<br />
CAN_L<br />
CAN_L<br />
CAN_GND<br />
CAN_GND<br />
CAN_GND<br />
Terminator<br />
Terminator<br />
Terminator<br />
* For Termination,<br />
only a jumper is<br />
necessary between<br />
pins 1 <strong>and</strong> 5.<br />
● To avoid communication malfunctions, a shielded cable with two twisted pairs is recommended.<br />
- One twisted pair is used for CAN_H (Pin 1) <strong>and</strong> CAN_L (Pin 2.)<br />
- Another twisted pair is used for CAN_GND (Pin 3 <strong>and</strong> Pin 7.)<br />
- The cable shield has to be connected to the metal body plug of the RJ-45 type connector.<br />
● Both ends of the CAN cable have to be terminated by a resistor of 120Ω.<br />
The <strong>SANMOTION</strong> R CANopen inter<strong>face</strong> amplifier has an internal termination resistor. It is necessary<br />
to plug a modular connector with a jumper between Pin 1 <strong>and</strong> Pin 5 for termination.<br />
11.3 Connector pin assignment<br />
The <strong>SANMOTION</strong> R CANopen inter<strong>face</strong> amplifier has two RJ-45 modular connector ports for the CAN<br />
connection. Pin assignment of both connectors is the same, <strong>and</strong> it is shown in the following figure.<br />
CN3, CN4 Pin No. Signal Name Note<br />
1 CAN_H<br />
2 CAN_L<br />
3 CAN_GND<br />
4 No connection<br />
5 Terminator<br />
6 (CAN_SHLD)<br />
7 CAN_GND<br />
8 No connection<br />
1. CN3 has two LED’s which show the status of<br />
CAN communication. (See Chapter 11.4.2)<br />
2. A termination resistor (120Ω) is integrated in this<br />
amplifier that can be connected between CAN_H<br />
<strong>and</strong> CAN_L by plugging a modular connector with<br />
a jumper between pins 1 <strong>and</strong> 5.<br />
3. The CAN_GND pin is connected to the amplifier<br />
internal signal ground.<br />
4. The CAN_SHLD is optional.<br />
27
11.4 Status display on the front panel of the servo amplifier<br />
11.4.1 7-segment LED<br />
One digit of the 7-segment LED displays the following drive states.<br />
- Settled Node-ID for CAN communication<br />
- <strong>Servo</strong> status<br />
- Alarm codes<br />
11.4.1.1 Settled Node-ID for CAN communication display<br />
Right after the control power is turned ON, a timeshared, 3-digit, settled Node-ID for CAN communication<br />
is displayed.<br />
The settled node-ID when it displays ‘1’ -> ‘2’ -> ‘3’ is “123” in decimal numbers.<br />
11.4.1.2 Drive status display<br />
After displaying the settled Node-ID, the following display appears if there is no error occurrence.<br />
<strong>Servo</strong> amplifier status<br />
Control power supply established (NOT RDY)<br />
Control power supply has been established, but amplifier (RDY) is OFF<br />
because the state of CAN communication has not been raised up to “Ready to<br />
switched ON” state<br />
Control power supply established (RDY)<br />
Control power supply has been established <strong>and</strong> amplifier (RDY) is ON<br />
Display<br />
“ ”<br />
Flashing<br />
Main power supply established (NOT RDY)<br />
Main power supply is ON or has been established, but amplifier (RDY) is OFF<br />
because the state of CAN communication has not been raised up to “Ready to<br />
switched ON” state<br />
Main power supply being established<br />
Main power supply is ON or has been established, but Operation Preparation<br />
Completion signal is OFF<br />
Main power supply established<br />
Main power supply has been established <strong>and</strong> Operation Preparation<br />
Completion signal is ON<br />
<strong>Servo</strong> is ON<br />
Power has been applied to the motor after servo ON<br />
Continuously draws the character “8”<br />
Over Travel status at Positive rotation<br />
Positive rotation is in “Over Travel” status<br />
“ ”<br />
Flashing<br />
Over Travel status at Negative rotation<br />
Negative rotation is in “Over Travel” status<br />
28
11.4.1.3 Alarm code display<br />
When an alarm occurs, a timeshared, 2-digit, Alarm Code (R-CANopen amplifier specific)” will be<br />
displayed continuously.<br />
For the details of the alarm codes, see <strong>SANMOTION</strong> R with CANopen Inter<strong>face</strong> Instruction Manual<br />
(M0007951.)<br />
11.4.2 Red <strong>and</strong> green LED on CN3<br />
The status of CAN communication can be displayed by following two single LED’s on the CN3.<br />
- Red LED: ERR_LED; displays error state of CAN communication<br />
- Green LED: RUN_LED; displays running state of CAN communication<br />
The following table shows how to display the error state by one ERR_LED.<br />
Description of CANopen ERR_LED<br />
Status ERR LED Description<br />
No error Off The device is in working condition<br />
Warning limit reached Single flash<br />
At least one of the error counters of the CAN<br />
controller has reached or exceeded the warning level<br />
(REC ≥ 96 or TEC ≥ 96)<br />
Error control event Double flash A guard event or a heartbeat event has occurred<br />
SYNC error<br />
Triple flash<br />
The SYNC message has not been received within<br />
the configured communication cycle period time<br />
Bus off<br />
On<br />
The CAN controller has detected the “Bus OFF”<br />
status<br />
The following table shows how to display the running state by RUN_LED.<br />
Description of CANopen RUN_LED<br />
Status RUN LED Description<br />
PRE-OPERATIONAL Blinking The device is in state PRE-OPERATIONAL<br />
STOPPED Single flash The device is in state STOPPED<br />
OPERATIONAL On The device is in state OPERATIONAL<br />
[NOTE]<br />
The differences between “Blinking,” “Single flash,” “Double flash,” <strong>and</strong> “Triple flash” are<br />
distinguished by flashed rate of each indicator that is shown in the following figure.<br />
29
Indicator states <strong>and</strong> flash rates<br />
Blinking<br />
(red)<br />
on<br />
off<br />
on<br />
off<br />
on<br />
off<br />
on<br />
off<br />
on<br />
off<br />
on<br />
off<br />
Blinking<br />
(green)<br />
Single<br />
flash<br />
(red)<br />
Single<br />
flash<br />
(green)<br />
Double<br />
flash<br />
(red)<br />
Triple<br />
flash<br />
(red)<br />
200<br />
ms<br />
200<br />
ms<br />
200<br />
ms<br />
200<br />
ms<br />
200<br />
ms<br />
200<br />
ms<br />
200<br />
ms<br />
200<br />
ms<br />
200<br />
ms<br />
200<br />
ms<br />
200<br />
ms<br />
200<br />
ms<br />
200<br />
ms<br />
200<br />
ms<br />
200<br />
ms<br />
1000<br />
ms<br />
1000<br />
ms<br />
1000<br />
ms<br />
1000<br />
ms<br />
30
11.5 Node-ID<br />
RSW2<br />
RSW1<br />
Each drive within the CANopen network has to have a unique Node-ID number.<br />
The Node-ID of this servo amplifier is set using the two 16 (0h to Fh) position<br />
rotary switches on the front panel of the amplifier [from 1 (RSW2: 0h, RSW1:<br />
1h) to 127 (RSW2: 7h, RSW1: Fh)].<br />
If both rotary switches are set to “0h” or “Fh” position, the value that has already<br />
been stored in non-volatile memory by using R-SETUP – Setup Software or<br />
written via SDO (object index 2250h) becomes effective as Node-ID number.<br />
If the setting of Node-ID is changed while the control power is ON, it is<br />
necessary to turn OFF the control power once or execute the “Reset node”<br />
comm<strong>and</strong> to activate the new set Node-ID number.<br />
11.6 Bit rate (transmission baud rate) <strong>and</strong> bus length<br />
Bit rate can change via R-SETUP – Setup Software or via SDO (object index 2251h).<br />
Selectable bit rate <strong>and</strong> maximum bus length depending on the bit rate are shown in the following table.<br />
If the setting of the bit rate is changed while the control power is ON, it is necessary to turn OFF the control<br />
power once or execute the “Reset node” comm<strong>and</strong> to activate the new set bit rate.<br />
Bit rate <strong>and</strong> bus length<br />
Bit rate Max. bus length Bit rate code<br />
1 Mbps 25m 8<br />
800 kbps 50m 7<br />
500 kbps (factory default) 100m 6<br />
250 kbps 250m 5<br />
125 kbps 500m 4<br />
(100 kbps; not supported) --- 3 (cannot be selected)<br />
50 kbps 1000m 2<br />
20 kbps 2500m 1<br />
10 kbps 5000m 0<br />
The bit rate must be the same for all units in one network.<br />
31
11.7 About the EDS file <strong>and</strong> the revision level of the servo amplifier<br />
The revision level of the servo amplifier’s communication firmware may change without prior notice.<br />
This section explains about the EDS file provided on the homepage, for this case.<br />
Description of EDS file<br />
File name<br />
Revision level of amplifier<br />
Version of communication firmware<br />
sanyo_rco.eds<br />
Rev. E or later<br />
Ver. 000B or later<br />
●<br />
Even after the change of the revision level of the servo amplifier, the existing functions will not be<br />
changed <strong>and</strong> the EDS file will be still available as before.<br />
How to check the revision level of the servo amplifier<br />
- Find a label on the back of the servo<br />
amplifier.<br />
- This letter indicates the revision level<br />
of the servo amplifier.<br />
How to check the version of the communication firmware<br />
- Read out the object 100Ah (software version) via SDO communication.<br />
- “V.**-□□” will be read out in the ASCII code. “□□” indicates the version of the communication<br />
firmware. If it is “0B”, it means “Ver. 000B.”<br />
32