Vehicle Inspection Study Guide STRAIGHT TRUCK/SCHOOL BUS
Vehicle Inspection Study Guide STRAIGHT TRUCK/SCHOOL BUS
Vehicle Inspection Study Guide STRAIGHT TRUCK/SCHOOL BUS

You also want an ePaper? Increase the reach of your titles
YUMPU automatically turns print PDFs into web optimized ePapers that Google loves.
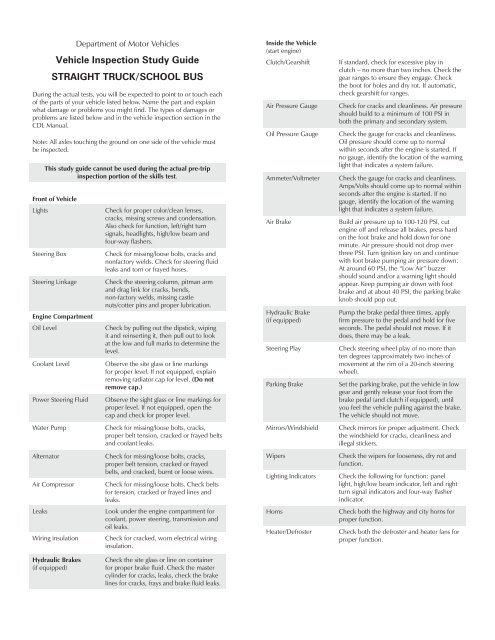
Department of Motor <strong>Vehicle</strong>s<br />
<strong>Vehicle</strong> <strong>Inspection</strong> <strong>Study</strong> <strong>Guide</strong><br />
<strong>STRAIGHT</strong> <strong>TRUCK</strong>/<strong>SCHOOL</strong> <strong>BUS</strong><br />
During the actual tests, you will be expected to point to or touch each<br />
of the parts of your vehicle listed below. Name the part and explain<br />
what damage or problems you might find. The types of damages or<br />
problems are listed below and in the vehicle inspection section in the<br />
CDL Manual.<br />
Note: All axles touching the ground on one side of the vehicle must<br />
be inspected.<br />
This study guide cannot be used during the actual pre-trip<br />
inspection portion of the skills test.<br />
Front of <strong>Vehicle</strong><br />
Lights<br />
Steering Box<br />
Steering Linkage<br />
Engine Compartment<br />
Oil Level<br />
Coolant Level<br />
Power Steering Fluid<br />
Water Pump<br />
Alternator<br />
Air Compressor<br />
Leaks<br />
Wiring insulation<br />
Check for proper color/clean lenses,<br />
cracks, missing screws and condensation.<br />
Also check for function, left/right turn<br />
signals, headlights, high/low beam and<br />
four-way flashers.<br />
Check for missing/loose bolts, cracks and<br />
nonfactory welds. Check for steering fluid<br />
leaks and torn or frayed hoses.<br />
Check the steering column, pitman arm<br />
and drag link for cracks, bends,<br />
non-factory welds, missing castle<br />
nuts/cotter pins and proper lubrication.<br />
Check by pulling out the dipstick, wiping<br />
it and reinserting it, then pull out to look<br />
at the low and full marks to determine the<br />
level.<br />
Observe the site glass or line markings<br />
for proper level. If not equipped, explain<br />
removing radiator cap for level. (Do not<br />
remove cap.)<br />
Observe the sight glass or line markings for<br />
proper level. If not equipped, open the<br />
cap and check for proper level.<br />
Check for missing/loose bolts, cracks,<br />
proper belt tension, cracked or frayed belts<br />
and coolant leaks.<br />
Check for missing/loose bolts, cracks,<br />
proper belt tension, cracked or frayed<br />
belts, and cracked, burnt or loose wires.<br />
Check for missing/loose bolts. Check belts<br />
for tension, cracked or frayed lines and<br />
leaks.<br />
Look under the engine compartment for<br />
coolant, power steering, transmission and<br />
oil leaks.<br />
Check for cracked, worn electrical wiring<br />
insulation.<br />
Inside the <strong>Vehicle</strong><br />
(start engine)<br />
Clutch/Gearshift<br />
Air Pressure Gauge<br />
Oil Pressure Gauge<br />
Ammeter/Voltmeter<br />
Air Brake<br />
Hydraulic Brake<br />
(if equipped)<br />
Steering Play<br />
Parking Brake<br />
Mirrors/Windshield<br />
Wipers<br />
Lighting Indicators<br />
Horns<br />
Heater/Defroster<br />
If standard, check for excessive play in<br />
clutch – no more than two inches. Check the<br />
gear ranges to ensure they engage. Check<br />
the boot for holes and dry rot. If automatic,<br />
check gearshift for ranges.<br />
Check for cracks and cleanliness. Air pressure<br />
should build to a minimum of 100 PSI in<br />
both the primary and secondary system.<br />
Check the gauge for cracks and cleanliness.<br />
Oil pressure should come up to normal<br />
within seconds after the engine is started. If<br />
no gauge, identify the location of the warning<br />
light that indicates a system failure.<br />
Check the gauge for cracks and cleanliness.<br />
Amps/Volts should come up to normal within<br />
seconds after the engine is started. If no<br />
gauge, identify the location of the warning<br />
light that indicates a system failure.<br />
Build air pressure up to 100-120 PSI, cut<br />
engine off and release all brakes, press hard<br />
on the foot brake and hold down for one<br />
minute. Air pressure should not drop over<br />
three PSI. Turn ignition key on and continue<br />
with foot brake pumping air pressure down.<br />
At around 60 PSI, the “Low Air” buzzer<br />
should sound and/or a warning light should<br />
appear. Keep pumping air down with foot<br />
brake and at about 40 PSI, the parking brake<br />
knob should pop out.<br />
Pump the brake pedal three times, apply<br />
firm pressure to the pedal and hold for five<br />
seconds. The pedal should not move. If it<br />
does, there may be a leak.<br />
Check steering wheel play of no more than<br />
ten degrees (approximately two inches of<br />
movement at the rim of a 20-inch steering<br />
wheel).<br />
Set the parking brake, put the vehicle in low<br />
gear and gently release your foot from the<br />
brake pedal (and clutch if equipped), until<br />
you feel the vehicle pulling against the brake.<br />
The vehicle should not move.<br />
Check mirrors for proper adjustment. Check<br />
the windshield for cracks, cleanliness and<br />
illegal stickers.<br />
Check the wipers for looseness, dry rot and<br />
function.<br />
Check the following for function: panel<br />
light, high/low beam indicator, left and right<br />
turn signal indicators and four-way flasher<br />
indicator.<br />
Check both the highway and city horns for<br />
proper function.<br />
Check both the defroster and heater fans for<br />
proper function.<br />
Hydraulic Brakes<br />
(if equipped)<br />
Check the site glass or line on container<br />
for proper brake fluid. Check the master<br />
cylinder for cracks, leaks, check the brake<br />
lines for cracks, frays and brake fluid leaks.
Safety/Emergency<br />
Equipment<br />
Front Suspension<br />
Ensure working fire extinguisher properly<br />
charged and mounted, spare electrical<br />
fuses (unless equipped with circuit<br />
breakers), three reflective triangles.<br />
Under the <strong>Vehicle</strong><br />
Drive shaft<br />
Check the drive shaft for cracks, non-factory<br />
welds, missing/loose bolts or nuts and proper<br />
lubrication.<br />
Springs<br />
Check for missing, cracked, shifted or bent<br />
springs. If 1/4 or more are missing, your<br />
vehicle could be put out of service.<br />
Exhaust System<br />
Check the exhaust system for cracks, holes,<br />
missing/loose bolts and nuts. Check for signs<br />
of soot, which can indicate an exhaust leak.<br />
Spring Mount(s)<br />
Shock Absorber<br />
Check both mounts and the U bolts for<br />
cracks, non-factory welds, missing or loose<br />
bolts and nuts.<br />
Check for cracks, leaks and missing bolts.<br />
Frame<br />
Rear of <strong>Vehicle</strong><br />
Check the vehicle frame for cracks, bends,<br />
nonfactory welds and rust.<br />
Front Wheel<br />
Rims<br />
Hub Seal<br />
Check the rims for bends, cracks and<br />
nonfactory welds.<br />
Check the hub oil seal for missing bolts,<br />
cracks, leaks and proper level (if equipped<br />
with site glass).<br />
Rear Wheels<br />
Check the rear wheels the same as the front<br />
with the exception of the tire depth, it should<br />
be 2/32” in the major grooves. Check the<br />
space between the dual tires. Tires should<br />
not be touching and no sign of debris. If<br />
equipped with spacers, they should not be<br />
bent, cracked or nonfactory welds.<br />
Tire<br />
Lug Nuts<br />
Front Brakes<br />
Slack Adjuster<br />
Check the tire for at least 4/32” tread<br />
depth in the major grooves. Check for<br />
cuts, bulges and proper air pressure using<br />
an air gauge.<br />
Check the lug nuts for missing, loose nuts<br />
and rust around them.<br />
Check the slack adjuster for missing cotter<br />
pins. If the slack adjuster moves more than<br />
one inch where the push rod attaches to<br />
it, it probably needs to be adjusted. Slack<br />
adjusters should not be at more than a<br />
90-degree angle with the brakes applied.<br />
Rear Suspension<br />
Rear Brakes<br />
Rear Lights<br />
Inspect this area the same as the front.<br />
Suspensions vary and all items should<br />
be checked for cracks, bent, non-factory<br />
welds, missing/loose bolts or nuts. Inspect<br />
walker beams, torsion bars and air bellows,<br />
if equipped.<br />
Inspect this area the same as the front of the<br />
vehicle.<br />
Check for proper color and clean<br />
lenses/reflectors, cracks, missing screws and<br />
condensation. Also check for function of<br />
left/right turn signals, brake lights, reverse<br />
lights and four way flashers.<br />
Chambers<br />
Air Hose<br />
Brake Drum<br />
Hydraulic Brakes<br />
(if equipped)<br />
Driver/Fuel Area<br />
Check the chambers for cracks, dents and<br />
air leaks.<br />
Check the hoses for loose connections, dry<br />
rot, holes and air leaks.<br />
Check the drum for cracks, non-factory<br />
welds and signs of grease or oil.<br />
Check the rotor for cracks, non-factory<br />
welds and signs of fluid leaks. Check the<br />
lines for cuts, holes, loose connections and<br />
fluid leaks. Check the calipers for cracks,<br />
missing/loose bolts and fluid leaks.<br />
If Passenger <strong>Vehicle</strong><br />
Also Inspect:<br />
Passenger Entry<br />
Seating<br />
Emergency Exits<br />
Baggage Compartment<br />
(if equipped)<br />
Check that steps and handrails secure, no<br />
missing hardware, no worn matting, door<br />
opens and closes correctly.<br />
Check that all seats are secure with no<br />
missing hardware.<br />
Check the function of all exits both inside<br />
and out, including all warning devices.<br />
Check that doors open and close correctly<br />
and are secure with no missing hardware.<br />
Door<br />
Check the door for cracked or bent hinges<br />
and that it functions properly.<br />
Mirrors<br />
Check the mirrors for cracks, cleanliness<br />
and missing/loose bolts/nuts.<br />
Fuel Tank<br />
Check the fuel tank for cracks, holes and<br />
that the straps are not loose or cracked.<br />
Shiny metal by straps could indicate a<br />
loose strap. Check under fuel tank for<br />
leaks.<br />
DL 141 (07/01/2013)