For Salvo Primary Dive Lights - SukellusLuola.com
For Salvo Primary Dive Lights - SukellusLuola.com
For Salvo Primary Dive Lights - SukellusLuola.com

You also want an ePaper? Increase the reach of your titles
YUMPU automatically turns print PDFs into web optimized ePapers that Google loves.
<strong>Primary</strong> Lighting Guide
USE AND CARE GUIDE<br />
<strong>For</strong> <strong>Salvo</strong> <strong>Primary</strong> <strong>Dive</strong> <strong>Lights</strong><br />
© <strong>Salvo</strong>, LLC<br />
705 NW Santa Fe Boulevard<br />
High Springs, FL 32643<br />
Phone 386.454.0019 • Fax 386.454.1661
Table of Contents<br />
Lighting Innerspace -- One Explorer at a Time. ........................ 2<br />
Light Models.............................................................................. 2<br />
Warranty Information................................................................. 2<br />
Features .................................................................................... 3<br />
Charging and Storage ............................................................... 5<br />
Pre-<strong>Dive</strong> .................................................................................... 6<br />
Post-<strong>Dive</strong>................................................................................... 7<br />
Changing the Bulb..................................................................... 8<br />
Rebel 12 and Handheld 9........................................................ 10
Lighting Innerspace --<br />
One Explorer at a Time.<br />
Congratulations on your new acquisition, unarguably the finest<br />
lighting equipment used worldwide by cave, wreck, reef and deep<br />
explorers.<br />
A<br />
wonderful choice you have made with your light selection. Please take a<br />
moment to read through this document. It is provided to answer many<br />
frequently asked questions and also as a platform for our re<strong>com</strong>mended care,<br />
use, and storage. As always, we re<strong>com</strong>mend that you do not exceed your<br />
level of training and wish you many years of safe diving.<br />
If you have additional questions after reading through the manual, please do not<br />
hesitate to contact us at 386.454.1440 or via email – sales@salvodiving.<strong>com</strong>.<br />
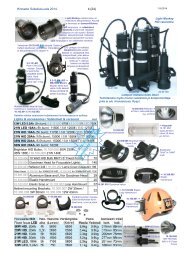
Light Models<br />
There are three configurations currently available for <strong>Salvo</strong> primary lights.<br />
• The Havoc II Series – HID <strong>Primary</strong> <strong>Lights</strong><br />
• The Rebel II Series – LED <strong>Primary</strong> <strong>Lights</strong><br />
• The Rebel 12W and Handheld 9W – LED <strong>Primary</strong> <strong>Lights</strong><br />
Warranty Information<br />
All of the <strong>Salvo</strong> lights <strong>com</strong>e with a one year warranty from the original date of<br />
purchase. The warranty covers all items including battery and charger. Please contact<br />
your local dealer or us directly should you experience any issues with your light that you<br />
may think is not right.<br />
2
Features<br />
All lights are delivered <strong>com</strong>plete from our facility--including a fully charged battery pack,<br />
charger, and of course the light itself.<br />
HAVOC II and REBEL II PRIMARY LIGHTS<br />
• Dry Lid Utilizing Banana Connector. Based on constant<br />
customer request and our <strong>com</strong>mitment to manufacture the highest<br />
quality primary light, the Havoc II and Rebel II lights utilize<br />
banana connectors from battery canister to lid. There are two<br />
positions for the lid – storage position and dive position. Also, the<br />
new lids have a <strong>com</strong>pletely recessed light switch, labeled with the<br />
‘OFF’ position, for maximum protection.<br />
• Completely sealed Li-Po battery canisters. Isn’t it amazing to<br />
see how battery technology has evolved in just the past couple of<br />
years? We are the first and only underwater lighting <strong>com</strong>pany to<br />
be using Li-Po batteries in our primary lights. Why did we seal the<br />
pack? To help reduce the cost of repairs due to nicked cords and<br />
switch boots along with the occasional improperly latched lids and<br />
‘oops, I forgot to put the o-ring back on the lid.’ The battery pack<br />
3
is a critical (and pricey) part to your primary light; it deserves the<br />
added attention and protection.<br />
• Delrin <strong>com</strong>ponent construction. With the exception of the<br />
aluminum light heads on the Rebel II 21W LED’s, all of our<br />
<strong>com</strong>ponents are housed within Delrin bodies. Delrin is a<br />
lightweight, low-friction, and wear-resistant thermoplastic with<br />
good physical and processing properties and capable of operating<br />
in temperatures in excess of 200 degrees Fahrenheit (approximately<br />
90 degrees Celsius). It also handles great at sub freezing<br />
temperatures, is extremely durable and stands up to the rigors of<br />
any diving environment.<br />
4
Charging and Storage<br />
All lighting systems <strong>com</strong>e fully charged from our facility; you will need to use the<br />
light before being able to charge it again. There are no customer serviceable<br />
<strong>com</strong>ponents sealed within this pack… SO, STAY OUT OF<br />
IT! All warranty claims will be nullified if the internal seal of the<br />
pack has been <strong>com</strong>promised.<br />
Charging the Battery Pack<br />
• Make sure to charge your battery 24 hours before diving.<br />
• Connect universal charger to wall outlet.<br />
• Connect battery canister to<br />
universal charger. Be<br />
mindful of polarity, RED<br />
BANANA connector of<br />
charger to RED SOCKET<br />
of battery canister.<br />
BLACK BANANA<br />
connector of charger to<br />
BLACK SOCKET of<br />
battery canister.<br />
5
• LED will glow red while charging and will turn green when the charge<br />
cycle is <strong>com</strong>pleted.<br />
• It is re<strong>com</strong>mended from the battery manufacturer to leave the Li-Pol<br />
packs partially discharged (30-50% rated capacity) when storing.<br />
Pre-<strong>Dive</strong><br />
To ensure years of dependable service from your light, follow the steps below during your<br />
pre-dive setup.<br />
• Is your battery charged?<br />
• Inspect and make sure the cord and switch boot do not have<br />
any cuts or damage<br />
• Be certain that the lid sealing o-ring is in place. There is<br />
really no reason to remove this o-ring during storage.<br />
Periodically you should inspect the lid o-ring and wipe dry any<br />
excess grease and sand, do not lubricate as it will attract dirt and<br />
grit.<br />
• Connect the lid assembly to the sealed battery. Be certain that<br />
the banana plugs of the lid are lined up with the color indexed<br />
sockets of the canister. Gently slide the lid down on the<br />
canister until the o-ring makes contact with both the lid and<br />
canister. If there is resistance, STOP!!, and ensure that the<br />
connectors are properly aligned. Never try to forcefully close<br />
the canister.<br />
6
• When closing the locking latches, make sure to apply pressure<br />
evenly and simultaneously to the latches.<br />
• Turn on the light and make sure it <strong>com</strong>es on. It is best to leave<br />
the light on for at least 30 seconds before turning off.<br />
Although the Brightstar bulbs and ballasts are designed to be<br />
hot re-strike able, “short-striking” the bulb can cause the life of<br />
the bulb to be shorter than normal.<br />
• If the light fails to strike, turn the switch off and wait 5-15<br />
seconds before trying again<br />
• Turn off the light and finish preparing for your dive.<br />
Post-<strong>Dive</strong><br />
To ensure years of dependable service from your light, follow the steps below during your<br />
post--dive breakdown.<br />
• Always rinse your gear after a salt-water dive<br />
• Before opening the light, make sure you dry any excess water<br />
from the lid and canister interface<br />
• Check for any water in the canister. If there was any water<br />
intrusion, it is best to detect it early<br />
• Inspect the cord and switch boot for any damage that may have<br />
occurred during your dive<br />
• Reinstall the lid assembly to the canister for transport. The<br />
battery canister has sockets for storage and transportation.<br />
Align the banana plugs 180˚ opposite from the color indexed<br />
7
‘dive’ sockets. Gently slide the lid down on the canister until<br />
the o-ring makes contact with both the lid and canister. If there<br />
is resistance, STOP!!, and ensure that the connectors are<br />
properly aligned. Never try to forcefully close the canister.<br />
• We re<strong>com</strong>mend storing your light in a cool dry environment.<br />
Changing the Bulb<br />
There are no user serviceable <strong>com</strong>ponents in the Rebel II series of LED primary lights.<br />
If you are experiencing any issues, please return them to <strong>Salvo</strong> for service, inspection, and<br />
repair.<br />
The Havoc II series of HID primary light features a user replaceable<br />
bulb.<br />
• Remove Goodman head by loosening focus adjustment screw<br />
to a point where the head will slide freely from the light head.<br />
8
• Carefully remove the lamp cover by gently pulling it off with a<br />
twisting motion. It is best to use a glove or wrap the lamp cover<br />
with a small towel to protect your hand from accidental<br />
breakage of the glass.<br />
Note – The 35W and 50W Havoc II HID primary lights have<br />
an additional collet and external lamp cover o-ring at the base<br />
of the lamp cover that needs to be unscrewed and removed<br />
before attempting removal of the lamp cover.<br />
• Remove the bulb from the socket and extend it to the end of<br />
the lead wires. Carefully unplug the bulb from the wires leading<br />
into the ballast body.<br />
9
• Connect the new bulb to the lead wires from the ballast.<br />
• Reinstall the bulb into the socket. Twist the bulb with a ¼ turn<br />
as you do so to help the wires back into the socket assembly.<br />
• Holding the lamp cover with a glove or towel, reinstall the lamp<br />
cover with a slight twisting motion.<br />
• The first 2-rings do the sealing. The third O-ring at the bottom<br />
is there to cushion the lamp cover and is not there to seal it.<br />
• Do not to use grease on these O-rings. The grease will make the<br />
O-rings to slick and pressure build up during reinstallation will<br />
cause the lamp cover to push back off. It is best to replace the<br />
O-rings if installing a new bulb.<br />
• Never remove the lamp cover unnecessarily. Most bulbs and<br />
lamp covers are not broken during a dive, but most <strong>com</strong>monly<br />
during unnecessary assembly and disassembly.<br />
Rebel 12 and Handheld 9<br />
Then Rebel 12W LED and Handheld 9W LED primary lights are unique to other<br />
lights because of the way they are charged and switch actuation. These unique features<br />
were added to ensure the ultimate in a <strong>com</strong>pact light ideal for today’s traveling diver.<br />
Charging<br />
• Remove light head from tail piece.<br />
10
• Inspect threads and o-rings to ensure they are free from dirt and<br />
debris.<br />
• Connect universal charger to wall outlet.<br />
• Connect universal charger to tail piece.<br />
11
• LED will glow red while charging and will turn green when the charge<br />
cycle is <strong>com</strong>pleted.<br />
• It is re<strong>com</strong>mended from the battery manufacturer to leave the Li-Ion<br />
packs partially discharged (30-50% rated capacity) when storing.<br />
Diving<br />
The switch for the Rebel 12W LED and Handheld 9W LED primary<br />
lights is located in the light head and is double o-ring sealed.<br />
• To turn the light on, rotate the head clockwise until the light<br />
head turns on. It is not necessary to continue turning the<br />
light head after it <strong>com</strong>es on, it will not get any brighter.<br />
• To turn the light off, rotate the light head counter clockwise.<br />
Do not unscrew the tailpiece <strong>com</strong>pletely underwater, this will<br />
damage the light. When the light turns off, stop.<br />
• It is re<strong>com</strong>mended to lubricate the double o-rings that seal<br />
the light head and tail piece in order to guarantee smooth<br />
actuation.<br />
12