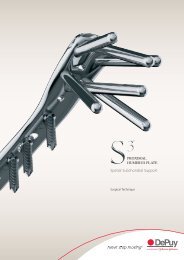
S3™ Proximal Humerus Plating System Surgical Technique - Biomet
S3™ Proximal Humerus Plating System Surgical Technique - Biomet
S3™ Proximal Humerus Plating System Surgical Technique - Biomet

You also want an ePaper? Increase the reach of your titles
YUMPU automatically turns print PDFs into web optimized ePapers that Google loves.
<strong>Surgical</strong> <strong>Technique</strong><br />
<strong>Surgical</strong> <strong>Technique</strong><br />
Step 13: Verify Central Guide<br />
Wire Placement<br />
• Place the guide wire in the centre of the<br />
humeral head<br />
• This plate position will reduce the risk of<br />
subacromial impingement<br />
Step 15: Manually Drill for Subchondral<br />
Support Pegs<br />
• With the 4.0 mm drill attached to the driver<br />
handle, advance the drill, through the drill<br />
guide until resistance from subchondral bone<br />
is felt<br />
• This will ensure that the peg engages<br />
subchondral bone for optimal fixation<br />
Tips: when drilling for smooth pegs use FDB40L<br />
(Drill Bit Fast 4.0 mm Long).<br />
When drilling for partially threaded pegs use<br />
FDS40 (Drill Bit Fast 4.0 mm Step).<br />
Step 14: Drill Cortex Through<br />
F.A.S.T. Guide<br />
• Using the short 4.0mm drill (FDB40S), drill<br />
through the F.A.S.T. Guide and perforate<br />
the cortex<br />
• This drill has a stop that will only<br />
allow it to penetrate the<br />
near cortex<br />
• If re-drilling is required after F.A.S.T. Guide<br />
removal, thread the drill guide (DRGSH) into<br />
the desired peg hole and drill on power using<br />
DB40S (Drill Bit Short 4.0 mm)<br />
Tips: bending the central guide wire and<br />
rotating it out of the way will ease the<br />
attachment of the drill guide to the plate.<br />
Other K-Wire holes can be used to provisionally<br />
fix the plate to the bone.<br />
Step 16: Verify Drill Depth<br />
• Once resistance is felt, fluoro imaging should<br />
verify that the tip of the manual drill is close to<br />
subchondral bone<br />
• Care should be taken not to penetrate<br />
subchondral bone<br />
Tips: the depth gauges have a bias built in that<br />
will reduce the measured depth by 2.5 mm. If<br />
peg to subchondral bone contact is desired,<br />
add 2.5 mm to the depth gauge.<br />
Depths can be Gauged from the<br />
manual drill or the sleeveless depth<br />
gauge. Both can be read through<br />
either the F.A.S.T. Guide or through<br />
the drill guide, using the appropriate<br />
calibrated scale.<br />
8 9