You also want an ePaper? Increase the reach of your titles
YUMPU automatically turns print PDFs into web optimized ePapers that Google loves.
<strong>Using</strong> <strong>par</strong> <strong>and</strong> <strong>cex</strong> <strong>for</strong> <strong>graphs</strong> <br />
Michael Blasingame <br />
SCRG <br />
2013 May 1
<strong>par</strong> <br />
• The func@on ‘<strong>par</strong>’ can be used to manipulate <br />
the current plot(s) <br />
• For example, it’s most commonly used to <br />
allow <strong>for</strong> mul@ple plots in one figure <br />
• Code example: <strong>par</strong>(mfrow = c(1, 3)) <br />
• Syntax interpreta@on: Set my figure window <br />
to allow a 1 (row) by 3 (column) ploMng space
<strong>par</strong>(mfrow=c(x,y))
<strong>par</strong>(new=T) <br />
• Some@mes, you want to be able to plot two <br />
different results on the same plot but can’t <br />
easily do this in one comm<strong>and</strong> due to dataset <br />
size <br />
• Example: Plot English <strong>and</strong> Spanish means of <br />
some effect with error bars, different colors, <br />
different lines, etc. <br />
• However, R will default to a new plot each <br />
@me…
<strong>par</strong>(new=T) <br />
• The comm<strong>and</strong> <strong>par</strong>(new=T) can be useful here <br />
• Syntax interpreta@on: Keep the plot I just created <br />
ac@ve—don’t create a new one with this next <br />
comm<strong>and</strong> <br />
• Example (in this order): <br />
– plotmeans(data$Correct[data$TaskLang=="ENG”…) <br />
– <strong>par</strong>(new=T) <br />
– plotmeans(data$Correct[data$TaskLang=="SPN”…)
<strong>par</strong>(new=T)
<strong>par</strong>(new=T) <br />
• Quick caveat: <strong>par</strong>(new=T) only works if the <br />
axes are the same! You can’t plot a means plot <br />
<strong>and</strong> then an interac@on plot using <strong>par</strong>(new=T)
<strong>par</strong>(mar=c(w,x,y,z) <br />
• Some@mes, your axes get crowded <br />
• <strong>Using</strong> the <strong>par</strong>(mar=c(w,x,y,z)) tells the plot <br />
how much space the bodom (w), lee (x), top <br />
(y), <strong>and</strong> right (z) sides get <br />
• Much of this depends on trial <strong>and</strong> error (just <br />
fiddling a bit un@l it looks like)
<strong>par</strong>(mar=c(w,x,y,z)) <br />
• You can combine mar with other <strong>par</strong> features <br />
• Example: <br />
– <strong>par</strong>(mfrow=c(1,3),mar=c(5,5,5,2)) <br />
• Interpreta@on: Give me a 1 (row) by 3 <br />
(column) plot with extra space on the bodom, <br />
lee, <strong>and</strong> top (but not a lot of space on the <br />
right)
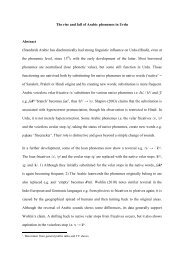
Area
axis <br />
• Some@mes, we <br />
want to override <br />
the axes labels, <br />
because R isn’t <br />
sure what our <br />
unique labeling <br />
system means <br />
Gross default
axis <br />
• The axis <strong>par</strong>ameter can be useful in overriding <br />
where labels are put <br />
• Example: <br />
– axis(1.5,1,"Clear Speech",<strong>cex</strong>.axis=1.5) <br />
– axis(1.5,2,"Plain Speech",<strong>cex</strong>.axis=1.5) <br />
• Interpreta@on: First number indicates where <br />
in the ver@cal space; second number indicates <br />
which @ck mark. Third is “label”; fourth is size <br />
(more on <strong>cex</strong> in a minute)
axis
axis <br />
• Quick caveat: you must turn off your x-‐axis <br />
labels using xaxt='n’ <br />
• Example: <br />
– plot(data…., xaxt=‘n’, main=“Title”…)
<strong>cex</strong> <br />
• The <strong>cex</strong> family tells you how big to magnify <br />
text <br />
• Default is ‘1’ <br />
• Family includes: <br />
– <strong>cex</strong> <br />
– <strong>cex</strong>.main <br />
– <strong>cex</strong>.axis <br />
– <strong>cex</strong>.lab
<strong>cex</strong> <br />
– <strong>cex</strong>: <strong>for</strong> legends <strong>and</strong> other independent func@ons <br />
outside of the ‘plot’ family <br />
– <strong>cex</strong>.main: <strong>for</strong> @tles (must have a main=“…”) <br />
– <strong>cex</strong>.axis: <strong>for</strong> axes (within the ‘axis’ func@on) <br />
– <strong>cex</strong>.lab: <strong>for</strong> labels within the ‘plot’ family <br />
– Example: <br />
– plot(…. ,<strong>cex</strong>.lab=1.5,<strong>cex</strong>.main=2,….) <br />
– Interpreta@on: magnify the labels by 1.5 <strong>and</strong> the <br />
@tle by 2
<strong>cex</strong> <br />
<strong>cex</strong>.main <br />
<strong>cex</strong> <br />
<strong>cex</strong>.label <br />
<strong>cex</strong>.axis
legend <br />
• Legends orient the reader to your figure <br />
without you having to explain each symbol <br />
• Code: <br />
–<br />
legend("bodomlee",lty=c(2,1),col=c("black","dark<br />
red"),c("English","Spanish"),<strong>cex</strong>=1.5) <br />
– Interpreta@on: legend(“placement”, symbol used, <br />
color of symbols, what the different symbols <br />
correspond to, magnifica@on <strong>par</strong>ameter) <br />
– NB: Placement can be “topright”, “toplee”, <br />
“bodomright”, “bodomlee”
legend <br />
• ‘legend’ only works if there is a current plot <br />
open! <br />
• Not to be confused with <strong>par</strong>(new=T) <br />
• Also, no@ce how ‘<strong>cex</strong>’ is used (not ‘<strong>cex</strong>.label’, <br />
etc.) because ‘legend’ is its own se<strong>par</strong>ate <br />
comm<strong>and</strong> line (think of it as a mini-‐figure <br />
independent of the rest of the plot)
plotmeans <br />
• Need library(gplots) <br />
• Calculates means of levels within a factor <strong>and</strong> <br />
plots mean + 95% confidence interval <br />
• User can specify CI confidence level (defaults <br />
to p = .95) <strong>and</strong> a variety of other <strong>par</strong>ameters
plotmeans <br />
• Example: <br />
– plotmeans(data$DependentVariable~data$Factor, <br />
lty=2, col=“darkred”, main=“Title”, xlab=“Factor”, <br />
ylab=“Response”,ylim=c(minDV,maxDV) ,ci.label=T, <br />
n.label=T, p = .95) <br />
– Interpreta@on: plotmeans(dependent variable, factor <br />
(each level within the factor is se<strong>par</strong>ate), line type, <br />
color <strong>for</strong> line, @tle, factor group, response, y-‐axis <br />
range, #s <strong>for</strong> CI, n within each level, confidence level) <br />
– See slide 3 <strong>for</strong> example combining ‘plotmeans’ <strong>and</strong> <br />
‘axis’ func@ons