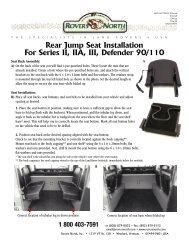
Work Lamp Kit Instructions For Defender (Rear Mount)
Work Lamp Kit Instructions For Defender (Rear Mount)
Work Lamp Kit Instructions For Defender (Rear Mount)

Create successful ePaper yourself
Turn your PDF publications into a flip-book with our unique Google optimized e-Paper software.
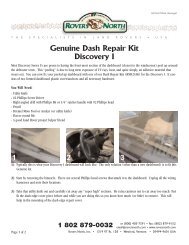
KIT:LRNA71707 INSTRUCTIONS: <strong>Instructions</strong> DLM113KI<br />
T H E S P E C I A L I S T S I N L A N D R O V E R S • U S A<br />
<strong>Work</strong> <strong>Lamp</strong> <strong>Kit</strong> <strong>Instructions</strong> <strong>For</strong> <strong>Defender</strong><br />
(<strong>Rear</strong> <strong>Mount</strong>)<br />
1. Remove left rear speaker.<br />
2. Remove rear license plate light and mount.<br />
a) Drill a 5/16” hole in left hand side of the plastic mount.<br />
b) Install the grommet supplied on the work lamp harness.<br />
3. <strong>Mount</strong> the Hella work light to the work light mount bracket.<br />
4. Feed the wires from the work light through the grommet in the rear body.<br />
5. Reattach license plate light and work light to the rear body of the vehicle.<br />
6. Remove drivers seat and gain access to the battery box.<br />
a) Locate a suitable spot for the relay and harness.<br />
b) Drill a 1/8” - 9/64” hole.<br />
c) Find the 2 black ground wires with the small eyelets and attach along with the relay into the hole you drilled, using<br />
the screw provided.<br />
7. Run the length of the wiring harness that has the 2 bullet ends out of the battery box, along the inside of the frame rail,<br />
(be careful to stay clear of exhaust pipes and moving parts, i.e. suspension) to left rear wheel well.<br />
a) Locate the grommet in the corner and run the work light harness through it.<br />
b) You can now connect the main harness to the work light harness with the bullet connectors supplied and reattach<br />
your speaker.<br />
8. Back in the battery box, run the single yellow wire, marked to auxiliary switch harness, out of the battery box toward the front<br />
and up the bulkhead to the grommet for the speedometer cable. Do not feed through the grommet yet.<br />
9. Now you must decide where to put the auxiliary light switch. If you have an available plastic hole plug on the underside of<br />
the main gauge cluster portion of the dash, continue reading. If not go directly to instruction 10a.<br />
10. Remove the 4 screws that hold the main gauge cluster, and move it to the left. Remove the plastic plug and push in the<br />
auxiliary light switch in the underside of main cluster panel. (Go to step 11).<br />
a) Remove the 3 screws that hold the bottom left hand dash pad and pull it away. Cut out the dash covering for the<br />
auxiliary switch. You will see on the backside of this panel there is one or two spots you can do this. Push in the<br />
auxiliary light switch.<br />
11. In back of the main gauge cluster panel, but not attached to it, you will see a round cylinder shape with 4 or so wires coming<br />
out of it. This is the key switch. Locate the white with orange wire, it should be the closest to you. Unplug it and install the<br />
grey wire with the 2 way connector onto the key switch. Also reattach the white with orange wire to one side of the 2 way<br />
connector. At this time run the single connector to one of the posts on the back of the auxiliary light switch.<br />
Page 1 of 2<br />
1 802 879-0032 or 1-800-403-7591 • Fax: (802) 879-9152<br />
e-mail: email@roversnorth.com • www.roversnorth.com<br />
Rovers North, Inc. • 1319 VT Rt. 128 • Westford, Vermont • 05494-9601 USA
KIT:LRNA71707 KIT: <strong>Instructions</strong> DLM113KI<br />
T H E S P E C I A L I S T S I N L A N D R O V E R S • U S A<br />
12. Now pull the single wire harness through the speedometer grommet and attach it to the second post on the auxiliary light<br />
switch. Reattach your dash piece(s).<br />
13. Back to the battery box, find the single red wire with the large eyelet on it. This is to be connected to the positive (+) post<br />
on the battery.<br />
14. With connections done, turn the key to the accessory position and turn on your light.<br />
Page 2 of 2<br />
1 802 879-0032 or 1-800-403-7591 • Fax: (802) 879-9152<br />
e-mail: email@roversnorth.com • www.roversnorth.com<br />
Rovers North, Inc. • 1319 VT Rt. 128 • Westford, Vermont • 05494-9601 USA
T H E S P E C I A L I S T S I N L A N D R O V E R S • U S A<br />
<strong>Instructions</strong> Questionnaire<br />
We rely on our customers to help us continually improve our instruction sheets. Please FAX or mail any comments, questions, or<br />
ideas for improvements you may have.<br />
Send To: Rovers North<br />
1319 Vermont Route 128<br />
Westford, VT 05494<br />
or Fax: 802-879-9152<br />
Your Name: _____________________ Phone #: ________________<br />
Address: _____________________ Email Adrs: ________________<br />
_____________________<br />
Instruction part number (top right corner) or description of what instructions are: ________________________________<br />
Overall, how would you rate the quality of this set of instructions? (please circle one):<br />
Poor Fair Good Very Good Excellent<br />
1 2 3 4 5 6 7 8 9 10<br />
Ideas, Comments, or Corrections (please include specifics, such as page number, or step number):<br />
_________________________________________________________________________________________<br />
_________________________________________________________________________________________<br />
_________________________________________________________________________________________<br />
_________________________________________________________________________________________<br />
_________________________________________________________________________________________<br />
_________________________________________________________________________________________<br />
_________________________________________________________________________________________<br />
_________________________________________________________________________________________<br />
_________________________________________________________________________________________<br />
_________________________________________________________________________________________<br />
THANK YOU!<br />
1 802 879-0032<br />
or (800) 403-7591 • Fax: (802) 879-9152<br />
email@roversnorth.com • www.roversnorth.com<br />
Rovers North, Inc. • 1319 VT Rt. 128 • Westford, Vermont • 05494-9601 USA