PWS100 Present Weather Sensor - Campbell Scientific
PWS100 Present Weather Sensor - Campbell Scientific
PWS100 Present Weather Sensor - Campbell Scientific
Create successful ePaper yourself
Turn your PDF publications into a flip-book with our unique Google optimized e-Paper software.
Section 6. Installation<br />
6.3 Installation Procedures<br />
6.3.1 Assembling the <strong>PWS100</strong><br />
The <strong>PWS100</strong> comes as a single unit, with the DSP enclosure attached to the<br />
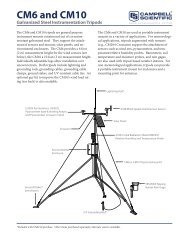
base of the sensor arms. The <strong>PWS100</strong> and power/communication enclosure (if<br />
purchased) are typically mounted to a <strong>Campbell</strong> <strong>Scientific</strong> tripod. Usersupplied<br />
mounting structures should be strong enough to withstand high winds,<br />
without significant movement.<br />
See the manuals supplied with your tripod for details on how to set up ready<br />
for <strong>PWS100</strong> mounting. Tripods need to be firmly secured to a base with the<br />
central pole vertical to ensure correct measurements with the <strong>PWS100</strong>. See the<br />
relevant tripod or tower manual for further details.<br />
6.3.2 Mounting the <strong>PWS100</strong><br />
NOTE<br />
A <strong>PWS100</strong> purchased from <strong>Campbell</strong> <strong>Scientific</strong> Europe will<br />
have a different mounting bracket.<br />
A pole mounting kit is supplied with the <strong>PWS100</strong>. This kit includes a DSP<br />
plate, a bracket, two u-bolts, four flat washers, four split washers, and four<br />
nuts. The <strong>PWS100</strong> usually comes with the DSP plate attached to it. The<br />
<strong>PWS100</strong> mounts onto a <strong>Campbell</strong> Scientfiic tripod, tower, or a user-supplied<br />
pole with a 1.5 inch (3.81 cm) to 2.1 inch (5.25 cm) outer diameter as follows.<br />
1. Fasten the bracket to the pole using one u-bolt, two flat washers, two split<br />
washers, and two nuts (see Figure 6-2).<br />
2. Place the DSP plate on the bracket. The tabs of the bracket fit in the<br />
notches at the top of the DSP plate (see Figure 6-3).<br />
3. Fasten the bottom of the DSP plate using the remaining u-bolt, washers,<br />
and nuts (see Figure 6-4).<br />
4. Mount the power supply enclosure if purchased. This enclosure can be<br />
mounted to the same tripod, tower, or user-supplied pole as the <strong>PWS100</strong>.<br />
Alternatively the power supply can be mounted elsewhere (e.g., on a wall<br />
at some distance from the sensor). The power supply enclosure should be<br />
mounted away from the sensor head to avoid wind flow disturbance or rain<br />
drops bouncing back up into the sensor’s sensing volume.<br />
CAUTION<br />
Take care not to overtighten the nuts on the u-bolts, as it<br />
may be possible to distort and/or damage the bracket or<br />
DSP plate by doing so, and/or the nuts may seize up. Only<br />
tighten the nuts to a degree necessary to hold the <strong>PWS100</strong><br />
firmly in place.<br />
6-3


