RMS USER manual
RMS USER manual
RMS USER manual

You also want an ePaper? Increase the reach of your titles
YUMPU automatically turns print PDFs into web optimized ePapers that Google loves.
<strong>RMS</strong> <strong>USER</strong> GUIDE<br />
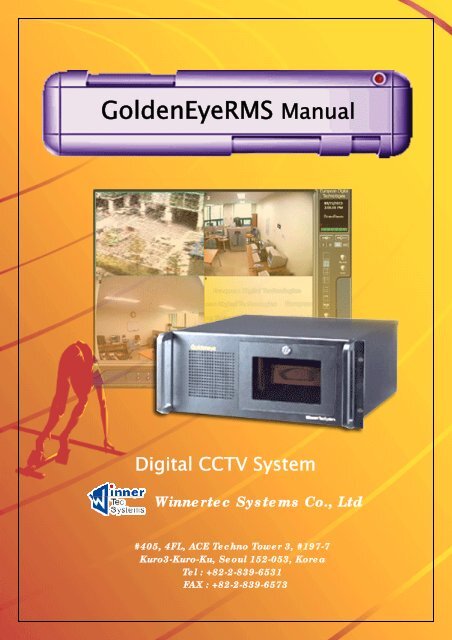
GoldenEye<strong>RMS</strong> Manual<br />
Digital CCTV System<br />
Winnertec Systems Co., Ltd<br />
#405, 4FL, ACE Techno Tower 3, #197-7<br />
Kuro3-Kuro-Ku, Seoul 152-053, Korea<br />
Tel : +82-2-839-6531<br />
FAX : +82-2-839-6573<br />
1<br />
<strong>RMS</strong> User Guide
<strong>RMS</strong> <strong>USER</strong> GUIDE<br />
CONTENTS<br />
1<br />
2<br />
2.1<br />
3<br />
4<br />
5<br />
6<br />
7<br />
3.1<br />
3.1.1<br />
3.1.2<br />
3.2<br />
3.2.1<br />
3.2.2<br />
3.2.3<br />
4.1<br />
4.1.1<br />
4.1.2<br />
4.2<br />
5.1<br />
5.2<br />
5.3<br />
5.4<br />
5.4.1<br />
5.4.2<br />
5.4.3<br />
5.4.4<br />
5.4.5<br />
7.1<br />
7.2<br />
7.3<br />
<strong>RMS</strong> General -------------------------------<br />
<strong>RMS</strong> Playing Circumstance ---------------------<br />
PC Type (<strong>RMS</strong> PC) -----------------------------<br />
<strong>RMS</strong> System Setup ---------------------------<br />
Server Setup (DVR) -----------------------------<br />
Modem or ISDN Setup--------------------------<br />
TCP/IP Networking (LAN card) ------------------------<br />
Client Setup (<strong>RMS</strong> PC) --------------------------<br />
TCP/IP Network Setup (LAN CARDS) ------------------<br />
Modem or ISDN Setup ------------------------------<br />
DVR <strong>RMS</strong> program Install ----------------------------<br />
<strong>RMS</strong> Playing Methods -------------------------<br />
Single <strong>RMS</strong> -----------------------------------<br />
LAN Type ---------------------------------------<br />
Modem or ISDN Type-------------------------------<br />
Multi <strong>RMS</strong> ------------------------------------<br />
Screen Explanation ---------------------------<br />
Main Screen ---------------------------------<br />
Remote Search Screen---------------------------<br />
Local Search Screen ----------------------------<br />
Smart Search Methods----------------------------<br />
Remote Setting Screen --------------------------<br />
General Setting Screen -----------------------------<br />
Camera Setting Screen -----------------------------<br />
Network Setting Screen -----------------------------<br />
Sensor Setting Screen ------------------------------<br />
User Setting Screen -------------------------------<br />
Two-way audio using Methods ------------------<br />
Notification Using Methods ---------------------<br />
3<br />
3<br />
3<br />
3<br />
3<br />
4<br />
8<br />
9<br />
9<br />
9<br />
9<br />
10<br />
11<br />
11<br />
12<br />
13<br />
14<br />
14<br />
15<br />
16<br />
17<br />
20<br />
20<br />
20<br />
21<br />
21<br />
22<br />
22<br />
23<br />
24<br />
24<br />
25<br />
2<br />
<strong>RMS</strong> User Guide
<strong>RMS</strong> <strong>USER</strong> GUIDE<br />
1 <strong>RMS</strong> General<br />
<strong>RMS</strong> (Remote Management System) is a software program through (ISDN,LAN) of<br />
which function is as follows;<br />
the past recorded image by camera and time and playing back<br />
Playing back function camera’s current image at remote site<br />
The recording images from Remote site are saved & searched in the<br />
CPU.<br />
Controlling function of <strong>RMS</strong> site DVR’s circumstance.<br />
Controlling function of P/T/Z camera on DVR.<br />
Auto connection and Notification function to <strong>RMS</strong><br />
2 <strong>RMS</strong> Playing Circumstance<br />
2.1 PC Type (<strong>RMS</strong> PC)<br />
H/W<br />
CPU<br />
Memory<br />
Hard Disk Drive<br />
Video Card<br />
Network<br />
Option<br />
Requirement<br />
Celeron 400MHz plus<br />
32MB plus<br />
4 Giga Byte plus<br />
Resolution : 1024X768 plus<br />
Color : High-Color(16bit) plus<br />
Dialup Modem, LAN Card, ISDN Card<br />
Sound card (two-way audio)<br />
※ Needy system(<strong>RMS</strong> Server/Client Surrounding)<br />
. Server PC (GED2/5000): more than one<br />
. Client PC (<strong>RMS</strong>): more than one<br />
※ <strong>RMS</strong> program Kinds<br />
- <strong>RMS</strong> Program is made of (<strong>RMS</strong> Main, <strong>RMS</strong> Multi, Event cap).<br />
. <strong>RMS</strong> Main: Connection to one server (DVR) and be able to search& control.<br />
. <strong>RMS</strong> Multi: Connection to many (upto16 DVR)<br />
. Event Cap: Motion & sensor incurs in server (DVR) and operates <strong>RMS</strong> program<br />
automatically.<br />
※ <strong>RMS</strong> program can be operated in ISDN, PSTN, LAN line, <strong>RMS</strong> Multi should be run LAN<br />
only.<br />
3<br />
<strong>RMS</strong> User Guide
<strong>RMS</strong> <strong>USER</strong> GUIDE<br />
3 <strong>RMS</strong> System Setup<br />
3.1 Server setup (DVR)<br />
Please mark as follows which means connection of client is acceptable<br />
.<br />
※ Setting screen Network Picture<br />
3.1.1 Modem or ISDN Setup<br />
※ Windows 98<br />
Should be prepared with modem and dialup networking already installed<br />
⑴ Start->setup->control, click Program add/delete.<br />
⑵ Click ‘communication’ on the window installing tab and select ‘detailed(D)’<br />
⑶ Select ‘ Dial up server’ and ‘ allow caller access’ program installation starts.<br />
⑷ Click ‘ Dial up network in’ on ‘ My computer’ and double click.<br />
⑸ Click ‘connection’ on menu, ‘dial up server’ click<br />
⑹ Check ‘Allow Client access’ click<br />
‘Server Type…’<br />
4<br />
<strong>RMS</strong> User Guide
<strong>RMS</strong> <strong>USER</strong> GUIDE<br />
⑺ Select ‘ Dial up Server’ and click<br />
‘ OK’ on the previous screen.<br />
⑻ ‘dial up icon’ is made as follows<br />
Dial up icon<br />
※ Windows 2000<br />
Like the win98 Modem should be installed. Remote Access setting should be set up<br />
for client, this is for Windows 2000<br />
Managing tool service’s Remote Access Auto Connection Manager / Remote Access<br />
Connection Manager / Routing and remote Access already started.<br />
⑴ Remote Access Auto Connection Manager / Remote Access Connection Manager<br />
/ Set up Routing and remote Access then “in coming connections’ can be made on<br />
‘network & dial up connection’.<br />
⑵ Set up following after clicking ‘incoming connections’ icon registering<br />
information.<br />
5<br />
<strong>RMS</strong> User Guide
<strong>RMS</strong> <strong>USER</strong> GUIDE<br />
Select incoming connection device<br />
Click “allow others to make private<br />
Connections by tunneling through<br />
the Internet or other network”<br />
⑶ ‘Check “Guest” on the user’s tab in order to get access permission<br />
Check ‘guest’ in Users tab.<br />
6<br />
<strong>RMS</strong> User Guide
<strong>RMS</strong> <strong>USER</strong> GUIDE<br />
※ Windows XP<br />
It is the same Windows 2000. Please see the follows,<br />
⑴ Select security setting->local policies->user rights assignment on the<br />
Start->set->control->management<br />
⑵ Select ‘Deny access to this computer from network’<br />
⑶ Delete ‘Guest’<br />
7<br />
<strong>RMS</strong> User Guide
<strong>RMS</strong> <strong>USER</strong> GUIDE<br />
3.1.2 TCP/IP Networking (LAN CARD)<br />
※ Windows 98<br />
Start->Setting->Network<br />
TCP/IP (In case of various adaptor) TCP/IP->LAN CARD NAME) Insert setting values.<br />
.<br />
Fixed IP address<br />
Insert suitable IP values<br />
Through network manager<br />
on IP Address, Gateway,<br />
DNS configuration part.<br />
※In case of Flexible server<br />
IP through DHCP serve do<br />
not this procedure.<br />
※ Windows 2000<br />
Select start->search->network and then, set up IP, GATEWAY, DNS after opening<br />
internet connection TCP/IP<br />
In case of Fixed IP<br />
# In case of flexible server<br />
through DHCP server, do not<br />
set up.<br />
8<br />
<strong>RMS</strong> User Guide
<strong>RMS</strong> <strong>USER</strong> GUIDE<br />
3.2 Client setup (<strong>RMS</strong> PC)<br />
It needs network setting remote image transmission. During this time, set up this<br />
according to user’s equipment (LAN CARD, MODEM, ISDN).<br />
3.2.1 TCP/IP network setup (LAN CARDS)<br />
Set this the same as server. You should know IP address in order to access DVR<br />
server.<br />
3.2.2 Modem or ISDN Setup<br />
Check if it works well if there is MODEM & ISDN used.<br />
.<br />
3.2.3 DVR <strong>RMS</strong> program settlement<br />
Play provided CD’s <strong>RMS</strong> setup. Connection Icon will be made on C:₩Program<br />
Files₩<strong>RMS</strong> folder & Screen. Following is the function of Major Key.<br />
- GDEHost.exe: Single The program connecting to one server through single <strong>RMS</strong><br />
- GDEHostEx.exe: The program connecting to various servers (up to 16units).<br />
However, multi <strong>RMS</strong> only can function at LAN type.<br />
- EventCap.exe: When there motion & sensor happen in the DVR server, this notify<br />
RMC PC And let it function.<br />
- LocalSearch.exe: The program which is showing the data which already recorded<br />
on the <strong>RMS</strong> PC.<br />
# There is also Image Tool, Backup viewer.<br />
9<br />
<strong>RMS</strong> User Guide
<strong>RMS</strong> <strong>USER</strong> GUIDE<br />
4 <strong>RMS</strong> Playing Methods<br />
• <strong>RMS</strong><br />
Begin-Program-<strong>RMS</strong>-<strong>RMS</strong> Main (or C:₩program files₩<strong>RMS</strong>₩gdhost.exe)<br />
You can display main screen.<br />
• Site Installation Method<br />
⑴ Put “site setting” button and following will be displayed.<br />
This operation is for setting Site Name, IP/TEL NO. In advance.<br />
Add: Site add<br />
Update: Site amendment<br />
Delete: Site delete<br />
⑵ Place a cursor( row no.5) and double click or put the right button in order to add.<br />
【 Modem or ISDN 】 【 TCP/IP 】<br />
⑶ SITE: Put the site name.<br />
⑷ IP/TEL NO: Telephone number or IP address will be fine as above.<br />
⑸ METHODS: In case of LAN, select TCP/IP, in case of MODEM select Modem ,<br />
In case of ISDN click ‘OK’.<br />
⑹ If all are clear put “save” and “close” button.<br />
10<br />
<strong>RMS</strong> User Guide
<strong>RMS</strong> <strong>USER</strong> GUIDE<br />
4.1 Single <strong>RMS</strong><br />
⑴ Site selection<br />
- Connect button will lead you following window<br />
- is Disconnect button.<br />
⑵ Select site and put user name & password, then click “OK”<br />
※ Connection methods is a little bit<br />
different methods according to LAN or<br />
MODEM/ISDN type.<br />
4.1.1 LAN Type<br />
Total number of camera is shown on this part and you can see the view<br />
If you click the part you want to look at.<br />
11<br />
<strong>RMS</strong> User Guide
<strong>RMS</strong> <strong>USER</strong> GUIDE<br />
4.1.2 Modem or ISDN Type<br />
- After disconnecting dial up, the same screen as LAN will be displayed.<br />
※ 참조 : Goldeneye icon is auto made on the dial up at Modem,<br />
ISDN.<br />
█ ISDN/MODEM at Windows 2000<br />
※ Making of connecting ICON<br />
⑴ After playing <strong>RMS</strong> main , click “Site Setting”.<br />
⑵ Insert telephone number, address, modem or IADN accordingly.<br />
⑸ Goldeneye Connecting icon will be made.<br />
※ Up to now this is only for icon making , following is for registering information of icon.<br />
One time installation is enough, no more necessary..<br />
⑹ Click Goldeneye icon’s registering information and select advanced security settings<br />
and click “setting up” .<br />
12<br />
<strong>RMS</strong> User Guide
<strong>RMS</strong> <strong>USER</strong> GUIDE<br />
We admit the protocol as left pictures.<br />
- Unsignaled code<br />
- Shiva code certified protocol<br />
- Challenge Handshake certified<br />
protocol<br />
- Microsoft CHAP version 2<br />
‘OK’ – ‘OK’ it is finished. You can connect the related site after <strong>RMS</strong> program.<br />
4.2 Multi <strong>RMS</strong><br />
Multi <strong>RMS</strong> can be connected maximum 16 DVR Servers. Select the program which you<br />
want to see (ex.no1 picture). Click the connection button and select the site & camera<br />
no. & OK number then You can transmit the image which is being recorded currently.<br />
※ Site Setting / Remote Search / Local Search is the same as Single <strong>RMS</strong>.<br />
13<br />
<strong>RMS</strong> User Guide
<strong>RMS</strong> <strong>USER</strong> GUIDE<br />
5 Screen Explanation<br />
5.1 Main Screen<br />
You can use this when you connect to site<br />
Connection completed<br />
4step control of displaying image<br />
Select devided screen (1,4,9,16)<br />
-Magnifying screen button<br />
-Next camera or next camera group<br />
- Pan/tilt control screen<br />
Saving image in <strong>RMS</strong> PC. You can review it at the local<br />
search.<br />
Control(On/Off) of outer parts.<br />
Control of Relay 1 ~ Relay 4 (On/Off)<br />
Outer controlling equipment at DVR.<br />
Turning to red after clicking, turning to white after<br />
one more.<br />
System Reset.<br />
14<br />
<strong>RMS</strong> User Guide
<strong>RMS</strong> <strong>USER</strong> GUIDE<br />
Succesful connection changes the color of these lamps.<br />
Information of received data<br />
- Setting mode confirmation amending function<br />
- Searching function of currently connected server.<br />
- Image searching function of client (local area)<br />
- Site setting<br />
5.2 Remote Search Screen<br />
This is the same as searching mode of DVR. Please refer to user’s guide.<br />
15<br />
<strong>RMS</strong> User Guide
<strong>RMS</strong> <strong>USER</strong> GUIDE<br />
5.3 Local Search Screen<br />
Connect through <strong>RMS</strong> S/W and when this is saved in HDD(<strong>RMS</strong> PC) searching function of<br />
this data. You can search the image recorded in main screen & remote searching screen.<br />
Click the local search and select<br />
the site which you would like to<br />
see.<br />
※ Site list is the place where the<br />
image has been saved.<br />
- Use the present day’s recording..<br />
- Use the past day’s recording<br />
16<br />
<strong>RMS</strong> User Guide
<strong>RMS</strong> <strong>USER</strong> GUIDE<br />
5.4 Smart Search<br />
5.4.1 Single <strong>RMS</strong>에서의 저장<br />
1) Step<br />
. After access the site on Single <strong>RMS</strong> and then click the smart search button.<br />
. Smart save which is beside of speed button (above Red Line) added.<br />
Original image are displayed if you click date, time for recording.<br />
17<br />
<strong>RMS</strong> User Guide
<strong>RMS</strong> <strong>USER</strong> GUIDE<br />
2) Step<br />
. As below, just one channel, user can select time zone for recording.<br />
You can also click smart save button without downloading specific time zone.<br />
In this case, you can set the time zone to download with left mouse button pushed<br />
And put the start button , then saving method proceeds.<br />
If you want to finish smart save procedure, put EXIT button then file up to that point<br />
will saved.<br />
. If you click the start button by mistake, there will be red line message shown in<br />
SmartSave Dialog.<br />
. SmartSave Dialog ‘s progress represented by percent.<br />
So, user want copy 1 hour the motion option data (actually from 31 minute) it<br />
will start 50%.<br />
18<br />
<strong>RMS</strong> User Guide
<strong>RMS</strong> <strong>USER</strong> GUIDE<br />
3) Step<br />
. Progress smart search on Local Search.<br />
. Local search. -> Access Smart Search.<br />
Select the past search pressing Past button.<br />
19<br />
<strong>RMS</strong> User Guide
<strong>RMS</strong> <strong>USER</strong> GUIDE<br />
5.5 Remote Setting Screen<br />
You can confirm & change setting mode. You can see following screen after<br />
Clicking remote setting button.<br />
5.4.1 General Setting Screen<br />
General system setting. (Initial screen devided number, outer monitor output<br />
Term, system complete, window setting function)<br />
※ Please refer to user guide <strong>manual</strong><br />
20<br />
<strong>RMS</strong> User Guide
<strong>RMS</strong> <strong>USER</strong> GUIDE<br />
5.4.2 Camera Setting Screen<br />
How to set the no. of cameras, compression way, recording methods.<br />
※ Please refer to user guide <strong>manual</strong><br />
5.4.3 Network Setting Screen<br />
-Network access permission & notification.<br />
※ user guide <strong>manual</strong><br />
21<br />
<strong>RMS</strong> User Guide
<strong>RMS</strong> <strong>USER</strong> GUIDE<br />
5.4.4 Sensor Setting Screen<br />
Setting methods of Sensor & relay operation.<br />
※ Refer to setting user guide <strong>manual</strong><br />
Click “ok” after setting and click Save & Exit button.<br />
5.4.5 User Setting Screen<br />
22<br />
<strong>RMS</strong> User Guide
<strong>RMS</strong> <strong>USER</strong> GUIDE<br />
6 Two-way Audio using Methods<br />
This is the way to transit the audio both way between server (DVR) & client.<br />
⑴ Connect suitable site and select camera which you want.<br />
⑵ If you click the right mouse button, little window shows up and select the way<br />
(Audio in/out/duplex).<br />
⑶ Select duplex, you can have two way communication.<br />
Select Audio in click, a mike present on your right side<br />
Select Audio in click, a speaker present on your right side.<br />
Select Duplex click, a mike and speaker present on your right side.<br />
23<br />
<strong>RMS</strong> User Guide
<strong>RMS</strong> <strong>USER</strong> GUIDE<br />
7 Notification Using Methods<br />
Automatic notification to users when there are some events during Motion recording,<br />
Sensor recording or Motion & Sensor recording.<br />
7.1 DVR Server Setting Methods<br />
⑴ Designate Motion recording or Sensor recording or Motion & Sensor at the camera<br />
setting.<br />
⑵ Set as following after opening “ network setting.<br />
Schedule date &<br />
hour with Drag &<br />
Drop.<br />
This means that<br />
it will notify the<br />
event occurred<br />
during this time.<br />
⑶ Input IP/TEL NO.<br />
⑷ Schedule the camera (date/hour)which you want to notify to.<br />
⑸ If you want multi IP , insert each IP and click “ IP ADD” button.<br />
Maximum eight number can be possible.<br />
24<br />
<strong>RMS</strong> User Guide
<strong>RMS</strong> <strong>USER</strong> GUIDE<br />
7.2 DVR Client Setting Methods<br />
⑴ Start->Program-><strong>RMS</strong>->Event cap<br />
Event Cap Icon will be made as right part.<br />
⑵ Double click Event Cap(<br />
) or click right button & select Option.<br />
⑶ Designate it if you use multi or single <strong>RMS</strong><br />
⑷ When event happens, notification is being done(thundering like red icon is made)<br />
designated program at option is operated.<br />
You also can find image picture at <strong>RMS</strong> main <strong>RMS</strong> as well as program operation.<br />
25<br />
<strong>RMS</strong> User Guide