Configuration - Unitymedia
Configuration - Unitymedia
Configuration - Unitymedia

You also want an ePaper? Increase the reach of your titles
YUMPU automatically turns print PDFs into web optimized ePapers that Google loves.
Table of Contents<br />
Product Overview........................................................4<br />
Package Contents....................................................4<br />
System Requirements..............................................4<br />
Introduction..............................................................5<br />
Features................................................................... 6<br />
Hardware Overview..................................................7<br />
Connections.......................................................7<br />
LEDs...................................................................8<br />
Installation....................................................................9<br />
Before you Begin......................................................9<br />
Wireless Installation Considerations...................... 10<br />
Getting Started.......................................................11<br />
<strong>Configuration</strong>..............................................................12<br />
Web-based <strong>Configuration</strong> Utility.............................12<br />
Setup Wizard....................................................13<br />
Manual <strong>Configuration</strong>.......................................17<br />
Dynamic (Cable)...........................................17<br />
PPPoE (DSL)................................................18<br />
PPTP............................................................19<br />
L2TP.............................................................21<br />
Static (assigned by ISP)...............................23<br />
Big Pond.......................................................24<br />
Wireless Settings..............................................25<br />
Network Settings..............................................27<br />
DHCP Server Settings..................................28<br />
DHCP Reservation.......................................29<br />
Table of Contents<br />
Virtual Server....................................................30<br />
Port Forwarding................................................32<br />
Application Rules..............................................33<br />
QoS Engine......................................................34<br />
Network Filters.................................................36<br />
Access Control.................................................37<br />
Access Control Wizard.................................37<br />
Website Filters..................................................40<br />
Inbound Filters..................................................41<br />
Firewall Settings...............................................42<br />
ALG <strong>Configuration</strong>............................................43<br />
VPN Passthrough.........................................43<br />
RTSP............................................................43<br />
H.323............................................................43<br />
SIP (VoIP).....................................................43<br />
MMS.............................................................43<br />
Router Settings.................................................44<br />
Advanced Wireless Settings.............................45<br />
Transmit Power.............................................45<br />
802.11d Mode...............................................45<br />
WISH Settings..................................................46<br />
Wi-Fi Protected Setup......................................48<br />
Advanced Network Settings.............................50<br />
UPnP............................................................50<br />
Internet Ping Block........................................50<br />
Internet Port Speed.......................................50<br />
Multicast Streams.........................................50<br />
D-Link DIR-655 User Manual
Table of Contents<br />
Administrator Settings......................................51<br />
Change Password........................................51<br />
Remote Management...................................51<br />
Time Settings...................................................52<br />
SysLog.............................................................53<br />
Email Settings..................................................54<br />
System Settings...............................................55<br />
Update Firmware..............................................56<br />
DDNS...............................................................57<br />
System Check..................................................58<br />
Schedules.........................................................59<br />
Device Information...........................................60<br />
Logs..................................................................61<br />
Statistics...........................................................62<br />
Internet Sessions..............................................62<br />
Wireless............................................................63<br />
WISH Sessions................................................63<br />
Support.............................................................64<br />
Connect to a Wireless Network................................74<br />
Using Windows ® XP...............................................74<br />
Configure WEP......................................................75<br />
Configure WPA-PSK..............................................77<br />
Troubleshooting.........................................................79<br />
Wireless Basics..........................................................83<br />
What is Wireless?..................................................84<br />
Tips........................................................................ 86<br />
Wireless Modes......................................................87<br />
Networking Basics.....................................................88<br />
Check your IP address...........................................88<br />
Statically Assign an IP address..............................89<br />
Technical Specifications...........................................90<br />
Wireless Security.......................................................65<br />
What is WEP?........................................................65<br />
What is WPA?........................................................66<br />
Wireless Security Setup Wizard.............................67<br />
Configure WEP......................................................70<br />
Configure WPA-Personal (PSK)............................ 71<br />
Configure WPA-Enterprise (RADIUS).................... 72<br />
D-Link DIR-655 User Manual
Section 1 - Product Overview<br />
Product Overview<br />
Package Contents<br />
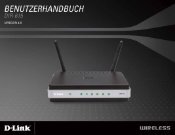
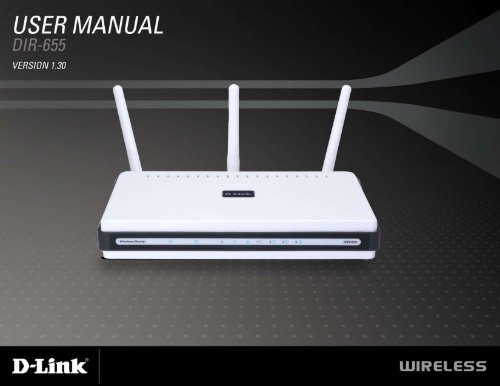
• D-Link DIR-655 Xtreme N Gigabit Router<br />
• 3 Detachable Antennas<br />
• Power Adapter<br />
• CAT5 Ethernet Cable<br />
• CD-ROM with Installation Wizard, User Manual,<br />
and Special Offers<br />
Note: Using a power supply with a different voltage rating than the one included<br />
with the DIR-655 will cause damage and void the warranty for this product.<br />
System Requirements<br />
• Ethernet-based Cable or DSL Modem<br />
• Computers with Windows ® , Macintosh ® , or Linux-based operating systems with an installed Ethernet<br />
adapter<br />
• Internet Explorer Version 6.0, Mozilla 1.7.12 (5.0), or Firefox 1.5 and above (for configuration)<br />
• Installation Wizard requires Windows ® XP with Service Pack 2<br />
D-Link DIR-655 User Manual
Section 1 - Product Overview<br />
D-Link DIR-655 User Manual<br />
Introduction<br />
TOTAL PERFORMANCE<br />
Combines award winning router features and Draft 802.11n wireless technology to provide the best wireless performance<br />
TOTAL SECURITY<br />
The most complete set of security features including Active Firewall and WPA2 to protect your network against outside<br />
intruders<br />
TOTAL COVERAGE<br />
Provides greater wireless signal rates even at farther distances for best-in-class Whole Home Coverage.<br />
ULTIMATE PERFORMANCE<br />
The D-Link Xtreme N Gigabit Router (DIR-655) is a draft 802.11n compliant device that delivers real world performance of<br />
up to 14x faster than an 802.11g wireless connection (also faster than a 100Mbps wired Ethernet connection). Create a secure<br />
wireless network to share photos, files, music, video, printers, and network storage throughout your home. Connect the Xtreme<br />
N Gigabit Router to a cable or DSL modem and share your high-speed Internet access with everyone on the network. In<br />
addition, this Router includes a Quality of Service (QoS) engine that keeps digital phone calls (VoIP) and online gaming smooth<br />
and responsive, providing a better Internet experience.<br />
EXTENDED WHOLE HOME COVERAGE<br />
Powered by Xtreme N technology, this high performance router provides superior Whole Home Coverage while reducing<br />
dead spots. The Xtreme N Gigabit Router is designed for use in bigger homes and for users who demand higher performance<br />
networking. Add a Xtreme N notebook or desktop adapter and stay connected to your network from virtually anywhere in<br />
your home.<br />
TOTAL NETWORK SECURITY<br />
The Xtreme N Gigabit Router supports all of the latest wireless security features to prevent unauthorized access, be it from<br />
over the wireless network or from the Internet. Support for WPA and WEP standards ensure that you’ll be able to use the best<br />
possible encryption method, regardless of your client devices. In addition, this Xtreme N Gigabit Router utilizes dual active<br />
firewalls (SPI and NAT) to prevent potential attacks from across the Internet.<br />
* Maximum wireless signal rate derived from IEEE Standard 802.11g and Draft 802.11n specifications. Actual data throughput will vary. Network conditions and<br />
environmental factors, including volume of network traffic, building materials and construction, and network overhead, lower actual data throughput rate. Environmental<br />
conditions will adversely affect wireless signal range.
Section 1 - Product Overview<br />
Features<br />
• Faster Wireless Networking - The DIR-655 provides up to 300Mbps* wireless connection with other<br />
802.11n wireless clients. This capability allows users to participate in real-time activities online, such as<br />
video streaming, online gaming, and real-time audio. The performance of this 802.11n wireless router<br />
gives you the freedom of wireless networking at speeds 14x faster than 802.11g.<br />
• Compatible with 802.11b and 802.11g Devices - The DIR-655 is still fully compatible with the IEEE<br />
802.11b standard, so it can connect with existing 802.11b PCI, USB and Cardbus adapters.<br />
• LCD Display - The LCD display screen provides information regarding the router.<br />
• Advanced Firewall Features - The Web-based user interface displays a number of advanced network<br />
management features including:<br />
• Content Filtering - Easily applied content filtering based on MAC Address, URL, and/or<br />
Domain Name.<br />
• Filter Scheduling - These filters can be scheduled to be active on certain days or for a<br />
duration of hours or minutes.<br />
• Secure Multiple/Concurrent Sessions - The DIR-655 can pass through VPN sessions. It<br />
supports multiple and concurrent IPSec and PPTP sessions, so users behind the DIR-655<br />
can securely access corporate networks.<br />
• User-friendly Setup Wizard - Through its easy-to-use Web-based user interface, the DIR-655 lets you<br />
control what information is accessible to those on the wireless network, whether from the Internet or from<br />
your company’s server. Configure your router to your specific settings within minutes.<br />
* Maximum wireless signal rate derived from IEEE Standard 802.11g and Draft 802.11n specifications. Actual data throughput will vary. Network conditions and<br />
environmental factors, including volume of network traffic, building materials and construction, and network overhead, lower actual data throughput rate. Environmental<br />
conditions will adversely affect wireless signal range.<br />
D-Link DIR-655 User Manual
Section 1 - Product Overview<br />
Hardware Overview<br />
Connections<br />
USB<br />
Connect a USB 1.1 or 2.0 flash<br />
drive to configure the wireless<br />
settings using WCN.<br />
Reset<br />
Pressing the Reset button restores the router to<br />
its original factory default settings.<br />
Gigabit LAN Ports (1-4)<br />
Connect Ethernet devices such as<br />
computers, switches, and hubs.<br />
Internet Port<br />
The auto MDI/MDIX Internet port is<br />
the connection for the Ethernet cable<br />
to the cable or DSL modem.<br />
Power Receptor<br />
Receptor for the supplied power<br />
adapter.<br />
D-Link DIR-655 User Manual
Section 1 - Product Overview<br />
Hardware Overview<br />
LEDs<br />
Status LED<br />
A blinking light indicates that the<br />
DIR-655 is ready.<br />
Internet LED<br />
A solid light indicates connection on the<br />
Internet port. This LED blinks during<br />
data transmission.<br />
WCN LED<br />
Insert a USB flash drive with WCN<br />
information. The LED will blink 3 times<br />
if it successfully transfers the wireless<br />
settings.<br />
Power LED<br />
A solid light indicates a<br />
proper connection to the<br />
power supply.<br />
WLAN LED<br />
A solid light indicates that the wireless<br />
segment is ready. This LED blinks<br />
during wireless data transmission.<br />
Local Network LEDs<br />
A solid light indicates a connection to an<br />
Ethernet-enabled computer on ports 1-4.<br />
This LED blinks during data transmission.<br />
D-Link DIR-655 User Manual
Section 2 - Installation<br />
Installation<br />
This section will walk you through the installation process. Placement of the router is very important. Do not place the<br />
router in an enclosed area such as a closet, cabinet, or in the attic or garage.<br />
Before you Begin<br />
Please configure the router with the computer that was last connected directly to your modem. Also, you can only use<br />
the Ethernet port on your modem. If you were using the USB connection before using the router, then you must turn off<br />
your modem, disconnect the USB cable and connect an Ethernet cable to the Internet port on the router, and then turn<br />
the modem back on. In some cases, you may need to call your ISP to change connection types (USB to Ethernet).<br />
If you have DSL and are connecting via PPPoE, make sure you disable or uninstall any PPPoE software such as<br />
WinPoet, Broadjump, or Enternet 300 from your computer or you will not be able to connect to the Internet.<br />
D-Link DIR-655 User Manual
Section 2 - Installation<br />
Wireless Installation Considerations<br />
The D-Link wireless router lets you access your network using a wireless connection from virtually anywhere within<br />
the operating range of your wireless network. Keep in mind, however, that the number, thickness and location of<br />
walls, ceilings, or other objects that the wireless signals must pass through, may limit the range. Typical ranges vary<br />
depending on the types of materials and background RF (radio frequency) noise in your home or business. The key<br />
to maximizing wireless range is to follow these basic guidelines:<br />
1. Keep the number of walls and ceilings between the D-Link router and other network devices to a<br />
minimum - each wall or ceiling can reduce your adapter’s range from 3-90 feet (1-30 meters.) Position<br />
your devices so that the number of walls or ceilings is minimized.<br />
2. Be aware of the direct line between network devices. A wall that is 1.5 feet thick (.5 meters), at a<br />
45-degree angle appears to be almost 3 feet (1 meter) thick. At a 2-degree angle it looks over 42 feet<br />
(14 meters) thick! Position devices so that the signal will travel straight through a wall or ceiling (instead<br />
of at an angle) for better reception.<br />
3. Building Materials make a difference. A solid metal door or aluminum studs may have a negative effect on<br />
range. Try to position access points, wireless routers, and computers so that the signal passes through<br />
drywall or open doorways. Materials and objects such as glass, steel, metal, walls with insulation, water<br />
(fish tanks), mirrors, file cabinets, brick, and concrete will degrade your wireless signal.<br />
4. Keep your product away (at least 3-6 feet or 1-2 meters) from electrical devices or appliances that<br />
generate RF noise.<br />
5. If you are using 2.4GHz cordless phones or X-10 (wireless products such as ceiling fans, lights, and<br />
home security systems), your wireless connection may degrade dramatically or drop completely. Make<br />
sure your 2.4GHz phone base is as far away from your wireless devices as possible. The base transmits<br />
a signal even if the phone in not in use.<br />
D-Link DIR-655 User Manual<br />
10
Section 2 - Installation<br />
Getting Started<br />
The DIR-655 includes a Quick Router Setup Wizard CD. Follow the simple steps below to run the Setup Wizard to<br />
guide you quickly through the installation process.<br />
Insert the D-Link Click’n Connect CD in the CD-ROM drive. The step-by-step instructions that follow are shown<br />
in Windows ® XP. The steps and screens are similar for the other Windows operating systems.<br />
If the CD Autorun function does not automatically start on your computer, go to Start > Run. In the run box type<br />
“D:\D-Link.exe” (where D: represents the drive letter of your CD-ROM drive).<br />
When the autorun screen appears, click the Start button.<br />
Note: It is reccomended to write down the SSID and Security Key, followed by the login password on the provided CD<br />
holder.<br />
D-Link DIR-655 User Manual<br />
11
Section 3 - <strong>Configuration</strong><br />
<strong>Configuration</strong><br />
This section will show you how to configure your new D-Link wireless router using the web-based configuration<br />
utility.<br />
Web-based <strong>Configuration</strong> Utility<br />
To access the configuration utility, open a web-browser<br />
such as Internet Explorer and enter the IP address of<br />
the router (192.168.0.1).<br />
Select Admin from the drop-down menu and then enter<br />
your password. Leave the password blank by default.<br />
If you get a Page Cannot be Displayed error, please<br />
refer to the Troubleshooting section for assistance.<br />
D-Link DIR-655 User Manual<br />
12
Section 3 - <strong>Configuration</strong><br />
Setup Wizard<br />
Click Launch Internet Connection Setup Wizard to begin.<br />
If you want to configure your wireless settings, click Launch Wireless<br />
Security Setup Wizard and skip to page 65.<br />
You may click Setup Wizard to quickly configure your router.<br />
If you want to enter your settings without running the wizard, click<br />
Manual <strong>Configuration</strong> and skip to page 17.<br />
Click Next to continue.<br />
D-Link DIR-655 User Manual<br />
13
Section 3 - <strong>Configuration</strong><br />
Create a new password and then click Next to continue.<br />
Select your time zone from the drop-down menu and then click Next<br />
to continue.<br />
Select the type of Internet connection you use and then click Next<br />
to continue.<br />
D-Link DIR-655 User Manual<br />
14
Section 3 - <strong>Configuration</strong><br />
If you selected Dynamic, you may need to enter the MAC address of the<br />
computer that was last connected directly to your modem. If you are currently<br />
using that computer, click Clone Your PC’s MAC Address and then click<br />
Next to continue.<br />
The Host Name is optional but may be required by some ISPs. The default<br />
host name is the device name of the Router and may be changed.<br />
If you selected PPPoE, enter your PPPoE username and password. Click<br />
Next to continue.<br />
Select Static if your ISP assigned you the IP address, subnet mask,<br />
gateway, and DNS server addresses.<br />
Note: Make sure to remove your PPPoE software from your computer. The<br />
software is no longer needed and will not work through a router.<br />
If you selected PPTP, enter your PPTP username and password. Click<br />
Next to continue.<br />
D-Link DIR-655 User Manual<br />
15
Section 3 - <strong>Configuration</strong><br />
If you selected L2TP, enter your L2TP username and password. Click Next<br />
to continue.<br />
If you selected Static, enter your network settings supplied by your Internet<br />
provider. Click Next to continue.<br />
Click Connect to save your settings. Once the router is finished rebooting,<br />
click Continue. Please allow 1-2 minutes to connect.<br />
Close your browser window and reopen it to test your Internet connection.<br />
It may take a few tries to initially connect to the Internet.<br />
D-Link DIR-655 User Manual<br />
16
Section 3 - <strong>Configuration</strong><br />
Manual <strong>Configuration</strong><br />
Dynamic (Cable)<br />
My Internet<br />
Connection:<br />
Host<br />
Name:<br />
Use<br />
Unicasting:<br />
DNS<br />
Addresses:<br />
MTU:<br />
MAC Address:<br />
Select Dynamic IP (DHCP) to obtain IP Address<br />
information automatically from your ISP. Select<br />
this option if your ISP does not give you any IP<br />
numbers to use. This option is commonly used<br />
for Cable modem services.<br />
The Host Name is optional but may be required<br />
by some ISPs.<br />
Check the box if you are having problems<br />
obtaining an IP address from your ISP.<br />
Enter the Primary DNS server IP address<br />
assigned by your ISP.<br />
Maximum Transmission Unit - you may need to<br />
change the MTU for optimal performance with<br />
your specific ISP. 1500 is the default MTU.<br />
The default MAC Address is set to the Internet<br />
port’s physical interface MAC address on the<br />
Broadband Router. It is not recommended that<br />
you change the default MAC address unless<br />
required by your ISP. You can use the Clone<br />
Your PC’s MAC Address button to replace<br />
the Internet port’s MAC address with the MAC<br />
address of your Ethernet card.<br />
D-Link DIR-655 User Manual<br />
17
Section 3 - <strong>Configuration</strong><br />
My Internet<br />
Connection:<br />
Address Mode:<br />
Internet Setup<br />
PPPoE (DSL)<br />
Choose PPPoE (Point to Point Protocol over Ethernet) if your ISP uses a PPPoE connection. Your ISP will provide<br />
you with a username and password. This option is typically used for DSL services. Make sure to remove your PPPoE<br />
software from your computer. The software is no longer needed and will not work through a router.<br />
Select PPPoE (Username/Password) from the drop-down menu.<br />
Select Static if your ISP assigned you the IP address, subnet mask,<br />
gateway, and DNS server addresses. In most cases, select Dynamic.<br />
IP Address:<br />
User Name:<br />
Enter the IP address (Static PPPoE only).<br />
Enter your PPPoE user name.<br />
Password:<br />
Enter your PPPoE password and then retype the password in the next<br />
box.<br />
Service Name:<br />
Enter the ISP Service Name (optional).<br />
Reconnection<br />
Mode:<br />
Maximum Idle<br />
Time:<br />
DNS Addresses:<br />
MTU:<br />
MAC Address:<br />
Select either Always-on, On-Demand, or Manual.<br />
Enter the Primary and Secondary DNS Server Addresses (Static PPPoE<br />
only).<br />
Enter a maximum idle time during which the Internet connection is maintained during inactivity. To disable this feature,<br />
enable Auto-reconnect.<br />
Maximum Transmission Unit - you may need to change the MTU for optimal performance with your specific ISP. 1492 is<br />
the default MTU.<br />
The default MAC Address is set to the Internet port’s physical interface MAC address on the Broadband Router. It is not<br />
recommended that you change the default MAC address unless required by your ISP. You can use the Clone Your PC’s<br />
MAC Address button to replace the Internet port’s MAC address with the MAC address of your Ethernet card.<br />
D-Link DIR-655 User Manual<br />
18
Section 3 - <strong>Configuration</strong><br />
Address Mode:<br />
PPTP IP<br />
Address:<br />
PPTP Subnet<br />
Mask:<br />
PPTP Gateway:<br />
Select Static if your ISP assigned you the IP address,<br />
subnet mask, gateway, and DNS server addresses. In<br />
most cases, select Dynamic.<br />
Enter the IP address (Static PPTP only).<br />
Enter the Primary and Secondary DNS Server Addresses<br />
(Static PPTP only).<br />
Enter the Gateway IP Address provided by your ISP.<br />
Internet Setup<br />
PPTP<br />
Choose PPTP (Point-to-Point-Tunneling Protocol ) if your ISP uses a PPTP connection. Your ISP will provide you with<br />
a username and password. This option is typically used for DSL services.<br />
PPTP Server IP:<br />
Username:<br />
Enter the Server IP provided by your ISP (optional).<br />
Enter your PPTP username.<br />
Password:<br />
Enter your PPTP password and then retype the password<br />
in the next box.<br />
Reconnect Mode:<br />
Select either Always-on, On-Demand, or Manual.<br />
Maximum Idle<br />
Time:<br />
DNS Servers:<br />
Enter a maximum idle time during which the Internet<br />
connection is maintained during inactivity. To disable this<br />
feature, enable Auto-reconnect.<br />
The DNS server information will be supplied by your ISP<br />
(Internet Service Provider.)<br />
D-Link DIR-655 User Manual<br />
19
Section 3 - <strong>Configuration</strong><br />
MTU:<br />
MAC Address:<br />
Maximum Transmission Unit - you may need to change the MTU for optimal performance with your specific ISP. 1400<br />
is the default MTU.<br />
The default MAC Address is set to the Internet port’s physical interface MAC address on the Broadband Router. It is not<br />
recommended that you change the default MAC address unless required by your ISP. You can use the Clone Your PC’s<br />
MAC Address button to replace the Internet port’s MAC address with the MAC address of your Ethernet card.<br />
D-Link DIR-655 User Manual<br />
20
Section 3 - <strong>Configuration</strong><br />
Internet Setup<br />
L2TP<br />
Choose L2TP (Layer 2 Tunneling Protocol) if your ISP uses a L2TP connection. Your ISP will provide you with a<br />
username and password. This option is typically used for DSL services.<br />
Address Mode:<br />
L2TP IP Address:<br />
L2TP Subnet Mask:<br />
Select Static if your ISP assigned you the IP address,<br />
subnet mask, gateway, and DNS server addresses. In<br />
most cases, select Dynamic.<br />
Enter the L2TP IP address supplied by your ISP (Static<br />
only).<br />
Enter the Subnet Mask supplied by your ISP (Static<br />
only).<br />
L2TP Gateway:<br />
L2TP Server IP:<br />
Username:<br />
Enter the Gateway IP Address provided by your ISP.<br />
Enter the Server IP provided by your ISP (optional).<br />
Enter your L2TP username.<br />
Password:<br />
Enter your L2TP password and then retype the password<br />
in the next box.<br />
Reconnect Mode:<br />
Select either Always-on, On-Demand, or Manual.<br />
Maximum Idle<br />
Time:<br />
DNS Servers:<br />
Enter a maximum idle time during which the Internet<br />
connection is maintained during inactivity. To disable this<br />
feature, enable Auto-reconnect.<br />
Enter the Primary and Secondary DNS Server Addresses<br />
(Static L2TP only).<br />
D-Link DIR-655 User Manual<br />
21
Section 3 - <strong>Configuration</strong><br />
MTU:<br />
Clone MAC<br />
Address:<br />
Maximum Transmission Unit - you may need to change the MTU for optimal performance with your specific ISP. 1400 is<br />
the default MTU.<br />
The default MAC Address is set to the Internet port’s physical interface MAC address on the Broadband Router. It is not<br />
recommended that you change the default MAC address unless required by your ISP. You can use the Clone Your PC’s<br />
MAC Address button to replace the Internet port’s MAC address with the MAC address of your Ethernet card.<br />
D-Link DIR-655 User Manual<br />
22
Section 3 - <strong>Configuration</strong><br />
Internet Setup<br />
Static (assigned by ISP)<br />
Select Static IP Address if all the Internet port’s IP information is provided to you by your ISP. You will need to enter in the IP address,<br />
subnet mask, gateway address, and DNS address(es) provided to you by your ISP. Each IP address entered in the fields must be in the<br />
appropriate IP form, which are four octets separated by a dot (x.x.x.x). The Router will not accept the IP address if it is not in this format.<br />
IP Address:<br />
Subnet Mask:<br />
Default Gateway:<br />
Enter the IP address assigned by your ISP.<br />
Enter the Subnet Mask assigned by your ISP.<br />
Enter the Gateway assigned by your ISP.<br />
DNS Servers:<br />
MTU:<br />
MAC Address:<br />
The DNS server information will be supplied by your<br />
ISP (Internet Service Provider.)<br />
Maximum Transmission Unit - you may need to<br />
change the MTU for optimal performance with your<br />
specific ISP. 1500 is the default MTU.<br />
The default MAC Address is set to the Internet port’s<br />
physical interface MAC address on the Broadband<br />
Router. It is not recommended that you change the<br />
default MAC address unless required by your ISP.<br />
You can use the Clone Your PC’s MAC Address<br />
button to replace the Internet port’s MAC address<br />
with the MAC address of your Ethernet card.<br />
D-Link DIR-655 User Manual<br />
23
Section 3 - <strong>Configuration</strong><br />
Internet Setup<br />
Big Pond<br />
BigPond Server:<br />
Enter the IP address of the login server.<br />
BigPond<br />
Username:<br />
BigPond<br />
Password:<br />
DNS Servers:<br />
MTU:<br />
MAC Address:<br />
Enter your BigPond username.<br />
Enter your BigPond password and then retype<br />
the password in the next box.<br />
The DNS server information will be supplied<br />
by your ISP (Internet Service Provider.)<br />
Maximum Transmission Unit - you may need<br />
to change the MTU for optimal performance<br />
with your specific ISP. 1500 is the default<br />
MTU.<br />
The default MAC Address is set to the<br />
Internet’s physical interface MAC address on<br />
the Broadband Router. It is not recommended<br />
that you change the default MAC address<br />
unless required by your ISP. You can use the<br />
Clone Your PC’s MAC Address button to<br />
replace the Internet port’s MAC address with<br />
the MAC address of your Ethernet card.<br />
D-Link DIR-655 User Manual<br />
24
Section 3 - <strong>Configuration</strong><br />
Enable<br />
Wireless:<br />
Wireless<br />
Network Name:<br />
Enable Auto<br />
Channel Scan:<br />
Wireless<br />
Channel:<br />
802.11 Mode:<br />
Check the box to enable the wireless function.<br />
If you do not want to use wireless, uncheck the<br />
box to disable all the wireless functions.<br />
Service Set Identifier (SSID) is the name of your<br />
wireless network. Create a name using up to 32<br />
characters. The SSID is case-sensitive.<br />
The Auto Channel Scan setting can be selected<br />
to allow the DIR-655 to choose the channel with<br />
the least amount of interference.<br />
Indicates the channel setting for the DIR-655.<br />
By default the channel is set to 6. The Channel<br />
can be changed to fit the channel setting for an<br />
existing wireless network or to customize the<br />
wireless network. If you enable Auto Channel<br />
Scan, this option will be greyed out.<br />
Wireless Settings<br />
Select one of the following:<br />
802.11g Only - Select if all of your wireless<br />
clients are 802.11g.<br />
Mixed 802.11g and 802.11b - Select if you<br />
are using both 802.11b and 802.11g wireless<br />
clients.<br />
802.11b Only - Select if all of your wireless<br />
clients are 802.11b.<br />
802.11n Only - Select only if all of your wireless<br />
clients are 802.11n.<br />
Mixed 802.11n, 802.11b, and 802.11g - Select if you are using a mix of 802.11n, 11g, and 11b wireless clients.<br />
Mixed 802.11n and 802.11g - Select if you are using a mix of 802.11n and 802.11g wireless clients.<br />
D-Link DIR-655 User Manual<br />
25
Section 3 - <strong>Configuration</strong><br />
Channel<br />
Width:<br />
Select the Channel Width:<br />
Auto 20/40 - Select if you are using both 802.11n and non-802.11n wireless devices.<br />
20MHz - This is the default setting. Select if you are not using any 802.11n wireless clients.<br />
Transmission<br />
Rate:<br />
Visibility<br />
Status:<br />
Wireless<br />
Security:<br />
Select the transmit rate. It is strongly suggested to select Best (Auto) for best performance.<br />
Select Invisible if you do not want the SSID of your wireless network to be broadcasted by the DIR-655. If Invisible is selected,<br />
the SSID of the DIR-655 will not be seen by Site Survey utilities so your wireless clients will have to know the SSID of your<br />
DIR-655 in order to connect to it.<br />
Refer to page 65 for more information regarding wireless security.<br />
D-Link DIR-655 User Manual<br />
26
Section 3 - <strong>Configuration</strong><br />
This section will allow you to change the local network settings of the router and to configure the DHCP settings.<br />
IP Address:<br />
Subnet Mask:<br />
Enter the IP address of the router. The default IP<br />
address is 192.168.0.1.<br />
If you change the IP address, once you click Apply,<br />
you will need to enter the new IP address in your<br />
browser to get back into the configuration utility.<br />
Enter the Subnet Mask. The default subnet mask is<br />
255.255.255.0.<br />
Network Settings<br />
Local Domain:<br />
Enter the Domain name (Optional).<br />
Enable DNS<br />
Relay:<br />
Uncheck the box to transfer the DNS server<br />
information from your ISP to your computers. If<br />
checked, your computers will use the router for a<br />
DNS server.<br />
D-Link DIR-655 User Manual<br />
27
Section 3 - <strong>Configuration</strong><br />
Enable DHCP<br />
Server:<br />
DHCP IP<br />
Address Range:<br />
DHCP Lease<br />
Time:<br />
Always<br />
Broadcast:<br />
NetBIOS<br />
Announcement:<br />
Learn NetBIOS<br />
from WAN:<br />
NetBIOS Scope:<br />
DHCP Server Settings<br />
DHCP stands for Dynamic Host Control Protocol. The DIR-655 has a built-in DHCP server. The DHCP Server will automatically assign<br />
an IP address to the computers on the LAN/private network. Be sure to set your computers to be DHCP clients by setting their TCP/IP<br />
settings to “Obtain an IP Address Automatically.” When you turn your computers on, they will automatically load the proper TCP/IP settings<br />
provided by the DIR-655. The DHCP Server will automatically allocate an unused IP address from the IP address pool to the requesting<br />
computer. You must specify the starting and ending address of the IP address pool.<br />
Check this box to enable the DHCP server on your router. Uncheck to<br />
disable this function.<br />
Enter the starting and ending IP addresses for the DHCP server’s IP<br />
assignment.<br />
Note: If you statically (manually) assign IP addresses to your computers<br />
or devices, make sure the IP addresses are outside of this range or you<br />
may have an IP conflict.<br />
The length of time for the IP address lease. Enter the Lease time in<br />
minutes.<br />
Enable this feature to broadcast your networks DHCP server to LAN/<br />
WLAN clients.<br />
NetBIOS allows LAN hosts to discover all other computers within the<br />
network, enable this feature to allow the DHCP Server to offer NetBIOS<br />
configuration settings.<br />
Enable this feature to allow WINS information to be learned from the<br />
WAN side, disable to allow manual configuration.<br />
This feature allows the configuration of a NetBIOS ‘domain’ name under which network hosts operates. This setting has no<br />
effect if the ‘Learn NetBIOS information from WAN’ is activatede.”<br />
NetBIOS Node:<br />
Select the different type oif NetBIOS node; Broadcast only, Point-to-Point, Mixed-mode and Hybrid.<br />
WINS IP<br />
Address:<br />
Enter your WINS IP address<br />
D-Link DIR-655 User Manual<br />
28
Section 3 - <strong>Configuration</strong><br />
DHCP Reservation<br />
If you want a computer or device to always have the same IP address assigned, you can create a DHCP reservation.<br />
The router will assign the IP address only to that computer or device.<br />
Note: This IP address must be within the DHCP IP Address Range.<br />
Enable:<br />
Check this box to enable the reservation.<br />
Computer<br />
Name:<br />
IP Address:<br />
MAC Address:<br />
Copy Your PC’s<br />
MAC Address:<br />
Save:<br />
Enter the computer name or select from the<br />
drop-down menu and click
Section 3 - <strong>Configuration</strong><br />
Virtual Server<br />
The DIR-655 can be configured as a virtual server so that remote users accessing Web or FTP services via the public<br />
IP address can be automatically redirected to local servers in the LAN (Local Area Network).<br />
The DIR-655 firewall feature filters out unrecognized packets to protect your LAN network so all computers networked<br />
with the DIR-655 are invisible to the outside world. If you wish, you can make some of the LAN computers accessible<br />
from the Internet by enabling Virtual Server. Depending on the requested service, the DIR-655 redirects the external<br />
service request to the appropriate server within the LAN network.<br />
The DIR-655 is also capable of port-redirection meaning incoming traffic to a particular port may be redirected to a<br />
different port on the server computer.<br />
Each virtual service that is created will be listed at the bottom of the screen in the Virtual Servers List. There are<br />
pre-defined virtual services already in the table. You may use them by enabling them and assigning the server IP to<br />
use that particular virtual service.<br />
For a list of ports for common applications, please visit http://support.dlink.com/faq/view.asp?prod_id=1191.<br />
D-Link DIR-655 User Manual<br />
30
Section 3 - <strong>Configuration</strong><br />
This will allow you to open a single port. If you would like to open a range of ports, refer to page 32.<br />
Name:<br />
IP Address:<br />
Private Port/<br />
Public Port:<br />
Protocol Type:<br />
Inbound Filter:<br />
Schedule:<br />
Enter a name for the rule or select an application<br />
from the drop-down menu. Select an application<br />
and click
Section 3 - <strong>Configuration</strong><br />
Port Forwarding<br />
This will allow you to open a single port or a range of ports.<br />
Name: Enter a name for the rule or select an application<br />
from the drop-down menu. Select an application<br />
and click
Section 3 - <strong>Configuration</strong><br />
Name:<br />
Trigger:<br />
Traffic Type:<br />
Firewall:<br />
Traffic Type:<br />
Enter a name for the rule. You may select a<br />
pre-defined application from the drop-down<br />
menu and click
Section 3 - <strong>Configuration</strong><br />
QoS Engine<br />
The QoS Engine option helps improve your network gaming performance by prioritizing applications. By default the<br />
QoS Engine settings are disabled and application priority is not classified automatically.<br />
Enable QOS:<br />
Dynamic<br />
Fragmentation:<br />
Automatic<br />
Uplink Speed:<br />
Measured<br />
Uplink Speed:<br />
Manual Uplink<br />
Speed:<br />
Connection<br />
Type:<br />
This option is disabled by default. Enable this<br />
option for better performance and experience with<br />
online games and other interactive applications,<br />
such as VoIP.<br />
This option should be enabled when you have a<br />
slow Internet uplink. It helps to reduce the impact<br />
that large low priority network packets can have<br />
on more urgent ones.<br />
This option is enabled by default when the QoS<br />
Engine option is enabled. This option will allow<br />
your router to automatically determine the uplink<br />
speed of your Internet connection.<br />
This displays the detected uplink speed.<br />
The speed at which data can be transferred from<br />
the router to your ISP. This is determined by your<br />
ISP. ISP’s often speed as a download/upload<br />
pair. For example, 1.5Mbits/284Kbits. Using this<br />
example, you would enter 284. Alternatively you<br />
can test your uplink speed with a service such<br />
as www.dslreports.com.<br />
By default, the router automatically determines whether the underlying connection is an xDSL/Frame-relay network or some<br />
other connection type (such as cable modem or Ethernet), and it displays the result as Detected xDSL or Frame Relay Network.<br />
D-Link DIR-655 User Manual<br />
34
Section 3 - <strong>Configuration</strong><br />
Detected<br />
xDSL:<br />
If you have an unusual network connection in which you are actually connected via xDSL but for which you configure either<br />
“Static” or “DHCP” in the Internet settings, setting this option to xDSL or Other Frame Relay Network ensures that the router<br />
will recognize that it needs to shape traffic slightly differently in order to give the best performance. Choosing xDSL or Other<br />
Frame Relay Network causes the measured uplink speed to be reported slightly lower than before on such connections,<br />
but gives much better results.<br />
When Connection Type is set to automatic, the automatically detected connection type is displayed here.<br />
D-Link DIR-655 User Manual<br />
35
Section 3 - <strong>Configuration</strong><br />
Network Filters<br />
Use MAC (Media Access Control) Filters to allow or deny LAN (Local Area Network) computers by their MAC addresses<br />
from accessing the Network. You can either manually add a MAC address or select the MAC address from the list of<br />
clients that are currently connected to the Broadband Router.<br />
Configure MAC<br />
Filtering:<br />
MAC Address:<br />
DHCP Client:<br />
Select Turn MAC Filtering Off, allow MAC<br />
addresses listed below, or deny MAC addresses<br />
listed below from the drop-down menu.<br />
Enter the MAC address you would like to<br />
filter.<br />
To find the MAC address on a computer, please<br />
refer to the Networking Basics section in this<br />
manual.<br />
Select a DHCP client from the drop-down menu<br />
and click
Section 3 - <strong>Configuration</strong><br />
Access Control<br />
The Access Control section allows you to control access in and out of your network. Use this feature as Parental<br />
Controls to only grant access to approved sites, limit web access based on time or dates, and/or block access from<br />
applications like P2P utilities or games.<br />
Add Policy:<br />
Click the Add Policy button to start the Access<br />
Control Wizard.<br />
Access Control Wizard<br />
Click Next to continue with the wizard.<br />
D-Link DIR-655 User Manual<br />
37
Section 3 - <strong>Configuration</strong><br />
Enter a name for the policy and then click Next to continue.<br />
Access Control Wizard (continued)<br />
Select a schedule (I.E. Always) from the drop-down menu<br />
and then click Next to continue.<br />
Enter the following information and then click Next to<br />
continue.<br />
• Address Type - Select IP address, MAC address, or<br />
Other Machines.<br />
• IP Address - Enter the IP address of the computer<br />
you want to apply the rule to.<br />
D-Link DIR-655 User Manual<br />
38
Section 3 - <strong>Configuration</strong><br />
Select the filtering method and then click Next to continue.<br />
Access Control Wizard (continued)<br />
Enter the rule:<br />
Enable - Check to enable the rule.<br />
Name - Enter a name for your rule.<br />
Dest IP Start - Enter the starting IP address.<br />
Dest IP End - Enter the ending IP address.<br />
Protocol - Select the protocol.<br />
Dest Port Start - Enter the starting port number.<br />
Dest Port End - Enter the ending port number.<br />
To enable web logging, click Enable.<br />
Click Save to save the access control rule.<br />
D-Link DIR-655 User Manual<br />
39
Section 3 - <strong>Configuration</strong><br />
Website URL/<br />
Domain:<br />
Enter the URLs that you want to deny or allow<br />
LAN computers from accessing.<br />
Website Filters<br />
Website Filters are used to deny or allow LAN computers from accessing specific web sites by the URL or domain.<br />
A URL is a specially formatted text string that defines a location on the Internet. If any part of the URL the blocked<br />
words applied, the site will not be accessible and the web page will not displayed. When applying for allowed list, only<br />
keywords entered will be allowed and anything else will be blocked. To use this feature, enter the text and click Save<br />
Setings. To delete the text, click Clear the List Below.<br />
D-Link DIR-655 User Manual<br />
40
Section 3 - <strong>Configuration</strong><br />
Inbound Filters<br />
The Inbound Filter option is an advanced method of controlling data received from the Internet. With this feature you<br />
can configure inbound data filtering rules that control data based on an IP address range. Inbound Filters can be used<br />
with Virtual Server, Port Forwarding, or Remote Administration features.<br />
Name:<br />
Action:<br />
Enable:<br />
Enter a name for the inbound filter rule.<br />
Select Allow or Deny.<br />
Check to enable rule.<br />
Source IP Start:<br />
Source IP End:<br />
Save:<br />
Inbound Filter<br />
Rules List:<br />
Enter the starting IP address. Enter 0.0.0.0 if<br />
you do not want to specify an IP range.<br />
Enter the ending IP address. Enter<br />
255.255.255.255 if you do not want to specify<br />
and IP range.<br />
Click the Save button to apply your settings.<br />
You must click Save Settings at the top to<br />
save the settings.<br />
This section will list any rules that are created.<br />
You may click the Edit icon to change the<br />
settings or enable/disable the rule, or click the<br />
Delete icon to remove the rule.<br />
D-Link DIR-655 User Manual<br />
41
Section 3 - <strong>Configuration</strong><br />
A firewall protects your network from the outside world. The D-Link DIR-655 offers a firewall type functionality.<br />
Enable SPI: SPI (Stateful Packet Inspection, also known as dynamic packet<br />
filtering) helps to prevent cyber attacks by tracking more state per<br />
session. It validates that the traffic passing through the session<br />
conforms to the protocol.<br />
NAT Endpoint<br />
Filtering:<br />
Anti-Spoof<br />
Checking:<br />
Enable DMZ<br />
Host:<br />
IP Address:<br />
Firewall Settings<br />
Select one of the following for TCP and UDP ports:<br />
Endpoint Independent - Any incoming traffic sent to an open port<br />
will be forwarded to the application that opened the port. The port<br />
will close if idle for 5 minutes.<br />
Address Restricted - Incoming traffic must match the IP address<br />
of the outgoing connection.<br />
Address and Port Restriction - Incoming traffic must match the<br />
IP address and port of the outgoing connection.<br />
Enable this feature to protect your network from certain kinds of<br />
“spoofing” attacks.<br />
If an application has trouble working from behind the router, you<br />
can expose one computer to the Internet and run the application on<br />
that computer. Note: Placing a computer in the DMZ may expose<br />
that computer to a variety of security risks. Use of this option is only<br />
recommended as a last resort.<br />
Specify the IP address of the computer on the LAN that you want to<br />
have unrestricted Internet communication. If this computer obtains<br />
it’s IP address automatically using DHCP, be sure to make a static<br />
reservation on the Basic > DHCP page so that the IP address of<br />
the DMZ machine does not change.<br />
Non-UDP/TCP/ Enable this feature to allow the router’ NAT to track application that uses protocols other than UDP, TCP or ICMP.<br />
ICMP LAN<br />
Sessions:<br />
D-Link DIR-655 User Manual<br />
42
VPN Passthrough<br />
RTSP<br />
H.323<br />
SIP (VoIP)<br />
MMS<br />
Section 3 - <strong>Configuration</strong><br />
Application Level Gateway (ALG) <strong>Configuration</strong><br />
Here you can enable or disable ALG’s. Some protocols and applications require special handling of the IP payload to<br />
make them work with network address translation (NAT). Each ALG provides special handling for a specific protocol<br />
or application. A number of ALGs for common applications are enabled by default.<br />
PPTP:<br />
Allows multiple machines on the LAN to connect to their corporate network using PPTP protocol.<br />
IPSEC (VPN):<br />
RTSP:<br />
Allows multiple VPN clients to connect to their corporate network using IPSec. Some VPN clients support traversal of IPSec<br />
through NAT. This ALG may interfere with the operation of such VPN clients. If you are having trouble connecting with your<br />
corporate network, try turning this ALG off. Please check with the system adminstrator of your corporate network whether<br />
your VPN client supports NAT traversal.<br />
Allows applications that use Real Time Streaming Protocol to receive streaming media from the internet. QuickTime and<br />
Real Player are some of the common applications using this protocol.<br />
MSN Messenger:<br />
Allows all of the Windows/MSN Messenger functions to work properly through the router.<br />
FTP:<br />
H.323<br />
(Netmeeting):<br />
SIP:<br />
Allows FTP clients and servers to transfer data across NAT. Refer to the Advanced > Virtual Server page if you want to<br />
host an FTP server.<br />
Allows Microsoft NetMeeting clients to communicate across NAT. Note that if you want your buddies to call you, you should<br />
also set up a virtual server for NetMeeting. Refer to the Advanced > Virtual Server page for information on how to set up<br />
a virtual server.<br />
Allows devices and applications using VoIP (Voice over IP) to communicate across NAT. Some VoIP applications and<br />
devices have the ability to discover NAT devices and work around them. This ALG may interfere with the operation of such<br />
devices. If you are having trouble making VoIP calls, try turning this ALG off.<br />
Wake-On-LAN:<br />
Allows Ethernet network adapters with Wake-On-LAN (WOL) to function.<br />
MMS: Allows Windows Media Player, using MMS protocol, to receive streaming media from the Internet.<br />
D-Link DIR-655 User Manual<br />
43
Section 3 - <strong>Configuration</strong><br />
Router Settings<br />
The Routing option is an advanced method of customizing specific routes of data through your network.<br />
Destination IP:<br />
Netmask:<br />
Gateway:<br />
Metric:<br />
Interface:<br />
Enter the IP address of packets that will take<br />
this route.<br />
Enter the netmask of the route, please note<br />
that the octets must match your destination<br />
IP address.<br />
Enter your next hop gateway to be taken if this<br />
route is used.<br />
The route metric is a value from 1 to 16 that<br />
indicates the cost of using this route. A value 1<br />
is the lowest cost and 15 is the highest cost.<br />
Select the interface that the IP packet must<br />
use to transit out of the router when this route<br />
is used.<br />
D-Link DIR-655 User Manual<br />
44
Transmit Power<br />
802.11d Mode<br />
Section 3 - <strong>Configuration</strong><br />
Transmit<br />
Power:<br />
Beacon Period:<br />
RTS Threshold:<br />
Fragmentation<br />
Threshold:<br />
DTIM Interval:<br />
802.11d:<br />
Set the transmit power of the antennas.<br />
Beacons are packets sent by an Access Point to<br />
synchronize a wireless network. Specify a value.<br />
100 is the default setting and is recommended.<br />
This value should remain at its default setting of<br />
2346. If inconsistent data flow is a problem, only<br />
a minor modification should be made.<br />
The fragmentation threshold, which is specified<br />
in bytes, determines whether packets will be<br />
fragmented. Packets exceeding the 2346 byte<br />
setting will be fragmented before transmission.<br />
2346 is the default setting.<br />
(Delivery Traffic Indication Message) 3 is the<br />
default setting. A DTIM is a countdown informing<br />
clients of the next window for listening to<br />
broadcast and multicast messages.<br />
Advanced Wireless Settings<br />
This enables 802.11d opration. 802.11d is a wireless specification developed to allow implementation of wireless networks in<br />
countries that cannot use the 802.11 standard. This feature should only be enabled if you are in a country that requires it.<br />
WLAN Partition:<br />
WLAN Partition prevents associated wireless clients from communicating with each other.<br />
WMM Function:<br />
Short GI:<br />
WMM is QoS for your wireless network. This will improve the quality of video and voice applications for your wireless<br />
clients.<br />
Check this box to reduce the guard interval time therefore increasing the data capacity. However, it’s less reliable and may<br />
create higher data loss.<br />
Extra Wireless:<br />
Extra protection for neighboring 11b wireless networks. Turn this option off to reduce the adverse effect of legacy wireless<br />
D-Link DIR-655 User Manual<br />
45
Section 3 - <strong>Configuration</strong><br />
WISH Settings<br />
WISH is short for Wireless Intelligent Stream Handling, a technology developed to enhance your experience of using<br />
a wireless network by prioritizing the traffic of different applications.<br />
Enable WISH:<br />
HTTP:<br />
Windows Media<br />
Center:<br />
Automatic:<br />
Enable this option if you want to allow WISH<br />
to prioritize your traffic.<br />
Allows the router to recognize HTTP transfers<br />
for many common audio and video streams<br />
and prioritize them above other traffic. Such<br />
streams are frequently used by digital media<br />
players.<br />
Enables the router to recognize certain<br />
audio and video streams generated by a<br />
Windows Media Center PC and to prioritize<br />
these above other traffic. Such streams are<br />
used by systems known as Windows Media<br />
Extenders, such as the Xbox 360.<br />
When enabled, this option causes the router<br />
to automatically attempt to prioritize traffic<br />
streams that it doesn’t otherwise recognize,<br />
based on the behaviour that the streams<br />
exhibit. This acts to deprioritize streams that<br />
exhibit bulk transfer characteristics, such as<br />
file transfers, while leaving interactive traffic,<br />
such as gaming or VoIP, running at a normal<br />
priority.<br />
WISH Rules: A WISH Rule identifies a specific message flow and assigns a priority to that flow. For most applications, the priority<br />
classifiers ensure the right priorities and specific WISH Rules are not required.<br />
WISH supports overlaps between rules. If more than one rule matches for a specific message flow, the rule with the highest<br />
priority will be used.<br />
D-Link DIR-655 User Manual<br />
46
Section 3 - <strong>Configuration</strong><br />
Name:<br />
Priority:<br />
Create a name for the rule that is meaningful<br />
to you.<br />
The priority of the message flow is entered<br />
here. The four priorities are defined as:<br />
BK: Background (least urgent)<br />
BE: Best Effort.<br />
VI: Video<br />
VO: Voice (most urgent)<br />
Protocol:<br />
Host IP Range:<br />
The protocol used by the messages.<br />
The rule applies to a flow of messages for which one computer’s IP address falls within the range set here.<br />
Host Port<br />
Range:<br />
The rule applies to a flow of messages for which host’s port number is within the range set here.<br />
D-Link DIR-655 User Manual<br />
47
Section 3 - <strong>Configuration</strong><br />
Wi-Fi Protected Setup<br />
Wi-Fi Protected Setup (WPS) System is a simplified method for securing your wireless network during the “Initial setup”<br />
as well as the “Add New Device” processes. The Wi-Fi Alliance (WFA) has certified it across different products as well<br />
as manufactures. The process is just as easy, as depressing a button for the Push-Button Method or correctly entering<br />
the 8-digit code for the Pin-Code Method. The time reduction in setup and ease of use are quite beneficial, while the<br />
highest wireless Security setting of WPA2 is automatically used.<br />
Enable:<br />
Enable the Wi-Fi Protected Setup feature.<br />
Lock Wireless<br />
Security<br />
Settings:<br />
PIN Settings:<br />
Locking the wireless security settings prevents the<br />
settings from being changed by the Wi-Fi Protected<br />
Setup feature of the router. Devices can still be<br />
added to the network using Wi-Fi Protected Setup.<br />
However, the settings of the network will not change<br />
once this option is checked.<br />
A PIN is a unique number that can be used to add<br />
the router to an existing network or to create a<br />
new network. The default PIN may be printed on<br />
the bottom of the router. For extra security, a new<br />
PIN can be generated. You can restore the default<br />
PIN at any time. Only the Administrator (“admin”<br />
account) can change or reset the PIN.<br />
Current PIN:<br />
Shows the current value of the router’s PIN.<br />
Reset PIN to<br />
Default:<br />
Generate New<br />
PIN:<br />
Restore the default PIN of the router.<br />
Create a random number that is a valid PIN. This becomes the router’s PIN. You can then copy this PIN to the user interface<br />
of the registrar.<br />
D-Link DIR-655 User Manual<br />
48
Section 3 - <strong>Configuration</strong><br />
Add Wireless<br />
Station:<br />
This Wizard helps you add wireless devices to the wireless network.<br />
The wizard will either display the wireless network settings to guide you through manual configuration, prompt you to enter the<br />
PIN for the device, or ask you to press the configuration button on the device. If the device supports Wi-Fi Protected Setup<br />
and has a configuration button, you can add it to the network by pressing the configuration button on the device and then<br />
the on the router within 60 seconds. The status LED on the router will flash three times if the device has been successfully<br />
added to the network.<br />
There are several ways to add a wireless device to your network. A “registrar” controls access to the wireless network. A<br />
registrar only allows devices onto the wireless network if you have entered the PIN, or pressed a special Wi-Fi Protected<br />
Setup button on the device. The router acts as a registrar for the network, although other devices may act as a registrar as<br />
well.<br />
Add Wireless<br />
Device Wizard:<br />
Start the wizard.<br />
D-Link DIR-655 User Manual<br />
49
UPnP<br />
Internet Ping Block<br />
Internet Port Speed<br />
Multicast Streams<br />
Section 3 - <strong>Configuration</strong><br />
UPnP Settings:<br />
Internet Ping:<br />
Advanced Network Settings<br />
To use the Universal Plug and Play (UPnP )<br />
feature click on Enabled. UPNP provides<br />
compatibility with networking equipment, software<br />
and peripherals.<br />
Unchecking the box will not allow the DIR-655 to<br />
respond to pings. Blocking the Ping may provide<br />
some extra security from hackers. Check the box<br />
to allow the Internet port to be “pinged”.<br />
Internet Port<br />
Speed:<br />
You may set the port speed of the Internet port to<br />
10 Mbps, 100 Mbps, 1000 Mbps or auto. Some<br />
older cable or DSL modems may require you to<br />
set the port speed to 10Mbps.<br />
Multicast<br />
streams:<br />
Check the box to allow multicast traffic to pass<br />
through the router from the Internet.<br />
D-Link DIR-655 User Manual<br />
50
Change Password<br />
Remote Management<br />
Section 3 - <strong>Configuration</strong><br />
Admin<br />
Password:<br />
User Password:<br />
Administrator Settings<br />
This page will allow you to change the Administrator and User passwords. You can also enable Remote Management.<br />
There are two accounts that can access the management interface through the web browser. The accounts are admin<br />
and user. Admin has read/write access while user has read-only access. User can only view the settings but cannot<br />
make any changes. Only the admin account has the ability to change both admin and user account passwords.<br />
Enter a new password for the Administrator Login Name.<br />
The administrator can make changes to the settings.<br />
Enter the new password for the User login. If you login as<br />
the User, you can only see the settings, but cannot change<br />
them.<br />
Gateway Name:<br />
Enter a name for the DIR-655 router.<br />
Remote<br />
Management:<br />
Remote Admin<br />
Port:<br />
Remote management allows the DIR-655 to be configured<br />
from the Internet by a web browser. A username and<br />
password is still required to access the Web-Management<br />
interface. In general, only a member of your network can<br />
browse the built-in web pages to perform Administrator tasks.<br />
This feature enables you to perform Administrator tasks from<br />
the remote (Internet) host.<br />
The port number used to access the DIR-655.<br />
Example: http://x.x.x.x:8080 whereas x.x.x.x is the Internet<br />
IP address of the DIR-655 and 8080 is the port used for the<br />
Web Management interface.<br />
Inbound Filter:<br />
This section will list any rules that are created. You may click<br />
the Edit icon to change the settings or enable/disable the<br />
rule, or click the Delete icon to remove the rule.<br />
D-Link DIR-655 User Manual<br />
51
Section 3 - <strong>Configuration</strong><br />
Time Settings<br />
The Time <strong>Configuration</strong> option allows you to configure, update, and maintain the correct time on the internal system<br />
clock. From this section you can set the time zone that you are in and set the Time Server. Daylight Saving can also<br />
be configured to automatically adjust the time when needed.<br />
Time Zone:<br />
Daylight<br />
Saving:<br />
Enable NTP<br />
Server:<br />
NTP Server<br />
Used:<br />
Manual:<br />
Select the Time Zone from the drop-down<br />
menu.<br />
To select Daylight Saving time manually, select<br />
enabled or disabled, and enter a start date and<br />
an end date for daylight saving time.<br />
NTP is short for Network Time Protocol. NTP<br />
synchronizes computer clock times in a network<br />
of computers. Check this box to use a NTP<br />
server. This will only connect to a server on the<br />
Internet, not a local server.<br />
Enter the NTP server or select one from the<br />
drop-down menu.<br />
To manually input the time, enter the values<br />
in these fields for the Year, Month, Day, Hour,<br />
Minute, and Second and then click Set Time.<br />
You can also click Copy Your Computer’s<br />
Time Settings.<br />
D-Link DIR-655 User Manual<br />
52
Section 3 - <strong>Configuration</strong><br />
SysLog<br />
The Broadband Router keeps a running log of events and activities occurring on the Router. You may send these logs<br />
to a SysLog server on your network.<br />
Enable Logging<br />
to SysLog<br />
Server:<br />
SysLog Server<br />
IP Address:<br />
Check this box to send the router logs to a<br />
SysLog Server.<br />
The address of the SysLog server that will be<br />
used to send the logs. You may also select<br />
your computer from the drop-down menu (only<br />
if receiving an IP address from the router via<br />
DHCP).<br />
D-Link DIR-655 User Manual<br />
53
Section 3 - <strong>Configuration</strong><br />
Email Settings<br />
The Email feature can be used to send the system log files, router alert messages, and firmware update notification<br />
to your email address.<br />
Enable Email<br />
Notification:<br />
From Email<br />
Address:<br />
To Email<br />
Address:<br />
SMTP Server<br />
Address:<br />
Enable<br />
Authentication:<br />
When this option is enabled, router activity logs<br />
are e-mailed to a designated email address.<br />
This email address will appear as the sender<br />
when you receive a log file or firmware upgrade<br />
notification via email.<br />
Enter the email address where you want the<br />
email sent.<br />
Enter the SMTP server address for sending email.<br />
If your SMTP server requires authentication,<br />
select this option.<br />
Check this box if your SMTP server requires<br />
authentication.<br />
Account Name:<br />
Enter your account for sending email.<br />
Password:<br />
On Log Full:<br />
On Schedule:<br />
Schedule:<br />
Enter the password associated with the account.<br />
Re-type the password associated with the<br />
account.<br />
When this option is selected, logs will be sent<br />
via email when the log is full.<br />
Selecting this option will send the logs via email<br />
according to schedule.<br />
This option is enabled when On Schedule is selected. You can select a schedule from the list of defined schedules. To create<br />
a schedule, go to Tools > Schedules.<br />
D-Link DIR-655 User Manual<br />
54
Section 3 - <strong>Configuration</strong><br />
Save Settings<br />
to Local Hard<br />
Drive:<br />
Load Settings<br />
from Local<br />
Hard Drive:<br />
Restore to<br />
Factory Default<br />
Settings:<br />
Use this option to save the current router<br />
configuration settings to a file on the hard disk<br />
of the computer you are using. First, click the<br />
Save button. You will then see a file dialog,<br />
where you can select a location and file name<br />
for the settings.<br />
Use this option to load previously saved<br />
router configuration settings. First, use the<br />
Browse control to find a previously save file<br />
of configuration settings. Then, click the Load<br />
button to transfer those settings to the router.<br />
This option will restore all configuration settings<br />
back to the settings that were in effect at the<br />
time the router was shipped from the factory.<br />
Any settings that have not been saved will be<br />
lost, including any rules that you have created. If<br />
you want to save the current router configuration<br />
settings, use the Save button above.<br />
System Settings<br />
Reboot Device:<br />
Click to reboot the router.<br />
D-Link DIR-655 User Manual<br />
55
Section 3 - <strong>Configuration</strong><br />
Update Firmware<br />
You can upgrade the firmware of the Router here. Make sure the firmware you want to use is on the local hard drive of<br />
the computer. Click on Browse to locate the firmware file to be used for the update. Please check the D-Link support<br />
site for firmware updates at http://support.dlink.com. You can download firmware upgrades to your hard drive from the<br />
D-Link support site.<br />
Firmware<br />
Upgrade:<br />
Browse:<br />
Notifications<br />
Options:<br />
Click on Check Online Now for Latest Firmware<br />
Version to find out if there is an updated firmware;<br />
if so, download the new firmware to your hard<br />
drive.<br />
After you have downloaded the new firmware,<br />
click Browse to locate the firmware update on<br />
your hard drive. Click Upload to complete the<br />
firmware upgrade.<br />
Check Automatically Check Online for Latest<br />
Firmware Version to have the router check<br />
automatically to see if there is a new firmware<br />
upgrade.<br />
Check Email Notification of Newer Firmware<br />
Version to have the router send an email when<br />
there is a new firmware available.<br />
D-Link DIR-655 User Manual<br />
56
Section 3 - <strong>Configuration</strong><br />
DDNS<br />
The DDNS feature allows you to host a server (Web, FTP, Game Server, etc…) using a domain name that you have<br />
purchased (www.whateveryournameis.com) with your dynamically assigned IP address. Most broadband Internet<br />
Service Providers assign dynamic (changing) IP addresses. Using a DDNS service provider, your friends can enter in<br />
your domain name to connect to your server no matter what your IP address is.<br />
DDNS:<br />
Server<br />
Address:<br />
Host Name:<br />
Username or<br />
Key:<br />
Password or<br />
Key:<br />
Timeout:<br />
Dynamic Domain Name System is a method of<br />
keeping a domain name linked to a changing IP<br />
Address. Check the box to enable DDNS.<br />
Choose your DDNS provider from the drop<br />
down menu.<br />
Enter the Host Name that you registered with<br />
your DDNS service provider.<br />
Enter the Username for your DDNS account.<br />
Enter the Password for your DDNS account.<br />
Enter a time (in hours).<br />
D-Link DIR-655 User Manual<br />
57
Section 3 - <strong>Configuration</strong><br />
System Check<br />
Ping Test:<br />
Ping<br />
Results:<br />
The Ping Test is used to send Ping packets to test if a<br />
computer is on the Internet. Enter the IP Address that you<br />
wish to Ping, and click Ping.<br />
The results of your ping attempts will be displayed here.<br />
D-Link DIR-655 User Manual<br />
58
Section 3 - <strong>Configuration</strong><br />
Schedules<br />
Name:<br />
Days:<br />
Time:<br />
Save:<br />
Enter a name for your new schedule.<br />
Select a day, a range of days, or All Week to<br />
include every day.<br />
Check All Day - 24hrs or enter a start and end<br />
time for your schedule.<br />
Click Save to save your schedule. You must click<br />
Save Settings at the top for your schedules to go<br />
into effect.<br />
Schedule<br />
Rules List:<br />
The list of schedules will be listed here. Click the<br />
Edit icon to make changes or click the Delete<br />
icon to remove the schedule.<br />
D-Link DIR-655 User Manual<br />
59
Section 3 - <strong>Configuration</strong><br />
Device Information<br />
This page displays the current information for the DIR-655. It will display the LAN, WAN (Internet), and Wireless<br />
information.<br />
If your Internet connection is set up for a Dynamic IP address then a Release button and a Renew button will be<br />
displayed. Use Release to disconnect from your ISP and use Renew to connect to your ISP.<br />
If your Internet connection is set up for PPPoE, a Connect button and a Disconnect button will be displayed. Use<br />
Disconnect to drop the PPPoE connection and use Connect to establish the PPPoE connection.<br />
General:<br />
WAN:<br />
Displays the router’s time and firmware version.<br />
Displays the MAC address and the public IP settings for the router.<br />
LAN:<br />
Wireless LAN:<br />
LAN<br />
Computers:<br />
IGMP Multicast<br />
Memberships:<br />
Displays the MAC address and the private (local) IP settings for the<br />
router.<br />
Displays the wireless MAC address and your wireless settings such as<br />
SSID and Channel.<br />
Displays computers and devices that are connected to the router via<br />
Ethernet and that are receiving an IP address assigned by the router<br />
(DHCP).<br />
Displays the Multicast Group IP Address.<br />
D-Link DIR-655 User Manual<br />
60
Section 3 - <strong>Configuration</strong><br />
Logs<br />
The router automatically logs (records) events of possible interest in it’s internal memory. If there isn’t enough internal<br />
memory for all events, logs of older events are deleted but logs of the latest events are retained. The Logs option allows<br />
you to view the router logs. You can define what types of events you want to view and the level of the events to view.<br />
This router also has external Syslog Server support so you can send the log files to a computer on your network that<br />
is running a Syslog utility.<br />
What to View:<br />
View Levels:<br />
Apply Log<br />
Settings:<br />
Refresh:<br />
You can select the types of messages that you want<br />
to display from the log. Firewall & Security, System,<br />
and Router Status messages can be selected.<br />
There are three levels of message importance:<br />
Informational, Warning, and Critical. Select the levels<br />
that you want displayed in the log.<br />
Will filter the log results so that only the selected<br />
options appear.<br />
Updates the log details on the screen so it displays<br />
any recent activity.<br />
Clear:<br />
Clears all of the log contents.<br />
Email Now:<br />
Save Log:<br />
This option will send a copy of the router log to<br />
the email address configured in the Tools > Email<br />
screen.<br />
This option will save the router to a log file on your<br />
computer.<br />
D-Link DIR-655 User Manual<br />
61
Section 3 - <strong>Configuration</strong><br />
Statistics<br />
The screen below displays the Traffic Statistics. Here you can view the amount of packets that pass through the DIR-655<br />
on both the Internet and the LAN ports. The traffic counter will reset if the device is rebooted.<br />
Internet Sessions<br />
D-Link DIR-655 User Manual<br />
62
Section 3 - <strong>Configuration</strong><br />
Wireless<br />
The wireless client table displays a list of current connected wireless clients. This table also displays the connection<br />
time and MAC address of the connected wireless clients.<br />
WISH Sessions<br />
The WISH Sessions page displays full details of wireless clients that are connected when WISH is enabled.<br />
D-Link DIR-655 User Manual<br />
63
Section 3 - <strong>Configuration</strong><br />
Support<br />
D-Link DIR-655 User Manual<br />
64
Section 4 - Security<br />
Wireless Security<br />
This section will show you the different levels of security you can use to protect your data from intruders. The<br />
DIR-655 offers the following types of security:<br />
• WPA2 (Wi-Fi Protected Access 2)<br />
• WPA (Wi-Fi Protected Access)<br />
• WEP (Wired Equivalent Privacy)<br />
• WPA2-PSK (Pre-Shared Key)<br />
• WPA-PSK (Pre-Shared Key)<br />
What is WEP?<br />
WEP stands for Wired Equivalent Privacy. It is based on the IEEE 802.11 standard and uses the RC4 encryption<br />
algorithm. WEP provides security by encrypting data over your wireless network so that it is protected as it is transmitted<br />
from one wireless device to another.<br />
To gain access to a WEP network, you must know the key. The key is a string of characters that you create. When<br />
using WEP, you must determine the level of encryption. The type of encryption determines the key length. 128-bit<br />
encryption requires a longer key than 64-bit encryption. Keys are defined by entering in a string in HEX (hexadecimal<br />
- using characters 0-9, A-F) or ASCII (American Standard Code for Information Interchange – alphanumeric characters)<br />
format. ASCII format is provided so you can enter a string that is easier to remember. The ASCII string is converted to<br />
HEX for use over the network. Four keys can be defined so that you can change keys easily.<br />
D-Link DIR-655 User Manual<br />
65
Section 4 - Security<br />
What is WPA?<br />
WPA, or Wi-Fi Protected Access, is a Wi-Fi standard that was designed to improve the security features of WEP (Wired<br />
Equivalent Privacy).<br />
The 2 major improvements over WEP:<br />
• Improved data encryption through the Temporal Key Integrity Protocol (TKIP). TKIP scrambles the keys<br />
using a hashing algorithm and, by adding an integrity-checking feature, ensures that the keys haven’t<br />
been tampered with. WPA2 is based on 802.11i and uses Advanced Encryption Standard (AES) instead<br />
of TKIP.<br />
• User authentication, which is generally missing in WEP, through the extensible authentication protocol<br />
(EAP). WEP regulates access to a wireless network based on a computer’s hardware-specific MAC<br />
address, which is relatively simple to be sniffed out and stolen. EAP is built on a more secure public-key<br />
encryption system to ensure that only authorized network users can access the network.<br />
WPA-PSK/WPA2-PSK uses a passphrase or key to authenticate your wireless connection. The key is an alpha-numeric<br />
password between 8 and 63 characters long. The password can include symbols (!?*&_) and spaces. This key must<br />
be the exact same key entered on your wireless router or access point.<br />
WPA/WPA2 incorporates user authentication through the Extensible Authentication Protocol (EAP). EAP is built on a<br />
more secure public key encryption system to ensure that only authorized network users can access the network.<br />
D-Link DIR-655 User Manual<br />
66
Section 4 - Security<br />
Wireless Security Setup Wizard<br />
To run the security wizard, click on Setup at the top and then<br />
click Launch Wireless Security Setup Wizard.<br />
Select how you would like to configure your wireless security<br />
settings:<br />
Auto - Allows the router to auto-generate Wireless Network<br />
Name (SSID) and WPA-Personal Passphrase. Click Save to<br />
apply the auto-generated settings.<br />
Manual - Allows you to go through the Wireless Security Setup<br />
Wizard and enter your settings manually.<br />
Click Next to continue.<br />
D-Link DIR-655 User Manual<br />
67
Section 4 - Security<br />
Enter the SSID (Service Set Identifier). The SSID is the<br />
name of your wireless network. Create a name using up to<br />
32 characters. The SSID is case-sensitive.<br />
Select the level of security for your wireless network:<br />
• Best - WPA2 Authentication<br />
• Better - WPA Authentication<br />
• Good - WEP Encryption<br />
• None - No security<br />
Click Next to continue.<br />
If you selected Best or Better, enter a password between<br />
8-63 characters.<br />
If you selected Good, enter 13 characters or 26 Hex digits.<br />
Click Next to continue.<br />
D-Link DIR-655 User Manual<br />
68
Section 4 - Security<br />
If you selected Good, the following screen will show you your<br />
WEP key to enter on your wireless clients.<br />
Click Save to finish the Security Wizard.<br />
If you selected Better, the following screen will show you your<br />
Pre-Shared Key to enter on your wireless clients.<br />
Click Save to finish the Security Wizard.<br />
If you selected Best, the following screen will show you your<br />
Pre-Shared Key to enter on your wireless clients.<br />
Click Save to finish the Security Wizard.<br />
If you selected WPA-Enterprise, the RADIUS information will be displayed. Click Save to finish the Security Wizard.<br />
D-Link DIR-655 User Manual<br />
69
Section 4 - Security<br />
Configure WEP<br />
It is recommended to enable encryption on your wireless router before your wireless network adapters. Please establish<br />
wireless connectivity before enabling encryption. Your wireless signal may degrade when enabling encryption due to<br />
the added overhead.<br />
1. Log into the web-based configuration by opening a<br />
web browser and entering the IP address of the router<br />
(192.168.0.1). Click on Setup and then click Wireless<br />
Settings on the left side.<br />
2. Next to Security Mode, select WEP.<br />
3. Next to WEP Key Length, select the level of ecryption<br />
(64 or 128-bit).<br />
Hex - (recommended) Letters A-F and numbers 0-9<br />
are valid.<br />
4. Next to WEP Key 1, enter a WEP key that you create.<br />
Make sure you enter this key exactly on all your wireless<br />
devices. You may enter up to 4 different keys.<br />
5. Next to Authentication, select Shared Key.<br />
6. Click Save Settings to save your settings. If you are<br />
configuring the router with a wireless adapter, you will lose<br />
connectivity until you enable WEP on your adapter and<br />
enter the same WEP key as you did on the router.<br />
D-Link DIR-655 User Manual<br />
70
Section 4 - Security<br />
Configure WPA-Personal (PSK)<br />
It is recommended to enable encryption on your wireless router before your wireless network adapters. Please establish<br />
wireless connectivity before enabling encryption. Your wireless signal may degrade when enabling encryption due to<br />
the added overhead.<br />
1. Log into the web-based configuration by opening a web browser<br />
and entering the IP address of the router (192.168.0.1). Click<br />
on Setup and then click Wireless Settings on the left side.<br />
2. Next to Security Mode, select WPA-Personal.<br />
3. Next to WPA Mode, select Auto, WPA2 Only, or WPA Only. Use<br />
Auto if you have wireless clients using both WPA and WPA2.<br />
4. Next to Cypher Type, select TKIP and AES, TKIP, or AES.<br />
5. Next to Group Key Update Interval, enter the amount of time<br />
before the group key used for broadcast and multicast data is<br />
changed (3600 is default).<br />
6. Next to Pre-Shared Key, enter a key (passphrase). The key is<br />
entered as a pass-phrase in ASCII format at both ends of the<br />
wireless connection. The pass-phrase must be between 8-63<br />
characters.<br />
7. Click Save Settings to save your settings. If you are configuring<br />
the router with a wireless adapter, you will lose connectivity until you enable WPA-PSK on your adapter and enter<br />
the same passphrase as you did on the router.<br />
D-Link DIR-655 User Manual<br />
71
Section 4 - Security<br />
Configure WPA-Enterprise (RADIUS)<br />
It is recommended to enable encryption on your wireless router before your wireless network adapters. Please establish<br />
wireless connectivity before enabling encryption. Your wireless signal may degrade when enabling encryption due to<br />
the added overhead.<br />
1. Log into the web-based configuration by opening a web browser<br />
and entering the IP address of the router (192.168.0.1). Click<br />
on Setup and then click Wireless Settings on the left side.<br />
2. Next to Security Mode, select WPA-Enterprise.<br />
3. Next to WPA Mode, select Auto, WPA2 Only, or WPA Only. Use<br />
Auto if you have wireless clients using both WPA and WPA2.<br />
4. Next to Cypher Type, select TKIP and AES, TKIP, or AES.<br />
5. Next to Group Key Update Interval, enter the amount of time<br />
before the group key used for broadcast and multicast data is<br />
changed (3600 is default).<br />
6. Next to Authentication Timeout, enter the amount of time before<br />
a client is required to re-authenticate (60 minutes is default).<br />
7. Next to RADIUS Server IP Address enter the IP Address of your<br />
RADIUS server.<br />
8. Next to RADIUS Server Port, enter the port you are using with<br />
your RADIUS server. 1812 is the default port.<br />
D-Link DIR-655 User Manual<br />
72
Section 4 - Security<br />
9. Next to RADIUS Server Shared Secret, enter the security<br />
key.<br />
10. If the MAC Address Authentication box is selected then the<br />
user will need to connect from the same computer whenever<br />
logging into the wireless network.<br />
11. Click Advanced to enter settings for a secondary RADIUS<br />
Server.<br />
12. Click Apply Settings to save your settings.<br />
D-Link DIR-655 User Manual<br />
73
Section 5 - Connecting to a Wireless Network<br />
Connect to a Wireless Network<br />
Using Windows ® XP<br />
Windows ® XP users may use the built-in wireless utility (Zero <strong>Configuration</strong> Utility). The following instructions are for<br />
Service Pack 2 users. If you are using another company’s utility or Windows ® 2000, please refer to the user manual<br />
of your wireless adapter for help with connecting to a wireless network. Most utilities will have a “site survey” option<br />
similar to the Windows ® XP utility as seen below.<br />
If you receive the Wireless Networks Detected bubble, click<br />
on the center of the bubble to access the utility.<br />
or<br />
Right-click on the wireless computer icon in your system tray<br />
(lower-right corner next to the time). Select View Available<br />
Wireless Networks.<br />
The utility will display any available wireless networks in your<br />
area. Click on a network (displayed using the SSID) and click<br />
the Connect button.<br />
If you get a good signal but cannot access the Internet,<br />
check you TCP/IP settings for your wireless adapter. Refer<br />
to the Networking Basics section in this manual for more<br />
information.<br />
D-Link DIR-655 User Manual<br />
74
Section 5 - Connecting to a Wireless Network<br />
Configure WEP<br />
It is recommended to enable WEP on your wireless router or access point before configuring your wireless adapter. If<br />
you are joining an existing network, you will need to know the WEP key being used.<br />
1. Open the Windows ® XP Wireless Utility by right-clicking<br />
on the wireless computer icon in your system tray<br />
(lower-right corner of screen). Select View Available<br />
Wireless Networks.<br />
2. Highlight the wireless network (SSID) you would like to<br />
connect to and click Connect.<br />
D-Link DIR-655 User Manual<br />
75
Section 5 - Connecting to a Wireless Network<br />
3. The Wireless Network Connection box will appear. Enter the<br />
same WEP key that is on your router and click Connect.<br />
It may take 20-30 seconds to connect to the wireless network. If the<br />
connection fails, please verify that the WEP settings are correct. The<br />
WEP key must be exactly the same as on the wireless router.<br />
D-Link DIR-655 User Manual<br />
76
Section 5 - Connecting to a Wireless Network<br />
Configure WPA-PSK<br />
It is recommended to enable WEP on your wireless router or access point before configuring your wireless adapter. If<br />
you are joining an existing network, you will need to know the WEP key being used.<br />
1. Open the Windows ® XP Wireless Utility by right-clicking<br />
on the wireless computer icon in your system tray<br />
(lower-right corner of screen). Select View Available<br />
Wireless Networks.<br />
2. Highlight the wireless network (SSID) you would like to<br />
connect to and click Connect.<br />
D-Link DIR-655 User Manual<br />
77
Section 5 - Connecting to a Wireless Network<br />
3. The Wireless Network Connection box will appear. Enter the<br />
WPA-PSK passphrase and click Connect.<br />
It may take 20-30 seconds to connect to the wireless network. If the<br />
connection fails, please verify that the WPA-PSK settings are correct.<br />
The WPA-PSK passphrase must be exactly the same as on the<br />
wireless router.<br />
D-Link DIR-655 User Manual<br />
78
Section 6 - Troubleshooting<br />
Troubleshooting<br />
This chapter provides solutions to problems that can occur during the installation and operation of the DIR-655. Read<br />
the following descriptions if you are having problems. (The examples below are illustrated in Windows ® XP. If you<br />
have a different operating system, the screenshots on your computer will look similar to the following examples.)<br />
1. Why can’t I access the web-based configuration utility?<br />
When entering the IP address of the D-Link router (192.168.0.1 for example), you are not connecting to a website on<br />
the Internet or have to be connected to the Internet. The device has the utility built-in to a ROM chip in the device itself.<br />
Your computer must be on the same IP subnet to connect to the web-based utility.<br />
• Make sure you have an updated Java-enabled web browser. We recommend the following:<br />
• Internet Explorer 6.0 or higher<br />
• Netscape 8 or higher<br />
• Mozilla 1.7.12 (5.0) or higher<br />
• Opera 8.5 or higher<br />
• Safari 1.2 or higher (with Java 1.3.1 or higher)<br />
• Camino 0.8.4 or higher<br />
• Firefox 1.5 or higher<br />
• Verify physical connectivity by checking for solid link lights on the device. If you do not get a solid link light, try using<br />
a different cable or connect to a different port on the device if possible. If the computer is turned off, the link light may<br />
not be on.<br />
• Disable any internet security software running on the computer. Software firewalls such as Zone Alarm, Black Ice,<br />
Sygate, Norton Personal Firewall, and Windows ® XP firewall may block access to the configuration pages. Check the<br />
help files included with your firewall software for more information on disabling or configuring it.<br />
D-Link DIR-655 User Manual<br />
79
Section 6 - Troubleshooting<br />
• Configure your Internet settings:<br />
• Go to Start > Settings > Control Panel. Double-click the Internet Options Icon. From the Security tab,<br />
click the button to restore the settings to their defaults.<br />
• Click the Connection tab and set the dial-up option to Never Dial a Connection. Click the LAN Settings<br />
button. Make sure nothing is checked. Click OK.<br />
• Go to the Advanced tab and click the button to restore these settings to their defaults. Click OK three<br />
times.<br />
• Close your web browser (if open) and open it.<br />
• Access the web management. Open your web browser and enter the IP address of your D-Link router in the address<br />
bar. This should open the login page for your the web management.<br />
• If you still cannot access the configuration, unplug the power to the router for 10 seconds and plug back in. Wait<br />
about 30 seconds and try accessing the configuration. If you have multiple computers, try connecting using a different<br />
computer.<br />
2. What can I do if I forgot my password?<br />
If you forgot your password, you must reset your router. Unfortunately this process will change all your settings back<br />
to the factory defaults.<br />
To reset the router, locate the reset button (hole) on the rear panel of the unit. With the router powered on, use a<br />
paperclip to hold the button down for 10 seconds. Release the button and the router will go through its reboot process.<br />
Wait about 30 seconds to access the router. The default IP address is 192.168.0.1. When logging in, the username is<br />
admin and leave the password box empty.<br />
D-Link DIR-655 User Manual<br />
80
Section 6 - Troubleshooting<br />
3. Why can’t I connect to certain sites or send and receive emails when connecting through my router?<br />
If you are having a problem sending or receiving email, or connecting to secure sites such as eBay, banking sites, and<br />
Hotmail, we suggest lowering the MTU in increments of ten (Ex. 1492, 1482, 1472, etc).<br />
Note: AOL DSL+ users must use MTU of 1400.<br />
To find the proper MTU Size, you’ll have to do a special ping of the destination you’re trying to go to. A destination<br />
could be another computer, or a URL.<br />
• Click on Start and then click Run.<br />
• Windows ® 95, 98, and Me users type in command (Windows ® NT, 2000, and XP users type in cmd) and<br />
press Enter (or click OK).<br />
• Once the window opens, you’ll need to do a special ping. Use the following syntax:<br />
ping [url] [-f] [-l] [MTU value]<br />
Example: ping yahoo.com -f -l 1472<br />
D-Link DIR-655 User Manual<br />
81
Section 6 - Troubleshooting<br />
You should start at 1472 and work your way down by 10 each time. Once you get a reply, go up by 2 until you get a<br />
fragmented packet. Take that value and add 28 to the value to account for the various TCP/IP headers. For example,<br />
lets say that 1452 was the proper value, the actual MTU size would be 1480, which is the optimum for the network<br />
we’re working with (1452+28=1480).<br />
Once you find your MTU, you can now configure your router with the proper MTU size.<br />
To change the MTU rate on your router follow the steps below:<br />
• Open your browser, enter the IP address of your router (192.168.0.1) and click OK.<br />
• Enter your username (admin) and password (blank by default). Click OK to enter the web configuration<br />
page for the device.<br />
• Click on Setup and then click Manual Configure.<br />
• To change the MTU enter the number in the MTU field and click Save Settings to save your settings.<br />
• Test your email. If changing the MTU does not resolve the problem, continue changing the MTU in<br />
increments of ten.<br />
D-Link DIR-655 User Manual<br />
82
Appendix A - Wireless Basics<br />
Wireless Basics<br />
D-Link wireless products are based on industry standards to provide easy-to-use and compatible high-speed wireless<br />
connectivity within your home, business or public access wireless networks. Strictly adhering to the IEEE standard,<br />
the D-Link wireless family of products will allow you to securely access the data you want, when and where you want<br />
it. You will be able to enjoy the freedom that wireless networking delivers.<br />
A wireless local area network (WLAN) is a cellular computer network that transmits and receives data with radio signals<br />
instead of wires. Wireless LANs are used increasingly in both home and office environments, and public areas such<br />
as airports, coffee shops and universities. Innovative ways to utilize WLAN technology are helping people to work and<br />
communicate more efficiently. Increased mobility and the absence of cabling and other fixed infrastructure have proven<br />
to be beneficial for many users.<br />
Wireless users can use the same applications they use on a wired network. Wireless adapter cards used on laptop<br />
and desktop systems support the same protocols as Ethernet adapter cards.<br />
Under many circumstances, it may be desirable for mobile network devices to link to a conventional Ethernet LAN in<br />
order to use servers, printers or an Internet connection supplied through the wired LAN. A Wireless Router is a device<br />
used to provide this link.<br />
D-Link DIR-655 User Manual<br />
83
Appendix A - Wireless Basics<br />
What is Wireless?<br />
Wireless or Wi-Fi technology is another way of connecting your computer to the network without using wires. Wi-Fi<br />
uses radio frequency to connect wirelessly, so you have the freedom to connect computers anywhere in your home<br />
or office network.<br />
Why D-Link Wireless?<br />
D-Link is the worldwide leader and award winning designer, developer, and manufacturer of networking products.<br />
D-Link delivers the performance you need at a price you can afford. D-Link has all the products you need to build your<br />
network.<br />
How does wireless work?<br />
Wireless works similar to how cordless phone work, through radio signals to transmit data from one point A to point<br />
B. But wireless technology has restrictions as to how you can access the network. You must be within the wireless<br />
network range area to be able to connect your computer. There are two different types of wireless networks Wireless<br />
Local Area Network (WLAN), and Wireless Personal Area Network (WPAN).<br />
Wireless Local Area Network (WLAN)<br />
In a wireless local area network, a device called an Access Point (AP) connects computers to the network. The access<br />
point has a small antenna attached to it, which allows it to transmit data back and forth over radio signals. With an<br />
indoor access point as seen in the picture, the signal can travel up to 300 feet. With an outdoor access point the signal<br />
can reach out up to 30 miles to serve places like manufacturing plants, industrial locations, college and high school<br />
campuses, airports, golf courses, and many other outdoor venues.<br />
D-Link DIR-655 User Manual<br />
84
Appendix A - Wireless Basics<br />
Wireless Personal Area Network (WPAN)<br />
Bluetooth is the industry standard wireless technology used for WPAN. Bluetooth devices in WPAN operate in a range<br />
up to 30 feet away.<br />
Compared to WLAN the speed and wireless operation range are both less than WLAN, but in return it doesn’t use<br />
nearly as much power which makes it ideal for personal devices, such as mobile phones, PDAs, headphones, laptops,<br />
speakers, and other devices that operate on batteries.<br />
Who uses wireless?<br />
Wireless technology as become so popular in recent years that almost everyone is using it, whether it’s for home,<br />
office, business, D-Link has a wireless solution for it.<br />
Home<br />
• Gives everyone at home broadband access<br />
• Surf the web, check email, instant message, and etc<br />
• Gets rid of the cables around the house<br />
• Simple and easy to use<br />
Small Office and Home Office<br />
• Stay on top of everything at home as you would at office<br />
• Remotely access your office network from home<br />
• Share Internet connection and printer with multiple computers<br />
• No need to dedicate office space<br />
D-Link DIR-655 User Manual<br />
85
Appendix A - Wireless Basics<br />
Where is wireless used?<br />
Wireless technology is expanding everywhere not just at home or office. People like the freedom of mobility and it’s<br />
becoming so popular that more and more public facilities now provide wireless access to attract people. The wireless<br />
connection in public places is usually called “hotspots”.<br />
Using a D-Link Cardbus Adapter with your laptop, you can access the hotspot to connect to Internet from remote<br />
locations like: Airports, Hotels, Coffee Shops, Libraries, Restaurants, and Convention Centers.<br />
Wireless network is easy to setup, but if you’re installing it for the first time it could be quite a task not knowing where to<br />
start. That’s why we’ve put together a few setup steps and tips to help you through the process of setting up a wireless<br />
network.<br />
Tips<br />
Here are a few things to keep in mind, when you install a wireless network.<br />
Centralize your router or Access Point<br />
Make sure you place the router/access point in a centralized location within your network for the best performance. Try<br />
to place the router/access point as high as possible in the room, so the signal gets dispersed throughout your home.<br />
If you have a two-story home, you may need a repeater to boost the signal to extend the range.<br />
Eliminate Interference<br />
Place home appliances such as cordless telephones, microwaves, and televisions as far away as possible from the<br />
router/access point. This would significantly reduce any interference that the appliances might cause since they operate<br />
on same frequency.<br />
D-Link DIR-655 User Manual<br />
86
Appendix A - Wireless Basics<br />
Security<br />
Don’t let you next-door neighbors or intruders connect to your wireless network. Secure your wireless network by turning<br />
on the WPA or WEP security feature on the router. Refer to product manual for detail information on how to set it up.<br />
There are basically two modes of networking:<br />
Wireless Modes<br />
• Infrastructure – All wireless clients will connect to an access point or wireless router.<br />
• Ad-Hoc – Directly connecting to another computer, for peer-to-peer communication, using wireless network<br />
adapters on each computer, such as two or more DIR-655 wireless network Cardbus adapters.<br />
An Infrastructure network contains an Access Point or wireless router. All the wireless devices, or clients, will connect<br />
to the wireless router or access point.<br />
An Ad-Hoc network contains only clients, such as laptops with wireless cardbus adapters. All the adapters must be in<br />
Ad-Hoc mode to communicate.<br />
D-Link DIR-655 User Manual<br />
87
Appendix B - Networking Basics<br />
Networking Basics<br />
Check your IP address<br />
After you install your new D-Link adapter, by default, the TCP/IP settings should be set to obtain an IP address from<br />
a DHCP server (i.e. wireless router) automatically. To verify your IP address, please follow the steps below.<br />
Click on Start > Run. In the run box type cmd and click OK. (Windows ® Vista users type cmd in the Start Seach<br />
box.)<br />
At the prompt, type ipconfig and press Enter.<br />
This will display the IP address, subnet mask, and<br />
the default gateway of your adapter.<br />
If the address is 0.0.0.0, check your adapter<br />
installation, security settings, and the settings<br />
on your router. Some firewall software programs<br />
may block a DHCP request on newly installed<br />
adapters.<br />
D-Link DIR-655 User Manual<br />
88
Appendix B - Networking Basics<br />
Statically Assign an IP address<br />
If you are not using a DHCP capable gateway/router, or you need to assign a static IP address, please follow the steps<br />
below:<br />
Step 1<br />
Windows ® Vista - Click on Start > Control Panel > Network and Internet > Network and Sharing Center > Manage<br />
Network Connections.<br />
Windows ® XP - Click on Start > Control Panel > Network Connections.<br />
Windows ® 2000 - From the desktop, right-click My Network Places > Properties.<br />
Step 2<br />
Right-click on the Local Area Connection which represents your network adapter and select Properties.<br />
Step 3<br />
Highlight Internet Protocol (TCP/IP) and click Properties.<br />
Step 4<br />
Click Use the following IP address and enter an IP address that is on the same<br />
subnet as your network or the LAN IP address on your router.<br />
Example: If the router´s LAN IP address is 192.168.0.1, make your IP address<br />
192.168.0.X where X is a number between 2 and 99. Make sure that the number<br />
you choose is not in use on the network. Set Default Gateway the same as the LAN<br />
IP address of your router (192.168.0.1).<br />
Set Primary DNS the same as the LAN IP address of your router (192.168.0.1). The<br />
Secondary DNS is not needed or you may enter a DNS server from your ISP.<br />
Step 5<br />
Click OK twice to save your settings.<br />
D-Link DIR-655 User Manual<br />
89
Appendix C - Technical Specifications<br />
Technical Specifications<br />
Standards<br />
• IEEE 802.11n (draft)<br />
• IEEE 802.11g<br />
• IEEE 802.11b<br />
• IEEE 802.3<br />
• IEEE 802.3u<br />
Security<br />
• WPA-Personal<br />
• WPA2-Personal<br />
• WPA-Enterprise<br />
• WPA2-Enterprise<br />
• 64/128-bit WEP<br />
Wireless Signal Rates*<br />
• 108Mbps • 48Mbps<br />
• 54Mbps • 24Mbps<br />
• 36Mbps • 12Mbps<br />
• 18Mbps • 9Mbps<br />
• 11Mbps • 5.5Mbps<br />
• 6Mbps • 1Mbps<br />
• 2Mbps<br />
MSC (0-15)<br />
• 130Mbps (270) • 117Mbps (243)<br />
• 104Mbps (216) • 78Mbps (162)<br />
• 66Mbps (135) • 58.5Mbps (121.5)<br />
• 52Mbps (108) • 39Mbps (81)<br />
• 26Mbps (54) • 19.5Mbps (40.5)<br />
• 12Mbps (27) • 6.5Mbps (13.5)<br />
Frequency Range<br />
2.4GHz to 2.483GHz<br />
External Antenna Type<br />
Three (3) detachable reverse SMA Antennas<br />
LEDs<br />
• Power • Internet • Status<br />
• WLAN • LAN (10/100/1000) • USB<br />
Operating Temperature<br />
32°F to 104°F ( 0°C to 40°C)<br />
Humidity<br />
95% maximum (non-condensing)<br />
Safety & Emissions<br />
• FCC<br />
Dimensions<br />
• L = 7.6 inches<br />
• W = 4.6 inches<br />
• H = 1.2inches<br />
Warranty<br />
11 Year<br />
* Maximum wireless signal rate derived from IEEE Standard 802.11g and Draft 802.11n specifications. Actual data throughput will vary. Network conditions and<br />
environmental factors, including volume of network traffic, building materials and construction, and network overhead, lower actual data throughput rate. Environmental<br />
factors will adversely affect wireless signal range.<br />
D-Link DIR-655 User Manual<br />
90