HD dvd maker - Unisupport
HD dvd maker - Unisupport
HD dvd maker - Unisupport
You also want an ePaper? Increase the reach of your titles
YUMPU automatically turns print PDFs into web optimized ePapers that Google loves.
<strong>HD</strong> <strong>dvd</strong> <strong>maker</strong><br />
Instruction manual
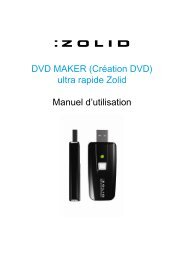
<strong>HD</strong> DVD Maker<br />
Telephone: 1300 558 702<br />
Web Support: www.unisupport.net
Contents<br />
Introduction3<br />
General Information and Safety Instructions3<br />
Package Contents3<br />
License key3<br />
Features5<br />
Hardware Installation5<br />
<strong>HD</strong> DVD Maker Drivers Setup6<br />
ShowBiz 3.5 Software Installation8<br />
Starting ShowBiz 3.5 12<br />
MediaConverter software installation 14<br />
MediaConverter Introduction 19<br />
File Conversion 19<br />
Setting the program up to work with “YouTube” 19<br />
“YouTube” video uploading 21<br />
Video Downloader 3.0 Software Installation 22<br />
Using the Video downloader 25<br />
Other useful information 27<br />
System Requirements 27<br />
After Sales Support TEL: 1300 558 702 WEB: www.unisupport.net<br />
<strong>HD</strong> DVD Maker Version 1 - P65051
Introduction<br />
Congratulations on the purchase of your <strong>HD</strong> DVD Maker. You will have hours of enjoyment with<br />
this highly versatile and handy device. You can use your new <strong>HD</strong> DVD Maker to archive your holiday<br />
videos on a DVD or CD, for example. You may also to record the best scenes from a game on your<br />
console (Xbox, PlayStation, etc) in order to show them to your friends later on.<br />
General Information and Safety Instructions<br />
Keep this User Manual for future reference.<br />
Keep this item away from small children.<br />
Package Contents<br />
1 x <strong>HD</strong> DVD Maker<br />
1 x YPBPR/AV cable<br />
1 x YPbPr Cable<br />
1 x USB Cable<br />
1 x AV/scart converter<br />
1 x RCA cable<br />
1 x Driver/Software CD<br />
1 x User Manual<br />
1 x Warranty Card<br />
2 x Warranty Sticker<br />
License key<br />
Please find your license number on the user manual front cover.<br />
ArcSoft MediaConverter 2.5<br />
xx-xxxxx-xxxxx-xxxxx<br />
After Sales Support TEL: 1300 558 702 WEB: www.unisupport.net<br />
3<br />
<strong>HD</strong> DVD Maker Version 1 - P65051
Examples of connection to a VCR device<br />
To connect a VCR to the DVD <strong>maker</strong>, please use the following supplied parts:<br />
• Scart converter<br />
• RCA extension cable (yellow, white and red RCA connectors)<br />
• YPbPr cable that connects to the DVD <strong>maker</strong><br />
Method of connection:<br />
Connect the scart converter, set the switch to “Output” to the RCA extension cable using the corresponding<br />
plugs.<br />
Connect the RCA extension cable to the multi cable using the yellow RCA connector and, depending<br />
on multi cable type, the white and red to the white and red RCA connectors or to the double<br />
plug that has a white and red connector.<br />
Now connect the multi cable to the DVD <strong>maker</strong><br />
The connection is now complete<br />
After Sales Support TEL: 1300 558 702 WEB: www.unisupport.net<br />
4<br />
<strong>HD</strong> DVD Maker Version 1 - P65051
Features<br />
• Easy ‘ YouTube” Uploading to share the files with your friends<br />
• File transfer to iPod / PSP / Mobile phone<br />
• USB 2.0 interface<br />
• Detects NTSC/PAL automatically<br />
• Real time Recording for Video or Still image in MPEG Format<br />
• Capture Video Source from VHS, V8, Hi8, etc.<br />
• Supports Still Image Capture in JPG format<br />
• Video Resolution:<br />
• NTSC: 720 X 480 @ 30 FPS<br />
• PAL: 720 X 576 @ 25 FPS<br />
• External Video Input: Composite<br />
• Burn content directly to CD or DVD<br />
• Detachable Composite<br />
Hardware Installation<br />
Please follow the pictorial guide below for input / output connections<br />
Please note<br />
Install the driver software before connecting the DVD <strong>maker</strong><br />
After Sales Support TEL: 1300 558 702 WEB: www.unisupport.net<br />
5<br />
<strong>HD</strong> DVD Maker Version 1 - P65051
<strong>HD</strong> DVD Maker Drivers Setup<br />
The DVD Maker package comes with complete Windows software utilities. These utilities can be found<br />
on the CD-ROM in this package. During installation, it is recommended to disable any sub-programs.<br />
These include applications such as antivirus software and system monitoring applications<br />
Insert the installation CD into the CD-ROM drive.<br />
The autorun page will appear as the below,<br />
To install the Driver for the unit, please click on “Driver”.<br />
1. Plug in the device<br />
2. Press “OK” to start the Driver installation<br />
After Sales Support TEL: 1300 558 702 WEB: www.unisupport.net<br />
6<br />
<strong>HD</strong> DVD Maker Version 1 - P65051
3. Click “OK” to finish the driver installation<br />
After Sales Support TEL: 1300 558 702 WEB: www.unisupport.net<br />
7<br />
<strong>HD</strong> DVD Maker Version 1 - P65051
ShowBiz 3.5 Software Installation<br />
The ShowBiz 3.5 program is to be used for converting videos into digital format that can be<br />
stored on a computer or DVD.<br />
The ShowBiz 3.5 program must be installed for the DVD <strong>maker</strong> to work<br />
After the drivers are installed, the next step you need to do is to install ShowBiz 3.5.<br />
Please follow the installation guide below<br />
1. Insert the installation CD. The auto run page appears.<br />
2. Click on “Arcsoft ShowBiz 3.5” to start installation.<br />
3. Click “Next”<br />
After Sales Support TEL: 1300 558 702 WEB: www.unisupport.net<br />
8<br />
<strong>HD</strong> DVD Maker Version 1 - P65051
4. Please read the End User License Agreement thoroughly and then click “Yes” to accept the End<br />
User License Agreement (EULA)<br />
5. Enter User Name, this can be your name or a company name of your choice, and the License Key.<br />
Then click “Next”, License Key can found on the front of the manual<br />
After Sales Support TEL: 1300 558 702 WEB: www.unisupport.net<br />
9<br />
<strong>HD</strong> DVD Maker Version 1 - P65051
6. Click “Next” to accept the default installation path (recommended) or click Browse to select a<br />
custom installation path<br />
7. Click “Next”<br />
After Sales Support TEL: 1300 558 702 WEB: www.unisupport.net<br />
10<br />
<strong>HD</strong> DVD Maker Version 1 - P65051
8. ShowBiz 3.5 is now installed on the computer<br />
Press “Finish”<br />
After Sales Support TEL: 1300 558 702 WEB: www.unisupport.net<br />
11<br />
<strong>HD</strong> DVD Maker Version 1 - P65051
Starting ShowBiz 3.5<br />
1. Doubleclick the Arcsoft ShowBiz 3.5 icon .<br />
2. When the program has started, click on capture<br />
3. Please make sure video device is set to ”Video grabber” and the audio device is the ”Audio PIN<br />
Source”.<br />
After Sales Support TEL: 1300 558 702 WEB: www.unisupport.net<br />
12<br />
<strong>HD</strong> DVD Maker Version 1 - P65051
4. next click on “Device Settings” and in the properties that open, set the Video standard to “PAL_I”<br />
and put a checkmark in “Video-input”<br />
5. the setup of ShowBiz 3.5 is now complete<br />
6. For information and a complete manual to Arcsoft ShowBiz 3.5, please press the “F1” button on<br />
the keyboard and the below help menu and manual will be shown<br />
After Sales Support TEL: 1300 558 702 WEB: www.unisupport.net<br />
13<br />
<strong>HD</strong> DVD Maker Version 1 - P65051
MediaConverter software installation<br />
The MediaConverter program is used after ShowBiz 3.5 has been used to convert a video to<br />
digital format. The MediaConverter program can convert the digital files into various formats<br />
for example it can make a file into .avi format.<br />
It is not necessary to use the MediaConver program for the DVD <strong>maker</strong> to work<br />
After the drivers are installed, the next step you need to do is to install the “Media Converter”. Please<br />
follow the steps below to install it.<br />
1. Insert the installation CD. The auto run page appears. Click on “Media Converter ” to start installation.<br />
2. Choose the installation language<br />
3. Please wait while the installation program initializes<br />
After Sales Support TEL: 1300 558 702 WEB: www.unisupport.net<br />
14<br />
<strong>HD</strong> DVD Maker Version 1 - P65051
4. Click “Next to go to the next step of the installation<br />
5. Please read the following license agreement carefully, and Click “Yes” to accept the license agreement.<br />
After Sales Support TEL: 1300 558 702 WEB: www.unisupport.net<br />
15<br />
<strong>HD</strong> DVD Maker Version 1 - P65051
6. You are required to insert the CD key. Please find the CD key for Arcsoft MediaConverter 2.5 at<br />
the front of the manual. Type in a username and the license key and click “Next” to continue<br />
7. Click “Next” to accept the default installation path (recommended) or click Browse to select a<br />
custom installation path<br />
After Sales Support TEL: 1300 558 702 WEB: www.unisupport.net<br />
16<br />
<strong>HD</strong> DVD Maker Version 1 - P65051
8. Setup will add program icons to the Program Folder’s list. You may type a new folder name, or<br />
select one from the existing folders list. Click “Next” to start installing. Please wait while installation<br />
in process.<br />
9. Please wait until the software installation finishes.<br />
After Sales Support TEL: 1300 558 702 WEB: www.unisupport.net<br />
17<br />
<strong>HD</strong> DVD Maker Version 1 - P65051
10. Click Finish to complete the software installation<br />
** For Media Converter features, please see the user manual found on the CD.<br />
** Serial Number is located on the CD cover<br />
After Sales Support TEL: 1300 558 702 WEB: www.unisupport.net<br />
18<br />
<strong>HD</strong> DVD Maker Version 1 - P65051
MediaConverter Introduction<br />
File Conversion<br />
Launch “ArcSoft Media Converter” for file format conversion.<br />
Select “Add File” to add the file you would like to convert to a different format.<br />
You can set up the file format on the left side of the screen.<br />
Select the folder where you want to save the file and click “Start” to<br />
complete file conversion.<br />
Setting the program up to work with “YouTube”<br />
Media Converter can directly convert your file into “YouTube” format and automatically upload it<br />
to the “YouTube” website. From “Extra” on the top right function bar, you can choose<br />
“Setting YouTube Account” to complete the “YouTube” account.<br />
After Sales Support TEL: 1300 558 702 WEB: www.unisupport.net<br />
19<br />
<strong>HD</strong> DVD Maker Version 1 - P65051
Setup Step 1<br />
Please create and log in to your “YouTube” account on “YouTube” website.<br />
An account on “YouTube” is mandatory to use this feature.<br />
Get Authorization<br />
After setting up your account, please click “Get Authorization”.<br />
Media Converter will guide you to “YouTube” website. Please press “Allow” to continue the setup<br />
procedure.<br />
After Sales Support TEL: 1300 558 702 WEB: www.unisupport.net<br />
20<br />
<strong>HD</strong> DVD Maker Version 1 - P65051
Save<br />
Please click “Save” on Media Converter to complete the setup.<br />
“YouTube” video uploading<br />
Select “YouTube Videos” on “Select Device Model” on left hand side.<br />
Select “YouTube” on “Convert To” near the bottom of the screen.<br />
Add the files you would like to upload to “YouTube” and press “Start” to start uploading.<br />
After Sales Support TEL: 1300 558 702 WEB: www.unisupport.net<br />
21<br />
<strong>HD</strong> DVD Maker Version 1 - P65051
Video Downloader 3.0 Software Installation<br />
The Video Downloader 3.0 program is an optional program that can download video files<br />
from the internet, for example it is able to download a video file from YouTube and save it<br />
onto the computer<br />
It is not necessary to install Video Downloader 3.0 for the DVD <strong>maker</strong> to work<br />
Please choose the Language you wish to use for the installation and click “OK” to continue<br />
Click “Next” to go to the next step of the installation.<br />
After Sales Support TEL: 1300 558 702 WEB: www.unisupport.net<br />
22<br />
<strong>HD</strong> DVD Maker Version 1 - P65051
Please read through the license agreement carefully and click “Yes” if you agree with the information.<br />
Click “Next” to accept the default installation path (recommended) or click “Browse” to select a new<br />
path for installation (advanced).<br />
After Sales Support TEL: 1300 558 702 WEB: www.unisupport.net<br />
23<br />
<strong>HD</strong> DVD Maker Version 1 - P65051
Click ”Next” to accept the folder name that will be used in the start menu (recommended) or type a<br />
new name for the program folder (advanced).<br />
Click ”Next” next to automatically download the Mediaconverter software (recommended) or<br />
remove the check mark by clicking on it (advanced), if this is done mediaconverter can be installed<br />
from the CD as well.<br />
After Sales Support TEL: 1300 558 702 WEB: www.unisupport.net<br />
24<br />
<strong>HD</strong> DVD Maker Version 1 - P65051
Click “Finish” to complete the installation.<br />
Using the Video downloader<br />
The Video downloader will start automatically with windows but is also available for start through<br />
the desktop icon.<br />
Follow the instructions in the Video downloader to download a video.<br />
After Sales Support TEL: 1300 558 702 WEB: www.unisupport.net<br />
25<br />
<strong>HD</strong> DVD Maker Version 1 - P65051
Go to e.g. YouTube and select a video for playback, click on the picture and the download button<br />
will appear, click this button and the download commences.<br />
In the Arcsoft downloader the files cued for download will be downloaded automatically, it is possible<br />
to select the folder that is used to store the files by clicking on the folder icon at the bottom<br />
of the screen.<br />
The files downloaded will be in macromedia Flash format but these can be altered using the Media<br />
converter tool. Please see the manual for this product for further reference.<br />
After Sales Support TEL: 1300 558 702 WEB: www.unisupport.net<br />
26<br />
<strong>HD</strong> DVD Maker Version 1 - P65051
Other useful information<br />
System Requirements<br />
• Intel dualcore or better CPU<br />
• Windows XP(sp2) / VISTA / Windows 7<br />
• 4 GB+ free hard drive space<br />
• 1024MB RAM (2048MB DDR RAM recommended)<br />
• 16-bit color display at 1024 x 768<br />
• DirectX 9 or above<br />
• Windows Media Player 9.0 recommended<br />
• 7200 RPM hard drive recommended<br />
• Please note: 1 hour of DV video requires approx. 13 GB space<br />
The files downloaded will be in macromedia Flash format but these can be altered using the Media<br />
converter tool. Please see the manual for this product for further reference.<br />
After Sales Support TEL: 1300 558 702 WEB: www.unisupport.net<br />
27<br />
<strong>HD</strong> DVD Maker Version 1 - P65051
After Sales Support TEL: 1300 558 702 WEB: www.unisupport.net<br />
28<br />
<strong>HD</strong> DVD Maker Version 1 - P65051
After Sales Support TEL: 1300 558 702 WEB: www.unisupport.net<br />
29<br />
<strong>HD</strong> DVD Maker Version 1 - P65051


