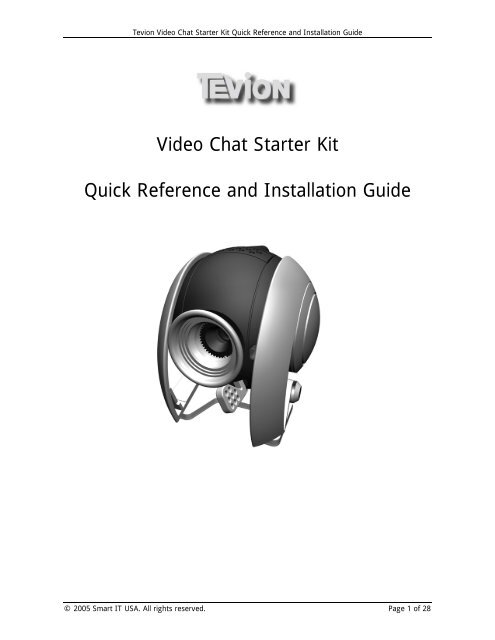
Video Chat Starter Kit Quick Reference and Installation ... - Unisupport
Video Chat Starter Kit Quick Reference and Installation ... - Unisupport
Video Chat Starter Kit Quick Reference and Installation ... - Unisupport

You also want an ePaper? Increase the reach of your titles
YUMPU automatically turns print PDFs into web optimized ePapers that Google loves.
Tevion <strong>Video</strong> <strong>Chat</strong> <strong>Starter</strong> <strong>Kit</strong> <strong>Quick</strong> <strong>Reference</strong> <strong>and</strong> <strong>Installation</strong> Guide<br />
<strong>Video</strong> <strong>Chat</strong> <strong>Starter</strong> <strong>Kit</strong><br />
<strong>Quick</strong> <strong>Reference</strong> <strong>and</strong> <strong>Installation</strong> Guide<br />
© 2005 Smart IT USA. All rights reserved. Page 1 of 28
Tevion <strong>Video</strong> <strong>Chat</strong> <strong>Starter</strong> <strong>Kit</strong> <strong>Quick</strong> <strong>Reference</strong> <strong>and</strong> <strong>Installation</strong> Guide<br />
Index<br />
Index.........................................................................................................................2<br />
Introduction ...............................................................................................................3<br />
Packaging Contents.....................................................................................................3<br />
System Requirements..................................................................................................3<br />
Web Camera Features .................................................................................................4<br />
1. Software <strong>and</strong> Web Camera <strong>Installation</strong> .....................................................................4<br />
1.1 Install The Web Camera Driver ........................................................................4<br />
1.2 Connecting The Web Camera To Your PC .........................................................7<br />
1.3 Install ArcSoft ® Software Suite ...................................................................... 13<br />
1.4 Install Instant Messenger Program ................................................................. 16<br />
2. Start <strong>Video</strong> <strong>Chat</strong>ting .............................................................................................. 16<br />
3. Using AMCAP Software .......................................................................................... 17<br />
4. Overview Of ArcSoft ® Software Suite (<strong>Video</strong>Impression ® 2 And PhotoImpression ® 5). 21<br />
4.1 ArcSoft PhotoImpression 5 ............................................................................ 21<br />
4.2 ArcSoft ® <strong>Video</strong>Impression 2........................................................................... 23<br />
4.3 Making Your First <strong>Video</strong>................................................................................. 24<br />
4.4 E-mailing A <strong>Video</strong> ......................................................................................... 26<br />
© 2005 Smart IT USA. All rights reserved. Page 2 of 28
Tevion <strong>Video</strong> <strong>Chat</strong> <strong>Starter</strong> <strong>Kit</strong> <strong>Quick</strong> <strong>Reference</strong> <strong>and</strong> <strong>Installation</strong> Guide<br />
Introduction<br />
<strong>Video</strong> <strong>Chat</strong>ting Made Easy: With the <strong>Video</strong> <strong>Chat</strong> <strong>Starter</strong> <strong>Kit</strong>, you have everything you<br />
need to video chat live, face-to-face with friends <strong>and</strong> family <strong>and</strong> it’s easy as 1, 2, 3. The<br />
high resolution, VGA web camera with built-in microphone allows you to create a live<br />
videoconference <strong>and</strong> chat (either talking or typing) using popular instant messaging<br />
programs (a link to download a free instant messaging program of your choice is included<br />
on the CD ROM). And the bundled ArcSoft ® Software Suite will enrich your web camera<br />
experience by allowing you to capture, edit, produce, <strong>and</strong> even email videos <strong>and</strong> photos<br />
Packaging contents<br />
• VGA USB web camera with built-in microphone<br />
• <strong>Quick</strong> <strong>Reference</strong> <strong>and</strong> <strong>Installation</strong> Guide<br />
• CD installation disk<br />
o Web Camera Driver<br />
o ArcSoft ® Software Suite: <strong>Video</strong> Impression ® 2 & Photo Impression ® 5: <strong>Video</strong><br />
<strong>and</strong> picture recording/editing/emailing software<br />
o Links to download popular instant messenger programs (IMs), video chatting<br />
software<br />
o Instruction Manuals for ArcSoft ® Software Suite<br />
System requirements<br />
• Windows ® 98, ME, 2000, XP<br />
• Intel Pentium II ® 400, Celeron ® or AMD Athlon ® processor or higher<br />
• CD-ROM drive<br />
• 16bit color display adaptor<br />
• 500Mb free hard disk space<br />
• Windows ® compatible soundcard <strong>and</strong> speakers<br />
• 1.1 or 2.0 USB port<br />
© 2005 Smart IT USA. All rights reserved. Page 3 of 28
Tevion <strong>Video</strong> <strong>Chat</strong> <strong>Starter</strong> <strong>Kit</strong> <strong>Quick</strong> <strong>Reference</strong> <strong>and</strong> <strong>Installation</strong> Guide<br />
Web Camera Features<br />
1. Software <strong>and</strong> Web Camera <strong>Installation</strong><br />
The video chat starter kit installation involves four principle steps:<br />
• Install the Web Camera Driver (includes AMCAP camera preview software)<br />
• Connect the Web Camera<br />
• Install ArcSoft ® Software Suite (video/photo editing/production/email software)<br />
• Install Instant Messenger Software (video chatting software)<br />
Warning! Do not plug in the web camera until the web camera driver is installed!<br />
1.1 Install the Web Camera Driver<br />
The web camera driver needs to be installed before connecting the web camera to your<br />
PC. Please note that this will automatically also install the AMCAP camera preview<br />
software described in section 1.2.3 <strong>and</strong> in section 3.<br />
Insert the installation CD into the CD-ROM drive <strong>and</strong> wait until the start-up menu appears.<br />
When you see the following screen (start-up menu), choose “Web Camera Driver”.<br />
© 2005 Smart IT USA. All rights reserved. Page 4 of 28
Tevion <strong>Video</strong> <strong>Chat</strong> <strong>Starter</strong> <strong>Kit</strong> <strong>Quick</strong> <strong>Reference</strong> <strong>and</strong> <strong>Installation</strong> Guide<br />
The installation process will now start. Press “Next” when the following screen appears.<br />
Choose “Complete” <strong>and</strong> press “Next”.<br />
Press “install” to begin the driver installation.<br />
© 2005 Smart IT USA. All rights reserved. Page 5 of 28
Tevion <strong>Video</strong> <strong>Chat</strong> <strong>Starter</strong> <strong>Kit</strong> <strong>Quick</strong> <strong>Reference</strong> <strong>and</strong> <strong>Installation</strong> Guide<br />
The driver will now be installed.<br />
During the installation process the following screen may appear:<br />
Please click “Continue Anyway” to continue the installation.<br />
© 2005 Smart IT USA. All rights reserved. Page 6 of 28
Tevion <strong>Video</strong> <strong>Chat</strong> <strong>Starter</strong> <strong>Kit</strong> <strong>Quick</strong> <strong>Reference</strong> <strong>and</strong> <strong>Installation</strong> Guide<br />
When this screen appears, the installation process is finished. Press “Finish” to close the<br />
window.<br />
Restart the computer.<br />
1.2 Connecting the web camera to your PC<br />
1.2.1 Connect the camera: When the computer has started up again, connect the web<br />
camera to a free USB port on your computer.<br />
Windows may ask you for the driver one more time (according to the screen below). In<br />
such case, follow the instruction below.<br />
© 2005 Smart IT USA. All rights reserved. Page 7 of 28
Tevion <strong>Video</strong> <strong>Chat</strong> <strong>Starter</strong> <strong>Kit</strong> <strong>Quick</strong> <strong>Reference</strong> <strong>and</strong> <strong>Installation</strong> Guide<br />
Make sure the installation disk is located in the CD-ROM drive.<br />
Choose “No not this time”, press “Next”.<br />
Choose “Install the software automatically (recommended)”, press “next”.<br />
© 2005 Smart IT USA. All rights reserved. Page 8 of 28
Tevion <strong>Video</strong> <strong>Chat</strong> <strong>Starter</strong> <strong>Kit</strong> <strong>Quick</strong> <strong>Reference</strong> <strong>and</strong> <strong>Installation</strong> Guide<br />
The driver will now be installed from the installation CD. The window above will pop up.<br />
Please press “Continue Anyway” to continue the installation.<br />
Click “Finish” to complete the driver installation.<br />
© 2005 Smart IT USA. All rights reserved. Page 9 of 28
Tevion <strong>Video</strong> <strong>Chat</strong> <strong>Starter</strong> <strong>Kit</strong> <strong>Quick</strong> <strong>Reference</strong> <strong>and</strong> <strong>Installation</strong> Guide<br />
1.2.2 Check to make sure the driver is properly installed<br />
For Windows XP/2000 users:<br />
Locate “My Computer” on the desktop > right click on the icon > choose “Properties”<br />
in the menu > Choose the “Hardware” tab > click on “Device Manager”. In the list<br />
under “Imaging devices” make sure that there is device named “USB PC Camera<br />
(SN9C103)”. If there is no such device, please make sure the Web camera is plugged<br />
into the USB port <strong>and</strong> run the installation again.<br />
For Windows ® 98/ME users:<br />
Double click “My Computer” icon -> Control Panel -> System -> Device Manager -><br />
Imaging Device; when you see " USB PC Camera with Mic (SN9C103)" that means<br />
that the camera is installed.<br />
© 2005 Smart IT USA. All rights reserved. Page 10 of 28
Tevion <strong>Video</strong> <strong>Chat</strong> <strong>Starter</strong> <strong>Kit</strong> <strong>Quick</strong> <strong>Reference</strong> <strong>and</strong> <strong>Installation</strong> Guide<br />
1.2.3 Test functionality<br />
To test the camera's video function, press the snapshot button on the top of the camera<br />
once (see below). This will automatically start the camera's preview software (AMCAP)<br />
that was included with the driver installation. The camera's in-use indicator will light up<br />
<strong>and</strong> the following screen will appear showing the video being captured by the camera.<br />
To take a snapshot simply press the snapshot button on top of the camera. This will make<br />
the snapshot appear in a new window (see below). To save the picture, click “File” <br />
“Save as...”. Then specify where to save the file <strong>and</strong> press “Save”.<br />
Once you have confirmed the camera is operating, exit the program by pressing the red X<br />
in the top right corner. It is very important you exit this program prior to using<br />
any other software, which utilizes the web camera.<br />
Please note that while viewing videos with AMCAP, you do have the ability to change the<br />
camera settings to improve the picture. To find out more about using AMCAP <strong>and</strong><br />
changing the image properties, go to section 3 “Using AMCAP software”.<br />
© 2005 Smart IT USA. All rights reserved. Page 11 of 28
Tevion <strong>Video</strong> <strong>Chat</strong> <strong>Starter</strong> <strong>Kit</strong> <strong>Quick</strong> <strong>Reference</strong> <strong>and</strong> <strong>Installation</strong> Guide<br />
1.2.4 Position the camera <strong>and</strong> the lens<br />
The web camera can be attached to laptops using the built-in clip or for desktop users,<br />
position conveniently on desktop (see pictures below). Adjust the position of the lens up<br />
or down to capture objects as desired. Use the focus lever to improve picture clarity<br />
Angle<br />
Adjustment<br />
Focus Adjustment<br />
1.2.5 Configure the built-in microphone<br />
The web camera houses a microphone that works independently from your computer’s<br />
sound card. Therefore if you would like to use<br />
the camera’s microphone for video chatting,<br />
settings will need to be checked/set.<br />
1. Click "Start" from the task bar<br />
2. Click ”Settings” <strong>and</strong> Choose "Control<br />
Panels".<br />
Open the option that corresponds to your<br />
operating system.<br />
a. Windows ® 98 users, double click on<br />
"Multimedia".<br />
b. Windows ® ME <strong>and</strong> Windows 2000 users,<br />
double click on "Sounds <strong>and</strong> Multimedia".<br />
c. Windows XP users, double click on<br />
"Sound <strong>and</strong> Audio Devices".<br />
Click the Audio tab.<br />
Set the preferred recording device<br />
a. Windows 98 <strong>and</strong> ME users, click on the<br />
"Preferred Device for Recording" box.<br />
b. Windows XP <strong>and</strong> Windows 2000, click on<br />
the Default Device box under Sound<br />
Recording.<br />
Choose “USB camera”.<br />
Close the window.<br />
© 2005 Smart IT USA. All rights reserved. Page 12 of 28
Tevion <strong>Video</strong> <strong>Chat</strong> <strong>Starter</strong> <strong>Kit</strong> <strong>Quick</strong> <strong>Reference</strong> <strong>and</strong> <strong>Installation</strong> Guide<br />
1.3 Install ArcSoft ® Software Suite<br />
The video chat starter kit is bundled with the ArcSoft ® Software suite, which contains<br />
powerful video <strong>and</strong> picture software tools for recording, editing, producing, emailing <strong>and</strong><br />
more. The suite includes <strong>Video</strong>Impressions ® 2 <strong>and</strong> PhotoImpressions ® 5. To install this<br />
software, click on “ArcSoft Software Suite” on the installation CD’s startup menu.<br />
1. This screen appears. Press “Next”.<br />
2. To agree with the license press “Yes”<br />
3. If the software should be installed in a different directory than the default, click<br />
“Browse” to specify the new directory, otherwise press “Next”.<br />
© 2005 Smart IT USA. All rights reserved. Page 13 of 28
Tevion <strong>Video</strong> <strong>Chat</strong> <strong>Starter</strong> <strong>Kit</strong> <strong>Quick</strong> <strong>Reference</strong> <strong>and</strong> <strong>Installation</strong> Guide<br />
4. Choose which software to install. Select both <strong>and</strong> click “Next”.<br />
5. Click “Next”<br />
© 2005 Smart IT USA. All rights reserved. Page 14 of 28
Tevion <strong>Video</strong> <strong>Chat</strong> <strong>Starter</strong> <strong>Kit</strong> <strong>Quick</strong> <strong>Reference</strong> <strong>and</strong> <strong>Installation</strong> Guide<br />
6. The software is now being installed.<br />
7. When this window is displayed, the software has been installed. Please select “Install<br />
DirectX” <strong>and</strong> press “Finish” to start the DirectX ® installation.<br />
8. The DirectX ® installation will now start. Select “I accept the agreement” <strong>and</strong> press<br />
“Next”.<br />
© 2005 Smart IT USA. All rights reserved. Page 15 of 28
Tevion <strong>Video</strong> <strong>Chat</strong> <strong>Starter</strong> <strong>Kit</strong> <strong>Quick</strong> <strong>Reference</strong> <strong>and</strong> <strong>Installation</strong> Guide<br />
9. The installation program will now check if the latest version of DirectX ® is installed on<br />
the computer, otherwise it will update to the newest version.<br />
When the update is completed press “Finish” to complete the installation.<br />
1.4 Install Instant Messenger Program<br />
To video chat with a friend, you will need to download <strong>and</strong> install your choice of free<br />
instant messaging software, which provides video chatting features (unless you already<br />
have one installed).<br />
Insert the installation CD into the CD-ROM drive <strong>and</strong> wait for the start-up menu to appear.<br />
Select “Download Popular Instant Messengers (IMs)”. This will start up the Internet<br />
browser <strong>and</strong> go to the web camera website with links to popular instant messengers.<br />
Choose a popular instant messenger to download. You will be linked automatically to the<br />
download website of the instant messenger you chose. Follow the download <strong>and</strong><br />
installation instructions on the screen.<br />
Please note that the web camera is compatible with popular instant messengers available<br />
today including:<br />
• AOL ® Instant Messenger (AIM ® )<br />
• MSN ® Messenger <strong>and</strong> Windows ® Messenger<br />
• Yahoo! ® Messenger<br />
2 Start <strong>Video</strong> <strong>Chat</strong>ting<br />
<strong>Video</strong> <strong>Chat</strong>ting is the easy <strong>and</strong> fun way to talk face-to-face with friends <strong>and</strong> family over<br />
the Internet. In order to video chat you will need to install <strong>and</strong> download an instant<br />
messaging program of your choice (see step 1.4) <strong>and</strong> have your web camera installed (the<br />
receiver of your video message however does not need a web camera to see you). While<br />
© 2005 Smart IT USA. All rights reserved. Page 16 of 28
Tevion <strong>Video</strong> <strong>Chat</strong> <strong>Starter</strong> <strong>Kit</strong> <strong>Quick</strong> <strong>Reference</strong> <strong>and</strong> <strong>Installation</strong> Guide<br />
not all instant messenger programs are identical, they all share the same basic steps in<br />
order to start video chatting.<br />
• Establish Screen Name / ID<br />
• Establish Contact/Buddy List (people you want to <strong>Video</strong> <strong>Chat</strong> with)<br />
• Verify/adjust web camera <strong>and</strong> built-in microphone settings<br />
• Invite someone from your contact/buddy list to a video session/conference (with<br />
the option to chat with text or audio)<br />
• Start <strong>Video</strong> <strong>Chat</strong>ting.<br />
You will find a more detailed step-by-step instruction by selecting the help option from<br />
whichever Instant Messenger program you decide to install. For your reference, below are<br />
some key definitions:<br />
• Screen Name/Passport logon/ ID: The name, which identifies you in the instant<br />
messenger community. Also the name, which your buddies/contacts should add to<br />
their buddy list.<br />
• Buddy List/Contact list: The list of your friends/contacts who also have the instant<br />
messenger program <strong>and</strong> with whom you want to chat<br />
• <strong>Video</strong> Session/ <strong>Video</strong> <strong>Chat</strong>ting: A face-to-face, live video <strong>and</strong> audio communication<br />
using the web camera<br />
3. Using AMCAP software<br />
The AMCAP software is a quick preview tool for your web camera <strong>and</strong> allows you to adjust<br />
camera settings to improve the picture quality. AMCAP also allows you to capture video,<br />
but we recommend you use ArcSoft ® <strong>Video</strong>Impressions ® 2 for this function.<br />
Note: The changes made to the picture in this program will also apply in other<br />
applications using the web cam (such as ArcSoft <strong>Video</strong>Impression ® 2).<br />
To start AMCAP press the snapshot button on the web cam (make sure the camera is not<br />
in-use by any other software programs before doing this).<br />
© 2005 Smart IT USA. All rights reserved. Page 17 of 28
Tevion <strong>Video</strong> <strong>Chat</strong> <strong>Starter</strong> <strong>Kit</strong> <strong>Quick</strong> <strong>Reference</strong> <strong>and</strong> <strong>Installation</strong> Guide<br />
This window may appear if you have more than one program installed that can use the<br />
webcam:<br />
Select AMCap <strong>and</strong> press “OK” to continue to the AMCAP application.<br />
The main preview screen will appear. Be sure that “preview” is checked in the<br />
“options” menu.<br />
© 2005 Smart IT USA. All rights reserved. Page 18 of 28
Tevion <strong>Video</strong> <strong>Chat</strong> <strong>Starter</strong> <strong>Kit</strong> <strong>Quick</strong> <strong>Reference</strong> <strong>and</strong> <strong>Installation</strong> Guide<br />
To change the resolution of the picture go to the “Options” menu, choose “<strong>Video</strong><br />
Capture Pin…”.<br />
In the “Properties” menu it is possible to change the different image options:<br />
Frame Rate: changes how many times the picture is updated per second.<br />
Color Space/Compression: Changes how the camera converts the colors.<br />
(Recommended: RGB 24)<br />
Output size: Defines the actual resolution of the picture in pixels. (Note: if set to 640 x<br />
480, the maximum frame rate will be 17.5)<br />
© 2005 Smart IT USA. All rights reserved. Page 19 of 28
Tevion <strong>Video</strong> <strong>Chat</strong> <strong>Starter</strong> <strong>Kit</strong> <strong>Quick</strong> <strong>Reference</strong> <strong>and</strong> <strong>Installation</strong> Guide<br />
To change the quality <strong>and</strong> colors of the picture, go to the “options” menu <strong>and</strong> select<br />
“<strong>Video</strong> Capture Filter…”.<br />
In this menu it is possible to change a lot of different properties to improve the image<br />
quality:<br />
© 2005 Smart IT USA. All rights reserved. Page 20 of 28
Tevion <strong>Video</strong> <strong>Chat</strong> <strong>Starter</strong> <strong>Kit</strong> <strong>Quick</strong> <strong>Reference</strong> <strong>and</strong> <strong>Installation</strong> Guide<br />
Image control:<br />
Image mirror flip/image vertical flip: Flips the picture horizontal <strong>and</strong> vertical.<br />
Brightness/Contrast/Gamma/Hue/Saturation/Sharpness/Image quality: Adjust<br />
these settings to improve the picture quality to fit the actual conditions.<br />
Auto Mode Control:<br />
(For advanced users only)<br />
Change these settings only if you have a reason to. Otherwise leave the setting in Auto<br />
mode.<br />
In/Out Door:<br />
Changes the light sensitivity of the camera compared to indoor or outdoor conditions.<br />
Flicker:<br />
To avoid a flashing picture this setting should be set to fit the power source in your<br />
region. (In the US 60Hz is used, In Europe 50Hz is used)<br />
Display:<br />
Change this option to fit if you have a flat panel display/laptop (LCD) or if you have a<br />
normal CRT screen.<br />
Backlight comp:<br />
If the light conditions are poor check this option to improve the light in the picture.<br />
Note: The settings changes instantly on the preview screen.<br />
4. Overview of ArcSoft ® Software Suite (<strong>Video</strong>Impression ®<br />
2 <strong>and</strong> PhotoImpression ® 5)<br />
The ArcSoft ® Software Suite is loaded with video <strong>and</strong> picture production <strong>and</strong> editing<br />
applications which will truly enhance your web camera experience. In the following<br />
sections you will find a brief overview of the software. A full brochure can be found on<br />
the installation CD ROM. To access the manuals, select the browse function from the CD-<br />
ROM start-up menu. A window with the contents of the CD will open. Here the manuals<br />
are located.<br />
4.1 ArcSoft PhotoImpression ® 5<br />
ArcSoft PhotoImpression ® 5 is a complete digital image editing application designed<br />
with real people in mind. Easy-to-use “Getting Start” guides, user-friendly interface, <strong>and</strong><br />
complete image editing functionality, give users a wonderful experience in organizing,<br />
viewing, enhancing, editing, printing <strong>and</strong> sharing photos.<br />
© 2005 Smart IT USA. All rights reserved. Page 21 of 28
Tevion <strong>Video</strong> <strong>Chat</strong> <strong>Starter</strong> <strong>Kit</strong> <strong>Quick</strong> <strong>Reference</strong> <strong>and</strong> <strong>Installation</strong> Guide<br />
Click “Start” “Program” “ArcSoft Software Suite“ “PhotoImpression 5” to<br />
launch PhotoImpression ® 5 or double click PhotoImpression 5 icon on the desktop <strong>and</strong><br />
you will see a window as the screenshot above.<br />
Select the picture source. For example: 1. Click “Folder” for acquiring photos from<br />
your computer 2. Select the file path. 3. You can start editing them.<br />
Note:For more detailed information, please refer to the Help of the program<br />
1. Get Photo – Choose how to view or acquire photos.<br />
2. Enhance – Crop, brighten, rotate, resize <strong>and</strong> modify photos.<br />
3. Create – Add clip art, special effects, frames <strong>and</strong> more.<br />
4. Project – Make calendars, photo books <strong>and</strong> greeting cards.<br />
5. Print – Print multiple images per page <strong>and</strong> multiple pages at one time.<br />
6. Send – Email photos or upload them to online photo sharing accounts.<br />
© 2005 Smart IT USA. All rights reserved. Page 22 of 28
Tevion <strong>Video</strong> <strong>Chat</strong> <strong>Starter</strong> <strong>Kit</strong> <strong>Quick</strong> <strong>Reference</strong> <strong>and</strong> <strong>Installation</strong> Guide<br />
4.2 ArcSoft ® <strong>Video</strong>Impression 2<br />
ArcSoft ® <strong>Video</strong>Impression 2 creates home movies <strong>and</strong> slide shows by combining<br />
existing videos, still images, exciting scene transitions, <strong>and</strong> multiple audio tracks. Though<br />
simple to use, the program provides intense <strong>and</strong> broad video editing <strong>and</strong> export options<br />
perfect for owners of digital still cameras, desktop <strong>and</strong> digital video cameras, <strong>and</strong><br />
camcorders.<br />
Click “Start” “Program” “ArcSoft Software Suite“ “<strong>Video</strong>Impression 2” to<br />
launch <strong>Video</strong>Impression ® 2 or double click <strong>Video</strong>Impression 2 icon on the desktop <strong>and</strong><br />
you will see a window as the screenshot above.<br />
Open a Project – Lets you browse the project files in the <strong>Video</strong>Impression 2 ® system<br />
folder. By “project,” we mean to say a file that contains all of the settings <strong>and</strong> each<br />
individual component on the Storyboard. When you save your work as a project, you can<br />
go back <strong>and</strong> swap components, add <strong>and</strong> remove them, alter audio, etc.<br />
Create a <strong>Video</strong> – Create a new video project. You can retrieve media materials from the<br />
device connected or choose media files from system folder. You can choose video<br />
materials from your photo album as well.<br />
Create a Slide Show – Create a slide show project. You can retrieve media materials<br />
from the device connected or choose media files from the system folder. You can choose<br />
slide show materials from your photo album as well.<br />
If the box “Always show this wizard when <strong>Video</strong>Impression starts.” at the bottom<br />
of the wizard is checked, the wizard will appear each time you run the program. If you'd<br />
like to skip the wizard next time, uncheck the box.<br />
Select the item you desire <strong>and</strong> the picture <strong>and</strong> videos you need then you will enter the<br />
editing interface as below.<br />
You can use the six steps in the Function Menu to create video clips <strong>and</strong> slide shows.<br />
© 2005 Smart IT USA. All rights reserved. Page 23 of 28
Tevion <strong>Video</strong> <strong>Chat</strong> <strong>Starter</strong> <strong>Kit</strong> <strong>Quick</strong> <strong>Reference</strong> <strong>and</strong> <strong>Installation</strong> Guide<br />
1. Media - Select the videos <strong>and</strong> images that will comprise your final movie or slide show.<br />
2. Edit - Modify video <strong>and</strong> image color <strong>and</strong> adjust the duration of each movie component.<br />
Only available for video projects.<br />
3. Effects - Add neat special effect transitions between each component, or apply a premade<br />
theme.<br />
4. Text - Place animated text on any movie component. Only available for video projects.<br />
5. Narrate - Record audio directly from the program <strong>and</strong> add it to your movie.<br />
6. Produce - Combine all components to create your final video; save it in a variety of<br />
ways or email it to friends.<br />
The Storyboard - The backbone of the creation process, it's where you assemble your<br />
movie.<br />
The Player - Preview <strong>and</strong> modify your movies in this area.<br />
Working with Albums - Albums let you organize your media for easy access.<br />
Note: For more detailed information, please refer to the Help of the program or in the<br />
instruction guides found on the CD-ROM.<br />
4.3 Making your first video<br />
This section is designed to walk you through the simple steps required to practice<br />
recording a video with your web camera using ArcSoft <strong>Video</strong>Impression ® 2. A more<br />
general overview of the software can be found in section 4.2 <strong>and</strong> a full user guide can be<br />
found on the CD-ROM.<br />
To record a video, start the video recording/editing program called <strong>Video</strong>Impression ® 2.<br />
This program is made for recording video from your camera <strong>and</strong> for editing <strong>and</strong> or<br />
emailing the video afterwards.<br />
The following screen is the start-up menu. Here you can choose 3 options: 1) To open an<br />
existing project (video), 2) To record a new video, or 3) to transform still images into a<br />
slide show video.<br />
© 2005 Smart IT USA. All rights reserved. Page 24 of 28
Tevion <strong>Video</strong> <strong>Chat</strong> <strong>Starter</strong> <strong>Kit</strong> <strong>Quick</strong> <strong>Reference</strong> <strong>and</strong> <strong>Installation</strong> Guide<br />
For your first recording choose option no. 2.<br />
Choose “capture from device”.<br />
Press the record button<br />
to start recording from your web camera.<br />
The program now asks where to save the recorded file. Specify the filename in the first<br />
box <strong>and</strong> click on the folder icon to specify the location where the file will be saved.<br />
© 2005 Smart IT USA. All rights reserved. Page 25 of 28
Tevion <strong>Video</strong> <strong>Chat</strong> <strong>Starter</strong> <strong>Kit</strong> <strong>Quick</strong> <strong>Reference</strong> <strong>and</strong> <strong>Installation</strong> Guide<br />
Then press the button “Start Capturing”<br />
To stop the recording, press the stop button<br />
The recording is now shown on the clipboard in the main program. Press the recording<br />
button once more to make another recording or press done to start editing your video.<br />
If you only see the main screen press the camcorder button to open the recording<br />
window again.<br />
4.4 E-mailing a video<br />
When you have recorded a video, you can easily e-mail it to your friends.<br />
To e-mail a video go to Arcsoft © <strong>Video</strong> Impression 2 <strong>and</strong> record a video as described in<br />
section 3a.<br />
When the video is recorded go to the menu point called “6 Produce” .<br />
Select Email.<br />
To select the file format, select WMV (ASF)<br />
Choose the preferred quality from the “compression” drop down box. Recommended is<br />
128 kbps (video for email).<br />
Email program: select MAPI.<br />
© 2005 Smart IT USA. All rights reserved. Page 26 of 28
Tevion <strong>Video</strong> <strong>Chat</strong> <strong>Starter</strong> <strong>Kit</strong> <strong>Quick</strong> <strong>Reference</strong> <strong>and</strong> <strong>Installation</strong> Guide<br />
Then press “SEND”<br />
Select where to save the file <strong>and</strong> press “Save”<br />
To email the video, go to your email program. Open a new draft <strong>and</strong> choose attach file.<br />
Then locate the file you just saved <strong>and</strong> send the mail.<br />
© 2005 Smart IT USA. All rights reserved. Page 27 of 28
Tevion <strong>Video</strong> <strong>Chat</strong> <strong>Starter</strong> <strong>Kit</strong> <strong>Quick</strong> <strong>Reference</strong> <strong>and</strong> <strong>Installation</strong> Guide<br />
The MSN® Messenger <strong>and</strong> Windows® Messenger trademarks are the property of Microsoft Corporation.<br />
The Yahoo!® Messenger trademark is the property of Yahoo! Inc.<br />
The AIM® <strong>and</strong> AOL® Instant Messenger TM trademarks are the property of America Online, Inc.<br />
The <strong>Video</strong>Impressions® 2, PhotoImpressions® 5 <strong>and</strong> ArcSoft® trademarks are the property of ArcSoft Inc.<br />
The Tevion trademark is the property of Aldi, Inc.<br />
Microsoft Corp., Yahoo!, Inc. <strong>and</strong> America Online, Inc. have not tested, do not sponsor or endorse, <strong>and</strong> are<br />
not affiliated with the Tevion <strong>Video</strong> <strong>Chat</strong> <strong>Starter</strong> <strong>Kit</strong>.<br />
This device complies with part 15 of the FCC Rules. Operation is<br />
subject to the following two conditions: (1) This device may not cause<br />
harmful interference, <strong>and</strong> (2) this device must accept any interference<br />
received, including interference that may cause undesired operation.<br />
© 2005 Smart IT USA. All rights reserved. Page 28 of 28