TX-DS787 - Onkyo
TX-DS787 - Onkyo
TX-DS787 - Onkyo

You also want an ePaper? Increase the reach of your titles
YUMPU automatically turns print PDFs into web optimized ePapers that Google loves.
Contents<br />
AV Receiver<br />
Before using 2<br />
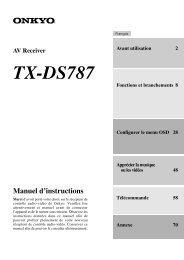
<strong>TX</strong>-<strong>DS787</strong><br />
Instruction Manual<br />
Facilities and connections 8<br />
Setting OSD menu 28<br />
Thank you for purchasing the <strong>Onkyo</strong> AV Receiver.<br />
Please read this manual thoroughly before making<br />
connections and plugging in the unit. Following the<br />
instructions in this manual will enable you to obtain<br />
optimum performance and listening enjoyment from<br />
your new AV Receiver. Please retain this manual for<br />
future reference.<br />
Enjoying music or videos 48<br />
Remote controller 58<br />
Appendix 70
WARNING:<br />
TO REDUCE THE RISK OF FIRE OR ELECTRIC SHOCK,<br />
DO NOT EXPOSE THIS APPLIANCE TO RAIN OR<br />
MOISTURE.<br />
CAUTION:<br />
TO REDUCE THE RISK OF ELECTRIC SHOCK, DO NOT<br />
REMOVE COVER (OR BACK). NO USER-SERVICEABLE<br />
PARTS INSIDE. REFER SERVICING TO QUALIFIED<br />
SERVICE PERSONNEL.<br />
WARNING<br />
RISK OF ELECTRIC SHOCK<br />
DO NOT OPEN<br />
AVIS<br />
RISQUE DE CHOC ELECTRIQUE<br />
NE PAS OUVRIR<br />
The lightning flash with arrowhead symbol, within an equilateral<br />
triangle, is intended to alert the user to the presence of uninsulated<br />
“dangerous voltage” within the product’s enclosure that may be of<br />
sufficient magnitude to constitute a risk of electric shock to persons.<br />
The exclamation point within an equilateral triangle is intended to<br />
alert the user to the presence of important operating and maintenance<br />
(servicing) instructions in the literature accompanying the appliance.<br />
2<br />
Important Safeguards<br />
1. Read Instructions – All the safety and operating instructions<br />
should be read before the appliance is operated.<br />
2. Retain Instructions – The safety and operating instructions<br />
should be retained for future reference.<br />
3. Heed Warnings – All warnings on the appliance and in the<br />
operating instructions should be adhered to.<br />
4. Follow Instructions – All operating and use instructions<br />
should be followed.<br />
5. Cleaning – Unplug the appliance from the wall outlet before<br />
cleaning. The appliance should be cleaned only as recommended<br />
by the manufacturer.<br />
6. Attachments – Do not use attachments not recommended by<br />
the appliance manufacturer as they may cause hazards.<br />
7. Water and Moisture – Do not use the appliance near water –for<br />
example, near a bath tub, wash bowl, kitchen sink, or laundry<br />
tub; in a wet basement; or near a swimming pool; and the like.<br />
8. Accessories – Do not place the appliance on an unstable cart,<br />
stand, tripod, bracket, or table. The appliance may fall, causing<br />
serious injury to a child or adult, and serious damage to the<br />
appliance. Use only with a cart, stand, tripod, bracket, or table<br />
recommended by the manufacturer, or sold with the appliance.<br />
Any mounting of the appliance<br />
should follow the manufacturer’s<br />
instructions, and should use a<br />
mounting accessory recommended<br />
by the manufacturer.<br />
9. An appliance and cart combination<br />
should be moved with care.<br />
Quick stops, excessive force, and<br />
uneven surfaces may cause the<br />
appliance and cart combination<br />
to overturn.<br />
10. Ventilation – Slots and openings<br />
PORTABLE CART WARNING<br />
S3125A<br />
in the cabinet are provided for ventilation and to ensure reliable<br />
operation of the appliance and to protect it from overheating,<br />
and these openings must not be blocked or covered. The<br />
openings should never be blocked by placing the appliance on<br />
a bed, sofa, rug, or other similar surface. The appliance should<br />
not be placed in a built-in installation such as a bookcase or<br />
rack unless proper ventilation is provided. There should be<br />
free space of at least 20 cm (8 in.) and an opening behind the<br />
appliance.<br />
11. Power Sources – The appliance should be operated only from<br />
the type of power source indicated on the marking label. If you<br />
are not sure of the type of power supply to your home, consult<br />
your appliance dealer or local power company.<br />
12. Grounding or Polarization – The appliance may be equipped<br />
with a polarized alternating current line plug (a plug having<br />
one blade wider than the other). This plug will fit into the<br />
power outlet only one way. This is a safety feature. If you are<br />
unable to insert the plug fully into the outlet, try reversing the<br />
plug. If the plug should still fail to fit, contact your electrician<br />
to replace your obsolete outlet. Do not defeat the safety purpose<br />
of the polarized plug.<br />
13. Power-Cord Protection – Power-supply cords should be<br />
routed so that they are not likely to be walked on or pinched by<br />
items placed upon or against them, paying particular attention<br />
to cords at plugs, convenience receptacles, and the point where<br />
they exit from the appliance.<br />
14. Outdoor Antenna Grounding – If an outside antenna or<br />
cable system is connected to the appliance, be sure the antenna<br />
or cable system is grounded so as to provide some protection<br />
against voltage surges and built-up static charges. Article 810<br />
of the National Electrical Code, ANSI/NFPA 70, provides information<br />
with regard to proper grounding of the mast and<br />
supporting structure, grounding of the lead-in wire to an antenna-discharge<br />
unit, size of grounding conductors, location of<br />
antenna-discharge unit, connection to grounding electrodes,<br />
and requirements for the grounding electrode. See Figure 1.<br />
15. Lightning – For added protection for the appliance during a<br />
lightning storm, or when it is left unattended and unused for<br />
long periods of time, unplug it from the wall outlet and disconnect<br />
the antenna or cable system. This will prevent damage to<br />
the appliance due to lightning and power-line surges.<br />
16. Power Lines – An outside antenna system should not be located<br />
in the vicinity of overhead power lines or other electric<br />
light or power circuits, or where it can fall into such power<br />
lines or circuits. When installing an outside antenna system,<br />
extreme care should be taken to keep from touching such<br />
power lines or circuits as contact with them might be fatal.<br />
17. Overloading – Do not overload wall outlets, extension cords,<br />
or integral convenience receptacles as this can result in a risk<br />
of fire or electric shock.<br />
18. Object and Liquid Entry – Never push objects of any kind<br />
into the appliance through openings as they may touch dangerous<br />
voltage points or short-out parts that could result in a fire<br />
or electric shock. Never spill liquid of any kind on the appliance.<br />
19. Servicing – Do not attempt to service the appliance yourself as<br />
opening or removing covers may expose you to dangerous<br />
voltage or other hazards. Refer all servicing to qualified service<br />
personnel.<br />
20. Damage Requiring Service – Unplug the appliance form the<br />
wall outlet and refer servicing to qualified service personnel<br />
under the following conditions:<br />
A. When the power-supply cord or plug is damaged,<br />
B. If liquid has been spilled, or objects have fallen into the<br />
appliance,<br />
C. If the appliance has been exposed to rain or water,<br />
D. If the appliance does not operate normally by following<br />
the operating instructions. Adjust only those controls that<br />
are covered by the operating instructions as an improper<br />
adjustment of other controls may result in damage and will<br />
often require extensive work by a qualified technician to<br />
restore the appliance to its normal operation,<br />
E. If the appliance has been dropped or damaged in any way,<br />
and<br />
F. When the appliance exhibits a distinct change in performance<br />
– this indicates a need for service.
21. Replacement Parts – When replacement parts are required,<br />
be sure the service technician has used replacement parts<br />
specified by the manufacturer or have the same characteristics<br />
as the original part. Unauthorized substitutions may result in<br />
fire, electric shock, or other hazards.<br />
22. Safety Check – Upon completion of any service or repairs to the<br />
appliance, ask the service technician to perform safety checks to<br />
determine that the appliance is in proper operation condition.<br />
23. Wall or Ceiling Mounting – The appliance should be mounted<br />
to a wall or ceiling only as recommended by the manufacturer.<br />
24. Heat – The appliance should be situated away from heat<br />
sources such as radiators, heat registers, stoves, or other appliances<br />
(including amplifiers) that produce heat.<br />
Precautions<br />
1. Warranty Claim<br />
You can find the serial number on the rear panel of this unit. In<br />
case of warranty claim, please report this number.<br />
2. Recording Copyright<br />
Recording of copyrighted material for other than personal use is<br />
illegal without permission of the copyright holder.<br />
3. AC Fuse<br />
The fuse is located inside the chassis and is not user-serviceable. If<br />
power does not come on, contact your <strong>Onkyo</strong> authorized service station.<br />
4. Care<br />
From time to time you should wipe the front and rear panels and<br />
the cabinet with a soft cloth. For heavier dirt, dampen a soft cloth<br />
in a weak solution of mild detergent and water, wring it out dry,<br />
and wipe off the dirt. Following this, dry immediately with a clean<br />
cloth. Do not use rough material, thinners, alcohol or other chemical<br />
solvents or cloths since these could damage the finish or remove<br />
the panel lettering.<br />
5. Power<br />
WARNING<br />
BEFORE PLUGGING IN THE UNIT FOR THE FIRST TIME,<br />
READ THE FOLLOWING SECTION CAREFULLY.<br />
The voltage of the available power supply differs according to<br />
country or region. Be sure that the power supply voltage of the<br />
area where this unit will be used meets the required voltage (e.g.,<br />
AC 230 V, 50 Hz or AC 120 V, 60 Hz) written on the rear panel.<br />
Worldwide models are equipped with a voltage selector to conform<br />
to local power supplies. Be sure to set this switch to match<br />
the voltage of the power supply in your area before plugging in the<br />
unit.<br />
For British models<br />
Replacement and mounting of an AC plug on the power supply cord<br />
of this unit should be performed only by qualified service personnel.<br />
IMPORTANT<br />
The wires in the mains lead are coloured in accordance with the<br />
following code:<br />
Blue : Neutral<br />
Brown : Live<br />
As the colours of the wires in the mains lead of this apparatus may<br />
not correspond with the coloured markings identifying the terminals<br />
in your plug, proceed as follows:<br />
The wire which is coloured blue must be connected to the terminal<br />
which is marked with the letter N or coloured black.<br />
The wire which is coloured brown must be connected to the terminal<br />
which is marked with the letter L or coloured red.<br />
IMPORTANT<br />
A 5 ampere fuse is fitted in this plug. Should the fuse need to be<br />
replaced, please ensure that the replacement fuse has a rating of 5<br />
amperes and that it is approved by ASTA or BSI to BS1362. Check<br />
for the ASTA mark or the BSI mark on the body of the fuse.<br />
IF THE FITTED MOULDED PLUG IS UNSUITABLE FOR<br />
THE SOCKET OUTLET IN YOUR HOME THEN THE FUSE<br />
SHOULD BE REMOVED AND THE PLUG CUT OFF AND<br />
DISPOSED OF SAFELY. THERE IS A DANGER OF SEVERE<br />
ELECTRICAL SHOCK IF THE CUT OFF PLUG IS INSERTED<br />
INTO ANY 13 AMPERE SOCKET.<br />
If in any doubt, consult a qualified electrician.<br />
FIGURE 1:<br />
EXAMPLE OF ANTENNA GROUNDING AS PER NATIONAL<br />
ELECTRICAL CODE, ANSI/NFPA 70<br />
ELECTRIC<br />
SERVICE<br />
EQUIPMENT<br />
NEC – NATIONAL ELECTRICAL CODE<br />
S2898A<br />
GROUND<br />
CLAMP<br />
ANTENNA<br />
LEAD IN<br />
WIRE<br />
ANTENNA<br />
DISCHARGE UNIT<br />
(NEC SECTION 810-20)<br />
GROUNDING CONDUCTORS<br />
(NEC SECTION 810-21)<br />
GROUND CLAMPS<br />
POWER SERVICE GROUNDING<br />
ELECTRODE SYSTEM<br />
(NEC ART 250, PART H)<br />
For U.S. models<br />
Note to CATV system installer:<br />
This reminder is provided to call the CATV system installer’s attention<br />
to Article 820-40 of the NEC, ANSI/NFPA 70, which provides<br />
guidelines for proper grounding and, in particular, specifies<br />
that the cable ground shall be connected to the grounding system<br />
of the building, as close to the point of cable entry as practical.<br />
FCC Information for User<br />
CAUTION:<br />
The user changes or modifications not expressly approved by the<br />
party responsible for compliance could void the user’s authority to<br />
operate the equipment.<br />
NOTE:<br />
This equipment has been tested and found to comply with the limits<br />
for a Class B digital device, pursuant to Part 15 of the FCC<br />
Rules. These limits are designed to provide reasonable protection<br />
against harmful interference in a residential installation. This<br />
equipment generates, uses and can radiate radio frequency energy<br />
and, if not installed and used in accordance with the instructions,<br />
may cause harmful interference to radio communications. However,<br />
there is no guarantee that interference will not occur in a particular<br />
installation. If this equipment does cause harmful interference<br />
to radio or television reception, which can be determined by<br />
turning the equipment off and on, the user is encouraged to try to<br />
correct the interference by one or more of the following measures:<br />
• Reorient or relocate the receiving antenna.<br />
• Increase the separation between the equipment and receiver.<br />
• Connect the equipment into an outlet on a circuit different<br />
from that to which the receiver is connected.<br />
• Consult the dealer or an experienced radio/TV technician for<br />
help.<br />
For Canadian models<br />
NOTE:<br />
THIS CLASS B DIGITAL APPARATUS COMPLIES WITH<br />
CANADIAN ICES-003.<br />
For models having a power cord with a polarized plug:<br />
CAUTION: TO PREVENT ELECTRIC SHOCK, MATCH<br />
WIDE BLADE OF PLUG TO WIDE SLOT, FULLY INSERT.<br />
Modele pour les Canadien<br />
REMARQUE:<br />
CET APPAREIL NUMÉRIQUE DE LA CLASSE B EST CON-<br />
FORME À LA NORME NMB-003 DU CANADA.<br />
Sur les modèles dont la fiche est polarisée:<br />
ATTENTION: POUR ÉVITER LES CHOCS<br />
ÉLECTRIQUES, INTRODUIRE LA LAME LA PLUS LARGE<br />
DE LA FICHE DANS LA BORNE CORRESPONDANTE DE<br />
LA PRISE ET POUSSER JUSQU’AU FOND.<br />
3
4<br />
Contents<br />
Before using<br />
Important Safeguards......................................... 2<br />
Precautions ......................................................... 3<br />
Contents .............................................................. 4<br />
Supplied accessories ......................................... 5<br />
Features ............................................................... 6<br />
Before using this unit ......................................... 7<br />
Setting the AM tuning step frequency ............................. 7<br />
Setting the Voltage selector .............................................. 7<br />
Installing the remote controller batteries ......................... 7<br />
Using the remote controller.............................................. 7<br />
Facilities and connections<br />
Front panel facilities ........................................... 8<br />
Front panel ........................................................................ 9<br />
Front panel display ......................................................... 10<br />
Remote controller ............................................. 11<br />
Rear panel facilities .......................................... 12<br />
Example of how to connect your equipment .... 16<br />
Standard connections...................................................... 17<br />
Connecting your audio components .............................. 18<br />
Connecting your video components .............................. 18<br />
Connecting speakers ....................................... 20<br />
Ideal speaker configuration ............................................ 20<br />
Minimum speaker configuration for<br />
surround sound playback ........................................ 20<br />
Speaker placement .......................................................... 20<br />
Connecting speakers ....................................................... 21<br />
Connecting the speaker cable ......................................... 21<br />
Connecting a subwoofer ................................................. 21<br />
Connecting antennas ....................................... 22<br />
Assembling the AM loop antenna .................................. 22<br />
Connecting the AM antenna cable ................................. 22<br />
Connecting the included antennas ................................. 22<br />
Connecting an FM outdoor antenna ............................... 23<br />
Connecting an AM outdoor antenna .............................. 23<br />
Directional linkage ......................................................... 23<br />
Connecting the antenna cable to the 75/300 Ω<br />
antenna adapter ....................................................... 23<br />
Connecting to the remote zone input ............. 24<br />
Connecting the main and remote zones ......................... 24<br />
Connecting to the IR IN MAIN input ................ 25<br />
Connecting power amplifiers and<br />
two surround back speakers ...................... 26<br />
Connecting power amplifiers ......................................... 26<br />
Connecting two surround back speakers ....................... 26<br />
Connecting the power ...................................... 27<br />
Connecting the power ..................................................... 27<br />
Setting OSD menu<br />
The On-Screen Display (OSD) menu .............. 28<br />
Navigating through the OSD menu ................................ 29<br />
Speaker Setup ................................................... 30<br />
1. Speaker Setup menu ................................................... 30<br />
1-1. Speaker Config sub-menu....................................... 30<br />
1-2. Speaker Distance sub-menu .................................... 31<br />
1-3. Level Calibration sub-menu ................................... 32<br />
1-4. Bass Peak Level sub-menu ..................................... 33<br />
Input Setup ........................................................ 34<br />
2. Input Setup menu ....................................................... 34<br />
2-1. Audio Setup sub-menu ............................................ 34<br />
2-2. Video Setup sub-menu ............................................ 36<br />
2-3. Listening Mode Preset sub-menu ........................... 37<br />
Input source signals ................................................ 37<br />
Listening modes ...................................................... 38<br />
2-4. Tone Control sub-menu .......................................... 40<br />
2-5. IntelliVolume sub-menu......................................... 40<br />
2-6. 12V Trigger sub-menu ............................................ 40<br />
Listening Mode Setup ...................................... 41<br />
3. Listening Mode Setup menu ...................................... 41<br />
Description listening mode parameters .................. 43<br />
Preference ......................................................... 45<br />
4. Preference menu ......................................................... 45<br />
4-1. Volume Setup sub-menu ......................................... 45<br />
4-2. Headphones Level sub-menu .................................. 45<br />
4-3. DTS LFE Level Setup sub-menu ............................ 45<br />
OSD Setup ......................................................... 46<br />
5. OSD Setup menu ........................................................ 46<br />
5-1. OSD Config sub-menu ............................................ 46<br />
5-2. OSD Setup sub-menu.............................................. 47<br />
5-3. OSD Position sub-menu ......................................... 47<br />
Enjoying music or videos<br />
Enjoying music in the remote zone ................. 48<br />
Controlling the <strong>TX</strong>-<strong>DS787</strong> from the remote zone ......... 48<br />
Adjusting the volume for the remote zone<br />
at the <strong>TX</strong>-<strong>DS787</strong> ..................................................... 48<br />
Controlling the <strong>TX</strong>-<strong>DS787</strong> without the remote controller .. 48<br />
Listening to Radio Broadcasts ........................ 49<br />
Listening to FM/AM Radio Stations ............................. 49<br />
Tuning into a radio station ............................................. 49<br />
Presetting a radio station ................................................ 50<br />
Selecting a preset radio station ...................................... 50<br />
Erasing a preset radio station ......................................... 50
Contents<br />
Listening to RDS broadcasts .......................... 51<br />
Listening to RDS broadcasts .......................................... 51<br />
PTY program types in Europe ....................................... 51<br />
Displaying Radio Text (RT) ........................................... 52<br />
Performing a PTY scan .................................................. 52<br />
Performing a TP scan ..................................................... 52<br />
Enjoying music or videos with the <strong>TX</strong>-<strong>DS787</strong> ... 53<br />
Selecting an input source ............................................... 53<br />
Adjusting the volume ..................................................... 53<br />
Changing the listening mode.......................................... 53<br />
Listening with headphones ............................................. 53<br />
Using the many features of the <strong>TX</strong>-<strong>DS787</strong> ................... 54<br />
If one of the messages shown below appears ................ 54<br />
Enjoying the multichannel output .................................. 54<br />
Recording a source .......................................... 55<br />
To record the input source signal you are currently<br />
watching or listening to .......................................... 55<br />
To record an input source signal different from that you are<br />
currently watching or listening to ............................... 56<br />
Recording the video from one source and the audio from<br />
another ..................................................................... 56<br />
Giving a name to each input source<br />
and preset radio station .............................. 57<br />
Giving a name to each input source ............................... 57<br />
To change a name ........................................................... 57<br />
To erase a name .............................................................. 57<br />
Giving a name to each preset radio station .................... 57<br />
Remote controller<br />
Using remote controller ................................... 58<br />
Overview ......................................................................... 58<br />
Using the remote controller to control each device ....... 58<br />
Controlling the <strong>TX</strong>-<strong>DS787</strong> ............................................. 58<br />
Controlling an <strong>Onkyo</strong> CD player ................................... 60<br />
Controlling an <strong>Onkyo</strong> MD recorder ............................... 60<br />
Controlling an <strong>Onkyo</strong> cassette tape deck....................... 61<br />
Calling up a preset radio station .................................... 61<br />
Controlling an <strong>Onkyo</strong> DVD player ................................ 62<br />
SAT, CABLE, VCR, and TV MODE buttons ................ 62<br />
Programming the commands of remote<br />
controllers for other devices into the<br />
remote controller ......................................... 63<br />
Programming procedure ................................................. 63<br />
Erasing the programmed command from one button .... 65<br />
Erasing all the commands programmed under a MODE button .. 65<br />
Using a Macro function .................................... 66<br />
What is a Macro function? ............................................. 66<br />
Programming a Macro function ..................................... 66<br />
Running a Macro function ............................................. 66<br />
Programming the Direct Macro function ....................... 67<br />
Running a Direct Macro function .................................. 67<br />
Erasing a macro from the MODE MACRO button ....... 68<br />
Erasing a direct macro from the DIRECT MACRO button ...... 68<br />
Erasing all commands and macros that have been<br />
programmed ............................................................ 69<br />
(Macro mode programming memo ............................... 69)<br />
Appendix<br />
Troubleshooting guide ..................................... 70<br />
POWER .......................................................................... 70<br />
SPEAKERS .................................................................... 70<br />
FM/AM TUNER ............................................................. 71<br />
VIDEO and AUDIO ....................................................... 71<br />
REMOTE CONTROLLER ............................................ 72<br />
OTHER ........................................................................... 72<br />
Specifications ................................................... 73<br />
Supplied accessories<br />
Check that the following accessories are supplied with the <strong>TX</strong>-<strong>DS787</strong>.<br />
AM loop antenna × 1 FM indoor antenna × 1<br />
(connector will vary depending<br />
on model specifications)<br />
Declaration of Conformity<br />
We, ONKYO EUROPE<br />
ELECTRONICS GmbH<br />
INDUSTRIESTRASSE 20<br />
82110 GERMERING,<br />
GERMANY<br />
declare in own responsibility, that the ONKYO product described<br />
in this instruction manual is in compliance with the corresponding<br />
technical standards such as EN60065, EN55013, EN55020 and<br />
EN61000-3-2, -3-3 (or EN60555-2, -3)<br />
GERMERING, GERMANY<br />
RC-390M<br />
Remote controller × 1<br />
Batteries (AA, R6 or UM-3) × 2<br />
75/300 Ω antenna adapter × 1<br />
(For all models other than USA,<br />
Canadian and European models)<br />
A.HORIUCHI<br />
ONKYO EUROPE ELECTRONICS GmbH<br />
5
Features<br />
■ THX Surround EX ®<br />
■ THX ® Select Certified<br />
■ Dolby ® Digital, DTS ® , Dolby ® Pro Logic TM<br />
■ Theater-Dimensional TM Virtual Surround Mode<br />
■ Cinema Re-EQ TM Circuitry<br />
■ 100 W×2 (Front), 100 W (Center), 100 W×2<br />
(Surround), 100 W (Surround Back) at 8 Ω,<br />
20Hz-20kHz, 0.08% THD (FTC)<br />
■ 135 W×2 (Front), 135 W (Center), 135 W×2<br />
(Surround), 135 W (Surround Back) at 6 Ω (DIN)<br />
■ 160 W×2 (Front), 160 W(Center), 160 W×2<br />
(Surround), 160 W (Surround Back) at 6 Ω<br />
(EIAJ)<br />
■ Wide Range Amplifier Technology (WRAT)<br />
■ All Discrete Output Stage<br />
■ 96kHz/24Bit D/A Converters<br />
■ 4 Digital Inputs (2 Coaxial and 2 Optical) and 1<br />
Digital Output (Optical)<br />
■ 3 Audio Inputs and 5 A/V Inputs<br />
■ 5 S-Video Inputs and 3 S-Video Outputs<br />
■ 2 Component Video Inputs and 1 Component<br />
Video Output<br />
■ Pre Out Terminals for Front L/R, Center,<br />
Surround L/R, Surround back L/R and<br />
Subwoofer<br />
■ Heavy-Duty Multiway Speaker Binding Posts for<br />
All Channels; All Dual Banana-Plug Compatible<br />
■ Zone 2 Powered capability<br />
■ Powerful Backlit Learning Remote with Macro<br />
Functions and LCD Display<br />
■ IntelliVolume<br />
■ Character Input<br />
■ RDS (PS, RT, PTY, TP) (European models only)<br />
■ DVD-Audio Capability<br />
* Manufactured under license from Dolby Laboratories.<br />
“Dolby”, “Pro Logic” and the double-D symbol are trademarks of<br />
Dolby Laboratories. Confidential Unpublished Works. ©1992-1997<br />
Dolby Laboratories, Inc. All rights reserved.<br />
• “Theater-Dimensional” and are trademarks of <strong>Onkyo</strong><br />
Corporation.<br />
• Lucasfilm and THX are trademarks of Lucasfilm Ltd. All rights<br />
reserved. Surround EX is a trademark of Dolby Laboratories. Used<br />
under authorization.<br />
• Re-Equalization and the “Re-EQ” logo are trademarks of Lucasfilm<br />
Ltd. Manufactured under license of Lucasfilm Ltd.<br />
• Manufactured under license from Digital Theater Systems, Inc. US<br />
Pat. No.5,451,942 and other worldwide patents issues and pending.<br />
“DTS” and “DTS Digital Surround” are trademarks of Digital Theater<br />
Systems, Inc.© 1996 Digital Theater Systems, Inc. All rights<br />
reserved.<br />
• Xantech is a registered trademark of Xantech Corporation.<br />
• Niles is a registered trademark of Niles Audio Corporation.<br />
THX Select<br />
Before any home theatre component can be THX Select<br />
certified, it must pass a rigorous series of quality and<br />
performance tests. Only then can a product feature the THX<br />
Select logo, which is your guarantee that the Home Theatre<br />
products you purchase will give you superb performance for<br />
many years to come. THX Select requirements define<br />
hundreds of parameters, including power amplifier<br />
performance, and pre-amplifier performance and operation<br />
for both digital and analog domains. THX Select receivers<br />
also feature proprietary THX technologies (e.g., THX Mode,<br />
see page 38) which accurately translate film soundtracks for<br />
home theater playback.<br />
6
DIGITAL<br />
OUTPUT<br />
(OPTICAL)<br />
1<br />
DIGITAL<br />
INPUT<br />
(OPTICAL)<br />
2<br />
1<br />
DIGITAL<br />
INPUT<br />
(COAXAL)<br />
2<br />
FRONT<br />
SURR<br />
SURR<br />
BACK<br />
R<br />
RC-390M<br />
REMOTE<br />
CONTROL<br />
R<br />
FRONT<br />
SURR<br />
GND<br />
SURR<br />
BACK<br />
SUB<br />
WOOFER<br />
L<br />
OUT<br />
TAPE<br />
(SB)<br />
SUB<br />
WOOFER<br />
PH<br />
CENTER<br />
MULTI CHANNEL<br />
INPUT<br />
IN<br />
CD<br />
R<br />
L<br />
(SB)<br />
CENTER<br />
L<br />
ANTENNA<br />
R<br />
R<br />
IR IN<br />
AM<br />
ZONE 2<br />
L<br />
L<br />
VIDEO<br />
1<br />
V IDEO<br />
2<br />
V IDEO<br />
3<br />
DVD<br />
MAIN<br />
FM<br />
75<br />
VIDEO<br />
AM FREQUENCY STEP<br />
9kHz<br />
VIDEO<br />
OUT<br />
I N<br />
OUT<br />
I N<br />
I N<br />
I N<br />
MON ITOR<br />
OUT<br />
10kHz<br />
S VIDEO<br />
S VIDEO<br />
COMPONENT<br />
VIDEO<br />
Y<br />
INPUT 1<br />
PB<br />
PR<br />
Y<br />
INPUT 2<br />
PB<br />
PR<br />
Y<br />
OUTPUT<br />
PB<br />
PR<br />
AV RECEIVER<br />
SPEAKER<br />
MAIN<br />
ZONE 2<br />
6 OHMS MIN. PER EACH<br />
SPEAKER TERMINAL<br />
AC OUTLETS<br />
SWITCHED<br />
TOTAL 100W MAX.<br />
120V<br />
220-230V<br />
Before using this unit<br />
Setting the AM tuning step frequency<br />
(Worldwide models only)<br />
AM FREQUENCY STEP<br />
9kHz<br />
PRE<br />
OUT<br />
10kHz<br />
MODEL NO. <strong>TX</strong>-DS 787<br />
FRONT<br />
SPEAKERS<br />
SURR<br />
BACK<br />
R<br />
L<br />
CENTER<br />
SPEAKER<br />
Worldwide models are equipped with a switch that controls the<br />
AM band tuning steps. Please set this switch to match the AM<br />
band tuning step frequency in your area.<br />
U.S.A. and Canada : 10 kHz<br />
Other areas : 9 kHz<br />
SURR<br />
SPEAKERS<br />
ZONE 2<br />
SPEAKERS<br />
R<br />
R<br />
CAUTION: SPEAKER IMPEDANCE<br />
L<br />
L<br />
VOLTAGE<br />
SELECTOR<br />
Setting the Voltage selector<br />
(Worldwide models only)<br />
VOLTAGE<br />
SELECTOR<br />
120V<br />
220-230V<br />
Worldwide models are equipped with a voltage selector to conform<br />
with local power supplies. Be sure to set this switch to match the<br />
voltage of the power supply in your area before plugging in the unit.<br />
Determine the proper voltage for your area: 220-230 V or 120 V.<br />
If the preset voltage is not correct for your area, insert a screwdriver<br />
into the groove in the switch. Slide the switch all the way to the upper<br />
(120 V) or to the lower (220-230 V), whichever is appropriate.<br />
Installing the remote controller batteries<br />
1<br />
1. Remove the battery compartment cover by<br />
pressing and sliding the cover.<br />
2. Insert two AA (R6 or UM-3) batteries into the<br />
battery compartment. Carefully follow the<br />
polarity diagram (positive (+) and negative (–)<br />
symbols) inside the battery compartment.<br />
2<br />
3. After batteries are installed and seated<br />
correctly, replace the compartment cover.<br />
3<br />
Notes:<br />
• Do not mix new batteries with old batteries or different kinds<br />
of batteries.<br />
• To avoid corrosion, remove the batteries if the remote<br />
controller is not to be used for a long time.<br />
• Remove dead batteries immediately to avoid damage from<br />
corrosion. If the remote controller does not operate smoothly,<br />
replace both the batteries at the same time.<br />
• The life of the batteries supplied is about six months but this<br />
will vary depending on usage.<br />
Remote control sensor<br />
STANDBY indicator<br />
30˚<br />
30˚<br />
<strong>TX</strong>-<strong>DS787</strong><br />
Approx. 5 meters<br />
Using the remote controller<br />
Point the remote controller toward the remote control sensor. The<br />
STANDBY indicator lights up when the unit receives a signal<br />
from the remote controller.<br />
Notes:<br />
• Place the unit away from strong light such as direct sunlight or<br />
inverted fluorescent light which can prevent proper operation<br />
of the remote controller.<br />
• Using another remote controller of the same type in the same<br />
room or using the unit near equipment which uses infrared rays<br />
may cause operational interference.<br />
• Do not put objects on the remote controller. Its buttons may be<br />
pressed by mistake and drain the batteries.<br />
• Make sure the audio rack doors do not have colored glass.<br />
Placing the unit behind such doors may prevent proper remote<br />
controller operation.<br />
• If there is any obstacle between the remote controller and the<br />
remote control sensor, the remote controller will not operate.<br />
7
Front panel facilities<br />
Here is an explanation of the controls and displays on the front panel of the <strong>TX</strong>-<strong>DS787</strong>.<br />
Front panel<br />
12 3 4 5 See illustration below<br />
6<br />
RT/ PTY/ TP<br />
FM MUTE /<br />
MODE<br />
DOWN<br />
TUNING<br />
UP<br />
CHARACTER / BASS /<br />
MEMORY TREBLE<br />
CH LEVEL<br />
ZONE 2 VOL<br />
MASTER VOLUME<br />
STANDBY/ ON<br />
DSP/ PRESET<br />
STANDBY<br />
ZONE 2<br />
POWER<br />
SMART SCAN<br />
CONTROLLER<br />
ON<br />
OFF<br />
PUSH TO ENTER<br />
REC OUT ZONE 2<br />
DISPLAY<br />
DIRECT<br />
LISTENING MODE<br />
STEREO<br />
/ DTS<br />
THX<br />
MENU<br />
EXIT<br />
SURROUND<br />
PHONES<br />
AUDIO SELECTOR<br />
VIDEO 4 /VIDEO CAM INPUT<br />
DVD VIDEO 1 VIDEO 2 VIDEO 3 VIDEO 4<br />
VCR 1 VCR 2<br />
TAPE<br />
FM AM PHONO C D<br />
S VIDEO<br />
VIDEO<br />
L<br />
AUDIO<br />
R<br />
AV RECEIVER <strong>TX</strong>-<strong>DS787</strong><br />
7<br />
8 9<br />
0<br />
A<br />
DIMMER<br />
<br />
A B C DE<br />
G I<br />
F H<br />
FM MUTE /<br />
CHARACTER / BASS /<br />
RT/ PTY/ TP<br />
MODE DOWN TUNING UP<br />
MEMORY TREBLE CH LEVEL ZONE 2 VOL<br />
DSP/ PRESET<br />
For all models other<br />
than European model<br />
SMART SCAN<br />
CONTROLLER<br />
PUSH TO ENTER<br />
LISTENING MODE<br />
DISPLAY<br />
DIRECT<br />
STEREO<br />
/ DTS<br />
THX<br />
MENU<br />
EXIT<br />
SURROUND<br />
J K M O<br />
L N<br />
Front panel display<br />
12 3 4 5 6<br />
7<br />
SLEEP DOLBY DIGITAL DTS DSP STEREO RDS TUNED<br />
PCM DIGITAL DOLBY PRO LOGIC DIRECT MEMORY FM STEREO AUTO<br />
ft<br />
ch<br />
dB<br />
8<br />
8<br />
9
Front panel facilities<br />
Front panel<br />
POWER switch<br />
Turns on and off the main power supply for the <strong>TX</strong>-<strong>DS787</strong>.<br />
• Before turning on the power, make sure all cables are properly<br />
connected.<br />
• Turning on the <strong>TX</strong>-<strong>DS787</strong> may cause a momentary power<br />
surge that might interfere with other electrical equipment on<br />
the same circuit. If this is a problem, plug the <strong>TX</strong>-<strong>DS787</strong> into a<br />
different electrical circuit.<br />
STANDBY indicator<br />
Lights when the <strong>TX</strong>-<strong>DS787</strong> is in the standby state and flashes<br />
when a signal is received from the remote controller.<br />
STANDBY/ON button<br />
Pressing this button while the main power is turned on the<br />
STANDBY indicator lights up and the front display turns off.<br />
Pressing it again returns it to the standby state. This state turns off<br />
the display, disables control functions.<br />
ZONE 2 indicator<br />
Lights when a signal is output to the remote zone (Zone 2). When<br />
the ZONE 2 indicator is off, then either output to the remote zone<br />
is turned off or Rec Out is selected.<br />
REC OUT/ZONE 2 buttons<br />
These buttons allow you to use the <strong>TX</strong>-<strong>DS787</strong> to output to a<br />
remote zone (Zone 2) or to another component for recording<br />
purposes (Rec Out). Press the REC OUT button to output the audio<br />
and video signals to a recording component for recording<br />
purposes. Press the ZONE 2 button to enjoy the output from the<br />
<strong>TX</strong>-<strong>DS787</strong> in a different room, which is referred to as a remote<br />
zone (Zone 2).<br />
When either button is pressed, the currently selected input source<br />
for recording or outputting to the remote zone is displayed in the<br />
front panel display. If “SOURCE” is displayed, then the same<br />
input source as that selected for the main zone will be output.<br />
To select an input source, press the desired button (REC OUT or<br />
ZONE 2) and then press one of the input source button within 3<br />
seconds. That source will be output for recording or viewing in the<br />
remote zone. To turn off either the REC OUT or ZONE 2 output,<br />
when “SOURCE” is displayed, press the button again. “OFF”<br />
appears in the front display.<br />
Notes:<br />
• The Rec Out and Zone 2 buttons use the same circuit and<br />
therefore cannot be used at the same time. When Rec Out is<br />
selected, nothing is output to Zone 2, and vice versa.<br />
• When not using Rec Out or Zone 2, turn off the signal. If<br />
turned on and the connected component is not turned on, the<br />
electric signal will still be sent through the circuitry and the<br />
excess load may cause deterioration of the audio signal.<br />
PHONES jack<br />
This is a standard stereo jack for connecting stereo headphones.<br />
The audio for the front right and left speakers are sent to the<br />
headphone speakers. When the headphones are plugged in, the<br />
listening mode automatically changes to stereo and output to the<br />
speakers is stopped.<br />
AUDIO SELECTOR button<br />
This button is used to select the type of audio input signal. Each<br />
time pressed, the setting cycles from “AUTO” → “Multichannel”<br />
→ “Analog” and back.<br />
AUTO (automatic detection): With this setting, the <strong>TX</strong>-<strong>DS787</strong><br />
automatically detects whether the input signal is digital or<br />
analog. When a digital signal is not input, then the analog<br />
signal is played.<br />
Multichannel: Select this setting to play back the input from the<br />
component connected to the MULTI CHANNEL INPUT port.<br />
This setting is effective when the Multichannel setting in the<br />
Audio Setup sub-menu is set to “Yes” (see page 35).<br />
Analog: Select this setting to play back the input from a source<br />
component connected to an AUDIO IN jack. With this setting,<br />
even if a digital signal is input from the same component, only<br />
the analog signal will be output.<br />
Input Source Buttons (DVD, VIDEO 1–4,<br />
TAPE, FM, AM, PHONO, and CD)<br />
These buttons are used to select the input source for the main zone.<br />
To select the input source for the remote zone (Zone 2) or<br />
recording out (Rec Out), first press the Zone 2 or Rec Out button,<br />
and then the desired input source button.<br />
VIDEO 4/VIDEO CAM INPUT<br />
These inputs are for connecting video cameras and other such<br />
equipment.<br />
RT/PTY/TP (European models only) button<br />
This button is only available on European models. Use this button<br />
to help tune into the Radio Data System (RDS) for FM<br />
broadcasting. RDS was developed within the European<br />
Broadcasting Union (EBU) and is available in most European<br />
countries. Each time the button is pressed, the display changes<br />
from RT (radio text) to PTY (program type) to TP (traffic<br />
program) and then back to RT again.<br />
DIMMER (other than European models)<br />
button<br />
Press to set the brightness of the front display. There are 3 settings<br />
available: normal, dark, and very dark.<br />
• The dimmer control for the front display can also be performed<br />
at the remote controller.<br />
Front display<br />
MASTER VOLUME dial<br />
The MASTER VOLUME dial is used to control the volume for the<br />
main zone. The volume for the remote zone (Zone 2) is<br />
independent.<br />
9
Front panel facilities<br />
FM MUTE/MODE button<br />
If you are listening to an FM radio station in stereo and the sound<br />
cuts out or there is a great deal of noise, switch from STEREO to<br />
MONO. Each time this button is pressed, the AUTO indication<br />
flashes and the stereo mode changes from AUTO to MONO and<br />
vice versa. This button also turns on and off the FM MUTE.<br />
TUNING UP/DOWN buttons<br />
Use these buttons to change the tuner frequency. The tuner frequency<br />
is displayed in the front display and it can be changed in 50 kHz<br />
increments for FM and 10 kHz (or 9 kHz) increments for AM.<br />
When FM is selected, you can hold down one of the tuning buttons<br />
and then release it to activate the auto-search feature. It will search<br />
for a station in the direction of the button you pressed and stop<br />
when it tunes into one.<br />
CHARACTER/MEMORY button<br />
This button is used to program names to preset radio stations and<br />
input sources, to change names previously programmed, or to<br />
delete names. This button is also used to assign the radio station<br />
that is currently tuned in to a preset channel or delete a previously<br />
preset station.<br />
BASS/TREBLE button<br />
Press to enter the mode for adjusting the bass and treble levels.<br />
CH LEVEL button<br />
Press to select the channel whose level is to be adjusted.<br />
ZONE 2 VOL button<br />
Press to enter the mode for adjusting the volume in the remote<br />
zone (Zone 2).<br />
SMART SCAN CONTROLLER (SSC) dial<br />
Turn clockwise or counterclockwise to select the setting for the parameter<br />
displayed in the front display. Press to move to the next parameter.<br />
DISPLAY button<br />
The DISPLAY button is used to display information about the<br />
current input source signal. Each time you press the display<br />
button, the screen changes to show you different information<br />
concerning the input signal.<br />
When an input source other than FM or AM is selected:<br />
Input or text<br />
name +<br />
volume 1)<br />
Program format 2)<br />
Input +<br />
Listening mode<br />
1) You can program text name for each input source (see page<br />
54). That text name will be displayed at this time.<br />
2) If the input signal does not have a program format, then this<br />
will be skipped.<br />
When FM or AM is selcted as the input source:<br />
Text name or<br />
frequency +<br />
Preset no. 1)<br />
FM/AM frequency +<br />
Preset no. 2)<br />
FM/AM +<br />
Listening mode<br />
1) Not displayed if there is no text name programmed for the preset<br />
channel.<br />
2) If a text name is programmed for the preset channel, display<br />
“2” is displayed for 3 seconds each time the input is changed<br />
from FM to AM or vice versa.<br />
LISTENING MODE buttons<br />
Press these buttons to select a listening mode for the current input source.<br />
DIRECT: Select for direct audio output that does not pass through<br />
sound alteration circuits and other filters.<br />
STEREO: Select for normal stereo output.<br />
j/DTS SURROUND: Select for the Dolby Pro Logic, Dolby<br />
Digital, or DTS listening modes.<br />
THX: Select for the THX listening mode.<br />
Remote control sensor<br />
MENU button<br />
Press to bring up the OSD menu. The OSD menu will appear on<br />
the TV monitor as well as the front display on the <strong>TX</strong>-<strong>DS787</strong>.<br />
and buttons<br />
When selecting items in the OSD Menu, press these buttons to move the<br />
on-screen cursor (or the highlighted portion) upward and downward.<br />
EXIT button<br />
Press to exit the OSD menu when at the Menu Screen, or move to<br />
one screen previous to the one that is displayed if at any other screen.<br />
Front panel display<br />
SLEEP indicator<br />
PCM DIGITAL indicator<br />
Listening mode or digital input format indicator<br />
MEMORY indicator<br />
FM STEREO indicator<br />
Lights when tuned into an FM radio broadcast in stereo.<br />
TUNED indicator<br />
AUTO indicator<br />
Multi function display<br />
ch<br />
ch<br />
10<br />
RDS indicator (European models only)
Remote controller<br />
1<br />
2<br />
3<br />
4<br />
5<br />
6<br />
7<br />
8<br />
9<br />
0<br />
A<br />
B<br />
AUDIO<br />
REC<br />
TRACK<br />
DISC<br />
MUTING<br />
OPEN/CLOSE<br />
E<br />
FE<br />
G<br />
H<br />
J I<br />
L K<br />
EXIT/RETURN button<br />
For entering the selected setting and returning to the previous<br />
screen.<br />
AUDIO button<br />
For selecting the audio input signal. The setting changes from<br />
“AUTO” to “Multichannel” to “Analog” and back each time this<br />
button is pressed.<br />
TRACK button<br />
For selecting a track when playing back a compact disc.<br />
CD/TAPE/DVD/MD operation buttons<br />
For operating <strong>Onkyo</strong> components connected to the <strong>TX</strong>-<strong>DS787</strong>.<br />
INPUT SELECTOR buttons<br />
For selecting the input source. To select Video 4, press the V-<br />
button and then 4 of the numerical keys.<br />
C<br />
D<br />
DVD<br />
T1<br />
T2<br />
TUN<br />
CD<br />
PH<br />
V1 V2 V3 V —<br />
STEREO DIRECT DSP<br />
1 2 3<br />
SURROUND THX DSP<br />
4<br />
Re-EQ<br />
5<br />
CH SEL<br />
6<br />
LEVEL +<br />
7<br />
LATE NIGHT<br />
8<br />
DIMMER<br />
9<br />
LEVEL —<br />
+ 10 0 ENT<br />
HOME THEATER CONTROLLER<br />
RC-390M<br />
M<br />
For a more detailed explanation of how to use the remote<br />
controller, refer to pages 58 through 69.<br />
SEND/LEARN indicator<br />
Lights red when sending a signal.<br />
LCD display<br />
Displays the component being operated or the operation status.<br />
ON/STNBY button<br />
ON: Turns on the <strong>TX</strong>-<strong>DS787</strong>.<br />
STNBY: Places the <strong>TX</strong>-<strong>DS787</strong> in the standby state.<br />
Be aware that pressing the STNBY button only places the <strong>TX</strong>-<br />
<strong>DS787</strong> in standby and does not turn the power completely off.<br />
Numeric key/STEREO/DIRECT/THX/<br />
DSP , /SURROUND/Re-EQ/LATE NIGHT/<br />
CH SEL/LEVEL+,–/DIMMER buttons<br />
For entering the number of a track.<br />
You can also select a listening mode, set the speaker output level,<br />
and adjust the brightness of the front display (DIMMER).<br />
LIGHT button<br />
For illuminating the buttons of the remote controller.<br />
MODE MACRO button<br />
For executing and programming the Macro function.<br />
OSD/MENU button<br />
For displaying the OSD Menu. However, when in the DVD mode,<br />
this button displays the DVD menu.<br />
ENTER/cursor button<br />
When selecting items in the OSD Menu, press the upper and lower<br />
portions to move the on-screen cursor (or highlighted portion)<br />
upward and downward, press the right and left portions to select<br />
parameter values or modes, and press ENTER to display the<br />
screen for the selected item.<br />
VOL button<br />
For adjusting the volume.<br />
SLEEP button<br />
For setting the sleep time.<br />
DIRECT MACRO button<br />
For executing and programming the Direct Macro function.<br />
MODE buttons<br />
For selecting the component to be operated by the remote<br />
controller.<br />
DISPLAY/DVD SET button<br />
For changing the display in the front display. However, when in<br />
the DVD mode, this button displays the DVD setup menu.<br />
CH button<br />
For selecting a tuner preset channel.<br />
TEST/TV/VCR button<br />
For setting the output levels for each speaker. Programs the TV/<br />
VCR switching mode when programming the remote controllers<br />
of other components.<br />
MUTING button<br />
Activates the mute function.<br />
DISC button<br />
For selecting the compact disc for playback when using a CD<br />
changer.<br />
ENT button<br />
For entering setting when operating MD or DVD players.<br />
11
Rear panel facilities<br />
Here is an explanation of the terminals found on the rear of the<br />
<strong>TX</strong>-<strong>DS787</strong> and how they are used. Before connecting your audio<br />
and video components, be sure to read this section carefully and<br />
then proceed to the explanations on how to connect each<br />
individual component (see pages 16).<br />
• Be sure to always refer to the instructions that came with<br />
the component that you are connecting.<br />
• Do not plug in the power cord until all connections have<br />
been made.<br />
• For input jacks, red connectors (marked R) are used for<br />
the right channel, white connectors (marked L) are used<br />
for the left channel, and yellow connectors (marked V) are<br />
used for video connection.<br />
• Insert all plugs and connectors securely. Improper<br />
connections can result in noise, poor performance, or<br />
damage to the equipment.<br />
Improper connection<br />
Inserted completely<br />
• Do not bind audio/video connection cables with power<br />
cords and speaker cables. Doing so may adversely affect<br />
the picture and sound quality.<br />
DIGITAL<br />
OUTPUT<br />
(OPTICAL)<br />
1<br />
DIGITAL<br />
INPUT<br />
(OPTICAL)<br />
2<br />
REMOTE<br />
CONTROL<br />
PRE<br />
R OUT L<br />
FRONT<br />
SURR<br />
ANTENNA AM<br />
IR IN<br />
ZONE 2<br />
R L<br />
FM<br />
75<br />
MAIN<br />
VIDEO<br />
OUT<br />
S VIDEO<br />
COMPONENT<br />
VIDEO<br />
Y<br />
INPUT 1<br />
PB<br />
PR<br />
AV RECEIVER<br />
MODEL NO. <strong>TX</strong>-DS 787<br />
FRONT<br />
SPEAKERS<br />
SURR<br />
BACK<br />
SPEAKER<br />
R<br />
L<br />
CENTER<br />
SPEAKER<br />
1<br />
DIGITAL<br />
INPUT<br />
(COAXIAL)<br />
FRONT<br />
SURR<br />
SURR<br />
BACK<br />
2<br />
R<br />
GND<br />
L<br />
(SB)<br />
SURR<br />
BACK<br />
SUB<br />
WOOFER<br />
OUT<br />
TAPE<br />
IN<br />
CD<br />
(SB)<br />
CENTER<br />
R<br />
L<br />
VIDEO<br />
1<br />
V IDEO<br />
2<br />
V IDEO<br />
3<br />
DVD<br />
I N<br />
OUT<br />
I N<br />
I N<br />
I N<br />
Y<br />
INPUT 2<br />
PB<br />
PR<br />
Y<br />
OUTPUT<br />
PB<br />
SURR<br />
SPEAKERS<br />
ZONE 2<br />
SPEAKERS<br />
R<br />
R<br />
MAIN<br />
ZONE 2<br />
CAUTION:<br />
SPEAKER IMPEDANCE<br />
6 OHMS MIN. PER EACH<br />
SPEAKER TERMINAL<br />
L<br />
L<br />
AC OUTLETS<br />
AC 230-240V 50Hz<br />
SWITCHED<br />
TOTAL 100W MAX.<br />
SUB<br />
WOOFER<br />
PH<br />
PR<br />
MULTI CHANNEL<br />
INPUT<br />
CENTER<br />
R<br />
L<br />
VIDEO<br />
MON ITOR<br />
OUT<br />
S VIDEO<br />
PRE<br />
OUT<br />
L<br />
ANTENNA<br />
12 V<br />
TRIGGER<br />
AM<br />
ZONE 2<br />
MAIN<br />
FM<br />
75<br />
R L VIDEO<br />
IR IN<br />
AM<br />
ONE 2<br />
MAIN<br />
FM<br />
75<br />
AM FREQUENCY STEP<br />
9kHz<br />
VIDEO<br />
10kHz<br />
S VIDEO<br />
COMPONENT<br />
VIDEO<br />
Y<br />
INPUT<br />
PB<br />
AC OUTLETS<br />
SWITCHED<br />
TOTAL 100W MAX.<br />
VOLTAGE<br />
SELECTOR<br />
120V<br />
220-230V<br />
OU<br />
OUT<br />
PR<br />
For USA models only<br />
For worldwide models only<br />
For worldwide models only<br />
12
Rear panel facilities<br />
DIGITAL INPUT/OUTPUT<br />
(coaxial and optical)<br />
These are the digital audio inputs and outputs. There are 2 digital<br />
inputs with coaxial jacks and 2 with optical jacks. The inputs<br />
accept digital audio signals from a compact disc, LD, DVD, or<br />
other digital source component. For digital output, there is 1<br />
optical output. The digital outputs can be connected to MD<br />
recorders, CD recorders, DAT decks, or other similar components.<br />
• When using the digital inputs and outputs, make sure to also<br />
connect the analog connections whenever possible.<br />
• When using one of the optical input or output jacks, remove<br />
the protective cap and keep it safely. When the jack is not used,<br />
replace the protective cap.<br />
• When using an optical input or output jack, always use an<br />
optical fiber cable.<br />
REMOTE<br />
CONTROL<br />
z connector<br />
<strong>TX</strong>-<strong>DS787</strong><br />
Ex: <strong>Onkyo</strong> CD player<br />
z connector<br />
Ex: <strong>Onkyo</strong> cassette tape deck<br />
COAXIAL<br />
Coaxial cable<br />
OPTICAL<br />
Optical fiber cable<br />
PRE OUT<br />
These jacks are for connecting auxiliary power amplifier.<br />
Optical digital input terminal<br />
An optical digital input terminal is<br />
equipped with a protection cap. When<br />
connecting, remove this cap. When not<br />
using, put the cap back on the terminal.<br />
GND<br />
Use this GND terminal for connecting the ground (or earth) wire if<br />
a turntable is connected. Refer to “Connecting a turntable” on page<br />
18.<br />
z (RI)<br />
By connecting the z connector as shown in the diagram below,<br />
you can use the RC-390M remote controller to operate <strong>Onkyo</strong><br />
cassette tape decks and compact disc players that also have<br />
<strong>Onkyo</strong>’s z connectors. Simply connect a remote control cable<br />
from this connector to the z connector of the cassette tape deck<br />
or compact disc player. An z remote control cable with a 3.5-<br />
mm (1/8-inch) miniature two-conductor plug comes with every<br />
cassette tape deck and compact disc player that has an z<br />
connector.<br />
• For remote control operation, the audio connection cables<br />
must also be connected.<br />
• The RC-390M remote controller does not support turntables.<br />
• If the connected component has two z connectors, you can<br />
use either one to connect to the <strong>TX</strong>-<strong>DS787</strong>. The other one can<br />
be used to daisy chain with another component.<br />
• For <strong>Onkyo</strong> DVD or MD players, you can control them by<br />
simply pointing the RC-390M controller directly at the<br />
component.<br />
ANTENNA<br />
These jacks are for connecting the FM indoor antenna and AM<br />
loop antenna that are supplied with the <strong>TX</strong>-<strong>DS787</strong>.<br />
IR IN MAIN/IR IN ZONE 2<br />
If the <strong>TX</strong>-<strong>DS787</strong> is located inside a rack or cabinet that will not<br />
allow infrared beams to reach the IR sensor, you will need to<br />
connect a remote sensor to IR IN MAIN input to be able to use the<br />
remote controller. Then install the remote sensor in an unblocked<br />
location where you can easily point the remote controller.<br />
To use the remote controller in the remote zone (Zone 2), which<br />
may be far separated from the <strong>TX</strong>-<strong>DS787</strong>, connect a multiroom<br />
system kit to the IR IN MAIN/IR IN ZONE 2 input.<br />
To be able to use the remote controller through either the IR<br />
IN MAIN or IR IN ZONE 2 inputs, you must connect one of<br />
the following (sold separately):<br />
• <strong>Onkyo</strong>’s Multi-Room System kits (IR Remote Controller<br />
Extension System), or<br />
• Multiroom A/V distribution and control systems from Niles ®<br />
and Xantech ® to name a few<br />
COMPONENT VIDEO INPUT/OUTPUT<br />
If your DVD player or other device has component video<br />
connectors, be sure to connect them to these component video<br />
connectors on the <strong>TX</strong>-<strong>DS787</strong>. The <strong>TX</strong>-<strong>DS787</strong> has two component<br />
video input connectors to obtain the color information (Y, PB, PR)<br />
directly from the recorded DVD signal or other video component<br />
and one component video output connector to output it directly<br />
into the matrix decoder of the display device. By sending the pure<br />
DVD component video signal directly, the DVD signal forgoes the<br />
extra processing that normally would degrade the image. The<br />
result is vastly increased image quality, with incredibly lifelike<br />
colors and crisp detail.<br />
Y PB PR RCA type<br />
13
Rear panel facilities<br />
SPEAKERS<br />
6 terminals are provided for the front left, front right, front center,<br />
surround left, surround right, and surround back speakers. Speaker<br />
outputs are compatible with banana plug connectors (other than<br />
European models).<br />
MULTI CHANNEL INPUT<br />
By connecting a DVD player, MPEG decoder, or other component<br />
that has a multi channel port, you can playback the audio with 5.1<br />
channel or 7.1 channel output. So, be sure to prepare a cable that<br />
can properly connect the <strong>TX</strong>-<strong>DS787</strong> to the peripheral device.<br />
<strong>TX</strong>-<strong>DS787</strong> MULTI CHANNEL INPUT<br />
AC OUTLETS<br />
The <strong>TX</strong>-<strong>DS787</strong> is supplied with AC mains outlets for connecting<br />
the power cords from other devices so that their power is supplied<br />
through the <strong>TX</strong>-<strong>DS787</strong>. By doing this, you can use the<br />
STANDBY/ON button on the <strong>TX</strong>-<strong>DS787</strong> to turn on and off the<br />
connected devices as well.<br />
The shape, number, and total capacity of the AC outlets may differ<br />
depending on the area of purchase.<br />
INPUT<br />
(COAXAL)<br />
FRONT<br />
SURR<br />
SURR<br />
BACK<br />
2<br />
R<br />
WOOFER<br />
L<br />
OUT<br />
TAPE<br />
IN<br />
(SB)<br />
CD<br />
CENTER<br />
Caution:<br />
Make sure that the total capacity of the other components<br />
connected to this unit does not exceed the capacity that is printed<br />
on the rear panel (e.g., 120 watts).<br />
SUB<br />
WOOFER<br />
MULTI CHANNEL<br />
INPUT<br />
PH<br />
CENTER<br />
R<br />
L<br />
DVD player/MPEG decoder<br />
AC OUTLETS<br />
AC 230-240V 50Hz<br />
SWITCHED<br />
TOTAL 100W MAX.<br />
European and some<br />
Asian models<br />
AC OUTLETS<br />
AC 120V 60Hz<br />
SWITCHED<br />
TOTAL 120W 1A MAX.<br />
USA and Canadian<br />
models<br />
AUDIO IN/OUT<br />
These are the analog audio inputs and outputs. There are 7 audio<br />
inputs (4 of which are linked to video inputs) and 3 audio outputs<br />
(2 of which are linked to a video output). The audio jacks are<br />
nominally labeled for cassette tape decks, compact disc players,<br />
turntables, and DVD players. To the audio jacks for VIDEO 1 to 3<br />
connect the audio output from VCRs, LD players, and other video<br />
components. The audio inputs and outputs require RCA-type<br />
connectors.<br />
• When connecting a VCR or other video component, make sure<br />
you connect the audio and video leads together (i.e., both to<br />
VIDEO 3).<br />
• The <strong>TX</strong>-<strong>DS787</strong> is designed for use with turntables that use<br />
moving magnet cartridges.<br />
RCA type<br />
MONITOR OUT<br />
The monitor output includes both composite video and S video<br />
configurations. This output is for connecting television monitors<br />
or projectors.<br />
14
Rear panel facilities<br />
VIDEO IN/OUT<br />
These are the video inputs and outputs. On the rear panel, there are<br />
4 video inputs and 2 video outputs and each one includes both<br />
composite video and S video configurations. Connect VCRs, LD<br />
players, DVD players, and other video components to the video<br />
inputs.<br />
The 2 video output channels can be used to be connected to video<br />
tape recorders for making recordings.<br />
• When connecting a VCR or other video component, make sure<br />
you connect the audio and video leads together (i.e., both to<br />
VIDEO 3).<br />
• The VIDEO 4 inputs are located on the front panel.<br />
Composite<br />
video jack<br />
S video jack<br />
12V TRIGGER terminal<br />
This terminal is provided so that you can use the operation of the<br />
<strong>TX</strong>-<strong>DS787</strong> control the operation of another externally connected<br />
device. Connect the component to this 1/8-inch mini-jack terminal<br />
and when the set input source is selected, the device will turn on.<br />
Set the 12V TRIGGER terminal using the 12V Trigger setting of<br />
the 12V Trigger sub-menu (see page 40).<br />
AM FREQUENCY STEP switch<br />
(see page 7)<br />
VOLTAGE SELECTOR (see page 7)<br />
15
Example of how to connect your equipment<br />
DVD recorder<br />
or other digital video<br />
recording device<br />
(VIDEO 1)<br />
7. Refer to page 19<br />
Satellite tuner or TV<br />
(VIDEO 3)<br />
6. Refer to page 19<br />
Tape deck, MD recorder,<br />
DAT deck, CD recorder,<br />
(TAPE)<br />
3. Refer to page 18<br />
DIGITAL<br />
OUTPUT<br />
(OPTICAL)<br />
1<br />
DIGITAL<br />
INPUT<br />
(OPTICAL)<br />
2<br />
REMOTE<br />
CONTROL<br />
R<br />
FRONT<br />
SURR<br />
PRE<br />
OUT<br />
L<br />
ANTENNA AM<br />
IR IN<br />
ZONE 2<br />
R L<br />
FM<br />
75<br />
MAIN<br />
VIDEO<br />
OUT<br />
S VIDEO<br />
COMPONENT<br />
VIDEO<br />
Y<br />
INPUT 1<br />
PB<br />
PR<br />
GND<br />
SURR<br />
BACK<br />
(SB)<br />
VIDEO<br />
1<br />
CD player<br />
(CD)<br />
2. Refer to page 18<br />
1<br />
DIGITAL<br />
INPUT<br />
(COAXAL)<br />
FRONT<br />
2<br />
R<br />
L<br />
SUB<br />
WOOFER<br />
OUT<br />
CENTER<br />
V IDEO<br />
2<br />
I N<br />
OUT<br />
I N<br />
Y<br />
INPUT 2<br />
PB<br />
PR<br />
SURR<br />
TAPE<br />
IN<br />
V IDEO<br />
3<br />
I N<br />
Y<br />
Turntable<br />
(PHONO)<br />
1. Refer to page 18<br />
SURR<br />
BACK<br />
(SB)<br />
CD<br />
R<br />
L<br />
DVD<br />
I N<br />
OUTPUT<br />
PB<br />
SUB<br />
WOOFER<br />
MULTI CHANNEL<br />
INPUT<br />
PH<br />
CENTER<br />
R<br />
L<br />
VIDEO<br />
MON ITOR<br />
OUT<br />
S VIDEO<br />
PR<br />
Analog signal<br />
Digital signal<br />
Signal flow<br />
DVD player<br />
(DVD)<br />
4. Refer to page 18<br />
VCR<br />
(VIDEO 2)<br />
5. Refer to page 18<br />
16
Example of how to connect your equipment<br />
Standard connections<br />
MODEL<br />
Front panel of <strong>TX</strong>-<strong>DS787</strong><br />
MASTER VOLUME<br />
VIDEO 4 /VIDEO CAM INPUT<br />
S VIDEO VIDEO L AUDIO R<br />
AV RECEIVER <strong>TX</strong>-<strong>DS787</strong><br />
Here is explanation of how to connect the main components to the<br />
<strong>TX</strong>-<strong>DS787</strong> in the standard manner. There are many ways that any<br />
one component can be connected, and it is up to you to decide<br />
which method best fits your situation. The directions given here<br />
are only one option and should only be thought of as such. It is best<br />
to fully understand the nature of each connector and terminal as<br />
well as each of your components and their features to ascertain<br />
which method of connection is best.<br />
• Be sure to always refer to the instruction manual that came<br />
with the component that you are connecting.<br />
• Do not plug in the power cord until all connections have been<br />
made.<br />
• For input jacks, red connectors (marked R) are used for the<br />
right channel, white connectors (marked L) are used for the<br />
left channel, and yellow connectors (marked V) are used for<br />
video connection.<br />
• Insert all plugs and connectors securely. Improper connections<br />
can result in noise, poor performance, or damage to the<br />
equipment.<br />
• Do not bind audio connection cables with power cords and<br />
speaker cables. Doing so may adversely affect the sound<br />
quality.<br />
Video camera<br />
(VIDEO 4)<br />
9. Refer to page 19<br />
For a detailed explanation of how to connect the devices given<br />
below, refer to the pages listed.<br />
Speakers: See page 20<br />
Radio antenna: See page 22<br />
Enjoying the <strong>TX</strong>-<strong>DS787</strong> from a remote room (Zone 2):<br />
See page 24<br />
Power amplifier: See page 26<br />
TV monitor or Projector<br />
(MONITOR OUT)<br />
8. Refer to page 19<br />
Default setting<br />
Input source Digital input Component video<br />
CD OPTICAL 1<br />
PHONO ----<br />
FM<br />
AM<br />
TAPE ----<br />
DVD COAXIAL 1 INPUT 1<br />
VIDEO 1 COAXIAL 2 ----<br />
VIDEO 2 ---- ----<br />
VIDEO 3 OPTICAL 2 INPUT 2<br />
VIDEO 4 ---- ----<br />
---- : No setting<br />
: Not applicable<br />
17
Example of how to connect your equipment<br />
Connecting your audio components<br />
Below is an example of how you can connect your audio<br />
components to the <strong>TX</strong>-<strong>DS787</strong>. Refer to the diagram on pages 16<br />
and 17 for the following connection examples.<br />
1. Connecting a turntable<br />
Using an RCA-type audio connection cable, connect the output<br />
terminal on the turntable to the PHONO IN jacks on the <strong>TX</strong>-<br />
<strong>DS787</strong>. Make sure that you properly connect the left channel to the<br />
L jack and the right channel to the R jack.<br />
Note:<br />
The <strong>TX</strong>-<strong>DS787</strong> is designed for use with moving magnet<br />
cartridges. For proper operation, connect a ground (or earth) wire<br />
to the GND terminal. For some turntables, however, connecting<br />
the ground wire may cause increased noise, and in such a case, a<br />
ground wire is not necessary and should not be connected.<br />
2. Connecting a compact disc player<br />
Using an RCA-type audio connection cable, connect the output<br />
terminal on the compact disc player to the CD IN jacks on the <strong>TX</strong>-<br />
<strong>DS787</strong>. Make sure that you properly connect the left channel to the<br />
L jack and the right channel to the R jack.<br />
If the compact disc player has a digital output jack as well, be sure<br />
to also connect it to either a DIGITAL INPUT (COAXIAL) or<br />
DIGITAL INPUT (OPTICAL) jack on the <strong>TX</strong>-<strong>DS787</strong> depending<br />
on the type of connector on the compact disc player.<br />
With the initial settings of the <strong>TX</strong>-<strong>DS787</strong>, the CD input source is<br />
set for digital input at the OPTICAL 1 jack. If the digital<br />
connection is made at a different jack, this must be changed at the<br />
OSD Menu: Input Setup → Audio Setup → Digital Input (see page<br />
34).<br />
3. Connecting a cassette tape deck, MD recorder,<br />
DAT deck, or CD recorder<br />
Using an RCA-type audio connection cable, connect the output<br />
terminals (PLAY) of the device to the TAPE IN jacks on the <strong>TX</strong>-<br />
<strong>DS787</strong> and the input terminals (REC) to the TAPE OUT jacks.<br />
Make sure that you properly connect the left channel to the L jack<br />
and the right channel to the R jack.<br />
If the device has a digital output jack as well, be sure to also<br />
connect it to either a DIGITAL INPUT (COAXIAL) or DIGITAL<br />
INPUT (OPTICAL) jack on the <strong>TX</strong>-<strong>DS787</strong> depending on the type<br />
of connector on the device.<br />
If you connect the device to the DIGITAL INPUT terminal, then<br />
this input source must be set for digital input at the OSD Menu:<br />
Input Setup → Audio Setup → Digital Input.<br />
If the device also has a digital input jack, it can be connected to the<br />
DIGITAL OUTPUT (OPTICAL) jack on the <strong>TX</strong>-<strong>DS787</strong> for<br />
digital recording of the source for REC OUT at the <strong>TX</strong>-<strong>DS787</strong>.<br />
Caution:<br />
The output from the DIGITAL OUTPUT jack of the <strong>TX</strong>-<strong>DS787</strong> is<br />
only the digital signal input to the DIGITAL INPUT jack.<br />
Connecting your video components<br />
Below is an example of how you can connect your video<br />
components to the <strong>TX</strong>-<strong>DS787</strong>. Refer to the diagram on pages 16<br />
and 17 for the following connection examples.<br />
The flow of the video signals is as follows:<br />
• The signal that comes in from VIDEO IN is sent to VIDEO<br />
OUT.<br />
• The signal that comes in from S VIDEO IN is sent to S VIDEO<br />
OUT<br />
• The signal that comes in from COMPONENT VIDEO IN is<br />
sent to COMPONENT VIDEO OUT.<br />
Caution:<br />
If only the video connection for the MONITOR OUT is made,<br />
even if the input from each source component is through a<br />
component video connection, the picture will not appear. If only<br />
the S video connection for the MONITOR OUT is made, the<br />
picture will not appear.<br />
4. Connecting a DVD player or LD player<br />
Using an RCA-type video connection cable, connect the video<br />
output terminal (composite) on the device to the DVD VIDEO IN<br />
jack on the <strong>TX</strong>-<strong>DS787</strong>. If there is an S video output terminal on the<br />
device, connect it to the DVD S VIDEO IN jack using an S video<br />
cable. If the device has component video outputs, connect them to<br />
one of the COMPONENT VIDEO INPUT jacks.<br />
Using an RCA-type audio connection cable, connect the audio<br />
output terminal on the device to the audio DVD IN jacks on the<br />
<strong>TX</strong>-<strong>DS787</strong>. Make sure that you properly connect the left channel<br />
to the L jack and the right channel to the R jack.<br />
If the device has a digital output jack as well, be sure to also<br />
connect it to either a DIGITAL INPUT (COAXIAL) or DIGITAL<br />
INPUT (OPTICAL) jack on the <strong>TX</strong>-<strong>DS787</strong> depending on the type<br />
of connector on the DVD player.<br />
With the initial settings of the <strong>TX</strong>-<strong>DS787</strong>, the DVD input source is<br />
set for digital input at the COAXIAL 1 jack. If the digital<br />
connection is made at a different jack, this must be changed at the<br />
OSD Menu: Input Setup → Audio Setup → Digital Input (see page<br />
34).<br />
5. Connecting a video cassette recorder<br />
Using an RCA-type video connection cable, connect the video<br />
output terminal (composite) on the video cassette recorder to the<br />
VIDEO 2 IN jacks on the <strong>TX</strong>-<strong>DS787</strong> and video input terminal to<br />
the VIDEO 2 OUT jacks. If there is an S video input/output<br />
terminal on the video cassette recorder, connect it to the S VIDEO<br />
2 IN/OUT jack using an S video cable. If the video cassette<br />
recorder has component video outputs, connect them to one of the<br />
COMPONENT VIDEO INPUT jacks.<br />
Using an RCA-type audio connection cable, connect the audio<br />
output terminal on the video cassette recorder to the same VIDEO<br />
2 IN audio jacks on the <strong>TX</strong>-<strong>DS787</strong> and audio input terminal to the<br />
VIDEO 2 OUT audio jacks. Make sure that you properly connect<br />
the left channel to the L jack and the right channel to the R jack.<br />
18
Example of how to connect your equipment<br />
6. Connecting a satellite tuner or television<br />
Using an RCA-type video connection cable, connect the video<br />
output terminal (composite) on the satellite tuner or television to<br />
the VIDEO 3 IN jacks on the <strong>TX</strong>-<strong>DS787</strong>. If there is an S video<br />
output terminal on the satellite tuner or television, connect it to the<br />
S VIDEO 3 IN jack using an S video cable. If the satellite tuner or<br />
television has component video outputs, connect them to one of<br />
the COMPONENT VIDEO INPUT jacks.<br />
Using an RCA-type audio connection cable, connect the audio<br />
output terminal on the satellite tuner or television to the same<br />
VIDEO 3 IN audio jacks on the <strong>TX</strong>-<strong>DS787</strong>. Make sure that you<br />
properly connect the left channel to the L jack and the right<br />
channel to the R jack.<br />
If the satellite tuner or television has a digital output jack as well,<br />
be sure to also connect it to either a DIGITAL INPUT<br />
(COAXIAL) or DIGITAL INPUT (OPTICAL) jack on the <strong>TX</strong>-<br />
<strong>DS787</strong> depending on the type of connector on the set top box or<br />
television.<br />
With the initial settings of the <strong>TX</strong>-<strong>DS787</strong>, the VIDEO 3 input<br />
source is set for digital input at the OPTICAL 2 jack. If the digital<br />
connection is made at a jack different from the initial settings, this<br />
must be changed at the OSD Menu: Input Setup → Audio Setup →<br />
Digital Input (see page 34).<br />
9. Connecting video camera or television game<br />
Using an RCA-type video connection cable, connect the video<br />
output terminal (composite) on the device to the VIDEO 4 IN<br />
jacks on the <strong>TX</strong>-<strong>DS787</strong>. If there is an S video output terminal on<br />
the device, connect it to the S VIDEO 4 VIDEO CAM INPUT jack<br />
using an S video cable.<br />
7. Connecting a DVD recorder or other digital<br />
video recording device<br />
Using an RCA-type video connection cable, connect the video<br />
output terminal (composite) on the device to the VIDEO 1 IN<br />
jacks on the <strong>TX</strong>-<strong>DS787</strong> and video input terminal to the VIDEO 1<br />
OUT jacks. If there is an S video input/output terminal on the<br />
device, connect it to the S VIDEO 1 IN/OUT jack using an S video<br />
cable. If the device has component video outputs, connect them to<br />
one of the COMPONENT VIDEO INPUT jacks.<br />
Using an RCA-type audio connection cable, connect the audio<br />
output terminal on the device to the same VIDEO 1 IN audio jacks<br />
on the <strong>TX</strong>-<strong>DS787</strong> and audio input terminal to the VIDEO 1 OUT<br />
audio jacks. Make sure that you properly connect the left channel<br />
to the L jack and the right channel to the R jack.<br />
If the device has a digital output jack as well, be sure to also<br />
connect it to either a DIGITAL INPUT (COAXIAL) or DIGITAL<br />
INPUT (OPTICAL) jack on the <strong>TX</strong>-<strong>DS787</strong> depending on the type<br />
of connector on the device.<br />
With the initial settings of the <strong>TX</strong>-<strong>DS787</strong>, the VIDEO 1 input<br />
source is set for digital input at the COAXIAL 2 jack. If the digital<br />
connection is made at a different jack, this must be changed at the<br />
OSD Menu: Input Setup → Audio Setup → Digital Input (see page<br />
34).<br />
If the device also has a digital input jack, it can be connected to the<br />
DIGITAL OUTPUT (OPTICAL) jack on the <strong>TX</strong>-<strong>DS787</strong> for<br />
digital recording of the source for REC OUT at the <strong>TX</strong>-<strong>DS787</strong>.<br />
8. Connecting a television monitor or projector<br />
Using an RCA-type video connection cable, connect the video<br />
input terminal (composite) on the monitor to one of the<br />
MONITOR OUT jacks on the <strong>TX</strong>-<strong>DS787</strong>. If there is an S video<br />
input terminal on the monitor, connect it to the S VIDEO<br />
MONITOR OUT jack using an S video cable. If the device has<br />
component video inputs, connect them to the COMPONENT<br />
VIDEO OUTPUT jacks.<br />
Caution:<br />
Note that the OSD Menu will only be displayed on the monitor<br />
connected to MONITOR OUT and not those connected to the<br />
COMPONENT VIDEO OUTPUT jacks.<br />
19
Connecting speakers<br />
Before connecting the speakers, place them correctly by<br />
consulting the instruction manuals that came with them.<br />
For surround playback, the configuration and placement of your<br />
speakers are very important.<br />
For THX surround EX playback, we recommend that you use a<br />
THX speaker system that is certified by Lucasfilm Ltd.<br />
Ideal speaker configuration<br />
• Front right and left speakers<br />
• Center speaker<br />
Produces a rich sound image by serving as a sound source for<br />
the front right and left speakers and enhancing the sonic<br />
movement.<br />
• Surround right and left speakers<br />
Adds three-dimensional sonic movement and produces<br />
environmental sound associated with the background and<br />
effect sound for each scene.<br />
• Surround back speaker<br />
Required for enjoying THX Surround EX audio. For audio<br />
using surround back right and surround back left speakers, a<br />
separately-sold 2-channel power amplifier is required.<br />
Lucasfilm/THX recommends the use of two Surround Back<br />
speakers to enjoy the full potential of THX Surround EX. An<br />
external stereo power amplifier will need to used to power the<br />
two speakers from the Pre-Amp out terminals.<br />
However, if you are unable to position two speakers in your<br />
listening environment, a single surround speaker can be used<br />
and the <strong>TX</strong>-<strong>DS787</strong> has an internal amplifier to power this<br />
speaker for your convenience.<br />
• Subwoofer<br />
Produces powerful and heavy bass.<br />
Minimum speaker configuration for surround<br />
sound playback<br />
• Front right and left speakers<br />
• Surround right and left speakers<br />
Surround back speaker/Surround back left and right speakers<br />
• Surround back speaker is required for enjoying THX Surround<br />
EX audio.<br />
• Place these speakers behind the listener so that the angle<br />
between each speaker and the listener is approximately 30<br />
degrees.<br />
• Place these speakers so that their height is 1 meter higher than<br />
that of the listener’s ears.<br />
(Only one surround back<br />
speaker)<br />
8<br />
10<br />
1<br />
2 3 4 5<br />
6 7<br />
10<br />
8<br />
(Two surround back<br />
speakers)<br />
10<br />
8 9<br />
Subwoofer<br />
A subwoofer is recommended for the highest bass effect.<br />
(Only one surround back speaker)<br />
(Two surround back speakers)<br />
The sound recorded for the center speaker and the subwoofer will<br />
be properly distributed to the front right and left speakers for<br />
optimized surround playback.<br />
1<br />
2 3 4 5<br />
1<br />
2 3 4 5<br />
Speaker placement<br />
Ideal speaker placement varies depending on the size of your room<br />
and the wall coverings. Here, only typical example of speaker<br />
placement and recommendations are shown.<br />
6 7<br />
10<br />
6 7<br />
10<br />
20<br />
Important points regarding speaker placement<br />
Front left and right speakers and center speaker<br />
• Place these three speakers at the same height from the floor.<br />
• Place each speaker so that sound is aimed at the location of the<br />
listener’s ears when at the listening position.<br />
Surround left and right speakers<br />
• Place these speakers so that their height is 1 meter higher than<br />
that of the listener’s ears.<br />
8 9 8 9<br />
1 TV or screen<br />
2 Front left speaker<br />
3 Subwoofer<br />
4 Center speaker<br />
5 Front right speaker<br />
6 Surround left speaker<br />
7 Surround right speaker<br />
8 Surround back left speaker<br />
or Surround back speaker<br />
9 Surround back right speaker<br />
10 Listening position<br />
Most dipoles have an arrow on them to indicate their orientation<br />
towards the screen. So for the side dipoles, the arrows point<br />
forward. For the back dipoles, the arrows should point towards<br />
each other to achieve the correct acoustical phasing in the room.
Connecting speakers<br />
Connecting speakers<br />
Notes:<br />
• The <strong>TX</strong>-<strong>DS787</strong> is designed to produce optimum sound quality<br />
when speakers with impedances within the specified ranges<br />
are connected. Check the following information and choose<br />
speakers with appropriate impedances for the connections.<br />
CAUTION:<br />
SPEAKER IMPEDANCE<br />
6 Ω min. per each speaker terminal.<br />
Connecting the speaker cable<br />
1. Strip away 15 mm (5/8 inch) of wire insulation.<br />
2. Twist wire ends very tight.<br />
3. Unscrew<br />
4. Insert wire<br />
5. Screw<br />
1<br />
15mm<br />
(5/8")<br />
2<br />
• When you are using only one<br />
speaker or when you wish to<br />
listen to monaural (mono)<br />
sound, a single speaker should<br />
never be connected in parallel<br />
to both the right and leftchannel<br />
terminals<br />
simultaneously.<br />
NO!<br />
+ – – + + – – +<br />
R L R L<br />
3 4 5<br />
• To prevent damage to<br />
circuitry, never shortcircuit<br />
the positive (+) and<br />
negative (–) speaker wire.<br />
NO!<br />
Connecting a subwoofer<br />
Use the PRE OUT SUBWOOFER jack to connect a subwoofer<br />
with a built-in power amplifier. If your subwoofer does not have a<br />
built-in amplifier, connect an amplifier to the PRE OUT<br />
SUBWOOFER jack and the subwoofer to the amplifier.<br />
• Be sure to connect the positive and negative cables for the<br />
speakers properly. If they are mixed up, the left and right<br />
signals will be reversed and the audio will sound unnatural.<br />
• Connect speakers with an impedance between 6 and 16 Ω.<br />
Connecting speakers with an impedance less that 6 Ω may<br />
damage the <strong>TX</strong>-<strong>DS787</strong>.<br />
• Do not connect more than one speaker cable to one speaker<br />
terminal. Doing so may damage the <strong>TX</strong>-<strong>DS787</strong>.<br />
Surround<br />
back<br />
speaker<br />
Front right<br />
speaker<br />
Front left<br />
speaker<br />
Center<br />
speaker<br />
DIGITAL<br />
OUTPUT<br />
(OPTICAL)<br />
1<br />
DIGITAL<br />
INPUT<br />
(OPTICAL)<br />
2<br />
REMOTE<br />
CONTROL<br />
FRONT<br />
SURR<br />
PRE<br />
R OUT L<br />
ANTENNA AM<br />
IR IN<br />
ZONE 2<br />
R L<br />
FM<br />
75<br />
MAIN<br />
VIDEO<br />
OUT<br />
S VIDEO<br />
COMPONENT<br />
VIDEO<br />
Y<br />
INPUT 1<br />
PB<br />
PR<br />
AV RECEIVER<br />
MODEL NO. <strong>TX</strong>-DS 787<br />
FRONT<br />
SPEAKERS<br />
SURR<br />
BACK<br />
SPEAKER<br />
R<br />
L<br />
CENTER<br />
SPEAKER<br />
1<br />
DIGITAL<br />
INPUT<br />
(COAXAL)<br />
FRONT<br />
SURR<br />
SURR<br />
BACK<br />
2<br />
R<br />
GND<br />
L<br />
(SB)<br />
SURR<br />
BACK<br />
SUB<br />
WOOFER<br />
OUT<br />
TAPE<br />
IN<br />
CD<br />
(SB)<br />
CENTER<br />
R<br />
L<br />
VIDEO<br />
1<br />
V IDEO<br />
2<br />
V IDEO<br />
3<br />
DVD<br />
I N<br />
OUT<br />
I N<br />
I N<br />
I N<br />
Y<br />
INPUT 2<br />
PB<br />
PR<br />
Y<br />
OUTPUT<br />
PB<br />
SURR<br />
SPEAKERS<br />
ZONE 2<br />
SPEAKERS<br />
R<br />
R<br />
MAIN<br />
ZONE 2<br />
CAUTION:<br />
SPEAKER IMPEDANCE<br />
6 OHMS MIN. PER EACH<br />
SPEAKER TERMINAL<br />
L<br />
L<br />
AC OUTLETS<br />
AC 230-240V 50Hz<br />
SWITCHED<br />
TOTAL 100W MAX.<br />
SUB<br />
WOOFER<br />
PH<br />
PR<br />
MULTI CHANNEL<br />
INPUT<br />
CENTER<br />
R<br />
L<br />
VIDEO<br />
MON ITOR<br />
OUT<br />
S VIDEO<br />
Subwoofer<br />
Surround<br />
right<br />
speaker<br />
Zone 2<br />
right<br />
speaker<br />
Zone 2<br />
left<br />
speaker<br />
Surround<br />
left<br />
speaker<br />
21
Connecting antennas<br />
To the use the tuner of <strong>TX</strong>-<strong>DS787</strong>, it is necessary to prepare the<br />
supplied FM and AM antennas.<br />
• Adjustment and placement of the FM and AM antennas for<br />
better reception must be done while listening to a station<br />
broadcast.<br />
• If better reception cannot be obtained, then placement of an<br />
outside antenna is recommended.<br />
Assembling the AM loop antenna<br />
Assemble the loop antenna as shown in the illustration.<br />
• Refer to the next page for details on connecting the AM loop<br />
antenna.<br />
Connecting the included antennas<br />
Connecting the FM indoor antenna:<br />
The FM indoor antenna is for indoor use only. During use, extend<br />
the antenna and move it in various directions until the clearest<br />
signal is received. Fix it with push pins or similar implements in<br />
the position that will cause the least amount of distortion.<br />
If the reception is not very clear with the attached FM indoor<br />
antenna, the use of an outdoor antenna is recommended.<br />
Connecting the AM loop antenna:<br />
The AM loop antenna is for indoor use only. Set it in the direction<br />
and position where you receive the clearest sound. Put it as far<br />
away as possible from the <strong>TX</strong>-<strong>DS787</strong>, televisions, speaker cables,<br />
and power cords.<br />
When reception is not satisfactory with the attached AM loop<br />
antenna alone, connection of an outdoor antenna is recommended.<br />
FM antenna<br />
Insert into the hole.<br />
Connecting the AM antenna cable<br />
1. Press down the lever.<br />
2. Insert the wire into the hole.<br />
USA and<br />
Canadian<br />
models<br />
Other<br />
models<br />
3. Release the lever.<br />
1 2 3<br />
Strip away the insulation<br />
from the end of the cable,<br />
then fully insert the<br />
stripped end of the cable.<br />
DIGITAL<br />
OUTPUT<br />
(OPTICAL)<br />
DIGITAL<br />
INPUT<br />
(OPTICAL)<br />
REMOTE<br />
CONTROL<br />
R<br />
1 FRONT<br />
SURR<br />
PRE<br />
OUT<br />
L<br />
ANTENNA AM FM<br />
75<br />
IR IN<br />
R<br />
ZONE 2<br />
L<br />
MAIN<br />
VIDEO<br />
S VIDEO<br />
(Indoor) AM loop antenna<br />
Hint:<br />
Either of the split ends of the AM antenna can be connected to<br />
either terminal. Unlike speaker cabling, there is no polarity for<br />
AM broadcast signals.<br />
22
Connecting antennas<br />
Connecting an FM outdoor antenna<br />
Please make sure that you follow the considerations:<br />
• Keep the antenna away from noise sources (neon signs, busy<br />
roads, etc.).<br />
• It is dangerous to put the antenna close to power lines. Keep it<br />
well away from power lines, transformers, etc.<br />
• To avoid the risk of lightning and electrical shock, grounding<br />
is necessary. Follow item 14 of the “Important Safeguards” on<br />
page 2 when you install the outdoor antenna.<br />
Directional linkage<br />
Do not use the same antenna for both FM and TV (or VCR)<br />
reception since the FM and TV (or VCR) signals can interfere with<br />
each other. If you must use a common FM/TV (or VCR) antenna,<br />
use a directional linkage type splitter.<br />
To receiver<br />
To TV (or VCR)<br />
Connecting the antenna cable to the 75/300 Ω<br />
antenna adapter (For all models other than<br />
USA, Canadian and European models)<br />
Connecting the 300 Ω ribbon wire:<br />
Loosen the screws and wrap the wire around these screws. Then<br />
tighten the screws with a screwdriver.<br />
DIGITAL<br />
OUTPUT<br />
(OPTICAL)<br />
DIGITAL<br />
INPUT<br />
(OPTICAL)<br />
REMOTE<br />
CONTROL<br />
1 FRONT<br />
SURR<br />
R<br />
PRE<br />
OUT<br />
L<br />
ANTENNA AM FM<br />
75<br />
IR IN<br />
R<br />
ZONE 2<br />
L<br />
MAIN<br />
VIDEO<br />
S VIDEO<br />
Outdoor<br />
antenna<br />
300 Ω<br />
ribbon wire<br />
Connecting the coaxial cable:<br />
Connecting an AM outdoor antenna<br />
An outdoor antenna will be more effective if it is stretched<br />
horizontally above a window or outside.<br />
• Do not remove the AM loop antenna.<br />
• To avoid the risk of lightning and electrical shock, grounding<br />
is necessary. Follow item 14 of the “Important Safeguards” on<br />
page 2 when you install the outdoor antenna.<br />
Outdoor antenna<br />
1. With your fingernail, or a small screwdriver,<br />
press the stoppers of the 75/300 Ω antenna<br />
adapter outward and remove the cover.<br />
2. Remove the transformer wire A from slit B and<br />
insert it into slit C.<br />
3. Prepare the coaxial cable as shown in the<br />
diagram.<br />
4. Connect the 75/300 Ω antenna adapter to the<br />
coaxial cable.<br />
1 Insert the end of the cable.<br />
2 Clamp it in place with pliers.<br />
5. Reinstall the cover.<br />
(Indoor) AM loop antenna<br />
1 2 3, 4<br />
DIGITAL<br />
OUTPUT<br />
(OPTICAL)<br />
DIGITAL<br />
INPUT<br />
(OPTICAL)<br />
REMOTE<br />
CONTROL<br />
1 FRONT<br />
SURR<br />
R<br />
PRE<br />
OUT<br />
L<br />
ANTENNA AM FM<br />
75<br />
IR IN<br />
R<br />
ZONE 2<br />
L<br />
MAIN<br />
VIDEO<br />
S VIDEO<br />
Slit C<br />
Slit B<br />
Wire A<br />
✦ ✦ ✦<br />
✦ ✦ ✦ ✦<br />
✦ ✦ ✦<br />
6<br />
mm mm 3<br />
mm<br />
6<br />
15mm<br />
5/8"<br />
23
Connecting to the remote zone (Zone 2) input<br />
Outline<br />
The <strong>TX</strong>-<strong>DS787</strong> allows you to connect another set of speakers and<br />
place them in a different room or separated area for listening to<br />
music. This other room or area is referred to as the remote zone<br />
(Zone 2), while the room where the <strong>TX</strong>-DS 787 is located is the<br />
main zone. In addition, the IR IN ZONE 2 input allows you to<br />
control the <strong>TX</strong>-<strong>DS787</strong> from the remote zone (Zone 2) with the<br />
remote controller even though the remote zone is physically<br />
separated. The diagram below shows how to make the proper<br />
connections for the remote zone.<br />
To be able to use the remote controller in the remote zone<br />
(Zone 2), you must connect one of the following (sold<br />
separately):<br />
• <strong>Onkyo</strong>’s Multi-Room System kits (IR Remote Controller<br />
Extension System), or<br />
• Multiroom A/V distribution and control systems from Niles ®<br />
and Xantech ® to name a few<br />
Connecting the main and remote zones<br />
1. Connect the speaker cables from the speakers<br />
in the remote zone (Zone 2) to the Zone 2<br />
speaker terminals on the <strong>TX</strong>-<strong>DS787</strong>.<br />
2. Install the connecting block in the main zone<br />
and connect it to the IR IN ZONE 2 input at the<br />
<strong>TX</strong>-<strong>DS787</strong>.<br />
3. Install the remote sensor in the remote zone<br />
and connect it to the connecting block in the<br />
main zone.<br />
Make connection as shown below. Do not plug the equipment into<br />
the power source until the connection is complete.<br />
Connection example for <strong>Onkyo</strong>’s Multi-room System kit<br />
Main zone Power supply<br />
Wall outlet<br />
Remote zone (Zone 2)<br />
Remote sensor<br />
Remote controller<br />
HOME THEATER CONTROLLER<br />
RC-390M<br />
Mini plug cable<br />
Connecting block<br />
ANTENNA<br />
ER<br />
IR IN<br />
ZONE 2<br />
R<br />
AM<br />
L<br />
VIDEO<br />
1<br />
FM<br />
75<br />
MAIN<br />
VIDEO<br />
OUT<br />
I N<br />
S VIDEO<br />
COMPONENT<br />
VIDEO<br />
Y<br />
INPUT 1<br />
PB<br />
PR<br />
Y<br />
INPUT 2<br />
AV RECEIVER<br />
MODEL NO. <strong>TX</strong>-DS 787<br />
FRONT<br />
SPEAKERS<br />
SURR<br />
BACK<br />
SPEAKER<br />
SURR<br />
SPEAKERS<br />
R<br />
R<br />
L<br />
L<br />
CEN<br />
SPE<br />
Zone 2<br />
left<br />
speaker<br />
Zone 2<br />
right<br />
speaker<br />
V IDEO<br />
2<br />
OUT<br />
I N<br />
PB<br />
PR<br />
ZONE 2<br />
SPEAKERS<br />
R<br />
MAIN<br />
L<br />
R<br />
L<br />
V IDEO<br />
3<br />
DVD<br />
I N<br />
I N<br />
Y<br />
OUTPUT<br />
PB<br />
ZONE 2<br />
CAUTION:<br />
SPEAKER IMPEDANCE<br />
6 OHMS MIN. PER EACH<br />
SPEAKER TERMINAL<br />
VIDEO<br />
MON ITOR<br />
OUT<br />
S VIDEO<br />
PR<br />
<strong>TX</strong>-<strong>DS787</strong><br />
Signal flow<br />
24
Connecting to the IR IN MAIN input<br />
Outline<br />
If the <strong>TX</strong>-<strong>DS787</strong> is located inside a cabinet or other enclosure<br />
where the infrared beams from the remote controller cannot enter,<br />
then operation with the remote controller will not be possible. In<br />
such a case, it will be necessary to install a remote sensor at a<br />
location outside of the cabinet for the infrared beams from the<br />
controller to reach.<br />
1. Connect the connecting block to the IR IN<br />
MAIN input at the <strong>TX</strong>-<strong>DS787</strong>.<br />
2. Install the remote sensor at a location where it<br />
can detect the infrared beams from the remote<br />
controller.<br />
3. Connect the remote sensor to the connecting<br />
block.<br />
Power supply<br />
Wall outlet<br />
Connecting block<br />
HOME THEATER CONTROLLER<br />
RC-390M<br />
Remote sensor<br />
Remote controller<br />
In the cabinet<br />
Outside of the cabinet<br />
Mini plug cable<br />
ANTENNA<br />
AM<br />
FM<br />
75<br />
IR IN<br />
ZONE 2<br />
MAIN<br />
R L VIDEO<br />
<strong>TX</strong>-<strong>DS787</strong><br />
25
POWER<br />
ON<br />
OFF<br />
STANDBY/ON<br />
(SB)<br />
AUTO POWER ON & AUDIO INPUT/OUTPUT LOOP<br />
2 CHANNEL AMPLIFIER M-282<br />
Connecting power amplifiers and two surround back speakers<br />
Connecting power amplifiers<br />
Using auxiliary power amplifiers allows you to listen at louder<br />
volumes than with the <strong>TX</strong>-<strong>DS787</strong> alone. If power amplifiers are<br />
used, connect each speaker to the corresponding power amplifier.<br />
1<br />
2<br />
3<br />
4<br />
5<br />
6<br />
7<br />
8<br />
Connecting two surround back speakers<br />
To connect two surround back speakers, connect a power amplifier<br />
to the PRE OUT SURR BACK terminals on the <strong>TX</strong>-<strong>DS787</strong>, and<br />
connect the surround back speakers to that power amplifier. You<br />
will also need to make the appropriate setting in the OSD Menu:<br />
Speaker Setup → Speaker Config → Surr Back Out (see page 30).<br />
4<br />
5 6<br />
Power amplifier<br />
FRONT<br />
SPEAKERS<br />
R<br />
L<br />
R<br />
PRE<br />
OUT<br />
L<br />
FRONT<br />
SURR<br />
SURR<br />
BACK<br />
SPEAKER<br />
CENTER<br />
SPEAKER<br />
SURR<br />
BACK<br />
R<br />
L<br />
DIGITAL<br />
OUTPUT<br />
(OPTICAL)<br />
1<br />
DIGITAL<br />
INPUT<br />
(OPTICAL)<br />
2<br />
1<br />
DIGITAL<br />
INPUT<br />
(COAXAL)<br />
FRONT<br />
2<br />
R<br />
GND<br />
L<br />
REMOTE<br />
CONTROL<br />
FRONT<br />
SURR<br />
SURR<br />
BACK<br />
OUT<br />
R<br />
SUB<br />
WOOFER<br />
1 Subwoofer<br />
2 Surround back right speaker<br />
3 Surround right speaker<br />
4 Front right speaker<br />
5 Front left speaker<br />
PRE<br />
OUT<br />
L<br />
(SB)<br />
CENTER<br />
ANTENNA<br />
IR IN<br />
R<br />
ZONE 2<br />
AM F<br />
75<br />
L<br />
VIDEO<br />
1<br />
V IDEO<br />
2<br />
MA<br />
VIDEO<br />
6 Surround left speaker<br />
7 Surround back left speaker<br />
8 Center speaker<br />
SUB<br />
WOOFER<br />
CENTER<br />
R<br />
1<br />
L<br />
2<br />
3<br />
1 Power amplifier<br />
2 Surround back left speaker<br />
3 Surround back right speaker<br />
4 Front right speaker<br />
5 Front left speaker<br />
SURR<br />
SPEAKERS<br />
ZONE 2<br />
SPEAKERS<br />
R<br />
MAIN<br />
ZONE 2<br />
7 8<br />
6 Center speaker<br />
7 Surround right speaker<br />
8 Surround left speaker<br />
L<br />
26
Connecting the power<br />
STANDBY indicator<br />
STANDBY/ON<br />
SEND/LEARN<br />
indicator<br />
ON<br />
AUDIO MODE<br />
STNBY<br />
AUDIO<br />
MUTING<br />
PTY/ TP<br />
FM MUTE /<br />
MODE DOWN TUNING UP<br />
CHARACTER / BASS /<br />
MEMORY TREBLE CH LEVEL ZONE 2 VOL<br />
MASTER VOLUME<br />
TRACK<br />
DISC<br />
STANDBY/ ON<br />
DSP/ PRESET<br />
STANDBY<br />
ZONE 2<br />
SMART SCAN<br />
CONTROLLER<br />
REC<br />
OPEN/CLOSE<br />
POWER<br />
ON<br />
OFF<br />
PUSH TO ENTER<br />
DVD<br />
CD<br />
REC OUT ZONE 2<br />
DISPLAY<br />
DIRECT<br />
LISTENING MODE<br />
STEREO<br />
/ DTS<br />
THX<br />
MENU<br />
EXIT<br />
T1<br />
T2<br />
TUN<br />
PH<br />
SURROUND<br />
V1<br />
V2 V3 V –<br />
PHONES<br />
AUDIO SELECTOR<br />
VIDEO 4 /VIDEO CAM INPUT<br />
STEREO DIRECT DSP<br />
1 2 3<br />
DVD VIDEO 1 VIDEO 2 VIDEO 3 VIDEO 4<br />
VCR 1 VCR 2<br />
TAPE<br />
FM AM PHONO C D<br />
SURROUND THX DSP<br />
4 5 6<br />
S VIDEO<br />
VIDEO L AUDIO R<br />
AV RECEIVER <strong>TX</strong>-<strong>DS787</strong><br />
Re-EQ CH SEL LEVEL +<br />
7 8 9<br />
LATE NIGHT DIMMER LEVEL –<br />
+ 10 0 ENT<br />
HOME THEATER CONTROLLER<br />
RC-390M<br />
POWER<br />
To wall outlet<br />
Connecting the power<br />
• The <strong>TX</strong>-<strong>DS787</strong> is shipped with the main power (POWER)<br />
switch in the on position ( ON). When the power cord is<br />
plugged in for the first time, the <strong>TX</strong>-<strong>DS787</strong> will automatically<br />
enter the standby state and the STANDBY indicator will light<br />
(same condition after step 2 below).<br />
• Before you plug in the <strong>TX</strong>-<strong>DS787</strong>, confirm that all<br />
connections have been made properly.<br />
• Turning on the power may cause a momentary power surge,<br />
which might interfere with other electrical equipment on the<br />
same circuit, such as computers. If this happens, use a wall<br />
outlet on a different circuit.<br />
1. Plug the power cord into an AC wall outlet.<br />
2. Press the POWER switch to set the <strong>TX</strong>-<strong>DS787</strong><br />
to standby state.<br />
The STANDBY indicator will light up.<br />
3. Press the STANDBY/ON button to turn on the<br />
<strong>TX</strong>-<strong>DS787</strong>. The display will light up and the<br />
STANDBY indicator will turn off.<br />
If you press the STANDBY/ON button again, the receiver<br />
returns to Standby mode.<br />
Turning the power on from the remote controller:<br />
Before you can use the remote controller, you must perform steps<br />
1 and 2 above and place the <strong>TX</strong>-<strong>DS787</strong> in the standby state.<br />
1. Press the AUDIO MODE button.<br />
2. Press the ON button to turn on the <strong>TX</strong>-<strong>DS787</strong><br />
(take it out of the standby state).<br />
• To return the <strong>TX</strong>-<strong>DS787</strong> to the standby state, press the<br />
STNBY button.<br />
Memory preservation<br />
This unit does not require memory preservation batteries. A<br />
built-in memory power backup system preserves the contents<br />
of the memory during power failures and even when the<br />
POWER switch is set to off. The POWER switch must be set<br />
to on in order to charge the backup system.<br />
The memory preservation period after the unit has been<br />
turned off varies depending on climate and placement of the<br />
unit. On the average, memory contents are protected over a<br />
period of a few weeks after the last time the unit has been<br />
turned off. This period is shorter when the unit is exposed to a<br />
highly humid climate.<br />
27
The On-Screen Display (OSD) menu<br />
The OSD menu is a setting menu that is displayed on your TV<br />
monitor and allows you to perform your speaker settings, setup<br />
your input sources, set the listening modes, and much more. In<br />
most situations, you will only need to set this once during the<br />
installation and layout of your home theater, and it rarely needs to<br />
be changed later.<br />
The OSD menu consists of a main screen that is divided up into 5<br />
menus: Speaker Setup, Input Setup, Listening Mode Setup,<br />
Preference, and OSD Setup. These menus are then divided up into<br />
various sub-menus, and these contain settings for you to optimize<br />
your home theater as you wish.<br />
1.Speaker Setup<br />
1.Speaker Config<br />
2.Speaker Distance<br />
3.Level Calibration<br />
4.Bass Peak Level<br />
|ENTER| Quit:|OSD|<br />
2.Input Setup<br />
Input:DVD<br />
1.Audio Setup<br />
2.Video Setup<br />
3.Listening Mode Preset<br />
4.Tone Control<br />
5.IntelliVolume<br />
6.12V Trigger<br />
|ENTER| Quit:|OSD|<br />
3.Listening Mode Setup<br />
Menu<br />
1.Speaker Setup<br />
2.Input Setup<br />
3.Listening Mode Setup<br />
4.Preference<br />
5.OSD Setup<br />
1.Stereo Setup<br />
2.Theater-Dimensional<br />
Setup<br />
3.Surround Setup<br />
4.THX Setup<br />
5.Mono Movie Setup<br />
|ENTER| Quit:|OSD|<br />
3.Listening Mode Setup<br />
|ENTER| Quit:|OSD|<br />
6.Enhanced 7 Setup<br />
7.Orchestra Setup<br />
8.Unplugged Setup<br />
9.Studio-Mix Setup<br />
10.TV Logic Setup<br />
12.All Ch Stereo Setup<br />
|ENTER| Quit:|OSD|<br />
4.Preference<br />
1.Volume Setup<br />
2.Headphones Level<br />
3.DTS LFE Level Setup<br />
|ENTER| Quit:|OSD|<br />
5.OSD Setup<br />
1.OSD Config<br />
2.OSD Setup<br />
3.OSD Position<br />
|ENTER| Quit:|OSD|<br />
28
The On-Screen Display (OSD) menu<br />
OSD<br />
Menu<br />
1.Speaker Setup<br />
2.Input Setup<br />
3.Listening Mode Setup<br />
4.Preference<br />
5.OSD Setup<br />
|ENTER| Quit:|OSD|<br />
Main menu<br />
1.Speaker Setup<br />
1.Speaker Config<br />
2.Speaker Distance<br />
3.Level Calibration<br />
4.Bass Peak Level<br />
|ENTER| Quit:|OSD|<br />
Menu<br />
1-1.Speaker Config<br />
a.Subwoofer :Yes<br />
b.Front :Small<br />
c.Center :Small<br />
d.Surr L/R :Small<br />
e.Surr Back :Small<br />
f.Surr Back Out :1ch<br />
Quit:|OSD|<br />
Sub menu<br />
Navigating through the OSD menu<br />
The explanations here assume you are using the buttons on the<br />
<strong>TX</strong>-<strong>DS787</strong> when entering the OSD menu. However, you can use<br />
the buttons on the remote controller as well. In addition to the<br />
display of the OSD Menu on your television monitor, the<br />
corresponding menu will also be displayed in the front display on<br />
the <strong>TX</strong>-<strong>DS787</strong>.<br />
The buttons on the remote controller correspond to those on the<br />
<strong>TX</strong>-<strong>DS787</strong> as shown below.<br />
Button on remote controller<br />
OSD/MENU<br />
(upper edge of<br />
ENTER button)<br />
Button on <strong>TX</strong>-<strong>DS787</strong><br />
MENU<br />
MENU<br />
UP<br />
1. Press the MENU button.<br />
The main menu screen of the OSD menu appears on your TV<br />
monitor.<br />
2. Using the and cursor buttons, select the<br />
menu that you want to enter.<br />
3. Press the ENTER button to enter the selected<br />
menu.<br />
The screen for that menu appears.<br />
4. Using the and cursor buttons, select the<br />
sub-menu that you want to enter, and press<br />
the ENTER button.<br />
Each sub-menu has different settings that can be changed as<br />
desired, and they are all explained below. To change a setting,<br />
first select it using the and cursor buttons, and then<br />
change the setting using the and cursor buttons.<br />
(lower edge of<br />
ENTER button)<br />
DOWN<br />
5. Press the EXIT button to set the new settings<br />
and return to the previous menu screen, and<br />
again to return to the main screen.<br />
(left edge of<br />
ENTER button)<br />
(right edge of<br />
ENTER button)<br />
ENTER<br />
EXIT/RETURN<br />
DSP/PRESET<br />
PUSH TO ENTER<br />
DSP/PRESET<br />
PUSH TO ENTER<br />
DSP/PRESET<br />
PUSH TO ENTER<br />
EXIT<br />
(turn the<br />
SSC dial<br />
to the left)<br />
(turn the<br />
SSC dial<br />
to the right)<br />
(press the<br />
SSC dial)<br />
EXIT<br />
Note:<br />
Press the MENU button to exit the OSD menu immediately.<br />
If the OSD Menu does not appear<br />
If the monitor is connected to MONITOR OUT (VIDEO) of the<br />
<strong>TX</strong>-<strong>DS787</strong>, then perform the operations given below and set the<br />
OSD output to “Video.” (The initial setting is “S Video.”)<br />
1. Press the MENU button.<br />
“1. Speaker Setup” appears in the front display.<br />
2. Turn the SSC dial to the right to display “5.<br />
OSD Setup” and press the SSC dial.<br />
“OSD Config?” appears.<br />
3. Press the SSC dial.<br />
“OSD Out: S Video” appears.<br />
4. Turn the SSC dial to the right to display “OSD<br />
Out: Video.”<br />
The OSD output changes to “Video.”<br />
29
Speaker Setup<br />
30<br />
1. Speaker Setup menu<br />
After you have installed the <strong>TX</strong>-<strong>DS787</strong>, connected all the<br />
components, and determined the speaker layout, it is now time to<br />
perform the settings in the Speaker Setup menu for the optimum<br />
sound acoustics for your environment and speaker layout.<br />
Before you perform the following settings, it is important that you<br />
first determine the following characteristics:<br />
• The types and sizes of the speakers that are connected.<br />
• The distance from each speaker to your normal listening<br />
position.<br />
Memo:<br />
(Only one surround back speaker)<br />
Front<br />
Menu<br />
1.Speaker<br />
1.Speaker<br />
Setup<br />
Setup<br />
2.Input Setup<br />
3.Listening Mode Setup<br />
4.Preference<br />
1.Speaker Config<br />
5.OSD<br />
2.Speaker<br />
Setup<br />
Distance<br />
3.Level Calibration<br />
4.Bass Peak Level<br />
[ ]m/ft<br />
SL<br />
(Two surround back speakers)<br />
Front<br />
[ ]m/ft<br />
SL<br />
[ ]m/ft<br />
SW<br />
[ ]<br />
m/ft<br />
[ ]m/ft<br />
|ENTER| Quit:|OSD|<br />
SW<br />
[ ]<br />
m/ft<br />
[ ]m/ft<br />
SBL<br />
|ENTER| Quit:|OSD|<br />
Monitor<br />
Center<br />
SB<br />
Monitor<br />
Center<br />
[ ]m/ft<br />
[ ]m/ft<br />
[ ]m/ft<br />
[ ]m/ft<br />
[ ]m/ft<br />
Tip:<br />
When setting the speaker size in the Speaker Config sub-menu,<br />
use the guidelines given below.<br />
Large: The complete frequency range for the channel you are<br />
setting will be output from the speaker.<br />
Small: Frequencies of the channel you are setting lower than 80<br />
Hz will be output from the subwoofer. If the front speakers are<br />
set to “Large,” then the sound may be output from both the left<br />
and right speakers. (Set all speakers for THX speaker systems<br />
to “small.”)<br />
SBR<br />
Front<br />
[ ]m/ft<br />
SR<br />
Front<br />
[ ]m/ft<br />
SR<br />
[ ]m/ft<br />
1-1. Speaker Config sub-menu<br />
Here you will enter which speakers are connected and the size of<br />
each speaker.<br />
Menu<br />
1.Speaker<br />
1.Speaker<br />
Setup<br />
Setup<br />
2.Input Setup<br />
3.Listening Mode Setup<br />
4.Preference<br />
5.OSD<br />
1-1.Speaker 1.Speaker Setup<br />
Config<br />
2.Speaker Distance<br />
3.Level Calibration<br />
4.Bass a.Subwoofer Peak Level :Yes<br />
b.Front :Small<br />
c.Center<br />
|ENTER| Quit:|OSD|<br />
:Small<br />
d.Surr L/R :Small<br />
e.Surr Back :Small<br />
f.Surr |ENTER| Back Out Quit:|OSD| :1ch<br />
Quit:|OSD|<br />
a. Subwoofer<br />
Yes: Select when a subwoofer is connected.<br />
No: Select when a subwoofer is not connected.<br />
b. Front<br />
Large: Select if the front speakers are large sized.<br />
Small: Select if the front speakers are small sized.<br />
• If “No” is selected for the Subwoofer setting, then this setting<br />
is fixed to “Large.”<br />
c. Center<br />
None: Select if no center speaker is connected.<br />
Large: Select if the center speaker is large sized.<br />
Small: Select if the center speaker is small sized.<br />
• If “Small” is selected for the Front setting, then “Large”<br />
cannot be selected for this setting.<br />
d. Surr L/R<br />
None: Select if no surround left and right speakers are connected.<br />
Large: Select if the surround left and right speakers are large<br />
sized.<br />
Small: Select if the surround left and right speakers are small<br />
sized.<br />
• If “Small” is selected for the Front setting, then “Large”<br />
cannot be selected for this setting.<br />
e. Surr Back<br />
None: Select if no surround back left and right speakers are<br />
connected.<br />
Large: Select if the surround back left and right speakers are large<br />
sized.<br />
Small: Select if the surround back left and right speakers are small<br />
sized.<br />
• If “None” is selected for the Surround L/R setting, then this<br />
setting is fixed to “None.” (The display also disappears from<br />
the screen.)<br />
• If “Small” is selected for the Surround L/R setting, then<br />
“Large” cannot be selected for this setting.<br />
f. Surr Back Out<br />
1ch: Select if there is only one surround back speaker.<br />
2ch (Preout Only): Select if there are two surround back<br />
speakers. (For preout output only.)
Speaker Setup<br />
1-2. Speaker Distance sub-menu<br />
Here you will enter the distance from each speaker to your normal<br />
listening position (Loudspeaker Position Time Synchronization*).<br />
This is important for the timing of the acoustics to create the<br />
proper sound space that the <strong>TX</strong>-<strong>DS787</strong> and today’s sound systems<br />
are able to produce.<br />
Note:<br />
Speakers that you selected “No” or “None” for in the Speaker<br />
Config sub-menu will not appear.<br />
(Only one surround back speaker)<br />
Menu<br />
1.Speaker<br />
1.Speaker<br />
Setup<br />
Setup<br />
2.Input Setup<br />
3.Listening Mode Setup<br />
4.Preference<br />
5.OSD<br />
1-2.Speaker 1.Speaker Config<br />
Setup<br />
Distance<br />
2.Speaker Distance<br />
3.Level Calibration<br />
4.Bass a.Unit Peak Level :meters<br />
b.Front L/R : 3.60m<br />
c.Center<br />
|ENTER| Quit:|OSD|<br />
: 3.60m<br />
d.Surr Right : 2.10m<br />
(Two surround back speakers)<br />
f.Surr |ENTER| Back Quit:|OSD| : 2.10m<br />
g.Surr Left : 2.10m<br />
h.Subwoofer : 3.60m<br />
Quit:|OSD|<br />
Menu<br />
1.Speaker Setup<br />
2.Input<br />
1.Speaker<br />
Setup<br />
Setup<br />
3.Listening Mode Setup<br />
4.Preference<br />
1-2.Speaker<br />
5.OSD<br />
1.Speaker<br />
Setup<br />
Config Distance<br />
2.Speaker Distance<br />
3.Level Calibration<br />
4.Bass a.Unit Peak Level :meters<br />
b.Front L/R : 3.60m<br />
c.Center<br />
|ENTER| Quit:|OSD|<br />
: 3.60m<br />
d.Surr Right : 2.10m<br />
e.Surr Back R : 2.10m<br />
f.Surr |ENTER| Back L Quit:|OSD| : 2.10m<br />
g.Surr Left : 2.10m<br />
h.Subwoofer : 3.60m<br />
Quit:|OSD|<br />
a. Unit<br />
feet: Select if you will enter the distances in feet.<br />
meters: Select if you will enter the distances in meters.<br />
b. Front L/R<br />
Set the distance from the front left and right speakers to your<br />
normal listening position between 1 and 30 feet in 0.5-feet<br />
intervals (0.3 to 9 meters in 0.15-meter intervals).<br />
Position the front left and right speakers so that they are the same<br />
distance from the listener. If they are not, you may lose the center<br />
position for stereo sound.<br />
c. Center<br />
Set the distance from the center speaker to your normal listening<br />
position between 1 and 30 feet in 0.5-feet intervals (0.3 to 9 meters<br />
in 0.15-meter intervals).<br />
d. Surr Right<br />
Set the distance from the surround right speaker to your normal<br />
listening position between 1 and 30 feet in 0.5-feet intervals (0.3 to<br />
9 meters in 0.15-meter intervals).<br />
e. Surr Back R<br />
Set the distance from the surround back right speaker to your<br />
normal listening position between 1 and 30 feet in 0.5-feet<br />
intervals (0.3 to 9 meters in 0.15-meter intervals).<br />
• This setting appears if set for two surround back speakers in<br />
the Speaker Config sub-menu.<br />
f. Surr Back L<br />
Set the distance from the surround back left speaker to your<br />
normal listening position between 1 and 30 feet in 0.5-feet<br />
intervals (0.3 to 9 meters in 0.15-meter intervals).<br />
• This setting appears if set for two surround back speakers in<br />
the Speaker Config sub-menu.<br />
Note:<br />
For audio using surround back right and surround back left<br />
speakers, a separately-sold 2-channel power amplifier is required.<br />
f. Surr Back<br />
Set the distance from the surround back speaker to your normal<br />
listening position between 1 and 30 feet in 0.5-feet intervals (0.3 to<br />
9 meters in 0.15-meter intervals).<br />
• This setting appears if set for one surround back speaker in the<br />
Speaker Config sub-menu.<br />
g. Surr Left<br />
Set the distance from the surround left speaker to your normal<br />
listening position between 1 and 30 feet in 0.5-feet intervals (0.3 to<br />
9 meters in 0.15-meter intervals).<br />
h. Subwoofer<br />
Set the distance from the subwoofer to your normal listening<br />
position between 1 and 30 feet in 0.5-feet intervals (0.3 to 9 meters<br />
in 0.15-meter intervals).<br />
* Loudspeaker Position Time Synchronization is a registered trademark<br />
of Lucasfilm Ltd.<br />
31
Speaker Setup<br />
1-3. Level Calibration sub-menu<br />
Here you will set the volume for each speaker so that they are all<br />
heard by the listener at the same level. This is especially important<br />
for speaker layouts where the left and right speakers are at<br />
different distances or in asymmetrical positions due to room<br />
designs and configurations. These settings and the distance<br />
settings performed above are vital to create the proper acoustics<br />
required for the optimum sound space and dynamics.<br />
Note:<br />
The speaker level settings here are not effective for multi-channel<br />
input sources. To adjust the speaker levels for multi-channel input<br />
sources, you will need to use the CH SEL, LEVEL+, and LEVEL–<br />
buttons on the RC-390M remote controller. See page 59.<br />
(Only one surround back speaker)<br />
Menu<br />
1.Speaker<br />
1.Speaker<br />
Setup<br />
Setup<br />
2.Input Setup<br />
3.Listening Mode Setup<br />
4.Preference<br />
5.OSD<br />
1-3.Level 1.Speaker<br />
Setup<br />
Calibration<br />
Config<br />
2.Speaker Distance<br />
3.Level Calibration<br />
4.Bass a.Left Peak Level : 0dB<br />
b.Center : 0dB<br />
c.Right<br />
|ENTER| Quit:|OSD|<br />
: 0dB<br />
d.Surr Right : 0dB<br />
f.Surr |ENTER| Back Quit:|OSD| : 0dB<br />
g.Surr Left : 0dB<br />
h.Subwoofer : 0dB<br />
Quit:|OSD|<br />
(Two surround back speakers)<br />
Menu<br />
1.Speaker<br />
1.Speaker<br />
Setup<br />
Setup<br />
2.Input Setup<br />
3.Listening Mode Setup<br />
4.Preference<br />
5.OSD<br />
1-3.Level 1.Speaker<br />
Setup<br />
Calibration<br />
Config<br />
2.Speaker Distance<br />
3.Level Calibration<br />
4.Bass a.Left Peak Level : 0dB<br />
b.Center : 0dB<br />
c.Right<br />
|ENTER| Quit:|OSD|<br />
: 0dB<br />
d.Surr Right : 0dB<br />
e.Surr Back R : 0dB<br />
f.Surr |ENTER| Back L Quit:|OSD| : 0dB<br />
g.Surr Left : 0dB<br />
h.Subwoofer : 0dB<br />
Quit:|OSD|<br />
Calibrating the speaker levels<br />
(1) When this sub-menu is entered, the <strong>TX</strong>-<strong>DS787</strong> will emit a pink<br />
noise from the front left speaker. At this time, the Master<br />
volume automatically increases to the reference level (0dB).<br />
Remember the level of this noise and then press the cursor<br />
button. (Note that this can be adjusted to any level between –<br />
12 and 12 decibels in 1-decibel intervals.) The <strong>TX</strong>-<strong>DS787</strong> will<br />
now emit the pink noise from the center speaker.<br />
(2) Using the and cursor buttons, adjust the volume level of<br />
the noise from the center speaker so that it is the same level as<br />
the front left speaker. You can jog back and forth between the<br />
speakers to help you compare the volume levels.<br />
(3) Press the cursor button again. The <strong>TX</strong>-<strong>DS787</strong> will now emit<br />
the pink noise from the front right speaker.<br />
(4) Repeat steps (2) and (3) above for the front right and other<br />
speakers until all speakers are adjusted to the same volume<br />
level.<br />
Notes:<br />
• Speakers that you selected “No” or “None” for in the Speaker<br />
Config sub-menu will not appear.<br />
• To accurately set the output levels, it is recommended to use a<br />
handheld sound pressure level (SPL) meter. Set the meter to C-<br />
weighting and slow averaging. A Radio Shack ® SPL meter or<br />
equivalent is recommended. Using the internal channel noise<br />
generators, set each channel so that you read a 75 decibel<br />
sound pressure level.<br />
a. Left<br />
Sound comes from the front left speaker. Adjust the sound level<br />
between –12 and 12 decibels in 1-decibel intervals.<br />
b. Center<br />
Sound comes from the center speaker. Adjust the sound level<br />
between –12 and 12 decibels in 1-decibel intervals.<br />
c. Right<br />
Sound comes from the front right speaker. Adjust the sound level<br />
between –12 and 12 decibels in 1-decibel intervals.<br />
d. Surr Right<br />
Sound comes from the surround right speaker. Adjust the sound<br />
level between –12 and 12 decibels in 1-decibel intervals.<br />
e. Surr Back R<br />
Sound comes from the surround back right speaker. Adjust the<br />
sound level between –12 and 12 decibels in 1-decibel intervals.<br />
• This setting appears if set for two surround back speakers in<br />
the Speaker Config sub-menu.<br />
f. Surr Back L<br />
Sound comes from the surround back (left) speaker. Adjust the<br />
sound level between –12 and 12 decibels in 1-decibel intervals.<br />
• This setting appears if set for two surround back speakers in<br />
the Speaker Config sub-menu.<br />
f. Surr Back<br />
Sound comes from the surround back speaker. Adjust the sound<br />
level between –12 and 12 decibels in 1-decibel intervals.<br />
• This setting appears if set for one surround back speaker in the<br />
Speaker Config sub-menu.<br />
Note:<br />
For audio using surround back right and surround back left<br />
speakers, a separately-sold 2-channel power amplifier is required.<br />
g. Surr Left<br />
Sound comes from the surround left speaker. Adjust the sound<br />
level between –12 and 12 decibels in 1-decibel intervals.<br />
h. Subwoofer<br />
Sound comes from the subwoofer. Adjust the sound level between<br />
–15 and 12 decibels in 1-decibel intervals.<br />
32
Speaker Setup<br />
1-4. Bass Peak Level (Bass Peak Level<br />
Manager*) sub-menu<br />
Setting the bass peak level is important to keep your subwoofer<br />
from being damaged by preventing it from outputting over a set<br />
volume. If your subwoofer has a built-in limiter, set this setting to<br />
“Off.”<br />
Note:<br />
If your system does not include a subwoofer, this setting will set<br />
the bass peak level for your front speakers.<br />
Menu<br />
1.Speaker<br />
1.Speaker<br />
Setup<br />
Setup<br />
2.Input Setup<br />
3.Listening Mode Setup<br />
4.Preference<br />
1.Speaker<br />
5.OSD<br />
1-4.Bass<br />
Setup<br />
Peak Config Level<br />
2.Speaker Distance<br />
3.Level Calibration<br />
4.Bass a.Bass Peak Level<br />
Limiter :Off<br />
|ENTER| Quit:|OSD|<br />
|ENTER| Quit:|OSD|<br />
Quit:|OSD|<br />
a. Bass Peak Level Limiter<br />
On: Select to set the bass peak level. When “On” is selected, the<br />
Peak Level setting appears below.<br />
Off: Select to turn off the bass peak level limiting function.<br />
Menu<br />
1.Speaker<br />
1.Speaker<br />
Setup<br />
Setup<br />
2.Input Setup<br />
3.Listening Mode Setup<br />
4.Preference<br />
5.OSD<br />
1-4.Bass 1.Speaker<br />
Setup<br />
Peak Config Level<br />
2.Speaker Distance<br />
3.Level Calibration<br />
4.Bass a.Bass Peak Level<br />
Limiter :On<br />
b.Bass<br />
|ENTER|<br />
Peak<br />
Quit:|OSD|<br />
Level<br />
:-12dB|ENTER|<br />
|ENTER| Quit:|OSD|<br />
|ENTER| Quit:|OSD|<br />
b. Bass Peak Level<br />
The current bass peak level is displayed. Press the ENTER button<br />
(or the SSC dial) to output a test sound. Then press the cursor<br />
button (or turn the SSC dial) to slowly raise the volume to the point<br />
where the sound becomes distorted and then back it off until it<br />
returns to normal. This is the proper setting for the bass peak level.<br />
After setting the Peak Level at the Bass Peak Level sub-menu,<br />
press the EXIT button. The values are set and the previous screen<br />
appears.<br />
Menu<br />
1.Speaker<br />
1.Speaker<br />
Setup<br />
Setup<br />
2.Input Setup<br />
3.Listening Mode Setup<br />
4.Preference<br />
5.OSD<br />
1-4.Bass 1.Speaker<br />
Setup<br />
Peak Config Level<br />
2.Speaker Distance<br />
3.Level Calibration<br />
4.Bass Peak Level<br />
b.Peak<br />
|ENTER|<br />
Level<br />
Quit:|OSD|<br />
:-12dB<br />
1.Turn Volume up.<br />
2.Press |ENTER| EXIT Quit:|OSD| just<br />
before sound is<br />
distorted.<br />
Quit:|OSD|<br />
Note:<br />
• The volume can be adjusted to either –∞ or between –61 to<br />
+18 decibels in 1-decibel increments.<br />
• Do not allow the distorted sound to be output from the<br />
subwoofer for a long time for it may damage the subwoofer.<br />
* Bass Peak Level Manager is a registered trademark of Lucasfilm Ltd.<br />
33
Input Setup<br />
2. Input Setup menu<br />
This menu allows you to setup the various input sources available<br />
with the <strong>TX</strong>-<strong>DS787</strong>. Each input source may have a great number<br />
of settings that are difficult to keep track of, so we recommend<br />
making a chart to record what you have set and for which<br />
component to prevent confusion later.<br />
Menu<br />
1.Speaker Setup<br />
2.Input<br />
2.Input<br />
Setup<br />
Setup<br />
3.Listening<br />
Input:DVD<br />
Mode Setup<br />
4.Preference<br />
5.OSD<br />
1.Audio<br />
Setup<br />
Setup<br />
2.Video Setup<br />
3.Listening Mode Preset<br />
4.Tone Control<br />
5.IntelliVolume<br />
6.12V<br />
|ENTER|<br />
Trigger<br />
Quit:|OSD|<br />
|ENTER| Quit:|OSD|<br />
Current<br />
Input<br />
Source<br />
2-1. Audio Setup sub-menu<br />
The settings made in this sub-menu are valid for the input source<br />
that is currently selected with the input source buttons at the front<br />
panel and, therefore, these settings are made separately for each<br />
digital input source. This sub-menu will not appear if the selected<br />
input source button is AM or FM. If this setting is incorrectly<br />
made, the digital audio signals may not be properly output, or not<br />
heard at all.<br />
Menu<br />
1.Speaker Setup<br />
2.Input<br />
2.Input<br />
Setup<br />
Setup<br />
3.Listening<br />
Input:DVD<br />
Mode Setup<br />
4.Preference<br />
5.OSD<br />
2-1.Audio a.Audio<br />
Setup<br />
Setup Setup<br />
b.Video Input:DVD Setup<br />
c.Listening Audio:Auto(OPT1)<br />
Mode Preset<br />
d.Tone Control<br />
e.IntelliVolume<br />
a.Digital Input:OPT1<br />
f.12V<br />
|ENTER|<br />
Trigger<br />
b.Digital Format:All<br />
Quit:|OSD|<br />
c.Multichannel |ENTER| Quit:|OSD| :No<br />
Quit:|OSD|<br />
Initial settings for each input source<br />
Input source<br />
Digital input<br />
CD OPTICAL 1<br />
PHONO ----<br />
FM<br />
AM<br />
TAPE ----<br />
VIDEO 4 ----<br />
VIDEO 3 OPTICAL 2<br />
VIDEO2/VCR2 ----<br />
VIDEO1/VCR1 COAXIAL 2<br />
DVD COAXIAL 1<br />
---- : Available for digital input but not set in initial settings.<br />
: Not available for digital input.<br />
34
Input Setup<br />
a. Digital Input<br />
This setting tells the <strong>TX</strong>-<strong>DS787</strong> which input source button on the<br />
front panel is connected with which digital input jack on the rear<br />
panel. To perform this setting, you must first select a digital input<br />
source at the front panel and then set the name of the digital input<br />
jack it is connected to here.<br />
For example, if the input source selected at the front panel is CD<br />
and the compact disc player is connected to DIGITAL INPUT<br />
(OPTICAL) 1, then select “OPT1” here. If the input source<br />
selected is not connected to a digital input, then select “----.”<br />
OPT1: Select if connected to DIGITAL INPUT (OPTICAL) 1.<br />
OPT2: Select if connected to DIGITAL INPUT (OPTICAL) 2.<br />
COAX1: Select if connected to DIGITAL INPUT (COAXIAL) 1.<br />
COAX2: Select if connected to DIGITAL INPUT (COAXIAL) 2.<br />
––––: Select if the input source is not from a digital input jack.<br />
Note:<br />
Do not assign a digital input to more than one input source. If you<br />
are making a digital connection that requires you to change the<br />
default settings, be sure to always first cancel the current digital<br />
input setting and then assign the new setting.<br />
b. Digital Format<br />
The default setting is “All.” If “----” is selected for this input<br />
source at the Digital Input setting, then this setting will not appear.<br />
Although you can use this default setting as is, you may change it<br />
as desired depending on the input signal format (e.g., if you know<br />
that you will always be listening to a certain input signal format<br />
from a particular input source).<br />
All: Select for automatic detection of the input signal format. The<br />
input signal format (Dolby Digital, DTS, PCM or Analog)<br />
used by the selected input source is detected automatically to<br />
execute the required decoding process.<br />
DTS: Select for DTS signal processing. The decoding process is<br />
executed only when DTS signals are input.<br />
PCM: Select for PCM signal processing. The decoding process is<br />
executed only when PCM signals are input.<br />
Note:<br />
If “All” is selected and a compact disc or LD is fast-forwarded<br />
during playback, decoded PCM signals may produce a skipping<br />
sound. In such cases, change the setting to “PCM.”<br />
Notes on DTS:<br />
• If you play a CD or LD that supports DTS when the “PCM”<br />
setting is selected on the <strong>TX</strong>-<strong>DS787</strong>, the DTS encoded signal<br />
will not be decoded and noise will be output. This noise could<br />
damage the amplifier and speakers. Therefore, be sure to<br />
selected “All” or “DTS” and use the digital input jacks<br />
(OPTICAL or COAXIAL) to connect the DTS source.<br />
• If you play a CD or LD that supports DTS when “All” is<br />
selected, you may hear a noise for a short while until the DTS<br />
decoder recognizes the DTS-encoded signal and starts<br />
operating. This is not a malfunction.<br />
• If you press the PAUSE or SKIP button on the player while<br />
playing a DTS source, a short noise may be heard. This is not a<br />
malfunction. In such cases, try playing the source in the “DTS”<br />
selected.<br />
• The DTS indicator on the <strong>TX</strong>-<strong>DS787</strong> lights while a DTS<br />
source is played. When playback finishes and the DTS signal<br />
transmission stops, the <strong>TX</strong>-<strong>DS787</strong> remains in DTS mode and<br />
the DTS indicator remains lit. This prevents noise when you<br />
operate the PAUSE or SKIP button on the player. Therefore, if<br />
the source is immediately switched from DTS to PCM, the<br />
PCM signal may not be played. In this case, stop the playback<br />
of the source on the player for about three seconds and then<br />
resume playback.<br />
• You may not be able to play some DTS source signals from<br />
certain CD players and LD players even if you connect the<br />
player to the <strong>TX</strong>-<strong>DS787</strong> digitally. This is because the digital<br />
signal has been processed (such as the output level, sampling<br />
frequency, or frequency response) and the <strong>TX</strong>-<strong>DS787</strong> cannot<br />
recognize the signal as DTS data. Therefore you may hear<br />
noise when you play a DTS source while processing the signal.<br />
• The outputs for the VIDEO 1 OUT, VIDEO 2 OUT, TAPE<br />
OUT, output analog audio signals. Do not record from CDs or<br />
LDs that support DTS using these outputs. If you do, the DTSencoded<br />
signal will be recorded as noise.<br />
• If a compact disc or LD encoded in the DTS format is played<br />
back with “PCM” selected, only noise will be produced.<br />
Always select “All” or “DTS” when playing back DTSencoded<br />
sources.<br />
c. Multichannel<br />
This sub-menu will not appear if AM or FM is selected at the front<br />
panel for the input source. This setting is normally set to “No,” and<br />
only needs to be changed to “Yes” if a DVD player, MPEG<br />
decoder, or other component that has a multi channel port is<br />
connected to the MULTI CHANNEL INPUT port for 5.1-channel,<br />
6.1-channel, or 7.1-channel audio. For example, if a DVD player is<br />
connected to the MULTI CHANNEL INPUT port, then select<br />
DVD at the front panel as the input source, bring up this sub-menu,<br />
and select “Yes” for the Multichannel setting. You can only select<br />
Multichannel with the AUDIO SELECTOR button when “Yes” is<br />
selected here.<br />
Note:<br />
When playing a device that is actually connected to the MULTI<br />
CHANNEL INPUT terminal, select Multichannel with the<br />
AUDIO SELECTOR button.<br />
35
Input Setup<br />
2-2. Video Setup sub-menu<br />
Menu<br />
1.Speaker Setup<br />
2.Input<br />
2.Input<br />
Setup<br />
Setup<br />
3.Listening<br />
Input:DVD<br />
Mode Setup<br />
4.Preference<br />
5.OSD<br />
2-2.Video a.Audio<br />
Setup<br />
Setup<br />
b.Video Input:DVD Setup<br />
c.Listening Mode Preset<br />
d.Tone a.Video Control:DVD<br />
e.IntelliVolume<br />
f.12V b.Component<br />
|ENTER|<br />
Trigger<br />
Quit:|OSD|<br />
Video<br />
:Input1<br />
|ENTER| Quit:|OSD|<br />
Quit:|OSD|<br />
a. Video<br />
This setting allows you to match the audio from one component<br />
with the video from another. Therefore, you can set a video source<br />
to be displayed while the audio from another input source is heard.<br />
For example, this allows you to play the music from a compact<br />
disc, while displaying the picture from a video cassette player or<br />
other video source.<br />
The default settings are given below.<br />
Input source selected<br />
CD<br />
PHONO<br />
FM<br />
AM<br />
TAPE<br />
DVD<br />
VIDEO1<br />
VIDEO2<br />
VIDEO3<br />
VIDEO4<br />
Video<br />
Last<br />
Last<br />
Last<br />
Last<br />
Last<br />
DVD<br />
VIDEO1<br />
VIDEO2<br />
VIDEO3<br />
VIDEO4<br />
b. Component<br />
If a component is connected to the one of the COMPONENT<br />
VIDEO inputs (1 or 2), then that input must be set here. This<br />
setting will not appear if AM, FM, PHONO, CD or TAPE is<br />
selected as the input source.<br />
The default settings are given below.<br />
Input source selected Component video input<br />
CD<br />
PHONO<br />
FM<br />
AM<br />
TAPE<br />
VIDEO 4 ----<br />
VIDEO 3 INPUT 2<br />
VIDEO 2/VCR 2 ----<br />
VIDEO 1/VCR 1 ----<br />
DVD INPUT 1<br />
---- : Not assigned with the default settings.<br />
Last : When you change to an input source set to “Last,” the video<br />
of the input source that you changed from is continued. For<br />
example, if the selected input source is VIDEO 1, and you then<br />
change to CD (set to “Last”), then the audio from the CD input<br />
is played while the video from VIDEO 1 continues.<br />
• If no video signal is to be assigned to the input source, set “----.”<br />
36
Input Setup<br />
2-3. Listening Mode Preset sub-menu<br />
With the <strong>TX</strong>-<strong>DS787</strong>, you can set a different listening mode for<br />
each different signal type that comes from each input source and<br />
also set the parameters for the listening mode itself. For example,<br />
if your DVD player also plays compact discs and the DVD video<br />
signal is DTS and the compact disc signal is PCM, then you can set<br />
a different listening mode for each.<br />
This is especially convenient if you frequently play the same types<br />
of movies or music.<br />
Menu<br />
1.Speaker Setup<br />
2.Input<br />
2.Input<br />
Setup<br />
Setup<br />
3.Listening<br />
Input:DVD<br />
Mode Setup<br />
4.Preference<br />
5.OSD<br />
2-3.ListeningMode a.Audio<br />
Setup<br />
Setup Preset<br />
b.Video Input:DVD Setup<br />
c.Listening Mode Preset<br />
d.Tone a.2ch Source Control<br />
e.IntelliVolume :Stereo<br />
f.12V<br />
|ENTER|<br />
Trigger<br />
b.PCM fs=96k<br />
Quit:|OSD|<br />
:Stereo<br />
c.Multichannel,Mono<br />
|ENTER| Quit:|OSD|<br />
Source :Surround<br />
Quit:|OSD|<br />
Input source signals<br />
a. 2ch Source<br />
Set a listening mode for the input signal from 2-channel analog<br />
sources, PCM sources, and 2/0-channel Dolby Digital and DTS<br />
sources.<br />
b. PCM fs=96k<br />
Set a listening mode for the input signal from digital PCM sources<br />
recorded with a sampling rate of 96 kHz.<br />
c. Multichannel, Mono Source<br />
Set a listening mode for the input signal from 2/1, 2/2, 3/0, 3/2-<br />
channel Dolby Digital and DTS sources. Or, set a listening mode<br />
for the input signal from 1/0-channel (Mono) Dolby Digital and<br />
DTS sources.<br />
• The <strong>TX</strong>-<strong>DS787</strong> will automatically switch to the listening<br />
mode set for the current input signal. For example, even when<br />
using the same DVD player, if a CD is played, the listening<br />
mode automatically becomes “Stereo,” and if a DVD is played<br />
(Dolby Digital 3/2.1), the listening mode automatically<br />
becomes Dolby D.<br />
* The 5.1-channel digital surround format has a variety of<br />
versions including Dolby Digital and DTS. The 5.1- channel<br />
digital surround format enables you to individually record and<br />
play five full-range (20 Hz to 20 kHz) channels (left and right<br />
front, center, and two surround channels) plus an LFE channel<br />
(Low Frequency Effect) for the low-range effect sound. It will<br />
create a realistic sound that can be heard in the theaters and<br />
concert halls.<br />
Relationship between input source and listening mode<br />
Input source signal (display) 2ch PCM fs=96k Multichannel, Mono<br />
Type of software Tape, CD, DVD DVD, LD,<br />
Record, Tuner<br />
Digital satellite<br />
DVD Video (Stereo), LD (Stereo)<br />
broadcast<br />
Digital satellite<br />
DTS-CD<br />
Listening Mode<br />
broadcast<br />
Direct ● ●<br />
Stereo ● ● ●<br />
Theater-Dimensional ● ●<br />
Surround ● ●<br />
(Pro Logic (3 Stereo),<br />
(DolbyD,<br />
DolbyD, DTS)<br />
Dolby D/6.1, DTS,<br />
DTS-ES)<br />
THX ● ●<br />
(Cinema)<br />
(Cinema,<br />
Surround EX)<br />
Mono Movie ● ●<br />
Enhanced 7 ● ●<br />
Orchestra ● ●<br />
Unplugged ● ●<br />
Studio-Mix ● ●<br />
TV Logic ● ●<br />
All Ch Stereo<br />
●<br />
The listening modes that can be set are different for each input source format.<br />
Note:<br />
You may not be able to select all the listening modes shown here depending on your speaker configuration or the selected input<br />
source.<br />
37
Input Setup<br />
Listening Modes<br />
Stereo<br />
This mode has all input sounds output from the left and right front<br />
speakers.<br />
Direct<br />
This mode delivers pure sound with minimum sound quality<br />
adjustment and filtration. The sound recorded for the right and left<br />
front channels is output to the right and left front speakers only and<br />
not output to the subwoofer.<br />
Mono Movie<br />
This mode is suitable for playing back monaural recording such as<br />
old movie soundtracks. The center channel delivers the<br />
unprocessed original sound, whereas the other channels deliver the<br />
center-channel sound processed with the appropriate<br />
reverberation. This allows you to enjoy monaural sound with the<br />
atmosphere of a movie theater.<br />
Surround modes<br />
With this mode, decoding is performed automatically to match the<br />
input signal. This original mode adds no sound processing to the<br />
input signal.<br />
• DOLBY DIGITAL Surround,<br />
DTS (Digital Theater System) Surround<br />
This 5.1-channel digital surround format enables you to<br />
individually record and play five full-range (20Hz–20kHz)<br />
channels (left and right front, center, two surround channels)<br />
plus an LFE channel (Low Frequency Effect) for the lowrange<br />
effect sound. It will create a realistic sound that could be<br />
heard in the theaters and concert halls.<br />
Dolby D (Dolby Digital)<br />
This mode is for listening to sources encoded in the Dolby<br />
Digital format.<br />
Dialog normalization (Dialog Norm)<br />
Dialog normalization is a feature of Dolby Digital. With this<br />
function, for example, if “Dialog Norm: +4” is displayed while<br />
playing back a Dolby Digital source, it means that that source<br />
material was recorded 4 decibels higher than normal. Thus, by<br />
lowering the volume by 4 decibels, it can be played back at the<br />
same standard level for other sources. However, since most<br />
source materials have been recorded at the same standard<br />
level, you will rarely need to adjust the volume.<br />
DTS<br />
This mode is for playing back DTS sources.<br />
• Pro Logic/3 Stereo (Dolby Pro Logic/3 Stereo)<br />
This mode is for playing back sources encoded using the<br />
Dolby Surround format. Select this listening mode when you<br />
play a VHS, VHS hi-fi, LD, or DVD video that has the<br />
mark.<br />
This surround format consists of four channels (left, right,<br />
center, and monaural surround) and emphasizes the center<br />
channel. Dolby Pro Logic is very effective for panning music,<br />
conversation, and three-dimensional sound movement output<br />
from the three front channels. It also simulates the atmosphere<br />
and surround effects of the sound reflected from the side and<br />
rear walls of the theater.<br />
If no surround speakers are connected, then the surround<br />
sound is divided and output from the front left and right<br />
channels (3 stereo).<br />
THX<br />
This mode is for playing back sources using THX.<br />
This mode will work well with 5.1-channel Dolby Digital and<br />
DTS sources and Dolby encoded sources.<br />
For excellent fidelity when playing back THX sounds, it is<br />
recommended to use a THX-certified speaker system.<br />
• THX Cinema<br />
This is the conventional 5.1-channel THX format. This mode<br />
should be used only when playing back sources that were<br />
mixed for playback in large movie theater environments.<br />
• THX Surround EX<br />
“THX Surround EX - Dolby Digital Surround EX” is a joint<br />
development of Dolby Laboratories and the THX division of<br />
Lucasfilm Ltd.<br />
In a movie theater, film soundtracks that have been encoded<br />
with Dolby Digital Surround EX technology are able to<br />
reproduce an extra channel which has been added during the<br />
mixing of the program. This channel, called Surround Back,<br />
places sounds behind the listener in addition to the currently<br />
available front left, front center, front right, surround right,<br />
surround left, and subwoofer channels.<br />
This additional channel provides the opportunity for more<br />
detailed imaging behind the listener and brings more depth,<br />
spacious ambience, and sound localization than ever before.<br />
When released to the home consumer market, movies that<br />
were created using the Dolby Digital Surround EX<br />
technology, may have a note to that effect on the packaging. A<br />
list of movies created using this technology can be found on<br />
the Dolby web site at http://www.dolby.com .<br />
Only receiver and controller products bearing the THX<br />
Surround EX logo, when in the THX Surround EX mode,<br />
faithfully reproduce this new technology in the home.<br />
This product may also engage the “THX Surround EX” mode<br />
during the playback of 5.1 channel material that is not Dolby<br />
Digital Surround EX encoded. In such case, the information<br />
delivered to the Surround Back channel will be program<br />
dependent and may or may not be very pleasing depending on<br />
the particular soundtrack and the tastes of the individual<br />
listener.<br />
38
Input Setup<br />
T-D (Theater-Dimensional)<br />
For the best enjoyment of your home theater, it is recommended<br />
that you have at least front left and right speakers, a center speaker,<br />
and surround left and right speakers. However, even if you only<br />
have front left and right speakers, you can still enjoy multichannel<br />
audio by using this mode.<br />
This mode controls the characteristics of the sound that reaches<br />
each ear to reproduce a multi-speaker setup. To receive the full<br />
effect, there is an optimum listening position (sweet spot). Refer to<br />
the explanation of the listening angle. In addition, if the reflective<br />
sound components are large, it may be difficult to achieve the<br />
desired result, so be sure to set up your system and listening<br />
position to minimize reflective sound.<br />
Enhanced 7<br />
Enhanced 7 intends to reproduce a natural surround environment<br />
by using 7-channel speakers. The sound effects moving smoothly<br />
toward the surround back. This mode is good for music and TV<br />
sports programs.<br />
Orchestra<br />
This mode is appropriate for classical and opera music. The center<br />
channel is cut and the surround channels are emphasized to widen<br />
the stereo image. It will simulate the natural reverberation that is<br />
created in large halls.<br />
TV Logic<br />
This mode gives realistic acoustics to TV programs that are aired<br />
from TV studios. It enhances the entire surround sound and clarity<br />
of the conversation.<br />
Unplugged<br />
This mode is suitable for acoustical instrumental sounds, vocals, and<br />
jazz music. By emphasizing the front stereo image, it will simulate<br />
the acoustics that you would experience in front of the stage.<br />
Studio-Mix<br />
This mode is for rock and popular music. The lively sounds are<br />
enhanced for a powerful acoustic image that simulates the feeling<br />
of being in a club or rock concert.<br />
All Ch Stereo<br />
This mode is designed for playing background music. The front,<br />
surround, and surround back channels create a stereo image that<br />
encompasses the entire area.<br />
39
Input Setup<br />
2-4. Tone Control sub-menu<br />
This sub-menu allows you to increase or decrease the volume for<br />
only the low (bass) or high (treble) frequency sounds. This submenu<br />
does not appear if “Direct” or “THX” are selected as the<br />
listening mode.<br />
Menu<br />
1.Speaker Setup<br />
2.Input<br />
2.Input<br />
Setup<br />
Setup<br />
3.Listening<br />
Input:DVD<br />
Mode Setup<br />
4.Preference<br />
5.OSD<br />
a.Audio 2-4.Tone<br />
Setup<br />
Setup Control<br />
b.Video Input:DVD Setup<br />
c.Listening Mode Preset<br />
d.Tone a.Bass Control : 0dB<br />
e.IntelliVolume<br />
f.12V b.Treble<br />
|ENTER|<br />
Trigger<br />
Quit:|OSD|<br />
: 0dB<br />
|ENTER| Quit:|OSD|<br />
Quit:|OSD|<br />
a. Bass<br />
Press the cursor button to decrease the bass sounds and press the<br />
cursor button to increase the bass sounds. The bass can be<br />
adjusted between -12 and +12 decibels in two steps.<br />
b. Treble<br />
Press the cursor button to decrease the treble sounds and press<br />
the cursor button to increase the treble sounds. The treble can be<br />
adjusted between -12 and +12 decibels in two steps.<br />
2-5. IntelliVolume sub-menu<br />
When switching input sources, you may find that the output level<br />
for different components or input sources connected to the <strong>TX</strong>-<br />
<strong>DS787</strong> is different even though the main volume setting is the<br />
same. Under normal circumstances, you would then have to<br />
change the volume setting each time you change the input source.<br />
This IntelliVolume sub-menu allows you to preset a volume level<br />
for each input source separately so that when you do switch from<br />
one input source to another, the <strong>TX</strong>-<strong>DS787</strong> adjusts the volume<br />
accordingly so that the resulting volume stays the same. To set the<br />
IntelliVolume, simply select an input source at the front panel, and<br />
if that source is quieter than other sources, increase its decibel<br />
level with the cursor button, or if it is louder than other sources,<br />
decrease its decibel level with the cursor button.<br />
The IntelliVolume can be adjusted between -12 and +12 decibels.<br />
Menu<br />
1.Speaker Setup<br />
2.Input<br />
2.Input<br />
Setup<br />
Setup<br />
3.Listening<br />
Input:DVD<br />
Mode Setup<br />
4.Preference<br />
5.OSD<br />
2-5.IntelliVolume<br />
a.Audio<br />
Setup<br />
Setup<br />
b.Video Input:OPT1 Setup<br />
c.Listening Mode Preset<br />
d.Tone a.IntelliVolume Control<br />
e.IntelliVolume : 0dB<br />
f.12V<br />
|ENTER|<br />
Trigger<br />
Quit:|OSD|<br />
|ENTER| Quit:|OSD|<br />
Quit:|OSD|<br />
2-6. 12V Trigger sub-menu (USA model only)<br />
This sub-menu allows you to make the required settings to turn on<br />
the output from the 12V TRIGGER terminal to control another<br />
component or device with the <strong>TX</strong>-<strong>DS787</strong> for each input source.<br />
Menu<br />
1.Speaker Setup<br />
2.Input<br />
2.Input<br />
Setup<br />
Setup<br />
3.Listening<br />
Input:DVD<br />
Mode Setup<br />
4.Preference<br />
5.OSD<br />
2-6.12V a.Audio<br />
Setup<br />
Trigger Setup<br />
b.Video Input:DVD Setup<br />
c.Listening Mode Preset<br />
d.Tone a.12V Trigger Control :Off<br />
e.IntelliVolume<br />
f.12V<br />
|ENTER|<br />
Trigger<br />
Quit:|OSD|<br />
|ENTER| Quit:|OSD|<br />
Quit:|OSD|<br />
a. 12V Trigger<br />
On: Select to activate the connected device when the input source<br />
is selected.<br />
Off: Select when no device is connected to the 12V TRIGGER<br />
terminal or you do not want the connected device to activate.<br />
40
Listening Mode Setup<br />
3. Listening Mode Setup menu<br />
This menu allows you to make adjustments to the various listening<br />
modes. These adjustments are in the form of parameters and each<br />
one is explained below. Note that some parameters cannot be set<br />
for some listening modes and that no sub-menu will have all<br />
parameters. Also, for some input signal formats, changes in the<br />
listening mode parameters may actually result in no change to the<br />
resulting output signal.<br />
Menu<br />
1.Speaker Setup<br />
2.Input<br />
3.Listening<br />
Setup<br />
Mode Setup<br />
3.Listening Mode Setup<br />
4.Preference<br />
5.OSD<br />
1.Stereo<br />
Setup<br />
Setup<br />
2.Theater-Dimensional<br />
Setup<br />
3.Surround Setup<br />
4.THX Setup<br />
5.Mono<br />
|ENTER|<br />
Movie<br />
Quit:|OSD|<br />
Setup<br />
|ENTER| Quit:|OSD|<br />
Menu<br />
1.Speaker Setup<br />
2.Input<br />
3.Listening<br />
Setup<br />
Mode Setup<br />
3.Listening Mode Setup<br />
4.Preference<br />
5.OSD<br />
6.Enhanced<br />
Setup<br />
7 Setup<br />
7.Orchestra Setup<br />
8.Unplugged Setup<br />
9.Studio-Mix Setup<br />
10.TV Logic Setup<br />
12.All<br />
|ENTER|<br />
Ch Stereo<br />
Quit:|OSD|<br />
Setup<br />
|ENTER| Quit:|OSD|<br />
Menu<br />
1.Speaker Setup<br />
2.Input<br />
3.Listening<br />
Setup<br />
Mode Setup<br />
3.Listening Mode Setup<br />
4.Preference<br />
5.OSD<br />
3-1.Stereo Setup<br />
Setup<br />
2.Theater-Dimensional<br />
Setup<br />
3.Surround a.Subwoofer Setup :On<br />
4.THX Setup<br />
5.Mono<br />
|ENTER|<br />
Movie<br />
Quit:|OSD|<br />
Setup<br />
Currently<br />
selected<br />
listening mode<br />
3-1. Stereo Setup<br />
Select this to modify the Stereo listening mode. The parameters<br />
that can be set are shown in the table below.<br />
Parameter<br />
Setting<br />
Initial value<br />
a Subwoofer Off, On On<br />
3-2. Theater-Dimensional Setup<br />
Select this to modify the Theater-Dimensional (T-D) listening<br />
modes. The parameters that can be set are shown in the table<br />
below.<br />
Parameter<br />
Setting<br />
Initial value<br />
a Subwoofer Off, On On<br />
b Listening Angle 20deg, 40deg 40deg<br />
c Center Off, On Off<br />
d Front Expander Off, On Off<br />
e Virtual Surr Level -3 dB to +3 dB 0 dB<br />
f Dialog Enhance Off, On Off<br />
3-3. Surround Setup<br />
Select this to modify the plain Dolby Digital, DTS, and Pro Logic<br />
Surround listening modes. The parameters that can be set are<br />
shown in the table below.<br />
Parameter<br />
Setting<br />
Initial value<br />
a Subwoofer Off, On On<br />
b Re-EQ Off, On Off<br />
c Surround Speakers Surround L/R, Surround Back*, Surround L/R<br />
Surround L/R+Back<br />
d Dolby D/6.1 Auto, On, Off Auto<br />
e DTS-ES Auto, On, Off Auto<br />
* Surround Back can only be selected when two surround back speakers are<br />
connected to the <strong>TX</strong>-<strong>DS787</strong>.<br />
3-4. THX Setup<br />
Select this to modify the THX listening modes; the one that is<br />
currently set is the one that is modified. The parameters that can be<br />
set are shown in the table below.<br />
Parameter<br />
Setting<br />
Initial value<br />
a Subwoofer Off, On On<br />
b Re-EQ Off, On On<br />
c Surround Speakers Surround L/R, Surround Back*, Surround L/R<br />
Surround L/R+Back<br />
d Dolby D Auto, On, Off Auto<br />
THX Surround EX<br />
e DTS On, Off Off<br />
THX Surround EX<br />
* Surround Back can only be selected when two surround back speakers are<br />
connected to the <strong>TX</strong>-<strong>DS787</strong>.<br />
|ENTER| Quit:|OSD|<br />
Quit:|OSD|<br />
41
Listening Mode Setup<br />
3-5. Mono Movie Setup<br />
Select this to modify the Mono Movie listening mode. The<br />
parameters that can be set are shown in the table below.<br />
Parameter<br />
Setting<br />
Initial value<br />
a Subwoofer Off, On On<br />
b Re-EQ Off, Re-EQ Off<br />
c Surround Speakers Surround L/R, Surround Back*, Surround L/R<br />
Surround L/R+Back<br />
d Front Effect Off, On On<br />
e Effect Level Low, Mid-low, Middle, Middle<br />
Mid-high, High<br />
f Room Size Small, Mid-small, Middle, Middle<br />
Mid-large, Large<br />
* Surround Back can only be selected when two surround back speakers are<br />
connected to the <strong>TX</strong>-<strong>DS787</strong>.<br />
3-6. Enhanced 7 Setup<br />
Select this to modify the Enhanced 7 listening mode. The<br />
parameters that can be set are shown in the table below.<br />
Parameter<br />
Setting<br />
Initial value<br />
a Subwoofer Off, On On<br />
b Re-EQ Off, On Off<br />
c Front Effect Off, On On<br />
d Effect Level Low, Mid-low, Middle, Middle<br />
Mid-high, High<br />
e Room Size Small, Mid-small, Middle, Middle<br />
Mid-large, Large<br />
3-7, 8, 9, and 10. Orchestra Setup, Unplugged Setup, Studio-<br />
Mix Setup, TV Logic Setup<br />
Select this to modify the Orchestra, Unplugged, Studio-Mix, and<br />
TV Logic listening modes; the one that is currently set is the one<br />
that is modified. The parameters that can be set are shown in the<br />
table below.<br />
Parameter<br />
Setting<br />
Initial value<br />
a Subwoofer Off, On On<br />
b Re-EQ Off, On Off<br />
c Surround Speakers Surround L/R, Surround Back*, Surround L/R<br />
Surround L/R+Back<br />
d Front Effect Off, On On<br />
e Effect Level Low, Mid-low, Middle, Middle<br />
Mid-high, High<br />
f Room Size Small, Mid-small, Middle, Middle<br />
Mid-large, Large<br />
* Surround Back can only be selected when two surround back speakers are<br />
connected to the <strong>TX</strong>-<strong>DS787</strong>.<br />
3-11. All Ch Stereo Setup<br />
Select this to modify the All Ch Stereo listening mode. The<br />
parameters that can be set are shown in the table below.<br />
Parameter<br />
Setting<br />
Initial value<br />
a Subwoofer Off, On On<br />
b Re-EQ Off, On Off<br />
42
Listening Mode Setup<br />
Description listening mode parameters<br />
Subwoofer<br />
Set this to “Off” if you are not using a subwoofer (even if one is<br />
connected). If “No” is selected for the Subwoofer setting in the<br />
Speaker Config sub-menu, then this setting will not appear.<br />
Re-EQ<br />
Depending on the listening mode, you can either turn Re-EQ on or<br />
off.<br />
Re-EQ: Re-EQ (re-equalization) takes the edginess or<br />
“brightness” out of your home cinema sound to compensate for<br />
the fact that sound mixed for theaters may sound too bright<br />
when played back through speakers in the home environment.<br />
On: Select to turn on the re-equalization filter.<br />
Off: Select to turn off the re-equalization filter.<br />
Surround Speakers<br />
This setting allows you to decide which speakers to output to when<br />
surround back speakers are connected and you are playing back a<br />
5.1-channel source.<br />
Surround L/R: This outputs the sound to the surround left and<br />
right speakers as normal and outputs nothing to the surround<br />
back speaker.<br />
Surround Back: This outputs the sound to the surround back<br />
speakers and outputs nothing to the surround left and right<br />
speakers. This setting can only be selected when two surround<br />
back speakers are connected to the <strong>TX</strong>-<strong>DS787</strong>.<br />
Sur L/R+Back: This outputs the sound to both the surround left<br />
and right speakers and the surround back speaker.<br />
Dolby D/6.1<br />
This setting allows you to set whether or not Dolby Digital sources<br />
will be played back using the matrix 6.1-channel output when a<br />
surround back speaker is connected.<br />
Auto: Automatically outputs signals with EX-identifying<br />
signals using 6.1-channel Dolby Digital.<br />
On: Outputs using 6.1-channel Dolby Digital regardless of<br />
whether or not the signal contains EX identifiers.<br />
Off: Does not output using 6.1-channel Dolby Digital<br />
regardless of whether or not the signal contains EX identifiers<br />
(Dolby D is used).<br />
However, if the surround channel is monaural or nonexistent, the<br />
playback is made using normal Dolby Digital regardless of the<br />
above setting. For Dolby Digital 6.1-channel playback, Dolby D/6.1<br />
is displayed for the listening mode.<br />
DTS-ES<br />
This setting allows you to set whether or not DTS sources will be<br />
played back using the matrix 6.1-channel (DTS-ES) output when a<br />
surround back speaker is connected.<br />
Auto: Automatically outputs signals with ES-identifying<br />
signals using DTS-ES playback.<br />
On: Outputs using DTS-ES playback regardless of whether or<br />
not the signal contains ES identifiers.<br />
Off: Does not output using DTS-ES playback regardless of<br />
whether or not the signal contains ES identifiers (DTS is used).<br />
However, if the surround channel is monaural or nonexistent, the<br />
playback is made using normal DTS regardless of the above setting.<br />
For DTS-ES playback, DTS-ES is displayed for the listening mode.<br />
Dolby D THX Surround EX<br />
This setting allows you to set whether or not Dolby Digital sources<br />
will be played back using THX Surround EX when a surround<br />
back speaker is connected.<br />
Auto: Automatically outputs signals with EX-identifying<br />
signals using THX Surround EX.<br />
On: Outputs using THX Surround EX regardless of whether or<br />
not the signal contains EX identifiers.<br />
Off: Does not output using THX Surround EX regardless of<br />
whether or not the signal contains EX identifiers (Dolby D is<br />
used).<br />
However, if the surround channel is monaural or nonexistent, the<br />
playback is made using normal THX regardless of the above<br />
setting. For THX Surround EX playback, Dolby D THX Surround<br />
EX is displayed for the listening mode.<br />
DTS THX Surround EX<br />
This setting allows you to set whether or not DTS sources will be<br />
played back using the THX Surround EX when a surround back<br />
speaker is connected.<br />
On: Outputs using THX Surround EX regardless of whether or<br />
not the signal contains ES identifiers.<br />
Off: Does not output using THX Surround EX regardless of<br />
whether or not the signal contains ES identifiers (DTS is used).<br />
However, if the surround channel is monaural or nonexistent, the<br />
playback is made using normal DTS regardless of the above<br />
setting. For THX Surround EX playback, DTS THX Surround EX<br />
is displayed for the listening mode.<br />
Front Effect<br />
Some live recordings contain acoustic reverberation. When you<br />
play these sources, more reverberation will be applied by the DSP,<br />
creating too much reverb effects and the sound loses frame or<br />
presence. In this case, set this setting to “Off.” No reverberation<br />
from the DSP will be applied to the sound output from the three<br />
front channels, so the sound source is be played as it is without any<br />
further reverberation.<br />
Effect Level<br />
This parameter allows you to adjust the strength of sound effects to<br />
match the playback source material, the acoustics of your room,<br />
and such other factors. This can be set to “Low,” “Mid-low,”<br />
“Middle,” “Mid-high,” or “High.”<br />
Room Size<br />
This parameter allows you set virtual hall size to simulate for each<br />
surround mode. You can choose from “Large,” “Mid-Large,”<br />
“Middle,” “Mid-Small,” or “Small.”<br />
43
Listening Mode Setup<br />
Listening angle<br />
The listening angle is the angle subtended by the front left and<br />
right speakers as seen from the listener. The setting of 20 and 40<br />
degrees are only for nominal purposes, so select the setting that is<br />
closest to your actual listening angle.<br />
Front left speaker<br />
Front right speaker<br />
Listening angle<br />
Center<br />
For systems that have a center speaker, the center channel signal<br />
can be output from the center speaker. For instance, in systems<br />
where the front left and right speakers are small, use of the center<br />
speaker may provide a better sound space. (If your system uses a<br />
center speaker, be sure to perform the level calibration with the left<br />
and right speakers in the Speaker Setup menu beforehand.)<br />
On: The center channel signal is output to the center speaker.<br />
Off: The center channel signal is output from the front left and<br />
right speakers (Phantom Center).<br />
Front Expander<br />
The front expander function spreads out the sound from the front<br />
speakers for the feeling of a wide sound space.<br />
On: Select to turn on the front expander function to simulate a<br />
wider sound space.<br />
Off: Select to turn off the front expander function for a normal<br />
sound space.<br />
Virtual Surr Level<br />
This parameter adjusts the virtual surround level. This can be set<br />
from –3 to +3 decibels.<br />
Dialog Enhance<br />
This parameter allows you to adjust the dialog sound level from<br />
the center speaker if it is difficult to hear.<br />
On: Enhances the vocal ranges for the center channel signal.<br />
Off: Outputs the center channel signal at the regular level and<br />
frequency characteristics.<br />
Relationship between listening mode and parameter<br />
Listening mode Direct Stereo T-D Surround* THX Mono Movie Enhanced 7 All Ch<br />
(Theater- Orchestra Stereo<br />
Dimensional)<br />
Unplugged<br />
Studio-Mix<br />
Parameter<br />
TV Logic<br />
Subwoofer ● ● ● ● ● ● ●<br />
Re-EQ ● ● ● ● ●<br />
Surround Speakers ● ● ●<br />
Dolby D/6.1<br />
●<br />
DTS-ES<br />
●<br />
Dolby D THX Surround EX<br />
●<br />
DTS THX Surround EX<br />
●<br />
Listening Angle<br />
●<br />
Center<br />
●<br />
Front Expander<br />
●<br />
Virtual Surr Level<br />
●<br />
Dialog Enhance<br />
●<br />
Front Effect ● ●<br />
Effect Level ● ●<br />
Room Size ● ●<br />
The parameters that can be set are different for each listening mode.<br />
* The surround given here refers to basic surround modes and consists of Dolby Pro Logic, Dolby Digital, DTS, etc.<br />
44
Preference<br />
4. Preference menu<br />
Menu<br />
1.Speaker Setup<br />
2.Input 4.Preference<br />
Setup<br />
3.Listening Mode Setup<br />
4.Preference<br />
5.OSD 1.Volume<br />
Setup<br />
Setup<br />
2.Headphones Level<br />
3.DTS LFE Level Setup<br />
4.Powered Zone2 Setup<br />
|ENTER| Quit:|OSD|<br />
|ENTER| Quit:|OSD|<br />
4-1. Volume Setup sub-menu<br />
This sub-menu allows you to make various settings concerning the<br />
volume control of the <strong>TX</strong>-<strong>DS787</strong>.<br />
Menu<br />
1.Speaker Setup<br />
2.Input<br />
4.Preference<br />
Setup<br />
3.Listening Mode Setup<br />
4.Preference<br />
5.OSD<br />
4-1.Volume Setup<br />
Setup<br />
2.Headphones Level<br />
3.DTS LFE Level Setup<br />
4.Powered a.Volume Display Zone2 Setup<br />
:Absolute<br />
b.Maximum<br />
|ENTER|<br />
Volume<br />
Quit:|OSD| :Off<br />
c.Power on Volume<br />
|ENTER| Quit:|OSD| :Last<br />
Quit:|OSD|<br />
a. Volume Display<br />
You can choose from two ways of displaying the volume setting<br />
on screen.<br />
Absolute: This displays the volume with a minimum of min<br />
(0) for no sound and a maximum of max (80). As a reference,<br />
the volume setting of Ref (62) is used as the 0 -decibel for the<br />
relative display method.<br />
Relative: This displays the volume as a decibel value on a<br />
scale with a designated reference point that is displayed as 0,<br />
which equals the volume setting of 62 for the absolute display<br />
method. With this display method, the minimum value is –∞,<br />
the next highest is –61, and the maximum value is +18.<br />
b. Maximum Volume<br />
This setting allows you to set the maximum volume that can be<br />
output with the MASTER VOLUME dial to prevent components<br />
from being damaged by excessively loud volumes. For the<br />
absolute volume display method, this can be set between 30 and<br />
79. For the relative volume display method, this can be set<br />
between –32 and +17 decibels.<br />
c. Power On Volume<br />
This sets a designated volume setting for the <strong>TX</strong>-<strong>DS787</strong> to be set<br />
every time that the power is turned on. This prevents the <strong>TX</strong>-<br />
<strong>DS787</strong> from being turned on while it is set to an extremely high<br />
volume and suddenly output very loud sounds. For the absolute<br />
volume display method, this can be set between min and max. For<br />
the relative volume display method, this can be set between –∞<br />
and +18 decibels. If you do not mind having the <strong>TX</strong>-<strong>DS787</strong> turned<br />
on with its current volume setting, set this to “Last.”<br />
4-2. Headphones Level sub-menu<br />
You can use this sub-menu to adjust the volume output from the<br />
headphones so that it matches the level output from the speakers.<br />
The headphone volume can be adjusted between –12 and +12<br />
decibels.<br />
4-3. DTS LFE Level Setup sub-menu<br />
This sub-menu is used to set the LFE level for the playback of DTS<br />
sources. Normal playback is at 0 decibels; however, for some<br />
music software where the bass sounds are played back at high<br />
volumes, you can set this setting to –10 decibels.<br />
45
OSD Setup<br />
5. OSD Setup menu<br />
This menu provides settings for you to customize the on-screen<br />
display (OSD) for the <strong>TX</strong>-<strong>DS787</strong> by setting different colors or<br />
positions for its display.<br />
Menu<br />
1.Speaker Setup<br />
2.Input<br />
5.OSD Setup<br />
Setup<br />
3.Listening Mode Setup<br />
4.Preference<br />
5.OSD<br />
1.OSD<br />
Setup<br />
Config<br />
2.OSD Setup<br />
3.OSD Position<br />
|ENTER| Quit:|OSD|<br />
|ENTER| Quit:|OSD|<br />
5-1. OSD Config sub-menu<br />
Menu<br />
1.Speaker Setup<br />
2.Input<br />
5.OSD Setup<br />
Setup<br />
3.Listening Mode Setup<br />
4.Preference<br />
5.OSD<br />
5-1.OSD Setup<br />
Config<br />
2.OSD Setup<br />
3.OSD Position<br />
a.OSD Output :S Video<br />
b.TV<br />
|ENTER|<br />
Format<br />
Quit:|OSD|<br />
:Auto<br />
|ENTER| Quit:|OSD|<br />
Quit:|OSD|<br />
a. OSD output<br />
This setting allows you to set the output of the OSD Menu. Select<br />
the video terminal to which your monitor is connected: “S<br />
VIDEO” or “VIDEO.”<br />
S Video: Outputs the OSD Menu through the S VIDEO<br />
MONITOR OUT terminals.<br />
Video: Outputs the OSD Menu through the VIDEO<br />
MONITOR OUT terminals.<br />
Note:<br />
If the OSD Menu is not displayed on the television monitor you are<br />
using, confirm whether the television is connected to an S VIDEO<br />
MONITOR OUT terminal or VIDEO MONITOR OUT terminal.<br />
b. TV format<br />
(For all models other than USA and Canadian models)<br />
The default setting is “Auto,” which means that the television<br />
format is detected and automatically set by the <strong>TX</strong>-<strong>DS787</strong>.<br />
However, if you know the correct format, you can use this setting<br />
to choose either PAL or NTSC so that no time is wasted on<br />
detection.<br />
46
OSD Setup<br />
5-2. OSD Setup sub-menu<br />
This sub-menu allows you to customize the OSD menu to display<br />
in the manner you desire.<br />
Menu<br />
1.Speaker Setup<br />
2.Input<br />
5.OSD Setup<br />
Setup<br />
3.Listening Mode Setup<br />
4.Preference<br />
5.OSD<br />
5-2.OSD 1.OSD<br />
Setup<br />
Config Setup<br />
2.OSD Setup<br />
3.OSD Position<br />
a.Background Color<br />
:Blue1<br />
b.Superimpose<br />
|ENTER| Quit:|OSD|<br />
Mode<br />
:Normal<br />
c.Immediate Display<br />
|ENTER| Quit:|OSD| :On<br />
d.Display Position<br />
:Bottom<br />
Quit:|OSD|<br />
5-3. OSD Position sub-menu<br />
This sub-menu allows you to adjust the position of the OSD menu<br />
as it is displayed on your screen. Depending on the monitor used,<br />
there may be cases where the OSD menu is not displayed in the<br />
center and parts of the menus are cut off. To adjust the position of<br />
the OSD menu, simply press the cursor buttons to inch the menu to<br />
position you desire.<br />
Menu<br />
1.Speaker Setup<br />
2.Input<br />
5.OSD Setup<br />
Setup<br />
3.Listening Mode Setup<br />
4.Preference<br />
5.OSD<br />
5-3.OSD 1.OSD<br />
Setup<br />
Config Position<br />
2.OSD Setup<br />
3.OSD Position<br />
|ENTER| Quit:|OSD|<br />
|ENTER| Quit:|OSD|<br />
a. Background Color<br />
Select either Blue1, Blue2, Green1, Green2, Magenta, Red1, or<br />
Red2 as the background color while the OSD menu is displayed.<br />
b. Superimpose<br />
Off: Select to have the OSD menu displayed on the selected<br />
background color.<br />
Normal: Select to have the OSD menu superimposed over the<br />
current video if one is displayed or on the selected background<br />
color if there is no video signal.<br />
Black: Select to have the OSD menu displayed on a black<br />
background at all times.<br />
c. Immediate Display<br />
On: Select this to have the screen immediately display certain<br />
operations as you perform them. The display will remain for a<br />
few seconds after the operation is completed.<br />
Exit:|EXIT|<br />
Quit:|OSD|<br />
VIDEO 1<br />
Off: Select this to turn off the immediate display of operations.<br />
Hint:<br />
If this is set to “Off,” the background color will not be displayed<br />
even when there is no video signal input.<br />
d. Display Position<br />
Use this setting to select the position of the immediate display that<br />
appears when certain operations are performed. You can position<br />
the immediate display at any of ten different levels ranging from<br />
the top all the way to the bottom.<br />
47
Enjoying music in the remote zone<br />
ON<br />
ZONE 2 indicator<br />
ZONE 2 VOL<br />
VOL<br />
STANDBY/ ON<br />
PTY/ TP<br />
FM MUTE /<br />
MODE DOWN TUNING UP<br />
CHARACTER / BASS /<br />
MEMORY TREBLE CH LEVEL ZONE 2 VOL<br />
MASTER VOLUME<br />
AUDIO<br />
TRACK<br />
MUTING<br />
DISC<br />
DSP/ PRESET<br />
STANDBY<br />
ZONE 2<br />
SMART SCAN<br />
CONTROLLER<br />
REC<br />
OPEN/CLOSE<br />
POWER<br />
ON<br />
OFF<br />
PUSH TO ENTER<br />
REC OUT ZONE 2<br />
PHONES<br />
AUDIO SELECTOR<br />
LISTENING MODE<br />
DISPLAY<br />
DIRECT STEREO<br />
/ DTS<br />
THX<br />
SURROUND<br />
DVD VIDEO 1 VIDEO 2 VIDEO 3 VIDEO 4<br />
TAPE<br />
VCR 1 VCR 2<br />
MENU<br />
EXIT<br />
FM AM PHONO C D<br />
S VIDEO<br />
VIDEO 4 /VIDEO CAM INPUT<br />
VIDEO L AUDIO R<br />
AV RECEIVER <strong>TX</strong>-<strong>DS787</strong><br />
INPUT<br />
SELECTOR<br />
buttons<br />
DVD<br />
CD<br />
T1 T2 TUN PH<br />
V1 V2 V3 V –<br />
STEREO DIRECT DSP<br />
1 2 3<br />
SURROUND THX DSP<br />
4 5 6<br />
Re-EQ CH SEL LEVEL +<br />
7 8 9<br />
LATE NIGHT DIMMER LEVEL –<br />
+ 10 0 ENT<br />
HOME THEATER CONTROLLER<br />
RC-390M<br />
ZONE 2<br />
Input source buttons<br />
SSC<br />
48<br />
Controlling the <strong>TX</strong>-<strong>DS787</strong> from the remote zone<br />
1. Aiming at the remote sensor, press the ON<br />
button on the remote controller.<br />
Note:<br />
Be aware that if you start using the system in the remote zone<br />
(Zone 2) while a recording is going on in the main zone, the<br />
recording will be stopped in the main zone.<br />
2. Press the appropriate input selector button on<br />
the remote controller to select the desired<br />
source.<br />
3. Adjust the volume to the desired level.<br />
Adjusting the volume for the remote zone at the<br />
<strong>TX</strong>-<strong>DS787</strong><br />
Following the procedure given below, you can adjust the volume<br />
for the remote zone at the <strong>TX</strong>-<strong>DS787</strong> without using the remote<br />
controller.<br />
1. Press the ZONE 2 VOL button.<br />
2. While “ZONE 2Volume” is displayed, turn the<br />
SSC dial to adjust the volume to the desired<br />
level.<br />
Controlling the <strong>TX</strong>-<strong>DS787</strong> without the remote<br />
controller<br />
1. Press the Zone 2 button on the <strong>TX</strong>-<strong>DS787</strong>.<br />
2. Select a source.<br />
After pressing the Zone 2 button, you must press an input<br />
source button within 3 seconds. The Zone 2 indicator lights.<br />
Ex.: When the CD button is pressed.<br />
To select the same source for the remote zone that is selected<br />
for the main zone, press the Zone 2 button again until<br />
“Zone2Sel:SOURCE” appears in the display.<br />
When “Zone2Sel:Off” is displayed, the output to the remote<br />
zone is turned off.<br />
Caution:<br />
If you are not using the system in the remote Zone, always<br />
press the ZONE 2 button consecutively to turn the ZONE 2<br />
function off.<br />
Notes:<br />
• If the source for the main zone is selected as the source for the<br />
remote zone and the source for the main zone is changed, then<br />
the source for the remote zone will change as well.<br />
• In the remote zone, you can only play the source in the 2-<br />
channel mode. You cannot play the source in the remote zone<br />
in the surround mode.<br />
• You can only play the source in the Stereo mode or Direct<br />
mode in the main zone, when you are playing the source in the<br />
remote zone.<br />
• If the Rec Out button is pressed in the main room while<br />
someone is using the system in the remote zone, the Zone 2<br />
function will be deactivated and the source will turn off in the<br />
remote zone.<br />
• The Zone 2 terminal is an analog output. Digital signals are not<br />
output. If no sound is heard from the selected input source,<br />
check if the component is connected to the analog inputs.<br />
• Please note that some third-party multi-room system<br />
components may not be fully compatible with the <strong>Onkyo</strong><br />
multi-room system components.
Listening to Radio Broadcasts<br />
FM MUTE/MODE<br />
TUNING UP/DOWN<br />
CHARACTER/MEMORY<br />
AUDIO/TAPE<br />
MODE<br />
CH<br />
PTY/ TP<br />
FM MUTE /<br />
MODE DOWN TUNING UP<br />
CHARACTER / BASS /<br />
MEMORY TREBLE CH LEVEL ZONE 2 VOL<br />
MASTER VOLUME<br />
AUDIO<br />
TRACK<br />
MUTING<br />
DISC<br />
STANDBY/ ON<br />
DSP/ PRESET<br />
STANDBY<br />
ZONE 2<br />
SMART SCAN<br />
CONTROLLER<br />
REC<br />
OPEN/CLOSE<br />
POWER<br />
ON<br />
OFF<br />
REC OUT ZONE 2<br />
DISPLAY<br />
DIRECT<br />
LISTENING MODE<br />
STEREO<br />
/ DTS<br />
SURROUND<br />
THX<br />
MENU<br />
PUSH TO ENTER<br />
EXIT<br />
DVD<br />
T1<br />
V1<br />
CD<br />
T2 TUN PH<br />
V2 V3 V –<br />
TUN<br />
PHONES<br />
AUDIO SELECTOR<br />
VIDEO 4 /VIDEO CAM INPUT<br />
STEREO DIRECT DSP<br />
1 2 3<br />
DVD VIDEO 1 VIDEO 2 VIDEO 3 VIDEO 4<br />
VCR 1 VCR 2<br />
TAPE<br />
FM AM PHONO C D<br />
S VIDEO<br />
VIDEO<br />
L AUDIO R<br />
SURROUND THX DSP<br />
4 5 6<br />
Re-EQ CH SEL LEVEL +<br />
AV RECEIVER <strong>TX</strong>-<strong>DS787</strong><br />
7 8 9<br />
LATE NIGHT DIMMER LEVEL –<br />
+ 10 0 ENT<br />
HOME THEATER CONTROLLER<br />
RC-390M<br />
FM<br />
AM<br />
SSC<br />
Listening to FM/AM Radio Stations<br />
Tuning into a radio station<br />
One of the features of the <strong>TX</strong>-<strong>DS787</strong> that is most frequently used<br />
is its ability to play FM and AM broadcast radio stations. The <strong>TX</strong>-<br />
<strong>DS787</strong> provides a number of listening modes perfect for listening<br />
to the radio and getting the most out of your audio system. Also, by<br />
presetting radio stations that you listen to frequently, you can<br />
select them easily by pressing the CH button on the remote<br />
controller.<br />
AM<br />
FM<br />
Band<br />
Frequency<br />
FM STEREO<br />
Tuned<br />
TUNED<br />
Tuned<br />
in stereo<br />
TUNED<br />
FM STEREO<br />
AUTO<br />
Auto mode<br />
1. Press either the AM or FM input source button.<br />
2. Using the TUNING UP and DOWN buttons on<br />
the front panel, tune into the station you<br />
desire.<br />
When you tune into a radio station, TUNED indicator appears<br />
in the display. If you tune into an FM station in stereo, then<br />
“FM STEREO” appears. If the signal is weak, it may be<br />
impossible to tune into the station in stereo. In such a case,<br />
press the FM MUTE/MODE button on the front panel. The<br />
AUTO indication disappears and the radio station is output in<br />
the monaural mode. To return to stereo, press the FM MUTE/<br />
MODE button again. “AUTO” appears. Some inter-station<br />
noise may be heard, but the sound will not cut in and out as it<br />
would if stereo was selected.<br />
• The tuner frequency changes in 50 kHz increments for FM<br />
and 10 kHz (or 9kHz) increments for AM.<br />
• When tuning into FM stations, you can press the TUNING<br />
UP or DOWN button continuously for more than 0.5<br />
seconds to scan for an FM station in the direction of the<br />
button you pressed (FM auto tuning mode). After you<br />
release the button and a station is received in stereo, the<br />
scanning stops.<br />
• The European model allows you to receive RDS<br />
broadcasts. See below for a more detailed explanation.<br />
Band<br />
Frequency<br />
49
Listening to Radio Broadcasts<br />
Presetting a radio station<br />
1. Tune into the radio station you desire (see<br />
“Tuning into a radio station” ).<br />
2. Press the CHARACTER/MEMORY button on<br />
the front panel.<br />
Selecting a preset radio station<br />
1. Press either the AM or FM input source<br />
button. The front display should show the<br />
currently selected frequency. If it displays the<br />
listening mode, press the DISPLAY button to<br />
display the frequency.<br />
2. Turn the SSC dial and select the number of the<br />
desired preset station.<br />
When using the remote controller:<br />
“Preset in?” appears in the front display. Press the SSC dial.<br />
Light<br />
3. Turning the SSC dial, select a preset number<br />
(from 1 to 40) to assign the station to be<br />
preset.<br />
MEMORY<br />
MEMORY<br />
Flash<br />
1. Make sure that “AUDIO” is shown in the<br />
remote controller display and press the TUN<br />
button.<br />
If “AUDIO” is not displayed, first press the AUDIO/TAPE<br />
MODE button to display “AUDIO” and then press the TUN<br />
button.<br />
2. Press the CH button and select the number<br />
of the desired preset station.<br />
Erasing a preset radio station<br />
TUNED<br />
MEMORY<br />
AUTO<br />
ch<br />
4. Press the SSC dial to finalize the procedure.<br />
1. Press the AM or FM button and turn the SSC<br />
dial to select the preset radio station that you<br />
want erase (see above).<br />
MEMORY<br />
Light<br />
2. Press the CHARACTER/MEMORY button.<br />
“Preset Erase?” appears.<br />
TUNED<br />
MEMORY<br />
AUTO<br />
ch<br />
This programs the radio station as a preset radio station.<br />
• Up to 40 stations can be stored in memory as preset radio<br />
stations.<br />
• You can enter text names for any of the preset radio<br />
stations (see page 57).<br />
3. Press the SSC dial.<br />
The selected preset station is erased.<br />
50
Listening to RDS broadcasts (European models only)<br />
Listening to RDS broadcasts<br />
RDS reception is available only on the European model and only<br />
in areas where RDS broadcasts are available.<br />
What is RDS?<br />
RDS stands for Radio Data System and is a type of FM<br />
broadcasting. RDS was developed within the European<br />
Broadcasting Union (EBU) and is available in most European<br />
countries. Many FM broadcasting stations now transmit the RDS<br />
signals, which provide the additional information required. RDS<br />
provides you with various services so that you can choose a station<br />
that broadcasts your favorite categories of music, news, or other<br />
information.<br />
There are three main classifications of RDS broadcasts. Though<br />
they can be tuned into by using the Tuning buttons as normal<br />
stations, RDS broadcasts allow you to scan for stations of the type<br />
and classification for which you are looking. This makes it much<br />
easier for you to find the station you want (see “Performing a PTY<br />
scan” and “Performing a TP scan” on page 52). The three main<br />
classifications are explained below.<br />
RT: Radio Text<br />
When an RDS station broadcasting RT information is selected,<br />
the text information received from the station is displayed.<br />
PTY: Program Type<br />
When an RDS station broadcasting PTY information is<br />
selected, the station type (classification) is displayed.<br />
TP: Traffic Program<br />
When an RDS station broadcasting TP information is selected,<br />
traffic information will be broadcasted periodically.<br />
Notes:<br />
• In some cases, the characters displayed on the display of the<br />
<strong>TX</strong>-<strong>DS787</strong> may not be exactly the same as the ones broadcast<br />
by the radio station. Also, unusual characters may appear on<br />
the display if the <strong>TX</strong>-<strong>DS787</strong> receives characters that cannot be<br />
displayed correctly. This is not a malfunction.<br />
• When an RDS station broadcasting PS information is selected,<br />
the name of the station is displayed instead of the frequency.<br />
PTY program types in Europe<br />
The text given in parenthesis is what is actually displayed on the<br />
<strong>TX</strong>-<strong>DS787</strong>.<br />
None (None):<br />
No program type.<br />
News reports (News):<br />
Reports on current events and happenings.<br />
Current affairs (Affairs):<br />
Topical reporting of current affairs, often with a wider range of<br />
topics than news reports.<br />
Information (Info):<br />
General information such as weather forecasts, consumer<br />
affairs, medical help, etc.<br />
Sport (Sport):<br />
Live sports action, sports news, and interviews.<br />
Education (Educate):<br />
Formal educational programs.<br />
Drama (Drama):<br />
Radio plays and serials.<br />
Culture (Culture):<br />
Cultural programs (including religious affairs).<br />
Science and technology (Science):<br />
Programs about the natural sciences and technology.<br />
Varied (Varied):<br />
Speech-based programs not covered by the above categories<br />
(e.g., quizzes, panel games, and comedy).<br />
Pop music (Pop M):<br />
Popular commercial music, usually from past or present sales<br />
charts (e.g., Top 40).<br />
Rock music (Rock M):<br />
Popular music with an alternative appeal, often not appearing<br />
on sales charts.<br />
Middle of the road music (M.O.R. M):<br />
Easy listening music (as opposed to Pop, Rock, or Classical).<br />
Light classics (Light M):<br />
Classical music for general rather than specialist appreciation.<br />
Serious classics (Classics):<br />
Performances of major orchestral works, symphonies,<br />
chamber music, etc. (including the Grand Opera).<br />
Other music (Other M):<br />
Music styles not covered by the above categories (e.g., Jazz,<br />
Rhythm & Blues, Folk, Country, and Reggae).<br />
Alarm (Alarm):<br />
When an RDS station is making an emergency broadcast, this<br />
ALARM will flash on the display.<br />
51
Listening to RDS broadcasts<br />
RT/PTY/TP<br />
SSC<br />
RT/PTY/ TP<br />
FM MUTE /<br />
MODE DOWN TUNING UP<br />
CHARACTER / BASS /<br />
MEMORY TREBLE CH LEVEL ZONE 2 VOL<br />
MASTER VOLUME<br />
STANDBY/ ON<br />
DSP/ PRESET<br />
STANDBY<br />
ZONE 2<br />
POWER<br />
SMART SCAN<br />
CONTROLLER<br />
ON<br />
OFF<br />
PUSH TO ENTER<br />
REC OUT ZONE 2<br />
DISPLAY<br />
DIRECT<br />
LISTENING MODE<br />
STEREO<br />
/ DTS<br />
THX<br />
MENU<br />
EXIT<br />
SURROUND<br />
PHONES<br />
AUDIO SELECTOR<br />
VIDEO 4 /VIDEO CAM INPUT<br />
DVD VIDEO 1 VIDEO 2 VIDEO 3 VIDEO 4<br />
VCR 1 VCR 2<br />
TAPE<br />
FM AM PHONO C D<br />
S VIDEO<br />
VIDEO<br />
L<br />
AUDIO<br />
R<br />
AV RECEIVER <strong>TX</strong>-<strong>DS787</strong><br />
Displaying Radio Text (RT)<br />
If the station you are currently tuned into is broadcasting RT<br />
signals, they will be displayed in the front display on the <strong>TX</strong>-<br />
<strong>DS787</strong>. If the station does not, this function will be ignored.<br />
1. To display the radio text, press the RT/PTY/TP<br />
button once.<br />
• If the current station you are listening to is not an RDS station,<br />
only the frequency of the station appear.<br />
• If “Waiting” appears on the display, more time is required to<br />
receive the RT information. When the information is received,<br />
the characters will scroll across the front display.<br />
• If “No Text Data” appears on the display, RT information is<br />
not available.<br />
• The display shows the frequency for 3 seconds and returns to<br />
program service name.<br />
Performing a PTY scan<br />
1. Press the FM input source button.<br />
2. Press the RT/PTY/TP button twice.<br />
The current program type appears on the display.<br />
5. Press the SSC dial when it reaches the station<br />
that you want to listen to.<br />
“Not Found” will appear when no RDS signal is being<br />
received from the station.<br />
Performing a TP scan<br />
1. Press the FM input source button.<br />
2. Press the RT/PTY/TP button three times.<br />
“>TP
Enjoying music or videos with the <strong>TX</strong>-<strong>DS787</strong><br />
SLEEP<br />
DIMMER<br />
Listening mode buttons CH LEVEL<br />
BASS/TREBLE MASTER VOLUME<br />
VOL<br />
RT/PTY/ TP<br />
FM MUTE /<br />
MODE DOWN TUNING UP<br />
CHARACTER / BASS /<br />
MEMORY TREBLE CH LEVEL ZONE 2 VOL<br />
MASTER VOLUME<br />
AUDIO<br />
TRACK<br />
MUTING<br />
DISC<br />
MUTING<br />
STANDBY/ ON<br />
DSP/ PRESET<br />
STANDBY<br />
ZONE 2<br />
SMART SCAN<br />
CONTROLLER<br />
REC<br />
OPEN/CLOSE<br />
POWER<br />
ON<br />
OFF<br />
REC OUT ZONE 2<br />
PHONES<br />
AUDIO SELECTOR<br />
LISTENING MODE<br />
DISPLAY<br />
DIRECT STEREO<br />
/ DTS<br />
THX<br />
SURROUND<br />
DVD VIDEO 1 VIDEO 2 VIDEO 3 VIDEO 4<br />
TAPE<br />
VCR 1 VCR 2<br />
PUSH TO ENTER<br />
MENU<br />
EXIT<br />
FM AM PHONO C D<br />
S VIDEO<br />
VIDEO 4 /VIDEO CAM INPUT<br />
VIDEO L AUDIO R<br />
AV RECEIVER <strong>TX</strong>-<strong>DS787</strong><br />
Listening<br />
mode<br />
buttons<br />
DVD<br />
CD<br />
T1 T2 TUN PH<br />
V1<br />
STEREO DIRECT DSP<br />
SURROUND THX DSP<br />
LATE NIGHT DIMMER<br />
HOME THEATER CONTROLLER<br />
RC-390M<br />
V2 V3 V –<br />
1 2 3<br />
4 5 6<br />
Re-EQ CH SEL LEVEL +<br />
7 8 9<br />
LEVEL –<br />
+ 10 0 ENT<br />
INPUT<br />
SELECTOR<br />
buttons<br />
LEVEL +<br />
LEVEL –<br />
CH SEL<br />
PHONES<br />
Input source buttons<br />
SSC<br />
DIMMER<br />
Though the <strong>TX</strong>-<strong>DS787</strong> is often used to listen to the radio, it does<br />
not show you its true ability until it is used to play music or watch<br />
videos, LDs, DVDs, and the like. The <strong>TX</strong>-<strong>DS787</strong> has the latest in<br />
state-of-the-art features to play back today’s acoustic technologies<br />
with the utmost in fidelity and power. From a two-speaker system<br />
to a seven-speaker system, you are assured a sound space that you<br />
can always enjoy.<br />
Selecting an input source<br />
Before you can listen to any input media, you must first select the<br />
input source at the <strong>TX</strong>-<strong>DS787</strong>. This tell it which input source to<br />
output to the speakers and monitor.<br />
To select an input source, simply press the button on the front<br />
panel (or on the remote controller) that corresponds to the input<br />
source you want.<br />
After you have selected the input source, simply turn on the<br />
corresponding component and play the media.<br />
Adjusting the volume<br />
Adjusting the main volume adjust the volume level output from all<br />
the speakers connected to the <strong>TX</strong>-<strong>DS787</strong> together. If headphones<br />
are connected, this also adjusts the volume heard from the<br />
headphone speakers. To adjust the volume, either press the VOL<br />
buttons on the remote controller or turn the MASTER<br />
VOLUME dial. To increase the volume, turn the dial to the right;<br />
to decrease the volume, turn the dial to the left.<br />
Changing the listening mode<br />
To change the listening mode during playback, turn the SSC dial<br />
on the front panel or the listening mode buttons on the remote<br />
controller (see page 59).<br />
Listening with headphones<br />
To listen with headphones, plug a pair headphones with a standard<br />
stereo plug into the PHONES jack on the <strong>TX</strong>-<strong>DS787</strong> front panel.<br />
When you connect headphones, the unit will enter STEREO mode<br />
automatically and no sound will be heard from the speakers. Note<br />
that the signal to the remote zone (Zone 2) will not be affected<br />
whether or not headphones are connected.<br />
53
Enjoying music or videos with the <strong>TX</strong>-<strong>DS787</strong><br />
Using the many features of the <strong>TX</strong>-<strong>DS787</strong><br />
Outputting from different input source:<br />
You can have the <strong>TX</strong>-<strong>DS787</strong> output the audio of one input<br />
source through the speakers while the video of another input<br />
source is output to the monitor (see page 36).<br />
Assigning names to input sources:<br />
You can enter a name for each input source so that when the<br />
source is selected the name of that source is displayed in the<br />
front display of the <strong>TX</strong>-<strong>DS787</strong> (see page 57).<br />
Temporarily changing the speaker output levels:<br />
To change the individual speaker volumes temporarily, use the<br />
remote controller and follow the procedure given below. Note<br />
that the calibration settings will return to the original settings<br />
when the <strong>TX</strong>-<strong>DS787</strong> is put in standby.<br />
1. Press the CH SEL button and select the desired speaker.<br />
2. Press the LEVEL + or – button to adjust the volume level.<br />
Using the sleep time:<br />
To set the sleep timer, press the SLEEP button on the remote<br />
controller and then set the time that you want the <strong>TX</strong>-<strong>DS787</strong> to<br />
enter the standby state (see page 59).<br />
Temporarily turning off the sound:<br />
To turn off the sound momentarily, such as when interrupted<br />
by a phone call, press the MUTING button on the remote<br />
controller (see page 59).<br />
Adjusting the bass and treble:<br />
You can adjust the bass and treble levels at the Tone Control<br />
sub-menu of the OSD menu: Input Setup → Tone Control (see<br />
page 40). You can also press the BASS/TREBLE button on the<br />
front to display either “BASS” or “TREBLE” in the front<br />
display (the display will change each time the button is<br />
pressed) and turn the SSC dial to adjust the volume. This<br />
function only affects the front left and right speakers, the<br />
center speaker, and the subwoofer.<br />
Adjusting the brightness of the front display:<br />
You can adjust the brightness of the front display of the <strong>TX</strong>-<br />
<strong>DS787</strong> with DIMMER button on the remote controller or on<br />
the <strong>TX</strong>-<strong>DS787</strong> front panel with other than European models<br />
(see page 9).<br />
If one of the messages shown below appears<br />
If you try to perform an operation that is not possible, “Not<br />
available” appears followed by one of the messages shown below<br />
to explain the reason.<br />
The operation is not allowed because headphones are plugged into<br />
the <strong>TX</strong>-<strong>DS787</strong>.<br />
The operation is not allowed because the selected input source is<br />
set for multichannel input.<br />
The operation is not allowed by the current speaker configuration.<br />
The operation is not allowed because the Zone 2 mode is turned on.<br />
No setting other than Dolby Digital can be set.<br />
Enjoying the multichannel output<br />
Before you can use a component with multichannel output, you<br />
must first select “Yes” for the Multichannel setting in the OSD<br />
menu for that input source: Input Setup → Audio Setup (see page<br />
34). Also, select “Multichannel” using the Audio Selector button<br />
on the front panel.<br />
1. Press the input source button for the<br />
component with multichannel output<br />
connected to the MULTI CHANNEL INPUT on<br />
the rear of the <strong>TX</strong>-<strong>DS787</strong>.<br />
2. Turn on the connected component and start<br />
playing the desired media.<br />
3. If necessary, press the CH SEL button on the<br />
remote controller to select an individual<br />
speaker. Then press the LEVEL + or – button<br />
to adjust the output level as desired.<br />
Adjust the speaker output levels so that you can hear the same<br />
sound level from each speaker at the listening position. For the<br />
front right, front left, center, surround right, surround left,<br />
surround back right and surround back left speakers, the<br />
output levels can be adjusted between –12 to +12 decibels. The<br />
subwoofer can be adjusted between –15 and +12 decibels.<br />
4. Adjust the volume with the MASTER VOLUME<br />
dial or the VOL buttons on the remote<br />
controller.<br />
54
Recording a source<br />
REC OUT<br />
RT/PTY/ TP<br />
FM MUTE /<br />
MODE DOWN TUNING UP<br />
CHARACTER / BASS /<br />
MEMORY TREBLE CH LEVEL ZONE 2 VOL<br />
MASTER VOLUME<br />
STANDBY/ ON<br />
DSP/ PRESET<br />
STANDBY<br />
ZONE 2<br />
SMART SCAN<br />
CONTROLLER<br />
POWER<br />
ON<br />
OFF<br />
PUSH TO ENTER<br />
REC OUT ZONE 2<br />
DISPLAY<br />
DIRECT<br />
LISTENING MODE<br />
STEREO<br />
/ DTS<br />
THX<br />
MENU<br />
EXIT<br />
SURROUND<br />
PHONES<br />
AUDIO SELECTOR<br />
VIDEO 4 /VIDEO CAM INPUT<br />
DVD VIDEO 1 VIDEO 2 VIDEO 3 VIDEO 4<br />
VCR 1 VCR 2<br />
TAPE<br />
FM AM PHONO C D<br />
S VIDEO<br />
VIDEO<br />
L<br />
AUDIO<br />
R<br />
AV RECEIVER <strong>TX</strong>-<strong>DS787</strong><br />
Input source buttons<br />
Of course the <strong>TX</strong>-<strong>DS787</strong> can also be used to record an input<br />
source media. This allows you to make copies of the music or<br />
videos you like, copy them from one type of media to another, or<br />
even record what is being broadcast on television or radio. Be<br />
aware that the Rec Out and Zone 2 buttons use the same circuit so<br />
that you cannot make recording and output to the remote zone<br />
(Zone 2) at the same time.<br />
To record the input source signal you are<br />
currently watching or listening to<br />
This method outputs to the audio and video outputs the currently<br />
selected input source signal. This method allows you to a signal<br />
while you are actually listening to or watching it.<br />
1. Select the input source to record by pressing<br />
the corresponding input source button.<br />
The input source is now selected and you may watch or listen<br />
to it as desired.<br />
Notes:<br />
• If you change the input source during recording, you will<br />
record the signals from the newly selected input source.<br />
• You cannot record the surround effects.<br />
• Digital signals input to the DIGITAL INPUT (COAXIAL) and<br />
DIGITAL INPUT (OPTICAL) inputs will be output to the<br />
DIGITAL OUTPUT (OPTICAL) output.<br />
• Digital input signals are only output to the digital outputs and<br />
analog input signals are only output from the analog outputs.<br />
There is no conversion from digital to analog or vice versa.<br />
When connecting CD players and other digital components, do<br />
not connect only the digital terminals, but the analog ones as<br />
well.<br />
• There are some restrictions on recording digital signals. When<br />
making digital recordings, consult the instruction manual that<br />
came with your digital recording equipment (e.g., MD<br />
recorder or DAT deck) to know what restrictions are imposed.<br />
• You cannot record the source connected to the MULTI<br />
CHANNEL INPUT connector.<br />
2. Press the REC OUT button repeatedly until<br />
“Rec Sel:SOURCE” appears in the front<br />
display.<br />
The currently selected input source signal to the TAPE OUT,<br />
VIDEO 1 OUT, VIDEO 2 OUT outputs for recording.<br />
3. Start recording at the recording component as<br />
desired.<br />
To confirm the settings, press the Rec Out button. The current<br />
settings will appear for 3 seconds in the front display.<br />
55
Recording a source<br />
To record an input source signal different from<br />
that you are currently watching or listening to<br />
This method outputs to the audio and video outputs the signal from<br />
the input source that you select here. This allows you to record an<br />
input source signal different from that which you are listening to or<br />
watching at the time of recording.<br />
1. Press the Rec Out button.<br />
2. Within 3 seconds, press the input source<br />
selector button of the input source signal that<br />
you wish to record.<br />
The signal from the selected input source will now be output to<br />
the TAPE OUT, VIDEO 1 OUT, and VIDEO 2 OUT outputs<br />
for recording.<br />
3. Start recording at the recording component as<br />
desired.<br />
To confirm the settings, press the Rec Out button. The current<br />
settings will appear for 3 seconds in the front display.<br />
Notes:<br />
• Be aware that the remote (Zone 2) and recording (Rec Out)<br />
outputs use the same circuit and therefore can be used at the<br />
same time.<br />
• You cannot record the surround effects.<br />
• Digital signals input to the DIGITAL INPUT (COAXIAL) and<br />
DIGITAL INPUT (OPTICAL) inputs will be output to the<br />
DIGITAL OUTPUT (OPTICAL) outputs.<br />
• There are some restrictions on recording digital signals. When<br />
making digital recordings, consult the instruction manual that<br />
came with your digital recording equipment (e.g., MD<br />
recorder or DAT deck) to know what restrictions are imposed.<br />
• You cannot record the source connected to the MULTI<br />
CHANNEL INPUT connector.<br />
Recording the video from one source and the<br />
audio from another<br />
You can add the sound from one source to the video of another<br />
source to make your own video recordings.<br />
Below is an example of recording the sound from a compact disc<br />
player connected to CD IN and the video from a video camera<br />
connected to VIDEO 4 IN to video cassette tape in a video cassette<br />
recorder connected to the VIDEO 1 OUT jack.<br />
1. Press the CD input source button.<br />
2. Set “VIDEO 4” for the Video setting in the<br />
Video Setup sub-menu of the OSD menu: Input<br />
Setup → Video Setup → Video.<br />
3. Insert a CD in the CD player and insert a tape<br />
in the video camera connected to the VIDEO 4<br />
IN.<br />
4. Insert a video tape for recording in the video<br />
cassette recorder connected to VIDEO 1 OUT.<br />
5. Press the REC OUT button repeatedly until<br />
“Rec Sel:SOURCE” appears in the front<br />
display.<br />
Now “CD” has been selected as the audio input source and<br />
“VIDEO 4” as the video input source.<br />
6. Start recording on the video cassette recorder<br />
and start playing at the CD player and video<br />
camera as desired.<br />
Notes:<br />
• If you change the input source during recording, you will<br />
record the audio signals from the newly selected input source<br />
and the video signals assigned to that input source.<br />
• You cannot record the surround effects.<br />
56
Giving a name to each input source and preset<br />
radio station<br />
Giving a name to each input source<br />
You can program names for each input source (e.g., DVD, CD)<br />
and preset channel.<br />
Characters available for name entry<br />
A B C D E F G H I J K L M N O P Q R S T U V W X Y Z<br />
a b c d e f g h i j k l m n o p q r s t u v w x y z<br />
0 1 2 3 4 5 6 7 8 9 – . ’( ) + * / = , : ; ! ? _(space)<br />
1. Select the source to which you wish to enter a<br />
name by pressing the corresponding input<br />
selector button.<br />
2. Press the CHARACTER/MEMORY button.<br />
“Name In ?” appears.<br />
3. Press the SSC dial.<br />
Now you can enter a name.<br />
4. Rotate the SSC dial to select the character you<br />
wish to enter and then press the SSC dial.<br />
5. Enter a name of up to 10 characters.<br />
The name entry mode is canceled automatically when you<br />
finish entering 10 characters.<br />
If you enter a name of less than 10 characters, press the<br />
CHARACTER/MEMORY button.<br />
To erase a name<br />
1. Select the source whose name you wish to<br />
erase by pressing the corresponding input<br />
selector button.<br />
2. Press the CHARACTER/MEMORY button twice.<br />
“Name Erase ?” appears.<br />
3. Press the SSC dial.<br />
The entire name is erased.<br />
Giving a name to each preset radio station<br />
You can give a desired name to each preset radio station.<br />
1. Select the preset radio station to which you<br />
wish to enter a name.<br />
Then, follow steps 2 through 5 of the above procedure “Giving<br />
a name to each input source” to give a name to each preset<br />
radio station. To change or erase a name, see to “To change a<br />
name” and “To erase a name.”<br />
To change a name<br />
1. Select the source whose name you wish to<br />
change by pressing the corresponding input<br />
selector button.<br />
2. Press the CHARACTER/MEMORY button.<br />
“Name In ?” appears.<br />
3. Press the SSC dial.<br />
Now you can change the name.<br />
4. Press the TUNING UP/DOWN button to select<br />
the character you wish to change.<br />
5. Rotate the SSC dial to select the character you<br />
wish to enter and then press the SSC dial.<br />
The name entry mode is canceled automatically when you<br />
finish entering 10 characters.<br />
If you enter a name of less than 10 characters, press the<br />
CHARACTER/MEMORY button.<br />
57
Using remote controller<br />
Overview<br />
The RC-390M remote controller is a useful tool to help you<br />
operate the components of your home theater. To do so, first press<br />
the Mode button that corresponds to the device you wish to<br />
control. At this time, the display on the remote controller will<br />
change to show the component that is selected. Then simply press<br />
the desired operation button and the component will operate<br />
accordingly. For example, if you wish to select the CD input<br />
source at the <strong>TX</strong>-<strong>DS787</strong> with the remote controller, first press the<br />
AUDIO/TAPE MODE button to select the <strong>TX</strong>-<strong>DS787</strong> (“AUDIO”<br />
will appear on the display) and then press the CD (INPUT<br />
SELECTOR) button.<br />
SEND/LEARN<br />
indicator<br />
ON<br />
AUDIO/TAPE<br />
MODE<br />
STNBY<br />
Using the remote controller to control each<br />
device<br />
In order to use the remote controller, you must first turn on the<br />
POWER switch at the <strong>TX</strong>-<strong>DS787</strong> so that it enters standby mode.<br />
1. Press the AUDIO/TAPE MODE button.<br />
“AUDIO” appears in the remote controller display.<br />
2. Press the ON button to turn on the <strong>TX</strong>-<strong>DS787</strong><br />
and press the STNBY button to put it back in<br />
the standby mode.<br />
When you press the STNBY button on the remote controller, it<br />
puts the <strong>TX</strong>-<strong>DS787</strong> in the standby state but does not turn it<br />
completely off.<br />
SEND/LEARN indicator<br />
This indicator acts as a guide when commands are programmed<br />
into or sent by the remote controller. It also warns the user when an<br />
error is made or battery power is low.<br />
ON<br />
SLEEP<br />
AUDIO/TAPE<br />
MODE<br />
DISPLAY<br />
CH<br />
STNBY<br />
LIGHT<br />
VOL<br />
Controlling the <strong>TX</strong>-<strong>DS787</strong><br />
If “AUDIO” is already appears in the display, proceed to step 2.<br />
1. Press the AUDIO/TAPE MODE button.<br />
“AUDIO” appears in the remote controller display.<br />
2. Press the desired operation button. The<br />
buttons shaded in the figure to the left are the<br />
operation buttons that can be used to control<br />
the <strong>TX</strong>-<strong>DS787</strong>.<br />
AUDIO<br />
AUDIO<br />
TRACK<br />
DISC<br />
MUTING<br />
TEST<br />
MUTING<br />
REC<br />
OPEN/CLOSE<br />
Re-EQ<br />
LATE NIGHT<br />
DIMMER<br />
DVD<br />
CD<br />
T1 T2 TUN PH<br />
V1 V2 V3 V –<br />
STEREO DIRECT DSP<br />
1 2 3<br />
SURROUND THX DSP<br />
4 5 6<br />
Re-EQ CH SEL LEVEL +<br />
7 8 9<br />
LATE NIGHT DIMMER LEVEL –<br />
+ 10 0 ENT<br />
HOME THEATER CONTROLLER<br />
RC-390M<br />
INPUT<br />
SELECTOR<br />
buttons<br />
Listening<br />
mode buttons<br />
LEVEL +<br />
LEVEL –<br />
CH SEL<br />
58
Using remote controller<br />
LIGHT: Illuminates the buttons.<br />
SLEEP: Sets the sleep function.<br />
• The SLEEP buttons enables you to set the <strong>TX</strong>-<strong>DS787</strong> to<br />
turn off automatically after a specified time period. If you<br />
press it once, the <strong>TX</strong>-<strong>DS787</strong> will turn off after 90 minutes.<br />
Each time it is pressed thereafter, the remaining time until<br />
the <strong>TX</strong>-<strong>DS787</strong> turns off decreases by 10 minutes. While,<br />
the sleep function is enabled, you can press the SLEEP<br />
button to see how much time is left. To cancel the sleep<br />
function, press the SLEEP button when the time displayed<br />
is less than 10 minutes.<br />
ON/STNBY: Turns on the <strong>TX</strong>-<strong>DS787</strong> or puts it in standby.<br />
DISPLAY: Changes the display.<br />
• Same as the DISPLAY button on front panel of the <strong>TX</strong>-<br />
<strong>DS787</strong>.<br />
VOL<br />
: Adjusts the volume.<br />
Notes:<br />
• The depth of the Late Night effect is determined by Dolby<br />
Digital software. Some sounds may produce no or little effect.<br />
• The Late Night function is effective only on Dolby Digital<br />
encoded software.<br />
CH SEL: Selects a speaker for changing the speaker output level.<br />
• See TEST button above.<br />
DIMMER: Adjusts the display brightness.<br />
• There are three settings available: normal, dark and very<br />
dark.<br />
LEVEL +: Increases the speaker level.<br />
• See TEST button above.<br />
LEVEL –: Decreases the speaker level.<br />
• See TEST button above.<br />
Listening mode buttons<br />
CH : Selects the tuner preset stations.<br />
TEST: Outputs a test tone for setting speaker levels.<br />
• Use this button in conjunction with the LEVEL +/– and<br />
CH SEL buttons to calibrate the speakers levels without<br />
entering the OSD Menu. When TEST button is pressed,<br />
the test noise (pink noise) is output. Use the LEVEL +/–<br />
buttons to increase or decrease the sound level. Use the CH<br />
SEL button to change from speaker to speaker. For a more<br />
detailed explanation of how to calibrate the speaker levels,<br />
see page 32.<br />
MUTING: Activates the mute function.<br />
• This button mutes the playback sound immediately. This<br />
can be useful, for example, when you receive a telephone<br />
call while listening to music or another source. When<br />
pressed, “Muting” is displayed on the <strong>TX</strong>-<strong>DS787</strong>. Press<br />
the MUTING button again to turn the sound back on.<br />
AUDIO: For selecting the audio input signal. The setting<br />
changes from “AUTO” to “Multichannel” to “Analog” and<br />
back each time this button is pressed.<br />
INPUT SELECTOR: Selects an input source.<br />
• Same as the input selector buttons on front panel of the<br />
<strong>TX</strong>-<strong>DS787</strong>.<br />
Re-EQ: Depending on the listening mode, you can turn the<br />
cinema re-equalization function on or off.<br />
• The re-equalization function takes the edginess or<br />
“brightness” out of your home cinema sound to<br />
compensate for the fact that sound mixed for theaters may<br />
sound too bright when played back through speakers in the<br />
home environment.<br />
LATE NIGHT: Sets “High,” “Low,” or “Off” for the late<br />
night function.<br />
• Cinema sound has a vast dynamic range; therefore, to hear<br />
the quieter sounds such as human conversations, they must<br />
be played back at larger volumes. When this parameter is<br />
set to “High” or “Low,” the dynamic range of the sound is<br />
narrowed down to allow you to easily hear minute sounds<br />
at low volumes. This function is especially useful if you<br />
wish to play a movie at low volumes during the nighttime.<br />
STEREO: Changes the listening mode directly to the Stereo<br />
listening mode.<br />
• If pressed, the listening mode for the selected input source<br />
set in the Listening Mode Preset sub-menu is also changed<br />
to the Stereo listening mode.<br />
SURROUND: Changes the listening mode to the surround<br />
mode for the current input signal (e.g., Dolby Pro Logic,<br />
Dolby Digital, or DTS).<br />
• If pressed, the listening mode for the selected input source<br />
set in the Listening Mode Preset sub-menu is also changed<br />
to the Surround listening mode. If Dolby Digital or DTS was<br />
already set as the listening mode:<br />
The operating mode for the 6.1-channel matrix playback<br />
of sources that allow 6.1-channel matrix playback will<br />
change as follows (see page 43):<br />
Auto→On→Off→Auto...<br />
DIRECT: Changes the listening mode directly to the Direct<br />
listening mode.<br />
• If pressed, the listening mode for the selected input source<br />
set in the Listening Mode Preset sub-menu is also changed<br />
to the Direct listening mode.<br />
THX: Changes the listening mode to the THX listening mode.<br />
• If pressed, the listening mode for the selected input source<br />
set in the Listening Mode Preset sub-menu is also changed<br />
to the THX listening mode. The operating mode for the<br />
THX Surround EX playback of sources that allow THX<br />
Surround EX playback will change as follows (see page<br />
43):<br />
Auto→On→Off→Auto...<br />
* “Auto” only appears for Dolby Digital sources.<br />
DSP / : Changes the listening mode as shown below.<br />
Direct ↔ Stereo ↔ Theater-Dimensional ↔ Surround ↔<br />
THX ↔ Mono Movie ↔ Enhanced7 ↔ Orchestra ↔<br />
Unplugged ↔ Studio-Mix ↔ TV Logic ↔ All Ch Stereo<br />
↔ Direct.<br />
• If pressed, the listening mode for the selected input source<br />
set in the Listening Mode Preset sub-menu is also changed.<br />
59
Using remote controller<br />
Controlling an <strong>Onkyo</strong> CD player<br />
The z connector of the <strong>Onkyo</strong> compact disc player must be<br />
connected to the <strong>TX</strong>-<strong>DS787</strong> (see page 13).<br />
CD MODE<br />
1. Press the CD MODE button.<br />
“CD” appears in the remote controller display.<br />
AUDIO<br />
MUTING<br />
TRACK<br />
DISC<br />
REC<br />
OPEN/CLOSE<br />
DVD<br />
CD<br />
T1 T2 TUN PH<br />
V1 V2 V3 V –<br />
STEREO DIRECT DSP<br />
1 2 3<br />
SURROUND THX DSP<br />
4 5 6<br />
Re-EQ CH SEL LEVEL +<br />
7 8 9<br />
LATE NIGHT DIMMER LEVEL –<br />
+ 10 0 ENT<br />
HOME THEATER CONTROLLER<br />
RC-390M<br />
CD<br />
operation<br />
buttons<br />
Numeric keys<br />
2. Press the desired operation button. The<br />
buttons shaded in the figure to the left are the<br />
operation buttons that can used to control an<br />
<strong>Onkyo</strong> compact disc player.<br />
TRACK: Selects a track<br />
DISC: Selects a disk in the CD changer<br />
: Track down<br />
: Track up<br />
: Play<br />
: Stop<br />
: Fast reverse<br />
: Fast forward<br />
: Pause<br />
OPEN/CLOSE r: Open/close the disc tray<br />
0, 1 to 9, +10: Numeric keys<br />
You may also use the following buttons:<br />
VOL : Adjusts the volume at the <strong>TX</strong>-<strong>DS787</strong><br />
MUTING: Activates the muting function at the <strong>TX</strong>-<strong>DS787</strong><br />
Controlling an <strong>Onkyo</strong> MD recorder<br />
Make sure that you point the remote controller toward the sensor<br />
on the <strong>Onkyo</strong> MD recorder.<br />
ON<br />
STNBY<br />
MD MODE<br />
1. Press the MD MODE button.<br />
“MD” appears in the remote controller display.<br />
2. Press the desired operation button. The<br />
buttons shaded in the figure to the left are the<br />
operation buttons that can used to control an<br />
<strong>Onkyo</strong> mini disc player.<br />
AUDIO<br />
MUTING<br />
TRACK<br />
DISC<br />
REC<br />
OPEN/CLOSE<br />
DVD<br />
CD<br />
T1 T2 TUN PH<br />
V1 V2 V3 V –<br />
STEREO DIRECT DSP<br />
1 2 3<br />
SURROUND THX DSP<br />
4 5 6<br />
Re-EQ CH SEL LEVEL +<br />
7 8 9<br />
LATE NIGHT DIMMER LEVEL –<br />
+ 10 0 ENT<br />
HOME THEATER CONTROLLER<br />
RC-390M<br />
MD<br />
operation<br />
buttons<br />
Numeric keys,<br />
ENT<br />
ON/STNBY: Turns the mini disc player on and off<br />
: Track down<br />
: Track up<br />
: Play<br />
: Stop<br />
: Fast reverse<br />
: Fast forward<br />
REC o: Record<br />
: Pause<br />
r: Eject the disc<br />
1 to 9, +10: Numeric keys<br />
ENT: Enters the settings<br />
60<br />
You may also use the following buttons:<br />
VOL : Adjusts the volume at the <strong>TX</strong>-<strong>DS787</strong><br />
MUTING: Activates the muting function at the <strong>TX</strong>-<strong>DS787</strong>
Using remote controller<br />
Controlling an <strong>Onkyo</strong> cassette tape deck<br />
The z connector of the <strong>Onkyo</strong> cassette tape deck must be<br />
connected to the <strong>TX</strong>-<strong>DS787</strong> (see page 13).<br />
AUDIO/TAPE<br />
MODE<br />
1. Press the AUDIO/TAPE MODE button.<br />
“AUDIO” appears in the remote controller display.<br />
2. Press the desired operation button. The<br />
buttons shaded in the figure to the left are the<br />
operation buttons that can used to control an<br />
<strong>Onkyo</strong> cassette tape player.<br />
AUDIO<br />
TRACK<br />
REC<br />
DVD<br />
T1 T2<br />
MUTING<br />
DISC<br />
OPEN/CLOSE<br />
CD<br />
TUN PH<br />
TAPE<br />
operation<br />
buttons<br />
: Play<br />
: Stop<br />
: Rewind<br />
: Fast forward<br />
REC o: Record<br />
: Reverse playback<br />
V1 V2 V3 V –<br />
STEREO DIRECT DSP<br />
1 2 3<br />
SURROUND THX DSP<br />
4 5 6<br />
Re-EQ CH SEL LEVEL +<br />
7 8 9<br />
LATE NIGHT DIMMER LEVEL –<br />
+ 10 0 ENT<br />
You may also use the following buttons:<br />
VOL : Adjusts the volume at the <strong>TX</strong>-<strong>DS787</strong><br />
MUTING: Activates the muting function at the <strong>TX</strong>-<strong>DS787</strong><br />
HOME THEATER CONTROLLER<br />
RC-390M<br />
Calling up a preset radio station<br />
1. Press the AUDIO/TAPE MODE button.<br />
“AUDIO” appears in the remote controller display.<br />
AUDIO/TAPE<br />
MODE<br />
CH<br />
2. Press the TUN input selector button.<br />
“(TUN)” appears in the remote controller display and<br />
momentarily and then “AUDIO” reappears.<br />
3. Press the CH + or – button to select the<br />
desired the preset station number.<br />
AUDIO<br />
MUTING<br />
TRACK<br />
DISC<br />
REC<br />
OPEN/CLOSE<br />
DVD<br />
T1<br />
T2<br />
TUN<br />
CD<br />
PH<br />
TUN<br />
V1<br />
V2 V3 V –<br />
STEREO DIRECT DSP<br />
1 2 3<br />
SURROUND THX DSP<br />
4 5 6<br />
Re-EQ CH SEL LEVEL +<br />
7 8 9<br />
LATE NIGHT DIMMER LEVEL –<br />
+ 10 0 ENT<br />
HOME THEATER CONTROLLER<br />
RC-390M<br />
61
Using remote controller<br />
Controlling an <strong>Onkyo</strong> DVD player<br />
ON<br />
STNBY<br />
DVD MODE<br />
Make sure that you point the remote controller toward the sensor<br />
on the <strong>Onkyo</strong> DVD player.<br />
1. Press the DVD MODE button.<br />
“DVD” appears in the remote controller display.<br />
ENTER<br />
Cursor<br />
button<br />
RETURN<br />
AUDIO<br />
MUTING<br />
TRACK<br />
DISC<br />
REC<br />
OPEN/CLOSE<br />
DVD<br />
CD<br />
T1 T2 TUN PH<br />
V1 V2 V3 V –<br />
STEREO DIRECT DSP<br />
1 2 3<br />
SURROUND THX DSP<br />
4 5 6<br />
Re-EQ CH SEL LEVEL +<br />
7 8 9<br />
LATE NIGHT DIMMER LEVEL –<br />
+ 10 0 ENT<br />
HOME THEATER CONTROLLER<br />
RC-390M<br />
DVD SET<br />
MENU<br />
DVD<br />
operation<br />
buttons<br />
Numeric keys,<br />
ENT<br />
2. Press the desired operation button. The<br />
buttons shaded in the figure to the left are the<br />
operation buttons that can used to control an<br />
<strong>Onkyo</strong> DVD player.<br />
ON/STNBY: Turns the DVD player on and off<br />
DVD SET: Enters the DVD setup menu<br />
DVD player on-screen buttons<br />
MENU: Displays the menu<br />
: Moves the cursor<br />
ENTER: Confirms the selection<br />
RETURN : Return buttons<br />
DVD player buttons<br />
: Chapter/Track down<br />
: Chapter/Track up<br />
: Play<br />
: Stop<br />
: Fast reverse<br />
: Fast forward<br />
: Pause<br />
OPEN/CLOSE r: Open/close the disc tray<br />
0, 1 to 9, +10: Numeric keys<br />
ENT: Confirm<br />
You may also use the following buttons:<br />
VOL : Adjusts the volume at the <strong>TX</strong>-<strong>DS787</strong><br />
MUTING: Activates the muting function at the <strong>TX</strong>-<strong>DS787</strong><br />
SAT, CABLE, VCR,<br />
and TV MODE<br />
Note:<br />
The ENT button on the bottom right of the numeric keys has the<br />
same function as “ENTER” of the ENTER/cursor button.<br />
AUDIO<br />
MUTING<br />
TRACK<br />
DISC<br />
SAT, CABLE, VCR, and TV MODE buttons<br />
REC<br />
DVD<br />
T1<br />
T2<br />
OPEN/CLOSE<br />
CD<br />
TUN PH<br />
No preset codes are programmed into the SAT, CABLE, VCR, and<br />
TV MODE buttons. You can use these buttons to program the<br />
remote controller signals of other devices (see page 63).<br />
V1 V2 V3 V –<br />
STEREO DIRECT DSP<br />
1 2 3<br />
SURROUND THX DSP<br />
4 5 6<br />
Re-EQ<br />
7<br />
CH SEL<br />
8<br />
LEVEL +<br />
9<br />
LATE NIGHT DIMMER LEVEL –<br />
+ 10 0 ENT<br />
You may use the following buttons:<br />
VOL : Adjusts the volume at the <strong>TX</strong>-<strong>DS787</strong><br />
MUTING: Activates the muting function at the <strong>TX</strong>-<strong>DS787</strong><br />
HOME THEATER CONTROLLER<br />
RC-390M<br />
62
Programming the commands of remote controllers for<br />
other devices into the remote controller<br />
The remote controller has two learning functions. One is a normal<br />
learning function that enables the remote controller to learn the<br />
codes from other remote controllers. The other is a macro learning<br />
function that enables you to program of series of operations into<br />
the remote controller so that they can all be performed at once by<br />
pressing one button.<br />
MULTI-CH<br />
INPUT<br />
POWER SUR<br />
SLEEP DIMMER MODE<br />
INPUT SELECTOR<br />
DVD TAPE TUNER PHONO C D<br />
TUNER<br />
VIDEO-1 VIDEO-2 GROUP PRESET<br />
C D DVD<br />
TEST<br />
TONE<br />
VOLUME<br />
CH SEL<br />
DISC<br />
MUTING<br />
85S<br />
TAPE<br />
Programming procedure<br />
When programming the commands of another remote controller to<br />
the RC-390M remote controller, you must first decide under which<br />
MODE button you want the commands to be linked. In general,<br />
you will select the MODE button that corresponds to the<br />
component you are programming. For example, if you are<br />
programming the functions from a remote controller for a compact<br />
disc player, you would choose the CD MODE button. Then, by<br />
pressing the CD MODE button, the buttons on the RC-390M<br />
remote controller will change to the commands you program here<br />
to operate the compact disc player.<br />
After programming which MODE button to use, you will then<br />
transfer the separate commands from the other remote controller<br />
over to the RC-390M remote controller one at a time. Each<br />
command is then programmed to a different button on the RC-<br />
390M remote controller. Any button is programmable for this step<br />
except for the eight MODE buttons (AUDIO, CD, DVD, MD,<br />
SAT, CABLE, VCR, and TV), the two MACRO buttons (DIRECT<br />
and MODE), and the LIGHT button.<br />
Even after the commands have been memorized, keep your old<br />
remote controller in a safe place. If for some reason the commands<br />
are lost (e.g., when the batteries run down), it will be necessary to<br />
memorize them once again.<br />
5 to 15 cm<br />
(2 to 6 inches)<br />
1. Place the remote controller and the remote<br />
controller for the other device facing each<br />
other at a distance of 5 to 15 cm (2 to 6 inches)<br />
apart.<br />
2. While pressing and holding down the desired<br />
MODE button on the remote controller, press<br />
the ENT button and then release both buttons.<br />
When you press and hold down the MODE button, the SEND/<br />
LEARN indicator lights. When you press the ENT button, the<br />
lamp turns off. When you release the buttons, the lamp lights<br />
again and “LEARN” appears in the display.<br />
AUDIO<br />
MUTING<br />
SEND/LEARN<br />
indicator<br />
MODE<br />
buttons<br />
3. Press and release the button on the remote<br />
controller to which you want to transfer the<br />
next command.<br />
You may select any button but the eleven ones indicated in the<br />
figure below. When you press the button, “RCV” appears in<br />
the display and the SEND/LEARN indicator turns off. When<br />
you release the button, the indicator lights again.<br />
If you press the wrong button by mistake, press that same<br />
button again. The SEND/LEARN indicator flashes twice,<br />
“CLEAR” appears in the display, and the remote controller<br />
exits the programming mode.<br />
TRACK<br />
DISC<br />
REC<br />
OPEN/CLOSE<br />
DVD<br />
CD<br />
T1 T2 TUN PH<br />
V1 V2 V3 V –<br />
STEREO<br />
1<br />
DIRECT<br />
2<br />
DSP<br />
3<br />
SURROUND THX DSP<br />
4 5 6<br />
Re-EQ CH SEL LEVEL +<br />
7 8 9<br />
LATE NIGHT DIMMER LEVEL –<br />
+ 10 0 ENT<br />
ENT<br />
DIRECT<br />
MACRO<br />
LIGHT<br />
MODE<br />
MACRO<br />
MODE<br />
buttons<br />
HOME THEATER CONTROLLER<br />
RC-390M<br />
: Buttons that cannot be programmed.<br />
63
Programming the commands of remote controllers for other devices into the remote<br />
controller<br />
4. Press and hold down the button (that<br />
corresponds to the command you are<br />
programming) on the remote controller of the<br />
other device until the SEND/LEARN lamp on<br />
the remote controller flashes twice and<br />
“SAVED” appears in the display.<br />
After flashing twice, the SEND/LEARN indicator will light<br />
again and “LEARN” appears in the display.<br />
5. Repeat Steps 3 and 4 to transfer all the<br />
commands you desire from the other remote<br />
controller and program them to buttons on the<br />
remote controller under the same MODE.<br />
Repeat Steps 2 through 4 to program commands to a different<br />
MODE (e.g., when programming from a different remote<br />
controller).<br />
6. Press the MODE button that you pressed in<br />
step 2 to complete the programming.<br />
7. Operate the newly programmed buttons to<br />
make sure the learning function was<br />
performed properly.<br />
Notes:<br />
• The remote controller codes for <strong>Onkyo</strong> compact disc players,<br />
cassette tape decks, DVD players, and mini disc recorder have<br />
already been programmed into buttons on the remote<br />
controller. You may, however, use these buttons to program<br />
the codes for other remote controllers. If you wish to restore<br />
the <strong>Onkyo</strong> preset codes after you program new codes, you<br />
must first erase the new codes (see page 65).<br />
• The remote controller has 408 memory slots (8 modes x 51<br />
buttons). Some remote controllers may have more commands<br />
that can be remembered by the remote controller. In such<br />
cases, it will be necessary for you to determine which<br />
commands are more important than others.<br />
• If no button is pressed for more than 30 seconds during the<br />
programming, or if you perform an invalid operation during<br />
programming, the SEND/LEARN indicator flashes three<br />
times quickly, “ERROR” appears in the display, and the<br />
remote controller exits the programming mode. Resume from<br />
Step 2.<br />
• If a failure occurs during programming, the SEND/LEARN<br />
indicator flashes three times quickly, “NG” appears in the<br />
display, and the remote controller exits the programming<br />
mode. Resume from Step 3.<br />
• If a failure occurs five times in row during programming,<br />
“ERROR” appears in the display, and the remote controller<br />
exits the programming mode. Resume from Step 3.<br />
• If you try to program beyond the learning capacity of the<br />
remote controller, the SEND/LEARN indicator flashes six<br />
times quickly, “FULL” appears in the display, and the remote<br />
controller exits the programming mode. Try programming<br />
under a different MODE button.<br />
• When you want to program a command to a button to which<br />
you have already programmed a command, simply follow the<br />
same procedure given and programming for that button will be<br />
overwritten.<br />
• The remote controller uses infrared rays to send its commands,<br />
as do most other remote controllers. Though most remote<br />
controller codes can be memorized by the remote controller,<br />
be aware that some remote controllers use a system that is<br />
quite different from the remote controller and therefore may<br />
not be able to be programmed.<br />
• Some remote controllers have a single button that performs<br />
multiple functions (for example, the function may change each<br />
time the button is pressed). If this is the case, each function<br />
must be programmed to a separate button on the remote<br />
controller.<br />
• Once you have transferred the commands from the other<br />
remote controller, refer to the instruction manual that came<br />
with that product for instructions on how to operate that<br />
product.<br />
• Make sure both the remote controller and the other remote<br />
controller have new batteries. If either of them has batteries<br />
that are low, you may not be able to program the commands of<br />
the other remote controller properly into the remote controller.<br />
See page 69 for how to erase the memorized commands from all<br />
buttons.<br />
64
Programming the commands of remote controllers for other devices into the remote<br />
controller<br />
SEND/LEARN<br />
indicator<br />
Erasing the programmed command from one<br />
button<br />
You can only erase memorized commands and not preset ones.<br />
AUDIO<br />
MUTING<br />
MODE<br />
buttons<br />
1. Press and hold down the desired MODE button<br />
for the command, press the ENT button, and<br />
then release both buttons.<br />
When you press the MODE button, the SEND/LEARN<br />
indicator lights and that mode appears in the display. When<br />
you press the ENT button, the lamp turns off. When you<br />
release the buttons, the lamp lights again and “LEARN”<br />
appears in the display.<br />
TRACK<br />
DISC<br />
REC<br />
DVD<br />
T1<br />
T2<br />
OPEN/CLOSE<br />
CD<br />
TUN PH<br />
2. Press and release the button for the command<br />
you wish to erase.<br />
When you press the button, the SEND/LEARN indicator turns<br />
off and “RCV” appears in the display. When you release the<br />
button, the lamp lights again.<br />
V1 V2 V3 V –<br />
STEREO DIRECT DSP<br />
1 2 3<br />
SURROUND THX DSP<br />
4 5 6<br />
Re-EQ CH SEL LEVEL +<br />
7 8 9<br />
LATE NIGHT DIMMER LEVEL –<br />
+ 10 0 ENT<br />
HOME THEATER CONTROLLER<br />
RC-390M<br />
ENT<br />
3. Press and release the same button again.<br />
The SEND/LEARN lamp flashes twice slowly and “CLEAR”<br />
appears in the display. The memorized command is erased.<br />
Note:<br />
If no button is pressed for more than 30 seconds during the<br />
programming, the SEND/LEARN indicator flashes three times<br />
quickly, “ERROR” appears in the display, and the remote<br />
controller exits the programming mode. Resume from Step 1.<br />
SEND/LEARN<br />
indicator<br />
MODE<br />
buttons<br />
Erasing all the commands programmed under a<br />
MODE button<br />
1. Press and hold down the desired MODE<br />
button, press the ENT button twice, and then<br />
release both buttons.<br />
When you press the MODE button, the SEND/LEARN<br />
indicator lights and that mode appears in the display. When<br />
you press the ENT button, the lamp turns off. When you<br />
release the buttons, the lamp flashes twice slowly and then<br />
lights again.<br />
AUDIO<br />
REC<br />
TRACK<br />
DISC<br />
MUTING<br />
OPEN/CLOSE<br />
2. Press and release the same MODE button<br />
again.<br />
When you release the button, the SEND/LEARN indicator<br />
flashes twice slowly. This erases all the commands memorized<br />
to the MODE button.<br />
DVD<br />
CD<br />
T1 T2 TUN PH<br />
V1 V2 V3 V –<br />
STEREO DIRECT DSP<br />
1 2 3<br />
SURROUND THX DSP<br />
4 5 6<br />
Re-EQ CH SEL LEVEL +<br />
7 8 9<br />
LATE NIGHT DIMMER LEVEL –<br />
+ 10 0 ENT<br />
HOME THEATER CONTROLLER<br />
RC-390M<br />
ENT<br />
Notes:<br />
• If no button is pressed for more than 30 seconds during the<br />
programming, the SEND/LEARN indicator flashes three<br />
times quickly and the remote controller exits the programming<br />
mode. Resume from Step 1.<br />
• If you perform an invalid operation during programming, the<br />
SEND/LEARN indicator flashes three times quickly,<br />
“ERROR” appears in the display, and the remote controller<br />
exits the programming mode. Resume from Step 1.<br />
• If many commands have been programmed to the MODE<br />
button, then the SEND/LEARN indicator may remain lit for<br />
some time during Step 2. This is not a malfunction.<br />
65
Using a Macro function<br />
What is a Macro function?<br />
A Macro function enables you to program a series of button<br />
operations (up to 16) on the remote controller into a single button.<br />
For example, to play a compact disc player connected to the <strong>TX</strong>-<br />
<strong>DS787</strong> normally, you must perform the following steps:<br />
1. Press the AUDIO/TAPE MODE button.<br />
2. Press the ON button.<br />
3. Press the CD (INPUT SELECTOR) button.<br />
4. Press the CD MODE button.<br />
5. Press the playback button.<br />
By using the macro function, you can perform the above five<br />
operations by only pressing two buttons.<br />
Programming a Macro function<br />
You can program a different macro into the MODE MACRO<br />
button for each of the eight MODE buttons. The macro is then<br />
executed by pressing the appropriate MODE button and then<br />
pressing the MODE MACRO button. For example, to program the<br />
macro described above into the CD MODE button, perform the<br />
steps given below.<br />
1. Press and hold down the desired MODE button (in<br />
this case, the CD MODE button), press the MODE<br />
MACRO button, and then release both buttons.<br />
When you press the CD MODE button, the SEND/LEARN<br />
indicator lights and “CD” appears in the display. When you<br />
press the MODE MACRO button, the indicator turns off.<br />
When you release the buttons, the indicator flashes and lights<br />
again and “M 01” appears in the display.<br />
ON<br />
AUDIO/TAPE<br />
MODE<br />
MODE MACRO<br />
CD MODE<br />
2. Press the operation buttons you wish to<br />
program in order (in this case, press AUDIO/<br />
TAPE MODE → ON → CD (INPUT SELECTOR)<br />
→ CD MODE → playback button).<br />
When you press each button, the SEND/LEARN indicator turns<br />
off and the display changes from “M 01” → “M 02” → “M 03”<br />
→ etc. When you release the button, the indicator lights.<br />
3. Press the MODE MACRO button to complete<br />
the programming.<br />
The SEND/LEARN indicator flashes twice slowly and<br />
“SAVED” appears in the display.<br />
AUDIO<br />
TRACK<br />
DISC<br />
MUTING<br />
(CD playback)<br />
4. Run the macro to check to see if the macro has<br />
been properly programmed.<br />
REC<br />
DVD<br />
T1<br />
T2<br />
OPEN/CLOSE<br />
Tip:<br />
• If you erase or change the command of a button programmed<br />
in a macro, that operation of that button will no longer work in<br />
the macro. In this case, it will be necessary for you to<br />
reprogram the macro in order to avoid incorrect operation.<br />
• The codes programmed into a macro will be transmitted at an<br />
interval of 0.5 seconds. However, some devices may not be<br />
able to complete one operation in 0.5 seconds and may miss<br />
the next code. In this case, after pressing one operation button,<br />
you can press the same MODE button again before pressing<br />
the next operation button to add another 0.5 seconds between<br />
the two operations.<br />
TUN<br />
CD<br />
PH<br />
V1 V2 V3 V –<br />
STEREO DIRECT DSP<br />
1 2 3<br />
SURROUND THX DSP<br />
4 5 6<br />
Re-EQ CH SEL LEVEL +<br />
7 8 9<br />
LATE NIGHT DIMMER LEVEL –<br />
+ 10 0 ENT<br />
HOME THEATER CONTROLLER<br />
RC-390M<br />
CD<br />
(INPUT<br />
SELECTOR)<br />
Notes:<br />
• You may program up to 16 button operations into each macro<br />
function. If you try to program a 17th operation, it will be<br />
ignored, “SAVED” appears in the display, and programming<br />
is stopped.<br />
• If no button is pressed for more than 30 seconds during the<br />
programming, the SEND/LEARN indicator flashes three times<br />
quickly, “ERROR” appears in the display, and the remote<br />
controller exits the programming mode. Resume from Step 1.<br />
• If you perform an invalid operation during programming, the<br />
SEND/LEARN indicator flashes three times quickly,<br />
“ERROR” appears in the display, and the remote controller<br />
exits the programming mode. Resume from Step 1.<br />
Running a Macro function<br />
Perform the procedure below to run a macro function that you<br />
have programmed into the remote controller. After programming a<br />
macro, you should always run it at least once to make sure that it<br />
has been programmed properly.<br />
1. Point the remote controller at the <strong>TX</strong>-<strong>DS787</strong><br />
and press the CD MODE button.<br />
66<br />
2. Press the MODE MACRO, and verify that the<br />
devices operate properly.<br />
It may take a while for the macro to finish transmitting, so be<br />
sure to continue pointing the remote controller at the device<br />
until the SEND/LEARN indicator turns off.
Using a Macro function<br />
Programming the Direct Macro function<br />
ON<br />
DIRECT<br />
MACRO<br />
AUDIO/TAPE<br />
MODE<br />
AUDIO<br />
TRACK<br />
DISC<br />
MUTING<br />
CD MODE<br />
MODE buttons<br />
(CD playback)<br />
With the direct macro function, you can program a series of button<br />
operations as a macro into the DIRECT MACRO button so the<br />
macro can be executed with just one touch. Note that for the direct<br />
macro function, only one macro can be programmed. For example,<br />
to program the macro described on the previous page for the<br />
DIRECT MACRO button, perform the steps given below.<br />
1. Press and hold down any one of the eight<br />
MODE buttons, press the DIRECT MACRO<br />
button, and then release both buttons.<br />
When you press the MODE button, the SEND/LEARN<br />
indicator lights and that mode appears in the display. When<br />
you press the DIRECT MACRO button, the indicator turns off.<br />
When you release the buttons, the indicator flashes briefly and<br />
then lights again and “M 01” appears in the display.<br />
REC<br />
OPEN/CLOSE<br />
DVD<br />
CD<br />
T1 T2 TUN PH<br />
V1 V2 V3 V –<br />
STEREO DIRECT DSP<br />
1 2 3<br />
SURROUND THX DSP<br />
4 5 6<br />
Re-EQ CH SEL LEVEL +<br />
7 8 9<br />
LATE NIGHT DIMMER LEVEL –<br />
+ 10 0 ENT<br />
CD<br />
(INPUT<br />
SELECTOR)<br />
2. Press the operation buttons you wish to<br />
program in order (in this case,<br />
press AUDIO/TAPE MODE → ON → CD (INPUT<br />
SELECTOR) → CD MODE → playback button).<br />
When you press each button, the SEND/LEARN indicator<br />
turns off and the display changes from “M 01” → “M 02” →<br />
“M 03” → etc. When you release the button, the indicator<br />
lights.<br />
HOME THEATER CONTROLLER<br />
RC-390M<br />
Tip:<br />
• If you erase or change the command of a button programmed<br />
in the direct macro, that operation of that button will no longer<br />
work in the macro. In this case, it will be necessary for you to<br />
reprogram the direct macro in order to avoid incorrect<br />
operation.<br />
• The codes programmed into a direct macro will be transmitted<br />
at an interval of 0.5 seconds. However, some devices may not<br />
be able to complete one operation in 0.5 seconds and may miss<br />
the next code. In this case, after pressing one operation button,<br />
you can press the same MODE button again before pressing<br />
the next operation button to add another 0.5 seconds between<br />
the two operations.<br />
3. Press the DIRECT MACRO button to complete<br />
the procedure.<br />
The SEND/LEARN indicator flashes twice slowly and<br />
“SAVED” appears in the display.<br />
4. Check to see if the macro has been properly<br />
programmed.<br />
Notes:<br />
• You may program up to 16 button operations into each macro<br />
function. If you try to program a 17th operation, it will be<br />
ignored, “SAVED” appears in the display, and programming<br />
is stopped.<br />
• If no button is pressed for more than 30 seconds during the<br />
programming, the SEND/LEARN indicator flashes three<br />
times quickly, “ERROR” appears in the display, and the<br />
remote controller exits the programming mode. Resume from<br />
Step 1.<br />
• If you perform an invalid operation during programming, the<br />
SEND/LEARN indicator flashes three times quickly,<br />
“ERROR” appears in the display, and the remote controller<br />
exits the programming mode. Resume from Step 1.<br />
Running a Direct Macro function<br />
Perform the procedure below to run a direct macro function that<br />
you have programmed into the remote controller. After<br />
programming a direct macro, you should always run it at least once<br />
to make sure that it has been programmed properly.<br />
1. Point the remote controller at the <strong>TX</strong>-<strong>DS787</strong><br />
and press the DIRECT MACRO button.<br />
It may take a while for the macro to finish transmitting, so be<br />
sure to continue pointing the remote controller at the device<br />
until the SEND/LEARN indicator turns off.<br />
67
Using a Macro function<br />
Erasing a macro from the MODE MACRO<br />
button<br />
MODE MACRO<br />
MODE buttons<br />
1. Press and hold down the desired MODE<br />
button, press the MODE MACRO button, and<br />
then release both buttons.<br />
When you press the MODE button, the SEND/LEARN<br />
indicator lights and that mode appears in the display. When<br />
you press the MODE MACRO button, the indicator turns off.<br />
When you release the buttons, the indicator flashes once and<br />
“M 01” appears in the display.<br />
AUDIO<br />
REC<br />
TRACK<br />
DISC<br />
MUTING<br />
OPEN/CLOSE<br />
2. Press the MODE MACRO button again.<br />
The SEND/LEARN indicator flashes twice slowly and<br />
“CLEAR” appears in the display. The macro programmed to<br />
the MODE button pressed in Step 1 above is erased.<br />
DVD<br />
CD<br />
T1 T2 TUN PH<br />
V1 V2 V3 V –<br />
STEREO DIRECT DSP<br />
1 2 3<br />
SURROUND THX DSP<br />
4 5 6<br />
Re-EQ CH SEL LEVEL +<br />
7 8 9<br />
LATE NIGHT DIMMER LEVEL –<br />
+ 10 0 ENT<br />
HOME THEATER CONTROLLER<br />
RC-390M<br />
Note:<br />
• If no button is pressed for more than 30 seconds during the<br />
programming, the SEND/LEARN indicator flashes three<br />
times quickly, “ERROR” appears in the display, and the<br />
remote controller exits the programming mode. Resume from<br />
Step 1.<br />
• Be aware that if you press a button other than MODE MACRO<br />
button in Step 2, then you will in effect be overwriting the<br />
previous macro with a new macro.<br />
Erasing a direct macro from the DIRECT<br />
MACRO button<br />
DIRECT MACRO<br />
MODE buttons<br />
1. Press and hold down any one of the eight<br />
MODE buttons, press the DIRECT MACRO<br />
button, and then release both buttons.<br />
When you press the MODE button, the SEND/LEARN<br />
indicator lights and that mode appears in the display. When<br />
you press the DIRECT MACRO button, the indicator turns off.<br />
When you release the buttons, the indicator flashes once and<br />
“M 01” appears in the display.<br />
AUDIO<br />
TRACK<br />
DISC<br />
MUTING<br />
2. Press the DIRECT MACRO button again.<br />
The SEND/LEARN indicator flashes twice slowly and<br />
“CLEAR” appears in the display. The macro programmed to<br />
the DIRECT MACRO button is erased.<br />
REC<br />
OPEN/CLOSE<br />
DVD<br />
CD<br />
T1 T2 TUN PH<br />
V1 V2 V3 V –<br />
STEREO DIRECT DSP<br />
1 2 3<br />
SURROUND THX DSP<br />
4 5 6<br />
Re-EQ CH SEL LEVEL +<br />
7 8 9<br />
LATE NIGHT DIMMER LEVEL –<br />
+ 10 0 ENT<br />
HOME THEATER CONTROLLER<br />
RC-390M<br />
Note:<br />
• If no button is pressed for more than 30 seconds during the<br />
programming, the SEND/LEARN indicator flashes three<br />
times quickly, “ERROR” appears in the display, and the<br />
remote controller exits the programming mode. Resume from<br />
Step 1.<br />
• Be aware that if you press a button other than DIRECT<br />
MACRO button in Step 2, then you will in effect be<br />
overwriting the previous direct macro with a new direct macro.<br />
68
Using a Macro function<br />
Erasing all commands and macros that have<br />
been programmed<br />
ON STNBY<br />
This procedure will erase all the commands and macros that you<br />
have programmed into the remote controller and return it to its<br />
default settings. This operation will not affect the preset settings of<br />
the remote controller.<br />
AUDIO<br />
REC<br />
TRACK<br />
DISC<br />
MUTING<br />
OPEN/CLOSE<br />
1. Open the battery cover and remove the<br />
batteries from the remote controller.<br />
2. While pressing and holding down the ON and<br />
STNBY buttons, re-insert the batteries in their<br />
correct orientation, and then release both<br />
buttons.<br />
The SEND/LEARN indicator flashes slowly and “CLEAR”<br />
appears in the display.<br />
DVD<br />
CD<br />
T1 T2 TUN PH<br />
V1 V2 V3 V –<br />
STEREO DIRECT DSP<br />
1 2 3<br />
SURROUND THX DSP<br />
4 5 6<br />
Re-EQ CH SEL LEVEL +<br />
7 8 9<br />
LATE NIGHT DIMMER LEVEL –<br />
+ 10 0 ENT<br />
HOME THEATER CONTROLLER<br />
RC-390M<br />
ENT<br />
3. Press the ENT button.<br />
The SEND/LEARN indicator lights up for about ten seconds<br />
and then turns off and “AUDIO” appears in the display.<br />
All programmed commands and macros are erased and the remote<br />
controller returns to its factory presets.<br />
Notes:<br />
• Proceed to Step 3 immediately after Step 2; otherwise, the<br />
batteries will be consumed quickly.<br />
• If you press any button other than the ENT button in Step 3,<br />
nothing will be erased. In this case, resume from Step 1.<br />
Macro mode programming memo:<br />
MACRO MODE MODE MODE MODE MODE MODE MODE MODE DIRECT<br />
MACRO MACRO MACRO MACRO MACRO MACRO MACRO MACRO MACRO<br />
↓ ↓ ↓ ↓ ↓ ↓ ↓ ↓<br />
AUDIO CD DVD MD SAT CABLE VCR TV<br />
Operation 1<br />
Operation 2<br />
Operation 3<br />
Operation 4<br />
Operation 5<br />
Operation 6<br />
Operation 7<br />
Operation 8<br />
Operation 9<br />
Operation 10<br />
Operation 11<br />
Operation 12<br />
Operation 13<br />
Operation 14<br />
Operation 15<br />
Operation 16<br />
69
Troubleshooting guide<br />
If a problem occurs while you are using the remote controller, first<br />
try to operate the controls on the front panel of the <strong>TX</strong>-<strong>DS787</strong> to<br />
make sure that it is not due to a malfunction (or worn out batteries)<br />
in the remote controller.<br />
POWER<br />
Power shuts off immediately after power on.<br />
• Amplifier protection circuitry has been activated.<br />
➞ Remove the power cord from outlet immediately. Contact<br />
your <strong>Onkyo</strong> service center.<br />
No power.<br />
• Power cord is disconnected.<br />
➞ Connect power cord.<br />
• External noise in the affecting the internal microcomputer.<br />
➞ Turn the power button off and then on again or remove the<br />
power cord from the outlet and then plug it in again.<br />
• Internal fuse is blown.<br />
➞ Contact your <strong>Onkyo</strong> Service Center.<br />
Power turns on but no sound.<br />
• “Muting” is displayed.<br />
➞ Press the MUTING button on the remote controller to turn<br />
it off.<br />
• Bad connections or wiring.<br />
➞ Check connections, speaker cables, etc.<br />
• Amplifier protection circuitry has been activated.<br />
➞ Contact your <strong>Onkyo</strong> Service Center.<br />
The sound of the playback source is not heard.<br />
• Input selector is not set properly.<br />
➞ Set to correct input source.<br />
• Headphones are connected.<br />
➞ Lower volume and then disconnect headphones.<br />
SPEAKERS<br />
No sound from the center speaker, or at very low<br />
volume.<br />
• Speaker cable is not connected.<br />
➞ Check the connection between the amplifier and the<br />
speaker.<br />
• Listening mode is set to Stereo or Direct.<br />
➞ Set the Listening mode to any mode other than Stereo or<br />
Direct. The output to the center speaker may differ<br />
depending on the listening mode.<br />
• CENTER level is set to minimum.<br />
➞ Set the CENTER level to the appropriate volume (page<br />
32).<br />
• CENTER SPEAKER is set to “None.”<br />
➞ Set CENTER SPEAKER to “Large” or “Small” (page 30).<br />
No sound or very low volume from subwoofer.<br />
• Subwoofer is set to “No.”<br />
➞ Check the speaker setting (page 30).<br />
• Subwoofer speakers output level setting is improper.<br />
➞ Check the output level of the Subwoofer using the test<br />
tone.<br />
Low frequency humming is heard.<br />
• Not properly grounded.<br />
➞ Check outer conductor of input plugs.<br />
• Turntable motor is not properly grounded.<br />
➞ Check for proper ground connection.<br />
• Audio connection cables on the rear panel are connected<br />
incorrectly.<br />
➞ Adjust the placement of the cable to reduce hum.<br />
Howling is heard when the volume is turned up.<br />
• Turntable and speakers are located too close together.<br />
➞ Move them farther apart.<br />
Rough or scratchy sound is heard. High range is<br />
not clear.<br />
• The needles of turntable is dirty or worn, or a problem exists<br />
with a connected component.<br />
➞ Refer to the instruction of the connected components and<br />
check for problem.<br />
• Treble control too high.<br />
➞ Turn treble down.<br />
No sound is output from the surround back<br />
speakers.<br />
70<br />
• The setting for the surround back speakers does not match the<br />
actual configuration.<br />
➞ Check the Surr Back Out setting (OSD MenuSpeaker<br />
Setup → Speaker Config). If one surround back speaker is<br />
connected, select “1 ch,” and if two surround back<br />
speakers are connected, select “2 ch” (page 30).
Troubleshooting guide<br />
FM/AM TUNER<br />
AM stations cannot be received.<br />
• AM loop antenna is not connected.<br />
➞ Connect the included AM loop antenna to the AM antenna<br />
terminals.<br />
Buzzing noise on AM stations (particularly<br />
noticeable at night or with weak stations).<br />
• Noise from electrical apparatus such as fluorescent lamp.<br />
➞ Move the AM loop antenna to different position.<br />
➞ Set up an outdoor AM antenna.<br />
Noise is heard at high-pitched sounds on AM<br />
stations.<br />
• Noise from TV set.<br />
➞ Place the AM loop antenna as far as possible from the TV.<br />
➞ Move unit away from TV set.<br />
Crackling noise on both AM and FM stations.<br />
• Noise caused by fluorescent lamp being turned on and off.<br />
➞ Move antenna as far as possible from the fluorescent lamp.<br />
• Noise from automobile ignition.<br />
➞ Install an FM outdoor antenna as far as possible from the<br />
road.<br />
➞ Change the position or direction of the outdoor antenna.<br />
The indicators light for stereo reception, but<br />
sound is distorted and stereo separation is bad.<br />
• Station is too strong.<br />
➞ Change to FM indoor antenna.<br />
• Multiple reflection of the radio waves because of tall buildings<br />
or mountains.<br />
➞ Use antenna that has better directivity and select a point<br />
where distortion is least.<br />
Indicators for stereo reception flicker and hiss is<br />
heard on FM stations.<br />
• Station is too weak.<br />
➞ Install an outdoor FM antenna.<br />
• Stereo FM broadcasts cover only about half the distance of an<br />
ordinary broadcast.<br />
➞ Change the position or direction of the outdoor antenna.<br />
No preset station is recalled.<br />
• Power cord has been unplugged or the POWER switch has<br />
been turned off for a long time.<br />
➞ The memory contents are lost. Store all stations again.<br />
VIDEO and AUDIO<br />
Desired picture does not appear.<br />
• Improper connection.<br />
➞ Check the connection again. Insert the plugs and<br />
connectors completely.<br />
• Video Setup sub-menu of Input Setup menu settings are<br />
incorrect.<br />
➞ Check Settings.<br />
No OSD Menu display.<br />
• Improper connection.<br />
➞ Check connections.<br />
• OSD Menu is displayed when monitor is connected to VIDEO<br />
or S VIDEO of MONITOR OUT.<br />
➞ Confirm connections.<br />
• Monitor is connected to MONITOR OUT VIDEO when the<br />
OSD output is set to “S Video” or monitor is connected to<br />
MONITOR OUT S VIDEO when the OSD output is set to<br />
“Video.”<br />
➞ Check the OSD Config sub-menu of OSD Setup (page 29).<br />
Picture and sound do not match.<br />
• Improper connection.<br />
➞ Check connections.<br />
• Video Setup sub-menu of Input Setup menu settings are<br />
incorrect.<br />
➞ Check settings.<br />
No sound, or sound of the selected source is not<br />
heard.<br />
• Digital Setup sub-menu of Input Setup menu settings are<br />
incorrect.<br />
➞ Check settings.<br />
No picture appears on the TV screen (or monitor).<br />
• TV (or monitor) is not set to receive the output signals from the<br />
receiver.<br />
➞ Set the TV (or monitor) to the receiver input.<br />
• Video cable is not connected securely.<br />
➞ Check connections.<br />
• S VIDEO IN signal is output at VIDEO OUT and S VIDEO<br />
OUT, but VIDEO IN signal is only output at VIDEO OUT.<br />
Also, COMPONENT VIDEO IN signal is only output at<br />
COMPONENT VIDEO OUT.<br />
➞ Check the input and output signals.<br />
71
Troubleshooting guide<br />
REMOTE CONTROLLER<br />
Front panel controls function but remote<br />
controller controls do not.<br />
• No batteries in remote controller.<br />
➞ Insert batteries.<br />
• Batteries have worn out.<br />
➞ Replace batteries.<br />
• Remote controller is not pointed at the remote sensor of the <strong>TX</strong>-<strong>DS787</strong>.<br />
➞ Point the remote controller at the remote sensor of the <strong>TX</strong>-<strong>DS787</strong>.<br />
• Remote controller is too far from the <strong>TX</strong>-<strong>DS787</strong>.<br />
➞ Operate the remote controller within 16 feet (5 meters).<br />
• Remote controller is functioning in a different mode<br />
➞ Press the AUDIO MODE button.<br />
OTHER<br />
LATE NIGHT function cannot be used.<br />
• Playback source is not Dolby Digital encoded.<br />
➞ Check that the DOLBY DIGITAL indicator lights up on<br />
the display.<br />
Re-EQ function cannot be used.<br />
• Listening mode is set to “Stereo,” “Theater-Dimensional” or<br />
“Direct.”<br />
➞ See table on page 44.<br />
For digital sources, sound is sometimes not<br />
output depending on media type.<br />
• Format of digital input source is fixed. Other digital formats<br />
will not be output.<br />
➞ Set Digital Format to “All” in the Audio Setup sub-menu<br />
of the Input Setup menu (page 35).<br />
For DTS and PCM sources, noises or incorrect<br />
starts occur when the digital source is played.<br />
• Digital Format settings is incorrect.<br />
➞ Try setting Digital Format to the same as the input source<br />
in the Audio Setup sub-menu of the Input Setup menu<br />
(page 35).<br />
Operation of fan is heard.<br />
• <strong>TX</strong>-<strong>DS787</strong> is equipped with internal ventilation fan to prevent<br />
overheating. This is not a malfunction.<br />
Also refer to the respective instruction manuals of the compact<br />
disc player, DVD player, video cassette recorder, TV monitor,<br />
etc., that compose your entertainment system.<br />
The <strong>TX</strong>-<strong>DS787</strong> contains an internal microcomputer that performs<br />
high-level operations. However, on extremely rare occasions,<br />
noise or interference from an external source or static electricity<br />
may cause faulty operation. If this occurs, unplug the power cord<br />
from the wall outlet, wait five or more seconds, and then plug it<br />
back in. This should correct the situation.<br />
*To reset the surround mode and other settings to the factory<br />
default settings, hold down the VIDEO 1 button with the <strong>TX</strong>-<br />
<strong>DS787</strong> turned on and then press the REC OUT button. “CLEAR”<br />
appears in the front display and the <strong>TX</strong>-<strong>DS787</strong> enters the standby<br />
state.<br />
Parameter cannot be set for Front Effect, Room<br />
Size, etc.<br />
• Parameter may not be able to be set depending on the listening<br />
mode.<br />
➞ See table on page 44.<br />
Multichannel audio is not output.<br />
• To listen to multichannel audio, “Yes” must be selected in the<br />
Multichannel sub-menu in the Input Setup menu. Also, it is<br />
necessary to select Multichannel with the AUDIO<br />
SELECTOR button.<br />
➞ Check that the component is connected to the MULTI<br />
CHANNEL INPUT port and check the OSD Menu settings.<br />
Components in remote zone (Zone 2) do not<br />
operate properly.<br />
• Components are incorrectly connected.<br />
➞ Check connections.<br />
• Objects are interfering with remote controller signals.<br />
➞ Move inferring objects away from path of remote<br />
controller signals.<br />
72
Specifications<br />
AMPLIFIER SECTION<br />
Continuous Average Power output (FTC)<br />
All channels:<br />
100 W per channel min. RMS at<br />
8 Ω, 2 channels driven from 20<br />
Hz to 20 kHz with no more than<br />
0.08% total harmonic distortion.<br />
130 W min. RMS at 6 Ω, 2<br />
channels driven from 1 kHz with<br />
no more than 0.1% total<br />
harmonic distortion.<br />
Continuous Power output (DIN) 135 W at 6 Ω<br />
Maximum Power output (EIAJ) 160 W at 6 Ω<br />
Dynamic Power Output (Stereo) 2 × 250 W at 3 Ω<br />
2 × 210 W at 4 Ω<br />
2 × 130 W at 8 Ω<br />
Total Harmonic Distortion: 0.08% at rated power<br />
0.08% at 1 W output<br />
IM Distortion:<br />
0.08% at rated power<br />
0.08% at 1 W output<br />
Damping Factor:<br />
60 at 8 Ω<br />
Input Sensitivity and Impedance<br />
PHONO:<br />
2.5 mV, 50 kΩ<br />
LINE (CD, TAPE, DVD,<br />
VIDEO 1-4):<br />
200 mV, 50 kΩ<br />
MULTICHANNEL INPUT<br />
(FRONT L/C/R, SURROUND<br />
L/R, SURROUND BACK L/R):200 mV, 50 kΩ<br />
(SUBWOOFER):<br />
36 mV, 50 kΩ<br />
COAXIAL 1, 2 (DIGITAL): 0.5 Vp-p, 75 Ω<br />
DVD, VIDEO1-4:<br />
1 Vp-p, 75 Ω<br />
1 Vp-p, 75 Ω (Y)<br />
0.28 Vp-p, 75 Ω (C)<br />
COMPONENT VIDEO 1, 2: 1 Vp-p, 75 Ω (Y)<br />
0.7 Vp-p, 75 Ω (PB, PR)<br />
Output Level and Impedance<br />
Rec out (TAPE, VIDEO 1, 2):<br />
200 mV, 2.2 kΩ<br />
Pre out:<br />
1 V, 470 Ω<br />
VIDEO (VIDEO 1, 2, MONITOR OUT):<br />
1 Vp-p, 75 Ω<br />
1 Vp-p, 75 Ω (Y)<br />
0.28 Vp-p, 75 Ω (C)<br />
COMPONENT VIDEO OUT: 1 Vp-p, 75 Ω (Y)<br />
0.7 Vp-p, 75 Ω (PB, PR)<br />
Phono Overload:<br />
110 mV RMS at 1 kHz, 0.5% T.H.D.<br />
Frequency Response:<br />
20 Hz to 30 kHz: ±1 dB<br />
(CD in Direct mode)<br />
10 Hz to 100 kHz: +1 dB,-3 dB<br />
(CD in Direct mode)<br />
RIAA Deviation:<br />
20 Hz to 20 kHz : ±0.8 dB<br />
Tone Control<br />
Bass:<br />
±12 dB at 100 Hz<br />
Treble:<br />
±12 dB at 10 kHz<br />
Signal-to-Noise Ratio (Stereo)<br />
Phono:<br />
80 dB (IHF A, 5 mV input)<br />
CD/Tape:<br />
100 dB (IHF A, 0.5 V input)<br />
Muting:<br />
–50 dB<br />
TUNER SECTION<br />
FM<br />
Tuning Range:<br />
87.5 to 108.0 MHz (50-kHz steps)<br />
Usable Sensitivity<br />
Mono:<br />
11.2 dBf, 1.0 µV (75 Ω IHF)<br />
0.9 µV (75 Ω DIN)<br />
Stereo:<br />
17.2 dBf, 2.0 µV (75 Ω IHF)<br />
23 µV (75 Ω DIN)<br />
50 dB Quieting Sensitivity<br />
Mono: 17.2 dBf, 2.0 µV (75 Ω)<br />
Stereo: 37.2 dBf, 20 µV (75 Ω)<br />
Capture Ratio:<br />
2.0 dB<br />
Image Rejection Ratio:<br />
USA & Canadian models: 40 dB<br />
Other area models:<br />
85 dB<br />
IF Rejection Ratio:<br />
90 dB<br />
Signal-to-Noise Ratio<br />
Mono:<br />
76 dB<br />
Stereo:<br />
70 dB<br />
Alternate Channel Attenuation: 55 dB<br />
Selectivity:<br />
50 dB (DIN)<br />
AM Suppression Ratio: 50 dB<br />
Total Harmonic Distortion<br />
Mono: 0.2%<br />
Stereo: 0.3%<br />
Frequency Response:<br />
30 Hz to 15 kHz, ±1.0 dB<br />
Stereo Separation:<br />
45 dB at 1 kHz<br />
30 dB at 100 Hz to 10 kHz<br />
AM<br />
Tuning Range<br />
USA & Canadian models: 530 to 1,710 kHz (10-kHz steps)<br />
European & Australian models: 522 to 1,611 kHz (9-kHz steps)<br />
Worldwide models: 531 to 1,602 kHz (9-kHz steps)<br />
530 to 1,710 kHz (10-kHz steps)<br />
Usable Sensitivity: 30 µV<br />
Image Rejection Ratio: 40 dB<br />
IF Rejection Ratio:<br />
40 dB<br />
Signal-to-Noise Ratio: 40 dB<br />
Total Harmonic Distortion: 0.7%<br />
GENERAL<br />
Power Supply:<br />
Power Consumption:<br />
Dimensions (W × H × D):<br />
Weight:<br />
AC 120 V, 60 Hz<br />
(USA & Canadian models)<br />
AC 230-240 V, 50 Hz<br />
(European & Australian models)<br />
AC 220-230 V, 50/60 Hz<br />
(some Asian models)<br />
AC 220-230 and 120 V switchable,<br />
50/60 Hz (Worldwide models)<br />
5.5 A<br />
440 W<br />
435 × 175 × 453 mm<br />
17-1/8" × 6-7/8" × 17-13/16"<br />
36.6 lbs. (USA & Canadian models)<br />
16.9 kg (European models)<br />
17.6 kg<br />
(Australian & worldwide models)<br />
17.4 kg (some Asian models)<br />
REMOTE CONTROLLER<br />
Transmitter:<br />
Infrared<br />
Signal range:<br />
Approx. 5 meters, 16 ft.<br />
Power supply: Two “AA” batteries (1.5 V × 2)<br />
Specifications and features are subject to change without notice.<br />
Power supply and voltage vary depending on the area in which the unit<br />
is purchased.<br />
73
74<br />
Memo
Memo<br />
75
Sales & Product Planning Div. : 2-1, Nisshin-cho, Neyagawa-shi, OSAKA 572-8540, JAPAN<br />
Tel: 072-831-8111 Fax: 072-833-5222<br />
ONKYO U.S.A. CORPORATION<br />
200 Williams Drive, Ramsey, N.J. 07446, U.S.A.<br />
Tel: 201-825-7950 Fax: 201-825-8150 E-mail: onkyo@onkyousa.com<br />
ONKYO EUROPE ELECTRONICS GmbH<br />
Industriestrasse 20, 82110 Germering, GERMANY<br />
Tel: 089-849-320 Fax: 089-849-3265 E-mail: info@onkyo.de<br />
ONKYO CHINA LIMITED<br />
Units 2102-2107, Metroplaza Tower I, 223 Hing Fong Road, Kwai Chung,<br />
N.T., HONG KONG Tel: 852-2429-3118 Fax: 852-2428-9039<br />
HOMEPAGE<br />
http://www.onkyo.co.jp/<br />
SN 29342963 D0008-1<br />
E