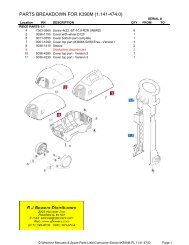
Karcher 570 - Ppe-pressure-washer-parts.com
Karcher 570 - Ppe-pressure-washer-parts.com
Karcher 570 - Ppe-pressure-washer-parts.com

You also want an ePaper? Increase the reach of your titles
YUMPU automatically turns print PDFs into web optimized ePapers that Google loves.
Service = Handbook<br />
<strong>Karcher</strong> <strong>570</strong>
<strong>Karcher</strong> <strong>570</strong><br />
Introduction<br />
The success of our products is based on the ease and speed with which they are serviced.<br />
Proper and effective service is only possible given adequate, practical training and the<br />
provision of easily understandable service documentation.<br />
This handbook is designed to help you in your daily work, first as operating instructions and<br />
then as work of reference. It can also be used as a training manual.<br />
The information contained in this handbook has been revised up to the date publication, April<br />
1990. It is not covered by our ammendment service. You will be regularly informed of<br />
modifications in our technical circulars.<br />
KARCHER<br />
CUSTOMER SERVICE TRAINING<br />
All rights reserved<br />
The text and illustrations in this publication may not be reproduced in any form or be made<br />
available to third parties without the express permission of:<br />
ALFRED KARCHER GMBH & CO.<br />
Reinigungssysteme<br />
Postfach 160<br />
D-7057 Winnenden
Contents <strong>Karcher</strong> <strong>570</strong><br />
Schematic arrangement ........................ 4<br />
1. Operation with mains water supply<br />
2. Operation with suction feed<br />
3. Operation with detergent<br />
Page 1<br />
Operation with detergent ...................... 5<br />
1. High-<strong>pressure</strong> cleaning without detergent<br />
2. Low-<strong>pressure</strong> cleaning with detergent<br />
3. Detergent metering valve<br />
4. Adjusting the doseage<br />
5. Switching over the 2-way nozzle<br />
Function of the relief valve .................... 7<br />
1 Function with hand-gun valve open<br />
2. Function with hand-gun valve closed<br />
3. Pressure and flow regulation<br />
Page<br />
Functional faults .................................. 11<br />
1. Relief valve does not lift<br />
2. Detergent not drawn in<br />
3. Air drawn in with detergent<br />
4. Water in detergent container<br />
5. Injector defetive<br />
Internal water leakage .......................... 13<br />
1. Checking the suction valves<br />
2. Checking the <strong>pressure</strong> valves<br />
3. Checking the relief valve<br />
Basic cleaner settings .......................... 8 1<br />
I Oil Leakage ............................................ 17<br />
1. Checking the pump delivery<br />
2. Checking the relief-valve opening<br />
<strong>pressure</strong><br />
3. checking the detergent feed<br />
4. Checking the detergent flow<br />
Rapid trouble-shooting ........................ 10<br />
Visible water leackage .......................... 15<br />
1. Pressure and flow control<br />
2. Leakage between cylinder head and<br />
housing<br />
3. Replacing the LP seal<br />
1. Oil drain plug leaking<br />
2. Piston and housing oil seals leaking<br />
Pump defects ........................................ 19<br />
1. Piston jammed<br />
2. Motor fan defective<br />
Cleaner does not run .......................... 10<br />
1. Motor does not run<br />
2. Circuit breaker trips<br />
3. Cleaner switches off after a short time<br />
Cleaner does not <strong>com</strong>e up<br />
to <strong>pressure</strong> ........................................ 10<br />
1. Water volume inadequate<br />
2. Water inlet filter blocked<br />
3. Pump not bleed of air<br />
4. Pump sucks in air<br />
5. Bore of HP nozzle worn too large<br />
Special tools .......................: .................. 20<br />
Technical data ...................................... 21<br />
Circuit diagrams .................................... 22<br />
1. Power supply connection<br />
2. Electrical circuit diagram<br />
Technical modifications ...................... 23
Kiircher <strong>570</strong><br />
Detergent suction hose<br />
Schematic arranaement<br />
Water supply connection<br />
Non return valve<br />
------<br />
Water container<br />
Pressure and flow control valve<br />
P<br />
Hi h <strong>pressure</strong> hose<br />
2-way nozzle<br />
C<br />
1. Operation with mains water feed<br />
The water from the main connection flows<br />
through the non-return valve to the pump<br />
and, when the motor is switched on, the<br />
pump delivers water under high <strong>pressure</strong><br />
through the high <strong>pressure</strong> hose and hand<br />
gun to the 2-way nozzle.<br />
2. Operation with suction feed<br />
When the motor is switched on, the pump<br />
draws water from the water tank or container,<br />
through the foot strainer and delivers it<br />
at high <strong>pressure</strong> through the high-<strong>pressure</strong><br />
hose and hand gun to the 2-way nozzle.<br />
3. Operation with detergent<br />
When the2-way nozzle isswitchedtofan jet,<br />
detergent is drawn by the injector through<br />
the detergent suction hose and is mixed with<br />
the water delivered by the pump. On the<br />
<strong>Karcher</strong> <strong>570</strong> cleaner, the amount of detergent<br />
fed can be adjusted by means of a<br />
metering valve.
Operation with detergent <strong>Karcher</strong> <strong>570</strong><br />
Injector connection<br />
Detergent suction hose<br />
1. High-<strong>pressure</strong> cleaning without 2. Low-<strong>pressure</strong> cleaning with deterdetergent<br />
gent<br />
The water is pumped through the injector to<br />
the 2-way nozzle. The <strong>pressure</strong> at which the<br />
water leaves the nozzle depends on the size<br />
of nozzle bore, the larger the bore, the lower<br />
the jet <strong>pressure</strong> and vice-versa.<br />
With the 2-way nozzle switchedto low-<strong>pressure</strong><br />
(large nozzle bore), the water passes<br />
at high speed through the injector and this<br />
results in a reduction in <strong>pressure</strong> (vacuum)<br />
at the injectorconnection. Such avacuum is<br />
only generated if the bore of the nozzle is<br />
larger than the bore of the injector.<br />
The vacuum thus generated causes detergent<br />
to be drawn through the detergent non<br />
return valve and detergent metering valve,<br />
to be mixed with the water delivered by the<br />
Pump.
Kijrcher <strong>570</strong><br />
Oneration with deteraent<br />
Detergent metering valve<br />
3. Detergent metering valve<br />
Position closed<br />
The knob, which is pressed over the metering<br />
valve is turned counter-clockwise to<br />
screw the tapered end of the metering spindle<br />
out of the metering bore.<br />
If the metering spindle is turned counterclockwise<br />
as far as it will go, then a large<br />
quantity of detergent will be drawn into the<br />
water flow . If the spindle is turned clockwise<br />
as far as it will go, the valve will be<br />
<strong>com</strong>pletely closed and there will be no flow<br />
of detergent.<br />
4. Nozzle setting<br />
At normal working <strong>pressure</strong> (with the 2-way<br />
nozzle set to full jet 25"), there is no detergent<br />
feed. Detergent is only drawn into the<br />
water flow when working at low <strong>pressure</strong>,<br />
using the fan-jet nozzle (with the nozzle<br />
turned to "CHEM").<br />
5. Switching the 2-way nozzle<br />
On <strong>Karcher</strong><strong>570</strong>cleaners, the guard overthe<br />
2-way nozzle is turned to low-<strong>pressure</strong> fanjet<br />
(CHEM).
Function of the relief valve KBrcher <strong>570</strong><br />
1. Function with hand gun open<br />
At standard working <strong>pressure</strong> with the <strong>pressure</strong><br />
and flow control valve turned to full<br />
water flow the relief valve is closed and the<br />
full pump delivery passes to the hand gun.<br />
2. Function with hand gun closed<br />
When the trigger of the hand gun is released,<br />
the <strong>pressure</strong> in the chamber below the<br />
relief valve piston increases and water passing<br />
through the bore developing a similar<br />
<strong>pressure</strong> in the chamber above the piston.<br />
Since the piston has a largerarea at the top<br />
than at the bottom (where its diameter is the<br />
same as that of the s~indle), it follows that<br />
, .<br />
thevalve seat, backto thesuction side of the<br />
pump.<br />
The gap between the valve spindle and the<br />
valve seat is such as to cause a circulation<br />
<strong>pressure</strong> of 10 bar to be applied to the<br />
greater effevtive piston area and thus to<br />
hold the valveopen against the spring <strong>pressure</strong>.<br />
When the trigger of the hand gun is pressed<br />
again, the <strong>pressure</strong> in the chamber above<br />
the piston falls <strong>com</strong>pletely away and the<br />
spring closes the overflow valve. The pump<br />
then builds up the standard working <strong>pressure</strong><br />
once again.<br />
the applied the top of the piston 3. <strong>pressure</strong> and flow control valve<br />
(~ressure x area = force) , is areater " than the<br />
ibrce applied to the bottom and thus the By turningthe knobon the <strong>pressure</strong>and flow<br />
force tending to press the piston and the control valve, it is possible to partly open the<br />
spindle downwards is greaterthan the force relief valve so that some of the water delive-<br />
(spring <strong>pressure</strong>) pressing it upwards. red by the pump is caused to flow back to its<br />
This causes the piston to open the valve suction side, thus reducing the <strong>pressure</strong><br />
spindle to allow water to flow between it and and flow of water delivered to the hand gun.
<strong>Karcher</strong> <strong>570</strong><br />
Basic cleaner settings<br />
1. Checking the pump delivery<br />
Fit the HP outlet with the shutoff valve<br />
(special too1)connectthe HP hose (without<br />
hand gun and spray lance), start the cleaner.<br />
Close the shutoff valve as far as necessary<br />
to bring the cleaner up to working<br />
<strong>pressure</strong> (see Technical Data) and rneasure<br />
the quantity of water delivered into a<br />
suitable container in litres, or gallones per<br />
minute.<br />
If the quantity of water delivered is too<br />
low, this indicates leakage within the<br />
Pump.<br />
2. Checking the <strong>pressure</strong> at which the<br />
relief vaGe opens<br />
Fit the shutoff valve(special tool) to the<br />
HP outlet and start the cleaner. Slowly close<br />
the shutoff valve and note when the needle<br />
of the <strong>pressure</strong> gauge indicates that the<br />
relief valve has switched to circulation<br />
(approx. 10 bar).<br />
The switchover must take place on reaching<br />
a <strong>pressure</strong> of approx. 120 bar.<br />
ADJUSTMENT IS NOT POSSIBLE, THE<br />
PRESSURE DEPENDS ON THE DESIGN
Basic cleaner settings <strong>Karcher</strong> <strong>570</strong><br />
3. Checking the detergent feed<br />
Start the cleaner and switch over to "operation<br />
with detergent" by turning the 2-way<br />
nozzle to "CHEM.<br />
With the meteling valve set to position "0,<br />
no detergent should be drawn into the cleaner.<br />
If detergent is drawn in, then the knob<br />
must be pulled off the metering spindle.<br />
The spindle should the be turned hand tight<br />
to close the valve <strong>com</strong>pletely and then the<br />
knob should be pressed back on (the stop<br />
limiting the rotation of the knob is at the top<br />
on the cylinder head).<br />
4. Checking the detergent flow<br />
The maximum detergent flow is checked by<br />
turningthe knobto the maximumsetting and<br />
by then measuring the quantity of detergent<br />
drawn from arneasurement glass in a given<br />
time.<br />
Detergent suction hose<br />
Hose nippel<br />
Detergent metering spindle
<strong>Karcher</strong> <strong>570</strong><br />
Cleaner does not run<br />
Rapid trouble shooting<br />
Cleaner does not <strong>com</strong>e up to <strong>pressure</strong><br />
1. Motor does not run 1. Inadequate water supbly<br />
Check main fuse or circuit breaker (10-16 Checkwatersupply hose (not less than 112"<br />
Amp delayed action).<br />
i.d.). A supply of at least 600 litres of water<br />
per hour must be available.<br />
Check the voltage at the power socket and<br />
<strong>com</strong>pare it with voltage on the nameplate. 2. Water inlet filter is blocked<br />
Check the switch on the cleaner.<br />
Check the motor capacitor<br />
2. Circuit breaker trips or fuse blows<br />
Check main fuse or circuit breaker (10-16<br />
Amp delayed action).<br />
Extension cable has too small a conductor<br />
cross-section (see Operating Instructions).<br />
Extension cable not unwound from drum.<br />
3. Cleaner switches off after running for<br />
a short time<br />
Check current consumption.<br />
Extension cable has too small a conductor<br />
cross-section (see Operating Instructions).<br />
/'<br />
Ease the filter out with a screwdriver, clean<br />
it and press it back in by hand.<br />
3. Pump not vented of air<br />
Switch off thecleanerand keep the triggerof<br />
the hand gun pulled until a steady flow of<br />
water emerges. Then switch the cleaner on<br />
again.<br />
4. Pump is sucking air<br />
Turn off the water-supply valve and check<br />
the hose connection.<br />
If you are drawing water by suction from a<br />
tank, checkthatthesuction head isnot more<br />
than 0.5 metres (20). If necessary, fill the<br />
suction hose with water.<br />
5. HP nozzle worn (bore too large)<br />
Replace the HP nozzle and check the <strong>pressure</strong>.<br />
If the <strong>pressure</strong> is still too low, the fault<br />
is in the HP pump (measure pump delivery).
Function fault <strong>Karcher</strong> <strong>570</strong><br />
Special screw plug<br />
Functional faults<br />
1. Relief valve does not switch to<br />
circulation<br />
Fault<br />
Relief valve does not close<br />
O-ring set defective<br />
Remove the housing cover<br />
Unscrew the special screw plug.<br />
Using an 8mm socketdriver, pressdownthe<br />
piston and by turning the piston, unscrew it<br />
from the valve spindle. Pull out the piston<br />
with some suitable pliers.<br />
Remove the O-ring set <strong>com</strong>plete and replace<br />
it with a new set, using the special tool<br />
after applying silicon grease.<br />
Insert the piston in the zylinder head, screw<br />
it to the spindle. Use loctite (No. 6.869-002)<br />
to secure it.<br />
Screw in the special screw plug <strong>com</strong>plete<br />
and tighten it with-a torque of 30 Nm.<br />
2. No detergent is drawn in<br />
Detergent non return valve and O-ring<br />
sticking together. Pull the suction hose from<br />
the hose nipple. Unscrew the hose nipple<br />
using a 19 mm oDen ended wrench.<br />
~auiion: The check ball could fall out.<br />
Remove the spring, ball and O-ring and<br />
clean them. Replace the O-ring (without<br />
grease), ball and spring.<br />
Note: The smaller end of the spring has to<br />
face towards the ball.
<strong>Karcher</strong> <strong>570</strong><br />
Function faults<br />
3. Air is drawn in when working with<br />
detergent<br />
The detergent hose is not secured firmly.<br />
Pull the hose off the nipple, cut off the end<br />
/ Detergent suction hose and press the hose back on.<br />
Leakage around the detergent metering<br />
Hose nipple<br />
spindle.<br />
Pull off the knob.<br />
Screw out the spindle.<br />
Refit the spindle and knob.<br />
Detergent metering spindle<br />
4. Water in the detergent container<br />
Detergent non return valve defective or<br />
incorrectly fitted.<br />
Pull off the suction hose.<br />
Unscrew the hose nipple. ,$<br />
Remove and clean the spring, ball and<br />
O-ring in the hose nipple.<br />
Replace any <strong>parts</strong> as necessary.<br />
Insert the spring, ball and O-ring in the<br />
hose nipple (without grease).<br />
5. Injector defective<br />
Screw out the injector with the aid of a<br />
suitable screwdriver.<br />
Replace the O-rings or, if necessary,<br />
replace the injector and O-rings.
Internal leakage <strong>Karcher</strong> <strong>570</strong><br />
Measuring the pumpdelivery indicates a<br />
loss of some water.<br />
Possible cause: The suction valve,<br />
delivery valve or relief valve defective.<br />
1. Checking the suction valve<br />
Remove the housing cover.<br />
Pull out the valve seat using special tool.<br />
Check and, if necessary, replace the valve<br />
seat and O-ring.<br />
Remove the valve plate and spring.<br />
\ Torx screw<br />
Checkthesealing surfacesof thevalveseat<br />
andvalve plate fordirt orgroove and replace<br />
if necessary.<br />
If necessary, replace the O-ring seal of the<br />
housing cover.<br />
Tighten the TOM screws with a torque of<br />
13 Nm.<br />
2. Checking the <strong>pressure</strong> valves<br />
Pressure valve<br />
Unscrew the valve screw.<br />
Remove the <strong>pressure</strong> valve <strong>com</strong>pletely with<br />
the special tool.<br />
Check the sealing surface of the valve and<br />
replace if necessary.<br />
Pressthevalveintothecylinder head, screw<br />
in the valve screw and tighten with atorque<br />
of 30 Nm.
Wrcher <strong>570</strong><br />
Internal water leakage<br />
3. Checking the relief valve<br />
Unscrew the special screw plug.<br />
Piston<br />
Spring<br />
O-ring<br />
Valve seat<br />
II Valve spindle<br />
Using an 8mm socket driver, press the<br />
piston downwards and unscrew it from the<br />
valve spindle.<br />
Pulloutthe pistonwith pliersand removethe<br />
spring. Using the special tool, screw out<br />
the valve seat.<br />
Remove the valve seat and valve spindle<br />
from the cylinder head.<br />
Check the valve seat and valve spindle for<br />
damage or wear and replace if necessary.<br />
If necessary, replace the valve-seat O-ring.<br />
Insert the valve seat andvalve spindle in the<br />
cylinder head and screw in firmly with<br />
special tool.<br />
Insert the spring and piston and screw the<br />
piston on tightly.<br />
Secure the piston with loctite (No. 6.869-<br />
002).<br />
Screw in the special screw plug and tighten<br />
with a torque of 30 Nm.
Visible water leakaae Kiircher <strong>570</strong><br />
1. Pressure and Flow Control<br />
When there is leakage between the control<br />
spindle and the screw plug, then it is necessary<br />
to replace the special screw plug <strong>com</strong>plete.<br />
Before screwing in the special screw plug, fit<br />
it with a new O-ring.<br />
Screw the special screw plug back into the<br />
cylinder head and tighten with a torque of<br />
30 Nm.<br />
Plastic <strong>washer</strong><br />
HPSealri\g I<br />
t-<br />
Piston<br />
- --<br />
2. Leakage between the cylinder head<br />
and housing.<br />
A leakage of one drop per minute is<br />
acceptable.<br />
Leakage bore<br />
Housing
Ka'eher<strong>570</strong><br />
Visible water leakage<br />
Plastic <strong>washer</strong><br />
\ yher<br />
Unscrew the cylinder head screws.<br />
Remove the cylinder head.<br />
I<br />
Pull out the HP seal ring by hand or, if this is<br />
difficult, use a puller.<br />
3. Leakage at the low-<strong>pressure</strong> seal<br />
Pass a screwdriver through the leakage<br />
groove and carefully lever out the<br />
aluminium <strong>washer</strong>.<br />
Caution: Take care not to damage the<br />
piston.<br />
Replace plastic <strong>washer</strong>.<br />
Note: The crowned side of the plastic<br />
<strong>washer</strong> faces towards the cylinder head.<br />
Grease a new HP seal ring with silicon<br />
grease and fit it using the special tool.<br />
Be sure to fit it correctly with the lips facing<br />
the cylinder head.<br />
Reinstall cylinder head and tighten<br />
the screws with a torque'of 15 Nm.
Oil leakage <strong>Karcher</strong> <strong>570</strong><br />
1. Oil drain plug leaking<br />
Lay the cleaner on its side and unscrew the<br />
oil drain plug.<br />
Top off with correct oil.<br />
6.288-050 SAE 15W40<br />
Oil drain plug'<br />
Seal ring<br />
Replace the seal ring and screw in the oil<br />
drain plug.<br />
2. Piston seals and housing seal leaking<br />
Remove the cylinder head.<br />
Drain the oil and replace the drain plug seal<br />
ring.<br />
Screw assembly screws (extra long screws)<br />
into the housing.<br />
Unscrew the housing fastening screws.<br />
Caution: Loosen the assembly screws<br />
evenly as you draw ofl the housing.<br />
Remove the housing together with the<br />
pistons.
Mrcher <strong>570</strong><br />
Oil leakage<br />
Pass a screwdriver through the leakage<br />
grooves and lever out the oil seal rings.<br />
Caution: Take care not to damage the<br />
sealing surfaces in the guide.<br />
Remove the O-ring.<br />
Clean the housing.<br />
/O-ring<br />
Note: The new oil seal rings should be<br />
soaked in water for some time before<br />
they are fitted.<br />
Without applying any grease, fit the oil<br />
seal rings in the housing using the<br />
special tool.<br />
Coat the O-ring with silicon grease and<br />
place it in the groove of the housing.<br />
Insert the pistons and springs in the<br />
housing.<br />
Pull the housing evenly into place by<br />
means of the assembly screws.<br />
Fill with app. 0.2 1 SAE 15W40<br />
1<br />
(6.288-050).<br />
Refit oil drain plug.<br />
oil seal ring
PumD defects <strong>Karcher</strong> <strong>570</strong><br />
Pump runs very noisily<br />
1. Piston jammed, swash plate worn<br />
Remove the cylinder head.<br />
Use the assembly screws to pull off the<br />
housing.<br />
Check the pistons for wear and, if necessary,<br />
replace the pistons and springs.<br />
Carefully lever out the oil seal rings with a<br />
screwdriver.<br />
Fit new oil seal rings without applying<br />
grease or oil.<br />
Checkthe swash plate forwear and replace<br />
if worn.<br />
The motor is generally replaced <strong>com</strong>plete<br />
with the swash plate.<br />
The swash plate can only be removed by<br />
pressing the motor shaft out of it in the<br />
direction of the motor cooling fan with a<br />
hand-lever press.<br />
2. Motor fan defective<br />
Pull ofl the motor cooling fan using the<br />
special tool.<br />
Press a new fan onto the motor shaft.<br />
Fit the fan cowling.
Wrcher <strong>570</strong><br />
Special tools<br />
Part No.<br />
Page<br />
Shutoff valve 2.901 -030 8<br />
O-ring insertion mandrel for relief valve piston 5.901 -104 11<br />
O-ring insertion mandrel for detergent metering spindle 5.901-102 12<br />
1<br />
Valve pliers 4.901 -062 13<br />
Valveseat removal tool 4.901 -054 14<br />
Mounting mandrel for HP and oil seal rings. 2.901 -031 16<br />
Puller for motor cooling 6.81 6-069 19
Technical datas <strong>Karcher</strong> <strong>570</strong><br />
Cleaner type<br />
I<br />
<strong>Karcher</strong> <strong>570</strong><br />
I<br />
From Serial No. 426281<br />
Part No. for cleaner ( 1.721-120 1 1.721-120<br />
Circuit diagram Part No.<br />
0.087-354<br />
0.087-354<br />
Voltage<br />
Volt<br />
220<br />
220<br />
Type of current<br />
PhlHz<br />
1 I50<br />
1 150<br />
Full-load power consumption<br />
Amp.<br />
9,5<br />
9,5<br />
HP nozzle<br />
Working <strong>pressure</strong> - full load*)<br />
bar<br />
Working <strong>pressure</strong> - part load<br />
bar<br />
Circulation <strong>pressure</strong><br />
bar<br />
Relief valve opening <strong>pressure</strong><br />
bar<br />
Flow volume - full load<br />
I/h<br />
Flow volume - part load<br />
I/h<br />
- - -<br />
Detergent flow - rnax.<br />
I/min<br />
*) on the cleaner's <strong>pressure</strong> gauge.
<strong>Karcher</strong> <strong>570</strong><br />
Electrical connection<br />
L1 N PE<br />
1. Electrical connection<br />
The electrical voltage is connected from<br />
L1 to the motor MI by way of the motor<br />
switch S1.<br />
The phase L1 is fed by way of the thermal<br />
overloadtrip L1 to the main auxiliary winding<br />
Z1 of the motor.<br />
The capacitor is connected between the<br />
main and auxiliary windings C1 .<br />
A lead from the main winding of the motor<br />
leads back to the neutral terminal N.<br />
2. Circuit diagram<br />
Legend<br />
S1 Motor switch<br />
F1 Thermo contact<br />
M1 Motor<br />
Z1 Auxiliary winding<br />
C1 Capacitor
Technical modifications <strong>Karcher</strong> <strong>570</strong><br />
Modification as of April 1989<br />
Old<br />
Cylinder head 5.550-1 16<br />
Delivery valve<br />
Spring 5.332-116<br />
Valve Pin 5.584-056<br />
Valve screw 5.583-088<br />
Working <strong>pressure</strong><br />
New<br />
Cylinder head 5.550-1 44<br />
Delivery Valve<br />
Valve <strong>com</strong>plete 4.580-180<br />
O-ring 6.362-480<br />
Valve screw 5.583-108<br />
Working <strong>pressure</strong><br />
Cleaner's <strong>pressure</strong> guage<br />
80 bar<br />
Cleaner's <strong>pressure</strong> guage<br />
90 bar<br />
Calibrated <strong>pressure</strong> guage<br />
68-78 bar<br />
Calibrated <strong>pressure</strong> guage<br />
80-88 bar<br />
Spray nozzle 050 6.41 5-480<br />
Spray lance 4.760-1 77<br />
Spray nozzle 045 6.41 5-461<br />
Spray lance 4.760-1 66<br />
Connected load<br />
1.85 kW<br />
Connected load<br />
2.00 kW<br />
Modification kit: For cleaners with serial No. up to 423 780, there is a modification<br />
kit available to change over to the latest version. Modifikation kit No. 2.882-293<br />
Modifikation as of December 1989<br />
Old<br />
New<br />
The individual <strong>parts</strong> for the<br />
<strong>pressure</strong> and flow control<br />
spindle are still available.<br />
The <strong>pressure</strong> and flow<br />
control adjustment can only<br />
be ordered <strong>com</strong>plete with<br />
this part Nr. 4.401-054
~ ~~-<br />
Alfred <strong>Karcher</strong> Ges.m.b.H. Tel.: (02 22) 25 15 45<br />
Obachgasse 26<br />
A-1220 Wien 22<br />
Fax: (02 22)<br />
25154530<br />
<strong>Karcher</strong> S.A. Tel.: (1) 43 99 67 70<br />
Z.A. des Petits Carreaux Far. . (1<br />
> ,\ 43 39 48 73<br />
~<br />
5, avenue des Coquelicots<br />
F-94865 Bonneuil s. MarneiCEDEX<br />
<strong>Karcher</strong> (Pty.) Ltd. Tel.: (03) 7 95 44 22<br />
21158 Browns Road Fax: (03) 7 01 00 01<br />
Noble Park 3174<br />
Melbourne. Victoria<br />
<strong>Karcher</strong> (U.K.) Ltd. Tel.: (0295) 26 75 11<br />
<strong>Karcher</strong> House Fax: (02 95) 26 64 36<br />
Beaumont Road<br />
Banbury Oxon, OX 16 7TB<br />
<strong>Karcher</strong> N. V. Tel.: (03) 3 14 33 61<br />
lndustrieweg 18 Fax: (03) 3 14 64 43<br />
8-2320 Hooastraten<br />
<strong>Karcher</strong> S.p.A Tel.: (03 32) 41 74 00<br />
Via Eivezia 4 +41 7419<br />
1-21 050 Cantello (VA) Fax: (03 32) 41 83 50<br />
<strong>Karcher</strong> Tel.: (01 92) 39 15 15<br />
lndustria e Comercio Ltda. Fax: (01 92) 39 21 10<br />
Estr. Mun. Campinas<br />
Paulinia, 2000<br />
Betel<br />
13082 Campinas - SP<br />
<strong>Karcher</strong> Cleaning Systems Inc. Tel.: (4 16) 6 72 82 33<br />
1770 Alstep Drive Fax:<br />
(416)<br />
Mississauga. Ontario L5S 1W1<br />
6 72 31 55<br />
<strong>Karcher</strong> Vaporapid AG Tel.: (01) 8 46 67 11<br />
Industriestr. 16<br />
CH-8108 Dallikon<br />
Fax: (01) 8 46 67 12<br />
Stammhaus: Tel.: (0 71 95) 14-0<br />
Alfred <strong>Karcher</strong> GmbH & Co. Tx.: 07-24432<br />
Alfred-<strong>Karcher</strong>-Str. 28-40 Fax:(O71 95) 1422 12<br />
Postfach 160<br />
D-7057 Winnenden<br />
<strong>Karcher</strong> NS Tel.: (65) 91 67 67<br />
Hestehaven 21<br />
DK-5260 Odense S<br />
Fax: (65) 91 11 04<br />
<strong>Karcher</strong> S.A. Tel.: (93) 8 46 44 47<br />
Pol. Industrial Font del Radium Fax: (93) 8 46 55 05<br />
Calle Doctor Trueta 6-7<br />
E-08400 Granollers (Barcelona)<br />
<strong>Karcher</strong> Cleaning Systems Co., Ltd. Tel.: (03) 32 35-83 31<br />
9-21, Shin Ogawa-cho Fax: (03) 32 35-83 07<br />
Shinjuku-ku, Tokyo 162<br />
<strong>Karcher</strong> AJS<br />
PO. Box 7<br />
Veitvet<br />
N-0518 Oslo 5<br />
Tel.: (02) 25 34 80<br />
Fax: (02) 25 95 48 . .<br />
<strong>Karcher</strong> B.V. Tel.: (0 16 08)<br />
Hermelijnweg 20 '87400<br />
NL-4877 AE Etten-Leur Fax: (0 16 08) 1 43 48<br />
<strong>Karcher</strong> AB Tel.: (0 31) 57 03 80<br />
Box 24 Fax: (0 31) 57 51 49<br />
S-42502 Hisings-Karra<br />
<strong>Karcher</strong> Oy<br />
Yrittajantie 17<br />
Tel.:<br />
Fax:<br />
(90) 8 79 91 77<br />
(90) 8 79 42 03<br />
SF-01800 Klaukkala<br />
@<br />
Alfred <strong>Karcher</strong> Inc. Tel.: (2 01) 8 90 04 44<br />
Browertown Road and Fax: (2 01) 8 90 05 34<br />
Andrews Drive<br />
P. 0. Box 778<br />
West Paterson, N.J. 07424<br />
@D<br />
<strong>Karcher</strong> (Pty.) Ltd. Tel.: (0 11) 9 76 31 00<br />
P. 0. Box 2417 Fax: (0 11) 9 76 22 44<br />
Kempton Park 1620