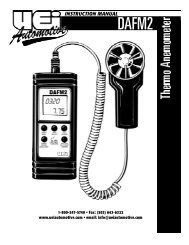
Manual - UEi Automotive
Manual - UEi Automotive
Manual - UEi Automotive

Create successful ePaper yourself
Turn your PDF publications into a flip-book with our unique Google optimized e-Paper software.
Dwell<br />
1. Set rotary selector to “ms-Pulse, Dwell, Duty” position.<br />
2. Press the menu key 3 to select “Dwell” function. The meter<br />
defaults at 4 cylinders (CL4).<br />
Press “ RANGE “ (Cylinder) push-button momentarily and<br />
repeatedly to select the required number of cylinder and display<br />
the cylinder setting in the second display.<br />
3. Insert black lead into “COM” terminal and red lead into<br />
“ms(-Pulse)” terminal.<br />
4. Connect the test leads as shown and read Dwell angle in the<br />
primary display. Adjust trigger levels by pressing “<br />
LEVEL<br />
“<br />
push-button momentarily, if necessary (Fig 11).<br />
5. Press the menu key 2 momentarily to display Dwell readings in<br />
terms of percentage if required.<br />
6. The frequency of the same signal source can be displayed in the<br />
second display by pressing the “ RPM “ push-button<br />
momentarily twice.<br />
7. Adjust the Dwell angle according to the procedures outlined in<br />
your vehicle service manual.<br />
NOTE: Recheck the timing whenever the Dwell able has<br />
been adjusted.<br />
Duty Cycle<br />
1. Set rotary selector to “ms-Pulse, Dwell, Duty” position.<br />
2. Press menu key 2 to select “Duty” function.<br />
3. Insert black lead into “COM” terminal and red lead into<br />
“ms(-Pulse)” terminal.<br />
4. Connect the test leads as shown and read the Duty Cycle<br />
percentage in the primary display. Adjust trigger levels by<br />
pressing “ LEVEL “ push-button momentarily, if necessary (Fig 12).<br />
5. Press menu key 1 or 3 momentarily to display Duty Cycle reading<br />
in terms of ms (Pulse Width) or (Dwell) angle if required.<br />
6. The frequency of the same signal source can be displayed in the<br />
second display by pressing the “ RPM “ push-button<br />
momentarily twice.<br />
In most applications, the negative trigger slope is assigned to display<br />
the percentage of time that the plunger is in the closed position (low<br />
duty cycle) during one duty cycle. The positive slop is assigned to<br />
display the percentage of time that the plunger is in the open position.<br />
Refer to the car’s service manual to verify slope assigned to position<br />
for each component.<br />
Press the “ LEVEL “ (±Trigger) push-button for more than 1 second to<br />
toggle between the negative (-) slope and the positive (+) slope, if<br />
required.<br />
To<br />
Distributor<br />
Distributor<br />
Coil<br />
To ECM<br />
Chassis<br />
Ground<br />
(Fig 11)<br />
(Fig 12)<br />
ADM5201-MAN P. 7