EFOY-PRO Series 1st generation - udomi
EFOY-PRO Series 1st generation - udomi
EFOY-PRO Series 1st generation - udomi
You also want an ePaper? Increase the reach of your titles
YUMPU automatically turns print PDFs into web optimized ePapers that Google loves.
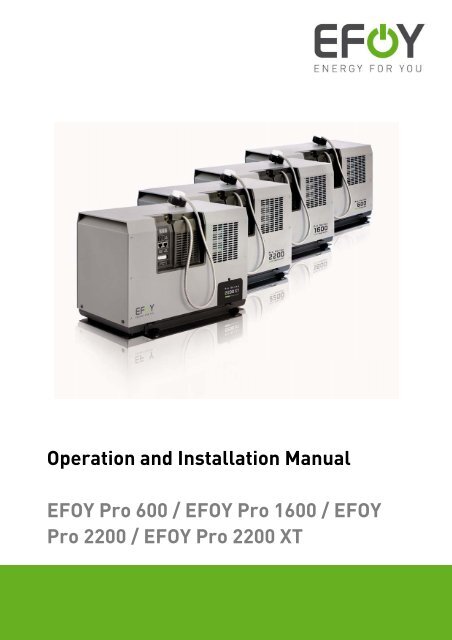
Operation and Installation Manual<br />
<strong>EFOY</strong> Pro 600 / <strong>EFOY</strong> Pro 1600 / <strong>EFOY</strong><br />
Pro 2200 / <strong>EFOY</strong> Pro 2200 XT
1. Table of Contents<br />
1. Table of Contents<br />
1. Table of Contents 2<br />
2. Introduction 4<br />
2.1 Foreword 4<br />
2.2 Safety Information 5<br />
2.3 Safety notice for methanol cartridges 7<br />
2.4 Normal Operation 7<br />
2.5 Declaration of Conformity 8<br />
2.6 Seals of Approval 8<br />
2.7 Warranty 9<br />
2.8 Disposal 10<br />
3. Configuration 11<br />
3.1 Standard Equipment 11<br />
3.2 Overview 12<br />
3.3 Specifications 13<br />
4. Installation 14<br />
4.1 Installation Space Requirements 14<br />
4.2 Mounting of the Fuel Cell 16<br />
4.3 Connecting the Off-Heat Duct 17<br />
4.4 Connecting the Exhaust Hose 18<br />
4.5 Installing the Fuel Cartridge Holder 20<br />
4.6 Electrical Connection to the Battery 21<br />
4.7 Combination with other energy sources 24<br />
4.8 Connecting the Remote Control 25<br />
5. Operation 27<br />
5.1 Integrated user interface 27<br />
5.2 Remote Control 28<br />
5.3 Select Language 30<br />
5.4 Remote Control with Computer 30<br />
5.5 Connecting the Fuel Cartridge 31<br />
5.6 Automatic Operation 33<br />
5.7 Switching On manually 34<br />
5.8 Switching Off manually 34<br />
5.9 Battery protection 35<br />
5.10 Automatic Antifreeze Feature 36<br />
5.11 Storage 37<br />
2
1. Table of Contents<br />
6. Maintenance 39<br />
6.1 Service 39<br />
6.2 Cleaning 39<br />
6.3 Change the filter (<strong>EFOY</strong> Pro 2200 XT) 40<br />
6.4 Disposal Filter XT1 42<br />
6.5 FAQs und Service 42<br />
7. Troubleshooting 44<br />
7.1 Safety 44<br />
7.2 Problems and Solution 45<br />
7.3 Problems without Error Messages 47<br />
7.4 Replacing Service Fluid 48<br />
8. Data Interface and Accessories 49<br />
8.1 Data Interface Functionality 49<br />
8.2 Computer Interface Adapter 49<br />
8.3 GSM Modem GSM-2-SMS 50<br />
8.4 Fuel Level Sensor FS1 50<br />
8.5 Cluster Controller CC1 51<br />
8.6 <strong>EFOY</strong> ProCube 52<br />
8.7 DuoCartSwitch 53<br />
9. Appendix 54<br />
9.1 Accessories and Spare Parts 54<br />
10. Appendix 55<br />
3
2. Introduction<br />
2. Introduction<br />
2.1 Foreword<br />
Thank you for purchasing an <strong>EFOY</strong> product. We hope that<br />
you will enjoy your new unit.<br />
Please read these instructions first before using and<br />
follow the installation instructions.<br />
Please contact our sales partner where you have bought<br />
the product in case you have questions about installation<br />
or operation.<br />
Manufacturer’s address:<br />
SFC Energy AG<br />
Eugen-Sänger-Ring 7<br />
D-85649 Brunnthal-Nord<br />
Phone: +49 89 673 5920<br />
Fax: +49 89 673 592 369<br />
Email: hotline@efoy.com<br />
web: www.efoy.com<br />
4
2. Introduction<br />
2.2 Safety Information<br />
Read the instructions before operating and keep them<br />
nearby. Be sure to follow all directions in the manual.<br />
Do not open unit or fuel cartridges. Do not use force to<br />
open cartridges and do not refill them. Any<br />
modifications to the unit may affect safe operation, will<br />
lead to a loss of license and will void the warranty Use<br />
only original <strong>EFOY</strong> equipment.<br />
Do not store unit and fuel cartridges at temperatures<br />
above 45° C. Do not operate at temperatures above<br />
45° C. Keep away from heat and direct sunlight.<br />
Store the unit where there is no danger of freezing, or<br />
use the automatic antifreeze feature. (see Chapter 5.10)<br />
Do not smoke when handling the unit or the fuel<br />
cartridges.<br />
Keep away from heat and open flame.<br />
There is a danger of fire if methanol leaks out (i.e.<br />
following an accident, or if the unit or the fuel cartridge<br />
has been damaged). Keep away from open fire and<br />
make sure area is well ventilated. Small amounts of<br />
methanol which may leak out will evaporate without<br />
leaving any residue.<br />
Keep unit and fuel cartridges (including empty or<br />
partially filled cartridges) out of children’s reach.<br />
Operate the unit only in accordance with instructions<br />
and keep operating area well ventilated. Do not block<br />
exhaust. Avoid inhaling exhaust fumes directly or for<br />
prolonged periods of time.<br />
5
2. Introduction<br />
There is no risk of coming into contact with methanol<br />
provided that you handle the unit and fuel cartridges in<br />
accordance with instructions.<br />
We are required by law to print the following notice.<br />
Methanol is toxic if inhaled, ingested or if it comes into<br />
contact with skin. Irreparable damage may occur if<br />
inhaled, ingested or if it comes into contact with skin. In<br />
the event of an accident or if nausea occurs, consult a<br />
physician immediately. Be sure to bring the fuel<br />
cartridge label or these instructions to the consultation.<br />
(A caution concerning methanol can be found in the<br />
appendix.)<br />
System exhaust may contain harmful components.<br />
Avoid inhaling exhaust directly or for prolonged periods<br />
of time. Use the exhaust hose to conduct exhaust gases<br />
to the exterior.<br />
Improper use or improper connection to other electrical<br />
devices may result in damage.<br />
WARNING<br />
In addition to these safety instructions, please observe<br />
the passages in bold type. Otherwise, you may<br />
endanger yourself and others.<br />
6
2. Introduction<br />
2.3 Safety notice for methanol cartridges<br />
WARNING<br />
You are given the methanol in the form of safe, tested<br />
fuel cartridges that protect you from coming into<br />
direct contact with the contents if used correctly. We<br />
are required by law to print the following notice.<br />
Methanol is easily flammable. Methanol is toxic if<br />
inhaled, ingested or if it comes into contact with skin.<br />
In the event of an accident or if nausea occurs, consult<br />
a physician immediately. Be sure to bring the fuel<br />
cartridge label or the methanol material safety data<br />
sheet to the consultation.<br />
Storage and transport of methanol may be subject to<br />
statutory regulations.<br />
More information is provided in the methanol safety<br />
data sheet on our website ww.efoy.com or by SFC<br />
directly.<br />
2.4 Normal Operation<br />
The <strong>EFOY</strong> Pro fuel cells are automatic charging devices<br />
for 12V and 24V lead batteries.<br />
The unit may be used only to charge lead batteries that<br />
conform to the specifications in Chapter 0.<br />
The unit can be used according the specification in<br />
Chapter 0 for stationary and mobile operation in vehicles.<br />
Operate only with original-equipment <strong>EFOY</strong> fuel<br />
cartridges.<br />
The unit is not intended for emergency medical power<br />
<strong>generation</strong>, or for powering life-sustaining or agricultural<br />
devices.<br />
The parallel operation of units to increase the charging<br />
current is possible.<br />
7
2. Introduction<br />
The serial operation of units to increase the voltage<br />
output is not permitted.<br />
Do not operate unit if housing is damaged.<br />
2.5 Declaration of Conformity<br />
SFC Energy AG, Eugen-Saenger-Ring 7, 85649 Brunnthal-<br />
Nord declares that the <strong>EFOY</strong> Pro 600, <strong>EFOY</strong> Pro 1600,<br />
<strong>EFOY</strong> Pro 2200 and the <strong>EFOY</strong> Pro 2200 XTconform to the<br />
European Community’s 2004/108/EG guidelines for<br />
electro-magnetic compatibility. The following norms<br />
apply: DIN EN 61000-6-1, DIN EN 61000-6-3<br />
2.6 Seals of Approval<br />
E 24<br />
These units have been tested in accordance with ECE<br />
Regulation No. 10 for electro-magnetic compatibility.<br />
Operation in motor vehicles is permitted.<br />
Approval number: E24 10R-020234<br />
These units have undergone voluntary testing by TÜV<br />
SÜD for conformity with the basic requirements of IEC<br />
62282-5 and have been awarded the seal of approval for<br />
product safety.<br />
8
2. Introduction<br />
2.7 Warranty<br />
The warranty period begins when the new unit is purchased.<br />
Your proof of purchase can be used as a record of this date.<br />
Please keep these documents carefully. Our warranty<br />
services are based on the SFC warranty conditions which are<br />
valid at the time of purchase.<br />
Service<br />
For technical queries on <strong>EFOY</strong> Pro fuel cells, our <strong>EFOY</strong><br />
customer service can be reached during office hours at the<br />
following numbers:<br />
Freecall (Germany): 00800 / 73 27 62 78*<br />
From any other country, please dial:<br />
+49 89 / 673 5920<br />
SFC Energy AG<br />
Eugen-Sänger-Ring 7<br />
85649 Brunnthal-Nord<br />
Germany<br />
Fax.: +49 89 / 673 592 369<br />
sales@efoy.com<br />
www.efoy.com<br />
*The freecall number is available from the following countries: Germany, Belgium,<br />
Denmark, France, Great Britain, Italy, the Netherlands, Norway, Austria, Sweden,<br />
Switzerland and Spain.<br />
9
2. Introduction<br />
2.8 Disposal<br />
Packaging<br />
Packaging protects your unit during shipping. All<br />
materials used are environmentally compatible and<br />
recyclable.<br />
We recommend saving the packaging for eventual<br />
winter storage.<br />
Should you nevertheless wish to dispose of the<br />
packaging, please do so properly.<br />
Your dealer or your local recycling center can provide<br />
information about proper disposal.<br />
WARNING<br />
Danger of Suffocation!<br />
Keep packaging away from children. Plastic wrapping<br />
and cartons may cause suffocation.<br />
Fuel Cartridges<br />
Old Units<br />
Sort empty fuel cartridges with plastics. Dispose of<br />
partly filled fuel cartridges in the same manner as<br />
solvents or paint.<br />
Old units are still valuable! Proper disposal can yield<br />
valuable raw materials while protecting the<br />
environment. Your supplier can advise you about<br />
returning old units.<br />
10
3. Configuration<br />
3. Configuration<br />
3.1 Standard Equipment<br />
Unit<br />
Remote control with data line<br />
RC1<br />
Fuel-cartridge holder with<br />
belt FH1<br />
The following is included in the standard delivery<br />
package:<br />
• <strong>EFOY</strong> Pro fuel cell<br />
• Remote control with data line<br />
• Fuel cartridge holder with belt<br />
• Mounting plate for <strong>EFOY</strong> Pro<br />
• Off-heat duct<br />
• Exhaust hose<br />
• Charge line<br />
• Service Fluid<br />
• User manual<br />
A basic-set is also available on demand:<br />
• <strong>EFOY</strong> Pro fuel cell<br />
• Service Fluid<br />
• User manual<br />
Charge line CL4:<br />
Mounting plate<br />
Exhaust hose EH1<br />
Connecting line to fuel-cell 1m<br />
Off-heat duct OD1<br />
Service Fluid<br />
Battery fuse power 15 A Battery fuse sense 2.0 A<br />
Length 0,5m Length 0,5m<br />
11
3. Configuration<br />
3.2 Overview<br />
1 Charge line connection<br />
2 Remote-control connection<br />
3 Data interface<br />
4 Push button<br />
5 LEDs<br />
6 Connection for EH 1 exhaust hose and nozzle for<br />
service fluid<br />
7 Fuel-cartridge connection<br />
8 Cooling inlet (reverse)<br />
9 Warm-air outlet and connection for off-heat duct<br />
12
3. Configuration<br />
3.3 Specifications<br />
Fuel Cells <strong>EFOY</strong> Pro 600 <strong>EFOY</strong> Pro 1600 <strong>EFOY</strong> Pro 2200 <strong>EFOY</strong> Pro 2200 XT<br />
Max. charging power per day 600 Wh/day 1560 Wh/day 2160 Wh/day 2160 Wh/day<br />
Nominal power 25 W 65 W 90 W 90 W<br />
Nominal voltage 12 V / 24 V 12 V / 24 V 12 V / 24 V 12 V / 24 V<br />
Nominal charging current at 12 V/24 V 2.1 A / 1.05 A 5.4 A / 2.7 A 7.5 A / 3.75 A 7.5 A / 3.75 A<br />
Recommended<br />
battery capacity*<br />
Weight<br />
Switching threshold for automatic<br />
battery charging at 12 V /24 V **<br />
at 12 V<br />
at 24 V<br />
Required start-up voltage at 12 V /24 V<br />
Noise level (at 1m / 7m distance)<br />
Nominal consumption***<br />
Quiescent current draw<br />
Operating temperature<br />
Start-up temperature<br />
Storing temperature<br />
Recommended altitude<br />
Dimensions L x W x D<br />
10 to100 Ah<br />
5 to 50 Ah<br />
6.8 kg<br />
(15 lbs)<br />
40 to 250 Ah<br />
20 to 120 Ah<br />
8.3 kg<br />
(18.3 lbs)<br />
On: 28.4 V<br />
>9 V / >18,5.0 V<br />
39 / 23 dB(A)<br />
0.9 l/kWh<br />
15 mA<br />
60 to 350 Ah<br />
30 to 175 Ah<br />
8.6 kg<br />
(19 lbs)<br />
-20 °C to +45 °C (-4°F to +113°F)<br />
+5 °C to +45 °C (41°F to 113°F)<br />
+1 °C to +45 °C (34°F to 113°F)<br />
Up to 1500 m (4920 ft)<br />
433 x 188 x 278 mm (17 x 8 x 11 in)<br />
Inclination along the roll axis Permanent: max. 35°; temporary (
4. Installation<br />
4. Installation<br />
4.1 Installation Space Requirements<br />
WARNING<br />
Securely fasten unit and fuel cartridges when using on<br />
board motor vehicles.<br />
Do not operate unit if there is danger of explosion.<br />
Unit is not watertight. Make sure that no water can<br />
enter.<br />
Keep unit and fuel cartridges away from children,<br />
temperatures in excess of 45 °C and direct sunlight.<br />
+45 °C<br />
–20 °C<br />
Make sure when choosing an installation space, that<br />
the temperature ranges between –20 °C and +45 °C.<br />
The unit requires air from the outside and generates<br />
off-heat that needs to be conducted to the outside.<br />
Please take this into account when considering<br />
possible locations.<br />
STACK<br />
HEAT<br />
EXCHANGER<br />
1 Air intake for installation space<br />
2 Air intake for heat exchange and for stack<br />
3 Off-heat from heat exchanger<br />
(see chapter 4.3)<br />
4 Exhaust from stack<br />
(see chapter 4.4)<br />
5 Off-heat from installation space<br />
14
4. Installation<br />
The installation space should have a minimum size of<br />
510 x 350 x 300 mm (L x W x H).<br />
In closed chambers please provide an opening with an<br />
opening cross section of at least 10 cm or 40 cm 2 for the<br />
air intake - at structured openings (fine grid, narrow<br />
gap) accordingly more.<br />
Use the off-heat duct to conduct the off-heat out of the<br />
installation space.<br />
The air openings of the installation space need to be<br />
protected against the penetration of water and<br />
particles.<br />
A forced ventilation of the installation space is required<br />
to prevent heat accumulation. This can be done with<br />
additional openings or an additional temperature<br />
controlled ventilator.<br />
Install only in upright position.<br />
Make sure that the device does not exceed the<br />
maximum inclination.<br />
Inclination along the direct axis: 35° (temporary 45°)<br />
Inclination along the quadrature axis: 20° max.<br />
All electrical connections, the fill opening for service<br />
fluid and the fuel cartridge should be easily accessible.<br />
Make sure that the fuel cartridge is located within reach<br />
of the connecting hose (70 cm) and that the hose is<br />
neither kinked nor crushed.<br />
The fuel-cartridge hose and the exhaust hose may not<br />
be damaged. Do not substitute another hose for either<br />
of the two.<br />
Use only original-equipment <strong>EFOY</strong> hoses.<br />
15
4. Installation<br />
4.2 Mounting of the Fuel Cell<br />
Select a suitable location as described in Chapter 4.1,<br />
paying attention to the dimensions in Chapter 0.<br />
1. Secure the mounting plate tightly to the desired<br />
location. Use proper screws and dowels, if<br />
necessary, so that the mounting plate cannot shake<br />
loose in case of an accident.<br />
2. Place the unit onto the mounting plate. It is possible<br />
to mount the unit in 2 possible directions.<br />
3. Put the mounting bar at the screws of the mounting<br />
plate.<br />
4. Move the mounting bar to the fuel cell and then to<br />
the right hand side. Adjust the mounting bar in this<br />
position with the two mounting nuts.<br />
16
4. Installation<br />
4.3 Connecting the Off-Heat Duct<br />
The off-heat duct (included) extracts warm air so that<br />
the unit can also be operated in close quarters.<br />
The off-heat of the heat exchanger needs to be<br />
conducted to the outside with a 100 mm duct. The cross<br />
section of the opening should be at least 35 cm² - at<br />
structured openings (fine grid, narrow gap) accordingly<br />
more.<br />
The air intake side must not be guided by a duct to<br />
enable forced ventilation within the installation space.<br />
Sink the screws for the off-heat flange into the holes<br />
provided.<br />
Use the bow to conduct warm air to the side. If you do<br />
not need the off-heat bow, you can connect the off-heat<br />
tube directly to the flange.<br />
Then pass the off-heat tube to the exterior. You will need<br />
an opening with a 100 mm diameter.<br />
Make sure the off-heat tube has no kinks.<br />
Pass the off-heat tube through the opening; any excess<br />
may be shortened.<br />
It may be necessary to use an external face plate to<br />
protect the outlet. Use a suitable sealant to prevent<br />
moisture from penetrating into the body or into the<br />
interior.<br />
17
4. Installation<br />
4.4 Connecting the Exhaust Hose<br />
Within the fuel cell methanol and oxygen are converted<br />
into water and carbon dioxide. This chemical reaction<br />
generates off-heat which needs to be conducted<br />
together with water vapour and carbon dioxide to the<br />
outside.<br />
WARNING<br />
Connect the included exhaust hose and conduct the<br />
exhaust to the outside.<br />
Exhaust gasses contain moisture and may exceed<br />
60 °C, causing scalding. Exhaust by-products may<br />
contain injurious substances. Avoid inhaling exhaust<br />
directly or for long periods of time.<br />
It is possible to collect the generated water in a<br />
separate water cartridge. But make sure that there is a<br />
hose that allows the gasses including the carbon<br />
dioxide to evaporate from the water cartridge to the<br />
outside.<br />
• Remove the cap from the exhaust port. Retain the<br />
cap for winter storage or for possible returns.<br />
• Attach the exhaust hose (included) to the exhaust<br />
port.<br />
• Route the hose to the exterior and use a suitable<br />
sealant to seal the opening. The hose may be<br />
shortened as needed. The opening must be 10 mm<br />
in diameter.<br />
• Make sure the exhaust hose has no kinks or<br />
blockage and that exhaust can escape freely.<br />
• The exhaust hose should be as short as possible.<br />
The part of the hose at the outside should not be<br />
longer than 5 cm. Cut diagonally the end of the hose<br />
to avoid the emergence of drops.<br />
18
4. Installation<br />
Routing the exhaust hose<br />
At no time may siphoning occur in the hose. Make sure<br />
that the hose is neither clogged nor blocked.<br />
The exhaust hose may not be longer than 50 cm in<br />
order to prevent freezing in winter. The hose may be<br />
up to 150 cm long for summer operation and during<br />
transitional seasons.<br />
Up<br />
Down<br />
Avoid siphoning<br />
19
4. Installation<br />
4.5 Installing the Fuel Cartridge Holder<br />
WARNING<br />
Keep fuel cartridge and all reserve cartridges away<br />
from children. Keep cartridges away from heat and<br />
out of direct sunshine.<br />
Secure fuel cartridge and all reserve cartridges so<br />
that they can not shift.<br />
Make sure that the fuel-cartridge connecting hose is<br />
neither crushed nor kinked.<br />
Do not place fuel cartridges or reserve cartridges in<br />
front of the air intake or outlet!<br />
COOLING AIR<br />
WARM AIR<br />
Do not place objects such as reserve fuel cartridges in<br />
front of the air intake or outlet.<br />
Place fuel cartridges next to or in front of the unit as<br />
illustrated.<br />
ELECTRICAL CONNECTION<br />
Secure the fuel-cartridge holder with four suitable<br />
screws and dowels, if necessary, so that it will not<br />
shake loose in the case of an accident.<br />
20
4. Installation<br />
4.6 Electrical Connection to the Battery<br />
WARNING<br />
All work should be carried out by qualified technicians<br />
in accordance with technical regulations.<br />
Improper connections or the use of wrong gauge wires<br />
could result in fire.<br />
All wires must be properly insulated and have<br />
adequate voltage rating. All connections must be tight.<br />
The use of uninsulated wires and contacts is not<br />
permitted.<br />
Use the wire harness (included) to connect the unit.<br />
The circuit connecting the battery must contain a fuse.<br />
Check the polarity (see illustration) before connecting<br />
the unit.<br />
Both sensor and power lines must always be<br />
connected.<br />
Always use separate lines for charging (power) and<br />
for voltage metering (sensor) to the battery.<br />
Otherwise, the flow of current will cause false<br />
readings.<br />
The charging lines consists of four leads that must be<br />
connected to the battery as follows:<br />
POWER LEAD<br />
Power lead:<br />
This lead carries current from the fuel cell to the<br />
battery.<br />
Sense lead:<br />
This lead measures battery voltage.<br />
SENSE LEAD<br />
21
4. Installation<br />
To minimize current loss in the leads, the following<br />
cross section is recommended, should the battery<br />
charging cable be insufficient:<br />
Length [m] min. cross section<br />
< 5 m 2,5 mm²<br />
5 – 10 m 4 mm²<br />
10 – 15 m 6 mm²<br />
Accessories:<br />
Extension sense line 8 m (Art. No. 151 906 005)<br />
Extension Power line 8 m (Art. No. 151 906 006)<br />
Notes:<br />
• The <strong>EFOY</strong> Pro is charging the connected battery and<br />
the battery supplies the power for the application..<br />
• The <strong>EFOY</strong> Pro can only be used to charge lead<br />
batteries which conform to the technical<br />
specification (see chapter 0).<br />
• The <strong>EFOY</strong> Pro can charge 12 V and 24 V batteries<br />
and automatically detects the voltage of the<br />
connected battery.<br />
• The charging parameters for the automatic mode<br />
can be adjusted with a standard PC – see user<br />
manual of computer interface adapter.<br />
• To protect the battery against deep discharging it is<br />
recommended to install a low-voltage load<br />
disconnector that disconnects the load from the<br />
battery.<br />
22
4. Installation<br />
Connection diagram<br />
<strong>EFOY</strong> fuel cartridge <strong>EFOY</strong> Pro <strong>Series</strong> Battery Load<br />
FUSE 2A<br />
RED<br />
BROWN<br />
FUSE 15A<br />
1<br />
2<br />
3<br />
4<br />
5<br />
6<br />
7<br />
<strong>EFOY</strong> Pro <strong>Series</strong><br />
connecting line to fuel cell<br />
extension sense line (optional)<br />
battery fuse 2 A<br />
battery<br />
extension power line (optional)<br />
battery fuse in power line 15 A<br />
23
4. Installation<br />
4.7 Combination with other energy sources<br />
The <strong>EFOY</strong> Pro can be combined with other energy<br />
sources which then load the battery together.<br />
A widely used combination is together with solar cells.<br />
In this case it is recommended to adjust the charging<br />
parameter of the <strong>EFOY</strong> Pro so that it only switches on<br />
if solar alone can not provide enough energy (e.g. in<br />
winter times).<br />
Connection diagram<br />
Solar cell Charge controller Battery<br />
Load<br />
<strong>EFOY</strong> fuel cartridge <strong>EFOY</strong> Pro <strong>Series</strong><br />
24
4. Installation<br />
4.8 Connecting the Remote Control<br />
The remote control (1) displays the current status and<br />
is used to control the device. Mount the panel where it<br />
is easily accessible.<br />
1 2<br />
3 4<br />
Flush mounting:<br />
1 remote control<br />
2 opening<br />
3 frame<br />
4 screws<br />
Flush mounting<br />
If installing the panel flush with the surface of the<br />
unit, make sure that there is a sufficient opening for<br />
the electronic components behind the opening.<br />
Use templates for drilling and sawing when flush or<br />
surface mounting (2). Use a drill to start the opening<br />
and then cut out the rest of the opening with a keyhole<br />
or compass saw.<br />
Connect the remote control with the DL 2 data line<br />
(included).<br />
Then secure the control panel (1) with four suitable<br />
screws (4) and place the frame (3) over the control<br />
panel.<br />
1 2<br />
Surface mounting<br />
Secure the surface mount with two screws.<br />
Connect the remote control with the DL 2 data line<br />
(included).<br />
3 4<br />
Then secure the control panel (1) with four suitable<br />
screws (4) and place the frame (3) over the control<br />
panel.<br />
Surface mounting:<br />
1 remote control<br />
2 surface mount<br />
3 frame<br />
4 screws<br />
25
4. Installation<br />
Connect the remote control with the DL 2 data line<br />
(included).<br />
Then insert the plug into the left socket on the unit<br />
marked “Remote Control“.<br />
If the DL 2 data line is not long enough, you can replace<br />
it with a commercially available network line that is<br />
longer or shorter (Category 5 patch cable).<br />
26
5. Operation<br />
5. Operation<br />
5.1 Integrated user interface<br />
1<br />
2<br />
3<br />
4<br />
Push-button<br />
Green LED<br />
Yellow LED<br />
Red LED<br />
The LED’s indicate the <strong>EFOY</strong> Pro system status. The push-button is used to control the unit.<br />
Push-button action Result Starting state Resulting state<br />
Push shortly (< 0,5s) Reset On, Off or Automatic Automatic<br />
Push longer (> 3s) Switch On / off On or Automatic Off<br />
Off<br />
On<br />
LED state Green LED Yellow LED Red LED<br />
On Ready Add service fluid Error<br />
Blinking Shutting down Fuel empty Interruption<br />
Off Off or error No error No error<br />
27
5. Operation<br />
5.2 Remote Control<br />
The optional remote control displays the current status<br />
and is used to control the <strong>EFOY</strong> Pro.<br />
Remote control connection:<br />
Connect the remote control with the included data line<br />
DL2.<br />
Then insert the plug into the left socket on the <strong>EFOY</strong><br />
Pro marked „Remote Control“.<br />
If the included data line DL2 is not long enough, you can<br />
replace it with a commercially available network cable<br />
(Cat. 5 patch cable).<br />
auto<br />
!<br />
reset<br />
1 Display<br />
2 Information button and language-selection button<br />
>><br />
3 On/Off button<br />
4 Button for automatic operation auto<br />
5 Yellow warning light “Please change fuel cartridge“<br />
6 Red error warning light<br />
7 Reset button reset<br />
Automatic<br />
Please change fuel cartridge<br />
The first line indicates the operating mode selected,<br />
such as “Automatic“.<br />
The second line of the display provides information<br />
about normal operation, errors or malfunctions (see<br />
Chapter 7 Troubleshooting).<br />
Press >> to obtain the following information.<br />
Automatic<br />
Voltage 13.6 V<br />
• Battery voltage<br />
28
5. Operation<br />
Automatic<br />
Current 4.6 A<br />
Automatic<br />
V03 9.06I12V/24V QB<br />
• Charging current<br />
Please note that the device interrupts power<br />
<strong>generation</strong> briefly several times an hour during<br />
normal operation and a charging power of 0.0 A is<br />
displayed then.<br />
• Firmware version<br />
Please check on a regular basis (at least once a<br />
year), if software updates are available.<br />
Automatic<br />
100200-0808-0002<br />
• Serial number<br />
Automatic<br />
Operating hours 500 h<br />
• Total operating hours<br />
Automatic<br />
Standby<br />
Automatic<br />
Charging mode<br />
• Standard display<br />
The standard display will be restored after about 30<br />
seconds. Alternatively, you can return to the<br />
standard display by pressing >> again.<br />
• If you have connected the optional cartridge sensor<br />
to your unit, a fuel cartridge will appear in the<br />
display as soon as a predetermined amount is<br />
reached.<br />
Always keep a reserve fuel cartridge at the ready.<br />
The cartridge need only be changed when the<br />
message “Please change cartridge“ appears in the<br />
display.<br />
29
5. Operation<br />
5.3 Select Language<br />
• Press >> on the control panel for two seconds. The<br />
control panel will display the language currently<br />
selected.<br />
Deutsch<br />
• The following languages are available:<br />
German (factory setting)<br />
English<br />
French<br />
Italian<br />
Dutch<br />
Spanish<br />
• Continue pressing >> until the desired language<br />
appears.<br />
• Then hold >> 2 more seconds in order to set your<br />
language choice.<br />
5.4 Remote Control with Computer<br />
It is also possible to remote control the <strong>EFOY</strong> Pro with a<br />
computer. By using a modem this can also be done<br />
remotely. The computer interface enables the same<br />
functions as the remote control (see chapter 8).<br />
30
5. Operation<br />
5.5 Connecting the Fuel Cartridge<br />
WARNING<br />
For safety’s sake, use only original <strong>EFOY</strong> fuel<br />
cartridges. Do not smoke while changing the cartridge<br />
and avoid open flames! Do not expose fuel cartridges<br />
to temperatures above 45 °C.<br />
Do not place the fuel cartridge in front of the air intake<br />
or outlet.<br />
Original-equipment <strong>EFOY</strong> fuel cartridges contain<br />
<strong>EFOY</strong>-approved methanol. Even slight impurities in<br />
commercially available methanol may cause<br />
permanent damage to the unit and may void the<br />
warranty.<br />
Please pay attention to the Safety notice for methanol<br />
cartridges (chapter 2.3)<br />
Note: When the cartridge is empty, “Please change<br />
fuel cartridge“ will appear on the remote control and<br />
the yellow light at the <strong>EFOY</strong> Pro and the remote<br />
control will blink. The cartridge may be changed while<br />
the system is running.<br />
• Unscrew the empty fuel cartridge and remove.<br />
• Close each cartridge tightly with the cap after use.<br />
• <strong>EFOY</strong> fuel cartridges are intended for one-way use<br />
only. They may not be refilled.<br />
• Sort empty fuel cartridges with plastics. Dispose of<br />
partly filled fuel cartridges in the same manner as<br />
solvents or paint.<br />
31
5. Operation<br />
1<br />
• Place a new sealed original-equipment <strong>EFOY</strong> fuel<br />
cartridge in the system (1).<br />
• Make sure the cartridge is fixed properly for<br />
mobile applications (2).<br />
• Only remove the childproof cap when the new fuel<br />
cartridge has been placed into the fuel-cartridge<br />
holder (3).<br />
• Screw the connector onto the new fuel cartridge.<br />
2<br />
• Press reset on the control panel to extinguish the<br />
yellow warning light and the maintenance message.<br />
Notes:<br />
• For mobile applications the fuel cartridge needs to<br />
be properly fixed with a fuel cartridge holder.<br />
• The optional M28 adaptor is required to connect the<br />
M28 cartridge to the <strong>EFOY</strong> Pro.<br />
3<br />
Connect the M28 fuel cartridge<br />
• Connect the <strong>EFOY</strong> Pro fuel cartridge connector (1)<br />
with the M28 adaptor (2).<br />
• Screw the M28 adaptor (2) onto the M28 fuel<br />
cartridge (3).<br />
32
5. Operation<br />
5.6 Automatic Operation<br />
CAUTION<br />
Before connecting to the electrical system, make sure<br />
the unit has been positioned properly and that the<br />
electrical system is protected by fuses (as described<br />
in Chapter 4.6).<br />
As soon as you connect the unit to the battery and after<br />
every reset the unit will start the automatic operation<br />
mode.<br />
The unit monitors the battery voltage and starts<br />
charging as soon as the battery voltage drops bellow a<br />
defined threshold. It will stop charging as soon as the<br />
battery voltage exceeds the defined switch off<br />
threshold.<br />
Note: To guarantee optimal battery maintenance, it is<br />
important that the charge current is not stopped<br />
abruptly when the deactivation threshold is reached.<br />
For this reason, the <strong>EFOY</strong> Pro continues to charge for<br />
up to 3 h after the deactivation threshold set is<br />
reached (by default, 14.2 Volt is preset). The<br />
recharging period depends on the battery voltage and<br />
the electricity consumption.<br />
The thresholds for automatic charging can be modified<br />
with a computer – see Computer interface user manual.<br />
Please note that the device interrupts power<br />
<strong>generation</strong> briefly several times an hour during<br />
normal operation and a charging power of 0.0 A is<br />
displayed then.<br />
Automatic<br />
Charging mode<br />
Automatic<br />
Start phase<br />
The second line of the display will indicate “charging<br />
mode“ as long as the unit is providing voltage to the<br />
electrical system.<br />
The device goes through a cold start phase of about 20<br />
minutes before reaching its full rated output.<br />
33
5. Operation<br />
Automatic<br />
Standby<br />
If the battery is sufficiently charged the unit will remain<br />
in the standby mode.<br />
Automatic<br />
Please change fuel cartridge<br />
Should the device detect a malfunction such as an<br />
empty fuel cartridge, it will shut down and advise you<br />
how to correct the situation. (“Please change fuel<br />
cartridge“.) Resume automatic operation using the<br />
reset button after the error has been corrected<br />
(See Chapter 7).<br />
5.7 Switching On manually<br />
If desired, you can switch on the unit manually regardless<br />
of the battery voltage. The unit will then be in the<br />
“charging mode“.<br />
This function is only possible when the battery voltage<br />
is below 13.2V / 26.4 V.<br />
On<br />
Charging mode<br />
Press on the control panel once if the unit has been<br />
switched off, and twice if it is operating in automatic<br />
mode. The unit will start up regardless of the battery<br />
voltage and will continue charging until it reaches the<br />
switch-off point.<br />
The device will then switch to automatic mode by itself<br />
and will only charge if the battery or the demand for<br />
power requires it.<br />
5.8 Switching Off manually<br />
Press<br />
on the remote control to switch off the device.<br />
The unit will gradually shut down, performing various<br />
function checks as it does so:<br />
Off<br />
Shutting down<br />
To protect components, the unit must run at least<br />
30 minutes before shutting down. If the unit is shut off<br />
beforehand, it will continue running until 30 minutes<br />
34
5. Operation<br />
have elapsed. The message “Shutting down” will<br />
appear in the display. Leave the fuel cartridge and the<br />
battery connected during this time.<br />
Please note that the fuel cell will not charge the<br />
battery automatically if it is switched off. The unit<br />
needs to be switched on manually and can only start<br />
up if it is connected to an intact battery and full fuel<br />
cartridge.<br />
5.9 Battery protection<br />
Off<br />
Battery protection<br />
The <strong>EFOY</strong> Pro fuel cell has an integrated battery<br />
protection function. This function prevents deep<br />
discharge of the battery when the operating mode is set<br />
to “Off”.<br />
Battery protection is automatically activated when the<br />
battery voltage is lower than 11.2 V (24.4 V) for more<br />
than 15 minutes. The battery protection charging mode<br />
ends when the voltage reaches 12.8 V (25.6 V).<br />
This function only serves to protect the battery, and<br />
does not recharge it.<br />
Off<br />
Battery protection -> to shut down<br />
press off<br />
Press the button to switch off the fuel cell after the<br />
battery protection function starts. The function is<br />
reactivated automatically when the unit is switched on<br />
or operated in automatic mode.<br />
Note: If you stop protective charging manually, battery<br />
protection is deactivated until the fuel cell is started<br />
again. Deep discharge can damage your battery. If<br />
battery protection starts repeatedly, please check<br />
your system.<br />
Battery protection only functions when a full <strong>EFOY</strong><br />
fuel cartridge is connected.<br />
35
5. Operation<br />
5.10 Automatic Antifreeze Feature<br />
Off<br />
Antifreeze mode<br />
This unit features an intelligent antifreeze feature. If the<br />
temperature drops close to the freezing point then the<br />
<strong>EFOY</strong> Pro starts automatically the charging mode to<br />
prevent freezing. As soon as the unit has warmed up<br />
enough it stops the antifreeze mode. The antifreeze<br />
mode works also if the unit is switched off.<br />
If the unit is in antifreeze mode, the message<br />
“Antifreeze mode” will appear on the second line. The<br />
first line will indicate the current operating mode, for<br />
example “Off”.<br />
The antifreeze function works only as long as a fuel<br />
cartridge and a sufficiently intact battery are<br />
connected.<br />
Please observe the following maintenance tips for<br />
storage and winter operation:<br />
If, despite precautions, the unit does freeze, let it thaw<br />
in a warm place for approximately 24 hours before<br />
operating. Please note that the unit’s performance may<br />
diminish if it freezes repeatedly.<br />
Running in straight antifreeze mode, the unit will<br />
consume approximately 10 liters of methanol in the<br />
course of a five-month Central European winter.<br />
36
5. Operation<br />
5.11 Storage<br />
• Press on the remote control to switch off the unit.<br />
Off<br />
Antifreeze mode<br />
• Wait until the unit has shut down and the display has<br />
disappeared (approx. 30 min.).<br />
• Unplug the charging line and the data line for the<br />
remote control.<br />
• Store the plugs and lines in a cool, dry place.<br />
• WARNING<br />
Do not smoke when handling unit and fuel<br />
cartridge. Keep away from open flame!<br />
• CAUTION<br />
Unscrew the fuel cartridge and close it with a cap.<br />
Keep all elements clean.<br />
• WARNING<br />
Keep unit and fuel cartridges – even empty or<br />
partially empty cartridges – away from children.<br />
• Remove the exhaust hose. Keep it clean and place a<br />
cap over the exhaust outlet.<br />
• Remove the off-heat tube and the off-heat bow if<br />
necessary and remove the <strong>EFOY</strong> Pro from the<br />
mounting plate.<br />
• CAUTION<br />
Store unit in a cool place; however, the temperature<br />
should exceed 1° C because the automatic antifreeze<br />
feature will only work if a fuel cartridge is attached<br />
along with a sufficiently charged battery. (See<br />
Chapter 5.10)<br />
37
5. Operation<br />
• CAUTION<br />
If the device is exposed to temperatures below<br />
0 °C without connected batteries and sufficiently<br />
filled fuel cartridges (frost protection), it must be<br />
thawed out for approximately 24 hours at room<br />
temperature before commencing operation.<br />
• Use a proper box such as the original carton to ship<br />
the unit. Use padding to prevent shocks. Transport<br />
the unit in an upright position only.<br />
38
6. Maintenance<br />
6. Maintenance<br />
6.1 Service<br />
WARNING<br />
Do not open unit! Unauthorized tampering may<br />
jeopardize safe operation and void any warranty. The<br />
unit does not contain any components that you can<br />
service or repair yourself.<br />
The unit is maintenance free under normal operating<br />
conditions.<br />
Please check on a regular basis (at least once a year),<br />
if software updates are available.<br />
<strong>EFOY</strong> Updater – Update your <strong>EFOY</strong> Pro fuel cell quickly<br />
It’s really easy: Simply connect the <strong>EFOY</strong> Updater to<br />
the <strong>EFOY</strong> Pro fuel cell and the update runs<br />
automatically.<br />
For further information on firmware updates, please<br />
contact your service partner or check our website:<br />
www.efoy.com/en/updater<br />
Or<br />
Freecall: 00800 732 762 78<br />
Hotline: +49 89 673 5920<br />
sales@efoy.com<br />
6.2 Cleaning<br />
WARNING<br />
Switch off device before cleaning and unplug the<br />
battery charging cable.<br />
39
6. Maintenance<br />
CAUTION<br />
The device is not watertight. Make sure that moisture<br />
cannot get inside.<br />
Clean only with a soft cloth dampened with a mild<br />
detergent.<br />
Reconnect the battery charging cable after cleaning so<br />
that the antifreeze feature remains activated. (See<br />
Chapter 5.10).<br />
6.3 Change the filter (<strong>EFOY</strong> Pro 2200 XT)<br />
NOTICE<br />
Keep filter and packaging out of the reach of<br />
children.<br />
Do not store the filter at temperatures below 0°C.<br />
When changing the filter, make sure that the<br />
surrounding area is clean and free from dust.<br />
Ensure that no dirt gets into the openings in the<br />
device<br />
Automatik<br />
Bitte Filter XT wechseln<br />
A message will be displayed on the remote control<br />
panel or via the modem when the filter has to be<br />
changed.<br />
1. Remove the device.<br />
To do this, disconnect the plugs, exhaust air vent, and<br />
the exhaust gas hose<br />
40
6. Maintenance<br />
2. Turn the device over onto its back<br />
3. Unscrew fixing screw 1 on service cover 2 using a<br />
suitable Allen key.<br />
2<br />
1<br />
4. Pull service cover 2 down.<br />
2<br />
5. Pull foam 3 on the right side out<br />
3<br />
4<br />
6. Push filter 4 to the right along flap 5 until the filter is<br />
exposed<br />
7. Take filter 4 out of the filter compartment.<br />
A few drops of liquid may leak out.<br />
41
6. Maintenance<br />
5<br />
8. Fit the new filter 6 in the filter compartment.<br />
9. Push new filter 6 to the left until it engages in place<br />
on the wall of the filter compartment.<br />
10. Slide foam 3 back to the right beside the filter.<br />
11. Slide service cover 2 onto the device and screw it<br />
tight.<br />
12. Press "Auto" and "Reset" together on remote<br />
control unit 7 to confirm that the filter has been<br />
changed.<br />
The service message will go out.<br />
6.4 Disposal Filter XT1<br />
Dispose of used filters with plastic waste<br />
6.5 FAQs und Service<br />
1. The service message is displayed on my remote<br />
control/via my modem. How much time do I have to<br />
change the filter?<br />
The message is displayed at 2200 hours of operation.<br />
The filter must be changed until max. 3000 hours of<br />
operation, otherwise the warranty is void.<br />
2. I have removed the filter and the <strong>EFOY</strong> Pro was not<br />
lying on the back. Some liquid leaked out. What should<br />
I do?<br />
This is the liquid needed to operate the fuel cell. The<br />
<strong>EFOY</strong> Pro 2200 XT needs this liquid to be able to start.<br />
Please fill in 2 bottles of Service Fluid in the nozzle fort<br />
he exhaust hose at the fuel cell.<br />
3. After having placed in the new filter, the unit shows<br />
error code 30. What happened?<br />
The unit has not been placed on the back while the filter<br />
has been changed. Some liquid must have spoiled out.<br />
42
6. Maintenance<br />
Please add service fluid (see. 2).<br />
4. Some liquid leaked out by removing the filter.<br />
A few drops of liquid may leak out. Please use a clean<br />
and fluff less cloth to absorb the liquid.<br />
5. I have placed the new filter and the service message<br />
is still running.<br />
Did you confirm the action via the remote control or<br />
your computer?<br />
43
7. Troubleshooting<br />
7. Troubleshooting<br />
7.1 Safety<br />
WARNING<br />
Do not open unit! It contains no components that you<br />
can repair yourself.<br />
Please contact our sales partner where you have<br />
bought the product if you are unable to fix a<br />
malfunction by using these instructions.<br />
Manufacturer’s address:<br />
SFC Energy AG<br />
Eugen-Sänger-Ring 7<br />
D-85649 Brunnthal-Nord<br />
Phone: +49 89 673 5920<br />
Fax: +49 89 673 592 369<br />
Email: hotline@efoy.com<br />
Web: www.efoy.com<br />
44
7. Troubleshooting<br />
7.2 Problems and Solution<br />
At the <strong>EFOY</strong> Pro and at the remote control the red and<br />
yellow light indicate a system error. The remote control<br />
additionally shows a detailed error message..<br />
The messages will assist you in solving the problem<br />
quickly and easily.<br />
Press the reset button on the control panel AFTER the<br />
problem has been solved.<br />
Message<br />
Check connection<br />
or<br />
Check battery<br />
Interruption: Please defrost<br />
device slowly<br />
(Error 40)<br />
Interruption: Surroundings too<br />
warm<br />
(Error 32, 41)<br />
Please contact service<br />
(Error 1, 10, 13, 14, 15, 17,<br />
70, 73, 75, 76, 80, 83, 84)<br />
Solution<br />
Check remote control connection – proper socket on<br />
the <strong>EFOY</strong> Pro is marked „Remote Control“.<br />
Check battery voltage. If under 10.5 V, use an external<br />
battery charger to recharge.<br />
The unit is frozen. Let stand at room temperature for<br />
approx. 24 hours before operating.<br />
Ambient temperature is too high. The unit starts again<br />
as soon as it has cooled down.<br />
System periphery error. Please contact the SFC partner<br />
where you have bought the product if the problem<br />
remains after a restart.<br />
Please check exhaust hose<br />
(Error 11, 12, 18)<br />
Please change fuel cartridge<br />
(Error 20, 21, 22, 23)<br />
Stack does not reach expected voltage.<br />
Check that the exhaust hose has been properly<br />
connected and arrange it so that condensation cannot<br />
form.<br />
Check for kinks. Clean hose if necessary and keep<br />
opening clear.<br />
Insert a new fuel cartridge as described in Chapter 5.5.<br />
Check connection and screw cartridge on tightly.<br />
Check cartridge hose for kinks. Check hose and<br />
connection for dirt.<br />
45
7. Troubleshooting<br />
Message<br />
Please check fuel cartridge<br />
connector<br />
(Error 72)<br />
Please refill service fluid<br />
(Error 30, 31)<br />
Please check battery voltage<br />
(Error 50, 51, 52, 53)<br />
Automatic restart<br />
(Error 63, 65)<br />
Solution<br />
Check fuel cartridge connection and screw cartridge on<br />
tightly.<br />
Check cartridge hose for kinks. Check hose and<br />
connection for dirt.<br />
Add service fluid (see Chapter Fehler! Verweisquelle<br />
konnte nicht gefunden werden.).<br />
Check that exhaust can escape and that ambient<br />
temperature is below 45° C.<br />
Error 50: Battery voltage is too low (sense line)<br />
Error 51: Battery voltage is too high (sense line)<br />
Error 52: Battery voltage is too low (power line)<br />
Error 53: Battery voltage is too high (power line)<br />
Check connections.<br />
Check whether the battery is the proper type.<br />
Check battery voltage. If too low, use an external<br />
battery charger to recharge.<br />
Check other charging devices such as generators or<br />
regulators for defects.<br />
Unit is restarting automatically - please wait.<br />
46
7. Troubleshooting<br />
7.3 Problems without Error Messages<br />
Please check the following if the device doesn’t respond<br />
and nothing is displayed on the remote control.<br />
If problem recurs: please contact the SFC partner<br />
where you have bought the product.<br />
Cause<br />
Remote control has no or<br />
wrong connection<br />
No battery connected, wrong<br />
battery or undercharged.<br />
Short-circuit fuse tripped<br />
Solution<br />
Check remote control connection<br />
Check contacts, polarity, cables and battery fuses.<br />
Connect a charged battery to start device.<br />
Check polarity of charge line.<br />
Turn off unit, check reason for short circuit/overload or<br />
wrong polarity and correct<br />
If problem recurs<br />
Contact the hotline at:<br />
Freecall: 00800 732 762 78<br />
Hotline: +49 89 673 5920<br />
hotline@efoy.com<br />
www.efoy.com<br />
47
7. Troubleshooting<br />
7.4 Replacing Service Fluid<br />
If service fluid is low the yellow light will turn on at the<br />
<strong>EFOY</strong> Pro and the message ”Please refill service fluid“<br />
will appear at the control panel display.<br />
There is no need to add service fluid prior to the initial<br />
start-up.<br />
Use <strong>EFOY</strong> brand service fluid only.<br />
Switch off the unit before refilling fluid. Unplug the<br />
charge line.<br />
Always keep the device’s service fluid nozzle clean.<br />
<br />
• Use a clean pair of scissors to cut off the tip of the<br />
cap.<br />
The service fluid bottle is for one time use only.<br />
• Remove the exhaust hose from the device’s service<br />
fluid nozzle.<br />
• Insert the tip into nozzle and gently squeeze the<br />
entire contents into the nozzle.<br />
Never refill more than one bottle of Service Fluid at<br />
a time.<br />
• Wipe off any spilled service fluid with a cloth.<br />
• Replace the exhaust hose.<br />
• Reconnect the charge line.<br />
• Order a spare bottle service fluid at your local<br />
dealer.<br />
48
8. Data Interface and Accessories<br />
8. Data Interface and Accessories<br />
8.1 Data Interface Functionality<br />
The <strong>EFOY</strong> Pro data interface enables the connection of:<br />
1<br />
2<br />
3<br />
• Computer or Modem with the interface adapter IA1<br />
• Fuel cartridge sensor FS1<br />
• Cluster Controller CC1<br />
• DuoCartSwitch<br />
Important: the data interface cannot be connected<br />
directly to a computer - the interface adapter is<br />
required for this.<br />
Remote<br />
Control<br />
Power<br />
Sense<br />
On/Off<br />
Reset<br />
Data<br />
Interface<br />
1 data line<br />
2 interface adapter<br />
3 PC (COM interface)<br />
Pin configuration of data interface:<br />
Pin 1: Output (reserved)<br />
Pin 2: RS232 RxD (Receive)<br />
Pin 3: RS232 TxD (Transmit)<br />
Pin 4: Ground<br />
Pin 5: + Battery voltage<br />
Pin 6: Input fuel cartridge sensor (FS1)<br />
Pin 7: Input Remote-on contact (CC1)<br />
Pin 8: Master/slave parallel operation control (CC1)<br />
8.2 Computer Interface Adapter<br />
With a computer it is possible to communicate with the<br />
<strong>EFOY</strong> Pro via a serial COM interface. By using a modem<br />
this can also be done remotely.<br />
This enables to check the current system status,<br />
change parameter or remote control the <strong>EFOY</strong> Pro.<br />
For a detailed description please see the computer<br />
interface adapter user manual.<br />
The Interface Adapter IA1 is used to connect the <strong>EFOY</strong><br />
Pro to a computer COM-interface.<br />
The USB-Adapter is used to connect the interface<br />
adapter to a computer USB-interface, if no COMinterface<br />
is available.<br />
49
8. Data Interface and Accessories<br />
8.3 GSM Modem GSM-2-SMS<br />
The optional GSM modem allows to control and<br />
configure the <strong>EFOY</strong> Pro remotely. It is recommended to<br />
use such a solution if the <strong>EFOY</strong> Pro is installed<br />
remotely.<br />
Functions:<br />
• Notification if errors occur<br />
• Notification if fuel cartridge goes low (with optional<br />
fuel cartridge sensor FS1)<br />
• Remote diagnostics<br />
• Remote control<br />
• Remote programming<br />
For further details see GSM modem user manual,<br />
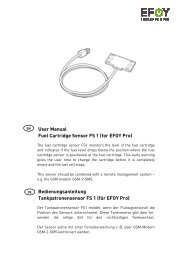
8.4 Fuel Level Sensor FS1<br />
The <strong>EFOY</strong> Pro by default does not supervise the fuel<br />
cartridge level. The <strong>EFOY</strong> Pro will go in an error as<br />
soon as the fuel cartridge is empty.<br />
The optional fuel cartridge sensor FS1 monitors the<br />
level of the fuel cartridge and indicates if the fuel level<br />
drops below the position where the fuel cartridge<br />
sensor is positioned at the fuel cartridge. This early<br />
warning gives the user time to change the cartridge<br />
before it is completely empty and the fuel cell stops.<br />
This sensor should be combined with a remote<br />
management system – e.g. the GSM modem GSM-2-<br />
SMS.<br />
The FS1 is mounted with two screws at the fuel<br />
cartridge holder. There are two different levels<br />
available to mount the FS1.<br />
The FS1 sensor is connected to the <strong>EFOY</strong> Pro data<br />
interface.<br />
50
8. Data Interface and Accessories<br />
8.5 Cluster Controller CC1<br />
The cluster controller CC1 provides 3 functions:<br />
• Interface splitter (provide 2 sockets)<br />
• Parallel operation of up to 5 <strong>EFOY</strong> Pro’s<br />
• Remote control of one <strong>EFOY</strong> Pro (remote-on pin)<br />
Interface splitter<br />
The cluster controller splits the data interface and<br />
provides two sockets to connect the interface adapter<br />
IA1 and the fuel cartridge sensor FS1 together.<br />
Parallel operation<br />
It is possible to parallel up to 5 <strong>EFOY</strong> Pro’s to provide a<br />
higher power output. The cluster controller C1 is used<br />
to synchronize the units so that they switch on and off<br />
together and act like one bigger fuel cell.<br />
Units running in parallel must all be in the same<br />
operating mode.<br />
1 cluster controller<br />
2 interface adapter<br />
3 computer connection<br />
4 to fuel cartridge sensor<br />
For a detailed description please see the cluster<br />
controller user manual.<br />
Automatic<br />
Charging mode<br />
P<br />
A “P” for “Parallel” will appear in the first line when the<br />
unit is operating in parallel.<br />
51
8. Data Interface and Accessories<br />
Automatic<br />
Charging mode<br />
R<br />
Remote control (remote-on)<br />
The <strong>EFOY</strong> Pro can be activated via a switching contact at<br />
the CC1, which means that the charging mode can be<br />
activated<br />
The same function can be activated via the computer<br />
interface. .<br />
An “R” for “remote” will appear in the first line when<br />
the unit is operating in remote mode.<br />
Automatic<br />
Charging mode<br />
R<br />
You can lock or unlock the unit’s software from a<br />
remote location by pressing auto and >><br />
simultaneously. This will deactivate the function and the<br />
unit cannot be started by a remote signal.<br />
If you have locked the software, a padlock<br />
in the first line of the display.<br />
will appear<br />
8.6 <strong>EFOY</strong> ProCube<br />
The <strong>EFOY</strong> ProCube is a modular plug&play solution for<br />
outdoor operation of the <strong>EFOY</strong> Pro.. The unit includes<br />
preinstalled electronics, air ventilation and all<br />
mounting materials. The integrated solar charge<br />
controller allows the easy combination with solar<br />
panels. .<br />
The <strong>EFOY</strong> ProCube allows the installation of:<br />
1x <strong>EFOY</strong> Pro (600, 1200, 1600)<br />
1x Fuel cartridge (M5, M10 or M28)<br />
1x Battery (40, 60, or 90 Ah)<br />
1x Fuel cartridge sensor FS1<br />
1x GSM modem GSM-2<br />
52
8. Data Interface and Accessories<br />
8.7 DuoCartSwitch<br />
The DuoCartSwitch enables the connection of two <strong>EFOY</strong><br />
fuel cartridges to one <strong>EFOY</strong> Pro fuel cell. The switching<br />
valves switches automatically from one cartridge to the<br />
other. The autonomy of the application can be doubled.<br />
Dimensions:<br />
174 x 119 x 196 cm<br />
Weight:<br />
0.7 kg<br />
53
9. Appendix<br />
9. Appendix<br />
9.1 Accessories and Spare Parts<br />
WARNING<br />
Use only original equipment! Use of unauthorized<br />
parts compromise safety and void the warranty.<br />
For a full accessories and spare parts list please visit<br />
www.efoy.com<br />
54
10. Appendix<br />
10. Appendix<br />
U-I and U-P characteristic as per CE test<br />
55
10. Appendix<br />
<strong>EFOY</strong> 2200: U-I and U-P Characteristic<br />
Output Power [M]<br />
Output Current [A]<br />
Output Current [A]<br />
Output Power [W]<br />
Output Voltage [V]<br />
SFC Energy AG<br />
Eugen-Sänger-Ring 7<br />
D-85649 Brunnthal-Nord<br />
Phone: +49 89 673 5920<br />
Fax: +49 89 673 592 369<br />
Email: hotline@efoy.com<br />
web: www.efoy.com<br />
UM-EN-100712 <strong>EFOY</strong> Pro | Copyright by SFC Energy AG 2010. Subject to change without notice<br />
56


