Go to Start > All programs> EndNote > EndNote Program - UCL
Go to Start > All programs> EndNote > EndNote Program - UCL
Go to Start > All programs> EndNote > EndNote Program - UCL

Create successful ePaper yourself
Turn your PDF publications into a flip-book with our unique Google optimized e-Paper software.
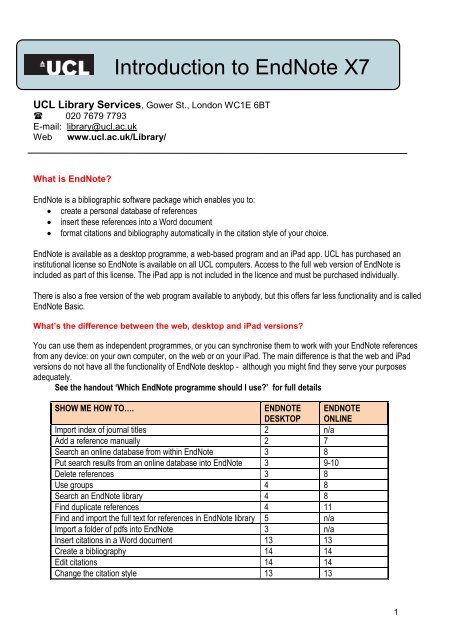
Introduction <strong>to</strong> <strong>EndNote</strong> X7<br />
<strong>UCL</strong> Library Services, <strong>Go</strong>wer St., London WC1E 6BT<br />
020 7679 7793<br />
E-mail: library@ucl.ac.uk<br />
Web www.ucl.ac.uk/Library/<br />
What is <strong>EndNote</strong>?<br />
<strong>EndNote</strong> is a bibliographic software package which enables you <strong>to</strong>:<br />
create a personal database of references<br />
insert these references in<strong>to</strong> a Word document<br />
format citations and bibliography au<strong>to</strong>matically in the citation style of your choice.<br />
<strong>EndNote</strong> is available as a desk<strong>to</strong>p programme, a web-based program and an iPad app. <strong>UCL</strong> has purchased an<br />
institutional license so <strong>EndNote</strong> is available on all <strong>UCL</strong> computers. Access <strong>to</strong> the full web version of <strong>EndNote</strong> is<br />
included as part of this license. The iPad app is not included in the licence and must be purchased individually.<br />
There is also a free version of the web program available <strong>to</strong> anybody, but this offers far less functionality and is called<br />
<strong>EndNote</strong> Basic.<br />
What’s the difference between the web, desk<strong>to</strong>p and iPad versions?<br />
You can use them as independent programmes, or you can synchronise them <strong>to</strong> work with your <strong>EndNote</strong> references<br />
from any device: on your own computer, on the web or on your iPad. The main difference is that the web and iPad<br />
versions do not have all the functionality of <strong>EndNote</strong> desk<strong>to</strong>p - although you might find they serve your purposes<br />
adequately.<br />
See the handout ‘Which <strong>EndNote</strong> programme should I use?’ for full details<br />
SHOW ME HOW TO….<br />
ENDNOTE<br />
DESKTOP<br />
ENDNOTE<br />
ONLINE<br />
Import index of journal titles 2 n/a<br />
Add a reference manually 2 7<br />
Search an online database from within <strong>EndNote</strong> 3 8<br />
Put search results from an online database in<strong>to</strong> <strong>EndNote</strong> 3 9-10<br />
Delete references 3 8<br />
Use groups 4 8<br />
Search an <strong>EndNote</strong> library 4 8<br />
Find duplicate references 4 11<br />
Find and import the full text for references in <strong>EndNote</strong> library 5 n/a<br />
Import a folder of pdfs in<strong>to</strong> <strong>EndNote</strong> 3 n/a<br />
Insert citations in a Word document 13 13<br />
Create a bibliography 14 14<br />
Edit citations 14 14<br />
Change the citation style 13 13<br />
1
A guide <strong>to</strong> <strong>EndNote</strong> desk<strong>to</strong>p<br />
These instructions are for <strong>EndNote</strong> X7 on Windows (some commands are different on a Mac) using Internet Explorer.<br />
When you first open <strong>EndNote</strong> you might be asked if you want <strong>to</strong> use <strong>EndNote</strong> online. Select not <strong>to</strong> at this point. A<br />
dialogue box will prompt you <strong>to</strong> open an existing library or create a new one. Choose <strong>to</strong> create a new library.<br />
The screen is split in<strong>to</strong> three main areas:<br />
The centre of the screen lists your references. Sort the references by clicking on any column header.<br />
The right pane offers a quick view of all fields for the highlighted reference (Reference tab), shows how it would<br />
display in a bibliography (Preview tab), or displays the pdf (Attached pdfs tab)<br />
The left pane displays groups<br />
Term Lists<br />
<strong>EndNote</strong> has lists of full journal titles and their standard abbreviations available <strong>to</strong> download in<strong>to</strong> a feature called the<br />
Journals Term List, so that when you cite references in a Word document, the correct format of the journal title will<br />
appear in the bibliography.<br />
You should import a list of journal titles before you begin <strong>to</strong> add references <strong>to</strong> your <strong>EndNote</strong> Library. The standard sets<br />
of abbreviated and full journal titles are available <strong>to</strong> download and save <strong>to</strong> your personal drive, <strong>to</strong> enable you <strong>to</strong> use<br />
them with <strong>EndNote</strong>. To download standard sets of journal titles:<br />
<br />
<br />
<br />
<br />
<br />
From the Tools menu, select Define Terms Lists<br />
From the Lists tab select Journals.<br />
Click on Import List… and navigate <strong>to</strong> where the Terms Lists folder is located (usually within <strong>Program</strong> Files on<br />
your computer)<br />
Double-click the Terms Lists folder then click on the list which best suits your subject area.<br />
Click on Open. An index of journal titles will now be loaded in<strong>to</strong> your Journals Terms List. You can then close<br />
the Terms List window.<br />
You can import more than one list but importing <strong>to</strong>o many will make the <strong>EndNote</strong> program run more slowly.<br />
Adding references <strong>to</strong> your library<br />
Adding references manually<br />
<br />
<br />
<br />
<br />
With your library open, go <strong>to</strong> References then New Reference<br />
Enter all the information you have for the reference. Note:<br />
o Ref type: The default reference type is ‘journal article’. Click on the drop down box next the<br />
reference type that is displayed <strong>to</strong> choose a different one. The fields available for that reference<br />
type will change accordingly.<br />
o Authors: Each individual author must be entered on a new line. Names can be entered in the<br />
format Bloggs, Joe or Joe Bloggs. If there are no commas, <strong>EndNote</strong> will treat the last word as<br />
the last name. Anything before the first comma is treated as a last name; anything after the first<br />
comma is treated as the given name.<br />
There is a spell checker available at the <strong>to</strong>p of the page<br />
When you have finished entering data, save and close the reference.<br />
2
To edit the reference, double-click on it<br />
Tip:<br />
<strong>EndNote</strong> allows you <strong>to</strong> import pdfs <strong>to</strong> your Library, and au<strong>to</strong>matically fills in the bibliographic details.<br />
<strong>Go</strong> <strong>to</strong> File > Import > Folder<br />
You can choose <strong>to</strong> have groups sets au<strong>to</strong>matically created <strong>to</strong> file your pdf imports, if your folder has<br />
sub-folders – select from the tick box options<br />
Click Choose and navigate <strong>to</strong> the folder on your drive which contains the pdfs<br />
With the import option as ‘PDF’ select Import<br />
The bibliographic details of the articles are filled in for you where possible<br />
Check the reference. Any missing data can be added manually.<br />
<strong>EndNote</strong> can be set up <strong>to</strong> au<strong>to</strong>matically import from a selected folder on your computer<br />
o <strong>Go</strong> <strong>to</strong> Edit > Preferences > PDF handling<br />
o Tick the option Au<strong>to</strong>matic PDF importing and select your folder by browsing<br />
o From the options at the <strong>to</strong>p of the dialogue box you can also choose <strong>to</strong> have the files renamed<br />
au<strong>to</strong>matically upon import if you wish<br />
o PDFs added <strong>to</strong> the folder selected will au<strong>to</strong>matically import <strong>to</strong> the Unfiled group<br />
o Imported files are added <strong>to</strong> an Imported folder created on your computer (not <strong>EndNote</strong>)<br />
<strong>EndNote</strong> actually creates a copy of the pdfs, so you don’t need <strong>to</strong> worry about broken/changing<br />
file paths.<br />
Obtaining references from online databases<br />
You can search a number of online databases from within <strong>EndNote</strong>. Click on the Integrated Library & Online<br />
Search Mode icon at the <strong>to</strong>p of the screen. Databases are displayed under ‘Online search’ in the left pane.<br />
To see other databases <strong>to</strong> search, click on More…at the bot<strong>to</strong>m of your Online Search group in the Groups<br />
pane. Click on choose.<br />
The Search box is at the <strong>to</strong>p of the screen.<br />
Complete your search criteria and then click Search.<br />
The number of results retrieved will be displayed. Click on OK <strong>to</strong> import them.<br />
For a comprehensive search, you should always go <strong>to</strong> the database itself. Some online databases and<br />
electronic journals allow you <strong>to</strong> export references directly in<strong>to</strong> <strong>EndNote</strong>. See the table below for examples<br />
and instructions. This is the quickest and most convenient way <strong>to</strong> get references directly from online databases<br />
in<strong>to</strong> your <strong>EndNote</strong> Library.<br />
WARNING!<br />
Be careful <strong>to</strong> check records imported from online databases. Sometimes data may be missing or misplaced.<br />
This must be amended manually. It is sometimes possible <strong>to</strong> download results and import them manually<br />
instead of direct export, using an amended filter. Ask a member of Library staff for advice.<br />
Please note:<br />
These instructions were compiled using Internet Explorer. Details may differ for other browsers. If you<br />
experience difficulties with the instructions below, try using a different browser<br />
3
Database<br />
Instructions for direct export or for saving references <strong>to</strong> import<br />
Tick the box or click on any result. At the bot<strong>to</strong>m of the screen choose <strong>to</strong> export as<br />
<strong>EndNote</strong>, Zotero. Click on Export. Choose destination as <strong>EndNote</strong> and select your<br />
COPAC<br />
<strong>EndNote</strong> library.<br />
Check that all data is exported <strong>to</strong> the correct fields.<br />
From the details screen for any result, or from your e-shelf, click on Send <strong>to</strong> and<br />
choose <strong>EndNote</strong>Web <strong>to</strong> send <strong>to</strong> your <strong>EndNote</strong> online account or Export RIS <strong>to</strong> send<br />
<strong>to</strong> the desk<strong>to</strong>p version of <strong>EndNote</strong>. If selecting Export RIS, when prompted <strong>to</strong> select<br />
Explore<br />
encoding, select US-ASCII. Click on OK and then Open the file. You can then<br />
choose <strong>EndNote</strong>. WARNING: not all fields may export correctly, ensure that you<br />
check and edit fields carefully.<br />
In <strong>Go</strong>ogle Scholar, before carrying out a search, click on Settings (<strong>to</strong>p right). Under<br />
Bibliography Manager, select <strong>to</strong> show links <strong>to</strong> import citations in<strong>to</strong> <strong>EndNote</strong>. Click on Save.<br />
<strong>Go</strong>ogle Scholar<br />
From your search results you can now click on the link beneath any result Import in<strong>to</strong><br />
http://scholar.google.co.uk <strong>EndNote</strong> and open the file.<br />
WARNING: Data might be missing or misplaced. Check the import carefully and make<br />
amendments manually.<br />
Mark the references you wish <strong>to</strong> save. At the <strong>to</strong>p of the screen, click on Export.<br />
Select <strong>EndNote</strong> from the drop-down ‘Export <strong>to</strong>’ menu. Choose which fields you want<br />
<strong>to</strong> export then click on Export citations. Choose your destination as <strong>EndNote</strong> and<br />
then select which Library you want <strong>to</strong> import your results <strong>to</strong>. Click on Open. You<br />
OvidSP<br />
might be asked <strong>to</strong> select the import filter. Some OVID databases <strong>to</strong> which <strong>UCL</strong><br />
subscribes do not have filters available. In this case, select the most appropriate filter<br />
and edit as necessary, or ask staff about downloading <strong>EndNote</strong> filters.<br />
WARNING: In some databases data will be missing or misplaced, so check the<br />
imported record carefully.<br />
Mark the relevant records. From the Send <strong>to</strong> menu, Select Citation Manager and<br />
PubMed<br />
click Create file ; if prompted choose <strong>to</strong> open the file. Select <strong>EndNote</strong> if prompted.<br />
Use direct export function. Mark the references you wish <strong>to</strong> export and click on<br />
Export. Select RIS format as the export format. Choose which fields <strong>to</strong> output then<br />
SCOPUS<br />
click on Export. Choose <strong>to</strong> open the file and select <strong>EndNote</strong> if prompted. You can<br />
then select your <strong>EndNote</strong> library.<br />
Use direct export function. At the bot<strong>to</strong>m of the SFX window, click on <strong>Go</strong> next <strong>to</strong><br />
Download Citation <strong>to</strong> Reference Manager / <strong>EndNote</strong> . Select Open and Select<br />
SFX<br />
<strong>EndNote</strong> if prompted. You can then select your <strong>EndNote</strong> library. Warning: data may<br />
Web of Knowledge<br />
(includes Web of Science,<br />
BIOSIS Previews)<br />
be missing – check imported reference carefully<br />
Tick the boxes next <strong>to</strong> the articles you want <strong>to</strong> export and click on the <strong>EndNote</strong><br />
but<strong>to</strong>n. Click Export if necessary. If you are asked which programme <strong>to</strong> export <strong>to</strong>,<br />
select <strong>EndNote</strong>. You can then select your <strong>EndNote</strong> library from the window which<br />
appears, if necessary. References may also be added <strong>to</strong> the marked list and then<br />
exported. This will give you further options regarding which fields <strong>to</strong> export.<br />
Some databases do not have a direct export facility; in this case you should save your references as a text file in a<br />
format which can then be imported in<strong>to</strong> <strong>EndNote</strong>:<br />
<br />
<br />
<br />
Run a search in the database as normal. Select references and save them in the appropriate<br />
format. Ensure you save the files in a place where you will easily find them again, e.g. desk<strong>to</strong>p.<br />
Open your <strong>EndNote</strong> library. Click on the import icon<br />
Select ‘Choose File’ <strong>to</strong> locate your saved file<br />
4
Select the appropriate import option for the database you have searched. If the option required<br />
is not listed, select Other filters…. for a comprehensive list.<br />
Click on Import<br />
For further instructions, refer <strong>to</strong> the help pages within the database you are using.<br />
Your references appear in the main window, and the Imported group in the left pane. This group is temporary<br />
and is refreshed with each new import. To see all the references in your Library at any time, click on the all<br />
References group at the <strong>to</strong>p of the left pane.<br />
To change fields displayed in the list of references in your <strong>EndNote</strong> library, right-click anywhere in the column<br />
headings. Select or deselect fields listed. You might like <strong>to</strong> display the Record Number field, as this can be<br />
helpful when using <strong>EndNote</strong> with Word.<br />
Deleting references<br />
When you want <strong>to</strong> delete a reference, it can be s<strong>to</strong>red temporarily in the ‘Trash’ folder. You can drag references<br />
across <strong>to</strong> ‘Trash’ or highlight the references and go <strong>to</strong> References > Move references <strong>to</strong> Trash. To delete<br />
references permanently, go <strong>to</strong> References > Empty trash. This cannot be undone.<br />
Saving references <strong>to</strong> a Group<br />
References can be organised in<strong>to</strong> ‘groups’, displayed on the left of the Library. A ‘Group Set’ holds a number of<br />
your Groups.<br />
<br />
<br />
<br />
<strong>Go</strong> <strong>to</strong> the Groups menu (or right click on any of the groups/group sets in the left pane – e.g. My<br />
Groups) and select Create Group Set or Create Group.<br />
Give your group set/group a name.<br />
Select the references you want <strong>to</strong> move <strong>to</strong> the group, by highlighting them (use Ctrl key <strong>to</strong> select more<br />
than one) and drag them in<strong>to</strong> the group. Or go <strong>to</strong> the Groups menu and then Add references <strong>to</strong><br />
Tip:<br />
Groups are effectively a way of tagging your references. If you delete a reference from a group it will remain in<br />
<strong>All</strong> References because all you have really done is remove its ‘tag’.<br />
Searching for references within your Library<br />
Select the group you want <strong>to</strong> search ( e.g. <strong>All</strong> References )<br />
The quick search box at the <strong>to</strong>p will search all fields, including the fulltext of any pdfs attached<br />
For a detailed search click Show search panel if it is not already showing. Fill in your search criteria.<br />
To add more search lines, click on the ‘+’ box at the right.<br />
Click Search. The results shown comprise a Search results group, at the <strong>to</strong>p on the left pane. This<br />
group is temporary and contents will be replaced with your next search.<br />
Tip:<br />
The Preview tab next <strong>to</strong> the Search tab allows you <strong>to</strong> see how the reference would look in a bibliography, as<br />
determined by a selected output style. If you want <strong>to</strong> browse through your references with the abstract visible, select<br />
the Annotated output style from the drop-down box at the <strong>to</strong>p left of the screen.<br />
5
Dealing with duplicate references<br />
Ensure duplicates are removed before using <strong>EndNote</strong> with Word <strong>to</strong> cite references.<br />
<strong>EndNote</strong> will search the currently selected references for duplicates.<br />
To search the whole library, click on the <strong>All</strong> References group.<br />
<strong>Go</strong> <strong>to</strong> References and then Find duplicates.<br />
Compare duplicate references <strong>to</strong> decide which <strong>to</strong> keep. The display au<strong>to</strong>matically shows the first<br />
difference detected between the references, if any. If you select Keep this record the other record will<br />
be sent <strong>to</strong> Trash.<br />
If you want <strong>to</strong> keep both records (or decide later) click on Skip <strong>to</strong> go <strong>to</strong> the next duplicate.<br />
References skipped are held in a temporary Duplicate References group. This group is discarded<br />
when you close your library.<br />
<strong>Go</strong> <strong>to</strong> Edit > Preferences > Duplicates <strong>to</strong> view and amend criteria used for identifying duplicates (the<br />
fields compared).<br />
Finding the full text<br />
To search for the full text free online for the references which you have in your library:<br />
<br />
<br />
<br />
<br />
<br />
Highlight reference(s)<br />
Click on References > Find full text > Find full text or click on the <strong>to</strong>olbar icon<br />
A copyright warning window will be shown; click OK.<br />
The ‘Find full text’ group in the left pane indicates whether the full text has been found. If the pdf is<br />
found it will be attached.<br />
If <strong>EndNote</strong> has found the URL associated with the record, e.g. the publisher’s website, this is inserted in the URL<br />
field.<br />
Tip:<br />
If no full text has been found, it is possible <strong>to</strong> cus<strong>to</strong>mise <strong>EndNote</strong> <strong>to</strong> search for the full text of items which you have<br />
institutional access <strong>to</strong> but this is not completely reliable. Ask staff for help.<br />
Backing up your library<br />
Every <strong>EndNote</strong> library is made up of a library file (.enl) and a data folder. Your library will not work unless both<br />
are saved <strong>to</strong>gether in the same place.<br />
<br />
<br />
<br />
<br />
In <strong>EndNote</strong>, go <strong>to</strong> the File menu and select Save a copy<br />
Navigate <strong>to</strong> the location where you wish <strong>to</strong> back up your files.<br />
<strong>EndNote</strong> will au<strong>to</strong>matically append ‘Copy’ <strong>to</strong> the file name, but you can re-name the file if you wish.<br />
Click on Save<br />
6
A guide <strong>to</strong> <strong>EndNote</strong> online<br />
Institutional access <strong>to</strong> the online programme is available <strong>to</strong> you while you are registered at <strong>UCL</strong> or are a member of a<br />
<strong>UCL</strong> library. To access <strong>EndNote</strong> online for the first time, you need <strong>to</strong> create an account. If you already have a Web of<br />
Knowledge account, you should use the same login details.<br />
<strong>UCL</strong> students/staff:<br />
From within the <strong>EndNote</strong> desk<strong>to</strong>p program, click on Tools and then Sync.<br />
Follow the instructions <strong>to</strong> sign up for an account for the online version.<br />
Online access is included as part of the product purchase for two years<br />
Other library members (e.g. NHS staff )<br />
Access needs <strong>to</strong> be created whilst using a <strong>UCL</strong> walk-in computer in the library.<br />
Open the database Web of Knowledge .Click on <strong>EndNote</strong> then click on the register link on the left.<br />
You can use Endnote online from a non-<strong>UCL</strong> computer for up <strong>to</strong> twelve months, after which you should log on<br />
at a <strong>UCL</strong> computer <strong>to</strong> have the twelve month roaming access re-set.<br />
Once registered you can log on directly at http://my.endnote.com. If you leave <strong>UCL</strong> libraries, you will still be able <strong>to</strong><br />
access the ‘basic’ version of <strong>EndNote</strong> online (see p. 1 of this guide), so your references are retained. The following<br />
instructions refer <strong>to</strong> the version accessible via the <strong>UCL</strong> institutional license.<br />
My References<br />
The first tab, My References, will show your references in the centre of the screen. On the left you will see that you<br />
can create Groups <strong>to</strong> help sort your references, and that there are links <strong>to</strong> see <strong>All</strong> My References and those which are<br />
unfiled (not yet put in<strong>to</strong> Groups).<br />
Adding references <strong>to</strong> your library<br />
Where possible it is best <strong>to</strong> get your references from online sources as this helps prevent typographical errors in<br />
adding references and is usually quicker. Sometimes, however, you cannot find a reference in an online source and<br />
you will need <strong>to</strong> add it manually, e.g. for references <strong>to</strong> chapters within books, conferences, unpublished material.<br />
Adding references manually<br />
<br />
<br />
<br />
<br />
<br />
<br />
With your library open, from the Collect menu, select New Reference.<br />
Select the appropriate Reference Type from the drop down menu<br />
Enter all the information you have for the reference. The first fields displayed are the ones usually required<br />
for bibliographic styles (citations and bibliographies)<br />
If you want <strong>to</strong> add the reference <strong>to</strong> a Group at this stage (see Using Groups below), click on the grey arrow<br />
<strong>to</strong> expand the Groups option at the bot<strong>to</strong>m of the page<br />
When you have finished entering data, save the reference.<br />
To view the reference in your Library, Click on the References tab<br />
7
You can search a number of online databases from within <strong>EndNote</strong> online. This is best if you are aware of a specific<br />
reference and wish <strong>to</strong> get the details in<strong>to</strong> your library. Note that for a comprehensive search, you should always go <strong>to</strong><br />
the database itself (e.g. PubMed, EMBASE)<br />
Searching online databases from within <strong>EndNote</strong> online<br />
<br />
<br />
<br />
<br />
Click on the Collect tab and then Online Search. If you click on Select favourites you can choose which<br />
databases you would like <strong>to</strong> appear on the drop-down menu. Select a database and then click on Connect.<br />
Fill out the search criteria.<br />
Choose whether <strong>to</strong> retrieve all references or just a range. The latter is safer as retrieving an unexpectedly<br />
high number of results could take some time. Click on Search.<br />
To select items <strong>to</strong> add <strong>to</strong> your library, tick the boxes and choose which group <strong>to</strong> add them <strong>to</strong> from the dropdown<br />
menu. A tick will appear in the copied column <strong>to</strong> indicate items which have been added <strong>to</strong> your library.<br />
Note that if you click away from the online search results page, the search results are not remembered.<br />
Using Groups<br />
Once you begin <strong>to</strong> add references <strong>to</strong> your Library, you might want <strong>to</strong> organise them in<strong>to</strong> groups. On the left of the<br />
Library, there is a pane <strong>to</strong> display Groups. By default you will have an <strong>All</strong> References group, an Unfiled Group for<br />
references which have not been put in<strong>to</strong> a Group, and a Trash group, where deleted references are held before they<br />
are permanently removed. The Quick List is a ‘clipboard’ area where you can collect <strong>to</strong>gether references, e.g. from<br />
different groups (see below) for the duration of your <strong>EndNote</strong> online session. Once you log out, the quick list is cleared.<br />
To create and manage a group<br />
<strong>Go</strong> <strong>to</strong> the Organise tab and Manage My Groups. Click New Group. Give your group a name and click OK.<br />
Click back on the My References tab, and <strong>to</strong> add references <strong>to</strong> your group, click on <strong>All</strong> References. Select<br />
the references you want <strong>to</strong> move and choose the group from the Add <strong>to</strong> Group drop-down menu.<br />
To view the references in a group, select that group from the list on the left. You can then also delete<br />
references from the group showing by selecting the reference and clicking Remove from Group<br />
If another <strong>EndNote</strong> user chooses <strong>to</strong> share their group with you, this will be shown under the Organise tab,<br />
under the adjacent tab, others’ groups. You will also see the group listed in the left pane in My References.<br />
Groups are effectively a way of tagging your references. If you delete a reference from a group it will remain in <strong>All</strong><br />
References because all you have really done is remove its ‘tag’.<br />
Use the options at the <strong>to</strong>p of the displayed list of references <strong>to</strong> move references between groups, delete or add <strong>to</strong> the<br />
quick list. To search for references in your Library, use the Quicksearch box at the <strong>to</strong>p left of the screen and select a<br />
group <strong>to</strong> search or <strong>All</strong> References. Note if you choose <strong>All</strong> References this won’t include groups shared with you by<br />
other <strong>EndNote</strong> users.<br />
8
Collecting references from the web – using the bookmarklet<br />
When looking at an online record, it is possible <strong>to</strong> ‘capture’ the references and add them directly <strong>to</strong> <strong>EndNote</strong><br />
online. You need <strong>to</strong> install a ‘bookmarklet’ which will allow you <strong>to</strong> do so.<br />
Collecting references from the web – using the bookmarklet<br />
Click on the Options tab and Download Installers, and follow instructions for the ‘Web capture’ <strong>to</strong>ol. This<br />
can be positioned in your Favourites bar of your browser.<br />
Run your search in the database of your choice as usual (e.g. PubMed, Cinahl, PsycINFO). When you find a<br />
result you would like <strong>to</strong> keep, navigate <strong>to</strong> the details screen for that reference, then click on the <strong>EndNote</strong><br />
online Capture but<strong>to</strong>n in your favourites bar.<br />
A new window opens, giving you the opportunity <strong>to</strong> add or edit bibliographic details and <strong>to</strong> assign the<br />
reference <strong>to</strong> one of your Groups. Make sure <strong>EndNote</strong> online is selected, then click on Save <strong>to</strong>.<br />
Check the reference in your library <strong>to</strong> make sure all the bibliographic fields have been successfully captured.<br />
In many cases, you will find that the bookmarklet <strong>to</strong>ol is not the best way <strong>to</strong> capture references; it works better for<br />
some databases than others. You might have better results using the online search within <strong>EndNote</strong> online (above) or<br />
exporting bibliographic details from online databases (described below).<br />
Collecting references from online databases<br />
Some databases, e.g. Web of Knowledge, give you the option <strong>to</strong> export selected references directly in<strong>to</strong> <strong>EndNote</strong><br />
online:<br />
Direct export from Explore<br />
Click on the title of the item <strong>to</strong> see the<br />
details page<br />
From the Send <strong>to</strong> link, click on<br />
<strong>EndNote</strong>Web<br />
Or<br />
Click on the stars <strong>to</strong> select items <strong>to</strong> add<br />
<strong>to</strong> your e-shelf. Then open your e-shelf<br />
Select items by ticking the boxes and<br />
choose ‘Push <strong>to</strong> <strong>EndNote</strong> Web’ from the<br />
drop-down box at the <strong>to</strong>p. Click <strong>Go</strong>.<br />
Then<br />
Log in <strong>to</strong> <strong>EndNote</strong> if necessary<br />
The reference(s) will au<strong>to</strong>matically be<br />
added <strong>to</strong> your Unfiled group.<br />
Direct export from Web of Knowledge<br />
From your Web of Knowledge search results, tick the<br />
boxes for the items you want <strong>to</strong> export <strong>to</strong> <strong>EndNote</strong><br />
online.<br />
Click on the blue text from the ‘Send<br />
<strong>to</strong>’ menu <strong>to</strong>p of the screen<br />
The references will be sent <strong>to</strong> your <strong>EndNote</strong> online<br />
Library. Click on <strong>EndNote</strong> at the <strong>to</strong>p of the Web of<br />
Knowledge screen <strong>to</strong> go directly <strong>to</strong> <strong>EndNote</strong> online.<br />
Your references will be in the unfiled group; from the ‘sort<br />
by’ drop down menu you can sort the group by order<br />
they were added <strong>to</strong> your Library <strong>to</strong> see the most recently<br />
imported items.<br />
When you are logged in<strong>to</strong> Web of Knowledge, search<br />
results which are in your <strong>EndNote</strong> online Library will have<br />
an icon displayed<br />
9
If you are using a computer without <strong>EndNote</strong> desk<strong>to</strong>p installed, for some databases a direct export <strong>to</strong> <strong>EndNote</strong><br />
function will push the references in<strong>to</strong> <strong>EndNote</strong> online. Always check the references carefully.<br />
If there is no direct export option you need <strong>to</strong> create a text file <strong>to</strong> import the references in<strong>to</strong> <strong>EndNote</strong> online. This<br />
is a two-stage process; please see tables below for specific examples.<br />
Step 1 – create the file<br />
Step 2 – import the file<br />
In most databases you need <strong>to</strong> mark or<br />
select the references you wish <strong>to</strong> export,<br />
then save the resulting file.<br />
<br />
<br />
<br />
<br />
<strong>Go</strong> <strong>to</strong> <strong>EndNote</strong> online and from the Collect tab, click on Import<br />
references<br />
Click on Browse <strong>to</strong> locate your saved file, select it and click on Open<br />
From the Import Option menu, select the filter required<br />
Select the Group you want <strong>to</strong> import references <strong>to</strong>, then select<br />
Import.<br />
Step 1 – database used<br />
Import option (filter) required<br />
Cochrane Library<br />
Mark the references you wish <strong>to</strong> save and click on Export<br />
Selected.<br />
Choose whether <strong>to</strong> save just the citation or the citation and<br />
abstract, and choose the PC file type if using a PC.<br />
Click on Export Citation. Save the results as a text file (.txt).<br />
<br />
<br />
Follow Step 2 above.<br />
Import Option: Cochrane Library (Wiley).<br />
OvidSP Databases (includes AMED, EMBASE, HMIC,<br />
MEDLINE, PsycINFO)<br />
Mark the references you wish <strong>to</strong> save and click Export at the<br />
<strong>to</strong>p of the screen.<br />
Select Reprint/Medlars from the drop-down Export Citation<br />
List menu.<br />
Choose which fields you want <strong>to</strong> export and then click on<br />
Export Citation(s). Save the file.<br />
Follow Step 2 above.<br />
Import Option: use the relevant Import Option<br />
for the database you are searching, e.g.<br />
Embase (OvidSP).<br />
Check imported records carefully, the data may<br />
be missing or misplaced.<br />
SCOPUS<br />
Tick the boxes next <strong>to</strong> the articles you want <strong>to</strong> export and<br />
click Export from the menu near the <strong>to</strong>p of the screen.<br />
Select RIS format as the export format. Choose which fields<br />
<strong>to</strong> output, and click on Export. Save the file<br />
<br />
<br />
Follow Step 2 above.<br />
Import Option: Scopus.<br />
SFX<br />
<br />
At the bot<strong>to</strong>m of the SFX window, click on <strong>Go</strong> next <strong>to</strong><br />
<br />
<br />
Follow Step 2 above.<br />
Import Option: Reference Manager (RIS).<br />
10
Download Citation <strong>to</strong> Reference Manager/ <strong>EndNote</strong><br />
Save the file<br />
<br />
Check imported records carefully, some<br />
references do not export correctly from SFX.<br />
Be careful <strong>to</strong> check records imported from online databases. Sometimes data may be missing or misplaced.<br />
This must be amended manually.<br />
If you are using many sources <strong>to</strong> obtain references, you should make sure that duplicates are discarded. Check<br />
for duplicates by clicking the Organize tab, then clicking Find Duplicates<br />
Sharing references with colleagues<br />
It is possible <strong>to</strong> share your ‘groups’ of references with any other <strong>EndNote</strong> online user, so that you all have<br />
access <strong>to</strong> the same set of references for collaborative working.<br />
Sharing references in a Group<br />
<strong>Go</strong> <strong>to</strong> the Organise tab and Manage my<br />
Groups. From this screen you can choose <strong>to</strong><br />
share references you file in<strong>to</strong> any of your<br />
groups with other <strong>EndNote</strong> online users.<br />
Tick on the box in the ‘Share’ column for that<br />
group<br />
Click on Manage Sharing. You can then invite<br />
others by email, and choose whether <strong>to</strong> give<br />
them read only or editing rights <strong>to</strong> references<br />
in the Group.<br />
File and figure attachments cannot be shared<br />
Groups shared by others<br />
You might also be invited <strong>to</strong> share references<br />
in another <strong>EndNote</strong> online user’s Group. In<br />
this case such groups are listed separately in<br />
your <strong>EndNote</strong> online library as ‘Groups<br />
shared by others’.<br />
Click on ‘Others’ Groups’ under the Organize<br />
tab <strong>to</strong>:<br />
choose <strong>to</strong> view or hide groups shared with you<br />
check who the group owner is<br />
check your level of access (read only or readwrite)<br />
as indicated in the Access column.<br />
Using <strong>EndNote</strong> online with <strong>EndNote</strong> desk<strong>to</strong>p<br />
Please note: The following only applies <strong>to</strong> users who also have access <strong>to</strong> <strong>EndNote</strong> desk<strong>to</strong>p.<br />
If you want <strong>to</strong> take advantage of the full features of <strong>EndNote</strong> desk<strong>to</strong>p, particularly the Cite While you Write <strong>to</strong>ols, you<br />
can transfer references from <strong>EndNote</strong> online <strong>to</strong> <strong>EndNote</strong> desk<strong>to</strong>p and vice versa.<br />
For <strong>EndNote</strong> X6 and X7 (current version)<br />
You can au<strong>to</strong>matically synchronise your <strong>EndNote</strong> desk<strong>to</strong>p and <strong>EndNote</strong> online libraries<br />
<br />
<br />
<br />
<br />
<br />
In <strong>EndNote</strong> desk<strong>to</strong>p, go <strong>to</strong> Tools then Sync or click the Sync but<strong>to</strong>n in the Library <strong>to</strong>olbar.<br />
Enter your e-mail address.<br />
Enter your <strong>EndNote</strong> online password.<br />
Press OK <strong>to</strong> initiate the Sync process.<br />
File and figure attachments are transferred<br />
11
Using Cite While you Write<br />
Word 2007 or 2010 (Windows)<br />
Both <strong>EndNote</strong> desk<strong>to</strong>p and <strong>EndNote</strong> online can work with Word <strong>to</strong> create bibliographies or insert references<br />
from your library in a Word document. You can then format the document in<strong>to</strong> a citation style of your choice,<br />
e.g. Harvard, Vancouver. This facility is called Cite While You Write.<br />
If you are using a computer with <strong>EndNote</strong> desk<strong>to</strong>p installed, the Cite While you Write <strong>to</strong>ols for both <strong>EndNote</strong><br />
and <strong>EndNote</strong> online should be included in Word as part of the installation. If you are using a computer without<br />
<strong>EndNote</strong> desk<strong>to</strong>p installed, you can download the <strong>to</strong>ols for <strong>EndNote</strong> online only, but you will need administrative<br />
rights <strong>to</strong> do so. In Endnote online, go <strong>to</strong> Options and download Installers and follow instructions.<br />
In Word, if the <strong>to</strong>olbar does not display, you need <strong>to</strong> activate it from the Options .<br />
<br />
<br />
<br />
<br />
In Word, Click on File then Options (located under Help) then Add-ins<br />
At the bot<strong>to</strong>m of the screen where it says Manage, check that COM Add-Ins is displayed then click<br />
<strong>Go</strong><br />
Tick the box for the Cite While You Write add-in and click OK<br />
If the <strong>EndNote</strong> <strong>to</strong>olbar does not appear, close Word and re-open the program<br />
Tip:<br />
If you have <strong>EndNote</strong> desk<strong>to</strong>p, you can still choose <strong>to</strong> use the <strong>to</strong>ols with <strong>EndNote</strong> online if necessary.<br />
Within Word click on the <strong>EndNote</strong> X7 tab and then Preferences.<br />
Click on the Application tab and select <strong>EndNote</strong> online from the drop-down menu.<br />
You will need <strong>to</strong> fill in your <strong>EndNote</strong> online account details so that Word can communicate with your<br />
<strong>EndNote</strong> online library.<br />
Inserting citations in Word<br />
<br />
<br />
<br />
<br />
Place your cursor in the place where you wish <strong>to</strong> insert a citation in your Word document<br />
Click near the bot<strong>to</strong>m of the Insert Citation icon and then select Find Citation (In <strong>EndNote</strong> online,<br />
click on Find Citations)<br />
Enter a search term <strong>to</strong> locate your reference, e.g. author's surname or title keyword<br />
Click on Insert. Your reference is entered as a citation in your document, <strong>to</strong>gether with an<br />
au<strong>to</strong>matically formatted bibliography / reference list<br />
In <strong>EndNote</strong> desk<strong>to</strong>p, you can also select references from your Library first:<br />
<strong>Go</strong> <strong>to</strong> <strong>EndNote</strong>. In your library highlight the reference(s) you wish <strong>to</strong> cite (hold the Ctrl key for<br />
selecting multiple references)<br />
<strong>Go</strong> <strong>to</strong> your Word document. Place the cursor where you wish <strong>to</strong> insert the citation<br />
12
Click near the bot<strong>to</strong>m of the Insert citation icon on the <strong>to</strong>olbar then select Insert selected<br />
citation(s)<br />
Tip:<br />
Keeping track of references used in your work<br />
As you begin <strong>to</strong> insert citations, <strong>EndNote</strong> desk<strong>to</strong>p au<strong>to</strong>matically creates a new group containing those<br />
references. This group has the same name as your Word document. This is a useful way <strong>to</strong> see which of the<br />
references in your Library you have used in your work.<br />
When you close the program(s) and re-open them, the group is not au<strong>to</strong>matically displayed in <strong>EndNote</strong>.<br />
Open your Word document and from the <strong>EndNote</strong> <strong>to</strong>olbar select Update Citations and bibliography, <strong>to</strong> see<br />
the group re-appear in <strong>EndNote</strong>.<br />
Formatting citations and bibliographies<br />
<strong>EndNote</strong> au<strong>to</strong>matically formats inserted citations and creates bibliographies in the chosen output style.<br />
<br />
<br />
<br />
In Word, click on the drop down menu next <strong>to</strong> Style: on the <strong>EndNote</strong> tab<br />
Click on Select another style but<strong>to</strong>n <strong>to</strong> view output styles. Click on the column headers <strong>to</strong> sort the lists<br />
by name or category.<br />
Click on OK. Your document will be reformatted <strong>to</strong> the style of your choice.<br />
Tip:<br />
Some output styles use full journal titles, some use abbreviated. If your journal titles don’t display as you<br />
expect, contact a member of staff for help.<br />
You might want <strong>to</strong> temporarily un-format your citation – for example, if you are using a numbered style and you<br />
want <strong>to</strong> check which reference the number refers <strong>to</strong>. To unformat citations<br />
Click on Convert Citations and Bibliography and then Convert <strong>to</strong> Unformatted Citations<br />
To re-format your document, click on Update Citations and Bibliography<br />
Editing citations<br />
Word generates code that is hidden in your Word document <strong>to</strong> enable it <strong>to</strong> communicate with <strong>EndNote</strong>. When<br />
you click on an in-text citation or your bibliography, the background will go grey, indicating that code is present.<br />
Do not type over or delete and part of your document with code, as this will disable communication with<br />
<strong>EndNote</strong>. Instead, use the Edit Citation command.<br />
In your Word document select an in-text citation and the background will go grey. Click on Edit &<br />
Manage Citation(s)<br />
From the Edit Citation screen, you can change the order of inserted citations (where multiple citations<br />
are inserted at the same point) add a prefix, suffix or page numbers <strong>to</strong> a citation; exclude the author<br />
name or year if desired, etc.<br />
13
Creating an independent bibliography<br />
To create a quick list of references from your library<br />
<strong>EndNote</strong> desk<strong>to</strong>p:<br />
Select the required output style from the drop down menu at the <strong>to</strong>p of the screen<br />
Highlight the references you wish <strong>to</strong> include (<strong>to</strong> choose all go <strong>to</strong> Edit – Select <strong>All</strong>)<br />
Right click or go <strong>to</strong> Edit and click on Copy Formatted<br />
In a Word document, click on Paste<br />
Your reference list will be displayed in the Output style selected in <strong>EndNote</strong><br />
Endnote online:<br />
If the references you wish <strong>to</strong> include are not all in the same group, create a quick list of the references you<br />
would like - from <strong>All</strong> References, select boxes and click ‘Copy <strong>to</strong> quick list’<br />
Click on the Format tab, and then Bibliography<br />
Select the references you wish <strong>to</strong> include, the bibliographic style and the file type from the drop-down options<br />
Choose <strong>to</strong> save, print or email the bibliography created.<br />
Preparing a paper for submission <strong>to</strong> publishers<br />
The hidden code which enables Word and Endnote <strong>to</strong> communicate makes the Word file size a lot larger and<br />
many publishers request that you remove this code when you submit your paper for publication. You should<br />
only do this when you are sure you have finished editing your document.<br />
Save your Word document (e.g. <strong>to</strong> your desk<strong>to</strong>p or your own file area).<br />
Click on Convert Citations and Bibliography and then Convert <strong>to</strong> Plain Text.<br />
This creates a copy of your manuscript, with the citations and bibliography inserted without the code (i.e. the<br />
links <strong>to</strong> <strong>EndNote</strong>.)<br />
Save this copy <strong>to</strong> your own drive. Do not delete your original document with the field codes retained!<br />
To edit your references once the code has been removed, you must edit the original copy of the manuscript and<br />
then remove the code again.<br />
Further information and support<br />
Help for <strong>EndNote</strong> desk<strong>to</strong>p is available at the <strong>to</strong>p of the screen<br />
For <strong>EndNote</strong> online, a Getting <strong>Start</strong>ed Guide and Help are available within the programme:<br />
From the My References tab, click on the Show Getting <strong>Start</strong>ed Guide link on the <strong>to</strong>p right<br />
The Help link is at the far <strong>to</strong>p right of the screen<br />
You can search the <strong>EndNote</strong> ‘Knowledge base’ at http://endnote.com/support/search-knowledgebase<br />
14