bx_digital V2 Manual.pdf
bx_digital V2 Manual.pdf
bx_digital V2 Manual.pdf

You also want an ePaper? Increase the reach of your titles
YUMPU automatically turns print PDFs into web optimized ePapers that Google loves.
x_<strong>digital</strong> <strong>V2</strong> manual
x_<strong>digital</strong> <strong>V2</strong> manual<br />
Index<br />
1. What is <strong>bx</strong>_<strong>digital</strong> <strong>V2</strong>?3<br />
2. What is M/S technology?3<br />
3. What is M/S good for in Mastering?4<br />
4. But what´s so new about <strong>V2</strong> then?4<br />
5. Features of the <strong>bx</strong>_<strong>digital</strong> <strong>V2</strong>:4<br />
6. How do I get started with <strong>bx</strong>_<strong>digital</strong> <strong>V2</strong>5<br />
7. Overview and Details7<br />
7.1. EQ-Section M (Mono) or L (Left), depending on the selected mode7<br />
7.2. New “SixPack” Master Section 7<br />
7.3. The Brainworx logos in the GUI8<br />
7.4. The Modus knob8<br />
7.5. Auto Listen, Solo, Auto Solo, Channel swap, Linked features, EQ off 8<br />
7.10. & 7.11. Bass Shift10<br />
7.12. & 7.13. Presence Shift11<br />
7.14. & 7.15. De-Esser L/R or M/S11<br />
7.16. Mono Maker11<br />
7.17. & 7.18 EQ-Panels12<br />
Mouse Wheel - Control:12<br />
7.19. LEDs/multiple levels (L/R & M/S)12<br />
7.20. Correlation & Balance Meters13<br />
7.21. Bypass13<br />
7.22. Undo/Redo (32 steps)13<br />
7.23. Settings (A/B/C/D)13<br />
7.24. <strong>Manual</strong> & Help13<br />
8. Troubleshooting14<br />
7.6. EQ-Section R (Right) or S (Stereo/S-signal)10<br />
7.7. Window switch 10<br />
7.8. & 7.9. LEDs for the L/R or M/S sections10<br />
2
x_<strong>digital</strong> <strong>V2</strong> manual<br />
1. What is <strong>bx</strong>_<strong>digital</strong> <strong>V2</strong>?<br />
<strong>bx</strong>_<strong>digital</strong> <strong>V2</strong> is an 11-band stereo EQ and stereo<br />
De-Esser that works in several modes, among them 2<br />
sophisticated M/S modes for mastering and microphone recordings.<br />
It is based upon the “modern classic” <strong>bx</strong>_<strong>digital</strong> V1 and the analog <strong>bx</strong>1 EQ. We<br />
developed this hi-end analogue EQ 2006/2007 and we offered an emulation of<br />
this EQ ever since.<br />
The hardware <strong>bx</strong>1 is our „MODUS EQ“, an analogue high class equalizer that<br />
runs in four different modes, giving you up to three channels of extremely<br />
musical filters:<br />
• a conventional L(eft) and R(ight) stereo mode for any stereo/dual mono<br />
applications.<br />
• a stereo mode with a built-in M/S-matrix, mainly used for stereo mastering<br />
purposes.<br />
• a 3-channel mode (one stereo PLUS one mono channel) for surround<br />
mastering & recording studios purposes.<br />
• an M/S-Recording-mode that will use two individual microphone-signals<br />
(M&S-signals) fed into the <strong>bx</strong>1 to create a highly mono compatible stereo<br />
signal, mainly used for orchestral recordings, choirs or for recording<br />
accoustic instruments in general.<br />
The hardware <strong>bx</strong>2 is an „Image Shifter“ and De-Esser that can work in M/S<br />
mode as well and therefore is the perfect extension to our <strong>bx</strong>1 when it comes<br />
to mastering stereo signals. It also includes a „Mono-Maker“ that allows you to<br />
mono the bass frequencies of your mix from 20 Hz up to 22 kHz to make sure<br />
your bass-section is „tight“ and compatible for vinyl-pressings.<br />
The <strong>bx</strong>_<strong>digital</strong> V1 was an exact emulation of both units´ features, our stateof-the-art<br />
equalizer <strong>bx</strong>1 and its expansion unit <strong>bx</strong>2, with only one mode of<br />
the hardware (the 3-channels-mode) not working (for audio host standard<br />
reasons). Together these two units are the perfect choice if you are looking<br />
for an extremely musical and tasty way of eq-ing and de-essing stereo signals<br />
(mixes), most likely in a mastering process, or if you are into mixing and sounddesign<br />
as well as recording with M/S-microphone-technique.<br />
<strong>bx</strong>_<strong>digital</strong> <strong>V2</strong> now offers additional features that neither the original <strong>bx</strong>1 analog<br />
EQ nor the v1 plug-in offered.<br />
tt<br />
Details: see chapter 5.<br />
2. What is M/S technology?<br />
Most engineers who are recording music know about the M/S microphone<br />
technique (two different microphones for stereo recordings - an OMNI or<br />
CARDIOID microphone for the M (mid) signal and a “FIGURE-OF-8 microphone”<br />
for the S (side) signal).<br />
Recording a signal with M/S microphone technique means to create a stereo<br />
(L/R) signal by mixing the M and the S signals together in a special way that<br />
will result in a very mono-compatible stereo signal. To record in M/S you<br />
have to feed the M-signal to the Left and Right channel of your mix and the<br />
S-Signal will be fed phase-correct to the Left channel and phase-reversed to<br />
the Right channel. This means you will have to split the S-signal and use a total<br />
of 3 channels for only 2 microphones that will be mixed together to create a<br />
conventional stereo-signal. Quite confusing?<br />
Well, <strong>bx</strong>_<strong>digital</strong> <strong>V2</strong> does all that work for you, just feed it with the separate<br />
M- and S- microphone signals and switch it to M/S Recording…<br />
For additional details about this technique you may have a look into any decent<br />
audio book. Please do so if you want to learn more about this method to create<br />
very mono-compatible stereo-signals, e.g. when recording classical music,<br />
drums, choirs or acoustic instruments in general.<br />
3
x_<strong>digital</strong> <strong>V2</strong> manual<br />
3. What is M/S good for in Mastering?<br />
Well, it may sound simple, but the <strong>bx</strong>_<strong>digital</strong> <strong>V2</strong> has a built-in M/S matrix that<br />
will separate any stereo signal into its mono sum and the stereo difference<br />
signals. Thus you are able to separately control these two signals which can be<br />
very useful when you work on a stereo mix that has certain „problems“ - or if<br />
you simply want to enhance certain elements in the mix.<br />
Ever tried to cut high frequencies of a mix to reduce the „essing“ of the lead<br />
vocals and at the same time boost high frequencies of your harmony instruments<br />
(guitars, keyboards, pianos, etc… most likely recorded or mixed in<br />
stereo)?<br />
With <strong>bx</strong>_<strong>digital</strong> <strong>V2</strong> and its M/S modes you can do exactly that.<br />
4. But what´s so new about <strong>V2</strong> then?<br />
First of all, all the great things about <strong>bx</strong>_<strong>digital</strong> are still in <strong>V2</strong>, we have not<br />
sorted out anything. M/S modes, Solo S and Solo M etc. are still on board.<br />
Then we have added features from both, the TDM version of <strong>bx</strong>_<strong>digital</strong> (7-bands,<br />
Auto Solo Mode, etc.), and from <strong>bx</strong>_hybrid as well (Auto Listen Mode).<br />
Add all new and improved audio filters (EQ bands) and you have a GREAT stereo<br />
EQ.<br />
EQ-ing in M/S will cause “non-linear” phases, but most<br />
experienced mastering engineers use this technique if a mix needs it, and if<br />
used with caution (a great advice on most things that are fun…) M/S processing<br />
can be a very creative and powerful weapon.<br />
Since <strong>bx</strong>_<strong>digital</strong> <strong>V2</strong> also has a “regular L/R mode”:<br />
You don´t have to do all this all the time… but you can… :-)<br />
Also, while there were quite some M/S - tools released after <strong>bx</strong>_<strong>digital</strong> V1 first<br />
came out, one original BX feature is the possibility to SOLO your M or S - signal,<br />
which means you can listen to ONLY the M or S signal of your mix and work on<br />
these two signals individually – phase corrected automatically.<br />
“Why is this so unusual?” you might ask now. Well, although the S signal is<br />
included in a regular L/R stereo signal, it is not in phase on both channels, so<br />
we had to come up with an easy way to correct that each time you want to<br />
listen to your S-signal solo…<br />
Start by playing some stereo mixes through your <strong>bx</strong>_<strong>digital</strong> <strong>V2</strong> plug-in and<br />
push the solo button of the S-section… you will be amazed of what you will<br />
hear… you will be able to correct stuff you have never even heard before in your<br />
mixes!<br />
Then dig some deeper, try the Auto Solo and Auto Listen Modes, the Shifter<br />
EQs, etc. You will quickly get the concept this way.<br />
5. Features of the <strong>bx</strong>_<strong>digital</strong> <strong>V2</strong>:<br />
<strong>bx</strong>1:<br />
• 7-band mastering quality EQ with Shelving, Bell and Pass-Filters.<br />
• “Auto Solo” and “Auto Listen” Modes<br />
• Unique and new “SixPack” master section: (6 knobs)<br />
• Input Gain and Balance features to adjust incoming levels and to balance<br />
out mixes that are not 100% centered.<br />
• Individual PAN for M and S signals (in all modes) to control the output<br />
balance - with more precision than ever.<br />
• Stereo Width Control for your mix. Make your mix wider<br />
without an effects processor by increasing the S-Signal –<br />
in ALL modes.<br />
• Filter section includes new Lo-Shelving, Hi-Shelving, full-parametric Bell type,<br />
4
x_<strong>digital</strong> <strong>V2</strong> manual<br />
Lo-Pass & Hi-Pass filters. All 7 bands have been adjusted in frequency-range<br />
and type-selection by international mastering engineers to help you get<br />
professional results for your mixes instantly.<br />
• Output Gain to adjust overall levels.<br />
• New mouse wheel control (place the cursor above any knob and use the<br />
mouse wheel…)<br />
<strong>bx</strong>2:<br />
• 4 more EQ bands (in the Shifter EQs), a dynamic EQ/De-Esser & more.<br />
• Image Shifters for your bass frequencies and high frequencies. Tune your<br />
lo-end and hi-end of your mix for a „bigger“ overall sound with „more air“<br />
at the same time and control potential harsh frequencies in your mixes.<br />
• De-Esser/dynamic EQs. Solo buttons let you listen to what you cut away<br />
separated from the mix.<br />
• Mono-Maker: Adjust the MonoMaker from 20 Hz to 22 kHz and your stereo<br />
mix will be Mono up to that frequency by cutting away the low-end of the<br />
stereo-difference of your stereo-mix - and adjusting the potential loss of<br />
bass frequencies in the Mono-Sum automatically! Ever had problems to<br />
cut your electronic music mixes with synthesizer basses to vinyl? Do you<br />
want to make sure your bass sounds are tight on disco speakers that<br />
might be spread all over the place? Try the Mono-Maker.<br />
• the <strong>bx</strong>2 works in M/S - modes just like the <strong>bx</strong>1, so you can give your mixes<br />
that extra lo-end on guitars and synths that the pros have without getting<br />
rumbling on your bass drums, basses, etc., or de-ess your voice very tight<br />
without making your whole mix dull, etc.<br />
EQ-Panel:<br />
• shows up to 11 bands of EQ for M and S separately (for all <strong>bx</strong>1 and <strong>bx</strong>2 EQ<br />
bands)<br />
6. How do I get started with <strong>bx</strong>_<strong>digital</strong> <strong>V2</strong><br />
in a typical mastering or recording-session?<br />
Mastering music is all about hearing objectively and enhancing musical performances<br />
if possible… but it is (often enough) about correcting mistakes that<br />
have been made in a mix session. This sounds basic, but we mean it very literally!<br />
We assume that most if not all people who have purchased <strong>bx</strong>_<strong>digital</strong> <strong>V2</strong> are<br />
familiar with using a standard L/R-EQ, so we will skip the total basics of “how to<br />
use an eq” and go on with less common-known EQ-techniques…<br />
In fact if you have a more or less “perfect” stereo-signal to work on (e.g. a very<br />
good mix) it might be a good idea not to change it at all or at least not very<br />
much, so you might be ok with using the “regular” L/R-mode of the <strong>bx</strong>_<strong>digital</strong><br />
and use the EQs rather carefully.<br />
But, let´s assume we have an average stereo-signal (e.g. a mix) with some<br />
problems that we want to correct. – It´s just… how can you correct problems<br />
you can´t even hear exactly?<br />
That´s over now… in the M/S-mastering-mode <strong>bx</strong>_<strong>digital</strong> <strong>V2</strong> can transform your<br />
stereo mix into 2 easy-to-adjust mono sums (M & S, or “Sum & Difference”),<br />
and the <strong>bx</strong>1 lets you hear both sections perfectly in-phase. This way you can<br />
hear any problem of your mix very obviously and also make any improvements<br />
to your mix simple but precisely.<br />
We propose you start working with <strong>bx</strong>_<strong>digital</strong> <strong>V2</strong> in M/S-Mastering mode<br />
(that´s the default setting) by simply listening to some of the mixes that you<br />
know very well or to some of your favorite CD-tracks.<br />
While you do so press the solo - buttons of the M and S - sections alternately<br />
to get used to how your mixes sound separated into these 2 mono sums. You<br />
will very fast be able to hear stuff inside your music that you might want to<br />
correct / adjust, so why don´t you just do it?<br />
5
x_<strong>digital</strong> <strong>V2</strong> manual<br />
Start EQ-ing the M- and S-section individually while Solo-ing the respective<br />
section - and don´t forget to switch the Solo-buttons off from time to time<br />
and listen to your complete mix in “full stereo sound” again. This way you get<br />
a feel for how your adjustments on the individual sections effect the whole<br />
stereo mix! After you have used a few EQ-bands on your mix compare it to your<br />
original mix by using the Bypass switch of the whole unit and/or of individual EQ<br />
bands (a new feature in <strong>V2</strong>).<br />
Mastering in M/S takes a little time to get used to - it´s just really different<br />
EQ-ing 2 separate mono-sums than EQ-ing conventional L&R-signals. But,<br />
it´s a very musical way of working, and there IS a reason why some of the<br />
top mastering studios in the world have been working like this for ages with<br />
custom-made M/S-boards - without really telling anybody…<br />
drums, snares, lead vocals, bass, etc.) in your mix disappear completely.<br />
If that´s the case you can be sure that your mix IS balanced!<br />
Make your mix wider than it originally was by increasing the Stereo Width<br />
without losing the center of your recordings! You will not loose bass drum<br />
power or vocals by making your mix wider this way… and it will not sound<br />
different played back in mono at all.<br />
Otherwise, if you have a drum-loop that was recorded with too much ambience<br />
sounds / reverb, just get rid of it by decreasing the Stereo Width (in all modes!).<br />
M/S-Mastering might just be the key for your music to sound as big - yet still<br />
open and clear - as productions often referred to as being „BIG“… :-)<br />
Many people who have used the M/S-modes for the first time told us that<br />
they had the impression of a “3D-like” depth in their mixes after processing the<br />
M- and the S-Signals individually. While using the M/S-technique for mastering<br />
does affect your phases in the stereo-signal we do not see this as a problem.<br />
In M/S modes altering phases is done intentionally. Of course, though, the<br />
M/S mastering mode works best if you want to correct small mistakes in your<br />
mixes… for adding or cutting away big amount of general bass or treble signals<br />
you might be better off working in L/R-mode…<br />
tt<br />
TIP: if needed simply use two instances of <strong>bx</strong>_<strong>digital</strong> on your master bus.<br />
one in L/R mode, the second in M/S mode.<br />
Once you are used to the basics of M/S you might easily get into more detailed<br />
functions… try balancing out a mix that is not centered 100% (most mixes<br />
that come from an analogue desk with inserted compressors, EQs, in the<br />
main stereo insert, etc. are not balanced 100%!) by Solo-ing the S-section and<br />
adjusting the Balance Gain until all the things that should be centered (like bass<br />
6
x_<strong>digital</strong> <strong>V2</strong> manual<br />
7. Overview and Details<br />
• LF: switchable from shelving (1st order) to peak via Q-pot<br />
• LMF: peak<br />
• MF: peak<br />
• HMF: peak<br />
• HF: switchable from shelving (1st order) to peak via Q-pot<br />
• Lo-Pass: 1st order<br />
• Hi-Pass: 1st order<br />
Please notice that each EQ band can be activated and bypassed (on/off) individually<br />
by clicking the labeled buttons.<br />
A bright name indicates ON.<br />
= off = on<br />
7.2. New “SixPack” Master Section<br />
6 knobs to control general settings,<br />
independent of which mode is being used.<br />
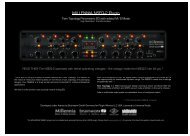
<strong>bx</strong>_<strong>digital</strong> <strong>V2</strong> - Screenshot<br />
7.1. EQ-Section M (Mono) or L (Left), depending on the selected mode<br />
7 Bands, 5 of them with<br />
G (Gain),<br />
f (Frequency) and<br />
Q (Quality) pots,<br />
plus Hi-Pass and Lo-Pass filters<br />
From Left to Right (top row):<br />
• Gain In: Input Gain adjustment for both channels (L/R or M/S).<br />
• Gain Out: Output Gain adjustment for Master Out (L/R).<br />
• Stereo Width: make your mix wider by increasing the Stereo Width<br />
(=boosting the S-signal) or decrease the Stereo Width to reduce ambience<br />
etc. (=reduce the S-signal)<br />
From Left to Right (bottom row):<br />
• Bal. L/R: “tilt” the image of your stereo sound by changing the balance of<br />
Left and Right signals<br />
7
x_<strong>digital</strong> <strong>V2</strong> manual<br />
• Pan M: with this unique and new feature you can center un-centered<br />
mixes, or create great effects by panning the “center only” (drums, vocals,<br />
bass, etc.) of your recording to the sides!<br />
tt<br />
Mixes from analogue consoles often have the problem that the “theoretical<br />
center” (these are the elements that should be in the center, like<br />
lead vocals, snares, etc.) are slightly off-axis because of analogue inserts<br />
(compressors, EQs, etc.) in the master sum. With the Pan M you can<br />
easily correct this, without effecting the stereo information (guitars, keys,<br />
reverbs, etc.) too much, and without tilting the whole stereo image (see<br />
Bal. L/R)<br />
• Pan S: tilt the stereo information without changing the center section<br />
of your mix too radically. Mixes with uneven stereo information (doubled<br />
guitars that are not perfectly centered for example) can easily be adjusted.<br />
tt<br />
The results of Pan S are much more subtle than Pan M, and we do not<br />
recommend doing drastic changes here.<br />
7.3. The Brainworx logos in the GUI<br />
7.4. The Modus knob<br />
Click them to get credit info, release<br />
versions, etc.<br />
The Modus knob lets you select between<br />
the 3 different “modes” the <strong>bx</strong>_<strong>digital</strong> plug-in<br />
can work in:<br />
• M/S-MASTERING-mode: for individual processing of the mono-sum and<br />
the stereo-difference of any regular Stereo-Signal.<br />
• L/R-mode: for conventional L/R-processing, linked or un-linked.<br />
• M/S-RECORDING-mode: this mode will provide a Stereo signal at the<br />
master output if <strong>bx</strong>_<strong>digital</strong> is fed with separate M&S-microphone signals<br />
or audio tracks.<br />
7.5. Auto Listen, Solo, Auto Solo, Channel swap, Linked features, EQ off<br />
• Auto Solo:<br />
Auto Solo is taken from the TDM version of <strong>bx</strong>_<strong>digital</strong> V1, and is now<br />
available for all versions. When enabled <strong>bx</strong>_<strong>digital</strong> will automatically switch<br />
to Solo M/Solo L as soon as a knob of the left EQ section is being clicked,<br />
until you release the knob again. The same goes for the right EQ section<br />
(Solo S/Solo R, depending on the mode <strong>bx</strong>_<strong>digital</strong> works in). Auto solo also<br />
works with touch sensitive controllers, such as digidesign´s C24 or icon<br />
controllers.<br />
• Solo M/Solo S (Solo L / Solo R):<br />
To listen to only the M or S signal phase corrected and mono-ed on both<br />
speakers just enable Solo M/Solo S. In the L/R mode these selectors<br />
become Solo L/Solo R, of course, but work just the same way.<br />
• LR (channel swap, pre EQ):<br />
This feature swaps left and right channels within <strong>bx</strong>_<strong>digital</strong> <strong>V2</strong>. As stereo<br />
mixes sound very different when channels are swapped this can be a<br />
creative tool in mastering sessions.<br />
• Link LED:<br />
The Link LED will be ON as soon as any feature of <strong>bx</strong>_<strong>digital</strong> is linked. This<br />
can be an EQ band, the De-Esser, or a Shifter.<br />
Also, you can link/unlink all bands and features clicking the Link LED.<br />
A click on any Link button will copy the setting of the button you click to<br />
the other side.<br />
Accidentally clicking the Link button can destroy your whole EQ settings<br />
– but we have a 32 step undo /redo on board now, so this won´t be a<br />
problem anymore.<br />
8
x_<strong>digital</strong> <strong>V2</strong> manual<br />
tt<br />
Pls see “22” (Undo/Redo).<br />
• EQ on/off:<br />
Here you can switch ALL EQ bands on or off, this will not bypass the<br />
De-Esser, the Mono-Maker or the SixPack master section (Stereo Width,<br />
etc.) though.<br />
tt<br />
If you need to bypass the whole <strong>bx</strong>_<strong>digital</strong> please use the dedicated Bypass<br />
switch in the top left corner or use your audio sequencer´s plug-in bypass.<br />
• AUTO LISTEN MODE(s):<br />
One of the new features of <strong>bx</strong>_<strong>digital</strong> <strong>V2</strong> and a powerful tool to select<br />
proper center frequencies in audio material that is hard to judge (Tom<br />
Toms, Vocals, Bass sounds, etc.).<br />
• The AUTO LISTEN POP-UP MENU:<br />
When you click on the letters next to the blue Auto Listen LED a<br />
pop-up menu will appear. In this menu you may choose which Auto<br />
Solo Listening features you want to use. 3 different functions of<br />
each EQ band can be switched to Auto Listen Mode:<br />
t t “Q f G” (initial setting):<br />
Will make <strong>bx</strong>_<strong>digital</strong> <strong>V2</strong> auto solo all EQ features each time you click on<br />
either a G (Gain), f (Frequency) or Q (Quality) knob.<br />
t t “- f -”:<br />
For example will only enable the Auto Listen features for the f (Frequency)<br />
knobs, but not automate G & Q, and so on…<br />
AUTO LISTEN MODE “Q”<br />
jump back to the actual G (Gain) setting. Clipping is avoided automatically.<br />
Notice that the temporarily EQ setting of the AUTO LISTEN MODE is always<br />
being displayed in ORANGE color while the actual EQ band´s gain setting is still<br />
being displayed in RED color.<br />
tt<br />
tt<br />
You HEAR the ORANGE setting when you see it.<br />
Mouse wheel control:<br />
Notice that changing knobs using the mouse wheel (just place the cursor<br />
above any knob of <strong>bx</strong>_<strong>digital</strong> <strong>V2</strong> and turn the wheel!) will not engage the<br />
Auto Listen Mode. This is a nice way to avoid bypassing the Auto Listen<br />
Mode for small changes that you prefer to do without this mode.<br />
Auto listen “Q” with<br />
with<br />
positive gain<br />
AUTO LISTEN MODE “f”<br />
Whenever <strong>bx</strong>_<strong>digital</strong> boosts AUTO bands to +12 dB<br />
temporarily the overall output volume is always<br />
being controlled and adjusted intelligently to avoid<br />
clipping automatically!<br />
Auto listen “Q”<br />
NEGATIVE gain<br />
This auto listen mode will play a very steep (narrow) and inversed<br />
notch filter sound of the actual audio signal as long as you click a knob<br />
or grab a (touch sensitive) controller pot or fader.<br />
This lets you hear the center frequency you are searching for exactly<br />
– and all this without the multiple mouse clicks or controller moves<br />
that needed to be done without the Auto Listen feature.<br />
This auto listen mode will boost or cut the respective EQ band´s gain to either<br />
(+12dB with positive Gain settings and “zero”) or (-12dB with negative Gain<br />
settings) whenever the Q knob is being clicked or touched (via a touch sensitive<br />
controller). As soon as you release the EQ band´s Q knob the gain setting will<br />
tt<br />
Gain up to the max, Q to a very narrow setting, sweep through the<br />
frequencies, re-adjust the Q, re-adjust the gain, etc… you know what we´re<br />
talking about… :-)<br />
9
x_<strong>digital</strong> <strong>V2</strong> manual<br />
AUTO LISTEN MODE “G”<br />
This AUTO LISTEN MODE finally is pretty easy to explain… as long as you click a<br />
Gain knob (or grab a touch sensitive controller pot or fader) all other bands of<br />
that EQ will be bypassed. This way all you hear is the touched EQ band solo-ed,<br />
without other EQ bands eventually effecting / overlaying your EQ setting.<br />
7.8. & 7.9. LEDs for the L/R or M/S sections<br />
We have included a <strong>digital</strong> level control in <strong>bx</strong>_<strong>digital</strong> <strong>V2</strong> that the hardware<br />
does not have. Red LEDs indicate potentially distorted signals in the<br />
respective signal-path and should be avoided…<br />
This may or may not be wanted, so remember: you have the choice to activate<br />
or deactivate each and every AUTO feature (Q, f or G) or any combination of<br />
these 3 features using the Auto Listen pop up menu. (see -12- above)<br />
The Auto Listen Mode can be switched off using the blue LED.<br />
7.6. EQ-Section R (Right) or S (Stereo/S-signal)<br />
depending on the selected mode<br />
The same 7-band EQ section as for the L<br />
section (or respectively the M section,<br />
depending on the selected mode), please<br />
check “1”.<br />
7.10. & 7.11. Bass Shift<br />
The Bass Shift is an „intelligent“ EQ band for the bass<br />
frequencies of your mix. We call it Bass Shift because 2<br />
different frequencies will be „shifted“ against each other<br />
with the turn of just one knob. The frequencies have been<br />
pre-set and cannot be changed. If you are looking for a<br />
sweepable Bass- (and Presence-) Shifter please check out<br />
<strong>bx</strong>_hybrid (available individually).<br />
The Bass Shift EQ can be used to easily adjust the overall bass sound of your<br />
recordings in a professional yet easy & fast way… turning the Bass Shift to the<br />
right will „push“ your bass down one octave by boosting one part of your bass<br />
frequencies while at the same time cutting other (higher) bass frequencies.<br />
Turning the BASS SHIFT to the left will cause the opposite…<br />
7.7. Window switch<br />
You may hide the graphic EQ curves if you want to save some screen<br />
space (we know <strong>bx</strong>_<strong>digital</strong> is not a small plug-in…), or if you simply prefer<br />
EQ-ing without seeing the EQ curves. Just click the “arrow” symbol.<br />
tt<br />
Please check the EQ panels (17. & 18.) to actually see what you are doing<br />
when working with the Bass Shift!<br />
Turning your BASS SHIFT to the right will result in a more „indirect“ and „deep<br />
soft“ bass sound, while turning to the left will result in a „dryer“ bass sound.<br />
10
x_<strong>digital</strong> <strong>V2</strong> manual<br />
tt<br />
A lot of contemporary pop & rock productions can be enhanced with<br />
„phatter“ guitar / keys sounds by turning the Bass Shift to the right up to<br />
2 or 3, and the same setting will make your bass drums sound huge!<br />
7.12. & 7.13. Presence Shift<br />
tt<br />
tt<br />
A similar function to what the Bass Shift EQ does to your<br />
bass signals for the high end of your recordings.<br />
Turning the Presence Shift EQ to the right will put more<br />
„air“ into your mixes without making them harsh!<br />
For M/S-modes: Try filtering out all the harsh frequencies of your mix in<br />
the M section with your EQ M and the M section of the De-Esser M (14.)<br />
and then make sure your mix doesn‘t sound dull by putting back some high<br />
frequencies into the mix via the EQ S (“6”) or the Presence Shift.<br />
The Presence Shift boosts frequencies above the ones that usually cause<br />
sibilance problems with voices. So you can try to de-ess your main voice<br />
(most likely to be in the center of your mix) with the M section of the <strong>bx</strong>´s<br />
De-Esser (“14”) and then set your Presence Shift of the S channel to 3 or<br />
4.<br />
7.14. & 7.15. De-Esser L/R or M/S<br />
(depending on the selected mode)<br />
The <strong>bx</strong>_<strong>digital</strong> De-Esser works with dynamic<br />
EQs that you can adjust to the needs of your<br />
mix. With the Solo buttons of the De-Esser<br />
section it is possible to listen to only the<br />
frequencies that you want to filter out of<br />
your mix.<br />
• When working in L/R-mode you should link the two channels to avoid<br />
unwanted permanent “panning” of your stereo-signal caused by uneven<br />
volume changes in the L or R channel.<br />
• Solo the respective section of your De-Esser on the <strong>bx</strong>2 panel. Turn up the<br />
De-Esser knob until you start hearing some high frequencies. Adjust the<br />
frequency to be filtered with the „f DSR“ knob and set the De-Esser knob<br />
to a value where the De-Esser will deduct as many high frequencies as you<br />
need to be filtered out.<br />
• Use the De-Esser´s LEDs to control the De-Esser´s gain deduction.<br />
• When the De-Essers of both channels have been linked in L/R-Mode, the<br />
detection signal for both channels will be a mono-mix of both channels.<br />
(L&R)<br />
7.16. Mono Maker<br />
The Mono Maker will mono out the bass frequencies of your<br />
stereo mix, adjustable from 20 Hz up to 22 kHz, using<br />
M/S-technique even when the <strong>bx</strong> runs in L/R-mode.<br />
The Mono-Maker will cut off bass-frequencies of the<br />
Side-Signal (S-channel) and will compensate this automatically<br />
in the Mid-Section (M) of the stereo mix with a dedicated shelving EQ in<br />
the mono-sum.<br />
tt<br />
This is a great tool for vinyl mastering, since it is essential to make sure<br />
that your lowest bass frequencies are mono, otherwise the needle could<br />
jump off the groove of the vinyl record.<br />
Especially when you master electronic music or modern heavy metal sounds<br />
with huge stereo bass sounds (synthesizers, low end doubled metal guitars,<br />
etc.) to vinyl for promotion copies / DJ copies make sure o mono out your deep<br />
bass sounds.<br />
11
x_<strong>digital</strong> <strong>V2</strong> manual<br />
tt<br />
tt<br />
Mono-ing your bass up to 60 / 80 Hz can also make a big impact on<br />
bass and bass drum sounds in general, and it will make sure that your<br />
bass sounds sound „tight“ on every single speaker of a big disco speaker<br />
systems that might use a lot of speakers (combinations of L and R signals)<br />
throughout the room(s) and (one or several) subwoofers.<br />
Setting the MONO MAKER too high can result in an audible loss of stereo<br />
width for certain instruments, i.e. low-end heavy guitars or synthesizer<br />
basses. A setting of up to 80 or 100 Hz should be fine with any kind of<br />
music, for higher settings: use your ears, please. :-)<br />
7.17. & 7.18 EQ-Panels<br />
The EQ panels show<br />
you all the EQ curves<br />
of <strong>bx</strong>_<strong>digital</strong> <strong>V2</strong><br />
separately for the<br />
L/R or for the M/S<br />
sections of your mix.<br />
Unlike a lot of other<br />
EQ plug-ins we have<br />
not included any possibility to change your EQ settings via the graphic panel,<br />
and we did that on purpose.<br />
There are simply too many EQ-bands (if you keep in mind that the BASS SHIFT<br />
and PRESENCE SHIFT are displayed additionally to the 7 „regular“ EQ bands of<br />
each section.<br />
Mouse Wheel - Control:<br />
It is possible to use the mouse wheel to control all knobs of the EQ! Just place<br />
the cursor above any knob and turn the mouse wheel up or down… no clicking<br />
needed ever…<br />
This is also a very cool alternative when working with Auto Listen Modes. In<br />
case you want to make some changes using the Auto Listen Mode and some<br />
without just use the mouse wheel for the latter – and the Auto Listen Mode<br />
will not be engaged.<br />
tt<br />
Type in exact values:<br />
Please notice that it is also very easy to type in exact values to any<br />
parameter of the <strong>bx</strong>_<strong>digital</strong> by simply clicking on the text fields below each<br />
knob. This makes it particularly comfortable to tune your EQ-bands to<br />
certain frequencies.<br />
7.19. LEDs/multiple levels (L/R & M/S)<br />
We have included dedicated LEDs for the Input Section<br />
(L&R), the M&S Section and the Output stage (L&R<br />
again), so you have total optical control over what you<br />
hear and what you do. Like with every other <strong>digital</strong> audio<br />
tool you should not push your levels into the red!<br />
Otherwise we feel that mastering and recording music (the main applications<br />
for <strong>bx</strong>_<strong>digital</strong>) is all about making cautious changes to your mix (unless the mix<br />
you work on was completely screwed up…), and when we tested <strong>bx</strong>_<strong>digital</strong> and<br />
EQ-ing in the panels often led us to making pretty big changes very quickly.<br />
In the end we also wanted to give you the “feel“ of the hardware as authentically<br />
as possible, so we decided to make the EQ panel only a visual control tool for<br />
what you do with the knobs of the <strong>bx</strong>_<strong>digital</strong> – or your mouse<br />
tt<br />
tt<br />
Even in L/R-mode the LEDs will show the M/S-signal, just for control<br />
purposes.<br />
In M/S-Recording-mode the first LED-segment will show M/S instead of<br />
L/R. This segment shows the input stage of the <strong>bx</strong>_<strong>digital</strong> since you are<br />
expected to input 2 individual signals (M&S instead of L/R) to the <strong>bx</strong>_<strong>digital</strong><br />
in this mode.<br />
12
x_<strong>digital</strong> <strong>V2</strong> manual<br />
7.20. Correlation & Balance Meters<br />
7.21. Bypass<br />
2 more new features for <strong>V2</strong>.<br />
Balance will show how the energy of the mix is shared<br />
between L and R channels. You can use the SixPack<br />
master section to alter Balance, Pan M & S.<br />
Correlation is a standard correlation meter. It can be<br />
handy to check phases when doing bigger changes in M/S.<br />
With the BYPASS button you can bypass the whole <strong>bx</strong>_<strong>digital</strong><br />
plug-in to compare your original mix and your corrections /<br />
improvements with the <strong>bx</strong>_<strong>digital</strong>.<br />
7.22. Undo/Redo (32 steps)<br />
One of the most exciting new features of <strong>V2</strong> is the<br />
32 steps Undo/Redo functionality. Every V1 user<br />
who has accidentally pushed the Link All knob knows what we´re talking about.<br />
Now you can just experiment and Undo whatever you don´t like.<br />
Together with the new A/B/C/D settings and Copy/Paste (see “23”) this is an<br />
engineer´s dream.<br />
7.23. Settings (A/B/C/D)<br />
You can now store up to 4 Settings of <strong>bx</strong>_<strong>digital</strong> <strong>V2</strong> without using the audio<br />
sequencer´s “Preset window” (most of them are not really fast and intuitive to<br />
use…).<br />
Start with one Setting (A by default), copy it to B (press “copy”, click B, click<br />
“Paste”, done!), then compare A and B. The same goes for C and D, of course.<br />
Also, you can Reset single Settings.<br />
Using Automation in mastering can be helpful to get the maximum out of your<br />
mixes. Maybe your mix needs different EQ-settings for various parts of the<br />
song?<br />
Settings are the way to go… and once again… you don´t HAVE to do it.. but you<br />
CAN…<br />
You´ll get it easily… :-)<br />
tt<br />
Presets: (in your audio sequencer host program)<br />
It´s still a good and professional idea to store one preset for every song<br />
that you master, even if you use Settings, maybe even make folders for<br />
certain projects, albums, etc.<br />
All 4 Settings of <strong>bx</strong>_<strong>digital</strong> <strong>V2</strong> will be stored with each Preset!<br />
This way you can easily recall any preset you made to change settings after<br />
you checked your mixes on other stereo systems (outside the studio).<br />
Keep in mind: if YOU don´t do it…. your customers WILL! :-)<br />
7.24. <strong>Manual</strong> & Help<br />
installation.<br />
Press <strong>Manual</strong> to open the PDF version of the manual<br />
which will be saved on your computer during<br />
Help will open a small splash screen in the plug-in window with links to help<br />
resources.<br />
13
x_<strong>digital</strong> <strong>V2</strong> manual<br />
8. Troubleshooting<br />
88<br />
Incomplete signals<br />
??<br />
You might have clicked on one or (or more) Solo-buttons of one section<br />
(L/R or M/S), so you only hear parts of your signal. Make sure both Solo<br />
buttons are switched OFF to hear your stereo mix.<br />
99<br />
Switch all Solo switches OFF, and you should hear your regular stereo<br />
signal.<br />
88<br />
Phasing/wrong panoramas<br />
??<br />
If you hear parts of your stereo signal not properly in place panorama-wise<br />
you might be working in the M/S-Recording mode with a standard-stereosignal<br />
running through your <strong>bx</strong>_<strong>digital</strong> plug-in!<br />
!!<br />
NEVER use the M/S-Recording mode for processing stereo-signals (like<br />
mixes!), unless you want to experiment with sound-design…<br />
88<br />
NO sound<br />
??<br />
Do you feed any sound into <strong>bx</strong>_<strong>digital</strong> <strong>V2</strong> at all??? :-)<br />
ENJOY WORKING WITH <strong>bx</strong>_<strong>digital</strong> <strong>V2</strong>!<br />
tt<br />
For more information and a video demo please visit:<br />
www.brainworx-music.de<br />
www.brainworx-usa.com<br />
Hitdorfer Straße 10<br />
40764 Langenfeld<br />
Germany<br />
info@brainworx-music.de<br />
www.brainworx-music.de<br />
www.brainworx-usa.com<br />
14