Miking a Grand Piano with DPA Microphones (PDF
Miking a Grand Piano with DPA Microphones (PDF
Miking a Grand Piano with DPA Microphones (PDF

Create successful ePaper yourself
Turn your PDF publications into a flip-book with our unique Google optimized e-Paper software.
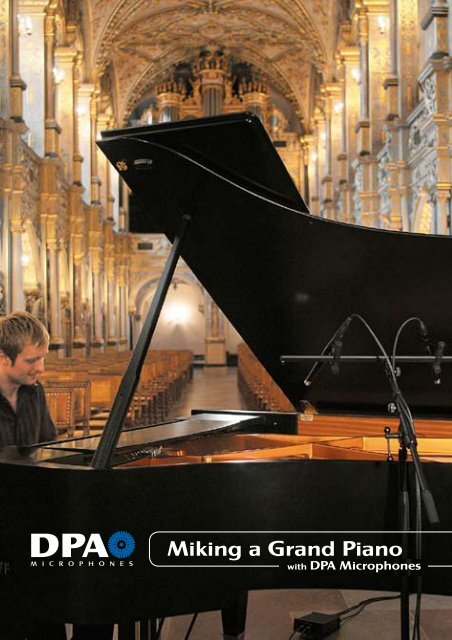
<strong>Miking</strong> a <strong>Grand</strong> <strong>Piano</strong>
<strong>Miking</strong> a <strong>Grand</strong> <strong>Piano</strong> <strong>with</strong> <strong>DPA</strong> <strong>Microphones</strong><br />
There are many ways to record a grand piano or amplify it live,<br />
depending on music style, sonic taste and the setting. In the following,<br />
we will describe a number of useful ways to record and amplify<br />
a grand piano using <strong>DPA</strong> microphones. As every piano, room and<br />
player is different, all setups should be regarded as guidelines. There<br />
are no strict rules and there is no better substitute for using your ears<br />
to adjust the sound to your liking.<br />
In our setups, we operate <strong>with</strong> seven different microphone kits from<br />
<strong>DPA</strong>. Each kit is described <strong>with</strong> various microphone placement proposals.<br />
We hope this piano primer starts you in an open-minded<br />
direction to discover new and even better techniques. Every time you<br />
approach a piano, finding these placement points is like a mystery<br />
waiting to be solved.
Try this at home or in the studio<br />
There are many choices to be aware of when placing microphones for<br />
recording the piano in a recording studio or studio type environment.<br />
Please remember that the difference between a good recording and a<br />
great recording depends on the choice of microphones and placement<br />
technique. Achieving the right sound balance may be just a question<br />
of moving the microphones a couple of centimeters in distance and<br />
degrees of angle.<br />
In general, using a cardioid microphone will be tight and focused <strong>with</strong> a<br />
clear sound image. Using omni microphones will provide a more open,<br />
larger, and more three-dimensional sound image. If the recording space<br />
has desirable acoustics, the omnis will bring more of the room tone into<br />
the recording. If the acoustics are less than great or more separation<br />
between sound sources is needed, a cardioid will probably be a better<br />
choice.<br />
Locating balance points<br />
There are balance points on the inside and near the piano that should<br />
be noted. One sonic balance decision you must make will be the desired<br />
“hammer to wood” ratio. Start <strong>with</strong> the mics over the hammers and pull<br />
them back into the wood to discover the balance point that pleases you.<br />
If the piano is part of an ensemble, miking a little closer towards the<br />
hammers will usually help it sit in the mix nicely, <strong>with</strong>out extensive high<br />
frequency equalization to help it punch through for solos. If you are<br />
recording a solo performance, a more woody sound will probably be<br />
more appropriate, but it is your choice.<br />
Fig. A, Spaced pair of omni condenser mics
To discover these balance points, <strong>DPA</strong> microphones can be placed anywhere<br />
you might imagine. You can place the mics outside the piano, using a<br />
spaced pair of omni condenser mics 1 – 2.5 m (3 – 8 ft) from the raised<br />
lid (long stick) of the piano, on the <strong>DPA</strong> stereo boom parallel to the lid,<br />
(<strong>DPA</strong> 3503 or 3506). This technique takes the lid out of the recording while<br />
leaving it in for the pianist to monitor acoustics (Fig. A).<br />
This setup also works well <strong>with</strong> cardioid microphones. Choose the 351 kit,<br />
(401-TL’s) or the Compact 3521 kit (4021’s) in either an ORTF configuration<br />
(Fig. B & C) or in a XY configuration (Fig. D). Using a mic stand <strong>with</strong><br />
wheels and a competent assistant, makes it easy to continuously move the<br />
pair around until the desired sound is found. Additionally, these cardioid<br />
microphones can also be placed under the lid to find a pleasing sound.<br />
You can read more about “Stereo Techniques” at the Microphone University<br />
at www.dpamicrophones.com.<br />
Fig. B, 4011-TL Stereo Kit in ORTF configuration<br />
Fig. C, 4021 Compact Stereo Kit<br />
in ORTF configuration<br />
Fig. D, 4021 Compact Stereo Kit<br />
in XY configuration
Cardioids and omnis combined<br />
One of the principal assets of <strong>DPA</strong> microphones is their incredibly smooth<br />
off-axis response and uniform phase characteristics. This is true for both<br />
our omni and cardioid mics. For this reason, they can be used in combination<br />
<strong>with</strong>out problem. Because of this off-axis smoothness, you can<br />
employ techniques that you could never attempt <strong>with</strong> most other microphones.<br />
Explore the far end of the piano away from the hammers <strong>with</strong><br />
the lid up. Some pianos sound great down there, others do not, you<br />
won’t know until you try. Combining omnis and cardioids that are under,<br />
over, and outside the piano can also produce pleasing sounds—capturing<br />
that illusive sustain as well as dynamic range along <strong>with</strong> fundamental and<br />
harmonic sounds.<br />
In practice, you can achieve any desired sound balance blending these two<br />
components; the close, distinct and percussive hammer sound from the<br />
cardioids and the softer and bigger room tone from the omnis.<br />
Another miking technique that many pianists are fond of using is two<br />
omnis pointed directly at each other, and up about 1.2 m (4 ft) above the<br />
piano keys (Fig. E). With one mic over the high “C” note and the other mic<br />
over the low “A” note, you will record almost the same sound as the pianist<br />
hears. Experiment <strong>with</strong> how high up the mic placement needs to be. The<br />
visual alignment is critical for greatest clarity. The diaphragms should point<br />
directly at each other. Usually you have the exact feeling of the pianist in<br />
the headphones including the sound of the fingernails on the ivory keys.<br />
Fig. E, Recording <strong>with</strong> 4006-TL Stereo Kit
Fig. F, DD0297 Diffuse-field Grid<br />
Acoustic Modification<br />
Accessories<br />
Listen to the different grids on the<br />
4003/4006-TL omnis in any of your<br />
placement attempts. The high frequency<br />
equalization boost from the<br />
black grid (Fig. F) is acoustic and<br />
very pleasing on some pianos, and<br />
again it might help in pushing the<br />
piano out of a busy or cluttered mix.<br />
On the other hand, using the trapezoid<br />
close-miking grid (Fig G) rolls<br />
off the high frequencies smoothly<br />
and provides a rounder tone <strong>with</strong><br />
softer attacks.<br />
Fig. G, Close-miking Grid<br />
Fig. H, UA0777 Nose Cone<br />
The nose cone and the Acoustic Pressure Equalizers (APEs) should also be<br />
considered. With these, you are able to modify the frequency response<br />
and directional characteristics acoustically, which are great miking tools,<br />
giving your recordings a more intense sensation of source clarity and<br />
pre-sence and a marked increase in brightness. Using the nose cone (Fig.<br />
H) will change the sound quality of the microphone to have an attack<br />
impact <strong>with</strong>out excessive volume sound. Try this for jazz, pop, and rock<br />
and roll piano to give you that more percussive sound. You can read more<br />
about “Acoustic Modification Accessories” at the Microphone University at<br />
www.dpamicrophones.com.
Large Diaphragm Tube microphones<br />
The 4041 large diaphragm microphone has an upper-midrange, 5 dB onaxis<br />
lift. With this presence boost attribute, you can use this microphone as<br />
a kind of “pointing equalizer”, to achieve the desired frequency change in<br />
the direction you actually need it. This means that it is possible to obtain a<br />
perfect balance between a neutral reproduced ambient room tone and a<br />
distinct keystroke sound <strong>with</strong> a nice present percussive attack, since only the<br />
on-axis response has the upper-midrange lift.<br />
Place the 4041 pair over or just ahead of the curve of the piano in an<br />
oversized ORTF configuration: 40 cm (16 in) spacing, 70° angle between<br />
the capsules and point the microphones at the hammers.<br />
For recordings in large environments <strong>with</strong> desirable acoustics, for instance<br />
churches or concert halls, a main pair <strong>with</strong> 4041 microphones at 2 – 3 m (6<br />
–10 ft) and elevated 3 – 4 m (10 – 13 ft) will outline the clarity of that piano<br />
in those exact surroundings. The sensation of brightness will be more prominent<br />
than <strong>with</strong> the linear response of the 4003’s/4006’s. Again, it is a matter<br />
of taste. The instrument and recording space will provide the answer.<br />
Try this on stage<br />
For amplifying a piano live, the main consideration is mostly how much gain<br />
before feedback you can achieve in the specific acoustical environment. How<br />
you mike will depend on this more than the actual preferential sound quality.<br />
The answer is either to place the omnis in the piano—<strong>with</strong> magnets at the<br />
piano frame—for one kind of sound or cardioids for even more spill rejection.<br />
On a “live” stage there is the risk of bumping into a microphone stand<br />
or the piano may be moved several times making it difficult to keep the mic<br />
placement consistent. For these reasons, we often choose to secure the <strong>DPA</strong><br />
compact omni or compact cardioid microphone to the piano frame using the<br />
MB4000 Magnet Base <strong>with</strong> a GM4000 or GM4050 Gooseneck Mount..<br />
If using omnis (3503, 3506, or 3552), we recommend trying the UA0777 Nose<br />
Cone. This setup will smooth out the pattern to an almost perfect omni allowing<br />
you to place the mics directly on top of the hammers <strong>with</strong>out overdoing<br />
the notes directly under the mic. Usually this placement is not where<br />
the pianist accompanies in the piano mid octaves, but above and below the<br />
accompaniment octave to a spot that features high note solos and bass note<br />
accents. This technique does not sound particularly good for recording but<br />
can produce excellent results on a “live” stage.
Fig. I, 4052 Compact Stereo Kit
<strong>Miking</strong> a piano <strong>with</strong> miniature microphones<br />
With the SMK4061 Stereo Microphone Kit a number of useful piano setups can<br />
be achieved: This is a low cost stereo kit, equally suited for project studios and<br />
for hidden mic setup on stage, using two high quality 4061 omnidirectional<br />
miniature microphones and a variety of mounting accessories for placement in<br />
and on the piano, <strong>with</strong> either open or closed lid.<br />
Try placing 4061 miniature microphones <strong>with</strong> the DMM001-B magnet holder<br />
in and around the sound holes of the piano (Fig. J). You can use two or three<br />
4061’s and create a balanced multidimensional sound <strong>with</strong> good front of house<br />
and monitor volume along <strong>with</strong> recordability. Try placing one mic over the high<br />
mid strings and one over the mid low strings. This method will give you high<br />
gain before feedback because of the close distance to the frame. It will provide<br />
a very rich and dynamic sound quality.<br />
Boundary Layer Mounts (BLM6000-B) are also included in the SMK4061 kit.<br />
Mount two BLM6000’s inside the open piano lid to get a natural sound for<br />
recording (Fig. K). The pressure zone technique will “draw in” and accumulate the<br />
piano’s timbre nicely and at the same time be very discreet. Placing them directly<br />
on the soundboard under the strings gives a sharp pop sound for on-stage<br />
use <strong>with</strong> a penetrating “honky-tonk” sound color.<br />
With the DMM0007 Universal Surface Mounts you can fix the mics directly on<br />
the inside of the piano lid. This is also an almost invisible mounting technique.<br />
The microphone element is able to hang from its own integrated cable <strong>with</strong> the<br />
double-sided tape pads and the height/acoustic balance can be easily adjusted.<br />
A well balanced, open-sounded position is 30 – 40 cm (12 – 16 in) over and<br />
in front of the hammers <strong>with</strong> approx. 60 cm (24 in) spacing (Fig. L).<br />
Fig. J, 4061´s mounted <strong>with</strong> magnet holders<br />
in piano<br />
Fig. L, 4061´s hanging in surface mounts<br />
fixed on piano lid
Fig. K, 4061 in boundary layer mount<br />
on piano lid
Seven solutions to choose from:<br />
3532 (4041 Large Diaphragm Stereo Kit, 130 V)<br />
Available as either 4041-S Solid State, 4041-Tube, or 4041-SP Solid State Phantom Power.<br />
A high end Stereo Kit consisting of a matched pair of 4041-T2 omnidirectional Large<br />
Diaphragm Tube microphones. The HMA5000 Microphone Amplifier and Power Supply<br />
plus the specially designed <strong>DPA</strong> Stereo Boom make this kit a highly desired professional<br />
solution, adding a bit of musical tube coloration to the recording.<br />
3506 (4006-TL Stereo Kit)<br />
The <strong>DPA</strong> 4006-TL is a worldwide reference thanks to its precise, detailed, and natural<br />
reproduction. The 3506 is likewise a product for sound engineers <strong>with</strong> demands for high<br />
quality. The total transparency and natural-sounding clarity of this microphone pair will<br />
provide you <strong>with</strong> a lifetime of satisfying listening. The feeling of being there is intense and<br />
impressive every time.<br />
3503 (4003 Stereo Kit, 130 V)<br />
This is the ultimate recording kit for faithful reproduction, using two high-voltage omnidirectional<br />
microphones. Includes a preamp and power supply. This is an excellent choice<br />
for classical recordings and bigger and more open sounding pianos in general.<br />
3511 (4011-TL Cardioid Stereo Kit)<br />
With a pair of 401-TL microphones <strong>with</strong> smooth off-axis response, this solution is recommended<br />
for stereo recording using close-miking techniques. Several standard setups such<br />
as ORTF or XY are also possible. The mics handle high SPL and will allow close placement<br />
as well as more distant placement <strong>with</strong> a focus on the proximity effect. This solution is<br />
recommended for jazz or pop recordings <strong>with</strong> mic placement closer to the hammers.<br />
3552 (4052 Compact Stereo Kit)<br />
The compact omni kit is a low-profile solution that mounts on the piano frame and can<br />
be used for closed and open lid techniques both in the studio and on stage. The compact<br />
kit offers the best of both worlds: genius mounting solutions and sonic excellence.<br />
3521 (4021 Compact Stereo Kit)<br />
The compact cardioid kit is a low profile solution that mounts on the piano frame allowing<br />
individual placement as well as a special mount for ORTF and XY stereo setups. This<br />
kit is recommended for recordings <strong>with</strong> a mic placement closer to the hammers or as<br />
permanent ORTF stereo setup <strong>with</strong> the dedicated holder. The compact kit offers the best<br />
of both worlds: genius mounting solutions and sonic excellence.<br />
SMK4061 Stereo Microphone Kit<br />
High quality 4061 omnidirectional miniature microphones and a variety of mounting accessories<br />
for placement in and on the piano, <strong>with</strong> open or closed lid. This is a low cost<br />
solution for project studios and hidden mic setup on stage.
© April 2007, <strong>DPA</strong> <strong>Microphones</strong> A/S - Product features and specifications are subject to change <strong>with</strong>out notice.
DPI-PIANOFLYER<br />
Headquarters:<br />
<strong>DPA</strong> <strong>Microphones</strong> A/S<br />
Gydevang 42-44<br />
DK-3450 Alleroed, Denmark<br />
Tel: +45 4814 2828<br />
Fax: +45 4814 2700<br />
info@dpamicrophones.com<br />
www.dpamicrophones.com<br />
United States:<br />
<strong>DPA</strong> <strong>Microphones</strong>, Inc.<br />
2432 N. Main St., Suite 200<br />
Longmont, CO 80501, USA<br />
Tel: +1 303-485-1025<br />
Fax: +1 303-485-6470<br />
info-usa@dpamicrophones.com<br />
www.dpamicrophones.com