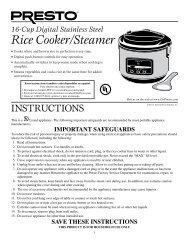
Presto® 8-Cup Cool Touch Electric Rice Cooker/Steamer Instruction ...
Presto® 8-Cup Cool Touch Electric Rice Cooker/Steamer Instruction ...
Presto® 8-Cup Cool Touch Electric Rice Cooker/Steamer Instruction ...

Create successful ePaper yourself
Turn your PDF publications into a flip-book with our unique Google optimized e-Paper software.
Visit us on the web at www.GoPresto.com<br />
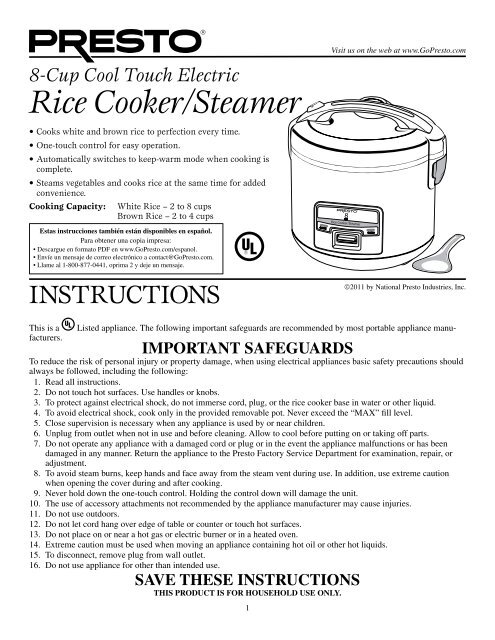
8-<strong>Cup</strong> <strong>Cool</strong> <strong>Touch</strong> <strong>Electric</strong><br />
<strong>Rice</strong> <strong>Cooker</strong>/<strong>Steamer</strong><br />
• Cooks white and brown rice to perfection every time.<br />
• One-touch control for easy operation.<br />
• Automatically switches to keep-warm mode when cooking is<br />
complete.<br />
• Steams vegetables and cooks rice at the same time for added<br />
convenience.<br />
Cooking Capacity: White <strong>Rice</strong> – 2 to 8 cups<br />
Brown <strong>Rice</strong> – 2 to 4 cups<br />
Estas instrucciones también están disponibles en español.<br />
Para obtener una copia impresa:<br />
• Descargue en formato PDF en www.GoPresto.com/espanol.<br />
• Envíe un mensaje de correo electrónico a contact@GoPresto.com.<br />
• Llame al 1-800-877-0441, oprima 2 y deje un mensaje.<br />
<strong>Instruction</strong>s<br />
©2011 by National Presto Industries, Inc.<br />
Listed appliance. The following important safeguards are recommended by most portable appliance manu-<br />
This is a<br />
facturers.<br />
IMPORTANT SAFEGUARDS<br />
To reduce the risk of personal injury or property damage, when using electrical appliances basic safety precautions should<br />
always be followed, including the following:<br />
1. Read all instructions.<br />
2. Do not touch hot surfaces. Use handles or knobs.<br />
3. To protect against electrical shock, do not immerse cord, plug, or the rice cooker base in water or other liquid.<br />
4. To avoid electrical shock, cook only in the provided removable pot. Never exceed the “MAX” fill level.<br />
5. Close supervision is necessary when any appliance is used by or near children.<br />
6. Unplug from outlet when not in use and before cleaning. Allow to cool before putting on or taking off parts.<br />
7. Do not operate any appliance with a damaged cord or plug or in the event the appliance malfunctions or has been<br />
damaged in any manner. Return the appliance to the Presto Factory Service Department for examination, repair, or<br />
adjustment.<br />
8. To avoid steam burns, keep hands and face away from the steam vent during use. In addition, use extreme caution<br />
when opening the cover during and after cooking.<br />
9. Never hold down the one-touch control. Holding the control down will damage the unit.<br />
10. The use of accessory attachments not recommended by the appliance manufacturer may cause injuries.<br />
11. Do not use outdoors.<br />
12. Do not let cord hang over edge of table or counter or touch hot surfaces.<br />
13. Do not place on or near a hot gas or electric burner or in a heated oven.<br />
14. Extreme caution must be used when moving an appliance containing hot oil or other hot liquids.<br />
15. To disconnect, remove plug from wall outlet.<br />
16. Do not use appliance for other than intended use.<br />
SAVE THESE INSTRUCTIONS<br />
This product is for household use only.<br />
1
Important Cord Information<br />
• This appliance has a polarized plug (one blade is wider than the other). To reduce the risk of electric shock, this plug is<br />
intended to fit into a polarized outlet only one way. If the plug does not fit fully into the outlet, reverse the plug. If it still<br />
does not fit, contact a qualified electrician. Do not attempt to modify the plug in any way.<br />
• A short power supply cord is provided to reduce the risk resulting from becoming entangled in or tripping over a longer<br />
cord. An extension cord may be used if care is properly exercised in its use.<br />
• If an extension cord is used, the marked electrical rating of the extension cord should be at least as great as the electrical<br />
rating of the appliance. The extension cord should be arranged so that it will not drape over the countertop or tabletop<br />
where it can be pulled on by children or tripped over unintentionally.<br />
Before First Use<br />
1. Remove all packaging materials.<br />
2. Become familiar with the various parts of the rice cooker (Fig. A) and read and follow the instructions carefully.<br />
3. Wash the rice pot and accessories according to the “Care and Cleaning” instructions, steps 2 through 4 on page 5.<br />
How To Use<br />
Important: For proper heat<br />
transfer between the rice cooker<br />
base and the removable pot,<br />
before each use, be sure the<br />
bottom of the removable pot and<br />
the heating plate within the rice<br />
cooker base (Fig. B) are free of<br />
debris. In addition, to prevent<br />
electrical shock, be sure the<br />
outside of the removable pot is<br />
completely dry before placing it<br />
into the rice cooker base.<br />
To Cook <strong>Rice</strong>:<br />
1. Place the rice cooker on<br />
a dry, level, heat resistant<br />
surface. To avoid steam<br />
damage to cabinets, position<br />
the rice cooker so it is not<br />
directly under cabinets.<br />
Removable rice<br />
pot<br />
Steaming<br />
basket<br />
Fig. A<br />
Cover release<br />
button<br />
Water measurement<br />
lines<br />
Cook indicator<br />
light<br />
<strong>Rice</strong> measuring<br />
scoop<br />
2<br />
<strong>Rice</strong> paddle<br />
holder<br />
Removable<br />
steam vent<br />
One-touch<br />
control<br />
Cover<br />
handle<br />
Hinged<br />
cover<br />
Warm indicator<br />
light<br />
<strong>Rice</strong> cooker<br />
base<br />
<strong>Rice</strong> paddle<br />
Heating plate<br />
Condensation<br />
collector<br />
2. Open the rice cooker cover by pressing the cover release button (Fig. A) and lift the<br />
hinged cover so it is in a fully upright position. Remove the rice pot if it is in place.<br />
3. Using the rice measuring scoop provided, measure the desired amount of rice and pour<br />
into the pot*. One level scoop of uncooked rice will yield 2 scoops of cooked rice. Note:<br />
The rice measuring scoop provided is 180 ml or 6 ounces, the rice industry standard,<br />
Fig. B<br />
rather than 240 ml or 8 ounces.<br />
4. Using the water measurement lines inside the pot (Fig. A), fill the pot with the appropriate amount of water (see the<br />
chart below). For example, if cooking 2 measuring scoops of rice, add enough water to fill up to line 2 marked on the<br />
pot. Note that the liquid measurement is also included in the chart, if you prefer to measure the water with a liquid<br />
measuring cup. Water amounts may be adjusted for firmer or moister rice; see “Helpful Hints” on page 5. Never<br />
exceed the “MAX” fill level. Overfilling may result in water boiling over the top of the rice pot.<br />
5. Make sure the exterior of the rice pot is dry and clean. Then place the pot into the cooker base so it is centered and the<br />
bottom is in direct contact with the heating plate (Fig. B). Failure to correctly position the pot may result in the rice<br />
cooker malfunctioning.<br />
Caution: Never add water to the cooker base or cook without the pot in place.<br />
*If desired, rice may be rinsed or soaked prior to cooking. See Helpful Hints on page 5.
6. Close the cover securely and plug the rice cooker into a 120 volt wall outlet.<br />
7. Press the one-touch control down and the red cook light will illuminate.<br />
Important: Never hold down the control as this will damage the unit.<br />
Caution: During cooking and warming it is normal for steam to escape from the cover vent. To prevent steam burns,<br />
keep hands and face away from the vent.<br />
8. When cooking is complete the unit automatically switches to the WARM mode and the amber warm light will<br />
illuminate.<br />
Allow rice to stand for approximately 10 minutes before opening the cover to ensure optimum texture and moisture<br />
levels.<br />
9. Open cover, gently fluff rice using paddle provided, and serve.<br />
Caution: Use caution when opening the cover as hot steam may escape. Hot steam can cause burns.<br />
Note: The rice pot features a premium nonstick finish for stick‐free cooking. To help protect this special surface, use<br />
the paddle which was included with your rice cooker. Using metal utensils in the rice pot may damage the nonstick<br />
finish.<br />
10. Do not leave rice in the pot on the WARM setting for more than 8 hours. Always unplug the rice cooker when the unit<br />
is not in use.<br />
White RICE COOKING CHART<br />
See special instructions below for cooking brown rice.<br />
RAW WHITE<br />
RICE<br />
WHITE RICE<br />
WATER MARKING<br />
(inside removable pot)<br />
LIQUID<br />
MEASUREMENT<br />
APPROXIMATE<br />
COOKING TIME*<br />
(minutes)<br />
APPROXIMATE COOKED<br />
RICE YIELD<br />
(6 ounce cup)<br />
1 rice scoop 1 line 10 ounces (290 ml) 17 to 20 2 cups<br />
2 rice scoops 2 line 16 ounces (470 ml) 19 to 23 4 cups<br />
3 rice scoops 3 line 22 ounces (650 ml) 22 to 26 6 cups<br />
4 rice scoops 4 line 28 ounces (830 ml) 25 to 31 8 cups<br />
The rice measuring scoop provided is equal to 180 ml or 6 ounces.<br />
The maximum capacity for this rice cooker is 8 cups of cooked rice. Do not place more than 4 rice scoops of uncooked<br />
white rice into the unit at one time.<br />
*Cooking times may vary depending on household voltage. The higher the voltage the shorter the cooking time; the lower<br />
the voltage the longer the cooking time.<br />
Special <strong>Instruction</strong>s for Cooking Brown <strong>Rice</strong>: Do not cook more than 2 rice scoops of brown rice. For 1 rice scoop of<br />
brown rice use the same water mark as for 1 rice scoop of white rice. For 2 rice scoops of brown rice measure out 3 rice<br />
scoops (18 ounces or 540 ml) of water and add to the pot.<br />
To Steam Food:<br />
1. When steaming only, pour 1 rice measuring scoop of water into the rice pot.<br />
2. Make sure the exterior of the rice pot is dry and clean and then place the pot into the cooker base. Fill steaming basket<br />
with desired food. Position the filled basket onto the rim of the rice pot.<br />
3. Close the cover securely and plug the rice cooker into a 120 volt wall outlet.<br />
4. Press the one-touch control down and the red cook light will illuminate. Refer to the steaming chart on page 4 for<br />
approximate steaming times and set a timer for the suggested time.<br />
Caution: During cooking and warming it is normal for steam to escape from the steam vent in the cover. To prevent<br />
steam burns, keep hands and face away from the vent.<br />
5. Once the suggested time is up, carefully open the cover to check for doneness. If cooking is complete, unplug the rice<br />
cooker.<br />
6. Using hot pads, grasp the two handles on the sides of the steamer basket and immediately lift the basket out of the<br />
pot. Remove food from steaming basket.<br />
3
To Cook <strong>Rice</strong> and Steam Food Simultaneously:<br />
When cooking rice and steaming food at the same time, do not cook more than 3 scoops uncooked white rice or 2 scoops<br />
uncooked brown rice.<br />
1. Place the desired amount of rice and recommended amount of water into the rice pot. Refer to the “To Cook <strong>Rice</strong>”<br />
instructions on pages 2 and 3 and begin cooking rice as directed.<br />
2. Refer to the steaming chart below for steaming times. Only those foods that have steaming times similar to the<br />
cooking time for the amount of rice being prepared should be placed in the rice cooker at the same time as the rice.<br />
For best results, foods with shorter cooking times should be added toward the end of the rice cooking time, so they<br />
are done at the same time as the rice.<br />
3. Place the desired food into the steaming basket. Open the cover, being careful to avoid escaping steam, and position<br />
the filled basket onto the rim of the rice pot. Close the cover securely and set a timer for the suggested steaming time<br />
(refer to the chart below).<br />
4. Once the suggested steaming time is up, carefully open the cover and check for doneness. If cooking is complete,<br />
using hot pads, carefully grasp the two handles on the sides of the steamer basket and carefully lift the basket out of<br />
the pot.<br />
5. If additional cooking time is needed for the rice, close cover and allow rice to continue cooking until done. When<br />
the rice is finished cooking the unit will automatically switch to the WARM mode and the amber warm light will<br />
illuminate.<br />
6. Do not leave rice in the pot on the WARM setting for more than 8 hours. Always unplug the rice cooker when the unit<br />
is not in use.<br />
Steaming Chart<br />
Food may be steamed while the rice is cooking. Steam foods together that have similar cooking times. When not cooking<br />
rice, use 1 rice measuring scoop of water for steaming.<br />
Asparagus<br />
Broccoli florets<br />
vegetables<br />
Cabbage, cut into 1½ to 2-inch wedges<br />
Carrots, baby cut<br />
Cauliflower florets<br />
Green beans<br />
Spinach<br />
Squash (yellow, zucchini), ¼-inch slices<br />
Fish, 1-inch thick<br />
Shrimp<br />
fish/poultry<br />
Chicken, boneless chicken breasts<br />
suggested steaming time<br />
12 – 15 minutes<br />
10 – 12 minutes<br />
12 – 16 minutes<br />
18 – 22 minutes<br />
12 – 15 minutes<br />
17 – 22 minutes<br />
8 – 10 minutes<br />
9 – 11 minutes<br />
14 – 16 minutes<br />
12 – 15 minutes<br />
25 – 28 minutes<br />
*Cooking times may vary due to the maturity of the vegetables as well as the size of the pieces. Cook the vegetables<br />
the minimum amount of time indicated if you prefer your vegetables crisp. If you prefer your vegetables soft, cook the<br />
maximum amount of time indicated.<br />
4
Helpful Hints<br />
• If desired, white rice may be rinsed in cold water prior to cooking. Rinsing makes rice less sticky by removing some<br />
of the starch. Rinse rice in another bowl or colander until water is clear. Brown rice, which has the bran intact, does<br />
not benefit from rinsing.<br />
• Like other rice cookers, the cooked rice that is in contact with the bottom of the rice pot will have a light brown,<br />
crust-like appearance. This is normal. This brown crust may be minimized with white rice if you soak the rice prior to<br />
cooking.<br />
• <strong>Rice</strong> can be flavored by using a combination of water and broth or broth alone. If broth is substituted for water, use<br />
the same amount of broth as you would water.<br />
• Brown rice requires more water and takes longer to cook than white rice. See the special instructions for cooking<br />
brown rice on page 3.<br />
• Different rices cook up moister and softer than others. In addition, firmness of the rice is a matter of personal<br />
preference. Water amounts may be adjusted to achieve desired texture. Try adding (for softer rice) or reducing (for<br />
firmer rice) water in 2 tablespoon increments for each scoop of rice cooked until the rice is to the desired moisture<br />
level. Never exceed the “MAX” fill level.<br />
• For flavorful rice pilafs or casseroles, sauté your favorite chopped veggies with desired spices in a small amount<br />
of vegetable oil in a skillet until veggies are translucent and tender. Follow steps 3 and 4 of the “To Cook <strong>Rice</strong>”<br />
instructions (see pages 2 and 3), add the sautéed veggies, and proceed with steps 5 through 10.<br />
• To prevent loss of steam and heat, do not open the rice cooker during cooking. The exception is when it is necessary<br />
to add food for steaming.<br />
• A kitchen timer is very helpful if you want to know approximately when the rice will be ready to serve. Simply set<br />
the timer for the maximum cooking time and add 10 minutes for the warming period.<br />
• The rice paddle fits into the rice paddle holder for convenient stirring, serving, and storing. Insert the paddle so the<br />
indented scoop side is towards the rice cooker.<br />
Care and Cleaning<br />
1. Remove plug from wall outlet and allow rice cooker to cool completely before cleaning.<br />
2. Remove the rice pot. Wash it in warm water and a mild detergent. Rinse and dry thoroughly. The rice pot may be<br />
washed in a dishwasher; however, because it is made of anodized aluminum, the outside of the pot will discolor due<br />
to the caustic nature of the dishwashing detergent. Do not use steel wool scouring pads or abrasive cleansers on the<br />
rice pot or on the rice cooker base.<br />
Important: Always make sure the rice pot is completely dry before placing it back into the rice cooker base. Placing<br />
a wet rice pot into the rice cooker may damage the unit and cause it to malfunction.<br />
3. The steaming basket, measuring scoop, and rice paddle may be washed in a dishwasher or in hot, soapy water.<br />
4. Wipe the inside of the cover and the interior and exterior of the rice cooker base with a soft, damp cloth. Dry<br />
thoroughly with a soft cloth. Do not immerse rice cooker BASE in water or other liquid.<br />
5. Remove the condensation collector on the side of the base (Fig. C); it collects<br />
condensation from the rice cooker cover when the cover is opened after cooking.<br />
Push the two lines on the lower portion of the collector. Then grab the sides of<br />
the collector and pull it out from the base. Empty any moisture that has collected.<br />
Wash the collector and reinsert it into the rice cooker base by fitting the two<br />
grooves on the sides of the collector over the tabs on the rice cooker base. Then<br />
push the collector back into position. Note: At times there may be no moisture or<br />
very little moisture in the collector. The amount of moisture will depend on how<br />
much condensation is remaining on the cover when it is opened.<br />
6. After each use, pull the steam vent out of the rice cooker cover.<br />
While holding the vent in both hands, turn the cap counterclockwise to<br />
disassemble it from the vent chamber. Wash the cap and chamber in hot, soapy<br />
water. Do not remove the rubber disk on the bottom of the vent chamber.<br />
Push<br />
lines<br />
Vent slots<br />
Steam vent<br />
Condensation<br />
collector<br />
7. Reassemble the cap portion to the vent chamber. Reinsert the vent into the rice cooker cover so the vent slots are<br />
towards the outer edge of the cooker.<br />
Fig. C<br />
5
Consumer Service Information<br />
If you have any questions regarding the operation of your Presto ® appliance or need parts for your appliance, contact us by<br />
any of these methods:<br />
• Call 1-800-877-0441 weekdays 8:00 AM to 4:30 PM (Central Time)<br />
• Email us at our website www.GoPresto.com<br />
• Write: National Presto Industries, Inc.<br />
Consumer Service Department<br />
3925 North Hastings Way, Eau Claire, WI 54703-3703<br />
When contacting the Consumer Service Department, please indicate the model number and the date code for the rice<br />
cooker. These numbers can be found on the bottom of the rice cooker base.<br />
Please record this information:<br />
Model Number _________________ Date Code ______________ Date Purchased ___________________________<br />
Inquiries will be answered promptly by email, telephone, or letter. When emailing or writing, please include a phone<br />
number and a time when you can be reached during weekdays if possible.<br />
Any maintenance required for this product, other than normal household care and cleaning, should be performed by our<br />
Factory Service Department. Be sure to indicate date of purchase and a description of defect when sending an appliance<br />
for repair. Send appliances for repair to:<br />
Canton Sales and Storage Company<br />
Presto Factory Service Department<br />
555 Matthews Dr., Canton, MS 39046-0529<br />
The Presto Factory Service Department is equipped to service all PRESTO ® appliances and supply genuine PRESTO ® parts.<br />
Genuine PRESTO ® replacement parts are manufactured to the same exacting quality standards as PRESTO ® appliances<br />
and are engineered specifically to function properly with its appliances. Presto can only guarantee the quality and<br />
performance of genuine PRESTO ® parts. “Look-alikes” might not be of the same quality or function in the same manner.<br />
To ensure that you are buying genuine PRESTO ® replacement parts, look for the PRESTO ® trademark.<br />
PRESTO ® Limited Warranty<br />
This quality PRESTO ® appliance is designed and built to provide many years of<br />
satisfactory performance under normal household use. Presto pledges to the original<br />
owner that should there be any defects in material or workmanship during the first year<br />
after purchase, we will repair or replace it at our option. Our pledge does not apply to<br />
damage caused by shipping. To obtain service under the warranty, return this PRESTO ®<br />
appliance, shipping prepaid, to the Presto Factory Service Department. When returning a<br />
product, please include a description of the defect and indicate the date the appliance was<br />
purchased.<br />
We want you to obtain maximum enjoyment from using this PRESTO ® appliance and<br />
ask that you read and follow the instructions enclosed. Failure to follow instructions,<br />
damage caused by improper replacement parts, abuse or misuse will void this pledge.<br />
This warranty gives you specific legal rights, and you may also have other rights which<br />
vary from state to state. This is Presto’s personal pledge to you and is being made in place<br />
of all other express warranties.<br />
NATIONAL PRESTO INDUSTRIES, INC.<br />
Eau Claire, WI 54703-3703<br />
Form 72-977A<br />
6