Lafarge in South Africa
Lafarge in South Africa
Lafarge in South Africa
Create successful ePaper yourself
Turn your PDF publications into a flip-book with our unique Google optimized e-Paper software.
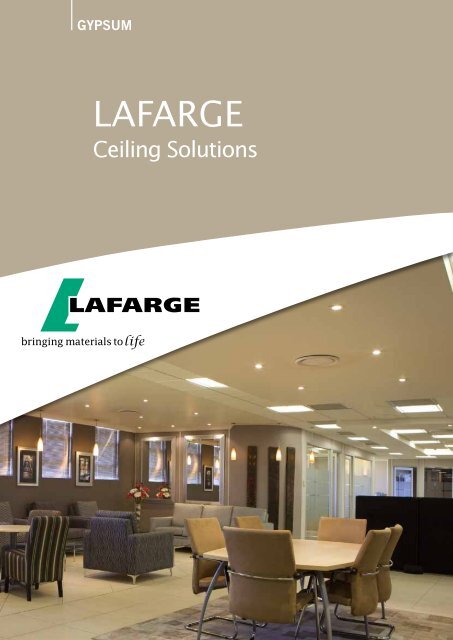
LAFARGE<br />
Ceil<strong>in</strong>g Solutions<br />
1
CONTENTS<br />
LAFARGE<br />
Ceil<strong>in</strong>g Solutions<br />
01 <strong>Lafarge</strong> Plasterboard<br />
02 <strong>Lafarge</strong> Ceil<strong>in</strong>g Solutions<br />
03 <strong>Lafarge</strong> Prefabricated Bulkheads<br />
04 <strong>Lafarge</strong> Acoustic Ceil<strong>in</strong>gs<br />
05 <strong>Lafarge</strong> Cove Cornice<br />
06 <strong>Lafarge</strong> Decorative Mould<strong>in</strong>gs<br />
2<br />
07 <strong>Lafarge</strong> Cornice Adhesive
LAFARGE PLASTERBOARD<br />
<strong>Lafarge</strong> Plasterboard<br />
<strong>Lafarge</strong> Plasterboard consists of an aerated gypsum core<br />
encased <strong>in</strong> and firmly bonded on both sides with special<br />
plasterboard l<strong>in</strong>er, render<strong>in</strong>g a smooth yet highly functional<br />
surface. Special characteristics of gypsum provide the<br />
outstand<strong>in</strong>g advantages over other flat sheet materials. The<br />
board is fabricated by a modern automatic process with the<br />
supervision of highly experienced eng<strong>in</strong>eers and chemists.<br />
<strong>Lafarge</strong> Plasterboard: Designed for <strong>in</strong>ternal walls, ceil<strong>in</strong>gs<br />
and partitions <strong>in</strong> residential and commercial build<strong>in</strong>gs,<br />
is quick and easy to <strong>in</strong>stall, while still be<strong>in</strong>g durable,<br />
recyclable, aesthetic and of superior quality without the<br />
necessary dry<strong>in</strong>g time for alternate wet trade solutions.<br />
Want to know what separates a great <strong>in</strong>terior from the<br />
average?<br />
The question of quality versus speed has always been a<br />
contentious one <strong>in</strong> the <strong>in</strong>terior design. Economics and<br />
demand require build<strong>in</strong>gs to go up quickly and affordably,<br />
which could compromise quality.<br />
High quality, <strong>Lafarge</strong> Plasterboard<br />
<strong>Lafarge</strong><br />
Plasterboard<br />
3
LAFARGE<br />
CEILING SOLUTIONS<br />
<strong>Lafarge</strong><br />
Ceil<strong>in</strong>g Solutions<br />
• The <strong>Lafarge</strong> Suspended Ceil<strong>in</strong>g Grid is an exposed face<br />
tee system. The grid is manufactured from galvanised<br />
steel which is capped across the exposed face. The<br />
<strong>Lafarge</strong> Cross Tee has a specially designed ‘clip’ fixed<br />
at each end. This ‘clip’ enables the <strong>Lafarge</strong> Cross Tee<br />
to‘click’ <strong>in</strong>to position, mak<strong>in</strong>g an audible ‘click’ sound<br />
as it does so, thereby confirm<strong>in</strong>g that the tee section is<br />
located correctly.<br />
• The <strong>Lafarge</strong> Ma<strong>in</strong> Tee ends are designed to ensure that<br />
the Ma<strong>in</strong> Tees easily l<strong>in</strong>e up to each other, while at the<br />
same time ensur<strong>in</strong>g a tighter connection.<br />
• The <strong>Lafarge</strong> Cross Tee is then easily clipped <strong>in</strong>to position<br />
by l<strong>in</strong><strong>in</strong>g the end up to the right side of the pre-punched<br />
open<strong>in</strong>g of the <strong>Lafarge</strong> Ma<strong>in</strong> Tee.<br />
• The opposite <strong>Lafarge</strong> Cross Tee is then <strong>in</strong>serted <strong>in</strong> the<br />
same manner.<br />
• The audible ‘click’ sound confirms that the correct<br />
location has been found and signifies that the <strong>Lafarge</strong><br />
Cross Tee is locked firmly <strong>in</strong>to position.<br />
• The size and design of the <strong>Lafarge</strong> Cross Tee end clips<br />
facilitates simple and easy assembly of the <strong>Lafarge</strong><br />
Ceil<strong>in</strong>g System.<br />
• <strong>Lafarge</strong> Ceil<strong>in</strong>g Grid can be dismantled as quickly and<br />
simply as it is connected. This ensures a high degree of<br />
re-usability of the <strong>Lafarge</strong> Cross Tees.<br />
• The unique clipp<strong>in</strong>g system allows for easy, one-handed<br />
<strong>Lafarge</strong> Ceil<strong>in</strong>g Grid assembly, which can speed up<br />
construction time significantly.<br />
Product Information<br />
• 15,24 and 35mm exposed face (white) (black or grey on<br />
special requested lead times).<br />
• 35mm exposed face (knurled) is galvanised.<br />
• End Clip -lock<strong>in</strong>g type.<br />
• Stitch<strong>in</strong>g on <strong>Lafarge</strong> Ma<strong>in</strong> and <strong>Lafarge</strong> Cross Tees for<br />
lateral rigidity.<br />
• Re<strong>in</strong>forced and stable structure.<br />
• <strong>Lafarge</strong> exposed Ma<strong>in</strong> Tees with slots at 300mm centres<br />
and first slot at 150mm.<br />
• <strong>Lafarge</strong> Cross Tees (l200mm) have a centre slot.<br />
• <strong>Lafarge</strong> Cross Tees (600mm and 1500mm), have no<br />
slots.<br />
4
LAFARGE CEILING SOLUTIONS<br />
LAY-IN SUSPENDED CEILING INSTALLATION<br />
1. Determ<strong>in</strong>e the ceil<strong>in</strong>g level around the room.<br />
2. Fix wall angle to the wall with nails or screws at 400mm<br />
<strong>in</strong>tervals.<br />
3. Hang <strong>Lafarge</strong> Ma<strong>in</strong> Tee at 1200mm <strong>in</strong>tervals,<br />
measur<strong>in</strong>g from the centre po<strong>in</strong>t, with galvanised steel<br />
suspension wires at 1200mm. Wrap the 2,5mm<br />
stra<strong>in</strong>ed suspension wire tightly at least 3 full turns<br />
around itself.<br />
4. Insert 1200mm <strong>Lafarge</strong> Ceil<strong>in</strong>g Grid Cross Tee at right<br />
angles to the 3600mm Ma<strong>in</strong> Tees.<br />
5. Lay-<strong>in</strong> the <strong>Lafarge</strong> Plasterboard tiles.<br />
Concealed Screw Up Jo<strong>in</strong>t Ceil<strong>in</strong>g Installation<br />
1. Determ<strong>in</strong>e the desired ceil<strong>in</strong>g level around the room.<br />
2. Fix perimeter trim to the wall at the desired ceil<strong>in</strong>g level.<br />
3. Hang the ma<strong>in</strong> tee with ridged hanger at 1200mm<br />
spac<strong>in</strong>g.<br />
4. Insert <strong>Lafarge</strong> Plaster Grid Cross Tee to the <strong>Lafarge</strong><br />
Plaster Grid Ma<strong>in</strong> Tee at 400mm spac<strong>in</strong>g slot provided<br />
<strong>in</strong> Ma<strong>in</strong> Tee Web, for 9mm and 12mm <strong>Lafarge</strong><br />
Plasterboard.<br />
5. Attach tapered-edge plasterboard to the face of the<br />
<strong>Lafarge</strong> Plaster Grid frame by fix<strong>in</strong>g the 25mm drywall<br />
screw <strong>in</strong>to it. (<strong>Lafarge</strong> Plasterboards should be fixed <strong>in</strong><br />
the same direction as the <strong>Lafarge</strong> Plaster Grid Cross<br />
Tee). The space between each screw should<br />
not exceed 150mm.<br />
6. Conceal the screw dimple with <strong>Lafarge</strong> Jo<strong>in</strong>t<strong>in</strong>g Plaster.<br />
7. Conceal the jo<strong>in</strong>t us<strong>in</strong>g fibre tape and <strong>Lafarge</strong> Jo<strong>in</strong>t<strong>in</strong>g<br />
Plaster.<br />
Tips on Ceil<strong>in</strong>g Installation:<br />
1. If the area of the plastered ceil<strong>in</strong>g is more than 225m²,<br />
expansion jo<strong>in</strong>ts must be used at 15m <strong>in</strong>tervals <strong>in</strong> order<br />
to prevent crack<strong>in</strong>g. (This expansion jo<strong>in</strong>t is usually<br />
specified by the professional team).<br />
2. For the room requir<strong>in</strong>g plasterboard for both ceil<strong>in</strong>g and<br />
partition, <strong>in</strong>stall the ceil<strong>in</strong>g first. However, if specific<br />
sound <strong>in</strong>sulation is needed, <strong>in</strong>stall the partition first.<br />
3. For any ceil<strong>in</strong>g system, leave enough ventilation above<br />
the ceil<strong>in</strong>g. This helps to prevent sagg<strong>in</strong>g.<br />
F<strong>in</strong>ish<strong>in</strong>g off a Ceil<strong>in</strong>g:<br />
The <strong>Lafarge</strong> l<strong>in</strong>e of decorative mould<strong>in</strong>gs adds a luxury<br />
feel to any room. The <strong>Lafarge</strong> light-weight non-toxic<br />
mould<strong>in</strong>gs are simple to <strong>in</strong>stall, leav<strong>in</strong>g a modern<br />
professional f<strong>in</strong>ish to a build<strong>in</strong>g or renovation project.<br />
There are 11 <strong>in</strong>dividual mould<strong>in</strong>gs to choose from, whether<br />
you require a simple functional mould<strong>in</strong>g, or a decorative<br />
profile, an ord<strong>in</strong>ary room will be turned <strong>in</strong>to a beautiful<br />
f<strong>in</strong>ished space with <strong>Lafarge</strong> Decorative Mould<strong>in</strong>gs.<br />
Lay <strong>in</strong> ceil<strong>in</strong>g tiles<br />
5
LAFARGE CEILING SOLUTIONS<br />
CONNECTING LAFARGE CEILING TEES<br />
Cross Section details of <strong>Lafarge</strong> Ceil<strong>in</strong>g Grid (Tees Exposed)<br />
Cross Section details of <strong>Lafarge</strong> Ceil<strong>in</strong>g Plaster Grid<br />
<strong>Lafarge</strong> Plaster Grid (Norgrid)<br />
Ma<strong>in</strong> Tees<br />
Slots<br />
Cross Tees<br />
6
LAFARGE CEILING SOLUTIONS<br />
LAFARGE LAY-IN CEILING GRID SYSTEM<br />
Cross Tee Connection<br />
Wall Angle Detail<br />
7
LAFARGE CEILING SOLUTIONS<br />
SPECIFICATIONS<br />
<strong>Lafarge</strong> Ceil<strong>in</strong>g Grid exposed Face 24mm (1200x600 system)<br />
Supply and <strong>in</strong>stall <strong>Lafarge</strong> Ceil<strong>in</strong>g Grid exposed face 24mm tee suspended ceil<strong>in</strong>g grid<br />
system. Ma<strong>in</strong> tee’s spaced at 1200mm & cross tee’s spaced at 600mm (1200x600<br />
system). Ceil<strong>in</strong>g tee’s to be white capped. Ma<strong>in</strong> tee’s supported at 1200mm maximum.<br />
Installation to be <strong>in</strong> accordance with SABISA (<strong>South</strong> <strong>Africa</strong>n Build<strong>in</strong>g Interior Systems<br />
Association) <strong>in</strong>stallation guidel<strong>in</strong>es.<br />
<strong>Lafarge</strong> Ceil<strong>in</strong>g Grid exposed Face 24mm (600x600 system)<br />
Supply and <strong>in</strong>stall <strong>Lafarge</strong> Ceil<strong>in</strong>g Grid exposed face 24mm tee suspended ceil<strong>in</strong>g grid<br />
system. Ma<strong>in</strong> tee’s spaced at 1200mm & cross tee’s spaced at 600mm with 600mm<br />
cross tee’s spaced between 1200mm cross tee’s at 600 centers (600x600 system).<br />
Ceil<strong>in</strong>g tee’s to be white capped. Ma<strong>in</strong> tee’s supported at 1200mm maximum.<br />
Installation to be <strong>in</strong> accordance with SABISA (<strong>South</strong> <strong>Africa</strong>n Build<strong>in</strong>g Interior Systems<br />
Association) <strong>in</strong>stallation guidel<strong>in</strong>es.<br />
<strong>Lafarge</strong> Ceil<strong>in</strong>g Grid exposed Face 35mm (1200x600 system)<br />
Supply and <strong>in</strong>stall <strong>Lafarge</strong> Ceil<strong>in</strong>g Grid exposed face 35mm tee suspended ceil<strong>in</strong>g grid<br />
system. Ma<strong>in</strong> tee’s spaced at 1200mm & cross tee’s spaced at 600mm (1200x600<br />
system). Ceil<strong>in</strong>g tee’s to be white capped. Ma<strong>in</strong> tee’s supported at 1200mm maximum.<br />
Installation to be <strong>in</strong> accordance with SABISA (<strong>South</strong> <strong>Africa</strong>n Build<strong>in</strong>g Interior Systems<br />
Association) <strong>in</strong>stallation guidel<strong>in</strong>es.<br />
<strong>Lafarge</strong> Ceil<strong>in</strong>g Grid exposed Face 35mm (600x600 system)<br />
Supply and <strong>in</strong>stall <strong>Lafarge</strong> Ceil<strong>in</strong>g Grid exposed face 35mm tee suspended ceil<strong>in</strong>g grid system. Ma<strong>in</strong> tee’s spaced at<br />
1200mm & cross tee’s spaced at 600mm with 600mm cross tee’s spaced between 1200mm cross tee’s at 600 centers<br />
(600x600 system). Ceil<strong>in</strong>g tee’s to be white capped. Ma<strong>in</strong> tee’s supported at 1200mm maximum. Installation to be <strong>in</strong><br />
accordance with SABISA (<strong>South</strong> <strong>Africa</strong>n Build<strong>in</strong>g Interior Systems Association) <strong>in</strong>stallation guidel<strong>in</strong>es.<br />
<strong>Lafarge</strong> Plaster grid concealed (1200x400 system)<br />
Supply and <strong>in</strong>stall <strong>Lafarge</strong> Ceil<strong>in</strong>g Grid exposed face 35mm tee suspended ceil<strong>in</strong>g grid system. Ma<strong>in</strong> tee’s spaced at<br />
1200mm & cross tee’s spaced at 400mm (1200x400 system). Ceil<strong>in</strong>g tee’s to be galvanized steel knurled capped.<br />
Ceil<strong>in</strong>g Grid clad with s<strong>in</strong>gle layer <strong>in</strong> either 9mm or 12mm tapered edge <strong>Lafarge</strong> Plasterboard fixed with 25mm drywall<br />
screws spaced at 150mm centers. Jo<strong>in</strong>ts are to be tapped and jo<strong>in</strong>ted with <strong>Lafarge</strong> Jo<strong>in</strong>t<strong>in</strong>g Compound and prepared for<br />
pa<strong>in</strong>t<strong>in</strong>g or jo<strong>in</strong>ts to be tapped and jo<strong>in</strong>ted and complete surface to be plastered <strong>in</strong> <strong>Lafarge</strong> Skim Lite average thickness<br />
3mm, to manufacturer specification. Ma<strong>in</strong> tee’s supported at 1200mm maximum, suspension to be ridged and constructed<br />
from galv<strong>in</strong>ized steel angles. Installation to be <strong>in</strong> accordance with SABISA (<strong>South</strong> <strong>Africa</strong>n Build<strong>in</strong>g Interior Systems<br />
Association) <strong>in</strong>stallation guidel<strong>in</strong>es.<br />
Note<br />
• Where necessary, light fitt<strong>in</strong>gs<br />
may require additional support.<br />
• Air duct<strong>in</strong>g etc. should be<br />
suspended/supported on its<br />
own sub-frame and should be<br />
<strong>in</strong> place before commencement<br />
with the ceil<strong>in</strong>g grid<br />
<strong>in</strong>stallation. The ceil<strong>in</strong>g tiles<br />
should not be suspended from<br />
the duct<strong>in</strong>g either.<br />
• Insulation materials can be<br />
layed over the ceil<strong>in</strong>g grid<br />
system <strong>in</strong> the ceil<strong>in</strong>g void.<br />
<strong>Lafarge</strong> Ceil<strong>in</strong>g Grid Specifications<br />
8
LAFARGE CEILING SOLUTIONS<br />
LAFARGE PLASTERBOARD CEILINGS<br />
Fixed Ceil<strong>in</strong>g<br />
<strong>Lafarge</strong> Gypsum offer three solutions <strong>in</strong> fixed ceil<strong>in</strong>g<br />
solutions, suspended plaster grid - steel brander<strong>in</strong>g and<br />
direct fixed timber methods<br />
• Use 9mm tapered-edge plasterboard for ceil<strong>in</strong>g<br />
<strong>in</strong>stallation; and 12 or15mm <strong>Lafarge</strong> Plasterboard<br />
for drywall <strong>in</strong>stallation.<br />
• Tapered-edge <strong>Lafarge</strong> Plasterboard is recommended for<br />
both drywall partition and ceil<strong>in</strong>g, s<strong>in</strong>ce Fiber tape and<br />
<strong>Lafarge</strong> Jo<strong>in</strong>t<strong>in</strong>g Plaster can smoothly conceal the jo<strong>in</strong>t.<br />
• Square-edge <strong>Lafarge</strong> Plasterboard is recommended for<br />
T-bar lay-<strong>in</strong> ceil<strong>in</strong>g system.<br />
• For double-layered <strong>in</strong>stallation, the first layer should<br />
be hung one way and the f<strong>in</strong>ish<strong>in</strong>g, or second layer,<br />
perpendicular or staggered. This method provides a<br />
stronger ceil<strong>in</strong>g and additional fire resistance.<br />
• When driv<strong>in</strong>g screws <strong>in</strong>to <strong>Lafarge</strong> Plasterboard, set the<br />
screws at the proper depth for maximum hold<strong>in</strong>g power.<br />
The depth of the screw can be adjusted by mov<strong>in</strong>g the<br />
nose of the screwdriver either <strong>in</strong> or out.<br />
• Spac<strong>in</strong>g of each screw should not exceed 220mm for<br />
partitions and 150mm for ceil<strong>in</strong>gs and be about lOmm<br />
from the edges of the board.<br />
• Drive the screws from the centre to the side of the board.<br />
If the partition is <strong>in</strong>stalled first, then allow 5mm spac<strong>in</strong>g<br />
between ceil<strong>in</strong>g and partition for adjustment <strong>in</strong> case that<br />
the ceil<strong>in</strong>g is moveable.<br />
Installation of Ceil<strong>in</strong>g 6.4mm <strong>Lafarge</strong> Plasterboard<br />
1. Determ<strong>in</strong>e the ceil<strong>in</strong>g height around the room.<br />
2. Set up the grids by us<strong>in</strong>g 38 x 38mm timber/steel<br />
brander<strong>in</strong>g at 400mm, spac<strong>in</strong>g for 6.4mm <strong>Lafarge</strong><br />
Plasterboard.<br />
3. Fix square-edge <strong>Lafarge</strong> Plasterboard to the grids by<br />
nail<strong>in</strong>g materials firmly. Keep lOmm space between each<br />
<strong>Lafarge</strong> Plasterboard.<br />
4. Locate H profile strips at plasterboard jo<strong>in</strong>ts.<br />
5. Conceal the nail dimple with <strong>Lafarge</strong> Jo<strong>in</strong>t<strong>in</strong>g Plaster.<br />
6.4mm <strong>Lafarge</strong> Plasterboard<br />
us<strong>in</strong>g H strip jo<strong>in</strong>t<br />
<strong>Lafarge</strong> 6.4mm<br />
Plasterboard<br />
9
LAFARGE CEILING SOLUTIONS<br />
LAFARGE PLASTERBOARD CEILINGS<br />
LAFARGE 6.4MM PLASTERBOARD<br />
Features:<br />
• <strong>Lafarge</strong> 6.4mm plasterboard has a harder core<br />
offer<strong>in</strong>g a cleaner cut and therefore a cleaner<br />
work<strong>in</strong>g environment.<br />
• The <strong>Lafarge</strong> 6.4mm plasterboard has been<br />
formulated to elim<strong>in</strong>ate sagg<strong>in</strong>g.<br />
• The <strong>Lafarge</strong> 6.4mm plasterboard allows for<br />
better handl<strong>in</strong>g due to a more rigid core<br />
recipe, reduc<strong>in</strong>g the risk of break<strong>in</strong>g on site.<br />
• The ivory coloured paper matches perfectly<br />
to the <strong>Lafarge</strong> 75mm cove cornice.<br />
• Pa<strong>in</strong>t<strong>in</strong>g becomes more efficient due to less<br />
pa<strong>in</strong>t hav<strong>in</strong>g to be applied to the board.<br />
• <strong>Lafarge</strong> 6.4mm plasterboard can be curved<br />
to offer that unique bulkhead shape.<br />
• The best f<strong>in</strong>ish is achieved by <strong>in</strong>stall<strong>in</strong>g the boards<br />
on the <strong>Lafarge</strong> steel brander<strong>in</strong>g system.<br />
Product available <strong>in</strong>:<br />
900mm width <strong>in</strong> lengths of 2400mm, 2700mm,<br />
3000mm, 3300mm, 3600mm<br />
& 4200mm<br />
1200mm width <strong>in</strong> lengths of 2400mm, 2700mm,<br />
3000mm, 3300mm, 3600mm<br />
& 4200mm<br />
10
LAFARGE CEILING SOLUTIONS<br />
LAFARGE STEEL BRANDERING<br />
<strong>Lafarge</strong> Steel Brander<strong>in</strong>g has been designed as an alternative<br />
to timber brander<strong>in</strong>g. <strong>Lafarge</strong> Steel Brander<strong>in</strong>g can also<br />
be used <strong>in</strong> bulkhead construction. A range of jo<strong>in</strong>ers are<br />
available to facilitate easy bulkhead construction.<br />
Advantages:<br />
1. Cost effective 7. Ease of cutt<strong>in</strong>g<br />
2. Easy transportation 8. M<strong>in</strong>imum wastage<br />
3. Handl<strong>in</strong>g and stack<strong>in</strong>g 9. Easy <strong>in</strong>stallation<br />
4. Easy level<strong>in</strong>g of suspension bracket 10. Eco friendly<br />
5. Straightness 11. More level f<strong>in</strong>ish<br />
6. Varied lengths<br />
Steel brander<strong>in</strong>g should be <strong>in</strong>stalled as follows:<br />
1. Steel brander<strong>in</strong>g sections must be fixed at 90 degrees to<br />
the roof trusses.<br />
2. The suspension bracket to be fixed to the Tie-Beam by<br />
either nail or screw at maximum 1200mm centres and<br />
located <strong>in</strong>to <strong>Lafarge</strong> Steel Brander<strong>in</strong>g.<br />
3. The brander<strong>in</strong>g should be fixed at centres as <strong>in</strong>dicated <strong>in</strong><br />
table 2.<br />
4. The <strong>Lafarge</strong> Ceil<strong>in</strong>g Plasterboard should be fixed at 90<br />
degrees to the <strong>Lafarge</strong> Steel Brander<strong>in</strong>g e.g. parallel to<br />
the roof trusses, with drywall screws spaced at maximum<br />
150mm centres.<br />
5. The <strong>Lafarge</strong> Steel Brander<strong>in</strong>g system can be used<br />
with the 6.4mm Ceil<strong>in</strong>g and H Jo<strong>in</strong>t<strong>in</strong>g Strip, or Tape<br />
and Jo<strong>in</strong>ted ceil<strong>in</strong>g system, or Flush Plastered<br />
ceil<strong>in</strong>g system when 9mm or 12mm ceil<strong>in</strong>g boards are<br />
used.<br />
6. The jo<strong>in</strong>er section must be used to jo<strong>in</strong> two pieces of<br />
<strong>Lafarge</strong> Steel Brander<strong>in</strong>g or when chang<strong>in</strong>g direction on<br />
a hip roof.<br />
7. It is advisable to fix a 20 x 20 steel angle to the<br />
perimeter walls as a support for the <strong>Lafarge</strong> Steel<br />
Brander<strong>in</strong>g and <strong>Lafarge</strong> Plasterboard fix<strong>in</strong>g, this<br />
will ensure a solid base for cornice fix<strong>in</strong>g.<br />
Note: Truss (Tie-Beam) spac<strong>in</strong>gs should not exceed<br />
1200mm.<br />
<strong>Lafarge</strong> Steel Brander<strong>in</strong>g system<br />
<strong>Lafarge</strong> Steel Brander<strong>in</strong>g Table 1<br />
Steel Brander<strong>in</strong>g Centres Table 2<br />
6,4mm <strong>Lafarge</strong><br />
Board H Jo<strong>in</strong>t<strong>in</strong>g Strip Tape<br />
and Jo<strong>in</strong>ted<br />
9mm <strong>Lafarge</strong><br />
Board Tape<br />
and Jo<strong>in</strong>ted<br />
9mm <strong>Lafarge</strong><br />
Board Plastered<br />
Ceil<strong>in</strong>gs<br />
Typical Jo<strong>in</strong>t Detail for 6,4mm <strong>Lafarge</strong> Plasterboard Ceil<strong>in</strong>g<br />
Typical Jo<strong>in</strong>t Detail for 9mm T/E <strong>Lafarge</strong> Plasterboard Ceil<strong>in</strong>g<br />
<strong>Lafarge</strong> Jo<strong>in</strong><strong>in</strong>g Plaster<br />
Typical <strong>Lafarge</strong> Skimmed Residential Ceil<strong>in</strong>g<br />
<strong>Lafarge</strong><br />
<strong>Lafarge</strong><br />
Plasterboard (6,4mm)<br />
9mm T/E <strong>Lafarge</strong><br />
Plasterboard<br />
Product Code Description Product Length<br />
GLBR Steel Brander<strong>in</strong>g 2400mm / 2700mm /<br />
3000mm / 3600mm<br />
4200mm<br />
GLJR Jo<strong>in</strong>er 75mm<br />
GLSB Suspension Bracket 150mm<br />
When us<strong>in</strong>g steel brander<strong>in</strong>g for a flush plastered ceil<strong>in</strong>g<br />
all tie beams or suspension must be addequately braced to<br />
prevent movement.<br />
11
LAFARGE CEILING SOLUTIONS<br />
SPECIFICATIONS FOR STEEL BRANDERING<br />
Supply and <strong>in</strong>stall <strong>Lafarge</strong> 6.4mm and 9mm residential<br />
plasterboard:<br />
The system is to consist of 6.4mm and 9mm plasterboard<br />
fastened to a leveled <strong>Lafarge</strong> steel brander<strong>in</strong>g system<br />
<strong>in</strong>clud<strong>in</strong>g all jo<strong>in</strong>ts, brackets and fix<strong>in</strong>gs.<br />
• Materials fix<strong>in</strong>g and fasten<strong>in</strong>g must be <strong>in</strong> accordance<br />
with <strong>Lafarge</strong> fix<strong>in</strong>g and <strong>in</strong>stallation methods, and must<br />
conform to the “SABISA” General Installation<br />
Guidel<strong>in</strong>es for Ceil<strong>in</strong>gs<br />
• Jo<strong>in</strong>t ceil<strong>in</strong>g boards with H profile jo<strong>in</strong>t<strong>in</strong>g strip,<br />
• Allow extra over for the supply and <strong>in</strong>stallation of<br />
(50/75/100mm) 14kg/m 2 <strong>in</strong>sulation on top of ceil<strong>in</strong>g,<br />
• Allow extra over for <strong>Lafarge</strong> Ceil<strong>in</strong>g Access Panel (top<br />
h<strong>in</strong>ged/bottom H<strong>in</strong>ged/lay <strong>in</strong>),<br />
• Allow extra over for <strong>Lafarge</strong> decorative mould<strong>in</strong>g and<br />
adhesive.<br />
• Allow extra over for <strong>Lafarge</strong> Gypsum 75mm Cove<br />
Cornice.<br />
Material Calculations for <strong>Lafarge</strong> Ceil<strong>in</strong>g Grid<br />
A 1200 x 600mm Grid (Exposed)<br />
1. Ma<strong>in</strong> tees 3600mm long at 1200mm centres. Multiply<br />
total ceil<strong>in</strong>g area x 0,232 = number of ma<strong>in</strong> tees.<br />
2. Cross tees 1200mm long at 600mm centres. Multiply<br />
total ceil<strong>in</strong>g area x 1,383 = number of cross tees.<br />
3. Wall angle, total length of wall divided by 3,6 =<br />
number of wall angles.<br />
4. Suspension hangers at maximum 1200mm centres.<br />
Total ceil<strong>in</strong>g area divided by 1,25 = number of hangers.<br />
5. <strong>Lafarge</strong> v<strong>in</strong>yl tiles 1200 x 600mm: total<br />
ceil<strong>in</strong>g area divided by 0,72 = number of ceil<strong>in</strong>g tiles.<br />
B 600 x 600mm Grid (Exposed)<br />
1,2,3,4 as 1200 x 600mm grid.<br />
6. Take the number of 1200 cross tees and multiply by<br />
1 = 600mm cross tees needed.<br />
7. <strong>Lafarge</strong> v<strong>in</strong>yl tiles 600 x 600mm: Total ceil<strong>in</strong>g area<br />
divided by 0,36 = number of tiles.<br />
C 1500 x 500mm Grid (Exposed)<br />
3,4 as 1200 x 600mm grid.<br />
8. Ma<strong>in</strong> tees 3600mm long at 1500mm centres. Multiply<br />
total ceil<strong>in</strong>g area x 0,191= number of ma<strong>in</strong> tees.<br />
9. Cross tees 1500mm long at 500mm centres. Multiply<br />
total ceil<strong>in</strong>g area x 1,334 = number of cross tees.<br />
10. <strong>Lafarge</strong> v<strong>in</strong>yl tiles 1500 x 500mm: Total<br />
ceil<strong>in</strong>g area divided by 0,75 = number of tiles.<br />
D. 1200 x 400mm Grid (Plaster)<br />
1,4 as 1200 x 600mm grid.<br />
11. Cross tees 1200mm long at 400mm centres. Multiply<br />
total ceil<strong>in</strong>g area x 2,08 = number of cross tees.<br />
12. Shadow l<strong>in</strong>e plaster trim = Total length of wall divided<br />
by 3,6 = number of shadow l<strong>in</strong>e plaster trim.<br />
13. <strong>Lafarge</strong> plasterboard m 2 of board divided <strong>in</strong>to<br />
total ceil<strong>in</strong>g area = number of boards.<br />
Steel Brander<strong>in</strong>g<br />
A. At 300mm centres 3.3 metres of Steel<br />
Brander<strong>in</strong>g per m 2<br />
B. At 400mm centres 2.5 metres of Steel<br />
Brander<strong>in</strong>g per m 2<br />
C. At 500mm centres 2 metres of Steel<br />
Brander<strong>in</strong>g per m 2<br />
Allow for a Suspension Bracket at every fix<strong>in</strong>g po<strong>in</strong>t spaced<br />
at maximum 1200mm centres.<br />
(Total length of steel brander<strong>in</strong>g divided by 1.2 equals the<br />
quantity of fix<strong>in</strong>g brackets).<br />
Allow for one Jo<strong>in</strong>er for every length of Steel Brander<strong>in</strong>g.<br />
NB The above calculations will provide approximate quantities and does not allow for<br />
wastage. Installation of grid shall be <strong>in</strong> accordance with the manufacturers<br />
specification, as well as the guidel<strong>in</strong>es layed out for SABISA (The <strong>South</strong> <strong>Africa</strong>n Build<strong>in</strong>g<br />
Interior Sub-contractors Association).<br />
12
LAFARGE CEILING SOLUTIONS<br />
LAFARGE SUPPORT COMPONENTS<br />
13
LAFARGE CEILING SOLUTIONS<br />
VINYL CEILING TILES<br />
<strong>Lafarge</strong> ceil<strong>in</strong>g tiles are a range of ready to use plasterboard<br />
ceil<strong>in</strong>g tiles available <strong>in</strong> various patterns and textures.<br />
The <strong>Lafarge</strong> Ceil<strong>in</strong>g Tile range are superb for modern<br />
build<strong>in</strong>g decoration without further pa<strong>in</strong>t<strong>in</strong>g and<br />
are easy to keep clean. Available <strong>in</strong> square edge or<br />
revealed edge for lay-<strong>in</strong> ceil<strong>in</strong>g <strong>in</strong>stallations.<br />
Support<strong>in</strong>g Structure<br />
To ensure a high standard of f<strong>in</strong>ish, it is essential that the<br />
support<strong>in</strong>g structure is accurate and sound. Additional<br />
supports are required at positions of light fitt<strong>in</strong>gs. Air<br />
conditioners/ventilat<strong>in</strong>g equipment must not to be<br />
supported from ceil<strong>in</strong>g grid and must have their own<br />
<strong>in</strong>dependent support system.<br />
<strong>Lafarge</strong> Gypsum has established a reputation for high<br />
quality ceil<strong>in</strong>g tiles. These tiles are manufactured with<br />
our quality <strong>Lafarge</strong> plasterboard. When coupled with our<br />
Gridlock ceil<strong>in</strong>g grid, the solution provides a high quality<br />
aesthetic ceil<strong>in</strong>g that is quick and easy to <strong>in</strong>stall.<br />
Support Structure<br />
To ensure a high standard of f<strong>in</strong>ish, it is essential that the<br />
support<strong>in</strong>g structure is accurate and sound. Additional<br />
supports are required at positions of light fitt<strong>in</strong>gs. Air<br />
conditioners/ventilat<strong>in</strong>g equipment not to be supported<br />
from ceil<strong>in</strong>g grid and must have their own support system.<br />
Care should be taken to ensure that the <strong>Lafarge</strong> ceil<strong>in</strong>g<br />
tiles are not dropped or subjected to rough handl<strong>in</strong>g.<br />
<strong>Lafarge</strong> ceil<strong>in</strong>g tiles should be stored <strong>in</strong> a dry area.<br />
The stacks must be packed on suitable timber supports,<br />
maximum 400mm apart and off the ground. (supports<br />
maximum lOOmm from ends)<br />
<strong>Lafarge</strong> plasterboard consists of an aerated gypsum core<br />
firmly bonded on both sides with a special plasterboard<br />
l<strong>in</strong>er. These characteristics of gypsum provide plasterboard<br />
with outstand<strong>in</strong>g advantages over other flat sheet materials.<br />
GENERAL DESIGN CRITERIA<br />
<strong>Lafarge</strong> Gypsum has established a reputation for high<br />
quality ceil<strong>in</strong>g tiles.<br />
The <strong>in</strong>formation conta<strong>in</strong>ed <strong>in</strong> this leaflet serves as a general<br />
guide. Architects, eng<strong>in</strong>eers and specifiers must approve<br />
the f<strong>in</strong>al design and construction criteria, as well as other<br />
implications on site.<br />
Fix<strong>in</strong>g Accessories<br />
A complete range of <strong>Lafarge</strong> Ceil<strong>in</strong>g Grid ceil<strong>in</strong>g tees are<br />
available. Please refer to the <strong>Lafarge</strong> Ceil<strong>in</strong>g Grid brochure.<br />
Hold down clips must be used <strong>in</strong> areas where w<strong>in</strong>d updraft<br />
could cause tiles to lift, or where light tiles will<br />
be used,
LAFARGE CEILING SOLUTIONS<br />
LAFARGE VINYL CEILING TILES<br />
V<strong>in</strong>yl Tile Code Nom<strong>in</strong>al Thickness Type<br />
Dimension<br />
JVT LR 1200mm x 600mm 9mm Square edge<br />
JVT LR 600mm x 600mm 6.6kg/m 2<br />
JVT LR 1200mm x 600mm 12mm Square edge<br />
JVT LR 600mm x 600mm 8.78kg/m 2<br />
JVT LR 1500mm x 500mm<br />
JVT LF 1200mm x 600mm 9mm Square edge<br />
JVT LF 600mm x 600mm 6.6kg/m 2<br />
JVT LF 1200mm x 600mm 12mm Square edge<br />
JVT LF 600mm x 600mm 8.78kg/m 2<br />
JVT LF 1500mm x 500mm<br />
JVT SWH 1200mm x 600mm 9mm Square edge<br />
JVT SWH 600mm x 600mm 6.6kg/m 2<br />
JVT SWH 1200mm x 600mm 9mm Square edge<br />
JVT SWH 600mm x 600mm 6.6kg/m 2 Foil Back<br />
JVT SWH 1200mm x 600mm 12mm Square edge<br />
JVT SWH 600mm x 600mm 8.78kg/m 2<br />
JVT SWH 1500mm x 500mm<br />
* Fissured and Seafern tiles have directional patterns.<br />
Vapour barriers can be lam<strong>in</strong>ated to the back ceil<strong>in</strong>g tiles as an optional extra for humid areas.<br />
Advantages<br />
Applications<br />
• Lightweight<br />
• Durable<br />
• Well decorated surface<br />
• Easy to use and quick to <strong>in</strong>stall<br />
• 91% light reflection (perforated tiles)<br />
• Non combustible, fire retardant core<br />
• Offices<br />
• Schools<br />
• Conference centres<br />
• Department stores<br />
• Factories<br />
• Hospitals<br />
15
LAFARGE PREFABRICATED<br />
BULKHEADS<br />
Comb<strong>in</strong>e speed and grace with high quality<br />
pre-manufactured <strong>Lafarge</strong> Bulkheads. These <strong>in</strong>novative<br />
bulkheads comb<strong>in</strong>e the best of architectural pr<strong>in</strong>ciples<br />
learnt <strong>in</strong> the past with modern day technology. Rather than<br />
build<strong>in</strong>g bulkheads on site you can save time, labour and<br />
wastage on the job site, by gett<strong>in</strong>g the f<strong>in</strong>ished product<br />
delivered to site, ready to <strong>in</strong>stall.<br />
Whether you choose from our range of standard designs or<br />
opt for a custom designed solution, you can be sure of a<br />
consistently superior f<strong>in</strong>ish matched with the strength of<br />
solid re<strong>in</strong>forcement. And, with the speed of its <strong>in</strong>stallation,<br />
it will give you a perfect f<strong>in</strong>ish for your commercial or<br />
residential application every time.<br />
Our <strong>in</strong>novative <strong>Lafarge</strong> Prefabricated Bulkheads offer<br />
high quality and consistency previously unheard of. These<br />
<strong>in</strong>novative design methods are pre-made to precision, us<strong>in</strong>g<br />
a unique patented process. This process allows for high<br />
quality consistent f<strong>in</strong>ishes to be produced irrespective of the<br />
quantity desired.<br />
<strong>Lafarge</strong><br />
Prefabricated<br />
Bulkheads<br />
16
LAFARGE PREFABRICATED BULKHEADS<br />
TECHNICAL DETAILS<br />
This is the result of an idea that threw an ideal bridge between architectural lessons of the past and the most advanced<br />
technology. <strong>Lafarge</strong> Gypsum, <strong>in</strong> association with Innovative Profile Systems, is projected <strong>in</strong>to the future with <strong>in</strong>novative<br />
products <strong>in</strong> the field of profiled concepts.<br />
Choose from a large range of standard designs, or new profiles can also be made to suit your requirements.<br />
Step Type<br />
L Type Profile<br />
LU Type Profile<br />
17
LAFARGE PREFABRICATED BULKHEADS<br />
SPECIFICATIONS<br />
Fair End Profile<br />
Standard Profiles<br />
Supply and <strong>in</strong>stall <strong>Lafarge</strong> Prefabricated Bulkhead as per Manufacturers <strong>in</strong>stallation guidel<strong>in</strong>es.<br />
Customised Profiles<br />
Supply and <strong>in</strong>stall <strong>Lafarge</strong> Prefabricated Bulkhead as per architectural draw<strong>in</strong>g.<br />
Fix<strong>in</strong>g Instruction<br />
18
INTRODUCTION<br />
<strong>Lafarge</strong><br />
Acoustic Ceil<strong>in</strong>gs<br />
An acoustic and decorative solution, <strong>Lafarge</strong> Acoustic<br />
Ceil<strong>in</strong>g Board is a square pattern perforated gypsum board<br />
designed for systems requir<strong>in</strong>g both superior acoustic and<br />
aesthetic qualities. With a protective mat glued to the back<br />
of the board, <strong>in</strong>stall<strong>in</strong>g the board is as simple as fix<strong>in</strong>g a<br />
standard system. With a Noise Reduction Coefficient (NRC)<br />
of up to 0.60, this solution helps to create an acoustic<br />
ambience.<br />
A major benefit of this solution is the ease of <strong>in</strong>stallation,<br />
due to the protective glass mat, which is glued to the back<br />
of the board, prevent<strong>in</strong>g dust emission. The protective mat<br />
enables a complete one-step <strong>in</strong>stallation, which saves time<br />
and results <strong>in</strong> <strong>in</strong>creased on-site productivity and overall cost<br />
effectiveness.<br />
sound absorption specifications. Its superior appearance<br />
featur<strong>in</strong>g square perforations is an additional benefit for<br />
schools, large open area ceil<strong>in</strong>gs <strong>in</strong> hotels, conference and<br />
concert halls and offices where the “look” is as important as<br />
acoustic performance.<br />
Features<br />
• Excellent sound absorption controll<strong>in</strong>g reflection.<br />
• High quality f<strong>in</strong>ish provid<strong>in</strong>g an aesthetic appearance<br />
• Recessed edges cater for a smooth surface with no<br />
visible jo<strong>in</strong>ts<br />
• Protective mat fixed to the back of the <strong>Lafarge</strong> Acoustic<br />
Ceil<strong>in</strong>g board prevents dust emission.<br />
Applications<br />
The high performance system is ideal for meet<strong>in</strong>g both<br />
noise reduction and quality design specifications <strong>in</strong> commercial<br />
build<strong>in</strong>gs. With an acoustic absorption of 0.60 and<br />
a complete one-step <strong>in</strong>stallation, <strong>Lafarge</strong> Acoustic<br />
Ceil<strong>in</strong>g Board is a cost-effective solution for achiev<strong>in</strong>g<br />
19
LAFARGE ACOUSTIC CEILINGS<br />
ACOUSTIC CEILINGS<br />
Ceil<strong>in</strong>g Installations<br />
<strong>Lafarge</strong> Acoustic Ceil<strong>in</strong>g Boards are <strong>in</strong>stalled on <strong>Lafarge</strong><br />
Plaster Grid <strong>in</strong> the same manner as standard flush plaster<br />
ceil<strong>in</strong>gs – fixed, jo<strong>in</strong>ted and skimmed <strong>in</strong> the same fashion.<br />
For timber <strong>in</strong>stallation the use of 30mm high-low thread,<br />
drywall screws are required. Steel frames require 25mm<br />
drywall screws.<br />
Place 50/80/100mm m<strong>in</strong>eral wool, placed directly on the<br />
back of <strong>Lafarge</strong> Acoustic Ceil<strong>in</strong>g Board.<br />
The jo<strong>in</strong>ts are f<strong>in</strong>ished with Fibertape and <strong>Lafarge</strong> Jo<strong>in</strong>t<strong>in</strong>g<br />
Compound, avoid<strong>in</strong>g obstruction of the nearest perforations.<br />
Pa<strong>in</strong>t<strong>in</strong>g should be carried out with a roller <strong>in</strong> order to<br />
protect the glass mat situated on the back of the <strong>Lafarge</strong><br />
Acoustic Ceil<strong>in</strong>g Board.<br />
Technical and Acoustic Specification<br />
Board Size:<br />
12.5mm x 1200mm x 2400mm<br />
Weight:<br />
10kg/m²<br />
Edge Type:<br />
Tapered Edge<br />
NRC<br />
0.73<br />
Plenium 100mm<br />
M<strong>in</strong>eral Wool 100mm<br />
NRC<br />
0.69<br />
Plenium 300mm<br />
M<strong>in</strong>eral Wool 100mm<br />
Rate of perforation 13.4%<br />
Shape<br />
Perforations<br />
Number of zones per sheet<br />
Square<br />
10 x 10mm<br />
8<br />
20
MATERIAL CALCULATIONS<br />
Material Calculations for <strong>Lafarge</strong> Ceil<strong>in</strong>g Grid<br />
A 1200 x 600mm Grid (Exposed)<br />
1 Ma<strong>in</strong> tees 3600mm long at 1200mm centres. Multiply total ceil<strong>in</strong>g area x 0,232 = number of ma<strong>in</strong> tees.<br />
2 Cross tees 1200mm long at 600mm centres. Multiply total ceil<strong>in</strong>g area x 1,383 = number of cross tees.<br />
3 wall angle = total length of wall divided by 3,6 = number of wall angles.<br />
4 Suspension hangers at maximum 1200mm centres. Total ceil<strong>in</strong>g area divided by 1,25 = number of hangers.<br />
5 <strong>Lafarge</strong> v<strong>in</strong>yl tiles 1200 x 600mm: total ceil<strong>in</strong>g area divided by 0,72 = number of ceil<strong>in</strong>g tiles.<br />
B 600 x 600mm Grid (Exposed)<br />
1,2,3,4 as 1200 x 600mm grid.<br />
6 Take the number of 1200 cross tees and multiply by 1 = 600mm cross tees needed.<br />
7 <strong>Lafarge</strong> v<strong>in</strong>yl tiles 600 x 6oomm: Total ceil<strong>in</strong>g area divided by 0,36 = number of tiles.<br />
C 1500 x 500mm Grid (Exposed)<br />
3,4 as 1200 x 600mm grid.<br />
8 Ma<strong>in</strong> tees 3600mm long at 1500mm centres. Multiply total ceil<strong>in</strong>g area x 0,191 = number of ma<strong>in</strong> tees.<br />
9 Cross tees 1500mm long at 500mm centres. Multiply total ceil<strong>in</strong>g area x 1,334 = number of cross tees.<br />
10 <strong>Lafarge</strong> v<strong>in</strong>yl tiles 1500 x 500mm: Total ceil<strong>in</strong>g area divided by 0,75 = number of tiles.<br />
D. 1200 x 400mm Grid (Plaster)<br />
1,4 as 1200 x 600mm grid.<br />
11 Cross tees 1200mm long at 400mm centres. Multiply total ceil<strong>in</strong>g area x 2,08 = number of cross tees.<br />
12 Shadow l<strong>in</strong>e plaster trim = Total length of wall divided by 3,6 = number of shadow l<strong>in</strong>e plaster trim.<br />
13 <strong>Lafarge</strong> plasterboard m 2 of board divided <strong>in</strong>to total ceil<strong>in</strong>g area = number of boards.<br />
Steel Brander<strong>in</strong>g<br />
A At 300mm centres 3.3 metres of Steel Brander<strong>in</strong>g per m 2 .<br />
B At 400mm centres 2.5 metres of Steel Brander<strong>in</strong>g per m 2 .<br />
C At 500mm centres 2 metres of Steel Brander<strong>in</strong>g per m 2 .<br />
Allow for a Suspension Bracket at every fix<strong>in</strong>g po<strong>in</strong>t spaced at maximum 1200mm centres.<br />
(Total length of steel brander<strong>in</strong>g divided by 1.2 equals the quantity of fix<strong>in</strong>g brackets).<br />
Allow for one Jo<strong>in</strong>er for every length of Steel Brander<strong>in</strong>g.<br />
NB: The above calculations will provide approximate quantities and do not allow for wastage. Installation of the grid shall be<br />
<strong>in</strong> accordance with the manufacturers specification, as well as the guidel<strong>in</strong>es layed out for SABISA (The <strong>South</strong> <strong>Africa</strong>n Build<strong>in</strong>g<br />
Interior Sub-Contractors Association).<br />
21
LAFARGE CEILING<br />
ACCESS PANELS<br />
<strong>Lafarge</strong><br />
Ceil<strong>in</strong>g Access Panels<br />
Maximis<strong>in</strong>g Ceil<strong>in</strong>g Space Accessibility <strong>Lafarge</strong> Gypsum’s<br />
<strong>in</strong>novative <strong>Lafarge</strong> Ceil<strong>in</strong>g Access Panels offer a cost effective,<br />
aesthetically pleas<strong>in</strong>g alternative to the conventional gypsum<br />
trap doors, ensur<strong>in</strong>g that your trap doors look neat and clean<br />
all the time.<br />
Modern and very functional, <strong>Lafarge</strong> Ceil<strong>in</strong>g Access Panels<br />
are available <strong>in</strong> three different configurations to cater for your<br />
specific requirements:<br />
• Top H<strong>in</strong>ged<br />
• Bottom H<strong>in</strong>ged<br />
• Lay <strong>in</strong><br />
22
LAFARGE CEILING ACCESS PANELS<br />
BENEFITS<br />
<strong>Lafarge</strong> Gypsum’s quality Ceil<strong>in</strong>g Access Panels guarantee a<br />
long lifespan.<br />
The panels are easy to <strong>in</strong>stall, thus sav<strong>in</strong>g time, and come<br />
complete with fully detailed fix<strong>in</strong>g <strong>in</strong>structions for quick<br />
on-site <strong>in</strong>stallation. Due to the powder-coated f<strong>in</strong>ish, ceil<strong>in</strong>g<br />
access panels are easy to clean - mak<strong>in</strong>g unsightly f<strong>in</strong>ger<br />
marks, that are prevalent on conventional gypsum trap<br />
doors, a th<strong>in</strong>g of the past.<br />
Configurations<br />
Modern and very functional, <strong>Lafarge</strong> Gypsum Ceil<strong>in</strong>g Access<br />
Panels are available <strong>in</strong> three different configurations to<br />
cater for your specific needs.<br />
Aesthetically superior to gypsum trap doors, they offer a<br />
neat, clean f<strong>in</strong>ish to ceil<strong>in</strong>gs<br />
Top H<strong>in</strong>ged<br />
Bottom H<strong>in</strong>ged<br />
T-Frames<br />
“T” Section Centre L<strong>in</strong>e Ceil<strong>in</strong>g modular grids are commonly<br />
used for conventional trapdoor frames <strong>in</strong> plastered<br />
ceil<strong>in</strong>gs. They can also be used for light fitt<strong>in</strong>gs.<br />
Lay In<br />
These grids are available ex-stock <strong>in</strong> the follow<strong>in</strong>g sizes and<br />
f<strong>in</strong>ishes:<br />
600 x 600 Natural Anodised<br />
600 x 600 White<br />
1 200 x 600 Natural Anodised<br />
1 200 x 600 White<br />
Specifications<br />
Allow extra over ceil<strong>in</strong>g for <strong>Lafarge</strong> Ceil<strong>in</strong>g Access Panel<br />
compris<strong>in</strong>g 635 x 635 mm white epoxy coated alum<strong>in</strong>ium<br />
T-frame with 580 x 580 mm white epoxy coated steel pan<br />
<strong>in</strong> a Top h<strong>in</strong>ged / Bottom h<strong>in</strong>ged / Lay-<strong>in</strong> option as supplied<br />
by <strong>Lafarge</strong> Gypsum fitted flush to ceil<strong>in</strong>g with and <strong>in</strong>clud<strong>in</strong>g<br />
screw fix<strong>in</strong>g through stalk of T-frame <strong>in</strong>to 38 x 38 mm<br />
softwood/steel brander<strong>in</strong>g / support<strong>in</strong>g subframe.<br />
23
LAFARGE CEILING ACCESS PANELS<br />
FIXING INSTRUCTION<br />
®<br />
Typical Jo<strong>in</strong>t Detail for 6,4mm <strong>Lafarge</strong> Plasterboard<br />
<strong>Lafarge</strong> 6.4mm<br />
Typical Jo<strong>in</strong>t Detail for 9mm T/E <strong>Lafarge</strong> Plasterboard<br />
<strong>Lafarge</strong> Jo<strong>in</strong>t<strong>in</strong>g Tape<br />
<strong>Lafarge</strong> Jo<strong>in</strong>t<strong>in</strong>g Plaster<br />
9mm T/E <strong>Lafarge</strong><br />
Plasterboard<br />
24
LAFARGE CEILING ACCESS PANELS<br />
QUICK REFERENCE GUIDE<br />
1195mm X 585mm / 585mm X 585mm<br />
1200mm X 600mm / 600mm X 600mm<br />
T-Frame<br />
Bottom H<strong>in</strong>ge<br />
Bottom H<strong>in</strong>ge Catch<br />
Top H<strong>in</strong>ge<br />
Top H<strong>in</strong>ge Detail<br />
25
LAFARGE DECORATIVE MOULDINGS<br />
LAFARGE DECORATIVE MOULDINGS<br />
The <strong>Lafarge</strong> decorative mould<strong>in</strong>gs add a luxury feel to any<br />
room. Mould<strong>in</strong>gs are an excellent tool to help hide small<br />
defects at corners and jo<strong>in</strong> materials of different thickness<br />
while add<strong>in</strong>g architectural <strong>in</strong>terest. The light-weight, non-toxic<br />
mould<strong>in</strong>gs are simple to <strong>in</strong>stall, leav<strong>in</strong>g a modern professional<br />
f<strong>in</strong>ish to a build<strong>in</strong>g or renovation project. There are currently<br />
11 <strong>in</strong>dividual mould<strong>in</strong>gs to choose from, whether you require<br />
a simple functional mould<strong>in</strong>g, or a decorative profile, an<br />
ord<strong>in</strong>ary room will be turned <strong>in</strong>to a beautifully f<strong>in</strong>ished space<br />
with <strong>Lafarge</strong> Decorative Mould<strong>in</strong>gs.<br />
Durable<br />
Made of high density moulded polystyrene, these mould<strong>in</strong>gs<br />
are extremely durable and will not chip if dropped. Cuts<br />
and dents can be filled with utility adhesive, reduc<strong>in</strong>g waste<br />
significantly.<br />
Product Information:<br />
• High density moulded polystyrene<br />
• Smooth white surface ready fo pa<strong>in</strong>t<strong>in</strong>g<br />
• Available <strong>in</strong> 2 meter lengths<br />
• Melt<strong>in</strong>g temperature: 80 degrees Celsius<br />
• Non-toxic<br />
• Weight:8kgs/100 m cornice<br />
• Pa<strong>in</strong>t: Acrylic water based PVA<br />
pa<strong>in</strong>t should be used. Enamel pa<strong>in</strong>t<br />
can be used but a primer of PVA<br />
pa<strong>in</strong>t is required.<br />
Resistant to humidity<br />
The <strong>Lafarge</strong> range of mould<strong>in</strong>gs are resistant to water and<br />
humidity, mak<strong>in</strong>g them an excellent choice for bathrooms<br />
and humid areas.<br />
Heat resistant<br />
While direct heat placed too close to mould<strong>in</strong>gs can damage<br />
them, the larger profiles can be used to conceal low voltage<br />
fluorescent light<strong>in</strong>g with a clearance of approximately 5cm.<br />
Installation<br />
Install<strong>in</strong>g mould<strong>in</strong>gs has never been easier with the<br />
lightweight range, which is prefabricated <strong>in</strong> the factory and<br />
arrives ready to <strong>in</strong>stall. The <strong>Lafarge</strong> Cornice Adhesive must<br />
be used to <strong>in</strong>stall <strong>Lafarge</strong> mould<strong>in</strong>gs.<br />
Water based acrylic PVA Pa<strong>in</strong>t should be used for f<strong>in</strong>al<br />
coat<strong>in</strong>g.<br />
Cost effective<br />
These pre-fabricated polystyrene mould<strong>in</strong>gs are cost effective,<br />
more durable and labour sav<strong>in</strong>g when compared to other<br />
products.<br />
<strong>Lafarge</strong><br />
Decorative Mould<strong>in</strong>gs<br />
26
LAFARGE DECORATIVE MOULDINGS<br />
DIMENSIONS<br />
<strong>Lafarge</strong><br />
Roman<br />
<strong>Lafarge</strong><br />
Grecian<br />
<strong>Lafarge</strong><br />
Classic<br />
<strong>Lafarge</strong><br />
NeoClassic<br />
<strong>Lafarge</strong><br />
Doric<br />
27
LAFARGE DECORATIVE MOULDINGS<br />
DIMENSIONS<br />
<strong>Lafarge</strong><br />
Classic 110<br />
<strong>Lafarge</strong><br />
Classic 110<br />
<strong>Lafarge</strong><br />
Milano<br />
<strong>Lafarge</strong><br />
Cyprus<br />
<strong>Lafarge</strong><br />
Tuscany<br />
<strong>Lafarge</strong><br />
Napoli<br />
28
LAFARGE CORNICE ADHESIVE<br />
LAFARGE CORNICE<br />
Application:<br />
• Substrates must be clean, free of dust and grease<br />
• Apply a liberal bead of adhesive along top and<br />
bottom of cornice<br />
• Press firmly to hold <strong>in</strong> position<br />
• Wipe away excess adhesive with a damp sponge<br />
or cloth<br />
• Keep away from frost<br />
For fix<strong>in</strong>g polystyrene and polyurethane:<br />
• Excellent adhesive and fill<strong>in</strong>g properties<br />
• Can be sanded<br />
• Good <strong>in</strong>itial grab<br />
• Suitable for pa<strong>in</strong>t<strong>in</strong>g<br />
• No film formation<br />
Characteristics:<br />
• Acrylic polymer<br />
• High <strong>in</strong>itial tack and f<strong>in</strong>al bond strength<br />
• Hard glue l<strong>in</strong>e with good sand<strong>in</strong>g properties<br />
• Excellent adhesion to paper and walls<br />
• Flow properties designed as a paste to be applied<br />
with a scraper<br />
Specifications:<br />
• Glue Spread: 50g / metre for small to medium mould<strong>in</strong>gs<br />
on new or straight walls 100g / metre<br />
for large mould<strong>in</strong>gs on new or straight<br />
walls 100g / metre for small to medium<br />
mould<strong>in</strong>gs on damaged or uneven walls<br />
200g / metre for large mould<strong>in</strong>gs on<br />
damaged or uneven walls<br />
• <strong>Lafarge</strong> Cornice Adhesive available <strong>in</strong> 3kg, 7kg and 310ml tube<br />
<strong>Lafarge</strong><br />
Cornice Adhesive<br />
Dilution of Glue<br />
• Dilution not recommended<br />
Clean<strong>in</strong>g of Equipment:<br />
• Clean equipment with water before adhesive dries<br />
• Dried adhesive can be manually brushed or scraped<br />
us<strong>in</strong>g hot water<br />
Storage:<br />
• Store between 15° to 30° under dry conditions<br />
• Unused conta<strong>in</strong>ers should be tightly sealed<br />
Shelf Life:<br />
• Approximately 12 months when stored correctly<br />
29
LAFARGE DECORATIVE MOULDINGS<br />
LAFARGE COVE CORNICE<br />
THE FINISHING TOUCH FOR ALL CEILINGS<br />
LAFARGE COVE CORNICE<br />
<strong>Lafarge</strong> Cove Cornice provides a recognised, tried, tested and accepted solution to add <strong>in</strong>ternal f<strong>in</strong>ish<strong>in</strong>g requirement detail.<br />
Features:<br />
• <strong>Lafarge</strong> Cove Cornice is formulated to give<br />
exceptionally high strength mak<strong>in</strong>g the product<br />
easy to handle and <strong>in</strong>stall and reduces breakages.<br />
• Lightweight material - mass per runn<strong>in</strong>g metre<br />
allows large loads, lower transport costs, easier<br />
handl<strong>in</strong>g and easy <strong>in</strong>stallation.<br />
• <strong>Lafarge</strong> Cove Cornice is manufactured us<strong>in</strong>g high quality<br />
ivory coloured paper offer<strong>in</strong>g a comfortable match to<br />
<strong>Lafarge</strong> plasterboard.<br />
• The paper colour and texture ensured less pa<strong>in</strong>t is<br />
required.<br />
• Absolute symmetry ensures a better f<strong>in</strong>ish and easy<br />
<strong>in</strong>stallation.<br />
• <strong>Lafarge</strong> Cove Cornice offers an aesthetically<br />
pleas<strong>in</strong>g f<strong>in</strong>ish.<br />
• Fire resistant gypsum-based plaster, which is therefore<br />
non-combustible.<br />
• Available <strong>in</strong> various lengths to accommodate any size job.<br />
• Supplied <strong>in</strong> bundles of five wrapped <strong>in</strong> a protective<br />
plastic sleeve.<br />
Fix<strong>in</strong>g Guidel<strong>in</strong>es:<br />
Nail <strong>Lafarge</strong> Cove Cornice with galvanized nails at 400mm<br />
centres to wall and ceil<strong>in</strong>g surfaces. Drive the nail head<br />
fitt<strong>in</strong>g to just below the paper cover<strong>in</strong>g surface.<br />
30<br />
Product available <strong>in</strong>:<br />
75mm and <strong>in</strong> lengths of 2700mm, 3000mm & 3600mm
LAFARGE CORNICE DECORATION<br />
PAINTING<br />
• Gypsum & Polystyrene mould<strong>in</strong>gs can be pa<strong>in</strong>ted directly<br />
with any acrylic water based pa<strong>in</strong>t.<br />
• A PVA pa<strong>in</strong>t or sealer would be required before apply<strong>in</strong>g<br />
any enamel or solvent based pa<strong>in</strong>t.<br />
• Polystyrene mould<strong>in</strong>gs should not be left unpa<strong>in</strong>ted<br />
as the mould<strong>in</strong>gs will turn yellow.<br />
• Apply<strong>in</strong>g PVA base coats to Polystyrene mould<strong>in</strong>gs before<br />
<strong>in</strong>stallation is advisable.<br />
• Ensure that touch-ups are sanded level to the mould<strong>in</strong>g<br />
profile.<br />
• Pa<strong>in</strong>t techniques can be applied to mould<strong>in</strong>gs by<br />
specialists.<br />
• On Gypsum Cornice apply a base coat of PVA after<br />
<strong>in</strong>stallation, then the f<strong>in</strong>al coat of PVA pa<strong>in</strong>t.<br />
FREQUENTLY ASKED QUESTIONS<br />
How long will <strong>Lafarge</strong> Decorative Mould<strong>in</strong>gs last?<br />
Indef<strong>in</strong>itely under normal conditions. Even <strong>in</strong> humid<br />
conditions, the <strong>Lafarge</strong> Decorative Mould<strong>in</strong>gs cannot<br />
be damaged by water (i.e. bathrooms)<br />
How strong is the product?<br />
Polystyrene mould<strong>in</strong>gs are very strong and durable. Gypsum<br />
Cornice is easy to cut, durable and suitable for decoration.<br />
Is the product environmentally friendly?<br />
Yes. <strong>Lafarge</strong> Decorative products are both solvent free<br />
and CFC free. They can safely be used <strong>in</strong> <strong>in</strong>fant’s and<br />
children’s rooms.<br />
How does the shape of the room affect <strong>in</strong>stallation?<br />
Due to the angled shape of the cornices, they can be<br />
bent <strong>in</strong>to a shallow concave curve. Convex curves are<br />
more difficult, but the cornices can be cut <strong>in</strong>to smaller<br />
lengths and <strong>in</strong>stalled with adhesive. When walls are not<br />
straight, do not try to bend the cornice to the shape of<br />
the wall: rather use an adhesive as a filler, keep<strong>in</strong>g the<br />
cornice straight. The dado rails have a flat profile and<br />
are more flexible and can be used <strong>in</strong> most shaped rooms.<br />
This applies to Gypsum and Styrene cornice.<br />
Is there a lot of wastage?<br />
No more than 5% of the total product required should<br />
be allowed for wastage. Cuts or bad dents can be easily<br />
filled with adhesive on Styrene cornice and <strong>Lafarge</strong> Jo<strong>in</strong>t<strong>in</strong>g<br />
Plaster or Gypsum Cornice.<br />
What adhesive should be used?<br />
We recommend <strong>Lafarge</strong> Utility Adhesive as supplied by<br />
<strong>Lafarge</strong> Industries (Pty) Ltd, which is both an adhesive<br />
and a filler. The adhesive/filler has a 6mm bridg<strong>in</strong>g<br />
capacity. The dry<strong>in</strong>g time on the adhesive/filler is<br />
approximately 10 m<strong>in</strong>utes to correct or remove before<br />
sett<strong>in</strong>g. The adhesive/filler will set completely with<strong>in</strong> 1<br />
hour. The adhesive/filler is water-based and can be<br />
cleaned before it dries.<br />
Gypsum Adhesive<br />
When us<strong>in</strong>g the utility adhesive with Gypsum Cornice, it is<br />
recommended that “tacks” be used to hold <strong>in</strong> position. When<br />
adhesive is dry, remove tacks and patch.<br />
What quantity of adhesive would be required?<br />
50g per metre for small to medium mould<strong>in</strong>gs on new<br />
or straight walls.<br />
100g per metre for large mould<strong>in</strong>gs on new or straight<br />
walls.<br />
100g per metre for small to medium mould<strong>in</strong>gs on<br />
damaged or uneven walls.<br />
200g per metre for large mould<strong>in</strong>gs on damaged or<br />
uneven walls.<br />
(The above mentioned quantities are to be used as a<br />
guidel<strong>in</strong>e only.)<br />
31
LAFARGE GYPSUM HEAD OFFICE<br />
18 Barium Street<br />
Alrode Ext 7 1449<br />
P O Box 167025<br />
Brackendowns 1454<br />
Tel: (+27 11) 389 4500<br />
Fax: (+27 11) 864 6816<br />
www.lafarge.co.za<br />
0861 GYPSUM<br />
(497786)<br />
32


