0 - Training Registration System - VDL Bus & Coach
0 - Training Registration System - VDL Bus & Coach
0 - Training Registration System - VDL Bus & Coach

Create successful ePaper yourself
Turn your PDF publications into a flip-book with our unique Google optimized e-Paper software.
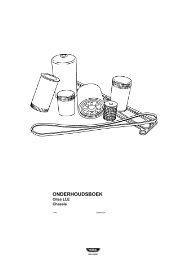
CORROSION PROTECTION<br />
Citea LLE/SLF/SLE/XLE<br />
Euro 5<br />
1208 DD068401
Citea LLE/SLF/SLE/XLE<br />
Foreword<br />
This system book contains safety regulations which must<br />
be strictly observed.<br />
Work which is not described in this system book is<br />
described in the <strong>VDL</strong> <strong>Bus</strong> & <strong>Coach</strong> Workshop Instruction<br />
Manual or the Workshop Instructions for the component<br />
concerned.<br />
Experienced mechanics<br />
The technical information and the explanations given in<br />
this system book have been compiled with the utmost<br />
care.<br />
Whilst compiling this system book, it has been assumed<br />
that the mechanic has the necessary experience and has<br />
had the required education or training to be able to carry<br />
out the work in a responsible and safe manner.<br />
Vehicle type<br />
The information in this system book has been updated<br />
until the time of printing and only concerns the following<br />
series of vehicles:<br />
Citea LLE / SLF / SLE / XLE.<br />
DD068401
Citea LLE/SLF/SLE/XLE<br />
CONTENTS<br />
Antichip coating<br />
Antichip coating............................................ 1-1<br />
General information ........................................ 1-1<br />
Washing the underside of the vehicle ............. 1-1<br />
Checking/repairing the antichip coating .......... 1-2<br />
Sealant seams ................................................ 1-7<br />
Paint treatment................................................ 1-9<br />
Anticorrosion treatment<br />
Anticorrosion treatment ............................... 1-1<br />
Why apply anticorrosion treatment ................. 1-1<br />
Treatment when storing the vehicle ................ 1-3<br />
Documentation Report Form ......................... -1<br />
DD068401
CONTENTS<br />
Citea LLE/SLF/SLE/XLE<br />
Disclaimers<br />
© 1208 <strong>VDL</strong> <strong>Bus</strong> & <strong>Coach</strong> bv, Valkenswaard,<br />
The Netherlands.<br />
In the interest of continuous product development <strong>VDL</strong><br />
<strong>Bus</strong> & <strong>Coach</strong> reserves the right to change specifications<br />
or products at any time without prior notice.<br />
No part of this publication may be reproduced and/or<br />
published by printing, by photocopying, in digital format<br />
or in any way whatsoever without the prior consent in<br />
writing of <strong>VDL</strong> <strong>Bus</strong> & <strong>Coach</strong>.<br />
This manual shall be governed by and applied in<br />
accordance with the laws of the Netherlands.<br />
Any dispute here under shall be referred to the decision<br />
of the District Court of ’s-Hertogenbosch in the<br />
Netherlands<br />
Next remark is relevant if the text has been translated for<br />
your convenience from the English original into an other<br />
language.<br />
A translation, however, can have the consequence that<br />
differences of interpretation arise with respect to the<br />
content and meaning of the text.<br />
In all cases, therefore, the English version of this<br />
document will be regarded exclusively as the single and<br />
authentic source to establish the content and the<br />
meaning of the text in case of a dispute.<br />
DD068401
Citea LLE/SLF/SLE/XLE<br />
ANTICHIP COATING<br />
ANTICHIP COATING<br />
0<br />
DD068401
ANTICHIP COATING<br />
Citea LLE/SLF/SLE/XLE<br />
0<br />
DD068401
Citea LLE/SLF/SLE/XLE<br />
ANTICHIP COATING<br />
Antichip coating<br />
1. ANTICHIP COATING<br />
1.1 GENERAL INFORMATION<br />
0<br />
All <strong>VDL</strong> <strong>Bus</strong> & <strong>Coach</strong> vehicles must undergo an antichip<br />
treatment followed by an anticorrosion treatment after the<br />
repair or replacement of chassis or bodywork components.<br />
This is applicable to both the products which have a powder<br />
coating/layer of zinc and the products which have a conventional<br />
paint system.<br />
If the chassis and the bodywork are not regularly checked<br />
and regularly maintained in accordance with the guidelines,<br />
then this may have consequences for the warranty of the<br />
entire vehicle.<br />
1.2 WASHING THE UNDERSIDE OF THE<br />
VEHICLE<br />
The paint used on the vehicles offers excellent protection<br />
against ageing during the vehicle's lifespan. In order to maintain<br />
this protection, it is important for the vehicle to be regularly<br />
cleaned. This should be done at least once a year, and<br />
should definitely be done at the end of the winter. Gritting salt<br />
has a negative effect on the chassis, the driveline and the<br />
bodywork. After the vehicle has been cleaned, the underside<br />
of the vehicle must be checked for damage. Below are a<br />
number of points of attention when washing the underside of<br />
the vehicle.<br />
High-pressure hose<br />
• The water temperature must not be greater than 50 °C.<br />
• The water pressure must not be greater than 80 bar.<br />
• Maintain a minimum distance of 30 cm from the surface.<br />
• It is not permitted to use additives.<br />
• Avoid spraying valves, connectors, oil seals, seals and<br />
other sensitive parts, because this may lead to faults.<br />
Car wash<br />
• The water temperature must not be greater than 50 °C.<br />
• The water pressure must not be greater than 80 bar.<br />
• Maintain a minimum distance of 30 cm to the chassis.<br />
• It is not permitted to use additives.<br />
• The permitted pH value is between 6 and 8.<br />
• Always rinse the vehicle with clean water.<br />
DD068401<br />
1 - 1
ANTICHIP COATING<br />
Antichip coating<br />
Citea LLE/SLF/SLE/XLE<br />
0<br />
1.3 CHECKING/REPAIRING THE ANTICHIP<br />
COATING<br />
The underside of the vehicle is treated with an antichip coating<br />
(UBC underbody coating) during manufacture.<br />
This coating should be demonstrably checked for damage<br />
every year.<br />
This coating must be replaced no later than every three<br />
years. Damage to the antichip coating must be repaired as<br />
quickly as possible.<br />
1.3.1 PRODUCTS<br />
Product<br />
Dinitrol UBC 4942 or an equivalent<br />
product.<br />
When/where to use<br />
All areas.<br />
Comments<br />
• It must be applied according to the manufacturer's instructions.<br />
• The antichip coating must be at least 300 µm thick in all<br />
areas.<br />
• The antichip coating of the chassis components must be at<br />
least 650 µm thick, including the powder coating.<br />
1 - 2<br />
DD068401
Citea LLE/SLF/SLE/XLE<br />
ANTICHIP COATING<br />
Antichip coating<br />
1.3.2 INSPECTING THE ANTICHIP COATING<br />
1. Clean the underside of the vehicle (see 0 - 1.2 Washing<br />
the underside of the vehicle (1 -1)).<br />
2. Check all the external components for damage and<br />
check the adhesion of the protective layers, such as the<br />
antichip coating and the layer of paint.<br />
3. Thoroughly check the corners where dirt can collect and,<br />
if necessary, remove any dirt.<br />
4. Make sure the wheel arches and the surrounding areas<br />
are clean.<br />
5. Make sure the water drainage holes are not blocked.<br />
0<br />
Comment<br />
Cracks may appear in time in the corners where the antichip<br />
coating is applied.<br />
Small cracks must be repaired. The antichip coating should<br />
be re-applied if any large cracks appear.<br />
1.3.3 RE-TREATMENT/REPAIR OF THE ANTICHIP<br />
COATING<br />
1. Remove the loose coating and the surface rust with a<br />
steel brush. Note: do not use a sanding disc or a similar<br />
tool, because this will affect the structure of the undercoat.<br />
2. Make sure all the parts are dry and free of dust and<br />
grease.<br />
3. Apply an antichip coating to all the specified parts where<br />
it has come loose/worn away.<br />
4. Pay particular attention to the box girders, cross points of<br />
the crossbeams, cross points of the diagonals, the sealant<br />
seams, the longitudinal beams and the wheel arches.<br />
5. Finish the paint in accordance with the paint instructions.<br />
DD068401<br />
1 - 3
ANTICHIP COATING<br />
Antichip coating<br />
Citea LLE/SLF/SLE/XLE<br />
0<br />
1.3.4 COMPONENTS NOT TO BE TREATED<br />
An antichip coating must not be applied to the following components,<br />
because this may have an adverse effect on their<br />
operation:<br />
General information<br />
Wheel suspension<br />
Steering mechanism<br />
Drive line<br />
Pneumatic<br />
components<br />
Electrical<br />
components<br />
Cables<br />
Fuel tanks<br />
Absorption materials<br />
Insulation materials<br />
Identification plates<br />
Grease nipples<br />
Allen screws and Phillips<br />
screws<br />
Air bellows<br />
Shock absorbers<br />
Disc brakes and brake calipers<br />
Height control rods<br />
Height control valves<br />
Height control sensors<br />
Steering shaft<br />
Universal joints<br />
Hydraulic lines<br />
Bevel gear case<br />
All the drive components,<br />
such as the engine, the gearbox,<br />
the drive shaft and the<br />
exhaust<br />
Valves<br />
Couplings<br />
Air reservoirs<br />
Brake cylinder bleed valves<br />
Spring brake booster nut +<br />
bolt<br />
Connectors/connections<br />
Electronic units<br />
Distribution box or fuse box<br />
Gearbox cables, if present.<br />
All the fuel tanks provided by<br />
<strong>VDL</strong> <strong>Bus</strong> & <strong>Coach</strong>, with the<br />
exception of the top<br />
All.<br />
All.<br />
Absorption and insulation material must<br />
never be coated, painted or sprayed,<br />
because the absorbing, insulating and<br />
fire-resistant properties will then be lost.<br />
1 - 4<br />
DD068401
Citea LLE/SLF/SLE/XLE<br />
ANTICHIP COATING<br />
Antichip coating<br />
1.3.5 GALVANIZED STEEL<br />
General information<br />
It is necessary to apply an antichip coating to galvanized<br />
steel for the following reasons:<br />
Dirt and salt in combination with water means that the water<br />
(conductor) cannot run off. These damp conditions create an<br />
electrolyte, which dissolves the zinc and the zinc oxides in<br />
various other bonds.<br />
0<br />
In areas subjected to heavy contamination, the thickness of<br />
the zinc coating is reduced by 10 - 20 µm/year for a coating<br />
which is 80 µm thick. It is easy to calculate when the zinc has<br />
eroded and, therefore, when the component is no longer protected.<br />
Repairing the zinc coating<br />
• Only use the products stated in the guidelines, because<br />
only then can the paint system be properly repaired.<br />
• Carefully follow the paint manufacturer’s instructions when<br />
applying paint.<br />
• After welding, also treat the back of welded objects as<br />
described below.<br />
• Observe the guidelines given below which meet the<br />
requirements of NEN-EN-ISO 1461.<br />
1. Cleaning<br />
• Remove any loose flakes of zinc.<br />
• If the surface to be treated cannot be lightly blasted,<br />
clean it with a steel brush and/or coarse sandpaper.<br />
• It the still intact layer of zinc 10 mm around the surface<br />
to be treated cannot be lightly blasted, clean it with a<br />
steel brush/coarse sandpaper.<br />
• Use a Tack cloth to remove any dust from the area to<br />
be treated.<br />
• Degrease the surface to be treated and the surrounding<br />
area with a solution of, for example, paint thinner.<br />
It is not permitted to treat galvanized<br />
steel with a primer with an alkyd resin<br />
base.<br />
DD068401<br />
1 - 5
ANTICHIP COATING<br />
Antichip coating<br />
Citea LLE/SLF/SLE/XLE<br />
0<br />
2. Applying zinc paint<br />
• Primer to be used: Redox EP Multi Primer from<br />
Sikkens or 622-Unibar Zinkrich from Baril Coatings.<br />
• Apply a 2-component EP primer (enriched with zinc) to<br />
the pre-treated surface in 2 or 3 layers in accordance<br />
with the manufacturer's instructions.<br />
The minimum thickness is 100 µm. The EP primer can<br />
be applied with a brush or a roller.<br />
3. Applying the topcoat<br />
• Topcoat to be used: Redox PUR Finish from Sikkens or<br />
an equivalent product.<br />
• Apply the topcoat over the primer in accordance with<br />
the manufacturer’s instructions. The minimum thickness<br />
is 50 µm. Redox PUR Finish can be applied with<br />
a brush or a roller.<br />
• Apply an antichip coating to the entire treated area (see<br />
1.3.2 Inspecting the antichip coating (1 -3)).<br />
1 - 6<br />
DD068401
Citea LLE/SLF/SLE/XLE<br />
ANTICHIP COATING<br />
Antichip coating<br />
1.4 SEALANT SEAMS<br />
1.4.1 GENERAL INFORMATION<br />
0<br />
The seams between panels are sealed with an elastic sealant<br />
to prevent the penetration of dirt and moisture. The sealant<br />
may be burnt in the event of repair work close to the<br />
sealant seams. It is very important that the sealant seams<br />
are carefully repaired so as to prevent corrosion between the<br />
panel elements. Sealant seams must be demonstrably<br />
inspected every year and, if necessary, repaired.<br />
A. Incorrect (too thick)<br />
B. Incorrect (too thin)<br />
C. Correct<br />
D. Incorrect (too thick)<br />
E. Incorrect (too thin)<br />
F. Correct<br />
ILAf0019<br />
DD068401<br />
1 - 7
ANTICHIP COATING<br />
Antichip coating<br />
Citea LLE/SLF/SLE/XLE<br />
0<br />
1.4.2 REPAIRS TO THE SEALANT JOINT<br />
Follow the procedure given below to repair the sealant joint:<br />
Always read the manufacturer's<br />
instructions before use.<br />
Preparing the surface<br />
1. Remove the old sealant coating.<br />
2. Repair the damaged layer of paint:<br />
• Apply a 30 µm layer of wash primer (Schaepman<br />
Nibralux wash primer (P41000076) or an equivalent<br />
product) to the damaged surface.<br />
• Drying time of the wash primer: minimum of 15 minutes<br />
at 20 °C.<br />
3. Clean the surface with Sika Cleaner-205 (or an equivalent<br />
product) using a clean, lint-free cloth or tissue.<br />
Drying time of at least 10 minutes and no longer than 2<br />
hours at 20 °C.<br />
4. The surfaces must be clean, dry and free of all traces of<br />
grease, oil and dust.<br />
Sealing<br />
Do not apply sealant at a temperature below 5 °C or above<br />
40 °C. The optimal application temperature is between 15 °C<br />
and 25 °C.<br />
5. Apply sealant (Sikaflex-221 or an equivalent product)<br />
and smooth out the joins using Sika Tooling Agent N as<br />
shown in the diagrams above.<br />
The joins must be smoothed out before a skin forms.<br />
Clean the sealant joints with water after they have been<br />
smoothed out.<br />
The sealant join must be continuous and must not have<br />
any gaps (where moisture can penetrate).<br />
6. Use Sika Remover-208 or an equivalent product to<br />
remove any excess sealant which has not yet hardened.<br />
Sealant that has hardened can only be removed<br />
mechanically.<br />
Spraying<br />
7. Sikaflex-221 or an equivalent product can be sprayed<br />
after a skin has formed. If desired, apply a layer of<br />
Schaepman Beticyl chassis paint or an equivalent product<br />
over the sealant seam.<br />
A topcoat may only be applied after the sealant has fully<br />
hardened.<br />
1 - 8<br />
DD068401
Citea LLE/SLF/SLE/XLE<br />
ANTICHIP COATING<br />
Antichip coating<br />
1.5 PAINT TREATMENT<br />
1.5.1 GENERAL INSTRUCTIONS<br />
0<br />
This section gives instructions for respraying and repairing<br />
<strong>VDL</strong> <strong>Bus</strong> & <strong>Coach</strong> paint systems which have been applied to<br />
various base materials.<br />
The products to be used are supplied by a number of manufacturers.<br />
However, only use products from reputable manufacturers<br />
that provide all the products for a complete paint<br />
layer structure. The processing of these products should be<br />
described in the instructions provided by the manufacturer.<br />
Work according to the guidelines listed below:<br />
• For rust-removal, use a rust-removal agent with a phosphoric<br />
acid base.<br />
• For cleaning, use an organic solvent without chlorine additives.<br />
• Use a two-component epoxy or polyester-based primer.<br />
• Use a two-component epoxy or polyester-based basic<br />
filler.<br />
• Use a two-component epoxy or polyester-based spray<br />
filler.<br />
• Use a two-component epoxy or polyester-based filler.<br />
• Use a two-component PUR finishing coat, with a gloss<br />
level of 70 units for a chassis finishing coat (measured at<br />
60 degree geometry).<br />
• Maximum drying temperature of 80 °C.<br />
• For the paint layer structure, only use products from a single<br />
manufacturer.<br />
• Use the products according to the manufacturer's instructions.<br />
• Never use products in a spray cabin that contain silicon.<br />
DD068401<br />
1 - 9
ANTICHIP COATING<br />
Antichip coating<br />
Citea LLE/SLF/SLE/XLE<br />
0<br />
Removing rust<br />
• Apply the rust-removal agent in accordance with the manufacturer's<br />
instructions.<br />
The concentration of the rust-removal agent must be in<br />
ratio to the amount of rust.<br />
• Preferably use a rust-removal paste on vertical parts.<br />
• Prevent rust-removal agents entering overlap joints.<br />
• Leave the rust-removal agent to work for the time specified<br />
by the manufacturer.<br />
• Rinse the area where rust has been removed at least twice<br />
with plenty of clean tap water.<br />
• Dry the area where the rust has been removed from.<br />
Failure to follow the applicable safety<br />
instructions for using paints and related<br />
products can result in serious injury and/<br />
or danger.<br />
Wear protective gloves and protective<br />
glasses when working with a rustremoval<br />
agent.<br />
To avoid unnecessary environmental<br />
pollution when using paints and related<br />
products and when handling paint waste,<br />
always work according to the applicable<br />
environmental requirements.<br />
1 - 10<br />
DD068401
Citea LLE/SLF/SLE/XLE<br />
ANTICHIP COATING<br />
Antichip coating<br />
1.5.2 RESPRAYING/REPAIRING PAINT SYSTEMS<br />
WITH A POWDER BASE<br />
General information<br />
• This section gives guidelines concerning respraying and<br />
repairing paint systems with a powder coating base.<br />
• Only use the products stated in the guidelines, because<br />
only then can the paint system be properly repaired.<br />
• Carefully follow the paint manufacturer’s instructions when<br />
applying paint.<br />
• After welding, also treat the back of welded objects as<br />
described below.<br />
0<br />
Work according to the guidelines listed below:<br />
Cleaning<br />
1. Use sandpaper (P40 - P60) to remove the burnt paint<br />
residue from the area to be repaired.<br />
2. Use a rust remover to remove any rust.<br />
3. Use a solvent to clean the area to be treated.<br />
4. Sand the area to be treated using P80 sandpaper, so that<br />
it is completely clean and free of rust.<br />
5. Remove any dust from the sanded area with a tack rag.<br />
6. Remove any grease and dirt from the area to be treated.<br />
Applying the undercoat<br />
Primer to be used: Priomat ® EP Grundierfüller 4090 kieselgrau<br />
from Spies Hecker or an equivalent product.<br />
Hardener to be used: Priomat ® Härter 3110 or an equivalent<br />
product.<br />
1. Apply an EP primer to the bare metal parts according to<br />
the manufacturer’s instructions.<br />
The thickness of the coating must be 60 - 90 µm. The EP<br />
primer can be applied with a brush or a roller.<br />
2. Leave the primer to evaporate for approximately 10 minutes.<br />
Next, dry the primer for 30 - 60 minutes at a temperature<br />
of 60 °C or for 12 hours at room temperature, depending<br />
on the thickness of the layer of primer.<br />
The primer cannot be dried using infrared<br />
radiation.<br />
DD068401<br />
1 - 11
ANTICHIP COATING<br />
Antichip coating<br />
Citea LLE/SLF/SLE/XLE<br />
0<br />
Applying the topcoat<br />
Topcoat to be used: Percotex ® Steinslagschutz halbmatt<br />
RAL 7024 graphitgrau from Spies Hecker or an equivalent<br />
product.<br />
Hardener to be used: Priomat ® Härter 3840 or an equivalent<br />
product.<br />
1. Sand the primed areas with sandpaper. Use P320 - P500<br />
sandpaper for dry sanding and P600 - P800 sandpaper<br />
for wet sanding. Remove any dust from the sanded area<br />
with a Tack rag and clean the area with a solvent.<br />
2. Apply the topcoat over the primer and the sanded areas<br />
according to the manufacturer’s instructions. The minimum<br />
thickness is 40 µm. Percotex can be applied with a<br />
brush or a roller.<br />
3. Allow the topcoat to evaporate for at least 60 minutes.<br />
Next, dry the topcoat for 60 minutes at a temperature of<br />
70 °C or for 24 hours at room temperature (20 °C).<br />
1.5.3 RESPRAYING/REPAIRING CONVENTIONAL<br />
PAINT SYSTEMS<br />
General information<br />
• This section gives guidelines concerning respraying and<br />
repairing conventional paint systems.<br />
• Only use the products stated in the guidelines, because<br />
only then can the paint system be properly repaired.<br />
• Carefully follow the paint manufacturer’s instructions when<br />
applying paint.<br />
• After welding, also treat the back of welded objects as<br />
described below.<br />
Work according to the guidelines listed below:<br />
Cleaning<br />
1. Use sandpaper (P40 - P60) to remove the burnt paint<br />
residue from the area to be repaired.<br />
2. Use a rust remover to remove any rust.<br />
3. Use a solvent to clean the area to be treated.<br />
4. Sand the area to be treated using P80 sandpaper, so that<br />
it is completely clean and free of rust.<br />
5. Remove any dust from the sanded area with a tack rag.<br />
6. Remove any grease and dirt from the area to be treated.<br />
1 - 12<br />
DD068401
Citea LLE/SLF/SLE/XLE<br />
ANTICHIP COATING<br />
Antichip coating<br />
Applying the undercoat<br />
Primer to be used: Priomat ® EP Grundierfüller 4090 kieselgrau<br />
from Spies Hecker or an equivalent product.<br />
Hardener to be used: Priomat ® Härter 3110 or an equivalent<br />
product.<br />
1. Apply an EP primer to the bare metal parts according to<br />
the manufacturer’s instructions.<br />
The thickness must be 20 µm. For clamped surfaces<br />
(surfaces that are clamped together by a bolt connection,<br />
etc.), the thickness of the primer must be 20 µm to 45 µm.<br />
The EP primer can be applied with a brush or a roller.<br />
2. Leave the primer to evaporate for approximately 10 minutes.<br />
Next, dry the primer for 30 - 60 minutes at a temperature<br />
of 60 °C or for 12 hours at room temperature, depending<br />
on the thickness of the layer of primer.<br />
0<br />
The primer cannot be dried using infrared<br />
radiation.<br />
Applying the topcoat<br />
Topcoat to be used: Percotex ® Steinslagschutz halbmatt<br />
RAL 7024 graphitgrau from Spies Hecker or an equivalent<br />
product.<br />
Hardener to be used: Priomat ® Härter 3840 or an equivalent<br />
product.<br />
1. Sand the primed areas with sandpaper. Use P320 - P500<br />
sandpaper for dry sanding and P600 - P800 sandpaper<br />
for wet sanding. Remove any dust from the sanded area<br />
with a Tack rag and clean the area with a solvent.<br />
2. Apply the topcoat over the primer and the sanded areas<br />
according to the manufacturer’s instructions. The minimum<br />
thickness is 40 µm. Percotex can be applied with a<br />
brush or a roller.<br />
3. Allow the topcoat to evaporate for at least 60 minutes.<br />
Next, dry the topcoat for 60 minutes at a temperature of<br />
70 °C or for 24 hours at room temperature (20 °C).<br />
DD068401<br />
1 - 13
ANTICHIP COATING<br />
Antichip coating<br />
Citea LLE/SLF/SLE/XLE<br />
0<br />
1 - 14<br />
DD068401
Citea LLE/SLF/SLE/XLE<br />
ANTICORROSION TREATMENT<br />
ANTICORROSION TREATMENT<br />
1<br />
DD068401
ANTICORROSION TREATMENT<br />
Citea LLE/SLF/SLE/XLE<br />
1<br />
DD068401
Citea LLE/SLF/SLE/XLE<br />
ANTICORROSION TREATMENT<br />
Anticorrosion treatment<br />
1. ANTICORROSION TREATMENT<br />
1.1 WHY APPLY ANTICORROSION<br />
TREATMENT<br />
Some places cannot be painted and that is where the material<br />
will be exposed to the air.<br />
If these places are then exposed to water and salt, they will<br />
start to rust.<br />
This rust may lead to the thickness of the material reducing<br />
by approximately 0.6 mm per year, which will have a negative<br />
effect on the strength of the construction.<br />
A preservative can prevent rust from forming if it is applied<br />
correctly.<br />
Good preservation is, therefore, extremely important for the<br />
strength and lifespan of a chassis.<br />
1<br />
1.1.1 INSPECTING THE ANTICORROSION COATING<br />
Hollow cavities and the inside of beams should be checked<br />
every year for faults.<br />
They should be re-treated every three years.<br />
Hollow cavities should be treated for corrosion after repair to<br />
the chassis or bodywork in order to prevent them from rusting<br />
on the inside.<br />
Re-treatment<br />
1. Remove all the loose dirt.<br />
2. Use a flexible tube to apply the wax.<br />
3. See the supplier's specifications for the specified thickness.<br />
1.1.2 PRODUCT<br />
Product<br />
Waxoyl 120-4<br />
Uses<br />
Spray with a tectyl spray gun,<br />
max. pressure 2 bar.<br />
Thickness approx. 50 µm.<br />
Comments<br />
• It must be applied according to the manufacturer's instructions.<br />
• Required quantity: approx. 1 litre per vehicle.<br />
Personal protection: face mask with<br />
carbon A filter.<br />
DD068401<br />
1 - 1
ANTICORROSION TREATMENT<br />
Anticorrosion treatment<br />
Citea LLE/SLF/SLE/XLE<br />
1.1.3 COMPONENTS TO BE TREATED<br />
Apply an anticorrosion coating to the following components.<br />
1<br />
Bare, untreated components.<br />
Wheel nuts, if they do not have<br />
protective caps.<br />
Nut-bolt connections.<br />
Hose coupling nuts (if bare).<br />
Hose clips and clamping<br />
straps of:<br />
Engine and gearbox<br />
Miscellaneous<br />
3cr12 stainless steel<br />
Hoses.<br />
Air reservoirs and clamping<br />
straps around air reservoirs.<br />
Fuel tanks and connections to<br />
the fuel tanks (also underneath).<br />
Apply an extra coating to the<br />
valve cover an engine.<br />
Treat bare components on the<br />
engine and gearbox.<br />
Treat places where water can<br />
accumulate as normal.<br />
Pedal attachment bolts.<br />
Engine brake valve lock nut.<br />
Steering column tube (if fitted).<br />
Connection seams of installed<br />
components (e.g. front axle<br />
mounting brackets, engine<br />
brackets, etc.).<br />
Attachments (nuts and studs)<br />
of air bellows on the chassis.<br />
Spray the inside of side wall<br />
tubes up to floor height.<br />
NOTE: AVOID GETTING WAXOYL<br />
BETWEEN THE DRIVE BELTS.<br />
Use a UV light to check for the presence<br />
of Waxoyl.<br />
1 - 2<br />
DD068401
Citea LLE/SLF/SLE/XLE<br />
ANTICORROSION TREATMENT<br />
Anticorrosion treatment<br />
1.1.4 COMPONENTS NOT TO BE TREATED<br />
Galvanized steel<br />
Just like other oils, wax is a good insulator, does not form an<br />
electrolyte and cuts off the supply of oxygen. The inside of<br />
tubes may be treated, but this will not be of much added<br />
value with regard to the actual prevention of corrosion,<br />
because there is a layer of zinc on the inside of the tubes<br />
which is not contaminated from the outside, so rust is not<br />
expected in these places.<br />
1<br />
Do NOT treat the following components with Waxoyl:<br />
• Sealant seams<br />
• Brake discs<br />
• Brake drums<br />
• Battery trays (have been treated with an acid-proof paint)<br />
• Brake booster rods<br />
• Galvanized lines<br />
• Heat shields<br />
• Exhaust<br />
• Tyres and the spare tyre<br />
• Steering wheel and floor<br />
• Steering damper rod<br />
• Air bellows<br />
•<br />
1.2 TREATMENT WHEN STORING THE<br />
VEHICLE<br />
If the vehicle is not going to be used for a long time, measures<br />
must be taken to safeguard the quality of the vehicle.<br />
These measures depend on the estimated storage time.<br />
Components to be treated<br />
• Generator<br />
• Front and rear axles<br />
• Gearbox<br />
• Coolant lines<br />
• Air reservoir ring valves<br />
DD068401<br />
1 - 3
ANTICORROSION TREATMENT<br />
Anticorrosion treatment<br />
Citea LLE/SLF/SLE/XLE<br />
1<br />
1 - 4<br />
DD068401
Citea LLE/SLF/SLE/XLE<br />
DOCUMENTATION REPORT FORM<br />
If you have any suggestions and/or comments regarding<br />
our documentation, or if you have observed any errors,<br />
then please complete this form and return it to:<br />
<strong>VDL</strong> <strong>Bus</strong> & <strong>Coach</strong><br />
<strong>Training</strong> and Documentation<br />
P.O. Box 645<br />
5550 AP Valkenswaard<br />
The Netherlands<br />
Fax: +31 (0)40 2084499<br />
Company name<br />
Name<br />
Signature<br />
: ............................................................................<br />
: ............................................................................<br />
: ............................................................................<br />
Chassis number: ........................................................<br />
Concerns document order number: ........................................................ Version: ...............................................<br />
Type of document:<br />
(tick what is applicable)<br />
Driver<br />
Maintenance<br />
Climate system<br />
Electrical circuit diagram<br />
Workshop<br />
<strong>Training</strong><br />
Components<br />
Other<br />
Type of error:<br />
(tick what is applicable)<br />
Language<br />
(description is not correct)<br />
Error in the technical information<br />
(values)<br />
Illustrations<br />
Additional information<br />
(texts, page number, etc.)<br />
..........................................................................................................................<br />
..........................................................................................................................<br />
..........................................................................................................................<br />
..........................................................................................................................<br />
..........................................................................................................................<br />
Your report will be taken seriously by <strong>VDL</strong> <strong>Bus</strong> & <strong>Coach</strong><br />
and, if necessary, will be immediately incorporated in the<br />
document.<br />
DD068401
Documentation Report Form<br />
Citea LLE/SLF/SLE/XLE<br />
DD068401