Adapting training plans for the prep discus thrower - Track & Field ...
Adapting training plans for the prep discus thrower - Track & Field ...
Adapting training plans for the prep discus thrower - Track & Field ...

Create successful ePaper yourself
Turn your PDF publications into a flip-book with our unique Google optimized e-Paper software.
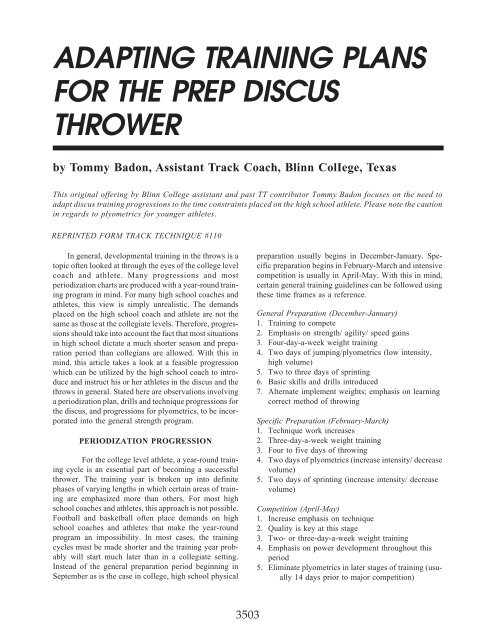
ADAPTING TRAINING PLANS<br />
FOR THE PREP DISCUS<br />
THROWER<br />
by Tommy Badon, Assistant <strong>Track</strong> Coach, Blinn ColIege, Texas<br />
This original offering by Blinn College assistant and past TT contributor Tommy Badon focuses on <strong>the</strong> need to<br />
adapt <strong>discus</strong> <strong>training</strong> progressions to <strong>the</strong> time constraints placed on <strong>the</strong> high school athlete. Please note <strong>the</strong> caution<br />
in regards to plyometrics <strong>for</strong> younger athletes.<br />
REPRINTED FORM TRACK TECHNIQUE #110<br />
In general, developmental <strong>training</strong> in <strong>the</strong> throws is a<br />
topic often looked at through <strong>the</strong> eyes of <strong>the</strong> college level<br />
coach and athlete. Many progressions and most<br />
periodization charts are produced with a year-round <strong>training</strong><br />
program in mind. For many high school coaches and<br />
athletes, this view is simply unrealistic. The demands<br />
placed on <strong>the</strong> high school coach and athlete are not <strong>the</strong><br />
same as those at <strong>the</strong> collegiate levels. There<strong>for</strong>e, progressions<br />
should take into account <strong>the</strong> fact that most situations<br />
in high school dictate a much shorter season and <strong>prep</strong>aration<br />
period than collegians are allowed. With this in<br />
mind, this article takes a look at a feasible progression<br />
which can be utilized by <strong>the</strong> high school coach to introduce<br />
and instruct his or her athletes in <strong>the</strong> <strong>discus</strong> and <strong>the</strong><br />
throws in general. Stated here are observations involving<br />
a periodization plan, drills and technique progressions <strong>for</strong><br />
<strong>the</strong> <strong>discus</strong>, and progressions <strong>for</strong> plyometrics, to be incorporated<br />
into <strong>the</strong> general strength program.<br />
PERIODIZATION PROGRESSION<br />
For <strong>the</strong> college level athlete, a year-round <strong>training</strong><br />
cycle is an essential part of becoming a successful<br />
<strong>thrower</strong>. The <strong>training</strong> year is broken up into definite<br />
phases of varying lengths in which certain areas of <strong>training</strong><br />
are emphasized more than o<strong>the</strong>rs. For most high<br />
school coaches and athletes, this approach is not possible.<br />
Football and basketball often place demands on high<br />
school coaches and athletes that make <strong>the</strong> year-round<br />
program an impossibility. In most cases, <strong>the</strong> <strong>training</strong><br />
cycles must be made shorter and <strong>the</strong> <strong>training</strong> year probably<br />
will start much later than in a collegiate setting.<br />
Instead of <strong>the</strong> general <strong>prep</strong>aration period beginning in<br />
September as is <strong>the</strong> case in college, high school physical<br />
<strong>prep</strong>aration usually begins in December-January. Specific<br />
<strong>prep</strong>aration begins in February-March and intensive<br />
competition is usually in ApriI-May. With this in mind,<br />
certain general <strong>training</strong> guidelines can be followed using<br />
<strong>the</strong>se time frames as a reference.<br />
General Preparation (December-January)<br />
1. Training to compete<br />
2. Emphasis on strength/ agility/ speed gains<br />
3. Four-day-a-week weight <strong>training</strong><br />
4. Two days of jumping/plyometrics (low intensity,<br />
high volume)<br />
5. Two to three days of sprinting<br />
6. Basic skills and drills introduced<br />
7. Alternate implement weights; emphasis on learning<br />
correct method of throwing<br />
Specific Preparation (February-March)<br />
1. Technique work increases<br />
2. Three-day-a-week weight <strong>training</strong><br />
3. Four to five days of throwing<br />
4. Two days of plyometrics (increase intensity/ decrease<br />
volume)<br />
5. Two days of sprinting (increase intensity/ decrease<br />
volume)<br />
Competition (April-May)<br />
1. Increase emphasis on technique<br />
2. Quality is key at this stage<br />
3. Two- or three-day-a-week weight <strong>training</strong><br />
4. Emphasis on power development throughout this<br />
period<br />
5. Eliminate plyometrics in later stages of <strong>training</strong> (usually<br />
14 days prior to major competition)<br />
3503
6. Work on psychological parameters in this stage<br />
7. Athletes should feel fresh and strong in final two<br />
weeks.<br />
Transition (June-July)<br />
1. Training continues, but intensity level must drop off<br />
2. Athlete needs break, both physically and mentally<br />
3. Many coaches and physical per<strong>for</strong>mance experts today<br />
feel this stage of <strong>training</strong> is just as important as<br />
<strong>the</strong> o<strong>the</strong>r three<br />
4. Weights and easy running are encouraged<br />
5. Game playing (i.e., basketball, softball, soccer, swimming,<br />
etc.) are also highly suggested activities during<br />
this phase<br />
6. Many high school track athletes are required to go<br />
directly into a summer weight <strong>training</strong> program <strong>for</strong><br />
football or a summer league basketball program. This<br />
can be used effectively in <strong>the</strong> transition phase, but<br />
emphasis must be on having fun, playing well and<br />
feeling good about oneself, not on <strong>the</strong> actual game<br />
conditions if <strong>the</strong> athlete is to fulfill his or her potential<br />
in any sport.<br />
TECHNIQUE PROGRESSION<br />
I. Preliminary Position<br />
A. The Grip<br />
1. Two types<br />
a. All five fingers spread<br />
b. Index and middle finger toge<strong>the</strong>r<br />
2. First joints of fingers curl over rim.<br />
B. Swings or Windups<br />
1. Down and up rhythm during windup<br />
2 Catch <strong>discus</strong> high on windup<br />
3. Legs bent slightly, weight on balls of feet<br />
4. Feet shoulder width or slightly wider<br />
5. Weight shifts from right back to left as <strong>discus</strong><br />
is swung back and <strong>for</strong>th<br />
6. Eliminate lengthy and excessive windups.<br />
Il. Turn<br />
A. Start<br />
1. Key to balance of rest of <strong>the</strong> throw<br />
2. Final right swing, <strong>thrower</strong> <strong>prep</strong>ares to lower<br />
and initiate first turn<br />
3. Left foot, left knee and left arm pivot toward<br />
left (think of this action as stamping out<br />
cigarette with ball of foot)<br />
4. Arms remain in line with shoulders<br />
5. Right foot is picked up last, only after initial<br />
movements have started<br />
6. Press left hip in direction of throw (don’t<br />
hide hip on first turn)<br />
7. Do not let heels touch<br />
8. Let arms swing wide<br />
9. Follow left arm around with eyes to stay on<br />
balance.<br />
B. Sprint<br />
1. Right leg leaves circle and moves in an arc<br />
from right to left and <strong>for</strong>ward<br />
2. Center of gravity passes outside or at edge of<br />
ring<br />
3. Left leg drives toward <strong>the</strong> front of <strong>the</strong> circle<br />
4. Begin sprint when left shoulder faces direction<br />
of throw<br />
5. Stay on left foot as long as possible<br />
6. Hips advance ahead of <strong>the</strong> shoulders as a<br />
running rotation occurs (think of this action<br />
as running away from <strong>the</strong> <strong>discus</strong>)<br />
7. Discus rises off shoulder.<br />
III. Landing in Middle and Power Position<br />
A. Landing<br />
1. Right foot lands with attempt to turn inward<br />
2. Keep right foot pivoting (turn heel out)<br />
3. Weight on ball of <strong>the</strong> foot<br />
4. Center of mass should be over right foot<br />
5. Left leg lands slightly flexed<br />
6. Torqued body position on landing (T-position)<br />
7. Make sure <strong>discus</strong> is back and hips are ahead<br />
of <strong>discus</strong>.<br />
B. Final Phase<br />
1. Right leg drives hip to <strong>the</strong> front<br />
2 Keep foot turning, hips and legs will follow<br />
3. Left arm bends to aid delivery by helping to<br />
block <strong>the</strong> left side<br />
4. Weight shifts to <strong>the</strong> left leg<br />
5 Discus is pulled, not pushed, through in a<br />
slinging motion<br />
6. Discus should be released at approximately<br />
39-degree optimum angle.<br />
IV. Reverse or Recovery<br />
A. Right leg usually shifts to <strong>the</strong> front to check <strong>for</strong>ward<br />
momentum<br />
1. Look into circle and reverse feet onto collapsed<br />
right leg to avoid falling<br />
2. Regain balance.<br />
DRILLS PROGRESSION<br />
I. Release<br />
1. Tosses: grip <strong>discus</strong> and toss with proper release<br />
into air<br />
2. Bowls: grip <strong>discus</strong> and bowl out of front of hand<br />
with proper release<br />
3. Soaps: grip <strong>discus</strong> and flip out of front of hand like<br />
squeezing a bar of soap<br />
4. Standing Slings: stand facing direction of throw,<br />
bring <strong>discus</strong> back behind body and sling <strong>for</strong>ward,<br />
releasing using proper grip<br />
3504
5. Fronts (Power Throws): take position in front of<br />
<strong>the</strong> ring, torque body and sling <strong>discus</strong> <strong>for</strong>ward<br />
with no reverse<br />
6. Cone Drills: standing slings and fronts with cones<br />
instead of <strong>discus</strong><br />
7. Pop Drill: face direction of throw as in standing<br />
slings, bring <strong>discus</strong> back behind body, placing<br />
majority of weight on back leg; sling <strong>discus</strong> <strong>for</strong>ward,<br />
popping left leg off <strong>the</strong> ground at release.<br />
II. Start and First Turn<br />
1. Balance Drill: and facing back of circle, wind<br />
<strong>discus</strong>, bend left knee, press right leg outward and<br />
turn 360°<br />
2 Kick Drill: coach stands in back of ring, outside of<br />
circle while athlete initiates start, presses right leg<br />
outward and kicks hand of coach at desired height<br />
3. Ball Drill: ball is placed in back of ring on side of<br />
left foot; athlete initiates start, presses right leg<br />
outward and kicks through <strong>the</strong> ball as he starts to<br />
sprint to front of circle<br />
4. Hip Lean Drill: coach stands outside of circle and<br />
holds on end of towel while athlete holds o<strong>the</strong>r end<br />
and leans in toward middle of circle, simulating<br />
feel of falling be<strong>for</strong>e initiating sprint to <strong>the</strong> middle<br />
of <strong>the</strong> ring.<br />
III. Second Turn and Recover<br />
1. South African Drill: most popular <strong>discus</strong> drill;<br />
face direction of throw in back of ring with left<br />
foot to <strong>the</strong> right of center; swing <strong>discus</strong> back,<br />
sprint to <strong>the</strong> middle, and complete throw<br />
2. Step-throughs: stand facing back with right foot in<br />
center of ring and left foot back in heel-toe relationship;<br />
step back with left foot to opposite side<br />
of <strong>the</strong> ring in heel-toe relationship; repeat this<br />
movement continuously.<br />
PLYOMETRIC PROGRESSION<br />
Many experts in track and field have placed great<br />
value on <strong>the</strong> concept of plyometric or jump <strong>training</strong>.<br />
These exercises, when used properly, can become an<br />
invaluable part of <strong>the</strong> strength <strong>training</strong> process, especially<br />
<strong>for</strong> <strong>the</strong> power elements in track and field. What many high<br />
school coaches fail to realize, however, is that many of<br />
<strong>the</strong>ir athletes are not physically mature enough to advance<br />
into <strong>the</strong> higher levels of plyometric <strong>training</strong> until<br />
much later in <strong>the</strong>ir careers. Because of this, many coaches<br />
have found out <strong>the</strong> hard way that many of <strong>the</strong> high-level<br />
plyometrics can hurt some young athletes as much as <strong>the</strong>y<br />
can help o<strong>the</strong>rs, even <strong>thrower</strong>s who may have <strong>the</strong> outward<br />
appearance of being stronger than o<strong>the</strong>r athletes <strong>the</strong> same<br />
age. High school coaches should keep in mind that <strong>the</strong><br />
plyometrics progression offered here is safe and has been<br />
used in <strong>the</strong> field by many outstanding coaches. It is better<br />
to be safe than sorry later, especially in <strong>the</strong> development<br />
of <strong>the</strong> young <strong>thrower</strong>. Here are a few hints when implementing<br />
a plyometrics program into <strong>the</strong> high school setting.<br />
In-Place Jumps<br />
1. Easiest of all plyometric exercises<br />
2. Consists of any jumps conducted from <strong>the</strong> ground<br />
and in one place<br />
3. Usually used as part of a condition circuit<br />
4. Can be done in sets of 10-50 depending on <strong>the</strong><br />
conditioning level of <strong>the</strong> athletes involved<br />
5. Sample jump circuit:<br />
a. Rocket jumps<br />
b. Butt kicks<br />
c. Lunge jumps<br />
d. Monkey jumps<br />
e. Knee tucks<br />
f. Ski jumps.<br />
Multi-jumps<br />
1. Usually two-legged in nature<br />
2. Sample exercises<br />
a. standing long jump<br />
b. standing triple jump<br />
c. hurdle hops<br />
d. double-leg bounds<br />
e. bleachers.<br />
Endurance Bounds<br />
1. Repetitive Hopping (RRR ... or LLL ...<br />
2. Alternate Leg Bounds (LRLRLRLRLRLRL...<br />
3. Repetitive Triple Jumps (LLRLLRLLR or<br />
RRLRRLRRLRRL ... )<br />
4. Alternate Hops (RRLLRRLLRRLLRRLL ...<br />
Depth Jumps (Box Jumps)<br />
1. Considered <strong>the</strong> hardest of all jumping exercises on<br />
<strong>the</strong> legs<br />
2. Safety is a must<br />
3. Land on balls of feet, do not ground heels upon<br />
contact with ground<br />
4. Some experts contend that athletes should be able<br />
to squat twice body weight be<strong>for</strong>e jumping on<br />
boxes as high as 24 inches. Certainly, athletes<br />
jumping on 36- 42 inch boxes need to be strong<br />
and in excellent physical condition be<strong>for</strong>e even<br />
considering to undertake this exercise.<br />
5. Sample exercises:<br />
a. Box rebounds<br />
b. Box combinations.<br />
3505
REFERENCES<br />
Booth, D. (1983). Discus. Unpublished paper.<br />
Myers, B. (1988). Plyometric Training. The Athletics Congress Level II<br />
Coaching Education Manual.<br />
Seagrave, L. & Pfaff, D. Guidelines For <strong>the</strong> Implementation of Plyometric<br />
Training. Unpublished paper.<br />
The Athletics Congress (1988). The Discus. The Athletics Congress Level I<br />
Coaching Manual.<br />
3506