Indirect and Direct Restorative Protocols - Caulk
Indirect and Direct Restorative Protocols - Caulk
Indirect and Direct Restorative Protocols - Caulk

Create successful ePaper yourself
Turn your PDF publications into a flip-book with our unique Google optimized e-Paper software.
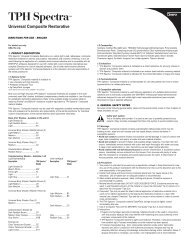
› PRINCIPLES & PRACTICES<br />
<strong>Direct</strong> Resin Procedures<br />
for Aesthetics in<br />
Anterior Restorations<br />
› Abstract:<br />
The aesthetic expectations of<br />
today’s dental patients require<br />
the practitioner to have an<br />
innate underst<strong>and</strong>ing <strong>and</strong><br />
the clinical skills necessary<br />
to perform smile repair or<br />
enhancement. Composite<br />
resins such as Esthet•X ®<br />
Micro Matrix <strong>Restorative</strong><br />
(DENTSPLY <strong>Caulk</strong>, Milford,<br />
DE) possess physical <strong>and</strong><br />
aesthetic properties that<br />
facilitate the clinician’s ability<br />
to provide direct treatment<br />
with success <strong>and</strong> predictability.<br />
This presentation reviews<br />
guidelines that influence<br />
composite material selection<br />
as well as placement protocols<br />
used in their direct application.<br />
The increasing aesthetic expectations<br />
of dental patients<br />
dictate the use of state-of-theart,<br />
imperceptible anterior<br />
restorations for smile repair<br />
or enhancement. When treating a fractured<br />
tooth or repairing an existing restoration<br />
(Figure 1), it is necessary to mimic the aesthetics<br />
of the surrounding dentition <strong>and</strong><br />
to build up the resin restoration in a manner<br />
that matches the contours, length, <strong>and</strong><br />
width of the adjacent teeth. In selecting an<br />
appropriate shade, it is important to do so<br />
prior to the placement of a rubber dam to<br />
prevent improper shade matching due to<br />
dehydration or the tooth reflecting the color<br />
of the dam. For a Class IV fracture or repair<br />
of a porcelain veneer, a chamfer preparation<br />
is placed around the entire margin to increase<br />
the adhesive surface area, <strong>and</strong> a scalloped<br />
bevel should be used to break up the<br />
chamfer line. Once the preparation is complete,<br />
the tooth may be etched <strong>and</strong> a dental<br />
adhesive may be applied.<br />
The dentin layer may then be built up<br />
with a composite resin material using slow,<br />
steady pressure. For anterior procedures, a<br />
material that provides high strength <strong>and</strong><br />
polishability (eg, Esthet•X® Micro Matrix<br />
<strong>Restorative</strong>, DENTSPLY <strong>Caulk</strong>, Milford,<br />
DE) should be selected. The range of shades<br />
available in Esthet•X® ensures a successful<br />
treatment outcome, whether performed in<br />
a single-shade approach or an advanced<br />
technique involving multiple shades <strong>and</strong><br />
opacities. It has also demonstrated high<br />
fracture toughness in areas (eg, margins,<br />
incisal regions) that must withst<strong>and</strong> considerable<br />
intraoral forces.<br />
First, a thin layer of opaque dentin is applied<br />
(Figure 2). The regular body layer is<br />
then built up over the opacious layer (Figures<br />
3 <strong>and</strong> 4), followed by a translucent<br />
enamel layer to mimic the natural dentition<br />
(Figure 5). Care is taken to leave space<br />
for the successive increments of composite<br />
resin that will render the final appearance<br />
of the restoration. The contour <strong>and</strong> shape<br />
are adapted using the appropriate instruments,<br />
<strong>and</strong> then light cured. For the aesthetic<br />
blending of shades, additional body<br />
<strong>and</strong> enamel layers may be individually<br />
Figure 1. A Class IV anterior fracture, porcelain repair, or diastema<br />
closure present similar aesthetic challenges.<br />
Figure 2. Following preparation <strong>and</strong> surface conditioning, a thin layer of<br />
Esthet•X ® is placed against the lingual matrix to form the palatal shelf.<br />
27