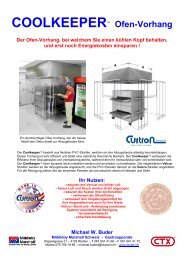
english - Michael W. Buder
english - Michael W. Buder
english - Michael W. Buder

Create successful ePaper yourself
Turn your PDF publications into a flip-book with our unique Google optimized e-Paper software.
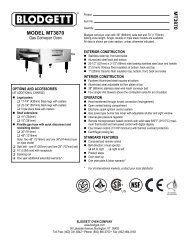
SECTION 3<br />
OPERATION<br />
WARNING<br />
OVEN MUST BE KEPT CLEAR OF<br />
COMBUSTIBLES AT ALL TIMES.<br />
III. STEP-BY-STEP OPERATION<br />
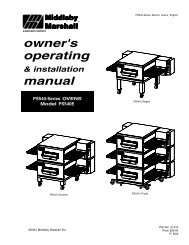
Control Panel (On split belt ovens, two conveyor speed<br />
controls are mounted on the control panel.)<br />
A. Startup Procedures<br />
Daily Startup<br />
1. Turn the BLOWER/HEAT switch (Figure 3-6) to the<br />
“ON” or “I” position. This starts the main blower fan and the<br />
cooling fan. The blower circulates air through the air fingers<br />
and must stay on during the cooking or baking process.<br />
2. Check to see if the cooling fan (see Figure 1-8) is operating<br />
when the BLOWER/HEATswitch (see Figure 3-6) is turned<br />
“ON” or “I”. The cooling fans cool the control components and<br />
burner blower motor. The cooling fan, located at the rear of the<br />
electrical control cabinet blows air into and through the cabinet.<br />
Air is exhausted through the front of the cabinet and also out<br />
the front of the oven. Refer to Daily Maintenance Section for fan<br />
intake checking procedure.<br />
IMPORTANT NOTE<br />
The cooling fan operates when the BLOWER/<br />
HEAT switch is turned “ON” or “I”. It must operate<br />
to keep the control console below 140°F (60°C).<br />
4. Set the temperature controller to the desired baking<br />
temperature. See section on bake times to determine<br />
desired temperature.<br />
NOTE: For complete temperature controller operation<br />
instructions refer to Step C.<br />
5. Turn the HEAT switch (Figure 3-6) to the “ON” or “I”<br />
position. This completes a circuit to supply electric power<br />
to the electric heating system.<br />
6. Close front window.<br />
7. Oven will reach a baking temperature of 500°F (232°C)<br />
in approximately 10 minutes. Allow the oven to cycle for<br />
30 minutes after it has reached desired bake temperatue.<br />
The oven is now ready for baking.<br />
Power Failure<br />
In case of power failure, turn off all switches; open oven<br />
window and remove product. After power has been<br />
reestablished follow normal startup procedure.<br />
B. Shutdown Procedure<br />
1. Turn the BLOWER/HEAT switch to “OFF” or “O”.<br />
NOTE: The blowers will remain on until the oven temperature<br />
cools down to 200°F (93°C) at which time they<br />
will stop automatically.<br />
2. Make certain that there are no products left on the<br />
conveyor inside the oven. Turn the CONVEYOR switch<br />
to “OFF” or “O”.<br />
3. Open the oven window.<br />
3. Turn the CONVEYOR switch (Figure 3-6) to the “ON” or<br />
“I” position. This starts the conveyor belt moving through<br />
the oven. Set the conveyor speed for the desired baking<br />
time. Refer to the following Procedures E, F and G.<br />
22