Ares ins manual.fh11 - Saruhan Makina ve Elektrikli Ev Aletleri
Ares ins manual.fh11 - Saruhan Makina ve Elektrikli Ev Aletleri
Ares ins manual.fh11 - Saruhan Makina ve Elektrikli Ev Aletleri

Create successful ePaper yourself
Turn your PDF publications into a flip-book with our unique Google optimized e-Paper software.
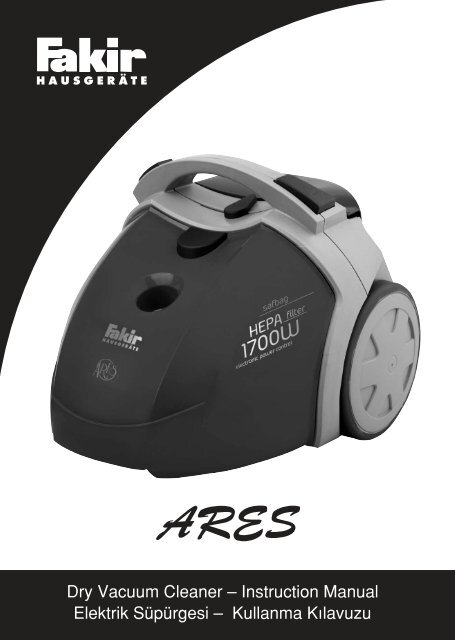
ARES<br />
Dry Vacuum Cleaner – Instruction Manual<br />
Elektrik Süpürgesi – Kullanma Kılavuzu
Girifl<br />
Uzun y›llar sorunsuz çal›flmas› için<br />
tasarlanan <strong>ve</strong> üretilen Fakir <strong>Ares</strong> <strong>Elektrikli</strong><br />
Süpürgeyi sat›n ald›¤›n›z için teflekkür<br />
ederiz.<br />
Benzer ürünleri kullanmaya al›fl›k<br />
olabilirsiniz, ancak kullanma k›lavuzunu<br />
okumak için lütfen zaman ay›r›n›z. Bu k›lavuz<br />
sat›n alm›fl oldu¤unuz üründen en iyi<br />
performans› alman›z için haz›rlanm›flt›r.<br />
Gü<strong>ve</strong>nlik Önemlidir<br />
Kendi gü<strong>ve</strong>nli¤iniz <strong>ve</strong> di¤erlerinin gü<strong>ve</strong>nli¤i<br />
için ürünü çal›flt›rmadan önce kullanma<br />
k›lavuzunu okuyunuz.<br />
Bu k›lavuzu ilerideki kullan›mlar için gü<strong>ve</strong>nli<br />
bir yerde saklay›n›z.<br />
Gü<strong>ve</strong>nlik Uyar›lar›<br />
<strong>Elektrikli</strong> bir cihaz kullan›l›rken, afla¤›daki<br />
önlemler her zaman al›nmal›d›r. Yang›n,<br />
elektrik çarpmas› <strong>ve</strong> kiflisel yaralanmalar›<br />
engellemek için;<br />
• Bu cihaz sadece hafif ev <strong>ve</strong> ofis kullan›m›<br />
için tasarlanm›flt›r. Cihaz› farkl› bir amaç<br />
için kullanmak, cihaza zarar <strong>ve</strong>recektir.<br />
• Cihaz› kullanmadan önce, flebeke voltaj›n›z<br />
ile cihaz›n voltaj›n›n uyumlu oldu¤undan<br />
emin olunuz.<br />
• Cihaz bir oyuncak de¤ildir. Bundan dolay›<br />
çocuklar›n cihaz› kullanmalar›na izin<br />
<strong>ve</strong>rmeyiniz <strong>ve</strong> cihaz› çocuklar›n yan›nda<br />
kullan›rken daha dikkatli olunuz.<br />
• ‹lk kullan›mdan önce cihaz› hasar <strong>ve</strong><br />
ar›zalara karfl› kontrol ediniz. Cihazda<br />
herhangi bir ar›za ya da hasar var ise, cihaz›<br />
kullanmay›n›z <strong>ve</strong> Fakir Yetkili Servisi’ne<br />
baflvurunuz.<br />
• Cihaz› aç›k alanda kullanmay›n›z.<br />
• Cihaz ile yan›c› s›v›lar›, yanan maddeleri<br />
(sigara, kül vb.) süpürmeyiniz.<br />
• Süpürgeyi hiçbir zaman do¤rudan <strong>ins</strong>anlara<br />
3<br />
<strong>ve</strong> hayvanlara tutmay›n›z.<br />
• Cihaz› sadece kendi aksesuarlar› ile<br />
kullan›n›z.<br />
• Bu kullanma k›lavuzunu ilerideki kullan›mlar<br />
için saklay›n›z.<br />
• Cihaz› hava ç›k›fl kanal› ya da çekifl k›sm›<br />
kapal› ya da t›kal›yken kesinlikle<br />
kullanmay›n›z.<br />
• Cihaz› duvara ya da mobilyan›za sert bir<br />
flekilde vurmay›n›z.<br />
• Cihaz kapal› durumdayken fiflini prizde<br />
b›rakmay›n›z.<br />
• Fakir cihazlar› bilinen teknik kurallara <strong>ve</strong><br />
güncel cihaz gü<strong>ve</strong>nlik yasalar›na uygundur.<br />
• Bu cihaz 2004/108/EC Elektromanyetik<br />
Uyumluluk <strong>ve</strong> 2006/95/EC düflük voltaj<br />
cihaz› talimatlar›na tamamen uygundur. Bu<br />
ürün cihaz tip etiketinde CE iflaretine sahiptir.<br />
• Fakir, dizayn <strong>ve</strong> donan›m de¤iflikli¤i hakk›na<br />
sahiptir.<br />
• Hasar gören cihazlar çal›flt›r›lmamal›d›r.<br />
Herhangi bir hasar durumunda derhal Fakir<br />
Yetkili Servisi’ne baflvurunuz.<br />
• Cihaz ancak tip etiketinde belirtilen gerilim<br />
flebekeye uygunsa çal›flt›r›lmal›d›r.<br />
• Prizler 16A’l›k ev sigortalar›yla garantiye<br />
al›nmal›d›r.<br />
• Cihaz farkl› bir amaç için ya da hatal› bir<br />
flekilde kullan›l›rsa <strong>ve</strong>ya bak›m› ya da tamir<br />
ifllemleri yetkili olmayan kifliler taraf›ndan<br />
yap›l›rsa ç›kabilecek istenmeyen<br />
sonuçlardan Fakir sorumlu de¤ildir.<br />
• Cihaz›, toz torbas› <strong>ve</strong> filtreleri tak›l› de¤ilken<br />
kesinlikle çal›flt›rmay›n›z.<br />
• Aksesuar parçalar› tak›l›rken, cihaz<br />
temizlenirken, tamir <strong>ve</strong>ya bak›m<br />
çal›flmalar›ndan önce fifli prizden çekiniz.<br />
• Cihaz›n tamiri ancak yetkili Fakir<br />
servislerince yap›lmal›d›r(yetkili servis<br />
listesine bak›n›z). Hatal› tamir ifllemleri<br />
kullan›c› için tehlike oluflturabilir.<br />
• Ba¤lant› kablosunu asla keskin kenarlara<br />
sürtmeyiniz <strong>ve</strong>ya ba¤lamay›n›z, elektrik<br />
süpürgesini kullan›rken kablonun üzerinden<br />
geçmemeye özen gösteriniz.
• Hasar görmüfl uzatma kablolar›n›<br />
kullanmay›n›z.<br />
• A¤›zlar <strong>ve</strong> boru uçlar›n› asla göz <strong>ve</strong> kulaklara<br />
yaklaflt›rmay›n›z.<br />
• Alet sadece kuru temizlik için kullan›labilir.<br />
Islak hal›lar› vakumlamadan önce, hal›n›n<br />
kurumas›n› bekleyiniz.<br />
• Cihaz› s›cak <strong>ve</strong>ya yanan maddeleri, patlay›c›<br />
s›v›lar› <strong>ve</strong> gazlar› vakumlamada<br />
kullanmay›n›z.<br />
• Cihaz› kullanmadan önce herhangi bir<br />
t›kan›kl›¤a karfl›, boru, hortum <strong>ve</strong> aparatlar›n›<br />
kontrol ediniz.<br />
• Cihaz H11 tip HEPA filtre’ye sahiptir. HEPA<br />
filtre, yüksek filtreleme kapasitesine sahip<br />
bir filtre çeflididir.<br />
BU KULLANMA KILAVUZUNU<br />
‹LER‹DEK‹ KULLANIMLAR ‹Ç‹N<br />
SAKLAYINIZ.<br />
Ürün bilgileri<br />
Model: <strong>Ares</strong> Elektrik Süpürgesi<br />
Renk Seçenekleri: K›rm›z› , krem<br />
Güç: 1800 W Max.<br />
Voltaj: 230 V<br />
Frekans: 50 Hz<br />
Ürün <strong>ve</strong> Aksesuarlar<br />
Toz Torbas›<br />
Küçük F›rça<br />
Kenar-Köfle Aparat›<br />
Yuvarlak F›rça<br />
4
Kullan›m<br />
Cihaz› çal›flt›rmadan önce;<br />
• Toz torbas›n›n (1), hava girifl filtresinin (2)<br />
<strong>ve</strong> hava ç›k›fl filtresinin (3) düzgünce<br />
yerlefltirildi¤inden emin olunuz.<br />
• On-Off (7) tufluna basarak süpürgenizi<br />
çal›flt›r›n›z.<br />
• Vakum ayarlama gücü tuflunu (8) istedi¤iniz<br />
vakum gücüne ayarlay›n›z.<br />
• Vakum hortumunu, süpürgenizin üzerindeki<br />
hortum girifline tak›n›z (4), hortumun di¤er<br />
ucunu ise, teleskopik boru’ya tak›n›z.<br />
Emifl gücü Ayar›<br />
Cihaz›n›z elektronik ayarlanabilir vakum<br />
gücüne sahiptir. Vakum ayarlama tuflunu<br />
kullanarak, emifl gücünü düflürebilir ya da<br />
artt›rabilirsiniz.<br />
Bunun yan›nda, cihaz›n›z›n tutma sap›n›n<br />
üzerinde, emifl gücünü anl›k olarak<br />
azaltmaya yarayan, sürgülü bir sistem vard›r.<br />
Sürgüyü açt›¤›n›zda emifl gücü düflecek,<br />
kapatt›¤›n›zda ise artacakt›r.<br />
• Teleskopik boru’nun boyunu (A)’ya basarak,<br />
istedi¤iniz uzunlu¤a göre ayarlayabilirsiniz.<br />
• Teleskopik boru’nun di¤er ucuna yer<br />
aparat›n›z tak›n›z.<br />
• Otomatik kablo sarma tufluna basarak (5),<br />
elektrik kablosunu çekiniz (6) <strong>ve</strong> fifli prize<br />
tak›n›z.<br />
UYARI: Elektrik kablosu üzerindeki sar›<br />
iflaret, elektrik kablosunun sonuna kadar<br />
çekildi¤ini gösterir.<br />
5<br />
GÜVENL‹ VANA UYGULAMASI: Bu<br />
elektrikli süpürge toz torbas› içine<br />
yerlefltirilmifl gü<strong>ve</strong>nli vana ile donat›lm›flt›r.<br />
Süpürgenin hortumu <strong>ve</strong>ya monte edilmifl<br />
aksesuarlar› t›kand›¤›nda ya da toz torbas›<br />
doldu¤u zaman otomatik olarak vana<br />
aç›lacakt›r. Vana aç›ld›ktan sonra sars›nt›<br />
sesi duyabilirsiniz.<br />
Aparatlar<br />
Yumuflak yüzeyler, hal› <strong>ve</strong> zemin<br />
kaplamalar›: Bu tür yüzeyler için, yer<br />
aparat›n› kullan›n›z. Yer aparat›n›, teleskopik<br />
boruya tak›n›z, hal›lar› süpürmek için, aparat
üzerindeki butona bas›n›z <strong>ve</strong> yer aparat›n›n<br />
alt›ndaki f›rçay› kapat›n›z.<br />
Sert Zeminler, ahflap kaplama, PVC<br />
kaplama, seramik kapl› yüzeyler: Bu<br />
tür zeminler için, yer aparat›n›n üzerindeki<br />
butona basarak, aparat alt›ndaki f›rçay›<br />
ç›kararak kullan›n›z.<br />
Aksesuar kompart›man› içinde,<br />
mobilyalar›n›z, döflemeleriniz <strong>ve</strong> zor<br />
ulafl›lacak kenar <strong>ve</strong> köfleler için<br />
kullanabilece¤iniz aparatlar› bulabilirsiniz.<br />
Bu aparatlar›, teleskopik boru ya da vakum<br />
hortumu ucuna takabilirsiniz. Kompat›man<br />
kapa¤›n› aç›n›z <strong>ve</strong> istedi¤iniz aparat›<br />
buradan al›n›z.<br />
Döflemeler, yataklar <strong>ve</strong> perdeler: Bu<br />
tür zeminleri temizlemek için küçük aparat›<br />
kullan›n›z. Bu aparat üzerine saç vb. küçük<br />
parçalar› toplamas› için, bant eklenmifltir.<br />
Bu aparat› kullan›rken, emifl gücünü<br />
azalt›n›z.<br />
Hassas ya da düzgün olmayan<br />
yüzeyler: Küçük f›rça, kitapl›k, resim<br />
çerçe<strong>ve</strong>leri <strong>ve</strong> pencere yüzeylerini<br />
temizlerken, bu aparat› kullan›n›z. Bu aparat›<br />
kullan›rken, emifl gücünü azalt›n›z.<br />
Kenar, köfle <strong>ve</strong> boflluklar: Bu tür<br />
yüzeylerin temizlenmesinde, kenar köfle<br />
aparat›n› kullan›n›z.<br />
Her bir f›rça <strong>ve</strong> aparat› hortum tutma sap›<br />
içine yerlefltirebilirsiniz. Aparatlar› hortum<br />
tutma sap›na yerlefltirmeniz kullan›m<br />
aç›s›ndan el<strong>ve</strong>rifllidir.<br />
Toz Torbas›n›n De¤ifltirilmesi<br />
Afla¤›daki durumlarda toz torbas›n›n<br />
de¤ifltirilmesi gerekir;<br />
1. Gü<strong>ve</strong>nlik vanas› aç›k ise<br />
2. Emifl gücü düflük ise<br />
3. Toz torbas› dolu ise<br />
E¤er gü<strong>ve</strong>nli vana aç›ksa <strong>ve</strong> toz torbas›<br />
henüz dolmam›flsa, toz torbas›n›<br />
ç›kartman›z› tavsiye ederiz. Çünkü sak›ncal›<br />
durumlarda ince toz, toz torbas› yüzeyinde<br />
bulunan delikleri t›kayabilir <strong>ve</strong> bu durum da<br />
elektrikli süpürgenizin emifl gücünü önemli<br />
derecede düflürmektedir.<br />
UYARI: Süpürgenizi toz torbas›<br />
içinde olmadan çal›flt›rmay›n›z.<br />
• Vakum borusunu ç›kart›n›z.<br />
• Toz torbas› kapa¤›n› (10) klipsini kald›rarak<br />
aç›n›z.<br />
• Toz torbas›n› (11) tutunuz hafifçe içeri do¤ru<br />
itiniz (A) <strong>ve</strong> ard›ndan toz torbas›n› d›flar›<br />
do¤ru çekerek ç›kart›n›z. (B)<br />
• Dolu SAFBAG toz torbas› kapa¤›n› kapat›n›z,<br />
böylece içierideki tozlar›n d›flar›ya ç›kmas›<br />
önlenir. Torbay› çöpe at›n›z.<br />
• Yeni torba çubu¤unu halkalar›n aras›na<br />
yerlefltirin <strong>ve</strong> toz kupas›n›n üstünden<br />
76
afla¤›s›na do¤ru hepsini sürgü ile hareket<br />
ettiriniz, toz torbas›n› d›flar› ç›kart›n›z. Toz<br />
torbas›n›n montaj›n›n hangi yönde yap›laca¤›<br />
torba üstündeki oklarda gösterilmifltir.<br />
• Kapa¤› klik sesi duyana kadar itiniz,<br />
s›k›flmad›¤›ndan <strong>ve</strong> yerine oturdu¤undan<br />
emin olunuz.<br />
SAFBAG (Space Action Filtration<br />
BAG)<br />
Teknik <strong>ve</strong> ekonomik parametreler<br />
göstermifltir ki, SAFBAG sistemli toz<br />
torbalar›, geleneksel toz torbalar›n›n 3-4<br />
kat›na kadar kullan›labilir.<br />
Fakir SAFBAG toz torbas›, gözenekli <strong>ve</strong> çok<br />
katmanl› özel bir materyalden imal edilmifltir.<br />
Geleneksel toz torbalar› ile<br />
karfl›laflt›r›ld›¤›nda, ekonomik <strong>ve</strong> teknik<br />
aç›dan onlardan çok daha üstündür;<br />
• ‹çindeki plastik alafl›m› sayesinde, toz<br />
torbas› kompart›man› içine daha düzgün<br />
oturur <strong>ve</strong> iyice yerleflir. Bu sayede, normal<br />
toz torbalar›ndan daha fazla toz toplama<br />
kapasitesine sahip olur.<br />
• Geleneksel toz torbalar›na göre 3 kat daha<br />
uzun süre kullan›labilir, bu da size tasarruf<br />
sa¤lar.<br />
• Daha iyi filtreleme sistemine sahiptir;<br />
1. Daha etkin toz toplama kapasitesine<br />
sahiptir.<br />
2. Daha kolay hava ak›fl› sayesinde, motor<br />
gücünü gelifltirir <strong>ve</strong> ömrünü uzat›r.<br />
3. Emifl gücünde azalmay› önler.<br />
4. D›flar› ç›kan hava daha temiz oldu¤u için,<br />
sa¤l›¤›n›z› korumaya yard›m eder.<br />
Hava girifl filtresi de¤iflimi<br />
• Toz torbas› de¤ifliminde oldu¤u gibi toz<br />
torbas› kapa¤›n› aç›n›z.<br />
• Hava girifl filtresini (12) yerinden ç›kar›n›z<br />
<strong>ve</strong> yenisini yerine oturana kadar (A) tak›n›z.<br />
Ard›ndan toz torbas› kapa¤›n› kapat›n›z.<br />
UYARI: SAFBAG toz torbas›n›n her 4<br />
de¤ifliminde ya da iste¤inize göre daha<br />
s›k aral›klarla, hava girifl filtresini<br />
yenileyiniz.<br />
Hava ç›k›fl filtresi de¤iflimi<br />
• Aksesuar kompart›man› kapa¤›n› (13) aç›n›z.<br />
• Filtre koruma kapa¤›n›n klipsine (14)<br />
basarak, kapa¤› afla¤› do¤ru iterek aç›n›z.<br />
(A)<br />
• HEPA filtreyi yerinden ç›kar›n›z.<br />
• Yeni HEPA filtreyi yerine tak›n›z.<br />
• Kapakl› toz torbas› sayesinde hijyenik bir<br />
biçimde tafl›nabilir.<br />
• Toz torbas›n›n üretildi¤i materyalin ekolojik<br />
olarak sa¤l›pa uygun oldu¤u onaylanm›flt›r.<br />
• Aksesuar kompart›man› kapa¤›n› kapat›n›z.<br />
7
Kullan›m Sonras›<br />
• Cihaz›n fiflini prizden çekiniz<br />
• Otomatik kablo sarma tufluna basarak,<br />
kabloyu sar›n›z. Kablo sar›l›rken herhangi<br />
bir yere tak›lmamas› için bir elinizle kabloyu<br />
tutunuz.<br />
• Yer aparat›n› teleskopik boru’dan ç›kar›n›z.<br />
UYARI: Cihaz›n›z› hem yatay hem de dik<br />
pozisyonda saklayabilirsiniz. Boru <strong>ve</strong><br />
hortum sabit olarak kalabilir ancak<br />
borunun k›vr›lmamas›na dikkat ediniz.<br />
Temizlik <strong>ve</strong> Bak›m<br />
• Temizlik <strong>ve</strong> bak›m’a bafllamadan önce,<br />
süpürgenizin fiflini prizden mutlaka çekiniz.<br />
• Cihaz sadece kuru <strong>ve</strong>ya hafif nemli yumuflak<br />
bir bezle temizleyiniz.<br />
• Alkol <strong>ve</strong> sol<strong>ve</strong>nt bazl› temizleyiciler<br />
kullanmay›n›z.<br />
• Yer aparat›n›, küçük aparat› <strong>ve</strong> küçük f›rçay›,<br />
kenar köfle aparat› yard›m›yla s›k s›k<br />
temizleyiniz.<br />
Geri Dönüflüm<br />
Her kullan›c› do¤al çevreyi koruyabilir. Bu<br />
ne pahal› ne de zor olan bir durumdur.<br />
Afla¤›daki önlemlere dikkat ederek çevreyi<br />
koruyabilirsiniz.<br />
• Yer aparat›ndaki kancay›, yatay (16a) ya<br />
da dikey (16b) olarak park pozisyonu<br />
klipsine yerlefltiriniz.<br />
• Karton paketleri lütfen geri dönüflüm<br />
konteynerlar›na at›n›z.<br />
• Polietilen torbalar› lütfen plastik için olan<br />
geri dönüflüm konteyner›na at›n›z.<br />
Sorun Giderme<br />
SORUN<br />
Yer aparat› zor hareket ediyor<br />
Toz torbas› hasar görmüfl<br />
Sigorta at›yor<br />
Emifl gücü çok düflük<br />
ÇÖZÜM<br />
Toz torbas› <strong>ve</strong> aksesuarlar› kontrol ediniz, herhangi<br />
bir t›kan›kl›k var ise t›kan›kl›¤› gideriniz.<br />
Emifl gücünü düflürünüz<br />
Toz torbas› <strong>ve</strong> filtreleri de¤ifltiriniz<br />
Ayn› sigortaya ba¤l› farkl› elektrikli aletler var ise onlar›<br />
kapat›n›z.<br />
E¤er problem devam ediyorsa, Fakir Yetkili Servisi’ne<br />
baflvurunuz.<br />
Toz torbas› <strong>ve</strong> filtreleri de¤ifltiriniz<br />
Teleskopik boru, vakum hortumu <strong>ve</strong> yer aparat›n›<br />
herhangi bir t›kan›kl›¤a karfl› kontrol ediniz.<br />
8
• Cihaz›n›z kullan›lamaz hale geldi¤inde,<br />
do¤al çevreye zarar <strong>ve</strong>rebilecek tehlikeli<br />
elementlerin yok edilebilmesi için cihaz›n›z›<br />
belirli bir yok etme merkezinde yok ediniz.<br />
Bu elektrikli süpürgeyi kesinlikle yerel bir<br />
at›k yok etme merkezinde yok etmeye<br />
çal›flmay›n›z.<br />
9
Introduction<br />
Thank you for purchasing Fakir <strong>Ares</strong> Dry<br />
Type Vacuum Cleaner which has been<br />
designed and manufactured to gi<strong>ve</strong> you<br />
many years of trouble-free service.<br />
You may already be familiar with using a<br />
similar product, but do please take time to<br />
read these <strong>ins</strong>tructions - they ha<strong>ve</strong> been<br />
written to ensure you get the <strong>ve</strong>ry best from<br />
your purchase.<br />
Safety is Important<br />
To ensure your safety and the safety of<br />
others, please ensure you read the Safety<br />
Instructions before you operate this product.<br />
Keep this information in a safe place for<br />
future reference.<br />
Important Safeguards<br />
When using an electric appliance, basic<br />
precautions should always be followed,<br />
including the following:<br />
To reduce the risk of fire, electric shock, or<br />
injury:<br />
• The device is only authorized for private,<br />
domestic use only. Using it for any other<br />
purposes will harm the device.<br />
• Before using the device, check that your<br />
local ma<strong>ins</strong> voltage coincides with the<br />
voltage of the ma<strong>ins</strong> adapter.<br />
• The devices is not a toy, therefore please<br />
be particularly careful when children are<br />
around.<br />
• Check the device and connections regularly<br />
for visible damage. The device must not<br />
be used if the housing is damaged or other<br />
damage is present. In case of a damage<br />
please contact with Authorized Fakir<br />
Service.<br />
• Do not use the unit outside.<br />
• Do not use the device to pick up<br />
inflammable fluids (e.g. Fuel or sol<strong>ve</strong>nt) or<br />
burning objects (e.g. ash cigarettes).<br />
• Do not point the vacuum cleaner at persons<br />
or animals when in operation.<br />
• Only use the device with the accessories<br />
supplied.<br />
• Please keep these <strong>ins</strong>tructions in a safe<br />
place for future references.<br />
• Clean any dust on the power plug regularly.<br />
• When servicing the unit, ne<strong>ve</strong>r put fingers<br />
or other objects into any rotating unit, the<br />
device would accidentally be turned on.<br />
• Do not operate the product co<strong>ve</strong>ring the<br />
suction or exhaust ports.<br />
• Do not strike the suction head hard aga<strong>ins</strong>t<br />
the wall or furniture.<br />
• Disconnect the power plug from the power<br />
outlet when not in use.<br />
• Fakir appliances comply with recognized<br />
technological standards and the current<br />
safety regulations for electrical appliances.<br />
• These appliances fulfil the requirements of<br />
Electro- Magnetic Compatibility (EMC) –<br />
2004/108/EC and Low Voltage Device (LVD)<br />
– 2006/95/EC” The appliance is marked<br />
with the CE symbol on the rating label.<br />
• Fakir reser<strong>ve</strong>s the right to modify designs<br />
and specifications without notice.<br />
• Appliance only to be connected to voltage<br />
indicated on the rating label.<br />
• Please connect the vacuum cleaner to 230V<br />
ma<strong>ins</strong> supply, equipped with fuse 16A.<br />
• Fakir will not accept any liability for damage<br />
or injury if the appliance is used other than<br />
for its intended purpose or is improperly<br />
operated or inexpertly repaired and<br />
maintained.<br />
• Before use, check to ensure that all the<br />
filters are correctly <strong>ins</strong>talled. The appliance<br />
must not be used without filters.<br />
• Use only genuine Fakir filters and<br />
accessories.<br />
• The appropriate filters (paper filter or micro<br />
power filter, micro main filter, motor<br />
protection filter or activated carbon filter or<br />
high efficiency submicron particulate airfilter<br />
or micro vario combination filter and micro<br />
exhaust filter) must be <strong>ins</strong>talled at all times<br />
to ensure the efficient operation of the<br />
appliance.<br />
• When connecting accessories, cleaning,<br />
repairing or servicing the unit, unplug the<br />
10
unit.<br />
• Do not let children use electrical appliances<br />
unsupervised.<br />
• Repairs should be carried out by an<br />
authorized Fakir service center (see<br />
enclosed list of adresses). Incorrect repairs<br />
may the user to electrical danger.<br />
• Do not pull out the plug from power supply<br />
socket by pulling on the connecting lead.<br />
• Do not pull the connecting lead o<strong>ve</strong>r sharp<br />
edges or allow it to become jammed.<br />
• Do not use damaged extension leads.<br />
• lf required, the connecting lead has to be<br />
replaced together with the cable rewind by<br />
an autorized Fakir After-Sales-Service only.<br />
• Before any maintenance operation or<br />
replacing a filter, and after use, switch off<br />
the appliance and pull out the ma<strong>ins</strong> plug.<br />
• Keep the nozzles and ends of tubes well<br />
away from the eyes and ears.<br />
• The appliance must only be used for dry<br />
vacuum cleaning. lt is not a dual-purpose<br />
(wet/dry) vacuum cleaner.<br />
• Do not use the appliance to pick up hot or<br />
glowing substances.<br />
• Do not use the appliance to pick up any<br />
sol<strong>ve</strong>nts, explosi<strong>ve</strong> liquids or gases.<br />
• Do not store the appliance in the open air.<br />
• Do not exposure the machine to weather,<br />
humidity nor excessi<strong>ve</strong> heat.<br />
• Clean the appliance only with a dry or<br />
slightly moist cloth. Do not allow any of the<br />
electrical components (switches, plug,<br />
socket, electronics etc.) to come into contact<br />
with water.<br />
• Your vacuum cleaner is equipped with<br />
HEPA (High Efficiency Particulate Air) H11.<br />
HEPA filter is a high filtration capability filter,<br />
made of special fibre, which is able to keep<br />
almost all particles bigger than 0, 3 micron.<br />
H11 number refers to filter penetrability.<br />
HEPA H11 filter keeps 95, 5% of particles<br />
bigger than 0, 3 micron.<br />
Keep this <strong>manual</strong> for future use.<br />
Technical Data<br />
Model: <strong>Ares</strong> Dry Type Vacuum Cleaner<br />
Colours: Red, Cream<br />
Power: Max. 1800 W<br />
Ma<strong>ins</strong> Voltage: 230 V<br />
Nominal Frequency: 50 Hz<br />
Product and Accessories<br />
Toz Torbas›<br />
11
Operation<br />
Before you start up your vacuum cleaner:<br />
• Check if the bag is assembled <strong>ins</strong>ide the<br />
dust cup (1), air-inlet filter (2) and air –outlet<br />
filter (3),<br />
ATTENTION: Be careful during<br />
pulling the cord out, the yellow mark<br />
on the cord show the end of the cord.<br />
• Start the vacuum cleaner up pressing the<br />
On-Off button (7)<br />
• Insert one end of the flexible hose (4) into<br />
the air intake duct, fit another end of the<br />
hose (handle) with sucking tube,<br />
• Adjust the desired length of the suction<br />
tube (depending on the height of the person<br />
operating the appliance) by pressing the<br />
"A" button and slide the tubes in the direction<br />
indicated by the arrows,<br />
• Fit the chosen accessories, i.e. brushnozzle,<br />
in another end of the tube,<br />
• Select appropriate suction power moving<br />
the cursor (8) according to the symbols on<br />
the vacuum cleaner.<br />
SUCTION POWER REGULATION<br />
The vacuum cleaner is equipped with<br />
electronic power regulation, which enables<br />
continuous power regulation. The regulation<br />
is executed with linear potentiometer.<br />
Moving the cursor according to the symbols<br />
on the vacuum cleaner results in increasing<br />
or reducing power. The vacuum cleaners<br />
450 type are also equipped with mechanical<br />
suction power regulation on the hose<br />
handle. It is enough to open the val<strong>ve</strong>, as<br />
it is shown in the drawing, to reduce the<br />
suction power.<br />
• pressing the cord re-wind button (5) pull<br />
the cord out (6) of the casing and <strong>ins</strong>ert the<br />
plug into power socket,<br />
SAFETY VALVE OPERATION<br />
The vacuum cleaner is equipped with safety<br />
val<strong>ve</strong>, which is located <strong>ins</strong>ide the dust cup<br />
(bag). It opens automatically when the hose<br />
or fitted accessories are blocked or the<br />
dust bag is excessi<strong>ve</strong>ly full of dust. You<br />
12
can hear characterstic ‘fluttering’ sound<br />
after val<strong>ve</strong> opening.<br />
Accessories<br />
Soft surface cleaning – carpets and floor<br />
co<strong>ve</strong>rings: we recommend you to use<br />
nozzle-brush for carpets. Fit the nozzlebrush<br />
with the tube and switch it to carpet<br />
clearing function: with hidden brush (press<br />
the switch on the nozzle-brush according<br />
to the drawing).<br />
Small brush is used for vacuuming: libraries,<br />
picture frames and windows. We<br />
recommend reducing suction power during<br />
such activity.<br />
Vacuuming gaps, corners, cavities,<br />
etc.:<br />
Gap nozzle is used for vacuuming: gaps,<br />
corners, spaces and other recesses with<br />
difficult access.<br />
You can place each of a/m brushes or<br />
nozzles <strong>ins</strong>ide the hose handle. In such<br />
case it is “handy” always ready for use.<br />
Hard surface cleaning – wooden<br />
floor, PVC floor, ceramic tiles, etc.:<br />
we recommend you to use nozzle-brush for<br />
such floor. Stick out the brush (press the<br />
switch on the nozzle-brush with a drawing<br />
). You can find nozzles for furniture, gaps<br />
and upholstery in accessories compartment<br />
(9) located <strong>ins</strong>ide the vacuum cleaner. You<br />
can fit them in extension tube inlet or hose<br />
inlet. Open the compartment lid and take<br />
out a nozzle or a brush.<br />
Cleaning of upholstery, mattress,<br />
etc.:<br />
Small nozzle is used for cleaning<br />
upholstered furniture, mattress, curta<strong>ins</strong>,<br />
etc. It is equipped with a tape for picking<br />
up threads, which enables exact picking<br />
up the threads, fine fibres, etc. We<br />
recommend reducing suction power during<br />
such activity.<br />
Vacuuming delicate material and<br />
rough objects:<br />
11<br />
Dustbag Replacing<br />
Dust bag replacing is necessary when you<br />
notice that:<br />
1. Safety val<strong>ve</strong> opens,<br />
2. Suction is significantly lower,<br />
3. Dust bag is full.<br />
If the safety val<strong>ve</strong> opens and the dust bag<br />
is not full yet, we recommend to replace<br />
the dust bag because in unfavorable<br />
conditions fine dust could ha<strong>ve</strong> clogged<br />
the pores on the surface of the dust bag,<br />
which decreases the vacuum cleaner's<br />
suction power to a considerable extent.<br />
ATTENTION: Do not vacuum without the<br />
dust bag.<br />
• Remo<strong>ve</strong> the hose from the air-inlet.<br />
• Release the hook of front lid (10), open it.<br />
• Holding the bag bar (11) lean it slightly<br />
<strong>ins</strong>ide (A), and then remo<strong>ve</strong> the whole bag<br />
upwards (B).
• Close the SAFBAG dust bag lid, to co<strong>ve</strong>r<br />
the inlet of the full bag. Dispose it.<br />
• Insert the bar of new bag between the<br />
runners and mo<strong>ve</strong> it altogether with a shutter<br />
up to the bottom of the dust-cup, laid the<br />
dust bag out. The direction of dust bag<br />
assembling is indicated with an arrow on<br />
the bag.<br />
• Close the lid pressing it until you can hear<br />
a characteristic clicking sound – be careful<br />
not to jam the bag.<br />
S A F B A G - SPACE ACTION<br />
FILTRATION BAG<br />
Technical and economic parameters<br />
exceed 3-4 times the parameters of<br />
traditional paper bags, which can still be<br />
applied. This dust bag has been made of<br />
a special porous material consisting of<br />
many layers. In comparison with traditional<br />
paper bag it is characterized with much<br />
better economic and technical parameters.<br />
• Due to big plasticity, it fits tightly the dustcup<br />
of the vacuum cleaner, what allows<br />
accumulating much more dirtiness<br />
(depending on the size of the dust-cup).<br />
• The period from the assembling up to the<br />
replacing the bag is approximately 3 times<br />
longer, which makes the vacuum cleaner<br />
operation cheaper,<br />
• It has significantly better filtration<br />
parameters, which means:<br />
• More efficient keeping dust,<br />
• Easier air-flow, which enhances engine<br />
power and li<strong>ve</strong>long,<br />
• The same big suction power in spite of<br />
filling up the dust bag,<br />
• Much better health protection, as the outlet<br />
air is much better cleaned<br />
• Hygienic handling – disposable dust bag<br />
with a shutter,<br />
• The material, the bag is made of, obtained<br />
all ecological approvals.<br />
AIR-INLET FILTER REPLACING<br />
• Open the vacuum cleaner such way as in<br />
case of dust bag replacing,<br />
• Take the air-inlet filter out of the casing (12),<br />
<strong>ins</strong>ert a new one, such a way that the inner<br />
filter edge was placed <strong>ins</strong>ide the limiting<br />
rib (A) and close the vacuum cleaner.<br />
ATTENTION!!! We recommend replacing<br />
the inlet filter after the SAFBAG dust bag<br />
has been replaced 4 times or more<br />
frequently if the filter becomes heavily<br />
dirty.<br />
AIR-OUTLET FILTER REPLACING<br />
• Open up the accessories compartment lid<br />
(13).<br />
• Press the filter co<strong>ve</strong>r locker strong (14) and<br />
lean it outside (A).<br />
12
• Remo<strong>ve</strong> the HEPA filter<br />
• Insert a new HEPA filter. Make sure the<br />
gasket fits tightly.<br />
but please be careful not to bend it to<br />
much.<br />
• Close the accessories compartment lid.<br />
After Operation<br />
• Unplug from outlet.<br />
• Rewind the cord pressing- button. Hold the<br />
plug when rewinding, do not allow the cord<br />
to get entangled and the plug to bump the<br />
casing.<br />
• Remo<strong>ve</strong> the nozzle from the tube.<br />
ATTENTION!!! You can store the vacuum<br />
cleaner in both horizontal and <strong>ve</strong>rtical<br />
positions. The hose can remain fitted,<br />
• Insert the hook on nozzle-brush into the<br />
runners for horizontal (16a) or <strong>ve</strong>rtical (16b)<br />
storage.<br />
CLEANING AND MAINTENANCE<br />
• Remember to check if the vacuum cleaner<br />
is unplugged before cleaning and<br />
maintenance.<br />
• Clean the casing and bag chamber with<br />
damp cloth (it can be wet with wash – up<br />
liquid) dry or wipe up to get it dry.<br />
• Do not use abrasi<strong>ve</strong> agents or dissol<strong>ve</strong>nt.<br />
• Vacuum the nozzle-brush, small brush or<br />
special accessories with a gap nozzle from<br />
time to time.<br />
Troubleshooting<br />
11
Environment Protection<br />
Each user can protect the natural<br />
environment. It is neither difficult nor<br />
expensi<strong>ve</strong>. In order to do it:<br />
put the cardboard packing into recycling<br />
paper container.<br />
put the polyethylene (PE) bags into<br />
container for plastic.<br />
When worn out, dispose the appliance to<br />
particular disposal centre, because of the<br />
dangerous elements of this appliance,<br />
which can be hazardous for natural<br />
environment.<br />
Please do not dispose this vacuum cleaner<br />
into domestic waste disposal!!!<br />
12